


Article Contents:
- Main Elements of Staircase Structure
- Load-Bearing Elements
- Steps and risers
- Guardrail Elements
- Mounting Systems for Load-Bearing Elements
- Attaching Stringer to Floor
- Attaching Stringer to Second Floor Ceiling
- Attaching Stringer to Wall
- Mounting Systems for Treads
- Attaching Treads to Stringer
- Attaching Treads to Stringer
- Bolted Mounting of Treads
- Mounting Balusters and Posts
- Mounting Wooden Balusters to Wooden Tread
- Mounting Metal Balusters
- Post mounting
- Mounting Handrails
- Wooden Handrail to Wooden Balusters
- Metal Handrail to Metal Posts
- Finishing of Components
- Sanding Wooden Elements
- Protective Coatings for Wood
- Processing of metal components
- Processing Stone Treads
- Practical Installation Guidelines
- Conclusion: When the Invisible Holds the Visible

The staircase appears as a monolithic structure. You ascend the steps, hold the handrail, without thinking about what holds each element in place. But look beneath the cladding, behind decorative panels — and a complex world of fasteners, joints, connections opens up. Dozens, sometimes hundreds of elements work invisibly, ensuring strength, stability, safety. Each step is held not by magic, but by a thoughtfully designed fastening system. Each baluster stands vertically thanks to a proper mounting joint. Each handrail is secure because the connections are designed to withstand load.
When building or reconstructing a staircase, you encounter questions: what fasteners to use for treads on a metal stringer? How to attach balusters to a wooden stringer so they don’t loosen? What to treat elements with after installation to ensure the staircase lasts for decades and looks good? There are no universal answers — everything depends on the type of construction, materials, operating conditions, and budget.
This article is a systematic guide to staircase components. Here, the main structural elements, types of fasteners for different joints, installation technologies, and requirements for finishing are discussed. After reading, you will be able to correctly select fasteners, design reliable connections, and ensure the longevity and aesthetics of the staircase.


Main Elements of Staircase Structure
Before discussing fasteners, it is necessary to understand: what is being fastened to what. A staircase consists of load-bearing, guardrail, and decorative elements. Each requires its own type of connection.


Stringer — inclined beam with notched teeth onto which steps are laid from above. The strongest load-bearing structure. Stringers can be single (central stringer for light staircases), double (along the edges of the flight), or triple (two side ones plus central for wide flights).
Stringer materials: I-beam or profiled pipe for metal-frame staircases, wooden beam with minimum cross-section of 80x200 mm for wooden staircases, reinforced concrete for heavy monolithic structures.
Tread — inclined beam supporting steps from the side. Steps are inserted into grooves cut into the inner side of the tread, or attached via metal brackets nailed or screwed to the tread. The tread covers the ends of steps, creating a closed staircase profile.
Treads are installed in pairs — on both sides of the flight. For wide staircases (over 120 cm), additional intermediate supports are placed between treads to prevent step sagging.
Stringers are installed in pairs — on both sides of the staircase. For wide staircases (over 120 cm), additional intermediate supports are placed between the stringers to prevent step sagging.
Balusters — special metal bolts on which steps are suspended to the wall or connected to each other, creating a self-supporting structure without visible stringers and treads. A baluster staircase looks light, floating, and modern. However, it requires a very strong load-bearing wall (brick, concrete, solid blocks at least 250 mm thick).
Our factory also produces:


Steps and treads
Tread — horizontal platform of the step on which one steps. According to construction norms, tread width (step depth) is a minimum of 250 mm, optimal 280–300 mm for comfortable stride.
Riser — vertical part of the step covering the space between treads. Riser height (step height) is ideally 150–180 mm. Riser is not mandatory — staircases without risers are called open, with risers — closed.
Guardrail elements
Get Consultation
Railing elements
Baluster spacing according to safety norms is maximum 150 mm to prevent a child from crawling between them. In practice, one or two balusters are installed per step — one on narrow staircases, two on wide ones.
Precision or carved from oak, ash, beech; metal from stainless steel, aluminum, wrought iron; glass panels replacing traditional balusters.
Materials:wooden balustersPolished or carved from oak, ash, beech; metallic from stainless steel, aluminum, wrought iron; glass panels replacing traditional balusters.
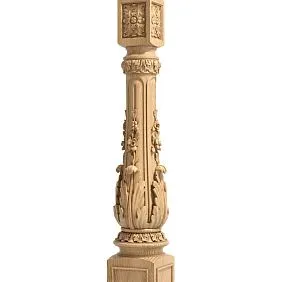
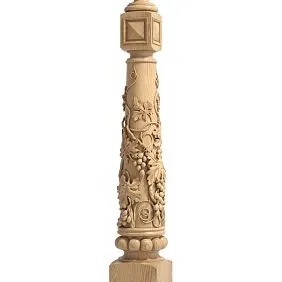
Post (newel) — support posts installed at the start and end of the flight, at turns. Thicker and heavier than balusters. Bear the main load from the handrail, ensuring the guardrail’s rigidity.
Wooden post cross-section minimum 80x80 mm, often 100x100 mm. Metal posts — pipe with 50–70 mm diameter or square profile 50x50 mm.
Handrail — element held onto during ascent and descent. Handrail height from the tread according to norms is 900 mm (permissible range 850–950 mm).
Section shape of the handrail is ergonomic — oval, round with diameter 40–50 mm, anatomical with finger recess. Materials: wood, metal with wooden or plastic overlay (cold to the touch), PVC.
Staircase reliability begins with securing load-bearing beams — stringers and treads — to the foundation and floor slabs.
Securing stringer to the floor
Attachment of the stringer to the floor
First option: anchor bolts.
Metal stringer has a support plate (base) with holes. The plate is placed against the concrete floor, holes are drilled into the concrete 12–16 mm in diameter and 100–120 mm deep. Anchor bolts M12–M16 are inserted into the holes, tightened, and the anchor’s spreader expands, permanently fixing the stringer.
Anchors withstand pull-out load up to 1,000–1,500 kg per bolt (depending on concrete quality). Two anchors are sufficient for one stringer.
Second option: embedded elements.
If the floor is concrete but the staircase is planned in advance, metal embedded plates with protruding studs are embedded into it during the screed pouring stage. The stringer is attached to the studs via bolts through holes in the support plate.
Third option: securing to wooden base.
Wooden stringer to wooden floor (joists, decking) is secured with strong screws (lag bolts) 8–10 mm in diameter and 100–120 mm long. Before each screw, a pilot hole 6 mm in diameter is drilled to prevent wood cracking.
Securing stringer to second-floor slab
First option: through-fastening.
Stringer is secured to the second-floor slab via bolts passing through the stringer and into the slab, with nuts tightened on the other side.
If the stringer is metallic, long bolts (studs) pass through the upper support plate and the floor slab, tightened with nuts from the upper floor side. Wide washers are placed under the nuts to distribute the load.
This method is the most reliable, but requires access to the floor slab from above and visible fastening elements on the second floor (if not concealed under the floor finish).
Second option: anchoring to the end of the floor slab.
If through-fastening is not possible, the stringer is anchored to the end of the reinforced concrete floor slab using horizontally driven anchors. The anchors penetrate the concrete to a depth of at least 100 millimeters.
Third option: suspension from the beam.
The metal stringer can be suspended from the steel beam of the floor slab using a welded connection or bolts through a mounting plate.
Stringer attachment to the wall
If the staircase is wall-mounted, one stringer is attached to the wall, the other is free.
First method: through metal brackets.
Steel L-shaped brackets are mounted to the wall using dowels or anchors with a spacing of 600–800 millimeters. The wooden stringer is attached to the brackets using M10–M12 bolts or strong screws.
Second method: directly with long screws.
The wooden stringer is screwed into a wooden wall (beam, log) using long screws (lag screws) with a diameter of 8 millimeters and a length of 120–150 millimeters. The screws are driven into the wall from below at an angle (bottom to top), which increases reliability.
To brick or concrete walls — through dowels. A hole with a diameter of 10 millimeters and a depth of 80–100 millimeters is drilled, a plastic dowel is inserted, and an 8-millimeter screw is screwed in. The spacing between fasteners is 500–600 millimeters.
Staircase tread attachment systems
The method of attaching treads is determined by the type of load-bearing structure — stringer, stringer, pegs, consoles.
Tread attachment to the stringer
Metal stringer with teeth:
The tread is placed on the horizontal surface of the tooth. Attachment from below with screws or bolts:
Screws for metal with a 4.5–5 mm diameter and a length of 35–50 mm are screwed from below through the metal stringer into the wooden tread. Four to six screws (two to three from each side of the stringer) are used per tread.
Bolted attachment is more reliable: holes are pre-drilled in the tooth surface, and recesses for bolt heads are selected from below in the tread. Bolts M6–M8 pass through the stringer and tread, tightened with nuts recessed into the recesses. The recesses are covered with wooden plugs and spackled.
Wooden stringer:
The tread is placed on the stringer's cutouts and additionally secured:
With wood screws of 4–5 mm diameter and 50–70 mm length, driven at an angle through the tread into the stringer. The attachment point is the rear part of the tread, closer to the nosing, so the screws are not visible.
With metal angles: steel 20x20 mm angles are screwed from the inside to the stringer, and the tread is placed on top of the angles and screwed to the angles with short screws.
Tread attachment to the stringer
Insertion into a groove:
Classic method. Grooves 15–20 mm deep are cut into the inner side of the stringer. The ends of the tread and nosing fit into the grooves and are glued with carpenter's glue.
Additionally, wooden blocks (30x30 mm) are attached to the stringer below each tread, supporting the tread from below. These blocks are called braces.
The advantage of insertion is aesthetics, the fastening is hidden. The disadvantage is labor-intensive, requiring precise marking and cutting of grooves.
Attachment to metal angles:
Steel brackets (perforated furniture brackets can be used) are mounted to the stringer from the inside, spaced according to the stair tread placement. Treads are laid onto the brackets and secured with self-tapping screws.
Faster installation method, but brackets are visible from the inside. If the staircase will be covered from below (with drywall or plywood), this is not an issue.
Tread bolted connection
Bolted staircases are constructions where treads are suspended from the wall or connected to each other with special bolts (bolts) without visible load-bearing beams.
Wall mounting:
Metal studs (bolts) with a diameter of sixteen to twenty millimeters are embedded or anchored into the load-bearing wall, protruding from the wall by one hundred twenty to one hundred fifty millimeters. The end of the stud has threads.
A blind hole with a diameter of twenty-two to twenty-six millimeters and a depth of eighty to one hundred millimeters is drilled into the tread end (toward the wall). A metal bushing with internal threads is inserted into the hole.
The tread is placed over the studs, screwed into the bushings, and tightened. Additionally, a decorative cover (rossette) is placed between the tread and the wall to conceal the connection joint.
Tread connection between themselves:
Vertical bolts run along the outer edge of the treads (opposite the wall)—steel rods with a diameter of eighteen to twenty-five millimeters and threaded ends. These bolts connect the treads to each other, transferring load downward in a chain.
Vertical through holes with a diameter two millimeters larger than the bolt diameter are drilled at the corners of the treads. The bolt passes through all treads, and the ends are tightened with nuts. Metal bushings (spacers) are placed on the bolt between treads to determine tread height.
Bolted construction requires precise calculation and quality installation, but creates a visually light, modern staircase.
Baluster and post mounting
Railing — a critical safety element. Balusters and posts must withstand lateral loads of at least one hundred kilograms (standard for residential buildings).
Mounting wooden balusters to wooden treads
Method one: dowel with glue.
A hole with a diameter of eight to ten millimeters and a depth of forty to fifty millimeters is drilled into the lower end of the baluster. A wooden dowel (tenon)—a cylindrical rod made of hardwood, protruding twenty to thirty millimeters from the end—is inserted into the hole.
A hole of the same diameter and depth of thirty to forty millimeters is drilled into the tread at the baluster installation point. The baluster’s dowel is coated with carpenter’s glue and inserted into the tread’s hole.
Additionally, the baluster is secured from below with a self-tapping screw driven at an angle through the tread into the lower part of the baluster. The screw enters the non-load-bearing part of the baluster (not the tenon), providing backup for the glued joint.
Method two: threaded rod.
A metal threaded rod (furniture bolt) with a diameter of six to eight millimeters and a length of fifty to seventy millimeters is screwed into the lower end of the baluster. Half the rod is screwed into the baluster, the other half protrudes.
A hole with a diameter half a millimeter larger than the rod’s diameter is drilled into the tread. A metal bushing with internal threads (wood anchor) is inserted into the hole.
The baluster with the protruding rod is screwed onto the bushing in the tread and tightened. The connection is strong and removable (the baluster can be unscrewed if necessary).
Method three: decorative baluster covers.
A baluster cover is a flat board with a thickness of twenty to twenty-five millimeters, installed on the tread along the railing line. Balusters are mounted to the cover (with self-tapping screws from below or dowels). The cover is attached to the treads with self-tapping screws or glue.
Advantage — ease of installation, precise baluster placement, additional decorative element.
Mounting metal balusters
To the metal stringer or base:
Welding — the most reliable connection. The lower end of the baluster (pipe or rod) is welded to the metal base. The weld seam is ground, spackled, and painted.
Bolted connection: a flange (plate) with holes is mounted to the baluster base. The flange is screwed to the metal stringer using M6-M8 bolts through previously drilled holes.
To wooden treads:
At the bottom of the metal baluster, there is a flange with holes. The flange is attached to the step, and screws are driven through the holes into the wood, with a diameter of four to five millimeters and a length of thirty to forty millimeters.
Sometimes a decorative rose made of metal or wood is placed under the flange, covering the fasteners and creating a finished look.
Mounting newels
Posts carry a greater load than balusters, therefore the fastenings are reinforced.
Wooden post to wooden platform (floor, step, platform):
Through-bolt fastening: in the center of the post, a blind hole is drilled from the bottom with a diameter of fifteen to twenty millimeters and a depth of one hundred twenty to one hundred fifty millimeters. A long bolt (stud) M12-M16 is inserted into the hole, protruding downward.
In the floor/step at the location of the post, a through hole is drilled. The bolt of the post passes through the hole and is secured from below with a nut and a wide washer. The post is firmly attached to the base.
Additionally, around the post on the floor, a decorative rose (wooden or metal) is installed, covering the fastening joint.
Metal post:
A flange (square plate 100x100–120x120 mm, thickness 5–8 mm) is welded or anchored to the base. The steel post (tube) is bolted to the flange.
If the base is concrete, holes for anchor bolts are drilled in the flange. If wooden, holes are drilled for strong screws (lag bolts).
Handrail fastening
The handrail connects posts and balusters, completing the railing. The fastening must be strong and, if possible, concealed.
Wooden handrail to wooden balusters
Method one: screws from below at an angle.
The handrail is laid on the balusters and aligned. From below, screws with a diameter of four millimeters and a length of forty to fifty millimeters are driven at an angle into the upper part of each baluster.
The screws are driven into the groove of the handrail (from the underside), so they are not visible from the outside. This method is fast, reliable, but requires skill — it is important not to miss and hit the baluster.
Method two: dowels.
At the upper ends of the balusters, dowels with a diameter of eight millimeters and a height of fifteen to twenty millimeters protrude. Corresponding holes are drilled in the underside of the handrail.
The handrail is placed over the baluster dowels and glued. Additionally, it can be secured with screws (concealed).
Method three: metal brackets.
Metal brackets (angles, plates) are attached to the top of the balusters. The handrail is bolted to the brackets from below. The brackets are concealed under the handrail.
Metal handrail to metal posts
Welding:
The handrail (round or rectangular tube) is welded to the posts. It is secure but not disassemblable. Weld seams are ground, polished, or filled with putty, then painted.
Threaded connectors:
Special metal fittings with internal threads. They are screwed into the ends of the handrail and post tubes, forming a strong detachable connection. They look neat and allow assembling complex configurations (turns, angles).
Final finishing of components
After installation, staircase elements require final finishing to protect against wear, moisture, dirt, and to provide an aesthetic appearance.
Sanding wooden elements
Before applying the finish, allWooden staircase elementsThey are sanded sequentially with grits 120, 180, 240. This removes roughness, scratches, tool marks, and opens the wood pores for better absorption of protective coatings.
After sanding, the surface is cleaned — with a vacuum cleaner and a damp cloth. Dust remaining on the surface mixes with varnish or oil, creating unevenness.
Protective coatings for wood
Varnish:
Water-based polyurethane varnish — eco-friendly, odorless, dries quickly (2–4 hours between coats). Forms a durable transparent film protecting against abrasion, moisture, and dirt. Applied in 3–4 coats with intermediate sanding using fine abrasive (320–400).
For treads, use varnish with high wear resistance (floor-grade, staircase-grade). Ordinary furniture varnish on treads wears out within one to two years.
Alkyd varnish — forms a hard film, long-lasting, but has a strong odor during application, takes a long time to dry (24 hours between coats), yellows light-colored wood over time.
Oil and oil-wax:
Impregnates wood from within, protects without forming a surface film. Wood remains matte with natural texture, warm to the touch. Oil enhances wood grain, making color richer.
Applied in 2–3 coats with 4–6 hour intervals. Excess after each coat is wiped with a cloth. Full polymerization (curing) of oil takes 2–3 weeks. Staircase can be used after 3–5 days, but carefully.
Oil requires renewal every 2–3 years (reapplying one coat on cleaned surface). Varnish lasts 5–7 years before renewal.
Stain and paint:
Stain (toning) changes wood color while preserving texture. Applied before varnish or oil. Allows to make pine look like walnut, ash like oak, etc.
Covering paint completely hides wood texture. Used when wood quality is low or a specific color is needed in interior (white, gray, colored staircases). Paint — water-based or alkyd enamel, applied as primer plus 2–3 coats.
Metal component processing
Primer and paint:
Metal elements after welding and grinding are degreased, primed with anti-corrosion primer (metal primer), then painted in 2–3 coats. Paint can be glossy, matte, hammered (textured), or powder (most durable, applied in factory conditions).
Chroming and anodizing:
Decorative-protective coatings applied by galvanic method in production. Chrome creates mirror-like shine, resistant to corrosion. Anodizing (for aluminum) creates a strong oxide layer, can be colored (black, gold, bronze).
Bluing:
Thermochemical steel treatment creating a black oxide film. Used for forged elements, gives an antique look.
Stone stair processing
Granite and marble stairs are sanded and polished in production. Additional processing after installation:
Hydrophobic impregnation — penetrates stone pores, repels water and dirt, simplifies maintenance. Applied with brush or spray, absorbs, does not alter appearance.
Polishing — restores shine if stone has dulled from use. Done with special abrasive pastes and polishers.
Practical installation recommendations
Accuracy of marking — the foundation of success.
Before drilling holes for fasteners, check the marking twice. Even an inaccuracy of 3–5 mm will cause misalignment, uneven installation, visible defects. Use laser level, measuring tools, templates.
Pre-drilling is mandatory.
Before screwing screws into wood or bolts into metal, drill pilot holes 1–2 mm smaller in diameter than the screw/bolt. This prevents wood cracking, facilitates screwing, and ensures accuracy.
Use quality fasteners.
Cheap screws from soft steel bend, break, strip their slots. Use screws and bolts made of hardened steel (yellow, black phosphate-coated). For wet areas — stainless steel fasteners.
Do not over-tighten connections.
Excessive tightening strips threads in wood, deforms metal, splits wood. Tighten to the point of resistance, but without excessive force. For critical connections, use a torque wrench.
Glue connections.
Even if the connection is mechanical (screws, bolts), additional gluing with wood glue or polyurethane enhances the connection, prevents squeaks. Especially important for treads and balusters.
Protect wood before installation.
If elements will be in hard-to-reach places after assembly (ends of treads, inner sides of stringers), treat them with a protective finish (antiseptic, oil, varnish) before installation. After assembly, you won’t be able to reach them.
Conclusion: what is invisible holds what is visible
The staircase is fully visible — treads, handrails, elegant balusters. But what holds this beauty is invisible — dozens of anchors, hundreds of screws, kilograms of glue, meters of welded joints. Proper fasteners transform a set of elements into a reliable structure that withstands thousands of ascents and descents, serves for decades, without squeaking, swaying, or losing strength.
Quality finishing protects elements from wear, moisture, and time. Varnish on treads prevents wood abrasion. Oil on balusters preserves the natural beauty of wood. Anti-corrosion coating on metal stops rust. Each layer of protection extends the life of the staircase for years.
Company STAVROS has specialized in producingwooden staircase components. In the assortment —precision-turned and carved balustersmade of oak, ash, beech in various profiles and designs, stair posts, handrails, treads, nosings, stringers.
All STAVROS products are made from premium solid wood, kiln-dried to 8–10% moisture content. This guarantees dimensional stability, absence of warping or cracking. Processing is done on high-precision equipment — geometry is perfect, surfaces are meticulously sanded.
Additional finishing of elements is possible — staining in any shade, oil, wax, or varnish coating, patina for an aged look. STAVROS also manufactures elements to custom sizes and drawings — non-standard balusters, exclusive posts, treads to specific opening dimensions.
STAVROS consultants will help select components for your staircase, calculate required quantities, recommend optimal fasteners, and advise on installation techniques. The company works with both private clients and professional builders, staircase manufacturers.
Besides staircase elements, STAVROS offers otherSolid Wood Itemsfor interior use: furniture legs, moldings, cornices, baseboards, thresholds, decorative elements — everything for creating a harmonious space from natural materials.
Create a staircase that serves generations. Where every element is securely fastened, where fasteners are designed for decades of use, where finishing protects and enhances. STAVROS provides premium materials and expert consultations to realize such projects. Contact us — we’ll turn your plans into a strong, beautiful, long-lasting reality.


