


Article Contents:
- Stage 1: Measuring the room — do not rely on documents
- Measuring tools
- What to measure: full list
- Measurement scheme: draw a plan
- Photo documentation
- Stage 2: Molding map — visualization of composition
- Determining types of elements
- Map for crown molding and baseboard: simple version
- Map for wall moldings: complex composition
- Map for outlets
- Scale and visualization
- Stage 3: Calculating quantities — math without errors
- Calculating crown molding and baseboard: perimeter plus reserve
- Calculating Corner Elements
- Calculating moldings for frames
- Calculating outlets
- Additional elements
- Calculation table: structuring data
- Stage 4: Estimate — from moldings to consumables
- Block 1: Molding
- Block 2: Adhesive and fasteners
- Block 3: Putty and primer
- Block 4: Paint
- Block 5: Tools
- Block 6: Installation (if hiring)
- Final estimate
- Stage 5: Material list — checklist for purchasing
- List structure
- Compatibility check
- Article numbers and codes
- Priorities and Alternatives
- Stage 6: Purchasing — How Not to Make Mistakes in the Store
- Checking Availability
- Product Inspection Upon Receipt
- Storage until installation
- Stage 7: Installation — A Checklist as a Step-by-Step Guide
- Surface Preparation
- Installation Sequence
- Sealing joints and painting
- Quality Control
- Typical Mistakes When Assembling a Kit: How to Avoid Them
- Mistake 1: Measuring 'By Eye'
- Mistake 2: Forgetting About Corners
- Mistake 3: Incompatible Elements
- Mistake 4: Not Accounting for Consumables
- Mistake 5: Not Making a Map, Gluing 'As You Go'
- Conclusion: Methodology as a Guarantee of Results

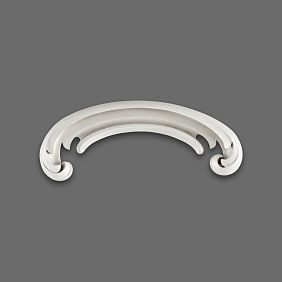
Go to Moldings shopGo to a store, choose a beautiful cornice, buy a couple of planks, bring them home — and discover that you're two meters short, that the corner elements are incompatible, that you forgot about the glue, that you need additional moldings for symmetry which are now out of stock. Buying molding without prior calculation is a lottery where you rarely win. The problem is not the complexity of the molding itself, but that a room is a system of interconnected surfaces where each finishing element affects another. The cornice runs along the perimeter, but the perimeter is not equal to the sum of the wall lengths, because elements are cut or joined with special parts in the corners. Wall moldings must be symmetrical relative to windows, doors, furniture, and symmetry requires precise distance calculation. Rosettes and corner elements are tied to cornices and moldings; their quantity and sizes are determined by the composition. The estimate consists not only of the cost of the molding itself, but also of consumables (glue, putty, primer, paint), tools, and possibly installation. The list of materials is not just a list of SKUs; it is a document that guarantees nothing is forgotten, everything is compatible, and quantities are sufficient, including a margin for cutting and possible defects. In this article, we will not discuss general advice like 'measure first, then buy,' but a specific step-by-step methodology: how to correctly measure a room, taking into account all irregularities and features; how to create a molding map — a layout diagram of elements tied to the room's architecture; how to calculate the exact quantity of each element based on the map; how to create an estimate broken down by expense items; how to form the final list of materials for purchase; and how this list simplifies installation, turning it from chaos into a sequence of clear actions.


Stage 1: Measuring the Room — Don't Trust the Documents
The first and critical stage is measurement. It might seem that you can take an apartment plan from the BTI or a design project, where the room dimensions are indicated, and use those numbers. This is a mistake. Actual dimensions almost always differ from the documents: walls are not perfectly vertical, corners are not exactly 90 degrees, ceilings are not perfectly horizontal. These deviations of a few centimeters are critical when calculating molding.


Tools for Measurement
Tape measure (minimum 5 meters, better 7-10): the basic tool. A metal tape measure is more accurate than a cloth one (cloth stretches). For long walls (over 5 meters), you'll need an assistant to hold the other end.
Laser rangefinder (laser tape measure): simplifies measurements, especially ceiling height and diagonals. Accuracy up to 1-2 mm, works for one person. Costs 2000-5000 rubles, pays off in time saved and accuracy.
Spirit level (better a laser level): checking wall verticality and ceiling horizontality. Important for understanding where compensations will be needed during installation.
Carpenter's square: checking room corners. Whether the angle is right (90 degrees) or has a deviation.
Notebook and pencil (or tablet with a note-taking app): record measurements immediately, on the spot. Don't rely on memory.
Our factory also produces:


What We Measure: Complete Checklist
Lengths of all walls: measure each wall separately, even if the room seems rectangular. Measure along the floor (for baseboards) and under the ceiling (for ceiling cornices). Often these dimensions differ by 2-5 cm due to wall slope.
Ceiling height: at several points in the room (in corners and in the center). The ceiling may not be horizontal; a height variation of 2-3 cm across a room is not uncommon in old buildings.
Room diagonals: from corner to corner (for a rectangular room — two diagonals). If the diagonals are equal, the room is rectangular. If they differ, the shape is irregular (parallelogram), which complicates calculation.
Corners: check with a square or measure diagonals (triangle method). If the angle is not 90 degrees, cutting the cornice will require not a standard 45-degree angle, but a different one.
Window dimensions and placement: width, height, distance from the window to room corners, to the floor, to the ceiling. This is important if you plan wall moldings symmetrical relative to the window.
Door dimensions and placement: opening width, height, distance from the door to corners. Consider that the cornice may be interrupted at the door if the door goes to the ceiling, or run above the door if the opening is standard.
Nitches, protrusions, boxes: any wall irregularities that affect molding placement. Measure depth, width, height.
Placement of radiators, outlets, switches: may affect molding placement if planning a complex composition.
Get Consultation
Measurement plan: draw a plan
Draw a room plan: top-down view (plan) and wall unfoldings (each wall separately, as if you 'unfold' the room into a flat plane). On the plan, mark:
Wall lengths (label dimensions at each line).
Position of windows and doors (rectangles, label dimensions).
Angles (mark if angle is not 90 degrees).
On wall unfoldings, mark:
Ceiling height (on each wall, if it differs).
Height and width of windows, doors.
Distance from corners to windows/doors.
Position of niches, protrusions.
This is your working plan, which you will return to at each stage.
Photographic documentation
Photograph each wall, each corner, windows, doors. Photos will help later when planning molding compositions — you’ll be able to see the room’s actual appearance, not just dry measurements.
Stage 2: Molding map — visualization of composition
Molding map — a diagram showing which molding elements and where they will be installed. This is not just a list of 'buy a crown molding and baseboard,' but an exact placement of each element relative to the room’s architecture.
Element type definition
Decide which types of molding you will use. Main options:
Ceiling crown molding (casing): around the room perimeter, at the junction of ceiling and walls. Visually raises the ceiling, creates framing.
Baseboard: around the perimeter, along the floor. Covers the junction of floor and wall, protects wall from damage.
Wall moldings (wall moldings): vertical, horizontal, or frames. Create architectural divisions on walls, symmetry, visual complexity.
Rosettes (circular or oval decorative elements): usually on ceiling, centered in room under chandelier, or on walls as accents.
Corner elements: special details for corners (internal and external), simplify crown molding installation.
Pilasters, capitals, bases: for creating columns or half-columns on walls (for classical interiors).
For initial experience, it is recommended to limit yourself to crown molding and baseboard. Wall moldings — next level of complexity.
Crown molding and baseboard map: simple option
On the room plan, draw a line for crown molding along the perimeter (under the ceiling) and a line for baseboard (at the floor). Mark corners: internal (where two room walls meet) and external (if there are protrusions).
For each corner, decide: will you use a corner element (if available for the selected crown molding) or will you cut the crown molding at a 45-degree angle. Corner elements are easier to install but more expensive. Cutting at 45 degrees requires precision but uses only the crown molding.
Mark on the plan where the crown molding breaks (usually at doorways, if the door reaches the ceiling) and where it continues.
Wall molding layout: complex composition
If planning moldings, you need a flat layout of each wall. On the layout, draw where and which moldings will be placed.
Classic composition options:
Horizontal moldings: one or two horizontal moldings at a height of 90–120 cm from the floor (the height of a chair back — hence the name 'chair rail', chair railings) and/or at 2/3 the height of the wall. They divide the wall into horizontal zones.
Vertical frames (panels): rectangular frames made of moldings, symmetrically placed on the wall. Classic — one large frame centered on the wall or several smaller ones.
Window and door framing: moldings around a window or door, like a frame, at a distance of 10–20 cm from the opening.
Symmetry is critical: if there is a window on the wall, the molding frames must be symmetrical relative to the center of the window. If there is no window, symmetry relative to the center of the wall.
Marking on the layout:
Mark the center of the wall (vertical axis of symmetry).
Draw the proposed molding frames, maintaining symmetry.
Indicate dimensions: distance from the frame to the wall edge, to the ceiling, to the floor, dimensions of the frames themselves (width, height).
Check whether moldings will interfere with windows, doors, furniture, or outlets.
Outlet layout
If planning an outlet on the ceiling under a chandelier: mark on the ceiling plan the center of the room (intersection of diagonals) or the location where the chandelier will hang (may not coincide with the center if the chandelier is offset for better lighting of the area).
Choose outlet size: diameter should be proportional to room size. For a 20 sq.m. room, an outlet with a diameter of 50–70 cm is suitable; for 30–40 sq.m., 70–100 cm.
Scale and visualization
Draw the layout to scale (e.g., 1:50 — 1 cm on paper equals 50 cm in reality). This will allow you to visually assess how the composition will look and whether the wall will be overloaded with moldings.
Use graphic editors (AutoCAD, SketchUp, or simple ones — Paint, PowerPoint) to create an accurate layout. You can find ready-made interior planners online.
Visualization: if you have the skills, create a 3D room model with moldings (SketchUp, Blender). This gives a better sense of the result than flat schematics.
Step 3: Calculation — math without errors
Based on the molding layout, calculate the exact quantity of each element.
Crown molding and baseboard calculation: perimeter plus allowance
Basic formula: sum of lengths of all walls where crown molding (or baseboard) will be installed. But this is only the beginning.
Example: rectangular room, walls 5 m, 4 m, 5 m, 4 m. Perimeter = 5+4+5+4 = 18 meters.
Adjustment for corners:
If using 45-degree miter cuts: the crown molding is mitered at each corner, losing approximately 10–15 cm per internal corner (depending on molding width). Four corners = 40–60 cm loss. Total: 18 m + 0.5 m = 18.5 m.
If using corner pieces: the crown molding is not mitered at corners, but you must subtract the length occupied by the corner piece (typically 10–15 cm per corner, depending on model). Four corners = 40–60 cm. Total: 18 m - 0.5 m = 17.5 m of crown molding + 4 corner pieces.
Adjustment for door openings: if the crown molding is interrupted by an 80 cm wide door, subtract 80 cm from the perimeter. If the door does not reach the ceiling and the molding runs above it, do not subtract.
Allowance for mitering and waste: add 10% to the final number. This compensates for cutting errors, possible defects, and wall irregularities. For the example: 18.5 m * 1.1 = 20.35 m, rounded up to 21 meters.
Standard length of crown molding/baseboard strip: usually 2 meters or 2.4 meters. Divide: 21 m / 2 m = 10.5 strips, round up = 11 strips of 2 meters (total 22 meters).
Calculating corner elements
Count the number of internal and external angles on the plan. Each angle requires one corner element (if you are using them).
Example: rectangular room = 4 internal angles. Need 4 corner elements.
If there is a protrusion (for example, a column), add 2 external angles.
Molding calculation for frames
For each frame on the wall, calculate the perimeter: (width + height) * 2.
Example: frame 100 cm wide, 150 cm high. Perimeter = (100+150)*2 = 500 cm = 5 meters.
If there are multiple frames, add up the perimeters of all frames.
Add a 10% reserve (for cutting corners of frames at 45 degrees, for errors).
Divide by the standard molding length (2 m), round up.
Socket calculation
Sockets are purchased individually. If you plan to install one socket for a chandelier — buy one. If you want sockets on walls in several locations — purchase according to the number of locations.
Additional elements
If the assortment includes special elements (overlay pieces, central elements for moldings, arch keystones, etc.), mark them on the plan and count the quantity.
Calculation table: structure data
Create a table:
|| Element | Length/Quantity on Plan | Adjustments | 10% Reserve | Total | Molding Length | Number of Molding Pieces |
|---------|---------------------------|---------------|-----------|-------|--------------|-------------------|
| Ceiling cornice | 18 m | +0.5 m (angles) | +1.85 m | 20.35 m | 2 m | 11 pcs |
| Floor skirting | 18 m | +0.5 m (angles) | +1.85 m | 20.35 m | 2 m | 11 pcs |
| Wall molding | 10 m (frames) | 0 | +1 m | 11 m | 2 m | 6 pcs |
| Ceiling cornice corner elements | 4 pcs (4 angles) | 0 | 0 | 4 pcs | - | 4 pcs |
| Ceiling socket | 1 pc | 0 | 0 | 1 pc | - | 1 pc |
This table is the basis for creating the material list and cost estimate.
Stage 4: Cost Estimate — from molding to consumables
Cost estimate — a detailed calculation of all project expenses. Not only the molding itself, but also everything needed for its installation and finishing.
Block 1: Molding
Based on the calculation table, record each element with its price.
Example:
Ceiling cornice, model K-123, 11 pieces at 2 m each, price 500 rubles/piece = 5500 rubles.
Floor skirting, model P-456, 11 pieces at 2 m each, price 300 rubles/piece = 3300 rubles.
Wall molding, model M-789, 6 pieces at 2 m each, price 200 rubles/piece = 1200 rubles.
Ceiling cornice corner elements, model K-123-U, 4 pcs, price 150 rubles/piece = 600 rubles.
Ceiling socket, model R-001, 1 pc, price 1500 rubles = 1500 rubles.
Total stucco: 12100 rub.
Block 2: Adhesive and fasteners
Adhesive for stucco: polyurethane stucco is glued with special adhesive (acrylic mounting, polyurethane, or liquid nails). The adhesive consumption depends on the type of stucco and manufacturer, usually indicated on the package.
Approximate consumption for cornice: 1 tube (310 ml) per 5-7 linear meters. For 20 meters of cornice, you need 3-4 tubes.
For baseboard: similarly, 3-4 tubes.
For moldings: 2 tubes.
Total: 9-10 tubes of adhesive. Price per tube 200-300 rub. Total: 10 tubes * 250 rub = 2500 rub.
Additional fasteners (if needed): for heavy cornices, sometimes screws or anchors are used in addition to adhesive. Package of anchors (100 pcs) — 300 rub, usually one package is enough.
Block 3: Putty and primer
Putty: for filling joints between stucco strips, small chips, gaps. Acrylic putty, fine packaging (1-2 kg) costs 200-400 rub. 1-2 kg is enough for a room.
Primer: it is advisable to prime stucco before painting (improves paint adhesion, reduces paint consumption). Acrylic primer, 1 liter costs 200-300 rub. 1-2 liters are enough for a room (depending on the total stucco area).
Total: putty 300 rub + primer 400 rub = 700 rub.
Block 4: Paint
If the stucco is white and the room has white ceiling/walls, painting may not be necessary (polyurethane stucco is usually white). But if you want to paint it in another color or white with a specific shade:
Acrylic or latex paint (for interior use, washable). Consumption is approximately 1 liter per 10 linear meters of cornice (in two coats). For 20 m cornice + 20 m baseboard + 10 m moldings = 50 m stucco. Consumption: 5 liters.
Paint price: 300-500 rub/liter (mid-range). Total: 5 l * 400 rub = 2000 rub.
Coloring (if needed): add 200-500 rub.
Block 5: Tools
If you don't have tools, add to the estimate:
Miter saw (for cutting cornice at an angle): 500-1000 rub.
Fine-toothed hacksaw (for cutting polyurethane): 300-500 rub.
Putty knives (for puttying): 100-200 rub.
Brushes and rollers (for painting): 300-500 rub.
Sandpaper (for sanding joints): 100 rub.
Total tools: 1500-2500 rub (if buying from scratch).
Block 6: Installation (if hiring)
If you don't install it yourself, but hire a professional:
Installation cost for cornice: usually 150-300 rub per linear meter (depends on region and complexity). For 20 m: 3000-6000 rub.
Baseboard installation: 100-200 rub/m. For 20 m: 2000-4000 rub.
Molding installation: 200-400 rub/m (more complex, requires precision for frames). For 10 m: 2000-4000 rub.
Molding painting: 50-100 rub/m. For 50 m: 2500-5000 rub.
Total installation and painting: 9500-19000 rub.
Final estimate
Summarize everything in a table:
|| Expense item | Amount, rub |
|-----------------|-----------|
| Molding | 12100 |
| Adhesive and fasteners | 2800 |
| Spackling and primer | 700 |
| Paint | 2000 |
| Tools (if needed) | 2000 |
| Installation and painting (if hiring) | 14000 |
| Total | 33600 |
If you install it yourself and have tools, total: 17600 rub.
Add a reserve of 10-15% for unexpected expenses (buying something forgotten, replacing a defective item). Final estimate with reserve: 19500-20000 rub (self-installation) or 38000-40000 rub (with installers).
Stage 5: List of materials — checklist for purchase
List of materials — this is the final list of everything you need to buy. This is your checklist for going toMoldings shopor for placing an online order.
List structure
Divide the list by categories:
Molding:
-
Ceiling cornice, model K-123, plank length 2 m — 11 pcs
-
Internal corner elements for cornice K-123 — 4 pcs
-
Floor skirting, model P-456, plank length 2 m — 11 pcs
-
Wall molding, model M-789, plank length 2 m — 6 pcs
-
Ceiling rose, model R-001, diameter 60 cm — 1 pc
Adhesive and fasteners:
-
Acrylic (or polyurethane) mounting adhesive, tube 310 ml — 10 pcs
-
Screws 6x40 (if needed) — 1 pack of 100 pcs
Consumables:
-
Acrylic finishing spackling, 1 kg — 2 pcs
-
Acrylic deep-penetration primer, 1 l — 2 pcs
-
Washable acrylic paint, white (or required color), 1 L — 5 pcs
-
Sandpaper P120, P180 — 2 sheets each
Tools (if needed):
-
Plastic miter saw — 1 pc
-
Fine-toothed saw for wood/plastic — 1 pc
-
10 cm rubber trowel — 1 pc
-
5 cm flat brush — 2 pcs
-
Short-pile paint roller + tray — 1 set
Compatibility check
Before finalizing the list, check:
Are corner elements compatible with the selected cornice? (Do profiles match?)
Is the adhesive suitable for the molding material? (Polyurethane, plaster, and wood require different adhesives.)
Is the paint compatible with the material? (For polyurethane — acrylic or latex; for plaster, any water-based emulsion paint is suitable.)
Is there enough adhesive and paint? (Recheck consumption according to the manufacturer's instructions.)
Article numbers and codes
If ordering online or in a large store, add article numbers (product codes) to the list. This avoids confusion if different models have similar names.
Example: Cornice K-123 (manufacturer's article: ST-K123-200), length 2 m — 11 pcs
Priorities and alternatives
Mark in the list which items are critical (without them the project cannot be implemented) and which are optional (can be omitted or replaced).
Example: Ceiling outlet — optional (if not available, can be omitted or replaced with another model). Cornice — critical (without it, the project is impossible).
Prepare alternatives: if the selected cornice model is unavailable, what models are similar in style and size? Write down 2–3 alternative article numbers.
Stage 6: Purchase — how to avoid mistakes in the store
With the list of materials in hand (or on your smartphone screen), go to the store or place an online order.
Availability check
Before going to the store, call or check online whether the required items are in stock. If something is unavailable, confirm the delivery time. You may need to adjust the project or choose an alternative.
Checking Goods Upon Receipt
When receiving the goods (in-store or upon delivery), check:
Quantity: matches the order?
Integrity: are there chips, cracks, or deformations?
Compatibility: if purchasing cornices and corner elements, verify that the profiles match (attach the corner to the cornice directly in the store).
Color and texture: are all planks the same shade? (Sometimes batches differ.)
Packaging: Is the manufacturer's packaging preserved? (Important for returns if the item doesn't fit.)
Storage until installation
Polyurethane molding: Store in a dry place, horizontally (planks should not sag, otherwise they will deform). Keep away from direct sunlight (may yellow).
Gypsum molding: Particularly sensitive to moisture, store in a dry place, carefully (gypsum is fragile).
Wooden molding: Keep away from moisture and sudden temperature changes (wood may warp).
Step 7: Installation — list as a step-by-step guide
Material list simplifies installation, turning chaos into a sequence.
Surface preparation
Clean mounting areas: Walls and ceiling must be clean, free of dust and grease stains. Wipe with a damp cloth and let dry.
Level (if needed): If walls/ceiling are very uneven, molding will sit with gaps. Either level with putty before installation, or fill gaps with putty afterward.
Marking: Using the molding layout, mark walls with a pencil: where the cornice will go, where the moldings will be. Use a level for horizontal lines, plumb bob or laser level for vertical lines.
Installation order
Start with cornice: Begin at corners. If using corner pieces, glue them first, then attach straight cornice planks to them. If cutting at 45 degrees, cut the corners, join them at the corner, then glue.
Apply adhesive to the back of the molding (on both "flanges" of the cornice — the one facing the ceiling and the one facing the wall), in a "snake" motion or in spots. Press against the surface and hold for 30-60 seconds until the adhesive sets. For heavy cornices, use additional fasteners (screws).
Jointing planks: Join planks butt-to-butt, without gaps. If a gap forms (due to uneven wall), fill it later with putty.
Then baseboard: Similar to cornice, start at corners, glue along the perimeter.
Wall moldings: According to the marking. For frames: First cut all four frame planks at 45-degree angles, then glue them in sequence, joining the corners.
Rose: Determine the center (by marking), apply adhesive to the back of the rose, press it to the ceiling, hold for a few minutes or temporarily fix it (can prop it with a mop or board).
Joint sealing and painting
After the adhesive has dried (usually 24 hours):
Inspect joints: Where there are gaps, fill with putty. Use a rubber putty knife, pressing putty into the gap and removing excess.
Let the putty dry (4-6 hours), then sand lightly (P180-P220).
Remove dust (vacuum + damp cloth).
Priming (if painting): Apply primer with a brush or roller, let dry (2-4 hours).
Painting: Two coats of paint with intermediate drying (time indicated on the can, usually 2-4 hours between coats). Paint with a brush (for cornices and relief moldings) or roller (for smooth surfaces).
Quality control
After completion, inspect the work:
Are all joints even, without gaps?
Is the cornice level (check with a level)?
Are the moldings symmetrical?
Is paint applied evenly, without drips?
If there are flaws, correct them (patch with putty, repaint).
Common mistakes when assembling the set: how to avoid them
Error 1: Measurements done by eye
Did not measure accurately, estimated roughly ("the wall is probably four meters"), bought a curtain rod with a small allowance. Delivered, started installation — one meter short. Or, conversely, bought with a huge allowance, wasted extra money, had nowhere to store leftovers.
How to avoid: measure with a tape measure or laser distance meter, record exact numbers. Do not rely on memory or rough estimates.
Error 2: Forgot about corners
Calculated the room's perimeter, bought a curtain rod exactly to the perimeter, forgot that length is lost at corners due to trimming. Not enough.
How to avoid: always add allowance for corners (10-15 cm per corner) and a general allowance of 10%.
Error 3: Incompatible elements
Bought a curtain rod of one model, corner elements of another (because the first was not in stock). Profiles did not match, the joint looks amateurish.
How to avoid: check compatibility before purchase. If corner elements for the chosen curtain rod are not available, either choose a different curtain rod or forgo corner elements and cut at 45 degrees.
Error 4: Did not account for consumables
Bought molding, delivered, started installation — but no glue was available. Went to buy more, lost time.
How to avoid: the materials list includes EVERYTHING, including glue, spackle, primer, paint. Buy the entire set at once.
Error 5: Did not make a map, glued "on the go"
Started gluing the curtain rod without planning where the moldings and outlet will be. As a result, the curtain rod was glued unevenly, moldings had to be placed asymmetrically, and the outlet ended up not centered.
How to avoid: create a molding map before starting installation. Mark walls according to the map. Only then begin installation.
Conclusion: methodology as a guarantee of result
Assembling a molding set for a specific room is not an art where everything depends on inspiration and improvisation — it is an engineering task where the result is determined by measurement accuracy, calculation logic, and preparation completeness. Going to a store and buying "something nice" — a strategy that only works in advertising. In reality, it leads to multiple trips, unnecessary expenses, and disappointment when you realize the purchased item doesn't fit.
Step-by-step methodology — measurements, map, calculation, estimate, materials list, installation — is a sequence where each stage depends on the previous one and ensures the next. Measurements without a map are useless — you have numbers, but no understanding of what to do with them. A map without calculation is beautiful but impractical — you know what you want, but don't know how much it costs or how to buy it. Calculation without an estimate is incomplete — you know how much molding you need, but forgot about glue and paint. An estimate without a materials list is vague — you have a total sum, but no shopping list. A materials list without installation is dead — materials are purchased but sit unused because you don't know where to start.
Measurements — this is the foundation. Exact dimensions of each wall, each corner, ceiling height, window and door placement. Do not rely on BTI plans or memory. Tape measure, laser distance meter, level, notebook — these are tools that transform the abstract space of a room into a set of concrete numbers you can work with.
Molding map — this is visualization. A room plan showing where each element will be: curtain rod along the perimeter, baseboard along the floor, moldings framed on walls, outlet on the ceiling. The map shows not only elements but also their relationships: symmetry, proportions, alignment with architecture (windows, doors, corners). The map is your project — the document you work from, which you can show to a designer, installer, or store clerk and say: "This is what I need."
Calculating quantities — this is math without emotions. Room perimeter, corner adjustments, allowance for trimming, dividing by molding length, rounding up. A table where for each element you record: how much is needed according to the map, how much allowance to add, how many moldings to buy. This table eliminates situations of "not enough" or "bought twice as much as needed."
Estimate — this is project economics. Not only molding, but also glue (how many tubes? at what price?), spackle, primer, paint, tools (if not available), installation (if hiring professionals). Each expense item is itemized, and the final sum is known before starting the project. An estimate with a 10-15% reserve covers unexpected expenses. You know the project's cost and can decide: is it affordable or not, where you can save (e.g., install yourself instead of hiring), what you can postpone (wall moldings — second priority, start with curtain rod and baseboard).
Materials list — this is an action checklist. A list of everything you need to buy, with article numbers, quantities, priorities. This list you take to the store or use for online ordering. The list guarantees nothing is forgotten, everything is compatible, and quantities are sufficient. After purchase, the list becomes an inventory description: what you have, what remains, what went into work.
Installation according to the list — this is a sequence without improvisation. You know that first you glue the curtain rod (starting with corners), then the baseboard, then the moldings, then the outlet. You know how much glue, spackle, paint you have — enough for the entire job. You don't stop midway because material ran out. You don't wander around guessing what to do next, because you have a map showing the final result.
Moldings shop— this is not just a place that sells decor, but a point where planning meets implementation. If you come with a materials list, a map, and understanding of exactly what you need, your visit will take an hour (select, order, pay, receive or arrange delivery). If you come without preparation, with the idea "I want something nice," your visit will turn into a multi-hour wandering that may end nowhere, because the choice is vast and criteria are absent.
Company STAVROS has been working with interior decor for more than 23 years, offering not only a wide assortmentmoldings from polyurethane, of wooden moldings, but also technical support in project planning. If you have a molding map and room measurements, STAVROS managers will help you select compatible elements, calculate exact quantities, prepare an estimate, and form a materials list with article numbers. This is a free consultation that saves your time and money, guaranteeing that the purchased set is complete and correct.
For complex projects (large areas, multi-room apartments, non-standard architecture) STAVROS offers on-site measurement and design services: a specialist visits, conducts measurements, creates a molding map, calculates the set, prepares an estimate. This is a paid service, but it eliminates errors: a professional sees what an amateur might miss (irregularities requiring additional material, complex corners requiring special elements, optimal molding placement for specific architecture).
The methodology for assembling a molding set — this is not bureaucracy, not extra work, but an investment of time during the planning stage, which pays off in time, money, and nerves saved on all subsequent stages. One hour of precise measurements saves a day of rework due to insufficient material. Two hours spent creating a molding map saves thousands of rubles on purchasing incompatible elements that must be returned or discarded. Half an hour spent creating a materials list eliminates situations where installation stops because glue ran out and the store is already closed.
The result of a methodical approach — this is not only a completed project (molding installed, painted, looking as on the picture), but also confidence, control, understanding. You knew what you were doing at every stage. You controlled the process, rather than drifting with the current. You understand where each number in the estimate and each item in the materials list came from. This knowledge does not disappear — your next project (another room, another apartment) will be faster, more confident, cheaper, because the methodology is already mastered and has become your skill.


