Article Contents:
- How a wooden handle transforms the kitchen's look — impact on style
- Why the handle matters more than it seems
- The warmth of wood in the cold kitchen environment
- Style codes of wooden handles
- Wooden bracket — lengths 96, 128, 160, 192, 256 mm — how to choose
- Standards for center-to-center distance
- How to choose bracket length based on the facade
- Bracket profile: square, round, oval
- Wooden rail handle — horizontal bracket for facades
- Where rail handles are used
- Wooden rail and style
- Technical parameters of rails
- Knob handle — for small drawers and hinged doors
- Where knobs are appropriate
- Types of knobs and their style codes
- Knob mounting
- Center-to-center distance — how to measure correctly and avoid mistakes
- How to measure center-to-center distance of an existing handle
- Standard values and tolerances
- Table of center-to-center distances and recommended facade widths
- Wooden handle for painting — which enamels are suitable
- Why 'paint-ready' is the best choice for updates
- Preparing a wooden handle for painting
- Which enamels are suitable
- Stain toning — walnut, oak, wenge
- Compatibility with MDF, veneer, solid wood facades
- Painted MDF facades
- Veneered facades
- Solid wood facades
- PVC film facades (film-coated MDF)
- Combining wooden handles with moldings and overlays
- Handle + molding + overlay system
- Furniture handles and legs: a systematic view
- Handles and cornice above the kitchen unit
- Caring for wooden furniture handles
- Weekly care
- Annual oil maintenance for handles
- Removing minor scratches
- FAQ - answers to popular questions
- About the Company STAVROS

There is a moment in kitchen renovation that seems insignificant—and that's exactly why it gets postponed until the end. Handles. 'We'll pick them later,' 'any will do,' 'the main thing is that they hold.' And then they look at the finished kitchen and realize: something is off. The unit is beautiful, the facades are smooth, the countertop is excellent—but a feeling of incompleteness hangs in the air. And the reason is precisely the handles.
wooden furniture handles—is the only element of a kitchen unit that a person touches with their hands hundreds of times a day. Every time they open a door or pull out a drawer. The tactile experience of interacting with the kitchen is formed precisely through the handle. Not through the color of the facade or the pattern of the countertop—but through the feel of the material, shape, weight, and surface temperature. Wood is warm, alive, pleasant to grip. No metal can replicate that.
Wooden furniture handles—is simultaneously function and decor, tactility and architecture, interior detailing at arm's length. This article is a detailed professional guide to the selection, types, sizes, installation, and stylistic application of wooden handles for kitchens and furniture.


How a wooden handle changes the look of a kitchen—impact on style
The handle is the final period in the sentence called 'kitchen interior.' You can write a long, beautiful sentence, but put a comma instead of a period at the end—and the meaning will hang in the air. That's exactly how incorrectly chosen handles work.


Why the handle is more important than it seems
Visually, the handle occupies fractions of a percent of the facade area. But it is precisely what creates a focal point of attention: when a person looks at a kitchen, their gaze automatically seeks elements at hand level—things they interact with. Handles are what are seen before the overall facade canvas.
That's why changing handles while keeping everything else so radically alters the perception of a kitchen. A white unit with chrome handles in a high-tech style and the same white unit withwooden kitchen handlesin a rounded shape—these are two different interiors. The facades are the same, the color is the same. But the character—is different.
Our factory also produces:


The warmth of wood in the cold environment of the kitchen
The kitchen is a space with metal (appliances, faucet), stone (countertop, backsplash), and plastic (household appliances). A wooden handle introduces the only warm note at the touch level into this material 'coldness.' It literally warms the experience of interacting with the kitchen.
At the same time, wood does not compete with metal—it complements it. Metal hinges, faucet, accessory rails, and wooden handles—this is an organic combination where each material occupies its functional niche.
Get Consultation
Stylistic codes of wooden handles
The shape of the handle is instantly read as a stylistic signal:
-
Straight bracket with square cross-section—Scandinavian style, minimalism, modern classic
-
Bracket with rounded profile—Provence, country, neoclassical
-
Long horizontal rail—modern style, minimalism, Japanese wabi-sabi style
-
Turned knob—classic, empire, baroque
-
Knob in kappa shape—Scandinavian design, retro-modernism
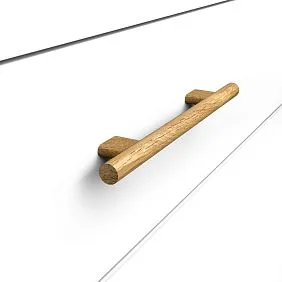
Wooden bracket handle — lengths 96, 128, 160, 192, 256 mm — how to choose
Bracket handle — the most common type of furniture handle. It is attached at two points (two screws), forming an arc or a straight horizontal bridge between them. The distance between the attachment points is called the center-to-center distance.
Center-to-center distance standards
International standard for center-to-center distances of furniture handles: 32 mm, 64 mm, 96 mm, 128 mm, 160 mm, 192 mm, 256 mm, 320 mm, 384 mm. These values are multiples of 32 mm — the basic modular unit in furniture production.
96 mm — standard for small wall cabinets (width 200–300 mm) and small drawers with a width of 200–300 mm. The handle is compact and does not overload a small front panel.
128 mm — universal standard. Suitable for most kitchen cabinets with a width of 300–400 mm, for drawer fronts with a standard width of 400–500 mm. 128 mm wooden kitchen handles — the most popular size in any catalog.
160 mm — for fronts with a width of 450–600 mm. Standard for base cabinets and medium-width tall cabinets. 160 mm wooden kitchen handles stand out well on a 600 mm cabinet front as an architectural accent.
192 mm — for wide fronts 600–800 mm. Two 300 mm wall cabinets with a single 600 mm front — a 192 mm handle sets the appropriate scale.
256 mm and more — for large fronts of tall cabinets (width 600–900 mm and height over 700 mm), for built-in refrigerators, for oven fronts.
How to choose bracket handle length based on the front panel
Practical rule: handle length (center-to-center distance) = 20–35% of the smaller dimension of the front panel. A 400 mm wide front — 96–128 mm handle. A 600 mm wide front — 128–192 mm handle. A 900 mm front — 192–256 mm handle.
A handle that is too short on a wide front looks random and small. One that is too long on a narrow front — like overload. Proportion is key.
Bracket profile: square, round, oval
The cross-section of the bracket handle grip — a separate parameter affecting tactile comfort and style:
-
Square cross-section 20×20 mm — graphic, modern, "architectural"
-
Round profile with a diameter of 16–22 mm — classic, comfortable to grip
-
Oval profile — a compromise between square and round, fits well in the palm
Grip thickness affects comfort: a handle that is too thin (diameter 10–12 mm) cuts into the palm when opening sharply. Optimum — 16–22 mm at the thinnest gripping point.
Wooden rail handle — horizontal bracket for front panels
Wooden kitchen rail — a bracket with a large center-to-center distance (from 256 mm and above), typically horizontally oriented, often spanning almost the entire width of the front panel. This is not just a handle — it is an architectural horizontal element, creating a pronounced line across the entire cabinet front.
Where a rail handle is used
Rail handles are organic on:
-
Long horizontal pull-out drawers (width 600–900 mm)
-
Oven and dishwasher fronts
-
Tall cabinets with a single vertical front panel
-
Top-hung cabinets near the ceiling (horizontal handle makes opening easier)
On wall cabinets of the upper row, the rail is installed at the bottom — fingers grip from below when opening. On lower drawers — horizontally at the top of the front panel.
Wooden rail and style
A wooden rail handle creates a horizontal line, making the cabinet visually "longer" and "wider". In Scandinavian and Japanese interiors, this is exactly the effect sought: long horizontals, minimal vertical decoration, calm rhythm of surfaces.
In combination with handle-less fronts (push-to-open), the rail handle is installed only on some cabinets — creating an accent rhythm: a section without a handle, a section with a rail, a section without a handle. This is a design technique that adds dynamism without excessive decoration.
Rail technical parameters
Length: 256, 320, 384, 448, 512 mm and more. Profile: typically rectangular (a rail 'reads' better with a square cross-section) or cylindrical. Material: oak or beech — the same species as for the frontwooden overlayor legs. Unity of species — unity of tone.
Rail fastening: two M4×40 mm screws through standard holes in the front. For rail lengths over 384 mm, three fastening points are recommended — the central screw prevents deflection of the wooden rod under load.
Push handle — for small drawers and hinged doors
A push handle is a handle with a single fastening point. One screw into the center of the front — and the push handle is ready. This is the simplest type of furniture handle structurally, but not the simplest stylistically.
Where a push handle is appropriate
A push handle is organic where a pull would be excessive in scale:
-
Small drawers up to 200 mm wide (spices, small kitchen utensils)
-
Hinged doors of narrow cabinets (200–250 mm)
-
Drawers in the base under the countertop (where opening is done 'towards oneself' with one finger)
-
Decorative boxes, nightstands, small dressers
On large fronts, a push handle gets lost — and looks like a random accent, not a thoughtful solution.
Types of push handles and their style codes
Turned push handle with a rounded cap — classic, Empire, neoclassical. The shape references 19th-century furniture, where push handles adorned secretaries and bureaus.
Push handle-'kappa' in the shape of a truncated cone — Scandinavian design, retro-modernism of the 1950s–60s. A simple, geometrically precise shape, recognizable and laconic.
Flat square push handle — minimalism, Japanese style. No decorations, only functional form.
Carved push handle with decorative relief — Baroque, Rococo. Used as a paired element withcarved overlays on fronts— creates a unified decorative system.
Push handle fastening
The push handle is fastened with one M4×25 mm or M4×30 mm screw — through a standard d=5 mm hole in the front. The depth of the mounting groove in the body of the push handle is 10–15 mm. The base diameter of the push handle is 30–50 mm. During installation, it is important to accurately find the center of the front — a deviation of the push handle from the center by 3–5 mm is noticeable to the naked eye.
Center-to-center distance — how to measure correctly and avoid mistakes
The center-to-center distance of a furniture handle is the distance between the centers of two mounting holes. This is a critically important parameter when replacing handles: the new handle must fit onto the existing holes in the front without redrilling them.
How to measure the center-to-center distance of an existing handle
First method — direct measurement: remove the handle, measure the distance between the centers of the holes in the front with calipers or a ruler. This is the center-to-center distance.
Second method — by the handle: measure the distance between the centers of the mounting grooves in the body of the handle. On standard pulls, these grooves are clearly visible from the back side.
Third method — by the holes in the front: insert pencils into the holes, measure the distance between them.
Standard values and tolerances
Standard values are multiples of 32 mm: 96, 128, 160, 192, 256 mm. Tolerance: ±1 mm is acceptable, ±2 mm can be accommodated with an elongated mounting slot in the handle (most brackets have a slot, not a hole, specifically for a small adjustment range).
If the center-to-center distance of your old handle does not match any standard (e.g., 110 mm or 142 mm), you are likely dealing with non-standard imported hardware. In this case, you will either need to find a handle with a similar non-standard distance or drill new holes (filling the old ones with wooden plugs for painting).
Table of center-to-center distances and recommended front panel widths
| Center-to-center distance | Recommended front panel width | Application |
|---|---|---|
| 96 мм | 200–350 mm | Small wall cabinets, small drawers |
| 128 мм | 300–500 mm | Standard wall cabinets, drawers |
| 160 мм | 450–600 mm | Base cabinets 450–600 mm |
| 192 мм | 550–700 mm | Wide base cabinets |
| 256 мм | 600–900 mm | Tall cabinets, ovens |
| 320 mm and more | 800–1,200 mm | Rails, top cabinets, refrigerators |
Wooden handle for painting — which enamels are suitable
Wooden furniture handles are supplied in three variants: pre-finished (varnish or oil), primed for painting, and 'in raw wood' — only sanded. The last option is for those who want an exact color match with the front panel.
Why 'for painting' is the best choice for updates
When you are replacing handles on an existing kitchen and want to create a feeling of 'original' rather than 'added-on,' a wooden handle for painting allows for an exact color match. You paint the handles with the same enamel as the front panels — and the handles become part of the front panel, not hardware on it.
This is an architectural technique widely used in custom kitchen design: handles are integrated into the front panel by color, while their shape provides a minimal hint of accent. A white kitchen with white wooden handles is an elegant solution that requires precise execution.
Preparing a wooden handle for painting
Step one: priming. For oak handles — a shellac-based sealer primer is mandatory (prevents yellowing and tannin bleed-through under white enamel). For beech handles — acrylic or alkyd primer. One coat, drying time 1–2 hours.
Step two: sanding. P320 on all surfaces. The goal is not to remove the primer, but to eliminate the 'raised grain' caused by the water-based primer.
Step three: first coat of enamel. Apply with a brush along the grain, a thin even coat. Avoid 'puddles' in end grain areas and bracket corners.
Step four: sanding with P400. Lightly, not down to the primer. The goal is to remove dust particles and the graininess of the first coat.
Step five: final coat. After complete drying — a final coat of the same enamel.
Which enamels are suitable
Acrylic enamel — quick drying (2–3 hours), no strong odor, good whiteness. Downside — slightly less hard than alkyd. For handles that are heavily used in the kitchen — add a top coat of polyurethane fixing varnish.
Alkyd enamel — harder, more wear-resistant. Takes longer to dry (12–24 hours between coats), has a characteristic odor. Over time, it yellows slightly in white tones.
Polyurethane enamel — best hardness and chemical resistance (cleaning agents). Optimal choice for the kitchen, where handles are regularly wiped with a damp cloth.
Staining with wood stain — walnut, oak, wenge
For those who want a natural wood tone — wood stain. Water-based stain — applied with a brush, excess is removed after 3–5 minutes. One coat — light, two–three — rich. After complete drying (4–6 hours) — topcoat varnish.
Popular tones for kitchen handles: 'walnut', 'dark oak', 'wenge', 'alder' (reddish-brown warm tone), 'chestnut'. The tone choice is determined by the tone of other wooden elements in the interior: countertop,furniture legs, ceiling beamsorwooden floor skirting board.
Compatibility with MDF, veneer, solid wood fronts
A wooden handle for MDF fronts, veneered fronts, and solid wood fronts is installed the same way — through a through hole in the front. But there are nuances in preparation and selection.
Painted MDF fronts
MDF front with paint — the most common type in modern kitchens. Under the coating — MDF board with a density of 750–900 kg/m³. Fastening with an M4×25 mm screw into MDF is no problem: MDF holds threads worse than solid wood, but for a furniture screw, the load capacity is sufficient.
Important: when drilling holes in MDF, use a drill with a depth stop or painter's tape at the drill exit point — MDF on the back side 'tears' and chips the coating without this precaution.
Handle tone: for white and solid-color MDF fronts — a wooden handle in a natural or stained tone creates a 'warm note' in a monochrome space.
Veneered facades
Veneer — a thin layer of natural wood (0.5–1.5 mm) on an MDF or chipboard substrate. The front has the texture and tone of natural wood. A wooden handle is organic here in material: wood + wood.
Compatibility rule: the wood species of the handle does not have to match the veneer species. The tone must match. A beech handle in a 'dark walnut' tone on walnut veneer — correct. An oak handle in a natural light tone on 'wenge' veneer — mismatch.
Solid wood kitchen fronts
Solid wood kitchen fronts — a premium segment, typically classic or neoclassical. Here, the handle should also be solid wood, of the same species or a similar tone.
For solid oak fronts — oak handles in the same varnish tone. For solid walnut — walnut handles or beech handles stained 'walnut'. Fastening in solid wood is more reliable than in MDF: solid wood holds screws 1.5–2 times better.
Fronts with PVC film (film-wrapped MDF)
PVC film is wrapped around milled MDF. Feature: the hole for the handle is drilled through the film — at the edges of the hole, the film can 'lift' if the drill is dull or the rotation speed is too high.
Solution: sharp drill, low speed (400–600 rpm), secure the starting point with painter's tape. After drilling — carefully press the film edges around the hole.
Combining wooden handles with moldings and overlays
Wooden furniture handleswork most effectively in a system where they are coordinated with other wooden interior elements — moldings, overlays, legs.
System 'handle + molding + overlay'
Classic scheme for decorating a kitchen front in a neoclassical style:
-
Molding around the perimeter of the frontcreates a frame
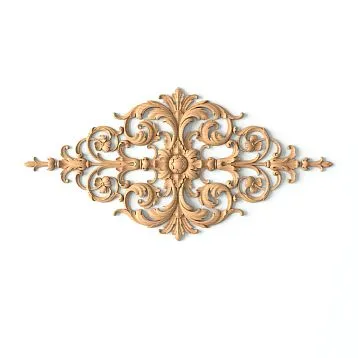
-
decorative insertin the center of the field — a floral or geometric accent
-
Wooden bracket handle on the lower part of the front — a functional anchor
All three elements are from the same catalog, the same wood species, the same tone. The handle doesn't just open the cabinet—it completes the architectural composition of the facade.
Furniture handles and legs: a systematic view
When the kitchen stands onwooden furniture legs(for example, an island or a bar table), and the handles are made from the same wood, the interior gains internal logic. Starting from the legs at the floor and ending with the handles at hand level, the wood guides the eye vertically throughout the space.
This is called material sequence—a principle used by professional interior designers. The repeating material creates rhythm and unity in the space.
Handles and the cornice above the cabinet
The upper tier of the kitchen cabinet is often adorned withwith wooden cornices. The cornice above the upper cabinets and the wooden handles on those same cabinets are the upper and lower decorative 'belts.' They should be made from the same species and tone. A cornice with a complex profile—a handle with a similar profile. A straight, modern cornice—a handle with a straight, square cross-section.
Caring for wooden furniture handles
Wood in the kitchen is in a high-stress zone. Grease, moisture, household chemicals. Proper care doubles the lifespan of the handles.
Weekly care
Wipe wooden furniture handles with a soft, damp cloth and a neutral detergent (pH 6–7). Acidic and alkaline agents (pH below 5 or above 8) damage the varnish coating—their use is prohibited.
After damp wiping—immediately wipe dry with a soft, dry cloth. Constant moisture on the surface damages even water-resistant varnish coatings within 6–12 months.
Annual maintenance for oiled handles
If the handles are coated with oil or oil-wax—once a year, apply a thin layer of maintenance oil (without sanding). Let it soak in for 15–20 minutes, remove the excess. The oil restores the protective layer and renews the color.
Removing minor scratches
A small scratch on a varnished handle—local sanding with P400 in the scratch area, applying a thin layer of varnish with a brush, drying. With proper color matching, the repair spot is almost unnoticeable.
On a handle with an oil coating—the scratch is even easier to fix: sanding with P320 at the damage point, applying a drop of oil with a swab, polishing with a cloth.
FAQ — answers to popular questions
Can wooden handles be installed on a kitchen with laminated MDF fronts?
Yes, this is a standard installation. Carefully drill holes through the PVC film—using a sharp drill at low speed with painter's tape securing the entry point.
How to choose the handle length if the kitchen has different front sizes?
Use one center-to-center distance step for all fronts of the same type (all wall-mounted—128 mm, all base—160 mm). This creates visual order despite different cabinet widths.
A wooden handle in the kitchen—won't it wear out too quickly?
With varnish or oil coating, oak or beech last 10–15 years with daily use. Scratches and wear are fixed with local repairs—unlike metal, wood can be restored.
How to install a handle without errors in placement?
Make a cardboard template: drill holes in it exactly matching the handle's center-to-center distance. Place the template on the front, mark through it with a pencil. Drill according to the markings—errors are eliminated.
Is special hardware needed to install wooden handles?
No. The standard screw for furniture handles is M4, length 20–30 mm depending on front thickness (16–19 mm for MDF, 18–22 mm for solid wood). The screw is included with most handles from the STAVROS catalog.
Can wooden handles of different shapes be combined on one kitchen?
Yes, provided two conditions are met: one wood species and one finish tone. For example, the knobs on small spice drawers and the 128 mm bar pull on standard cabinets—both elements are oak in the 'walnut' tone. The shapes differ—the system is unified.
Which handle is suitable for a Provence-style kitchen?
A bar pull with a rounded profile made of beech, finish—white enamel with a light patina on the ends. Center-to-center distance 96–128 mm for wall cabinets, 128–160 mm for base cabinets. Complement itdecorative inlayswith a floral ornament on the central fronts—and the Provence look will be complete.
About the company STAVROS
Details make all the difference. Anyone who has ever held a handle made of real oak—and compared it to a plastic plug with a metal rod—knows this. The difference is not just tactile. It's a difference in understanding what 'well-made' means.
STAVROS is a Russian manufacturer of wooden products for furniture and interiors.wooden furniture handlesare presented in the catalog in the full range of types and sizes: bar pulls with center-to-center distances from 96 to 384 mm, knobs, rails—all made of oak and beech with 8–10% moisture content, the surface sanded for any finish.
In the same catalog—Decorative overlays for facadesover 400 models,Moldings and cornices, Furniture legsandstaircase components. All products are from one production facility, from the same wood species, with unified quality standards.
Buy wooden kitchen handles with delivery across Russia—in the STAVROS catalog. Orders from 1 piece. Professional consultation on selecting center-to-center distance, tone, and style—upon request.