Article Contents:
- Chapter 1. The Evolution of Baseboards: From Utility to Art
- History of Origin
- Russian Traditions
- Industrial Revolution and Mass Production
- Material Science: The Soul and Body of Baseboards
- Solid Wood — The Aristocracy of Materials
- Coniferous Species: Accessible Luxury
- Broadleaf Species: Symphony of Color and Texture
- MDF — Technology at the Service of Beauty
- Production technology
- Advantages of MDF
- Varieties of MDF Baseboards
- Veneered Baseboards — Balance of Price and Prestige
- Veneering Technology
- Types of Veneer
- Chapter 3. Geometry of Perfection: Dimensions, Profiles, Proportions
- Baseboard Height — Question of Proportions and Style
- Classic Formula
- Style Adjustment
- Influence of Furniture
- Baseboard Thickness — Foundation of Stability
- Standard Thicknesses
- Compatibility with floor covering
- Baseboard Length — Minimum Joints, Maximum Beauty
- Long-Length Baseboards
- Custom Baseboards
- Baseboard Profiles — Language of Forms and Styles
- Classic profiles
- Modern profiles
- Special Elements of Baseboard Systems
- Corner Elements
- Connecting elements
- Plugs
- Chapter 4. Decorative Elements and System Solutions
- Wooden Rails — Universal Design Tool
- Dimensional Scale of Wooden Rails
- Application of baseboards in interior
- Technology of rail installation
- Moldings and cornices — the aristocracy of decoration
- History of moldings
- Types of moldings
- Wooden cornice — the crown of interior
- Chapter 5. Color and finishing — the soul of wooden baseboard
- Natural Tones — Beauty Without Embellishment
- Light wood species
- Dark wood species
- Toning — expanding the palette of possibilities
- Types of toning compounds
- Popular toning shades
- Painting — boundless creative possibilities
- White MDF baseboard — the classic of the genre
- Color solutions
- Special effects and textures
- Brushing — emphasizing texture
- Artificial aging
- Textured Coatings
- Chapter 6. Installation — secrets of professional quality
- Preparation stage — the foundation of success
- Assessment of wall condition
- Checking angles
- Tool preparation
- Installing MDF baseboard — step-by-step technology
- Marking
- Cutting
- Fitting
- Mounting methods
- Joint Processing
- Installing MDF baseboard — features of working with composite material
- Pilot hole drilling
- Choosing Fasteners
- Adhesive for MDF baseboard
- Working with complex areas
- Curved walls
- Pipes and utilities
- Door openings
- Final finishing
- Putty
- Sealing
- Final finishing
- Chapter 7. Interior styles and baseboard selection
- Classic style — triumph of traditions
- Parameters of a classic baseboard
- Coordination with other elements
- Modern style — minimalism and functionality
- Features of a modern baseboard
- Integration with communications
- Scandinavian style — northern restraint
- Features of a Scandinavian baseboard
- Color palette
- Loft — industrial aesthetics
- Loft approach to baseboard
- Provence — French provincial style
- Features of a baseboard in Provence style
- Minimalism — philosophy of emptiness
- Minimalist baseboard
- Chapter 8. Technical aspects and innovations
- Shadow baseboard — revolution in design
- Construction of a shadow baseboard
- Advantages of a shadow baseboard
- Disadvantages
- Baseboard with lighting
- Types of lighting
- Technical solutions
- Flexible baseboards
- Materials of flexible baseboards
- Invisible baseboard
- Operating principle
- Applications
- Chapter 9. Economic aspects
- Cost of wooden baseboards
- Pricing by species
- Price of wooden planks
- The price of MDF baseboard is formed differently than the price of solid wood. Here the main factors are profile complexity, surface quality, and finish type.
- Ownership Cost Comparison
- Solid wood
- MDF skirting board
- Impact on property value
- Chapter 10. Maintenance and Operation
- Daily care of wooden skirting boards
- Dry cleaning
- Wet Cleaning
- What Absolutely Cannot Be Done
- Seasonal care
- Winter period
- Summer period
- Local repair and restoration
- Repairing minor defects
- Coating restoration
- Problem Prevention
- Controlling microclimate
- Protection from Mechanical Damage
- Chapter 11. Trends and Innovations
- Modern trends in skirting board design
- Trend for larger sizes
- Technology integration
- Ecological trends
- Innovative materials
- Thermally treated wood
- Modified wood
- Composite materials of new generation
- Technological innovations in production
- CNC processing
- 3D printing with wood
- Laser Processing
- Design trends
- Contrasting solutions
- Colored skirting boards
- Hidden skirting boards
- Chapter 12. Special Applications
- Wooden ceiling skirting board
- Differences from floor skirting board
- Choosing ceiling skirting board
- Skirting board for bathroom
- Material requirements
- Suitable materials
- Installation features
- Wooden strips in interior design
- Space zoning
- Finishing with wooden strips
- Strip sizes and proportions
- Skirting board in commercial spaces
- Increased foot traffic
- Safety
- Aesthetic requirements
- Chapter 13. Master Classes and Practical Tips
- How to choose skirting board correctly: step-by-step algorithm
- Step 1: Room analysis
- Step 2: Defining the Style
- Step 3: Choosing the Material
- Step 4: Defining the Dimensions
- Step 5: Choosing the Profile
- Secrets of Quality Installation
- Tool preparation
- Room Marking
- Baseboard Cutting
- Installation
Imagine the moment of absolute silence in a newly finished interior. Every detail in its place, every line precisely aligned, every shade harmoniously blending with the rest. But it is precisely in such moments that it becomes obvious: the devil is in the details. And among all these details, there is one that can either crown a masterpiece or irreversibly ruin it — the baseboard.
Over half a century of work in interior design and woodworking, I have witnessed revolutions in materials, technologies, and styles. But one truth remained unchanged: wooden baseboard — this is not merely a functional element concealing the junction between floor and wall. It is a philosophy of approach to space creation, a bridge between practicality and aesthetics, the final note in the symphony of interior design.


Chapter 1. Evolution of the Baseboard: From Utility to Art


History of Origin
The history of the baseboard goes back to ancient times. In ancient Roman architecture, the baseboard was called a square slab serving as the foundation for columns. The word itself comes from the Greek 'plinthos' — brick, tile. But the baseboard we know today appeared much later.
In medieval Europe, the first wall baseboards were crudely processed wooden strips, whose sole purpose was to protect the lower part of the wall from mechanical damage and moisture. No one at that time thought about aesthetics — survival in harsh conditions of cold castles and primitive dwellings was the main concern.
The true golden age of baseboard art began in the Renaissance. Italian masters were the first to understand: every element of interior design must serve beauty. The first profiled baseboards appeared, adorned with carving and gilding. French palaces of the 17th–18th centuries perfected this art — baseboards became full-fledged works of decorative-applied art.
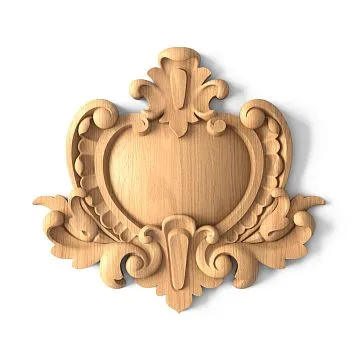
Our factory also produces:


Russian Traditions
Baseboards appeared in Russia much later, during the Peter the Great era, along with other European innovations. However, Russian masters brought their own characteristics to this art. While European baseboards were predominantly white or gilded, Russian masters preferred natural wood tones, emphasizing the beauty of the material.
The production of baseboards was especially developed in the northern regions of Russia, rich in forests. Masters from Arkhangelsk, Vologda, and Kostroma were renowned for their skill in working with coniferous species, creating items capable of serving for centuries.
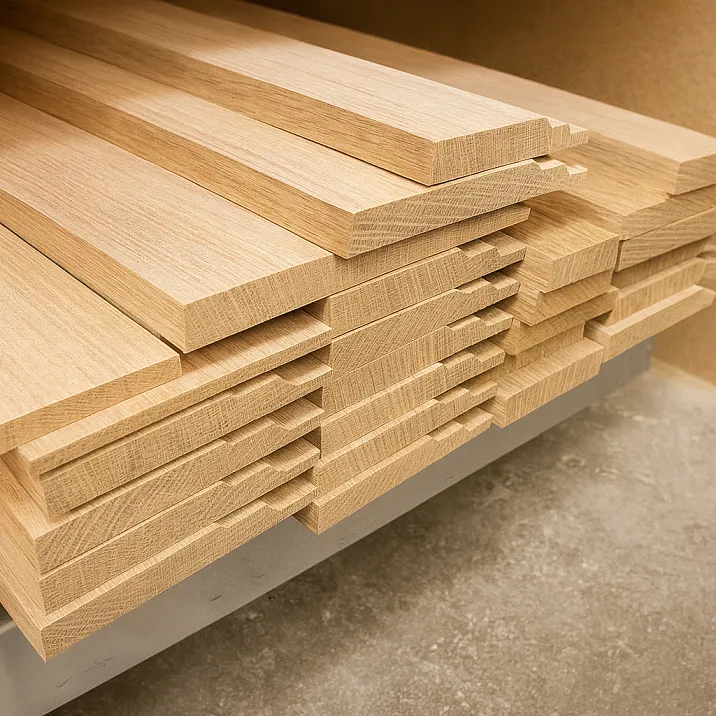
Get Consultation
Industrial Revolution and Mass Production
The 19th century brought a revolution in baseboard production. The advent of mechanical lathes enabled mass production, making beautiful baseboards accessible not only to the aristocracy but also to the middle class.
It was precisely during this time that the main profile types were formed, many of which are still used today. The Victorian era gave us tall baseboards with rich ornamentation, Art Nouveau — smooth, organic forms, and modernism of the early 20th century — simplified, geometric profiles.
Chapter 2. Material Science: The Soul and Body of the Baseboard
Solid Wood — the Aristocracy of Materials
Solid wood baseboard — this is the embodiment of everything the nature can offer for interior finishing. Each solid wood plank is a unique work of art, created by time and natural forces.
Working with solid wood for more than half a century, I have studied the character of each species, understood their quirks and advantages. Solid wood lives, breathes, and changes depending on humidity and temperature. This is not a flaw — it is a feature that must be understood and accounted for.
Coniferous Species: Accessible Nobility
Spruce — this is the alpha and omega of woodworking. The density of spruce is 480–520 kg/m³, providing an optimal balance of strength and ease of processing. wooden rail Made from spruce — a classic choice for most projects.
The color palette of spruce is strikingly diverse — from nearly white sapwood to rich golden-orange heartwood. Annual rings are clearly visible, creating a distinctive pattern that cannot be replicated by any artificial materials.
The resinous nature of spruce — its blessing and curse simultaneously. Resin protects the wood from rot and insects, imparts a distinctive aroma, but can cause problems if improperly processed. Proper drying and resin removal — mandatory steps in preparing spruce baseboards.
Spruce is a more calm and predictable species. The density of spruce, 350-450 kg/m³, makes it even easier to process. The wood color is more uniform, without pronounced differences between sapwood and heartwood.
Spruce skirting boards are ideal for painting. The fine-pored structure of the wood ensures even paint application without streaks or spots. White MDF skirting board often imitates exactly the texture of spruce.
Larch is the elite among coniferous species. The density of larch reaches 650-700 kg/m³, comparable to oak. High resin content makes larch practically indestructible — it does not rot, does not attract insects, and is not afraid of moisture.
The color of larch varies from light yellow to reddish-brown. Annual rings are clearly visible, but transitions between them are smoother than in pine. Larch skirting boards are the choice for those willing to invest in quality for decades ahead.
Deciduous species: symphony of color and texture
Oak is the undisputed king of the wooden kingdom. The density of oak, 690-750 kg/m³, ensures exceptional strength and durability. Oak skirting board is an investment for centuries, passed down from generation to generation.
Oak impresses with its variety of shades and textures. Young oak has a light golden color with a greenish tint. As it ages, it darkens, acquiring a noble brown color with darker veins. Oak that has been soaked in water for hundreds of years becomes almost black, acquiring a metallic sheen.
A distinctive feature of oak is clearly visible heartwood rays, creating a unique radial pattern. This pattern, resembling flames, cannot be artificially imitated.
Ash is the dancer among wood species. Ash fibers curve like waves, creating a dynamic, lively pattern. The density of ash, 650-750 kg/m³, combines with exceptional flexibility, allowing the creation of skirting boards with the most complex profiles without the risk of cracking.
The color range of ash varies from cream-white to light brown with gray and pinkish tones. Sapwood is almost white, while heartwood may have olive or brown hues. Ash tones beautifully, allowing any color to be achieved — from classic wenge to ultra-modern bleached wood.
Walnut — an aristocrat with a dark character. American black walnut, European walnut, Manchurian walnut — each variety possesses its own unique beauty. The density of walnut, 600-650 kg/m³, is optimal for creating complex profiles with the finest details.
The color palette of walnut is impressive in richness — from light brown to almost black with purple, golden, and greenish veins. The wood grain resembles expensive marble, yet possesses the warmth only wood can provide.
Beech — European classic with a pink heart. The density of beech, 650-750 kg/m³, combines with excellent workability. Beech skirting boards are easily profiled and accept any type of finish perfectly.
Beech’s characteristic pinkish hue with dark specks makes it instantly recognizable. Beech wood is very uniform, with no pronounced difference between sapwood and heartwood. This makes beech skirting boards ideal for staining and painting.
Maple — the light genius of temperate latitudes. The density of maple, 530-650 kg/m³, allows creating strong yet lightweight skirting boards. Maple wood is almost white with a cream or yellowish tint.
Maple’s special value lies in its ability to 'play' with light. Fine pores create a silky texture that appears differently under various lighting conditions. Maple skirting boards are especially suitable for interiors with large windows.
Cherry — American dream in wood. The density of cherry, 530-580 kg/m³, is optimal for residential interiors. Young cherry has a light pink color, which darkens with age to a noble reddish-brown.
Cherry wood has a natural gloss that intensifies with polishing. The grain is fine and delicate, without sharp contrasts. Cherry skirting boards are the choice for those who appreciate refined elegance.
MDF — technology serving beauty
MDF skirting board — a triumph of modern technology over nature’s caprices. Fine wood particle fraction, pressed under 25 MPa pressure at 200°C without formaldehyde, creates a material with unique properties.
Production technology
Producing quality MDF is a complex technological process requiring precise parameter control. Wood chips are ground into flour, then mixed with lignin-based binders — a natural polymer found in wood.
The board is formed under pressure and at high temperature. This process activates lignin, converting it into a natural glue bonding wood particles. The result is a uniform material with density 720-850 kg/m³, exceeding the density of many natural species.
Advantages of MDF
The main advantage of MDF is absolute geometric stability. MDF floor skirting board does not deform due to humidity changes, does not crack, does not warp. This is especially important in the Russian climate with its sharp seasonal changes.
The homogeneous structure of MDF allows creating complex profiles with sharp edges and smooth transitions. Modern CNC routers are capable of reproducing any shape with precision down to fractions of a millimeter.
The MDF surface is perfectly prepared for any type of finishing. MDF skirting board for painting No additional preparation is required — paint lays evenly, without streaks or spots.
Varieties of MDF skirting boards
White MDF skirting board — classic choice for most interiors. The white color visually expands the space, creating a sense of cleanliness and freshness. Especially popular in Scandinavian and minimalist interiors.
MDF skirting board oak — imitation of noble oak wood on an MDF base. Modern printing technologies allow reproducing not only the color but also the texture of natural oak. Only a specialist can visually distinguish high-quality imitation from real oak.
MDF skirting board 80 — standard height for most residential rooms. 80 mm is the optimal proportion for ceilings 2.5–2.7 meters high.
MDF skirting board 100 — for rooms with higher ceilings or when the skirting board should become a noticeable design element.
Veneered skirting boards — balance of price and prestige
Veneering — a technology allowing to achieve the appearance of valuable wood species at significantly lower costs. A thin veneer layer (0.6–3 mm) is glued onto an MDF or less valuable wood base.
Veneering technology
Modern veneering — a high-tech process. Veneer is obtained by peeling (unwinding logs into thin layers) or planing (cutting thin plates). Each method gives a characteristic pattern.
Peel veneer has a more pronounced, "wild" pattern with large swirls. Planed veneer gives a calmer, more uniform pattern, close to natural solid wood.
Veneer is glued under pressure at a temperature of 120–140°C. Environmentally friendly adhesives based on polyvinyl acetate or polyurethane are used.
Types of veneer
Radial veneer — cut parallel to the wood's growth rings. Gives a uniform pattern with minimal distortion. Considered the most valuable.
Tangential veneer — cut tangentially to the growth rings. Gives a more expressive pattern with characteristic parabolic growth rings.
Cap veneer — obtained from caps (bark growths on tree trunks). Has a whimsical, unique pattern. Used for exclusive items.
Chapter 3. Geometry of perfection: dimensions, profiles, proportions
Skirting board height — question of proportions and style
After half a century of practice, I have developed my own system for determining the optimal skirting board height. It is based not only on mathematical proportions but also on the psychology of spatial perception.
Classic formula
Basic formula: skirting board height should be 1/30 of room height. For a standard apartment with 2.7-meter ceilings, the optimal skirting board height is 90 mm. However, this is only a starting point.
Style adjustment
Classic interiors require skirting boards 100–150 mm high. Rich decoration, complex profiles, heavy cornices — all this dictates corresponding skirting board proportions.
Modern styles tend toward higher skirting boards — 120–200 mm. Wide wooden baseboard becomes a full-fledged design element, emphasizing the geometry of the space.
Minimalism prefers skirting boards 60–80 mm high. Simple forms, clean lines, absence of decorative elements.
The height of the skirting board should harmonize with the height of the furniture. If the room predominantly features low furniture (sofas, chairs, coffee tables), the skirting board should be correspondingly lower. Tall cabinets and shelves require a higher skirting board.
The thickness of the skirting board — the basis of stability
The thickness of the skirting board — not less important than height. It affects not only the appearance but also the strength and durability of the product.
The thickness of the skirting board is no less important than the height. It affects not only the appearance but also the strength and durability of the product.
Standard thicknesses
16 mm — minimum thickness for residential spaces. Suitable for light parquet boards of 14–15 mm thickness.
18–20 mm — optimal thickness for most applications. Suitable for solid boards of 18–22 mm thickness.
22–25 mm — for premium interiors with solid floor coverings.
Matching with floor covering
The rule is simple: the thickness of the skirting board should equal or slightly exceed the thickness of the floor covering. This creates visual unity and a sense of structural integrity.
Skirting board length — minimum joints, maximum beauty
Standard skirting board length — 2.5 meters. This size is optimal for transportation and suitable for most rooms. However, for creating a truly high-quality interior, consider other options.
Long skirting boards
Skirting boards 3–4 meters long allow minimizing the number of joints, which is especially important in large rooms. Fewer joints — fewer potential problem areas, a more refined appearance.
Custom-made skirting boards
For exclusive projects, skirting boards can be manufactured in any length — up to 6 meters and more. This allows creating completely seamless solutions even in very large rooms.
Skirting board profiles — the language of forms and styles
The profile of the skirting board — its character, its way of communicating with space. Over half a century of work, I have studied hundreds of different profiles and understood the logic of their application.
Classic profiles
Ogee — the most common profile with a softly rounded front face. The rounding radius can vary from 3 to 15 mm depending on the skirting board size. Ogee is universal — suitable for almost any style.
Quarter — a profile with a rectangular cross-section, one side beveled at a 45-degree angle. Creates a play of light and shadow, emphasizing the geometry of the interior.
Heel — a complex profile resembling a heel. Composed of several radii and straight sections. Characteristic of classical styles.
Bead — a profile with several steps of different heights. Wooden bead creates a complex play of light and shadow, suitable for luxurious interiors.
Modern profiles
Flat — completely flat front surface without any relief. Embodiment of minimalist aesthetics.
Beveled — a flat profile with a slight bevel on the top edge. Creates a delicate shadow line without compromising overall simplicity.
Teardrop — a modern interpretation of the ogee with an asymmetrical cross-section. One radius is larger than the other, creating a dynamic, contemporary silhouette.
Special elements of the skirting board system
Modern baseboard is not just a plank, but a complete system of interconnected elements.
Corner elements
Wooden corner — an indispensable part of a quality baseboard system. Internal and external angles, left and right elements, are distinguished.
A properly manufactured corner element should exactly match the baseboard profile, ensuring perfect alignment without gaps or seams.
Connecting elements
Special connectors are used to join baseboards on straight sections. They allow creating a perfectly flat joint without visible transitions.
End caps
End caps cover open ends of the baseboard where it does not abut a wall or another element. A quality end cap must fit perfectly in profile and color.
Chapter 4. Decorative elements and system solutions
Wooden planks — a universal design tool
Wooden planks — in a modern interior, they are far more than just material for framing or structures. They are a full-fledged design tool capable of transforming any space.
Size guide for wooden planks
Wooden plank 20×40 — the most popular size for interior work. These proportions are optimal for creating various decorative elements, framing, and structures.
Wooden plank 10×20 — for thin, elegant structures. Suitable for creating latticework partitions, decorative panels.
Wooden plank 50×50 — for heavy-duty structures, load-bearing elements. Can be used as a standalone decorative element in loft interiors.
Wooden plank 10×10 — thin planks for delicate work. Ideal for creating small decorative elements, overlays, and patterns.
Application of planks in interior design
Wooden planks on walls — one of the main trends in modern design. Vertical planks visually increase room height, horizontal planks expand the space.
Ceiling made of wooden planks — an effective solution for modern interiors. Planks can be arranged parallel to create a rhythmic pattern, or at an angle to form a dynamic composition.
Zoning with wooden planks — a way to divide space without compromising its integrity. Plank partitions allow light and air to pass through while clearly defining functional zones.
Plank installation technology
Quality plank installation requires precision and care. The base must be perfectly level, and planks must be of uniform thickness and width.
Frame method — planks are attached to a pre-installed frame. This method allows leveling wall irregularities and creating an air gap for ventilation.
Direct mounting — planks are attached directly to the wall. Requires a perfectly level base, but results in a thinner construction.
Moldings and cornices — the aristocracy of decoration
Wooden cornice и Wooden moldings These are elements that transform an ordinary interior into a work of art. They create a play of light and shadow, highlight architectural features, and add depth and dimension.
History of moldings
Moldings appeared in ancient architecture as functional elements — they directed rainwater away from building walls. Gradually, their decorative function became dominant over their utilitarian purpose.
In Russian architecture, moldings developed particularly during the Baroque and Classicism periods. Russian craftsmen created their own school of decorative carving, distinguished by exceptional plasticity and expressiveness.
Types of moldings
Ceiling moldings — create a smooth transition between wall and ceiling. They can be simple (crown molding) or complex (with multiple profiles).
Wall moldings — used to create panels, frame pictures, mirrors, and doorways.
Floor moldings — essentially, these are baseboards. But this term emphasizes their decorative function.
Wooden cornice — the crown of the interior
A cornice is not just the end of a wall — it is an architectural element that defines the character of the entire room. A properly chosen cornice can turn an ordinary room into a grand hall.
A classic cornice consists of several elements: the main profile (the gusset), the shelf (horizontal surface), and the quarter (transitional element). Each element has its own function within the overall composition.
A modern cornice can be extremely minimalist — a simple plank with a beveled edge. But even in this simplicity, there is its own beauty and logic.
Chapter 5. Color and finish — the soul of wooden baseboards
Natural shades — beauty without embellishment
The natural color of wood is always a safe choice. Nature created these shades over millions of years, and each is perfect in its own way.
Light-colored woods
Natural pine has a warm honey tone with pinkish veins. This color creates a feeling of sunny warmth even on the cloudiest day.
Spruce is lighter than pine, with a cream or yellowish tint. The color of spruce is more subdued and neutral, easily combining with any other shades.
Maple — almost white with a slight cream tint. Maple baseboards visually expand space, creating a sense of cleanliness and freshness.
Birch — light yellow with a slight pinkish tint. Characteristic dark streaks give birch baseboards a unique charm.
Dark-colored woods
Mature oak has a rich brown color with golden veins. This is the color of stability, reliability, and aristocracy.
Walnut impresses with a rich palette of shades — from light brown to almost black, with purple, green, and golden hues.
Wenge — an exotic African wood with almost black color and golden veins. Wenge is a symbol of luxury and refined taste.
Staining — expands the palette of possibilities
Staining allows you to change the color of wood while preserving its natural texture. This art requires a deep understanding of wood properties and staining compounds.
Types of staining compounds
Water-based stains — environmentally friendly, odorless, dry quickly. They provide calm, natural shades.
Alcohol-based stains penetrate deeply into wood, providing rich, vibrant colors. Require skill due to rapid drying.
Oil-based stains dry slowly, allowing adjustment of color intensity. Provide deep, rich tones.
Popular staining shades
White oak — artificially aged oak with a whitish patina. Ideal for Scandinavian, Provence, and shabby chic interiors.
Wenge — imitation of exotic wood on more affordable timber. Achieves a luxurious look at a reasonable price.
Walnut — a universal dark shade suitable for most classic interiors.
Mahogany — a red-brown tone, symbol of English classicism. Especially striking on wood with pronounced grain.
Painting — unlimited creative possibilities
Paintable skirting board opens up unlimited creative possibilities. Modern paints allow achieving any color, any texture, any effect.
White MDF skirting board — genre classic
White skirting board — it's not just a color, it's a design philosophy. White visually expands space, creating a sense of purity, light, and air.
Pure white — for modern minimalist interiors. Requires perfect surface quality, as even minor defects are visible on white.
Cream white — a warmer tone suitable for classic interiors. Less conspicuous than pure white.
Ivory — a creamy white shade. Creates a sense of coziness, suitable for traditional interiors.
Color solutions
A colored skirting board can become a bright accent in the interior or a delicate addition to the main palette.
Black skirting board — a bold solution for modern interiors. Black adds graphic contrast, emphasizing the geometry of space.
Gray skirting board — a universal choice for modern interiors. Gray color easily combines with any other shades.
Colored skirting board — blue, green, red, yellow. Such a skirting board can become an interior highlight, but requires support from other elements of the same color palette.
Special effects and textures
Brushing — emphasizing texture
Brushing — the process of removing soft wood fibers with metal brushes. This results in a relief texture of annual rings on the surface.
Brushed skirting boards have a special tactile appeal. You want to touch them, feel the natural wood texture with your fingers.
Artificial aging
Various techniques allow giving a new skirting board the appearance of an antique piece:
Patina — applying patina (artificial aging layer) into profile grooves.
Crackle — creating a network of fine cracks on the paint surface.
Wear marks — imitation of natural wear in areas of maximum contact.
Textured finishes
Modern technologies allow creating any textures on the skirting board surface:
Under leather — imitation of natural leather texture.
Under stone — reproduction of marble, granite, travertine textures.
Under metal — bronze, copper, steel, gold.
Chapter 6. Installation — secrets of professional quality
Preparation stage — foundation of success
Quality skirting board installation begins long before the first nail. Preparation — this is 70% of the entire work's success.
Wall condition assessment
Walls must be perfectly flat. Deviations exceeding 2 mm per linear meter are unacceptable — the skirting board will not fit tightly to the surface, resulting in unsightly gaps.
Flatness is checked using a 2-meter rule and a level. The rule is applied to the wall at various points, and gaps are measured with a ruler.
Angle checking
Special attention — room corners. They must be strictly vertical and equal to 90 degrees. Deviations exceeding 1 degree will require special skirting board adjustment.
Verticality of angles is checked with a plumb bob or laser level. Compliance with 90 degrees — with a square.
Tool preparation
For quality skirting board installation, professional tools are required:
Miter saw — for precise cutting at required angles. Modern miter saws allow setting angles with precision down to 0.1 degrees.
Try square — for manual cutting of angles. A quality try square must have adjustable stops and the ability to fix the workpiece.
Jigsaw — for curved cuts and fitting to place.
Drill with drill bit set — for pre-drilling holes for fasteners.
Measuring tools — tape measure, ruler, square, level.
Installing MDF skirting board — step-by-step technology
Marking
I always start marking from the longest wall without door openings. I measure the exact length and add 10–15 mm for fitting. I record all dimensions in a notebook — memory may fail at the most critical moment.
Special attention — door openings. The skirting board must not interfere with door opening, but must neatly fit around the door frame.
Cutting
I cut on a miter saw with a fine-toothed blade (at least 60 teeth). A fine tooth provides a clean cut without chipping.
I cut angles at 45 degrees. For internal angles — from the back side, for external — from the front. This is critically important — an error will result in scrapping the entire piece.
Fitting
Even with the most precise marking and cutting, fitting to place is required. I try each element before fastening, trimming by several millimeters if necessary.
Joints must be perfect — no gaps, gaps, or steps. If the joint is not perfect, it's better to redo it — correcting defects later will be impossible.
Methods of mounting
Combined mounting — my favorite method. First, I apply polyurethane adhesive to the back of the skirting board, press it against the wall, then additionally secure it with finish nails or screws.
Mounting with clips — a modern method that allows easy removal of the skirting board when necessary. Special clips are mounted to the wall, and the skirting board clicks into them.
Hidden mounting — screws are screwed in at an angle through the groove on the back of the skirting board. The fasteners are completely hidden.
Joint treatment
Joints on straight sections are glued with PVA glue, excess is immediately wiped off with a damp cloth. After the glue dries, the joint becomes almost invisible.
Corner joints are more complex. I use special wood putty, which after drying is sanded and covered with the same compound as the entire skirting board.
Installation of MDF skirting board — characteristics of working with composite material
MDF requires a special approach during installation. This material is harder than natural wood, but also more brittle.
Pre-drilling
Pre-drilling holes for screws is mandatory. The drill bit diameter should be 1-2 mm smaller than the screw diameter. This prevents cracking of the MDF.
Choice of fasteners
For MDF skirting board fasteners I use special screws with concealed heads. The screw length should be 2.5 times the thickness of the skirting board.
Adhesive for MDF skirting board
Not all adhesives are suitable for MDF. I recommend using polyurethane adhesives — they provide strong adhesion and compensate for temperature deformations.
Working with complex sections
Curved walls
To navigate curved sections, the MDF skirting board can be bent, provided you make cuts on the back side. The cut depth is 2/3 of the skirting board thickness, and the spacing is 10-15 mm.
Tubes and utilities
Bypassing pipes — one of the most complex tasks. I use a cardboard template to mark the cut on the skirting board. I cut the opening with a jigsaw, and make the final fitting with a file.
Door openings
In door openings, the skirting board must carefully go around the door frame. Usually, I cut a quarter-sized opening to ensure tight fitting without gaps.
Final finishing
Putty
I fill all mounting points with special putty matching the skirting board color. After drying, I sand with fine-grit sandpaper until I achieve a smooth surface.
Sealing
I seal the skirting board joint with the floor using acrylic sealant. This prevents moisture and dust from getting under the skirting board and ensures a neat appearance.
Final finishing
MDF skirting board for painting After installation, it is ready for final finishing. I prime the surface, then apply paint in two layers with intermediate sanding.
Chapter 7. Interior styles and skirting board selection
Classic style — triumph of traditions
A classic interior requires an appropriate skirting board. This is not just a strip at the base of the wall — it is an architectural element that emphasizes the elegance and sophistication of the space.
Parameters of a classic skirting board
Height — at least 100 mm, ideally 120-150 mm. Classic style loves grandeur, and a low skirting board will look out of place.
Profile — must be profiled, with several radii and transitions. A simple flat profile is unacceptable in a classic interior.
Material — traditionally solid wood of noble species: oak, walnut, mahogany. A modern compromise — quality MDF with imitation of valuable species.
Color — natural wood tones or white. Black color is allowed only in very formal interiors.
Combination with other elements
In a classic interior, the skirting board does not exist on its own — it is part of a unified decorative system. Wooden cornice, Moldings, decorative elements must harmonize with each other, creating a unified ensemble.
Modern style — minimalism and functionality
Modern style in interior design dictates its own rules for skirting boards. Here, clean lines, geometric forms, and functionality are important.
Features of a modern skirting board
Height — can vary from 60 to 200 mm depending on the specific project. Wide wooden baseboard often becomes a full-fledged design element.
Profile — extremely minimalist. Flat, beveled, with minimal radii. No complex decorative elements.
Color — white, gray, black, natural light wood tones. Bright colors are allowed as accent elements.
Integration with utilities
A modern skirting board often serves not only a decorative but also a functional role. MDF skirting board with cable channel allows hiding electrical wires, internet and television cables.
Scandinavian style — northern restraint
Scandinavian style is a philosophy of coziness, naturalness, and connection with nature. The skirting board in such an interior should emphasize these qualities.
Features of a Scandinavian skirting board
Material — must be natural wood. Light-colored species are preferred: pine, spruce, birch.
Finishing — minimal. Light whitewashing, matte lacquer or wax. Goal — to preserve the natural beauty of the wood.
Profile — simple, but not primitive. Soft radii, smooth transitions, no ornamentation.
Color Palette
Scandinavian skirting board — always light, natural tones. White, cream, light gray, natural wood color. Dark colors are not allowed in Scandinavian style.
Loft — industrial aesthetics
Loft — a style that emerged in industrial spaces in New York. It dictates its rules for all interior elements, including skirting boards.
Loft approach to skirting boards
In traditional loft, skirting boards may be absent altogether — rough brick walls directly transition into concrete floors. But in modern loft interpretation, skirting boards are used as a functional element.
Material — rough wood, metal, composite materials. Wooden planks can replace traditional skirting boards.
Color — dark, saturated tones. Black, dark gray, rust color.
Texture — deliberately rough. Tool marks, unprocessed knots, cracks — all of this adds authenticity.
Provence — French provincial style
Provence — the style of French countryside, romantic and cozy. The skirting board in such an interior should support the overall atmosphere.
Characteristics of skirting boards in Provence style
Material — natural wood, must have an aged effect. Scratches, chips, patina — all of this is encouraged.
Color — pastel shades. White, cream, lavender, olive. Often uses multi-layer painting followed by aging.
Profile — classic, with soft radii. But not overly complex — Provence loves simplicity.
Minimalism — philosophy of emptiness
Minimalism — it is not just a style, it is a philosophy of life. Every element must be functional and beautiful at the same time.
Minimalist skirting board
Height — medium, 60–80 mm. Should not draw attention, but should be noticeable.
Profile — extremely simple. Flat or with minimal bevel.
Color — white, gray, natural light tones. No bright accents.
Integration — skirting board should blend with the wall, not create contrasts.
Chapter 8. Technical aspects and innovations
Shadow skirting board — revolution in design
Shadow skirting board — a relatively new solution that radically changes the perception of space. Instead of a traditional skirting board, a shadow gap is created between the wall and floor.
Construction of shadow skirting board
The wall does not reach the floor by 10-20 mm. An LED strip is often installed in the resulting gap, creating a floating floor effect. Hidden MDF skirting board — one of the ways to realize this idea.
Advantages of shadow skirting
Visual space expansion — the absence of a clear boundary between the wall and the floor creates an illusion of greater volume.
Modern — shadow skirting — an attribute of the most modern interiors.
Lighting — the possibility of integrating lighting creates additional design opportunities.
Disadvantages
Cleaning difficulty — the gap between the wall and the floor collects dust that is hard to remove.
High quality requirements — even minor irregularities on the wall or floor will be very noticeable.
Cost — implementing a shadow skirting requires high skill and corresponding expenses.
Skirting board with lighting
MDF skirting board with lighting — another modern solution combining functionality and decor.
Types of lighting
Top lighting — the LED strip is located at the top of the skirting board, illuminating the wall.
Bottom lighting — light is directed onto the floor, creating a floating skirting board effect.
Double lighting — combination of top and bottom lighting.
Technical solutions
Modern LED strips consume minimal electricity, have a long service life (up to 50,000 hours), and are available in various color temperatures.
Lighting control can be performed using standard switches, dimmers, or smart home systems.
Flexible skirting boards
Flexible skirting boards have been developed for rooms with complex geometry, capable of following any wall curves.
Materials of flexible skirting boards
Polyurethane — the most popular material. Easily bends, takes any shape, can imitate wood texture.
Rubber — for the most complex cases. Can be bent in any direction.
Composite materials — combine flexibility with strength.
Invisible skirting board
The technology of hidden skirting allows creating a perfectly smooth transition between the wall and the floor without visible elements.
Working principle
A special niche is made in the wall, into which the skirting board is recessed. The surface of the skirting board is on the same plane as the wall and is painted the same color.
Application
Hidden skirting is ideal for minimalist interiors, where any protruding elements are inappropriate.
Chapter 9. Economic Aspects
Cost of wooden skirting boards
Wooden skirting board price depends on many factors: wood species, profile complexity, processing quality, order volume.
Pricing by species
Coniferous species — the most affordable option. The price of pine skirting may be 3-5 times lower than oak.
Broadleaf species — mid-range price category — beech, ash, maple. Cost 30-50% higher than coniferous.
Premium species — oak, walnut, exotic types. Price may exceed coniferous by 5-10 times.
Wooden planks price
The cost of planks depends on cross-section, length, and wood species. Small planks cost more per cubic meter due to higher production labor intensity.
MDF skirting board Pricing is different from solid wood. Here, the main factors are profile complexity, surface quality, and finish type.
Standard profiles — most affordable. Mass production allows reducing cost.
Complex profiles — require special tools, increasing cost by 30-50%.
Painted skirting boards — 40-60% more expensive due to additional technological process.
Ownership cost comparison
When choosing between different types of skirting boards, it is important to consider not only the initial cost but also the total ownership cost.
Solid Wood
Initial cost — high, especially for premium species.
Service life — 50-100 years with proper care.
Maintenance costs — periodic finish renewal every 10-15 years.
Restoration possibility — unlimited.
MDF skirting board
Initial cost — medium.
Service life — 20-30 years.
Maintenance costs — minimal.
Restoration possibility — limited.
Impact on property value
Quality skirting boards significantly affect the overall perception of the interior and, accordingly, the property value.
Premium skirting boards can add 3-5% to the cost of an apartment. This significantly exceeds the cost of their purchase and installation.
Low-quality skirting boards, on the contrary, may reduce the attractiveness of real estate, especially in the premium segment.
Chapter 10. Maintenance and Operation
Daily care for wooden skirting boards
Proper care is the key to a long service life of wooden skirting boards. Over half a century of work, I have developed a care system that preserves the original beauty of wood for decades.
Dry cleaning
Daily wiping with a soft dry cloth removes dust and prevents its accumulation in the profile's relief. I use special anti-static cloths that not only remove dust but also prevent its re-deposition.
A vacuum cleaner with a soft attachment effectively removes dust from complex profiles. Especially important for skirting boards with deep relief, where a regular cloth cannot reach all recesses.
Wet cleaning
A slightly damp cloth — for removing more serious dirt. The cloth should be well wrung out — excess moisture may damage the wood.
Special wood care products. Modern formulations not only clean but also nourish the wood, restoring the protective properties of the finish.
What absolutely cannot be done
Abrasive agents — even fine abrasives can scratch the lacquered surface.
Solvents — acetone, white spirit, and similar substances dissolve lacquer coatings.
Excess moisture — prolonged contact with water may cause wood deformation.
Seasonal care
Winter period
Heating season — the most challenging time for wooden skirting boards. Low air humidity may cause wood to crack.
Air humidification — maintaining humidity at 40-60% prevents wood from drying out.
Avoiding direct heat exposure — radiators should not direct hot air directly onto skirting boards.
Summer period
High humidity in summer can also cause problems, especially in poorly ventilated rooms.
Ventilation — regular room ventilation prevents mold and mildew formation.
Protection from direct sunlight — ultraviolet rays can change the color of wood, especially lighter species.
Local repair and restoration
Removing minor defects
Scratches on the lacquered surface are easily removed with special polishes. Deep scratches require partial restoration of the finish.
Dents on solid wood can be removed with a damp cloth and an iron. Moisture causes wood fibers to swell and restore their shape.
Paint chips — are sanded with fine sandpaper, primed, and repainted with matching paint.
Restoring the finish
After 10-15 years, any finish loses its original properties. But this is not a reason to replace the skirting boards!
Polished surfaces — old varnish is removed by sanding, the surface is cleaned and covered with new varnish.
Painted surfaces — old paint is removed by stripping or sanding, and new coating is applied.
Tinted surfaces — require special care during restoration. Often, the entire surface must be retinted to achieve uniform color.
Problem Prevention
Microclimate Control
Temperature — optimal room temperature is 18–24°C. Sudden temperature changes are harmful to wood.
Humidity — ideal humidity is 45–60%. Deviations in either direction may cause warping.
Ventilation — good ventilation prevents mold and mildew formation, especially important in bathrooms and kitchens.
Protection from Mechanical Damage
Furniture trim — protects baseboards from impacts by furniture legs.
Care during cleaning — vacuum cleaners and mops should not strike baseboards.
Protection during renovation — baseboards must be protected with plastic sheeting or cardboard during renovation work.
Chapter 11. Trends and Innovations
Modern Trends in Baseboard Design
Over half a century of work, I have seen how trends in baseboards have changed. Today, several clear trends are shaping the industry's development.
Trend toward larger sizes
Wide wooden baseboard Height of 120–200 mm has become standard in modern interiors. This is due to the general trend toward larger design elements.
Perception psychology — wide baseboards create a sense of stability and solidity.
Functionality — larger size allows better concealment of floor-wall joint irregularities.
Aesthetics — wide baseboards become a full-fledged design element, not just a technical necessity.
Technology Integration
Modern baseboards are not just decorative elements, but also carriers of various technologies.
Built-in lighting — LED strips turn baseboards into interior lighting elements.
Cable management — special channels allow hiding wires and cables.
Smart home — sensors for temperature, humidity, and motion can be integrated into baseboards.
Ecological Trends
Growing ecological awareness influences material and technology choices.
Natural materials — preference is given to solid wood from ecologically clean regions.
Ecological coatings — water-based varnishes and paints without volatile organic compounds.
Recycling — use of wood from recycled materials, reuse of baseboards.
Innovative Materials
Thermo-treated Wood
Thermo-treatment at 160-230°C in the absence of oxygen radically changes the properties of wood.
Stability — thermo-treated wood practically does not deform due to moisture.
Durability — degradation of lignin and hemicellulose makes wood unattractive to fungi and insects.
Color — thermo-treatment imparts a noble dark tone throughout the entire thickness.
Modified Wood
Chemical modification of wood allows obtaining a material with unique properties.
Acetylation — treatment with acetic anhydride makes wood practically indestructible.
Furfurylation — impregnation with furfuryl alcohol increases the density and strength of wood.
Next-Generation Composite Materials
Wood-Polymer Composites — combine the beauty of wood with the practicality of plastic.
Bio-composites — use natural fibers and biodegradable binders.
Technological Innovations in Production
CNC Processing
Modern CNC machines allow creating skirting boards of any complexity with precision down to fractions of a millimeter.
Reproducibility — each skirting board is absolutely identical to another.
Profile Complexity — possibility of creating profiles of any complexity.
Customization — ease of manufacturing unique profiles for specific projects.
3D Wood Printing
The latest technology allows "printing" products from wood composites.
Complex Geometry — possibility of creating shapes impossible with traditional processing.
Zero Waste — minimal production waste.
Personalization — each item can be unique.
Laser Processing
Laser technologies open new possibilities in decorating skirting boards.
Engraving — application of complex patterns and ornaments.
Texturing — creation of various surface textures.
Marking — discreet application of information about the manufacturer and date of manufacture.
Designer Trends
Contrasting solutions
Modern designers are not afraid of contrasts. A black skirting board in a white interior, a white skirting board with a dark floor — such solutions are becoming increasingly popular.
Colored skirting boards
Moving away from traditional colors to bright, saturated shades. A blue, green, or red skirting board can become the highlight of the interior.
Hidden skirting boards
Shadow gaps, hidden profiles — everything that makes the skirting board less noticeable but still functional.
Chapter 12. Special Applications
Ceiling wooden skirting board
Ceiling skirting board — a special category of products requiring a special approach to selection and installation.
Differences from floor skirting board
Profile — ceiling skirting board has a special profile ensuring tight fit against both the ceiling and the wall simultaneously.
Mounting — attaches only to the wall, without support on a horizontal surface.
Loads — subjected only to its own weight, allowing for more complex and elegant profiles.
Choosing ceiling skirting board
Room height — for low ceilings (up to 2.5 m), a skirting board 30–50 mm high is suitable. For high ceilings, skirting boards up to 150 mm can be used.
Interior style — classic interiors require complex profiles, while modern interiors require minimalist ones.
Lighting — if the ceiling skirting board is used for hidden lighting, a special profile with a ledge for LED strip is required.
Skirting board for bathroom
Bathroom — a special room where skirting board is exposed to high humidity and temperature fluctuations.
Material requirements
Moisture resistance — the material must withstand 100% humidity without deformation.
Biostability — resistance to mold and fungi.
Chemical resistance — resistance to cleaning agents.
Suitable materials
Larch — natural moisture resistance makes it ideal for bathrooms.
Thermally treated wood — high stability and biostability.
Moisture-resistant MDF — an economical solution with good performance characteristics.
Installation features
Waterproofing — mandatory waterproofing of the skirting board joint with the floor.
Ventilation — ensuring an air gap for ventilation.
Fasteners — use stainless steel fasteners to prevent corrosion.
Wooden planks in interior design
wooden rail in modern interior design — it is a universal design tool capable of solving numerous tasks.
Space zoning
Vertical planks create visual barriers without disrupting air and light circulation.
Horizontal planks can divide a room into functional zones.
Lattice structures — combination of vertical and horizontal elements.
Wooden plank cladding
Walls — plank cladding creates rhythm, adds texture, hides imperfections.
Ceiling — ceiling with wooden planks adds coziness, improves room acoustics.
Facades — external cladding with planks creates a modern architectural appearance.
Plank dimensions and proportions
Wooden plank 20×40 — the most popular size for interior work.
Wooden plank 10×20 — for slender, elegant structures.
Wooden plank 50×50 — for massive structures in loft style.
Baseboard in commercial spaces
Commercial spaces impose special requirements on baseboards.
Increased traffic flow
Durability — material must withstand intensive use.
Repairability — ability to quickly restore damaged areas.
Hygiene — ease of cleaning, resistance to cleaning agents.
Safety
Fire safety — compliance with fire safety requirements.
Ecological safety — absence of harmful emissions.
Mechanical safety — absence of sharp edges, secure fastening.
Aesthetic requirements
Presentability — baseboard must match company image.
Long-term visual durability — maintaining attractiveness over time.
Branding capability — integration of brand elements.
Chapter 13. Master classes and practical tips
How to choose baseboards correctly: step-by-step algorithm
Over half a century of work, I have developed a clear algorithm for choosing baseboards that never fails.
Step 1: Room analysis
Ceiling height — determines the maximum possible baseboard height.
Room area — affects the choice of proportions.
Lighting — dark rooms require light-colored baseboards.
Functional purpose — residential space, office, public area.
Step 2: Style determination
Existing interior — baseboards must harmonize with the overall style.
Planned changes — if interior renovation is planned, future plans should be considered.
Architectural features — historic buildings require a special approach.
Step 3: Material selection
Budget — determines available material options.
Operating conditions — humidity, temperature, foot traffic.
Ecological requirements — especially important for children’s rooms and bedrooms.
Step 4: Size determination
Height — according to the formula 1/30 of room height, adjusted by style.
Thickness — according to the thickness of the floor covering.
Length — to minimize joints.
Step 5: Profile selection
Interior complexity — simple interiors require simple profiles.
Lighting — complex profiles are effective with directional lighting.
Practicality — complex profiles are harder to maintain.
Secrets of quality installation
Tool preparation
Circular saw — primary tool for precise cutting. The blade must be sharp with fine teeth.
Miter box — for manual cutting of angles. Always check angle accuracy before work.
Level — for checking horizontal alignment during installation. Length should be at least 1 meter.
Tape measure — for precise measurements. Preferably with a metal tape.
Room layout
Perimeter walk — start with the longest wall without openings.
Angle measurement — all angles must be checked with a square.
Door opening accounting — determine the method for handling door frames.
Drawing a plan — sketch the room layout with dimensions of each section.
Baseboard cutting
Material allowance — add 10–15 mm to each dimension for fitting.
Cutting direction — to prevent chipping, cut from the front side.
Angle control — check each angle against a template before cutting.
Installation
Dry assembly — assemble the entire perimeter before final fastening.
Joint control — all joints must be perfect.
Fastening — use a combined method: adhesive + mechanical fasteners.