Article Contents:
- Decorative geometry: rhythm and structure
- Oak and beech beams: strength and aesthetics
- Wooden strips and planks: walls and ceilings
- Wooden molding: universal frame
- Decorative wooden layout: fine geometry
- Combination: strips + molding + layout + planks
- Wood textures and interior perception
- Buying a set for a unified design
- Conclusion: comprehensive finishing by STAVROS
- Frequently Asked Questions
A wall is not just a vertical surface painted in one color. It is a canvas on which architectural drama unfolds, where lines, volumes, and rhythms create the mood and character of the space.Wooden plankStrips, planks, molding — seemingly the simplest elements of trim. But it is precisely they that transform a plane into a structure, monotony into rhythm, emptiness into volume. Vertical strips reach upward, visually raising the ceiling. A horizontal beam divides the wall into tiers, creating proportions.wooden molding by the meterFrames panels and mirrors, defining the composition boundaries. Let's figure out how to build a decorative finishing system where each element serves the overall concept, and whyTrimming ItemsMade from natural oak and beech, remain unmatched.


Decorative geometry: rhythm and structure
Rhythm is the foundation of any composition, whether it's a musical piece, dance, or architectural space.Wooden planks for decorationCreate visual rhythm, organizing the perception of the plane. Evenly spaced vertical strips with 100-150 mm intervals form a calm, measured rhythm — like a metronome setting the pace. Strips with variable intervals — 50 mm, then 100 mm, then 150 mm — create syncopated rhythm, dynamism, movement. Chaotically placed strips of different widths form a free jazz rhythm, unpredictable and expressive.
Vertical strips visually increase the height of a room. The gaze slides along the lines from bottom to top, creating an illusion of higher ceilings. This technique is especially valuable in standard apartments with 2.5–2.7 meter ceilings, where every visual centimeter counts. Strips 20–40 mm wide with 80–120 mm spacing — optimal ratio for creating height effect without overloading the space.
Horizontal strips expand space, making it visually more spacious. They slow down vertical gaze movement, forcing it to glide along the wall, exploring width. Horizontal rhythm calms, creates a sense of stability and security. Effective in narrow spaces — corridors, entryways — where visually pushing walls apart is needed.
Diagonal strips introduce dynamism, energy, directional movement. A diagonal from lower left to upper right is perceived as ascending — optimistic, upward-looking. A diagonal from upper left to lower right — descending, more calm. Diagonal placement is more complex to install: requires precise marking, angled cuts, joint fitting. But the result is worth the effort — space acquires uniqueness, an authorial character.
Combined schemes combine different strip directions, creating complex geometric patterns. Vertical strips in the central part of the wall and horizontal strips along the edges form a framed structure. Diagonal strips crossing vertical ones form a grid. Chaotic strips of different widths and intervals create an abstract composition reminiscent of modern painting.
Strip scale is determined by room size. In compact rooms of 10–15 m², thin strips 15–25 mm wide are suitable — they don’t overload space, creating elegant graphics. In spacious rooms of 30 m² or more, thicker strips 40–60 mm can be used, creating substantial, imposing structure. Too thin strips in large rooms disappear, failing to create the desired scale. Excessively thick strips in small rooms overwhelm, visually consuming space.
Color solution of strip constructions affects their perception. Strips in wall tone create monochromatic relief surface, where effect is built on play of light and shadow. Contrasting strips — dark on light walls or light on dark — emphasize geometry, making structure more expressive. Strips painted in bright accent color transform wall into art object, interior dominant.


Oak and beech beams: strength and aesthetics
Oak beamMaterial combining structural strength with outstanding aesthetics. Oak with density 700–800 kg/m³ and hardness 3.7–4.2 on Brinell scale withstands serious mechanical loads. Oak beam 50x50 mm can support weight up to 500–700 kg when used as a beam with 2-meter span. This allows using it not only decoratively, but also structurally — for creating load-bearing frames, partition frames, support elements.
Decorative use of oak beams is equally impressive. Beam 30x30 or 40x40 mm is used to create volumetric wall panels, where beams form frame structure with fillings of panels, mirrors, fabric inserts. Such panels are characteristic of classical and neoclassical interiors, where architectural logic, spatial zoning into modules, repetition of basic proportions are valued.
Oak texture makes beam a self-sufficient decorative element. Pronounced annual rings, heartwood rays, natural color variations create lively, dynamic surface that requires no additional decoration.Buy oak beamsUnder transparent lacquer, suitable for interiors where connection with nature, sense of naturalness, eco-friendliness is important.
Oak timber beamFeatures more uniform texture without sharp contrasts. Density 650–680 kg/m³ and hardness 3.2–3.5 units slightly lower than oak, but still provide high strength and stability. Beech color — warm rose-beige — creates cozy, friendly atmosphere. Beech beam is ideal for Scandinavian and modern interiors, where softness, warmth, absence of aggressive visual dominants are valued.
Oak is more difficult to process than beech: tools wear out faster, wood chips more easily, and the surface after sanding is less smooth. This makes beech beams more technologically efficient and slightly cheaper than oak for comparable performance characteristics.Beech beam for lathingSuitable for projects requiring large amounts of linear material and limited budgets.
Beam sizes are selected based on function. Structural beams have a cross-section from 40x40 to 100x100 mm — they serve as frameworks, load-bearing frames, and structural elements. Decorative beams with a cross-section of 20x20 to 40x40 mm are used for panel framing, creating relief structures, and zoning spaces. Side ratios can be square (40x40) or rectangular (30x50, 40x60), expanding design possibilities.
Beam length is determined by transportation constraints and installation convenience. Standard length of 2–3 meters is optimal for most tasks. Upon request, beams up to 6 meters long are manufactured for covering extended surfaces without intermediate joints. Beam joints along the length are made using a micro-tenon — a toothed connection that is stronger than the wood itself and virtually invisible after sanding and painting.
Beam finishing can be natural under transparent lacquer, stained with dyes to alter tone, or painted in solid colors to conceal texture. The choice depends on interior concept and desired visual effect. Natural oak and beech emphasize connection with nature. Stained wood creates a specified color palette while preserving visible texture. Painted beams function as purely geometric elements, where form matters more than material.
Our factory also produces:


Wooden beams: walls and ceilings
wooden boards and beamsIn wall applications, they perform several functions simultaneously. Decorative function — creating relief, volume, visual interest. Acoustic function — dispersing sound waves, reducing reverberation, improving acoustic environment. Zoning function — dividing space into functional zones without erecting load-bearing walls. Concealing function — hiding wall irregularities, utilities, and engineering systems.
Wall-mounted beams are installed on a subframe made of smaller-section beams. The subframe is attached to the wall at 400–600 mm intervals, providing a flat surface for final finishing. An air gap of 30–50 mm forms between beams and the wall, improving acoustics and allowing concealed utilities — electrical wiring, internet cables, LED strips for contour lighting.
Vertical beam placement on walls — a classic option visually increasing room height.Wooden railsBeams are attached to horizontal subframe beams using finish nails, screws, or hidden clips. The spacing between beams is chosen based on desired coverage density: solid cladding with 10–20 mm gaps creates nearly monolithic surfaces, while sparse cladding with 80–120 mm gaps forms an openwork structure.
Horizontal beam placement is characteristic of Scandinavian style and modern minimalism. Horizontal lines calm the space, create a sense of stability, and visually expand it. Beams are attached to vertical subframe beams, forming a rhythmic structure. A popular variation features uneven spacing: narrow gaps alternate with wide ones, creating a dynamic, non-static effect.
Diagonal beam placement requires precise calculation and careful marking. The diagonal angle is typically 30–60 degrees — sharper angles are difficult to install, while more obtuse angles lose the diagonal effect. Beams are cut to the required angle, joined end-to-end, and attached to a subframe oriented perpendicular to the beam direction. The result — a dynamic, original composition that distinguishes the interior from standard solutions.
Ceiling beam structures transform a flat white ceiling into an architectural element.form the architecture of walls and ceilings, creating a play of light and shadow.On the ceiling, they create a sense of volume, structure, and thoughtful design. Beams can run along the long side of the room, elongating space, or across, widening it. Diagonal placement introduces dynamism, breaking the static nature of rectangular rooms.
Lighting between beams — an effective technique that turns the ceiling into a source of soft, diffused light. LED strips are mounted in gaps between beams, light reflects off the base ceiling and passes through the gaps, creating even illumination. This method ensures comfortable lighting without harsh shadows or glare, visually lightening the ceiling structure and creating a floating effect.
Acoustic properties of beam ceilings improve with installation of acoustic mats behind beams. Mineral wool, acoustic foam, or specialized sound-absorbing panels are placed between the subframe, reducing reverberation and improving room acoustics. This is especially relevant for home theaters, music rooms, and recording studios, where sound quality is critical.
Get Consultation
Wooden molding: universal frame
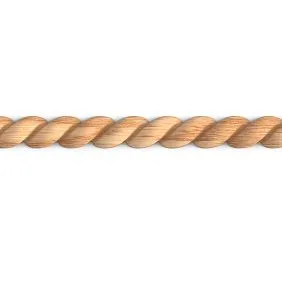
Beadboard can be purchased by the linear meter (hence the name), cut to required sizes for each specific object (a mirror frame 80×120 cm requires perimeter = 4 meters of beadboard, accounting for 45-degree corner cuts).It is not only for framing pictures and photographs. Molding is a universal profiled element that creates decorative frames on walls, ceilings, and furniture. Molding width 30–120 mm, profile height 15–60 mm — this range of sizes allows selecting a solution for any task, from delicate mirror framing to heavy wall panel frames.
Wall molding forms geometric divisions — rectangles, squares, circles, ovals. A classic approach — dividing the wall into three horizontal tiers using molding frames. The lower tier (plinth) 80–120 cm high is painted in a darker tone. The middle tier (main field) occupies most of the wall. The upper tier (frieze) 40–60 cm high completes the composition. This three-tiered structure traces back to classical architectural canons and creates a classic, harmonious composition.
Molding around mirrors and panels creates a visual frame, separating them from the wall plane. Molding width is chosen proportionally to the framed object’s size: for a small mirror 50x70 cm, 40–50 mm wide molding is sufficient; for a large panel 150x200 cm, 80–100 mm molding is required. The molding profile can be simple (one rounded edge), medium-complex (multiple tiers), or richly decorated (carving, gilding, patina).
Ceiling molding frames the central area with a chandelier or built-in lighting. A rectangular molding frame creates a classic ceiling division. An oval or circular frame emphasizes the central composition. A complex polygonal frame with inscribed geometric figures forms an Art Deco or neoclassical style. Ceiling molding visually reduces ceiling height, making the space more intimate and cozy.
Molding in furniture is used for framing facades, creating relief structures, decorating cornices and plinths. Surface-mounted molding on a flat cabinet door mimics a framed panel construction, transforming a simple facade into a classic one. Molding around the tabletop perimeter creates a decorative edge protecting the edge from chipping. Molding on furniture cornices enhances expressiveness, adds tiered complexity to the profile.
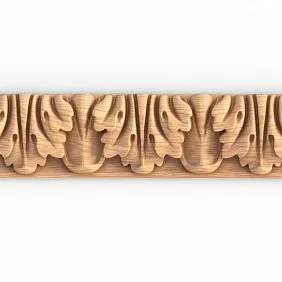
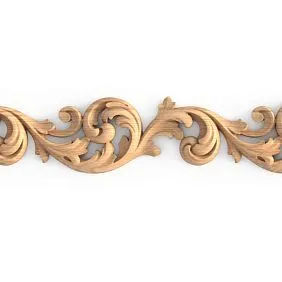
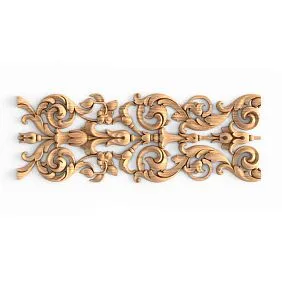
Molding profiles vary from simple to highly complex. Flat molding with one bevel — a minimalist solution for modern interiors. Molding with rounded and curved edges — a universal option suitable for most styles. Multi-tiered molding with grooves, dentils, and carved elements — for classic, baroque, and empire styles. Profile selection depends on interior style and nature of framed objects.
Molding joints in corners are made at 45 degrees to create a neat joint with matching relief. The cut is made on a circular saw with precise angle setting. Even the slightest deviation results in a gap or overlap. After cutting, elements are dry-fitted to check joint quality. Then they are glued and additionally secured with finish nails or hidden fasteners.
Molding can be painted to match wall color for a monochromatic relief or contrasted to emphasize geometry. Popular options for classic interiors include gilding, patina, and aging effects. Modern styles favor monochromatic solutions: white molding on white walls, black molding on black walls — the effect is built on relief, not color contrast.
Decorative wood paneling: fine geometry
Decorative wooden molding— a thin strip 15–40 mm wide and 5–12 mm thick, creating fine divisions within larger forms. If molding divides a wall into large panels, paneling divides these panels into even smaller fragments, creating a complex hierarchical structure. This approach is characteristic of classical interiors, where detail, layering, and richness of form are important.
Paneling in wall panels divides panels, creating fine geometry. A 100x150 cm rectangular panel can be divided by paneling into 4–6–9 small rectangles. Each fragment is filled with its own material: fabric, leather, mirror, stained MDF, embossed wallpaper. Variety of fillings creates visual interest, complexity, and richness of textures.
Paneling on furniture facades forms the structure of classic cabinets. A cabinet door is divided by paneling into several sections, each perceived as a separate panel. This division makes a large facade more scaled, detailed, and visually interesting. Paneling is attached with glue and additional fixation using finish nails; mounting points are spackled and painted to match.
Paneling around glass inserts in doors and furniture secures glass and creates decorative framing. Paneling width 20–30 mm is optimal for 4–6 mm thick glass. Paneling has a groove into which glass is inserted, then secured with finish nails or glue. Properly installed paneling securely holds glass, preventing rattling or shifting.
The profile of the molding can be flat rectangular or shaped with rounded corners and bevels. A flat profile suits minimalist and Scandinavian interiors. A shaped profile with rounded edges is characteristic of neoclassicism. A complex profile with grooves and chamfers is typical of classic and baroque styles. The molding profile must harmonize with the profile of the crown molding and other trim elements.
The molding is usually painted to match the color of the main item — crown molding, panels, or facade. This creates a monolithic, unified look. Contrasting molding color emphasizes geometry and makes the structure more expressive. Popular combinations include: white molding on a gray background, gold molding on a white background, black molding on a beige background.
Installing molding requires precision and care. All elements must be strictly parallel and perpendicular, forming exact angles, fitting together without gaps. Any carelessness — a crooked line, a gap at the joint, a mismatched profile — destroys the impression of quality. Professional craftsmen use laser levels, guides, and templates to ensure perfect geometry.
Combination: planks + crown molding + molding + beams
Creating a complex decorative composition requires coordinating all elements into a unified system.wooden boards and beamsCrown molding, molding — each element performs its own role, but together they create a cohesive, thought-out image.
The basic principle of combining elements is hierarchy of scales. The largest elements — beams with a cross-section of 40x40 mm and above — form the main structure, the frame of the composition. Medium elements — planks 30-40 mm wide and crown molding 60-80 mm wide — create secondary divisions. Small elements — thin planks 15-20 mm and molding 20-30 mm — refine details, adding final detailing.
The second principle — profile unity. If the beam has sharp edges, planks and crown molding should have similar sharpness. If the beam has rounded edges, all other elements should have similar rounded edges. Profile unity creates visual connection, a sense of thoughtfulness, stylistic coherence.
The third principle — material unity. All wooden elements are made from one species — oak or beech. Mixing species creates different textures that disrupt the perception of unity. It is permissible to combine wood with other materials (metal, glass, stone), but this should be a deliberate design technique, not a coincidence.
The fourth principle — color coordination. All elements are painted in a single color palette or controlled contrast. Chaotic mixing of colors destroys the composition, making it random and unthoughtful. The classic approach — all elements in one color with different shades (light gray, gray, dark gray). The contrasting approach — two colors (white and black, beige and brown), where each color has its own role.
The fifth principle — functional logic. Large elements (beams) carry structural load or simulate it. Medium elements (planks, crown molding) create the main decorative effect. Small elements (molding) refine details. Violating this logic — using small molding for large divisions, or a massive beam for small divisions — creates dissonance and disproportion.
Designing a combined system begins with sketches and computer models. The designer draws the composition, calculates dimensions, and evaluates the visual effect. Samples of all elements are manufactured and assembled into a mock-up of a wall or ceiling fragment. The harmony of combinations, proportions, and detailing are assessed. Adjustments are made until the ideal result is achieved.
Ordering a complete set from one manufacturer guarantees compatibility.Trimming ItemsProduced by STAVROS from a single batch of wood, undergo a unified processing and finishing, have coordinated dimensions and profiles. This eliminates compatibility issues, color mismatches, and geometric discrepancies that arise when purchasing elements from different suppliers.
Wood textures and interior perception
Oak, with its pronounced annual rings and medullary rays, creates an active, dynamic texture. Oak planks and beams bring energy, character, and expressiveness into the interior. Oak is associated with strength, durability, and nobility — qualities valued in prestigious interiors, offices, and libraries. The color of oak ranges from light golden to dark brown, allowing selection of a shade to match any concept.
Beech, with its uniform pinkish texture, creates a calm, soothing atmosphere.Buy wooden skirting boardBeech is suitable for interiors where comfort, warmth, and softness are important. Beech is suitable for bedrooms, children's rooms, and living rooms, where a comfortable, friendly environment is created. The pinkish tone of beech harmonizes with warm tones — beige, cream, peach, terracotta.
Ash, with its light texture and smooth lines, creates a light, airy impression. Ash is popular in Scandinavian interiors, where naturalness, simplicity, and connection to nature are valued. The color of ash — from whitewashed to light straw — makes the space bright and visually spacious. Ash combines well with white walls, light fabrics, and natural materials.
Walnut, with its dark chocolate texture and complex pattern, creates a luxurious, prestigious impression. Walnut is associated with wealth, status, and refinement. Ash planks and crown molding transform the interior into a prestigious space, emphasizing its premium character. Walnut requires appropriate surroundings — quality furniture, expensive finishing materials, and thoughtful lighting.
Staining wood allows changing the natural color while preserving the visibility of the texture. Stains based on water, alcohol, or oil penetrate the wood structure, coloring the fibers. Any shades are possible — from light honey to nearly black. Staining highlights the texture, making it more contrasting and expressive. Popular stains: gray oak, whitewashed oak, wenge, walnut, teak.
Painting in dense, opaque colors hides the wood texture, turning wooden elements into purely geometric shapes. White, black, gray, and colored planks and crown molding work as graphic lines, where shape, rhythm, and composition matter more than material. Painted wood is cheaper than natural wood, as it allows using second-grade wood with minor defects, which the paint will conceal.
Combining different species in one interior requires caution. Mixing oak and beech creates a contrast of textures, which can be an interesting design technique or a dissonance depending on execution. A safe approach — use one species for all wooden elements or paint everything in dense colors, neutralizing texture differences.
Purchasing a set for a unified design
Purchasing a complete setmolding productsTo implement a design project, a systematic approach is required. The first step — detailed calculation of the quantity of each element. A specification is prepared: planks 30 mm wide — 120 linear meters, beams 40x40 mm — 45 linear meters, crown molding 60 mm wide — 80 linear meters, molding 25 mm — 150 linear meters. An additional 10-15% allowance is added to the calculated quantity for trimming, defects, and possible installation errors.
The second step — selection of wood species. Oak for maximum strength and expressive texture. Beech for optimal quality-to-price ratio. Ash for light Scandinavian interiors. Walnut for premium prestigious spaces. The choice is determined by the interior style, budget, and the client's personal preferences.
The third step — determining the finish. Natural color under transparent lacquer showcases the beauty of the texture. Staining creates the desired shade while preserving visible wood structure. Painting in dense colors turns trim into geometric elements. Possible combinations: main elements natural, accent elements stained or painted.
The fourth step — coordinating all profiles. All elements should have similar motifs — radii of rounded edges, character of bevels, proportions. Samples of all profiles are requested from the manufacturer, assembled into a mock-up, and visually evaluated. Based on the evaluation, adjustments are made or profiles are approved for production.
The fifth step — placing an order with precise specifications, dimensions, profiles, wood species, and finish type. Serious manufacturers provide technical documentation with profile drawings, material and color samples. The standard production time for trim is 7-14 days. Custom profiles with tool development — 3-4 weeks.
Sixth step — production control. Large orders are divided into batches with phased delivery. After manufacturing the first batch, the client evaluates quality, conformity to samples, and dimensional accuracy. Adjustments are made as needed before launching the remaining batches. This minimizes the risk of defects and non-compliance with expectations.
Seventh step — logistics and storage. Trim is delivered in protective packaging and stored in a dry room with controlled humidity. Before installation, the material must undergo acclimatization for 48–72 hours. Violation of storage conditions leads to warping, cracking, and loss of appearance.
Eighth step — professional installation. Installation of complex grooved and molding structures requires qualification, experience, and specialized tools. The installation team must have a portfolio of similar projects, positive references, and understanding of the designer’s concept. Installation cost amounts to 40–60% of material cost for complex geometric compositions.
Conclusion: Comprehensive finishing by STAVROS
Decorative surface finishing — an art where each element contributes to the overall concept. STAVROS offers a full spectrummolding productsof solid oak and beech:Wooden rails, Oak beam, Oak timber beam, wooden molding by the meter, available in all sizes and profiles.
All elements are made from premium-grade wood, undergo kiln drying to 8±2% moisture content, are processed on high-precision equipment, and coated with professional finishes. Strict quality control at every stage guarantees premium-grade products meeting the highest standards.
Wooden planks for decorationSTAVROS products are available from warehouses in Saint Petersburg and Moscow with delivery across Russia. A wide range of sizes, species, and finish options allows implementation of any design project. Custom manufacturing is possible according to individual specifications, including unique profiles and non-standard sizes.
Frequently asked questions
What is the difference between a rail and a board? A rail is a thin flat element 20–60 mm wide and 10–25 mm thick. A board is a more substantial element with square or rectangular cross-section from 20x20 to 100x100 mm.
Can oak rails be used on ceilings? Yes, oak rails are ideal for ceiling structures. It is important to ensure secure attachment to the joists and account for the weight of the structure.
How to calculate the number of rails for a wall? Measure the wall area, determine the rail width and spacing between rails. Formula: (wall height / (rail width + spacing)) × wall length. Add 15% reserve.
Is additional treatment of rails needed after purchase? If rails are supplied with factory finish, no additional treatment is required. Untreated rails require sanding, priming, and coating with varnish or oil.
Which wood species is better for rails — oak or beech? Oak is stronger, has a more pronounced texture, and is more expensive. Beech is more uniform, easier to work with, and cheaper. Choose oak for natural color, beech for staining.
How much does a trim set for finishing a 15 m² wall cost? Depends on the density of coverage, element sizes, and wood species. On average, materials cost 35,000–75,000 rubles and installation costs 20,000–45,000 rubles.
How to care for wooden rails? Regular dry vacuuming with a soft brush. Periodic wet wiping with microfiber cloth. Reapply finish every 5–7 years under intensive use.