


Article Contents:
- Why Door Decoration is a Smart Investment
- Door Mouldings: The Foundation of Transformation
- Wooden Mouldings: Nobility and Status
- Polyurethane Mouldings: Lightness and Practicality
- Combined approach: the best of both worlds
- Decorative Panels and Overlays: Accents and Highlights
- Where to Place Decorative Overlays
- Overlay Materials and Styles
- Step-by-Step Door Decoration Technology
- Step One: Planning the Composition
- Step Two: Preparing the Door Surface
- Step Three: Marking Element Positions
- Step Four: Cutting Mouldings at an Angle
- Step Five: Gluing Elements
- Step Six: Filling Seams and Joints
- Step Seven: Painting
- Door Framing: Architraves as an Extension of Decor
- Wooden Architraves: Material Unity
- Polyurethane Architraves: Practicality and Variety
- Contrast Framing: A Bold Solution
- Mistakes That Turn Decor into Kitsch
- Mistake One: Disregarding Proportions
- Second mistake: overloading with decor
- Mistake Three: Style Mismatch
- Fourth mistake: poorly fitted corners
- Fifth mistake: wrong glue
- Decoration Styles: Choose Your Path
- Classic: Symmetry and Richness
- Neoclassic: Reserved Elegance
- Modern Style: Geometry and Contrasts
- Scandinavian Minimalism: Less is More
- Loft: Roughness and Elegance
- Frequently Asked Questions
- Conclusion: Create a Unique Interior with STAVROS

Is it worth overpaying for designer doors when you can turn the simplest door leaf into a work of art with your own hands?Decorating interior doors— is an opportunity to change the appearance of an entire room without major renovations and astronomical costs. All you need are the right materials, a little patience, and an understanding of basic composition principles.polyurethane create a classic frame between the wall and ceiling. The profile height varies from minimalist 50 mm to ceremonial 200 mm — the choice depends on the room's height and style. In a room with 2.7 m ceilings, a 150 mm cornice will look excessive, 'pressing' from above. And in a hall with 3.5 m ceilings, a narrow 60 mm cornice will get lost, failing to visually mark the boundary.turn a smooth panel into an elegant paneled construction in just a few hours, and the result looks as if the door was custom-made in a prestigious workshop.
Doors are something we look at dozens of times a day but rarely think about their aesthetic role. Yet, they define the perception of the interior, create rhythm, and set the style. A bland, smooth door ruins the most thoughtfully designed setting. However, a well-thought-outInterior Door Decorcan breathe life into even the most boring space. And you don't need to be a professional designer—just know a few simple techniques and be able to handle glue and a tape measure.


Why door decoration is a smart investment
Replacing all interior doors in an apartment will cost 150-300 thousand rubles depending on the material and manufacturer. Decorating existing door leaves with moldings and overlays—15-30 thousand rubles for the entire apartment. The difference is tenfold, and the visual effect sometimes even surpasses buying new doors. Why? Because you choose the pattern, element size, color, and style yourself—creating a unique product that no one else has.
Modern mass-produced doors are stamped by the millions. Even expensive models often look the same because manufacturers use standard milling and templates. But a hand-decorated door is always unique. No one will exactly replicate your combination of moldings, placement ofdecorative panel for interior door, color scheme. It's your original work that definitely won't be found at your neighbors'.
The third point is practicality. Has the old door gotten scratched, paint peeled off, dents appeared? Instead of replacing it, it's enough to mask the defects with decorative elements, paint everything in a fresh color—and you have a completely new product. Moldings and overlays hide any surface imperfections, making the door visually more expensive, solid, and respectable.


Door moldings: the foundation of transformation
Moldings for interior doors— are profiled strips with shaped profiles that create three-dimensional relief on a flat surface. They come in wood, MDF, polyurethane, and plastic. Each material has its pros and cons, but for door decoration, two options are optimal: wood and polyurethane.
Our factory also produces:


Wooden moldings: nobility and status
Solid wood products— is a classic that never goes out of style. Oak, beech, ash—each wood species has its own texture, color, character. Wooden moldings are glued to the door, painted or stained to match the main panel, creating the illusion of a solid paneled construction.
Pros of wooden moldings: naturalness, pleasant tactile feel, possibility of multiple repaints and sanding. If the door is wooden or veneered, a wooden molding integrates into it organically, becoming one whole. Cons: higher price compared to polyurethane, need for precise corner fitting (wood doesn't forgive mistakes), sensitivity to humidity (may warp in the bathroom or kitchen).
The width of wooden moldings for doors varies from 15 to 60 mm. Narrow strips of 15-25 mm are suitable for creating thin frames, minimalist decor. Medium 30-40 mm—a universal solution for most doors. Wide 50-60 mm—for massive entrance or double-leaf interior doors where solidity is needed.
Get Consultation
Polyurethane moldings: lightness and practicality
polyurethane decorweighs many times less than wood, is completely moisture-resistant, not afraid of temperature fluctuations, doesn't crack from door frame shrinkage. Polyurethane moldings are glued with liquid nails or special adhesive, painted any color, imitate wood, plaster, stone—anything.
Pros of polyurethane: price 30-50% lower than wood, perfect geometry (doesn't warp, doesn't deform), ease of installation (cuts with a utility knife, light weight doesn't load the door), moisture resistance (can even be used in the bathroom). Cons: may dent from a strong impact (wood is more resistant to point loads), less tactilely pleasant (though visually indistinguishable).
Profiles of polyurethane moldings are diverse: from simple rectangular to complex shaped ones with multiple steps and grooves. For classic interiors, carved profiles with plant motifs are suitable. For modern ones—concise geometric strips.
Combined approach: the best of both worlds
No one forbids combining wood and polyurethane on one door. For example, make the main frame from a wooden molding, and the central overlays from polyurethane carved elements. Wood gives nobility and status, polyurethane—complexity of forms and detailing that is expensive and labor-intensive to create in wood.
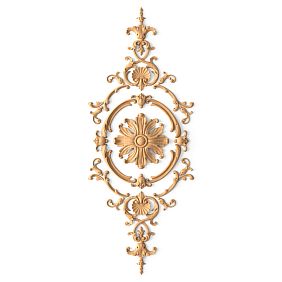
Decorative panels and overlays: accents and highlights
— is a ready-made element with an ornament that is glued onto the panel and becomes the central accent of the composition. Panels come in rectangular, square, round, oval, and shaped. Sizes—from miniature 100×100 mm to impressive 600×800 mm.Where to place decorative overlays
Classic scheme: two-four overlays symmetrically placed on the door. If the door is single-leaf with a height of 2 meters, it's optimal to place two overlays—upper and lower, with a 200-300 mm margin from the edges. If the door is wide (900 mm and more), you can make four overlays—two upper, two lower, creating a symmetrical grid.
Classic layout: two to four overlays are symmetrically placed on the door. If the door is single-leaf and 2 meters high, it's optimal to position two overlays—one at the top and one at the bottom, with a 200-300 mm offset from the edges. If the door is wide (900 mm or more), you can use four overlays—two at the top and two at the bottom, creating a symmetrical grid.
Modern scheme: asymmetry. One large overlay in the upper third of the door, shifted left or right. Or several small overlays, randomly scattered across the surface. Modern design allows experimentation, moving away from strict symmetry, creating dynamic compositions.
Minimalist scheme: one central overlay. A simple geometric element — square, circle, rectangle — is placed strictly in the center of the door. This is the most concise solution, suitable for Scandinavian, Japanese, and high-tech interiors.
Materials and styles of overlays
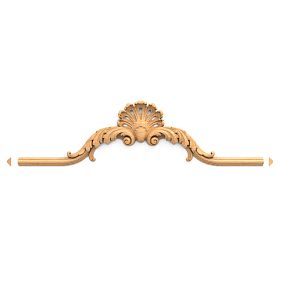
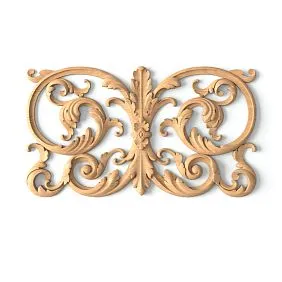
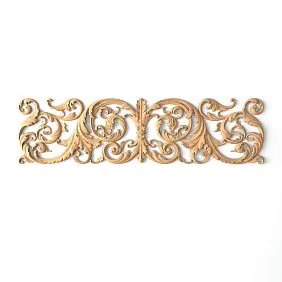
Carved wooden overlays are a classic for palace, English, and French interiors. Grapevines, acanthus leaves, Baroque curls, Rococo ornaments. Such elements give the door a sense of history, nobility, and the feel of antique craftsmanship.
Polyurethane overlays are versatile in style. You can find classic carved elements, geometric Art Deco panels, minimalist rectangular strips, and floral Art Nouveau motifs. Polyurethane allows for the reproduction of any relief with jewelry-like precision, while the price remains affordable.
MDF overlays are the golden mean. They imitate wood (texture, grain) but are geometrically stable, not afraid of humidity, and cost less than solid wood. MDF panels are good for doors in modern interiors where clarity of lines and absence of decorative excess are important.
Step-by-step door decoration technology
Now let's move on to practice. How to properly glue moldings and overlays onto a door so that the result looks professional?
Step one: planning the composition
Before gluing, you need to have a clear idea of what you want to achieve. Draw a sketch of the door on paper to scale. Mark where the moldings and overlays will be, their size, and distance from the edges. A classic paneled door has 2-6 rectangular panels framed by molding. The upper panels are usually shorter in height, the lower ones are larger.
Golden proportions: distance from the edge of the door to the molding frame — 80-120 mm. Distance between panels vertically — 100-150 mm. Height of upper panels — 1/3 of the height of the lower ones. These proportions create a harmonious, balanced composition.
Place the moldings and overlays on the door without glue, see how they look. Take a photo. Sometimes what seemed beautiful in a drawing looks out of place in reality. It's better to rework the composition before gluing than after.
Step two: preparing the door surface
The door must be clean, dry, and degreased. If it has old paint or varnish, lightly sand the surface with fine sandpaper (P180-P220) to improve adhesive adhesion. You don't need to remove all the varnish, just matte the surface. Wipe the door with alcohol or a degreaser, let it dry.
If the door has defects (dents, chips, peeling paint), fill them with putty, let dry, sand. Moldings will hide many flaws, but large irregularities will interfere with tight adhesion of the decor.
decorative gyan
Step three: marking the position of elements
Use a tape measure, level, pencil. Measure the door, find the center, mark the vertical and horizontal axes. From the axes, measure distances to future elements. Check symmetry: the distance left and right, top and bottom should be the same (if you are creating a symmetrical composition).
Painter's tape helps visualize future frames. Stick strips of tape along the contour of future moldings — you'll see what the final composition will look like. If something doesn't look right — reapply the tape until you achieve perfection.
Step four: cutting moldings at an angle
The most difficult part of door decoration is cutting molding corners at 45°. If the corners don't meet perfectly, there will be gaps, and the composition will fall apart. You need a tool: a miter saw or a miter box (a device for precise cutting at a given angle).
Measure the length of each side of the frame. Cut the molding with a 5-10 mm allowance for adjustment. Cut one end at 45°, place it on the door, mark the point of the second corner, cut. Place all four sides of the frame on the door without glue, check if the corners meet. If there are gaps — carefully file and adjust.
Perfect corner alignment is a sign of craftsmanship. Gaps up to 0.5 mm are acceptable (they can be filled with sealant), larger ones are noticeable and spoil the impression.
Step five: gluing elements
Use glue for moldings: polyurethane construction adhesive, liquid nails, special glue for molding. Apply glue to the back of the molding in a zigzag or thin line along the center. Don't overapply — excess will squeeze out and need to be removed.
Place the molding on the door exactly according to the markings, press. Hold for 2-3 minutes (the adhesive setting time is indicated in the instructions). If the molding is long, secure it in several points with painter's tape until the glue sets. Remove squeezed-out excess glue with a damp cloth before it hardens.
Glue all moldings, then overlays. Overlays are glued more simply: apply glue, press, hold for 2 minutes. The main thing is to hit the intended spot exactly, because moving an element after the glue sets is impossible without damaging the surface.
Step six: filling seams and joints
After the glue has completely dried (24 hours), inspect the joints. If there are gaps between moldings in the corners or between the molding and the door, fill them with acrylic sealant. Apply sealant in a thin bead, smooth with a wet finger or rubber spatula. Let dry, lightly sand with fine sandpaper.
Step seven: painting
If the moldings and door are already the same color — great, you can leave as is. If painting is needed, proceed as follows: prime the entire surface (door + moldings) with acrylic primer, let dry 2-4 hours. Apply the first coat of paint with a brush, roller, or spray gun. Let dry 6-8 hours. Apply the second coat. Two coats are mandatory for even color and durable coating.
To create effects (patina, aging, contrasting moldings), use special techniques. For example, the door is painted gray, the moldings are white. Or the door is white, the moldings are tinted to resemble wood. Contrast emphasizes the relief and makes the composition more expressive.
Door framing: casings as an extension of the decor
door framingcompletes the composition. If the door leaf is decorated with moldings, it is logical for the casings (strips framing the opening) to match the style. Simple rectangular casings will ruin all the work of decorating the door. You need shaped casings with a profile that echoes the profile of the moldings on the leaf.
Wooden casings: unity of material
Solid wood casingscreate a cohesive picture with wooden moldings on the door. If the door is decorated with oak planks, the casings are also oak. Unity of material and tone is the key to harmony.
The width of casings for interior doors is 60-90 mm. Narrow 60-70 mm are suitable for small rooms, standard openings. Medium 70-80 mm is a universal solution. Wide 80-90 mm is for spacious rooms with high ceilings, where a narrow casing will get lost.
The profile of casings can be simple (rectangular cross-section with rounded edges) or shaped (with grooves, steps, decorative elements). For classic interiors, choose shaped casings; for modern ones, simple ones.
Polyurethane casings: practicality and variety
Polyurethane decor for door openingsis an alternative to wood when the budget is limited or moisture resistance is important. Polyurethane casings can be painted any color, imitating wood, stone, plaster—everything needed to create the desired style.
Installing polyurethane casings is easier than wooden ones: they are lightweight, glued with liquid nails, and do not require heavy-duty fasteners. Corners are cut with a utility knife or handsaw, without special tools.
Contrast framing: a bold solution
If the door is white with white moldings, the casings can be made contrasting—dark gray, black, resembling dark wood. Contrast highlights the opening and makes the door the central element of the room. This works in modern, eclectic, art deco interiors where graphic quality and clarity of lines are important.
Mistakes that turn decor into kitsch
Even the right materials can yield poor results if typical mistakes are made.
First mistake: ignoring proportions
Too wide moldings on a narrow door look ridiculous, like a foreign element. Too thin moldings on a massive double door get lost and fail to create the desired effect. Rule: the width of the molding should be approximately 1/25-1/30 of the door width.
Mistake two: overloading with decor
Ten overlays on one door is not luxury; it's visual chaos. The fewer elements, the more refined the result. Two to four elements on a standard door is optimal. More is overkill.
Third mistake: style mismatch
A Baroque carved overlay on a minimalist IKEA door is a stylistic disaster. A geometric art deco molding on a classic paneled door is also. Choose decor that matches the style of the door itself and the interior.
Mistake four: poorly fitted corners
Gaps in the corners between moldings are a sign of unprofessionalism. Perfect corner joining requires precision, patience, and the right tools. Don't rush; fit each element to perfection.
Mistake five: incorrect glue
PVA does not hold moldings on a vertical surface—they will fall off in a month or two. Superglue is brittle—it breaks under the slightest load. Use special glue for moldings: polyurethane mounting adhesive, liquid nails for heavy elements, adhesive for stucco.
Decoration styles: choose your path
Different interiors require different approaches to door decoration.
Classic: symmetry and richness
Classic interiors require symmetrical compositions, rich decor, and noble materials. Use wooden moldings, carved overlays with floral motifs, shaped casings. Colors: white, ivory, antique gold, patinated bronze. Number of elements: 4-6 rectangular panels on the door, framed by moldings.
Neoclassicism: Reserved Elegance
Neoclassical is classic without excess. Moldings with simple profiles, without carved details. Overlays are minimalist or none at all—only frames made of moldings. Colors: white, light gray, beige. Number of elements: 2-4 panels, laconic casings.
Modern style: geometry and contrasts
Modern interiors allow asymmetry, contrasting combinations, and experiments. Use thin moldings, geometric overlays (squares, rectangles, circles), contrasting colors. White door + black moldings, gray door + white moldings. Number of elements: 1-3, asymmetrically placed.
Scandinavian minimalism: less is more
Scandinavian style is simplicity, light, natural materials. Decor is minimal: one or two thin molding frames, without overlays. Color: white, light gray, natural wood.Wooden plankscan be used instead of moldings to create modern vertical or horizontal compositions.
Loft: roughness and elegance
Loft combines industrial roughness with classic elements. A door made of rough wood or metal + elegant classic moldings. The contrast creates intrigue. Color: black, dark gray, rusty metallic + gold or white moldings.
Frequently asked questions
Can moldings be glued to a laminated door?
Yes, but the surface needs to be sanded with fine sandpaper to improve adhesive adhesion. Smooth laminate holds glue poorly, rough laminate holds it excellently.
What glue is best for wooden moldings?
Polyurethane construction adhesive or liquid nails for heavy elements. They provide strong adhesion and seam elasticity, which is important for vertical surfaces.
How long does the glue take to dry before painting?
Initial set — 15-30 minutes, full curing — 24 hours. Painting is only possible after complete drying, otherwise elements may shift.
Can a bathroom door be decorated?
Yes, use polyurethane moldings and overlays — they are completely moisture-resistant. Wooden elements in the bathroom may warp due to high humidity.
How to remove moldings if you want to change the design?
Carefully pry with a putty knife, peel off. Remove adhesive residue with solvent or mechanically. Sand the surface, new elements can be glued.
Is it necessary to remove the door from hinges for decoration?
Preferably, but not mandatory. If the door is removed, it's more convenient to work — you can lay it horizontally, the glue won't drip. But decorating can be done in place as well, just more difficult.
Can MDF moldings be used on a wooden door?
Yes, provided high-quality painting is done. MDF moldings are visually indistinguishable from wooden ones if the color and texture of the coating are correctly matched.
What is the cost of decorating one door?
Materials: 2000-5000 rubles (moldings, overlays, glue, paint). DIY work — free. Craftsman's work — 3000-8000 rubles. Total: 2000-13000 rubles versus 15000-40000 rubles for a new door.
Is decor suitable for sliding doors?
Yes, but the moldings should be thin (no more than 20 mm thick) so the door moves freely in the tracks. Heavy overlays may weigh down the panel, check if the rollers can handle it.
Can wood and polyurethane be combined on one door?
Yes, it's even recommended. Main frames — wood (status, nobility), central overlays — polyurethane (complexity of forms, detailing).
Conclusion: create a unique interior with STAVROS
Doors are not just openings, they are architectural elements that define the character of an interior.Decorating interior doorswith your own hands — is an opportunity to turn bland smooth panels into works of art without astronomical costs.polyurethane create a classic frame between the wall and ceiling. The profile height varies from minimalist 50 mm to ceremonial 200 mm — the choice depends on the room's height and style. In a room with 2.7 m ceilings, a 150 mm cornice will look excessive, 'pressing' from above. And in a hall with 3.5 m ceilings, a narrow 60 mm cornice will get lost, failing to visually mark the boundary.andDecorative Insertsoffer limitless possibilities for creativity: from strict classic to bold modern.
Door Decorfrom STAVROS — are quality materials that last for decades without losing aesthetic properties. Wooden moldings made of oak and beech, polyurethane overlays with filigree detailing, shaped casings of all profiles and sizes — the company's assortment has everything to realize any designer idea.
STAVROS specialists will help select the optimal combination of elements for your interior style, calculate the required amount of materials, and advise on installation technology. Each product undergoes strict quality control — from profile geometry to surface finish purity.
Create an interior where every detail is thought out, where even doors become objects of admiration. Turn ordinary panels into elegant paneled constructions. Add individuality and character to your home. All this is possible with STAVROS decorative elements — where craftsmanship traditions meet modern technology, true beauty is born. Delivery across all of Russia, specialist consultations, quality guarantee — start transforming your interior today.


