Article Contents:
- Hallway as a high-risk zone: what really happens here
- Mechanical impacts: bumps, abrasion, scratches
- Humidity and contamination: water, dirt, street dust
- Narrow space: psychology of confinement
- Wall protection: why panels and battens outperform wallpaper
- Wall panels: armor for the lower third of the wall
- Decorative battens: a modern alternative to panels
- Polyurethane elements: when maximum durability is needed
- Baseboard: a small detail with big responsibility
- Why plastic is a bad idea for the hallway
- Wooden baseboard: the choice of reasonable people
- Height and profile: matching room proportions
- Visual space correction: moldings and battens as design tools
- Horizontal moldings: creating an illusion of width
- Vertical laths: raising the ceiling
- Diagonal and Combined Solutions
- Decor above doorways: the finishing touch
- Stucco decorations: from classic to modern
- Door casings as a compositional element
- Practical aspects: installation and maintenance
- Surface Preparation: The Foundation of Durability
- Panel and batten installation: two main methods
- Finishing care: minimum effort, maximum result
- Color solutions: light versus dark
- Light palette: expanding and lightening
- Dark accents: adding character
- Accent wall: focal point in the hallway
- Lighting: light as part of the finishing
- Multi-level lighting: upper, middle, lower tiers
- Decorative Element Lighting
- Frequently asked questions about hallway finishing
- Can wallpaper be used in the hallway or is it better to avoid it altogether?
- What panel thickness is optimal for a narrow hallway?
- Is a vapor barrier needed under wooden panels in a hallway?
- What should be the distance between battens on a wall?
- How to care for dark panels in a hallway, as all dust is visible on them?
- Can polyurethane elements be installed on uneven walls?
- What is cheaper: painting walls or covering them with panels?
- Which finishing style is better suited for a small hallway?
- Conclusion: Investing in the First Impression

The hallway is the first room a person enters when stepping over the threshold of your home. It is here that the first impression is formed, setting the tone for the perception of the entire dwelling. The paradox is that this space most often remains undeservedly neglected during renovation. Owners invest effort and money into the living room, bedroom, kitchen, while the hallway makes do with 'what's left.' Meanwhile, the entryway and hallway are zones of extreme use, where every square meter is subjected to trials that other rooms do not face.
Dirt from the street, moisture from wet shoes and outerwear, mechanical impacts from bags and suitcases, constant movement—all this creates unique requirements for finishing materials. Beautiful wallpaper that looks great in a bedroom will turn into worn-out disappointment in a hallway within a couple of months. Delicate decorative plaster will become stained and scratched. Cheap plastic baseboards will break from a hit with a shopping bag.
Exactly thereforeDecorative corridor wall finishingrequires a special approach—one that combines practicality with aesthetics, durability with elegance. How to create a space that is both presentable and indestructible? Let's break it down in detail.


The Hallway as a High-Risk Zone: What Really Happens Here
Before discussing solutions, it's important to understand the scale of the problem. What exactly makes a hallway such a challenging room to finish?


Mechanical Impacts: Impacts, Abrasion, Scratches
Imagine a typical morning in a family of four. Two adults getting ready for work, two children for school. Each person passes through the hallway at least twice: leaving and returning. That's eight passes. Plus guests, delivery people, visiting neighbors. In a day, 15-25 people pass through a standard urban hallway. Over a week—more than a hundred. Over a year—thousands.
Each pass involves contact with the walls. A hand leaning on the wall while putting on shoes. The edge of a bag brushing against a corner. A child's backpack bumping into the wall. A suitcase leaned against the baseboard. An umbrella leaving a wet mark. All of these are micro-injuries to the finish that accumulate and become noticeable in a short time.
The lower wall zone (from the floor to a height of 80-100 cm) receives maximum damage. This is where impacts from hard objects, contact with shoes, and splashes from wet clothing occur. The middle zone (100-150 cm) suffers from hand touches and abrasion from clothing. The upper part of the wall is relatively safe, but it is not protected from dust, soot (if someone smokes in the house), or condensation.
Our factory also produces:


Humidity and Contamination: Water, Dirt, Street Dust
The hallway is a buffer zone between the street and the home. All the street dirt we bring in on our shoes and clothing settles here. Wet umbrellas, damp jackets after rain, snow on boots in winter—sources of increased humidity that no other room faces (except, of course, the bathroom).
Ordinary paper wallpaper in such conditions becomes soaked and peels off. Paint without proper durability fades and becomes spotty. Wooden elements without protective coating can warp from humidity fluctuations. This is why materials for hallways must have increased moisture resistance and easily withstand wet cleaning.
Dust in the hallway is special—it's not just household dust from fabric fibers and skin particles that accumulates in living rooms. It's street dust: fine particles of soil, sand, cement (if there's construction nearby), soot and exhaust fumes (in cities). This dust is abrasive; it gets ingrained into porous surfaces and damages them.
Get Consultation
Narrow Space: The Psychology of Confinement
Most hallways and entryways in standard apartments are narrow, elongated rooms without natural light. An area of 3-5 square meters with a length of 4-6 meters and a width of less than one and a half meters. In such a space, any mistake in finishing is visually amplified: dark walls turn the hallway into a gloomy tunnel, poorly chosen decor clutters an already cramped space.
The absence of windows means dependence on artificial lighting. With the wrong choice of materials and colors, even good lighting won't help—the space will seem oppressive and uncomfortable. This is why visually expanding and lightening the space becomes one of the key tasks when finishing a hallway.
Wall Protection: Why Panels and Battens Outperform Wallpaper
If you still think that it's enough to put up washable wallpaper in a hallway, allow me to share the bitter experience of thousands of people who went down that path. Washable wallpaper can indeed be wiped with a damp cloth, but they cannot withstand mechanical impacts. Catch the edge with a backpack—it tears. Bump it with a suitcase—a dent appears. Lean against it in a dirty jacket—a stain that can't be scrubbed off without damaging the pattern.
Wall Panels: Armor for the Lower Third of the Wall
The most vulnerable zone in any hallway is the lower third of the wall, from the floor to a height of 90-120 cm. This is where all the main impacts and contamination occur. The professional solution is to protect this zone with wall panels. Not decorative 'wood-look' panels made of thin plastic, but real panels made of solid wood or high-quality MDF.
Wooden panels are a classic, tested over centuries. In old European houses and Russian estates, hallway and entryway walls were traditionally clad with wood to a height of 120-150 cm. This was called boiserie—panel cladding that not only protected walls from damage but also created an atmosphere of solidity and prosperity.
Modern wooden panels retain all the advantages of the traditional approach but are manufactured using advanced wood processing technologies. Solid oak, beech, ash—species with high hardness and resistance to mechanical impacts. The panels undergo chamber drying to a moisture content of 8-12%, guaranteeing geometric stability and absence of deformation after installation.
Advantages of wooden panels in a hallway:
-
Impact resistance: solid wood withstands impacts that would tear wallpaper and cause plaster to crumble
-
Moisture resistance: with proper protective coating, wood is not afraid of splashes and wet cleaning
-
Repairability: scratches on wooden panels can be sanded and re-varnished; damaged sections can be replaced
-
Durability: quality wooden panels last for decades while maintaining their original appearance
-
Aesthetics: natural wood grain and warm tones create a cozy atmosphere even in narrow hallways
-
Tactility: wood feels pleasant to the touch, unlike cold plastic
High-density MDF panels are a worthy alternative to solid wood at a lower budget. Quality European-made MDF has a density of 750-850 kg/m³, ensuring high strength and stability. MDF panels are not afraid of moisture, do not deform, and are easy to clean. They can be painted any color or covered with veneer from valuable wood species, imitating solid wood at a much lower cost.
Panel installation height is determined by practical considerations and room proportions. The classic option is 90 cm from the floor, the height where most dirt and impacts occur. A more thorough approach involves panels 120-150 cm high, protecting almost two-thirds of the wall height. In narrow hallways with low ceilings (2.5-2.7 m), it's better to limit to 90-100 cm to avoid 'crushing' the space. In hallways with high ceilings (3 m and above), you can afford panels 150 cm high - they will look proportional and solid.
Decorative battens: a modern alternative to panels
If classic wall panels seem too traditional for you, consider the modern trend -Decorative wall panelingWooden or MDF battens installed vertically or horizontally with a specific spacing create a structured surface that simultaneously protects the wall and looks stylish and modern.
Vertical battens in hallways are a popular solution in Scandinavian and contemporary styles. Planks with a cross-section of 20×40 mm or 30×50 mm are installed on the wall with 50-100 mm spacing, creating a rhythmic 'striped' surface. Advantages of this approach:
-
Visual ceiling height increase: vertical lines stretch the space upward, especially valuable in narrow hallways
-
Wall protection: impacts hit the batten, not the wall; battens are stronger than plaster or wallpaper
-
Hidden utility placement: an air gap remains between battens and wall where wires can be hidden
-
Built-in lighting possibility: LED strips placed behind battens create soft glow that visually expands space
-
Easy installation and repair: damaged battens can be easily replaced without affecting the entire structure
Horizontal battens work differently - they visually widen narrow spaces. If a hallway is long and narrow (a classic problem in standard layouts), horizontal planks create an illusion of greater width. This works as an optical trick: the eye follows the lines, making the room seem wider than it actually is.
Combined approach - battens in the lower wall zone (up to 100-120 cm high) for protection, with paint or wallpaper above. This is a practical solution combining reliable protection of vulnerable areas with material and budget savings.
Polyurethane elements: when maximum durability is needed
For particularly challenging conditions - hallways in apartment buildings with heavy traffic, entry areas of private homes with large families, commercial spaces - it makes sense to consider polyurethane decorative elements. Modern high-density polyurethane has phenomenal impact resistance, absolute moisture resistance, and is not afraid of temperature fluctuations.
Polyurethane panels imitating wood paneling, molding, or stone are practically indistinguishable from natural materials after painting, while significantly surpassing them in performance characteristics. Such cladding doesn't crack, doesn't deform, and is easy to clean even with aggressive products. Meanwhile, polyurethane elements weigh several times less than wood or plaster counterparts, simplifying installation.
Baseboard: a small detail with big responsibility
Baseboards are an element many underestimate when planning hallway finishing. It seems: what's the big deal with baseboards, just install any cheap plastic one - and you're done. But six months later, this 'cheap' baseboard cracks from suitcase impacts, yellows from wet cleaning, pulls away from the wall due to thermal expansion. And you have to replace it. During replacement, the already repaired wall gets damaged, plaster crumbles at attachment points. One small mistake creates a chain of problems.
Why plastic is a bad idea for hallways
Plastic baseboards are widely used in residential construction for one simple reason - they're cheap. The cost per linear meter of plastic baseboard is 2-3 times lower than wood or MDF. But this savings is illusory. Plastic's service life in hallway conditions is 3-5 years with careful handling. And hallways don't get careful handling.
Plastic is brittle. Impacts from hard objects leave dents or cracks. In frosty weather (if the hallway adjoins cold walls or doors), plastic becomes even more brittle and can crack from minor impacts. Plastic discolors. Cheap varieties yellow from UV exposure (if the hallway has windows) and over time. White baseboards turn gray-yellow after two years, and no cleaning restores their original appearance.
Plastic deforms. With temperature and humidity fluctuations (inevitable in hallways - opening doors in winter lets cold air in, closing warms the room), plastic expands and contracts. Fastenings loosen, baseboards pull away from walls, dirt accumulates in gaps.
Wooden baseboard: the choice of reasonable people
Baseboard MDFor solid wood baseboards - this is a solution that lasts for decades. Yes, initial investment is higher. But if you divide the cost by service life, it comes out cheaper than plastic that needs replacing every 5 years.
Wooden skirting boards or high-quality MDF skirting boards offer a number of undeniable advantages:
Mechanical strength. Hardwood (oak, beech, ash) or high-density MDF withstand impacts that would cause plastic to crack. Even if a scratch or dent appears on the surface, it can be restored—sanded down and refinished with varnish or paint. This trick won't work with plastic—a damaged element can only be replaced.
Geometric stability. Properly dried wood (moisture content 8-12%) does not deform from temperature and humidity fluctuations within normal residential ranges. High-density MDF does not react to climatic changes at all—it is absolutely stable.
Aesthetics. The natural texture of wood and its warm hue create a completely different impression than plastic imitation. Even a wooden skirting board painted white looks more noble than a plastic one—a different surface texture, a different interaction with light. A paintable MDF skirting board, after quality painting, is indistinguishable from wood but costs less.
Eco-friendliness. Wood is a natural material that does not emit harmful substances. MDF with emission class E1 (European standard) is also safe. Plastic skirting boards, especially cheap ones, can emit an unpleasant odor, especially in hot weather.
Repairability. Local damage to a wooden skirting board is fixed by sanding and refinishing. A general refresh—repainting the entire skirting board system—costs less than buying and installing new plastic ones.
Height and profile: choosing according to room proportions
The standard skirting board height is 70-80 mm. This is a universal size suitable for most rooms. But in a hallway, it makes sense to consider a taller skirting board—90-100 mm or even 120 mm. Why?
A tall skirting board protects a larger area of the wall from impacts and dirt. In a hallway, where the likelihood of contact with the lower part of the wall is highest, this is a significant advantage. A tall skirting board visually 'raises' the wall, especially if it is painted the same color as the wall or a shade darker. This creates a plinth effect that adds solidity to the interior.
In narrow hallways with low ceilings, a skirting board that is too tall can 'eat up' precious centimeters of height, making the space feel even lower. Here, it is wiser to limit yourself to the standard 70-80 mm. In hallways with high ceilings (3 meters and above), a skirting board height of 120-140 mm will look proportional and stately.
The skirting board profile is another important parameter. A classic profile with a rounded top and decorative grooves suits traditional interiors. A rectangular skirting board with minimal relief is the choice for modern, minimalist spaces. A wide, flat skirting board (so-called 'Euro skirting') is a relevant trend in recent years, fitting perfectly into Scandinavian and contemporary styles.
Visual space correction: moldings and battens as design tools
A narrow, long hallway with a low ceiling and no windows is a typical layout problem faced by owners of apartments in Soviet-era buildings and even in some modern budget-class new builds. Can such a space be visually improved without tearing down walls or raising ceilings? Yes, and there are proven techniques for this, based on the use of decorative elements.
Horizontal moldings: creating an illusion of width
Horizontal lines in an interior visually expand space. This is an optical effect related to how our brain processes linear perspective. When we see a horizontal line running along a wall, we subconsciously 'stretch' the space in that direction.
How to apply this principle in a narrow hallway? Using horizontal moldings—decorative strips that are attached to the wall at a certain height and create a visual belt. A classic technique is to divide the wall into two zones with a horizontal molding at a height of 90-100 cm from the floor. The lower zone is painted a darker shade or paneled, the upper zone—a light color or wallpapered. The molding acts as the boundary between the zones.
Such zoning creates several effects:
-
Visual expansion: the horizontal line 'pushes apart' the walls, the hallway appears wider
-
Dynamics: breaking up a monotonous wall into zones creates visual interest, the eye doesn't slide over a boring, plain surface
-
Practicality: the dark lower zone hides dirt, and the light upper zone reflects light, making the hallway brighter
You can use not one, but two or three horizontal moldings, creating a more complex composition. For example, one molding at a height of 30 cm from the floor (separates the skirting zone), a second at 100 cm (main division), a third under the ceiling (ceiling cornice). Such a multi-level system creates a rich, structured surface that distracts from the narrowness of the space.
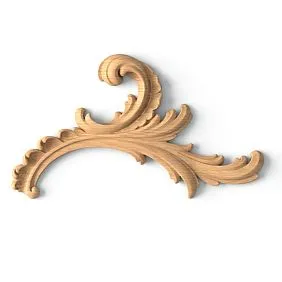
The material for the moldings is chosen based on the overall style and budget. Wooden moldings are classic—they are warm, noble, and durable. Polyurethane moldings are a modern alternative—lightweight, moisture-resistant, and easy to install. After painting, they are indistinguishable from wooden or plaster ones but cost less and are not afraid of humidity.
Vertical slats: raise the ceiling
If the main problem of the hallway is not so much narrowness as a low ceiling (2.5 m and below), vertical lines come to the rescue. They work in the opposite way: they stretch the space upward, creating an illusion of greater height.
Vertical battens installed on the wall from floor to ceiling create a powerful visual stretching effect. The eye follows the vertical planks upward, and the ceiling seems higher than it is. This technique is especially effective if the battens reach the ceiling itself without a gap—a continuous vertical line maximizes the effect.
An additional technique is to paint the battens and the wall between them the same light color, and the ceiling the same or a slightly lighter shade. This blurs the visual boundary between the wall and ceiling, creating a sense of a single, upward-flowing space.
The spacing between the battens affects the intensity of the effect. Frequent battens (spacing 50-80 mm) create a more pronounced rhythm but can visually 'overload' a small space. Sparse battens (spacing 150-200 mm) provide a calmer, more subtle effect suitable for very narrow hallways.
Diagonal and combined solutions
For those ready for bolder experiments, there are diagonal and combined compositions. Battens installed at a 45-degree angle create a dynamic pattern that disrupts the perception of confined space. The brain is busy deciphering the geometric pattern and stops focusing on the narrowness of the hallway.
A combination of horizontal and vertical elements—for example, horizontal moldings in the lower zone and vertical battens in the upper—creates a complex, multi-layered surface. This approach requires impeccable taste and a sense of proportion to avoid turning the hallway into a chaotic jumble of lines. But when implemented correctly, the result can be impressive.
Decoration above doorways: the finishing touch
A hallway usually concentrates several doors: the entrance door, doors to rooms, and a door to the bathroom. Doorways are architectural elements that can and should be used to enhance the decorative effect. One classic technique is placing decorative elements above doorways.
Stucco Decorations: From Classic to Modern
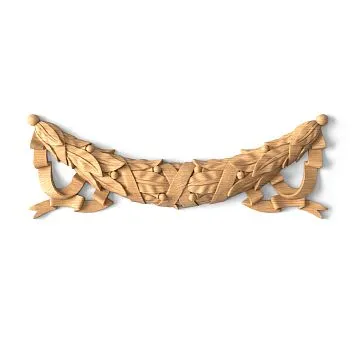
Sculptural wall decorationAbove the door — this is a technique that originated from classical architecture, where every opening was crowned with a pediment, cartouche, or other decorative element. In modern interiors, this technique has been adapted and simplified but has not lost its effectiveness.
Polyurethane overlays in the form of decorative elements are placed above the door opening, creating a visual accent. This can be a simple rectangular element with a relief ornament, an imitation of a classical pediment, floral decor, or an abstract composition. After being painted to match the wall color or in a contrasting shade, such an element becomes the highlight of the interior.
Advantages of polyurethane overlays for hallways:
-
Lightweight: polyurethane is several times lighter than plaster, which simplifies installation and does not create a load on structures.
-
Moisture resistance: polyurethane is not afraid of humidity, which is critical for hallways.
-
Impact resistance: unlike fragile plaster, polyurethane withstands accidental impacts without damage.
-
Variety of forms: modern casting technologies allow creating decor of any complexity.
-
Easy installation: elements are glued with special adhesive, requiring no complex surface preparation.
Placing decor above doors solves several tasks. First, it visually enriches the space: monotonous walls come to life, creating points of visual interest. Second, it provides vertical structuring: decor above doors creates a rhythm along the hallway, organizing the space. Third, it elevates the status of the interior: thoughtful details always indicate a high level of finishing.
Door Casings as a Compositional Element
Door casings themselves are a powerful tool for decorating hallways. Wide casings with expressive profiles turn a simple door opening into an architectural element. In narrow hallways, where there is little space for wall decor, doors become the main focal points.
The choice of casing width and profile depends on the room's proportions. In narrow hallways with low ceilings, massive casings will look out of place; it's better to choose concise strips 60-70 mm wide. In spacious entryways with high ceilings, you can afford casings 90-120 mm wide with a rich profile — this creates a representative look.
The color scheme of casings also matters. Casings matching the door color — a classic approach that creates unity in the door block. Casings matching the wall color — a modern technique where doors seem to dissolve into the wall, visually not breaking up the space. Contrasting casings — a bold solution that makes doors accent elements.
Practical aspects: installation and maintenance
Beauty is useless without practicality. Even the most exquisite materials won't bring joy if they are improperly installed or require complex maintenance that cannot be provided in real-life conditions. Let's talk about the practical side of the matter.
Surface Preparation: The Foundation of Longevity
Any decorative finish holds as firmly as the base is prepared. Hallway walls often have defects: unevenness, cracks, remnants of old coatings. All these problems need to be addressed before starting decorative finishing.
Removing old coatings — the first step. If there was wallpaper on the walls, it needs to be completely removed by soaking with water or a special solution. If the walls were painted with oil paint, it needs to be scraped off with a putty knife or sander — new paint or adhesive won't adhere to a glossy oil surface.
Filling cracks and potholes — the second step. All defects are widened (expanded), primed, and filled with putty. After drying, the patched areas are sanded to a smooth surface.
Leveling walls — the third step. If walls are very uneven (variations over 5 mm per meter), they need to be leveled with plaster or drywall. For wallpapering or painting, a perfectly smooth surface is required. For installing panels or slats, requirements are softer — minor unevenness is compensated by the mounting system.
Priming — the final preparation step. Deep-penetration primer strengthens the surface, improves adhesion, and reduces absorbency. For wet areas (hallway adjacent to a bathroom), primer with antiseptic additives is used to prevent mold growth.
Installing Panels and Slats: Two Main Methods
Wall panels and decorative slats are installed using two main methods: adhesive and frame. Each has its advantages and limitations.
Adhesive installation — the simplest and fastest method. Panels or slats are glued directly to the wall with special adhesive (polyurethane adhesive for wood, liquid nails for lightweight elements). This method requires a perfectly even wall — all unevenness will be visible, panels won't fit tightly. Advantages: speed, simplicity, minimal space loss (panels add only a few millimeters to the wall). Disadvantages: requirements for base evenness, difficulty in removal if repair is needed.
Frame installation — a professional method for complex cases. A system of guides (wooden batten or metal profile) is mounted on the wall, to which decorative elements are then attached. This method allows leveling wall unevenness, hiding utilities (wires, pipes), and creating a ventilated gap between the wall and finish. Advantages: doesn't require perfectly even walls, allows hiding utilities, simplifies removal and repair. Disadvantages: more complex and lengthy installation, loss of 3-5 cm of space (critical in very narrow hallways).
The choice of method depends on wall condition and tasks. If walls are even and only decorative covering is needed — adhesive installation. If walls are crooked or wires need hiding — frame installation.
Finish Maintenance: Minimum Effort, Maximum Result
One of the key advantages of panels, slats, and moldings made of wood, MDF, or polyurethane is ease of maintenance. Unlike wallpaper, which cannot be properly washed, or decorative plaster, from which stains are hard to remove, these materials easily withstand wet cleaning.
Regular cleaning includes wiping with a damp cloth once a week. This removes dust and surface dirt. For wooden and MDF elements, a well-wrung cloth is used — excess water is harmful. For polyurethane elements, there are no restrictions — they are completely moisture-resistant.
Deep cleaning once a month includes washing with mild detergents. Suitable options are dishwashing liquid diluted in water or specialized wood care products. Abrasive powders should not be used — they scratch the surface.
Protective coating renewal is required every few years. Wooden elements coated with varnish gradually lose their shine in areas of frequent contact. Every 3-5 years, it makes sense to renew the coating: lightly sand the surface with fine sandpaper and apply a new layer of varnish. This takes a few hours and restores the finish to its original appearance.
MDF elements under paint are even easier to update: simply repaint them, after lightly sanding the old paint for better adhesion. Polyurethane elements do not require updating at all — they maintain their appearance for decades without changes.
Color solutions: light versus dark
Color is the most powerful tool for visual space correction. An incorrectly chosen color can turn a narrow corridor into a gloomy tunnel. A properly selected palette will make it bright, spacious, and welcoming.
Light palette: expanding and lightening
Light colors reflect light, creating a sense of spaciousness and airiness. This is especially important for a corridor without windows, where all lighting is artificial. White, light gray, beige, ivory, light wood tones — all of these work to expand the space.
A completely white corridor is a bold solution that creates a gallery effect or Scandinavian minimalism. White walls, white panels, white doors, light flooring — such a space appears significantly larger than it is. The drawback is that it shows dirt. White surfaces require frequent cleaning, especially in the baseboard area.
A compromise solution is a light top with a slightly darker bottom. For example, walls above 100 cm are painted in light beige, and the lower zone is clad with panels in light oak color. This is more practical (the darker lower zone hides dirt) and visually more interesting (two shades create depth).
Warm light shades (beige, peach, light yellow) create a cozy, welcoming atmosphere. Cool light shades (light gray, bluish, silvery) make the space more strict, modern, and graphic.
Dark accents: adding character
A completely dark corridor is a risky solution, suitable only for spacious hallways with good lighting. But dark accents in a light space are a technique that adds character, depth, and drama.
A dark lower zone (panels in wenge or dark walnut color) against light walls creates contrast and visual interest. Dark doors on light walls become graphic accents. A dark ceiling (yes, it's possible!) in a corridor with high ceilings creates an intimate atmosphere and visually reduces excessive height, making the space cozier.
An important principle: there should be fewer dark elements than light ones. A ratio of 30% dark to 70% light is a safe proportion. If there is more dark, the corridor risks becoming gloomy.
Accent wall: a focal point in the corridor
One of the modern techniques is creating an accent wall in the corridor. This is a wall that stands out in color or texture against the others. Usually, it is the end wall at the end of the corridor — the one that catches the eye upon entry.
An accent wall can be painted in a rich color (deep blue, emerald, terracotta), clad with slats of a contrasting shade, or adorned with decorative panels. This technique creates a focal point that distracts attention from the narrowness of the corridor. The gaze fixes on the bright wall, and the space is perceived not as a narrow tunnel but as a room with an interesting feature.
Lighting: light as part of the finish
No finish will reveal its potential without proper lighting. In a corridor without windows, artificial light is all you have. And this light must be well thought out.
Multi-level lighting: upper, middle, lower tiers
A single chandelier or ceiling light is not enough. A professional approach is multi-level lighting, where each level serves its own purpose.
Upper level — general lighting. Ceiling lights (spotlights, linear lights, chandeliers) create uniform overall light. For a narrow corridor, linear lights placed along the central axis are better — they visually elongate the space.
Middle level — local lighting. Wall sconces at a height of 180-200 cm create soft light spots that decorate the walls and add depth. Mirror lighting (a mandatory element in the hallway) also belongs to the middle level.
Lower level — intimate lighting. Baseboard lighting or lower wall lighting creates a floating wall effect, visually lightening the space. LED strips hidden behind slats or panels provide soft glow that looks beautiful in the evening and serves as a nightlight.
Lighting decorative elements
Moldings, slats, plasterwork above doors — all these elements can and should be lit to enhance the effect. Directed light from ceiling spotlights, grazing along the textured surface of molding, creates a play of light and shadow that emphasizes volume and texture.
Hidden lighting behind slats is a modern technique that turns a wall into a glowing surface. LED strips placed in the gap between slats and the wall create a soft glow that seeps through the gaps. The effect is soft, not blinding, but bright enough to serve as the main lighting in the evening.
Lighting from below is a dramatic technique that creates unusual lighting effects. Fixtures embedded in the floor near the wall direct light upward, creating long shadows and emphasizing the texture of the finish. This technique requires caution — excess bottom lighting can create an anxious, unnatural atmosphere.
Frequently asked questions about corridor finishing
Can wallpaper be used in a corridor, or is it better to avoid it altogether?
Wallpaper can be used in a corridor, but with caveats. Regular paper wallpaper is a bad idea; they won't withstand wet cleaning and will quickly lose their appearance. Washable vinyl wallpaper on a non-woven base is an acceptable option for the upper part of the wall (above 100-120 cm), where there is no direct contact with hands and objects. For the lower wall zone, wallpaper is categorically unsuitable — more reliable protection in the form of panels or slats is needed here. A compromise solution: panels at the bottom, wallpaper at the top. The best wallpaper option for a corridor is glass fiber wallpaper for painting. They are very durable, withstand multiple repaintings, and are easy to clean.
What panel thickness is optimal for a narrow corridor?
In a narrow hallway, every centimeter of space counts, so the thickness of the finish matters. Thin panels (6-10 mm thick MDF) glued directly to the wall add minimal thickness. Solid wood typically has a thickness of 18-22 mm — this is more, but not critical. A frame mounting system adds 30-50 mm depending on the thickness of the battens. For a very narrow hallway (width less than 100 cm), frame mounting is undesirable — it's better to level the walls and use the adhesive method. For a hallway 120 cm wide or more, frame mounting is acceptable.
Is a vapor barrier needed under wooden panels in a hallway?
If the hallway is inside the apartment and does not adjoin cold exterior walls, a vapor barrier is not needed. If the hallway adjoins a cold wall (e.g., it's on the first floor, the wall faces the street) or an unheated stairwell, it is advisable to create a ventilated gap between the wall and the panels. This is done with frame mounting. A vapor barrier film is not needed; an air gap of 20-30 mm is sufficient, which will ensure air circulation and prevent condensation. Be sure to leave ventilation gaps at the bottom and top of the panel system for air inflow and outflow.
What should be the distance between battens on the wall?
The optimal distance depends on the cross-section of the battens and the desired visual effect. For battens with a cross-section of 20×40 mm, the optimal spacing is 80-100 mm (distance between the centers of the battens). This creates a harmonious rhythm, neither too frequent nor too sparse. For more massive battens of 30×50 mm, the spacing can be increased to 120-150 mm. If you want the effect of a continuous surface, you can install the battens flush against each other (spacing equals the width of the batten) or with a minimal gap of 5-10 mm. If you want a light, airy structure — increase the spacing to 200-300 mm. Important: all battens must be installed with absolutely uniform spacing — any unevenness will be noticeable.
How to care for dark panels in a hallway? Dust is very visible on them.
Yes, dark surfaces show dust more clearly than light ones. But the solution is simple: regular dry cleaning. Wipe the panels with a dry soft cloth or a special dust-collecting cloth every 2-3 days. This will take a couple of minutes but will maintain a flawless appearance. Wet cleaning — once a week with a well-wrung cloth. Do not use excess water. For wooden panels, there are special polishes that create an anti-static effect — less dust is attracted to the surface. An alternative solution: choose a matte, not glossy, panel finish. Matte dark surfaces are less demanding to clean; dust is less noticeable on them.
Can polyurethane elements be installed on uneven walls?
Minor unevenness (up to 3-5 mm) is compensated by the adhesive layer during installation. Use elastic polyurethane glue that fills small gaps. Major unevenness (more than 5 mm) will be visible in any case — the polyurethane element will not fit tightly, and gaps will form. For installation on uneven walls, it is better to use flexible elements (small-section moldings) that follow the wall's relief. Rigid, large elements (wide cornices, massive overlays) require a flat base. An alternative option: first level the section of the wall where the element will be attached with local putty, then mount the decor.
What is cheaper: painting walls or covering them with panels?
Painting is cheaper in terms of materials but requires perfectly flat walls. If the walls are uneven, they will have to be leveled with plaster and putty — this is expensive and labor-intensive work. Panels are more expensive in terms of materials but do not require perfect wall leveling (especially with frame mounting). In the end, the final cost may be comparable. An additional factor: durability. Painted walls in a hallway will need to be refreshed (repainted) every 5-7 years — paint wears off, stains don't come off. Panels last 15-20 years without refreshing, and if necessary, they can be restored. Considering the service life, panels are more economical.
What style of finish is best for a small hallway?
For a small hallway, styles that lean towards minimalism and light colors are optimal: Scandinavian, contemporary, modern minimalism. Avoid styles with excessive decor (Baroque, classicism with an abundance of stucco) — in a small space, this creates visual overload. Concise forms, light shades, simple lines, functionality — these are the principles that work in a small hallway. Vertical battens in Scandinavian style, light panels for painting, white or light gray wall color — a safe and effective choice.
Conclusion: Investing in the First Impression
A hallway is not just a passage room. It is the business card of your home, the first thing guests see, a daily reminder to you of the quality of life. Saving on hallway finishing turns into constant problems: worn-out wallpaper, cracked baseboards, a gloomy atmosphere. Reasonable investments in quality materials and thoughtful design pay off with comfort, durability, and aesthetic pleasure.
The balance between beauty and practicality is not a compromise, but a goal. Modern materials allow creating finishes that are both exquisite and durable. Wooden panels and high-quality MDF, decorative battens, wear-resistant baseboards, elegant moldings, and polyurethane stucco — all these are tools for creating a space that pleases the eye and does not require constant repairs.
The company STAVROS has specialized for over two decades in the production and supply of high-quality products made from solid wood and MDF for interiors. The assortment includes all necessary elements for creating the perfect hallway: from wall panels and decorative battens to baseboards, moldings, and polyurethane decorative elements.
Each product undergoes strict quality control. The wood undergoes chamber drying to an optimal moisture content of 8-12%, which eliminates deformation. Processing on high-precision equipment ensures perfect geometry. A wide selection of profiles, sizes, and wood species allows for the realization of any design concept — from classic to ultra-modern.
Professional STAVROS consultants will help you select materials for your specific project, calculate the required quantity considering the room's features, and offer optimal solutions within your budget. The company's website features a full product catalog with detailed descriptions, photos, and technical specifications.
Finishing a hallway is not an expense, but an investment. An investment in comfort, in durability, in daily aesthetic pleasure. An investment in the first impression your home makes. Choose quality, choose reliability, choose STAVROS.