Article Contents:
- Step-by-step installation of ceiling skirting
- Preparing the base and materials
- Choosing the adhesive composition
- Technique for cutting corners
- Process of attaching skirting
- Installing cornices and moldings on walls
- Features of installing wall profiles
- Creating wall panels with moldings
- Installing floor polystyrene skirting: step-by-step instruction
- Preparing the lower part of the wall and floor
- Options for mounting floor skirting
- Features of installation in doorways
- Nuances of working with stretch ceilings
- Principles of mounting on stretch ceilings
- Step-by-step installation technology
- Jointing and final finishing
- Sealing Joints and Gaps
- Sanding and priming
- Painting profiles
- Installing polystyrene skirting: cost when done independently
- Calculating material costs
- Cost of necessary tools
- Comparison with professional installation
- Hi Wood product from STAVROS
- Conclusion
Decorative polystyrene profiles have transformed from a luxury accessible to few into a mass solution for creating elegant interiors. Skirting, cornices, and moldings made from this material allow you to recreate classical palace moldings in an ordinary city apartment, while installation is so simple that even beginners without construction experience can perform it. The lightness of the material, ease of processing, ability to paint, and affordable price have made polystyrene decor a universal solution for interiors of any style and budget.
However, the apparent simplicity of installation is deceptive — there are numerous nuances, ignorance of which leads to defects, rework, and disappointment. Choosing the wrong adhesive may result in heavy elements peeling off within a month after renovation. Errors in cutting corners create gaps that spoil the overall appearance. Incorrect techniques when working with stretch ceilings may damage the expensive fabric. Inadequate preparation of the base can reduce the lifespan of the decor by several times.
In this detailed guide, we will reveal all the secrets of professional installation of polystyrene profiles. You will learn,what to glue ceiling skirting made of polystyrene to, how to properly performInstallation of polystyrene baseboard on the floorWhat features does it have?installation of decorative cornices made of polystyreneWhen is it applied?Installation of polystyrene baseboard with self-tapping screwsand what is the actualInstallation of polystyrene baseboard pricewhen performing the work yourself.
Step-by-step installation of ceiling baseboard


Preparation of the base and materials
The success of the installation depends on 70 percent on the quality of surface preparation, which beginners often underestimate.
Cleaning the ceiling and upper part of the walls begins with complete removal of whitewash if present. Whitewash is completely unsuitable as a base - it does not provide adhesive for the glue, and the baseboard will inevitably peel off within a few weeks or months. Wash the whitewash with warm water mixed with table vinegar in a ratio of 2 tablespoons to 5 liters of water. Use a sponge or soft cloth, regularly changing the water as it becomes dirty. Work in sections, thoroughly washing each square meter. After complete removal of whitewash, allow the surface to dry for at least 12 hours, preferably 24 hours.
Removal of old wallpaper from the ceiling and upper part of the walls is performed to the width of the baseboard plus 5-7 centimeters. If you plan to install a 80-millimeter wide baseboard, clean a strip at least 130-150 millimeters wide. Soak old paper wallpaper with warm water and detergent, then scrape it off with a putty knife. Vinyl and fabric wallpapers are removed using special wallpaper removal compounds or with a steam iron. It is important to remove not only the wallpaper but also any remaining adhesive - scrape it off with a putty knife until a clean base is reached.
Checking paint adhesion is performed on painted surfaces. Conduct the test: stick a small piece of painter's tape onto the painted surface, press it down, then sharply pull it off. If paint particles remain on the tape - the coating is not strong and must be removed. Scrape off peeling paint with a putty knife until reaching a solid layer. If the paint holds firmly, a light sanding with fine-grit sandpaper is sufficient to create a rough surface that improves adhesion.
Leveling the base is critically important for tight baseboard fit. Place a long straightedge or level board along the junction of the wall and ceiling around the entire perimeter of the room. Mark areas where protrusions exceed 3-5 millimeters in depth - these must be chiseled or sanded down. Fill depressions and grooves deeper than 3-5 millimeters with gypsum putty. After the putty dries (usually 2-4 hours depending on layer thickness and humidity), sand the surface with P120-P180 grit sandpaper until achieving a smooth, even plane.
Priming the prepared surface is a mandatory step; skipping it significantly reduces the reliability of the bond. Use an acrylic deep-penetration primer on water-based base. Apply with a roller or wide brush to a 10-15 centimeter wide strip along the junction line of the ceiling and wall. The primer penetrates into the base pores, strengthens it, reduces absorbency, and ensures better adhesion to the glue. Drying time is indicated on the packaging, usually 4-6 hours at 18-23 degrees Celsius and normal humidity. On very porous, loose surfaces (old plaster, unfinished drywall) it is recommended to apply two layers of primer with intermediate drying.
Acclimatization of baseboards is necessary to prevent thermal deformation after installation. If the material was stored in a cold room, garage, unheated warehouse, or delivered during winter at sub-zero temperatures, bring the packaged items into the room where installation will take place, at least 24 hours, ideally 48 hours before starting work. The material temperature must fully equalize with the room temperature. Optimal installation temperature is plus 18-24 degrees Celsius. At lower temperatures, the glue sets more slowly and poorly; at higher temperatures, it may dry too quickly before achieving a reliable bond.
Our factory also produces:


Choice of adhesive composition
Questionwhat to glue ceiling skirting made of polystyrene tois crucial for long-term bond durability.
Specialized acrylic-based polystyrene adhesive - optimal choice for most cases. These compositions are specifically developed for bonding polystyrene, expanded polystyrene, and extruded polystyrene to various bases. They have the required viscosity, sufficient open time (3-5 minutes during which the element position can be adjusted), rapid initial setting (30-60 seconds of pressing), and full strength development within 12-24 hours. Popular brands: Moment Montage for polystyrene, Titan Wild, Quelyd Masterfix, ORAC Decofix Pro. Consumption is approximately 300-500 milliliters per 10 linear meters of standard-width (70-100 mm) baseboard. Price ranges from 150 to 400 rubles per 310 ml tube.
Universal construction adhesives such as liquid nails are suitable for polystyrene, but with caveats. Choose compositions without solvents - water-based or synthetic rubber-based. Adhesives with solvents (toluene, acetone) will degrade polystyrene, causing it to dissolve and deform. Check the labeling: it must indicate that the adhesive is suitable for polystyrene, expanded polystyrene, and EPS. Liquid nails provide very strong bonding, but have a thicker consistency, making it difficult to apply in thin layers. Higher consumption - 400-700 milliliters per 10 meters. Brands: Moment Montage Superstrong, Tytan Professional, Makroflex. Price 200-500 rubles per tube.
MS-polymer-based adhesives - professional solution for demanding jobs. MS-polymers (modified silane) combine the strength of polyurethane adhesives with the safety of acrylics. They contain no solvents, are odorless, provide exceptionally strong elastic bonds resistant to vibrations and temperature fluctuations. Suitable for bonding heavy, wide baseboards, cornices, and sockets. Drawback - high price, 500-800 rubles per 290 ml tube. Brands: Soudal Fix All, Bostik Mammouth Glue, Henkel Makroflex FT101.
Gypsum putty as adhesive - an old budget method still used by professional masters. Finishing gypsum putty is mixed with water to a thick sour cream consistency, applied to the back of the baseboard and to the wall/ceiling. The baseboard is pressed into place, excess putty is squeezed out and immediately forms a neat joint. Advantages: lowest cost (a 5 kg bag costs 150-250 rubles, sufficient for 50-70 meters of baseboard), simultaneous filling of gaps, ability to adjust position within 5-10 minutes. Disadvantages: not suitable for heavy elements, requires skill, long drying time (24-48 hours), works only on absorbent bases (plaster, drywall), holds poorly on painted surfaces.
Absolutely unacceptable adhesives for polystyrene: any compositions based on organic solvents (nitro adhesives, 88 adhesives, rubber adhesives, chloroprene adhesives), hot-melt adhesives from glue guns (insufficient strength for ceiling applications), silicone sealants (poor adhesion to polystyrene and bases).
Get Consultation
Technique for cutting angles
Perfect corner joints are a sign of professionalism, requiring precision and the right tools.
Using a miter box - the main tool for precise cutting at the required angle. A miter box is a P-shaped groove made of wood, plastic, or aluminum with slots that guide the saw blade at specified angles. For ceiling baseboards, slots at 45 degrees are used to form 90-degree corners. Miter boxes come in simple fixed-slot types (costing 200-500 rubles) and professional adjustable-angle types (1500-5000 rubles). A simple one is sufficient for home use.
Correct orientation of the baseboard in the miter box is critical. The ceiling baseboard is placed in the miter box in an INVERTED position relative to the installation: the side that will contact the ceiling is pressed against the bottom of the miter box; the side that will contact the wall is pressed against the far side of the miter box. This is important to remember, otherwise the cut will be mirrored and unusable.
Cutting for an internal corner is performed as follows. Left element (which will be to the left of the corner): place the baseboard in the miter box as described above, with the left end further into the box. Use the slot that cuts from left-down to right-up (when viewed from above the miter box). Cut smoothly without pressure. Right element (which will be to the right of the corner): similarly, but use the slot that cuts from right-down to left-up.
Cutting for an external corner (less common, but occurs on protrusions, columns): the cutting direction is opposite to that for an internal corner. For the left element, use the slot from right-down to left-up; for the right element, use the slot from left-down to right-up.
The cutting tool must be sharp and appropriate. Best options are metal hacksaws with fine teeth or specialized foam board saws. The blade must be taut without play. A stationery knife is suitable only for very thin baseboards up to 50 millimeters wide. A jigsaw can be used, but only at minimum speed with a fine-toothed blade - otherwise the polystyrene will melt from friction.
Checking the fit before gluing is mandatory. Align two trimmed elements against each other at the corner WITHOUT glue, check the joint tightness. The gap must not exceed 0.5–1 millimeter. If the gap is larger, adjust the cut. Use P80–P120 grit sandpaper wrapped around a block, carefully sand the cut until perfect alignment is achieved. For molding with relief patterns, also check that the pattern matches up seamlessly — it must continue without interruption.
Plinth installation process
Correct glue application and pressing technique ensure secure mounting.
Glue is applied to both surfaces of the plinth — to the ceiling and to the wall. Remove the cap from the glue tube, insert the tube into the mounting gun, cut the tip at a 45-degree angle to a width of 5–7 millimeters. Apply glue in a snake or dotted line pattern along the entire length of each mounting surface. Do not apply in a thick continuous layer — when pressed, excess glue will squeeze out, forming streaks that are difficult to remove. Optimal glue line thickness is 5–7 millimeters, spacing between dots for dotted application is 30–50 millimeters. For plinths wider than 100 millimeters, apply an additional glue line down the middle of the backside for enhanced adhesion.
Installation begins at the most visible corner of the room — usually the corner first seen upon entering the room. Here, the joint must be perfect. Position the first element at the installation site, aligning the trimmed corner with the room’s corner line. Press the plinth firmly with your entire palm against both the ceiling and the wall. Do not press pointwise with your fingers — soft polystyrene easily deforms, leaving dents that will be visible after painting. Press evenly along the entire length of the element for 30–60 seconds until the glue begins to set. You will feel when the glue has set — the plinth will no longer shift under pressure.
Remove excess glue immediately while it is still wet. Carefully wipe away glue squeezed out at the edges using a damp sponge or soft cloth. Acrylic glues are easily washed off with water while fresh. Do not spread glue over the plinth and wall surfaces — this will leave stains that will become visible after painting. It is better to let the glue slightly dry for 10–15 minutes, then carefully trim excess with a sharp office knife.
Temporary fixation is required until the glue fully dries. Cut painter’s tape strips 15–20 centimeters long. Attach them every 50–70 centimeters along the length of the plinth, one end to the plinth, the other end to the ceiling and wall, creating pressing force. The tape must hold the plinth firmly pressed but not deform it. For heavy, wide plinths, use weights — place a ladder with a layer of soft fabric along the plinth to provide support from below. Temporary fixation can be removed after 12–24 hours depending on glue type and conditions (temperature, humidity).
Jointing elements along length is performed on straight wall sections. If the wall is longer than the standard plinth length (usually 2000 or 2400 millimeters), multiple elements will need to be joined. Cut ends strictly perpendicular to the plinth length — use a 90-degree slot in a miter box or cut with a square. Apply glue to the mounting surfaces against the wall/ceiling and definitely to the end of the first element. Attach the first element. Apply glue to the mounting surfaces and end of the second element. Position the second element tightly against the first, ensuring tight contact at the ends with no gap. Press firmly to the base. Try to place straight joints in less visible areas — behind curtains, above doors, in shadowed corners.
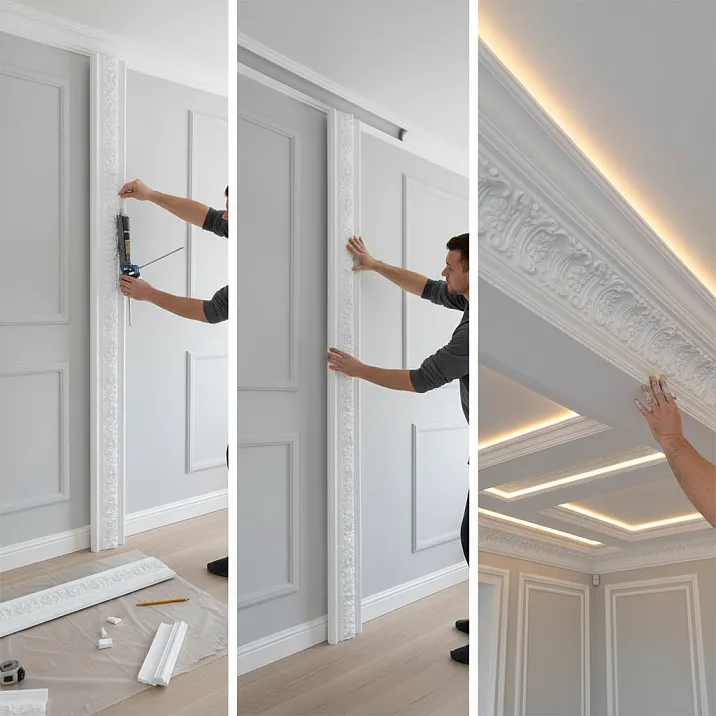
Installing cornices and moldings on walls
Features of mounting wall profiles
installation of decorative cornices made of polystyreneand moldings on walls have their own specifics compared to ceiling elements.
Wall preparation is similar to ceiling preparation, but there are nuances. Walls are usually more accessible for thorough treatment. Remove wallpaper on a strip 10 centimeters wider than the molding. If the wall is painted with quality interior paint that adheres well, light sanding and degreasing are sufficient — the molding will adhere reliably. If the wall is plastered and unpainted, priming is mandatory — otherwise, porous plaster will actively absorb moisture from the glue, preventing it from setting properly.
Horizontal level marking is critical for horizontal moldings. Use a laser level, water level, or long bubble level. Mark several points at the desired height along the entire length of the wall, connect them with a pencil or chalk line. Even a 5–10 millimeter deviation over a 4–5 meter length will be noticeable to the eye — the molding will appear crooked.
Glue application on wall moldings is performed only on the rear flat surface contacting the wall. Unlike ceiling plinths, wall moldings have only one mounting surface. Glue is applied in a snake or grid pattern depending on the molding width. For narrow moldings up to 50 millimeters wide, a single center line is sufficient. For wider moldings 80–150 millimeters — two parallel lines or a grid.
Mounting is performed by pressing the molding firmly against the wall according to the marking. Press evenly with your entire palm along the length for 30–60 seconds. Check levelness with a level — while the glue has not yet set, you can adjust the position. Temporary fixation using painter’s tape from the molding to the wall above and below the molding.
Vertical moldings require checking vertical alignment using a plumb bob or laser level. The mounting technique is similar, but instead of checking horizontal alignment, check vertical alignment.
Creating wall panels using moldings
Classic wall decoration technique — creating rectangular or square panels framed by moldings.
Layout planning begins with marking on the wall. Determine panel size and placement considering wall proportions and furniture, picture, mirror placement. Classic proportions: panels occupy the lower third or two-thirds of wall height, panel width relates to height in a ratio from 1:1 (square) to 1:1.5 (elongated rectangle). Distance between panels is usually equal to molding width or 1.5–2 times wider.
Marking is done with a pencil using a level, tape measure, and square. Draw thin lines outlining all panels. Check symmetry and parallelism. Moldings will be glued along these lines.
Molding cutting is performed according to dimensions, taking into account joints at corners. For rectangular panels, corners are cut at 45 degrees similarly to ceiling plinths. Begin installation with the top horizontal panel of the panel, then the side verticals, and finally the bottom horizontal.
Panel filling can vary: contrasting color painting, wallpapering with pattern, fabric covering, installing decorative panels. This is done before or after molding installation depending on the chosen material.
Installing polystyrene floor plinth: step-by-step instructions
Preparation of lower wall and floor section
Installation of polystyrene baseboard on the floorRequires special attention to preparing the base at floor level.
Cleaning the lower wall section begins by removing wallpaper to a height of plinth plus 5 centimeters. If wallpaper reaches the floor, cut it off at this height. Check paint or whitewash for durability and remove if necessary. Pay special attention to removing grease stains typical for kitchens — clean the surface with a cleaning agent, then with clean water.
Checking wall flatness at plinth installation level is done with a long straightedge. Level any irregularities deeper than 5 millimeters with spackling compound, let dry, then sand.
Checking floor flatness is important for tight plinth-to-floor contact. If the floor has significant height variations, the plinth may locally detach from the floor, forming gaps. Minor irregularities are not critical — the plinth will slightly bend. Significant irregularities (more than 10 millimeters over 2 meters) may require floor leveling or using flexible plinths.
Prime the wall area to a height of plinth plus 5 centimeters with acrylic primer. Let dry for 4–6 hours.
Options for mounting floor plinth
There are several ways to install baseboards, each with its own advantages.
Adhesive mounting - the simplest and fastest method. The same adhesive used for ceiling moldings is applied. Adhesive is applied in a zigzag pattern to the back of the baseboard, which is then pressed against the wall. Advantages: speed, no visible fasteners, suitable for any walls. Disadvantages: difficult removal, not suitable for baseboards with cable channels, requires a flat surface.
Installation of polystyrene baseboard with self-tapping screwsMore reliable method for heavy, wide baseboards. Technology: drill holes in the baseboard and wall at 40-50 cm intervals, insert plastic anchors, and screw the baseboard in place with concealed-head screws. Sink the screw heads 1-2 mm into the baseboard material, then fill and sand with acrylic putty. After painting, the fasteners will be invisible. Advantages: maximum reliability, suitable for uneven walls, possible removal. Disadvantages: requires more time, tools needed (drill, screwdriver), fastener locations visible until painted.
Mounting on clips - a system for baseboards of special construction. Plastic clips are mounted to the wall at 50 cm intervals, and the baseboard clicks into them. Advantages: easy removal for access to cables, possibility of multiple reinstallation. Disadvantages: more expensive, suitable only for special baseboards, requires perfectly flat walls.
Combined mounting - adhesive plus screws at several points. Ensures reliability under difficult conditions (uneven walls, heavy baseboards, rooms with temperature fluctuations).
Installation features in doorways
Doorways require careful trimming of the baseboard.
Trimming flush with the door frame - standard solution. Measure the distance from the corner to the inner edge of the door frame, cut the baseboard precisely perpendicular to this point. The end of the baseboard should be level with the inner edge of the frame. For neatness, lightly sand the end with sandpaper.
Dealing with protruding moldings requires additional steps. If the molding protrudes beyond the wall plane, the baseboard will hit it. Solutions: trim the bottom of the molding to the height of the baseboard, routing the baseboard under the molding; use an angular transition piece; trim the rear corner of the baseboard to create a bevel allowing it to go around the molding.
Nuances of working with a stretch ceiling
Principles of mounting on stretch ceilings
A stretch ceiling creates specific conditions requiring special mounting technology for ceiling moldings and cornices.
Strict prohibition against gluing to the ceiling fabric - the main rule. The PVC film of a stretch ceiling, only 0.15-0.35 mm thick, is under tension. Attempting to glue a baseboard to it will cause deformation of the fabric, creasing, and possible tearing. Adhesive is chemically incompatible with PVC, causing discoloration and stains. The only correct technology - mounting the baseboard ONLY to the wall.
Requirements for wall preparation increase. Since the baseboard is supported only by the wall without support from the ceiling, the surface must be perfectly prepared. Level the wall section to the height of the baseboard plus 5 cm to a perfectly smooth plane. Any bumps or hollows will cause poor adhesion, which is critical when mounting only to the wall. Two-coat primer is mandatory.
Choosing lightweight profiles is necessary for reliability. Heavy, wide cornices create significant leverage, pulling them away from the wall. Optimal profiles are up to 100 mm wide from standard polystyrene or up to 150 mm wide from low-density extruded polystyrene. For wider profiles, consider reinforced mounting.
Step-by-step installation technology
The sequence of actions for mounting on a stretch ceiling differs from the standard.
Protecting the stretch ceiling fabric before starting work is mandatory. Apply 5 cm wide painter’s tape along the line of baseboard installation on the stretch ceiling. This protects against accidental contact with adhesive, putty, or paint, which cannot be removed from PVC without traces. Alternative - a strip of dense polyethylene film, secured with painter’s tape to the wall above the mounting line and covering the mounting area.
Apply adhesive ONLY to the surface adjacent to the wall. This is critically important. The upper part of the baseboard facing the ceiling must remain completely dry, with not a single drop of adhesive. Apply adhesive carefully in a zigzag pattern only to the back surface.
Glue strictly horizontally to the wall without attempting to press against the ceiling. Correct technique: press the baseboard against the wall with your palms positioned at the middle height of the profile. Pressure must be directed strictly perpendicular to the wall. DO NOT attempt to press the upper edge against the ceiling. If there remains a 1-3 mm gap between the top edge of the baseboard and the stretch ceiling fabric - this is correct and normal.
Temporary fixation of painter’s tape to the wall. Apply tape strips every 50 cm from the baseboard to the wall above the baseboard, creating pressure against the wall. DO NOT glue tape to the stretch ceiling - removing it may damage the fabric.
Fill gaps with acrylic sealant after the adhesive dries. If a gap forms between the baseboard and the ceiling, carefully fill it with white acrylic sealant. Guide the nozzle of the caulking gun along the gap, wipe away excess with a damp finger to form a smooth bead. The sealant remains elastic after drying, not creating a rigid bond with the fabric, allowing slight movement during temperature changes.
Jointing and finishing
Filling joints and gaps
After the adhesive dries (12-24 hours), all installed profiles require finishing adjustments.
Inspecting all joints under good lighting reveals problem areas. Walk along all installed elements with a portable lamp, marking areas where gaps exist in corner joints, straight-line joints along the length, or between the baseboard and the substrate.
Filling gaps with acrylic finishing putty is done with a narrow putty knife 3-5 cm wide. Apply putty, pressing it into the gap to fully fill it. Level it flush with the baseboard surface. Immediately wipe away excess with a damp sponge. For deep gaps over 3 mm, apply putty in two stages: the first layer fills the depth, let it dry 2-3 hours, then apply the second layer to level it flush.
Putty drying time depends on layer thickness. A thin layer up to 2 mm dries in 2-4 hours. A thick layer 5-10 mm may take 12-24 hours. Do not rush sanding - un-dried putty will smear and clog the pores of sandpaper.
Drying time of the putty depends on the thickness of the layer. A thin layer up to 2 millimeters dries in 2-4 hours. A thick layer of 5-10 millimeters may take up to 12-24 hours. Do not rush with sanding — under-dried putty will smear and clog the pores of the sandpaper.
Sanding and priming
Surface preparation for painting determines the quality of the final finish.
Sanding of filled areas is done with fine-grit sandpaper P180-P240. Use sandpaper wrapped around a wooden block or a special sanding pad — this ensures a smooth surface. Sand gently with circular motions without heavy pressure. Polystyrene is a soft material; excessive force will leave scratches and dents that will become visible after painting. The goal is to make filled areas invisible, perfectly smooth, and seamlessly blended with the main surface.
Removing dust after sanding is critically important. Dust left on the surface will disrupt the adhesion of primer and paint, creating a rough finish. Wipe all elements with a dry microfiber cloth, then slightly damp (not wet) cloth. You can vacuum with a soft attachment on minimal power. Allow the surface to dry completely for 30-60 minutes before priming.
Priming the entire surface of installed profiles is done with water-based acrylic primer. Apply in a thin, even layer using a medium-width (5-7 cm) brush with soft synthetic bristles. For smooth areas, a small velvet roller (10-15 cm wide) can be used. For textured areas, always use a brush to ensure all ornament recesses are filled. Primer fills polystyrene micro-pores, equalizes absorption, and creates a uniform surface. Paint will lay evenly without streaks or spots. Drying time for primer is usually 2-4 hours at 18-23°C and normal humidity.
Profiling of profiles
Final painting transforms white polystyrene profiles into finished decorative elements.
Paint selection is limited to water-based compositions. Use acrylic, latex, or water-emulsion interior paints. Paints based on organic solvents (alkyd, oil, nitrocellulose) are strictly prohibited — they will degrade polystyrene, causing it to dissolve, deform, and shrink. Check the packaging: it must be labeled as water-based, for interior use, and solvent-free.
The gloss level of paint is chosen based on preference and room purpose. Matte paint hides minor surface defects, scratches, and unevenness, creating a noble classic surface without glare. The downside — harder to maintain, and ingrained dirt is difficult to remove. Satin (semi-gloss) — a compromise between matte and glossy: a light silk-like sheen, practical for maintenance, easy to clean, and hides moderate defects. Glossy paint emphasizes texture, creating a bright, shiny surface, easy to clean, but reveals all base imperfections.
The first layer of paint is applied thinly and evenly. Mix the paint thoroughly with a wooden stick for 1-2 minutes before use. If the paint is thick, you can dilute it with water according to the manufacturer’s instructions (usually no more than 5-10%). Dip the brush into paint up to one-third of the bristle length, lightly squeeze out excess paint at the edge of the can. Apply paint with long, continuous strokes along the profile. Do not press hard on the brush — this leaves brush marks. Carefully paint textured areas, moving the brush in different directions to ensure paint fills all recesses. Do not apply a thick layer — better to apply two or three thin layers than one thick layer with drips. Drying time for the first layer is indicated on the can, usually 2-4 hours. For full drying, allow 6-8 hours or preferably a full day.
The second layer of paint is applied after the first layer is fully dry. Inspect the painted surface. If there are rough spots, raised bristles from the brush, or minor defects — lightly sand them with fine sandpaper P320-P400. Sand very lightly, barely touching the surface, to avoid removing paint down to the base. Wipe away dust with a damp cloth, let it dry. Apply the second layer using the same technique as the first. For better coverage, you can apply it perpendicular to the first layer. Usually, two layers are sufficient for an ideal finish.
A third layer may be required when painting in saturated dark colors (black, dark blue, burgundy, emerald), when painting light paint over a dark base, or when the paint has insufficient coverage. Remember the golden rule: three thin layers are better than two thick ones.
Polystyrene skirting board installation cost when done yourself
Material cost calculation
Installation of polystyrene baseboard priceWhen done yourself, the cost is the sum of materials and tools.
The cost of baseboards depends on width, material density, and profile complexity. Simple smooth baseboards of standard density, 60-80 millimeters high, cost 150-300 rubles per linear meter. Baseboards with decorative relief, 70-100 millimeters, cost 300-500 rubles per meter. Impact-resistant high-density baseboards, 80-120 millimeters, cost 500-900 rubles per meter. For a standard two-room apartment with a baseboard perimeter of 60 meters, expenses will range from 9,000 to 27,000 rubles depending on the chosen profile.
The cost of adhesive is calculated based on a consumption of 300-500 ml per 10 meters of skirting board. For 60 meters, you will need 1800-3000 ml of adhesive. A tube of specialized adhesive (310 ml) costs 150-400 rubles. You will need 6-10 tubes, costing 900-4000 rubles. Alternative — a bucket of adhesive (3-5 kg) for 800-1500 rubles, more economical for large volumes.
Cost of putty for filling joints: a 5 kg bag of finishing gypsum putty costs 150-300 rubles, sufficient for 50-80 meters of skirting boards.
Cost of primer: a 5-liter can of acrylic primer costs 300-600 rubles, sufficient for treating 50-80 meters of perimeter.
Cost of paint: a 3-liter can of quality acrylic paint costs 800-1500 rubles. To paint 60 meters of skirting boards in two layers, you will need 1.5-2 liters — one can is sufficient.
Total materials for 60 meters: skirting boards 9000-27000 rubles, adhesive 900-4000 rubles, putty 150-300 rubles, primer 300-600 rubles, paint 800-1500 rubles. Total material cost 11150-33400 rubles depending on profile and material selection.
Cost of necessary tools
If you don’t have tools, you’ll need to make an investment, but it will pay off and remain for future projects.
Simple plastic saw — 200-500 rubles. Metal hacksaw with fine teeth — 250-600 rubles. Tubing caulking gun — 150-500 rubles. Set of putty knives — 200-400 rubles. Brushes for priming and painting — 150-300 rubles. Roller with tray — 150-300 rubles. Tape measure, level, pencil — if you don’t have them, another 300-500 rubles. Sandpaper of various grits — 100-200 rubles. Painter’s tape — 80-150 rubles. Total cost of basic tool set 1500-3500 rubles.
Comparison with professional installation
Professional installation services in regions of Russia cost 200-400 rubles per linear meter of skirting board. For 60 meters, this is 12000-24000 rubles for labor alone, without materials. When installing yourself, you save this amount.
Total costs for installing 60 meters of skirting boards yourself: materials 11150-33400 rubles plus tools 1500-3500 rubles (if purchased for the first time) = 12650-36900 rubles. When hiring professionals: materials 11150-33400 rubles plus labor 12000-24000 rubles = 23150-57400 rubles. Savings by installing yourself amount to 10500-20500 rubles, which is significant with a limited budget.
Hi Wood product line from STAVROS
South Korean brand Hi Wood (Hai Wood) is a globally recognized leader in producing decorative polystyrene elements of ultra-high density. Over 30 years of experience, use of eco-friendly plant polymer with density 50-65 kg/m³ (2-3 times higher than standard polystyrene), international quality and safety certifications — all of this makes HiWood a benchmark in its segment.
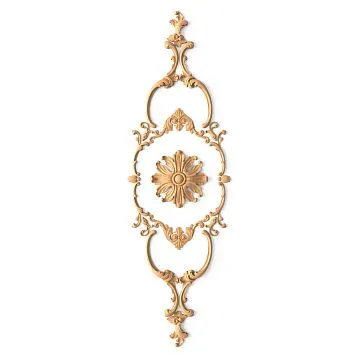
The assortment includes more than 300 models of skirting boards, cornices, moldings, and sockets of various purposes, sizes, and styles. From compact profiles for minimalist interiors to luxurious decorated elements for classic spaces. Each model is meticulously designed — precise geometry with deviation no more than 0.3-0.5 mm, ideal surface, clear relief detailing.
Ecological safety is confirmed by the Korea Eco-Label — the highest degree of eco-friendliness awarded after rigorous testing. The material does not emit harmful substances, is safe for health, suitable for children’s rooms and medical facilities. UV resistance due to patented stabilization system completely eliminates yellowing — 20-year guarantee of maintaining white color.
STAVROS Company - official partner and supplier of Hi Wood products in Russia - offers a full range of decorative elements for implementing projects of any complexity. Working directly with a leading global manufacturer, STAVROS guarantees the authenticity of products, eliminating counterfeits, fair prices without intermediary markup, professional consultations on selecting elements and installation techniques, and organized logistics with delivery to any region of Russia.
The STAVROS website features detailed catalogs with photos, dimensions, and prices of all items. Company specialists will help calculate the required amount of materials for your project, select matching elements from the same collection, and advise on installation techniques. Delivery is organized by transport companies with the option to track the shipment. Quality packaging ensures no damage during transit.
Conclusion
Installing decorative polystyrene profiles is a task accessible for self-execution when proper technology and careful preparation are followed. A quality base, correct choice of adhesive, precise cutting of angles, and neat finishing touches determine the result that will delight for decades.
Special attention is required when working with stretch ceilings - strict adherence to mounting technology, attaching only to walls, eliminates the risk of damaging the expensive fabric. Choosing quality materials from reputable manufacturers such as Hi Wood guarantees durability, eco-friendliness, and flawless decorative appearance.
Self-installation allows significantly saving on professional services, redirecting saved funds toward purchasing higher-quality materials or additional decorative elements. Modern technologies and accessibility of information make creating a beautiful, professional interior accessible to every homeowner.