


Article Contents:
- Preparation for Installation: What You Need to Know Before Starting Work
- Tools and Materials for Professional Installation
- Marking Baluster Positions: Accuracy as the Key to Success
- Methods for Attaching Balusters to Steps
- Mounting on wooden tenons
- Fastening with Threaded Rods
- Mounting with screws
- Installing Support Posts: The Foundation of the Structure
- Cutting Balusters to Height and Angle
- Installation of intermediate balusters
- Installing the Handrail Support Board
- Making and Installing a Round Handrail
- Attaching the Handrail to Support Posts
- Features of Installation on Different Types of Staircases
- Installation Without a Subrail
- Final finishing and wood protection
- Quality Control and Structure Testing
- Common Installation Mistakes and How to Avoid Them
- Caring for Wooden Balusters and Railings
- Upgrading and Replacing Fence Elements
- Frequently Asked Questions
- Conclusion: From Craftsmanship to Perfection

What turns an ordinary staircase into an architectural statement? Professional Installing wooden balusters yourself — is an art where the precision of engineering calculation meets aesthetic sense. Properly installed balusters and railings not only ensure safe movement but also set the visual rhythm of the entire structure, turning a utilitarian element into a central accent of the interior. Installation requires understanding of the material, skill in working with tools, and attention to detail — this is exactly what we will discuss in detail.


Preparation for Installation: What You Need to Know Before Starting Work
Every successful Installing balusters on a wooden staircase by yourself begins with thorough preparation. First of all, make sure the staircase structure is complete: steps are installed, leveled, and securely fastened. Any movement or deformation of the base will make quality installation of the railing impossible. Check the horizontality of the steps with a spirit level — the permissible deviation is no more than 2 millimeters per meter of length.
Wood moisture content is a critical parameter. Balusters and handrails should acclimate in the room for at least 7-10 days before installation. During this time, the wood will equalize its moisture content with the environment, which will prevent subsequent deformation and cracking. The ideal moisture content for installation is 10-12 percent. If the elements are supplied without a finish, it is recommended to perform preliminary sanding and priming before installation — this makes it easier to treat hard-to-reach areas.
Create an accurate plan for baluster placement. Count the number of steps, determine the installation spacing (standard is 2 balusters per step), calculate the positions of the support posts. Marking must be done with millimeter precision — an error at the beginning will lead to accumulated deviations along the entire length of the flight. Use a laser level to apply center lines on the steps and create a control string for setting the height of the balusters.


Tools and Materials for Professional Installation
Installing wooden balusters requires a specific set of tools. The basic arsenal includes: a drill with a set of wood drill bits from 6 to 12 millimeters in diameter, a cordless screwdriver with adjustable torque, a miter saw for precise cutting of elements at the required angle, a jigsaw for making curved cuts, a hand router for creating grooves in the handrail (if required).
Measuring tools are no less important: a laser plane and level builder, a hydraulic or magnetic level at least 1000 millimeters long, a metal tape measure with a lock, a caliper for controlling diameters, a carpenter's square for checking right angles. Additionally, you will need clamps of various sizes for fixing elements during assembly, a rubber mallet for seating parts without damage, screwdrivers, a set of wrenches.
Fastening materials are selected depending on the chosen installation method. For dowel mounting you will need: wooden dowels 8-10 millimeters in diameter, 60-80 millimeters long, PVA wood glue or polyurethane glue. For threaded fastening: M8 or M10 studs 100-120 millimeters long, nuts and washers of the appropriate size, wood screws of various lengths (from 50 to 100 millimeters), reinforced metal brackets for attaching posts.
Our factory also produces:


Marking Baluster Positions: Accuracy as the Key to Success
Correct marking is the foundation of quality installation. Start by installing the outermost support posts. The first post is installed at the level of the first step (starting post), the last one — at the level of the upper landing or last step (final post). A control string is stretched between these two points, which sets the line of the upper ends of all intermediate balusters.
On each step, mark the positions of the balusters. The standard arrangement is two balusters: one at a distance of 50-70 millimeters from the front edge of the tread, the second — at a distance of 50-70 millimeters from the back edge. This ensures a clear distance between balusters of no more than 150 millimeters, which meets safety requirements. For wide steps (more than 300 millimeters), three balusters can be installed: two at the edges, one in the center.
Find the central axis of each position. Draw lines along the step (parallel to the edge) and across (perpendicular to the edge) — their intersection will give the exact center for baluster installation. Use a center punch or awl to mark the center — this will prevent the drill bit from shifting when drilling. Pay special attention to marking on winder and turning steps — here balusters are installed taking into account the fan arrangement and variable angle of inclination.
Get Consultation
Methods for attaching balusters to steps
There are several proven methodsInstallation of wooden balusters. The choice depends on the staircase design, type of balusters, access to the underside of the steps, and aesthetic preferences. Let's examine each method in detail.
Fastening with wooden dowels
The classic and most common method is installation on wooden dowels. This method provides a strong connection, requires no visible fasteners, and allows precise positioning of balusters. A hole 8-10 millimeters in diameter is drilled into the lower end of the baluster to a depth of 40-50 millimeters strictly along the central axis. It is important that the drilling is perpendicular to the end — use a drill press or a special guide jig.
A similar hole of the same depth is drilled into the step at the marked point. The total depth of the two holes should be 5-10 millimeters greater than the length of the dowel — this creates a gap for excess glue and prevents the part from being pushed out during assembly. The wooden dowel is generously coated with wood glue and driven into the hole in the step until it stops. Then, the lower end of the baluster is also coated with glue and placed onto the protruding part of the dowel.
The baluster is set strictly vertical using a level and fixed in this position with temporary supports or clamps until the glue fully sets (usually 24 hours). This method requires patience but provides the cleanest and strongest connection. The disadvantage is the inability to disassemble without damaging the elements.
Mounting with threaded rods
A more technological option isInstalling wooden balusters on stairs installation on threaded studs. This method allows adjusting the height of balusters and, if necessary, dismantling the structure. A hole 1-2 millimeters smaller than the diameter of the stud is drilled into the lower end of the baluster along the central axis to a depth of 60-70 millimeters. A threaded stud M8 or M10, 100-120 millimeters long, is screwed into this hole for two-thirds of its length.
A hole of the same diameter is drilled into the step to a depth of 40-50 millimeters. The baluster with the stud is screwed into the hole in the step with a rotating motion. Verticality is controlled with a level, and the position is adjusted by further screwing or unscrewing if necessary. For reliability, the threaded connection can be additionally reinforced with glue — apply it to the stud before screwing it into the step.
An alternative option is through-fastening with a long stud. If there is access to the underside of the step, you can use a stud that passes completely through the entire thickness of the step and is secured from below with a nut and a wide washer. This is the strongest method, but it requires free space under the staircase for access to the fastener.
Mounting with screws
For acceleratedof installing wooden railings and balusters installation, you can use self-tapping screws. The baluster is placed on the marked spot and pressed against the step. From below, a pilot hole 3-4 millimeters in diameter is drilled through the step and enters the lower end of the baluster by 30-40 millimeters. Then, a self-tapping screw 80-100 millimeters long is screwed in from below — it passes through the step and enters the baluster, pulling it tight.
For reliable fixation of one baluster, 4 self-tapping screws are required, arranged in a cross pattern with an offset from the center of approximately 15-20 millimeters. The screw heads are countersunk into the wood by 2-3 millimeters and covered with wooden plugs or filled with putty. This method does not require complex tools, is performed quickly, but is less aesthetic and requires access to the underside of the steps.
Installing support posts: the foundation of the structure
Before proceeding with installing wooden balusters and handrails, it is necessary to install support posts. They serve as the main load-bearing elements to which the handrail is attached and define the geometry of the entire railing.Posts for staircase have a larger cross-section (usually from 80x80 to 120x120 millimeters) and are installed at key points: at the beginning of the flight, at the end of the flight, at turns, and on intermediate landings.
The fastening of the support post must be as strong as possible. For wooden steps, the optimal option is through-fastening with long threaded studs 12-16 millimeters in diameter. Two holes are drilled in the base of the post to a depth of 80-100 millimeters with a center-to-center distance of 60-80 millimeters. Through holes of the same diameter are drilled in the step and riser (if the structure is on stringers) or in the stringer (if the staircase is on stringers).
The studs are inserted into the holes in the post, the post is placed in position, and the studs pass through the step. From below, a reinforced metal washer is placed on each stud, and a nut is screwed on. The nuts are tightened alternately and evenly, while controlling the verticality of the post with a level in two mutually perpendicular planes. After tightening, the stud heads in the post are covered with wooden plugs, which are glued flush with the surface and sanded.
If there is no access to the underside of the step (for example, the staircase is closed from below with a soffit), use fastening with metal brackets. Reinforced steel brackets measuring at least 100x100 millimeters are attached to the side surface of the post with powerful self-tapping screws (at least 6 per bracket). Then, the brackets are fixed to the step and riser or to the stringer with self-tapping screws or anchors. Such fastening is less aesthetic but, when done correctly, provides sufficient strength.
Cutting balusters to height and angle
After installing the outer support posts, a control string is stretched between them at the level of the future upper ends of the balusters. This string serves as a guide for determining the exact height of each baluster and the angle for cutting its upper end. On inclined flights, balusters are installed strictly vertically, and their upper ends are cut at an angle corresponding to the angle of the staircase.
The angle of the staircase is determined by dividing the height of the flight by its length. For example, if the flight rises 1500 millimeters vertically over a horizontal distance of 3000 millimeters, the angle is approximately 26-27 degrees. It is at this angle that the upper ends of the balusters need to be cut. Use a miter saw with the ability to set the angle of inclination — this will ensure a clean and precise cut.
The height of the baluster is determined individually for each position. Place the baluster in position without cutting, measure the distance from its upper end to the control string, subtract this value from the total height of the baluster — this gives the cutting height. Mark the cutting line considering the angle of inclination and perform the cut. After cutting, the upper end must be thoroughly sanded — a rough surface will impair the quality of gluing with the handrail base or handrail.
Installation of intermediate balusters
After preparation, proceed to installing wooden balusters and handrails. Start from the first step and move sequentially upward. For each baluster, perform the following operations: apply glue to the dowel (or stud threads), place the baluster in position, set it strictly vertical using a level, and fix it with temporary supports or clamps until the glue sets.
It is critically important to control the verticality of each baluster in two planes — along and across the flight. Even a slight deviation (1-2 degrees) will cause the upper ends of the balusters not to lie in the same plane, making handrail attachment problematic. Use a long level (at least 1000 millimeters) or a laser level for precise control.
After installing all balusters on one flight, check their upper ends with a straightedge or a flat batten — all points should lie in the same plane. If deviations are found, adjust the position of problematic balusters while the glue has not yet set. Allow the glue to dry completely (at least 24 hours) before proceeding to install the handrail base and handrail.
Installing the handrail support rail
Handrail cleat— is a wooden component that attaches to the top ends of balusters and serves as a base for installing the handrail. It performs several functions: increases the contact area between balusters and the handrail, simplifies handrail installation, enhances the rigidity of the entire structure, and conceals minor inaccuracies in baluster height.
The handrail cleat is made from a board 18-25 millimeters thick and 80-120 millimeters wide. For straight flights, a straight cleat is used; for curved sections, a bent-laminated or steamed and bent cleat is used, shaped to the radius. The cleat length equals the flight length from the first newel post to the last, plus a 20-30 millimeter allowance on each side for trimming flush after installation.
The cleat is laid on the top ends of the balusters, aligned relative to their axes (usually centered or slightly offset towards the inner side of the staircase), and secured with clamps. Fastening is done with screws: one 40-50 millimeter long screw is driven from above through the cleat into each baluster. Screw heads are countersunk 3-5 millimeters and covered with wooden plugs or filled with putty for finishing.
An alternative method is concealed angled screw fastening. The screw is driven from the side through the cleat into the body of the baluster at a 45-60 degree angle. This method leaves no visible fastener marks on the top surface of the cleat but requires greater care and precision. After installing the cleat, its ends are trimmed flush with the newel posts, and the top surface is sanded to ensure a tight fit for the handrail.
Manufacturing and installation of a round handrail
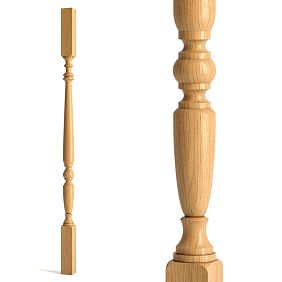
Round handrail 50millimeters is the standard diameter for stair railings. It fits comfortably in an adult's hand, providing a secure grip during ascent and descent. The handrail can be made independently on a lathe or purchased ready-made. Straight sections of handrail are used for straight flights; for turns and winder steps, bent elements are used, manufactured according to a template.
The handrail length for one flight is determined by the distance between newel posts along the top line plus overhangs on the posts (usually 50-80 millimeters on each side). IfBuy round wooden handrailstandard length (usually 2000-3000 millimeters), splicing several sections will be required for long flights. Splicing is done at a 45-degree angle (mitered) with glue and reinforcement using a wooden dowel or internal rod inside the handrail.
Attaching the handrail to the handrail cleat is done in several ways. The first is with glue and wooden dowels. Holes for dowels are drilled in the lower part of the handrail and the upper part of the cleat at 300-400 millimeter intervals. Dowels are glued into the cleat, the handrail is placed over the dowels with glue applied, and pressed with a weight or clamps until fully set.
The second method is with screws from below. Screws 60-80 millimeters long are driven from below through the handrail cleat into the body of the handrail at an angle. Screw heads remain hidden on the underside of the cleat. This method is more technologically advanced but requires precise calculation of screw length to prevent it from protruding through the top surface of the handrail.
The third method is combined: glue plus screws. Combining the two methods provides maximum joint strength. After installing the handrail, its ends are trimmed flush with the newel posts or with a slight overhang (20-30 millimeters), edges are rounded, and the entire surface is thoroughly sanded.
Attaching the handrail to newel posts
Connecting the handrail to newel posts requires special attention — significant operational loads are concentrated here. There are several ways to execute this joint. The most common is mortising the handrail into a groove in the post. A vertical groove 30-40 millimeters deep and width equal to the handrail diameter is routed into the top of the post. The handrail is inserted into the groove, secured with glue and screws driven through the post wall into the handrail body at an angle.
An alternative option is attaching the handrail with metal brackets. Special fastening elements (steel or brass plates with shaped cutouts) are attached to the top end of the post, the handrail is placed into the bracket cutout and secured with screws. This method is less aesthetic as the fasteners are partially visible, but it provides high strength and the possibility of disassembly.
For round posts, a special fitting is used — a connecting sleeve that fits over the post end and has a socket for the handrail. The sleeve is attached to the post with a long screw or rod, the handrail is inserted into the sleeve socket and secured with glue or a set screw. After installation, the joint between the handrail and post can be decorated with a trim ring or left clean if the connection is neatly executed.
Installation features on different types of staircases
Installing wooden railings and balusters yourselfon a stringer staircase has its own specifics. Balusters are installed directly on the treads of the steps, and fastening is done using any of the described methods. Access to the underside of the steps is usually available, allowing for through-fastening with rods or screws — the strongest option.
On a stringer staircase, balusters can be installed in two ways: on the steps (if the stringer is internal and the steps protrude beyond its plane) or directly on the stringer (if the steps are inset flush). Fastening to the stringer requires precise marking considering the angle of inclination — balusters must stand strictly vertical, and their attachment points must be located along an inclined line on the stringer.
Spiral and winder staircases present the greatest complexity. Here, each baluster has an individual height and top end cut angle. The handrail cleat is made curved to the staircase radius by steaming or gluing thin laminates. The handrail must also be curved — it is manufactured according to a template or a ready-made bent element of the required radius is ordered.
Installation without a handrail cleat
Is it possible to do without a handrail cleat? Yes, by performing direct attachment of balusters into a groove in the handrail. This method is more aesthetic — the structure looks more elegant and lightweight, but is technically more complex. A longitudinal groove 20-30 millimeters deep and width equal to the thickness of the baluster top ends (usually 30-40 millimeters for turned balusters) is routed along the entire length of the handrail's lower part.
The top ends of the balusters are cut not only to the staircase's angle of inclination but also to form a flat tenon that will fit into the handrail groove. This requires precise measurements and careful work on a milling machine or with a handheld router. Balusters are inserted into the handrail groove, and the entire assembly is glued together. For additional fixation, screws can be used, driven at an angle through the side wall of the groove into the baluster body.
This method requires pre-assembly of the entire railing on a workbench — the handrail with balusters already secured in it is installed on the staircase as a single module. This is difficult on long flights where the structure's weight can reach tens of kilograms, but it is quite feasible on short spans. The main advantage is an absolutely clean structure with no visible fasteners and maximally precise positioning of all elements.
Final finishing and wood protection
After completing installation, final finishing of the railing must be performed. If elements were installed without pre-coating, proceed with sanding. Start with 120 grit to remove minor contaminants and installation marks, then 180 grit, and finish with 220-240 grit. Pay special attention to joints, ends, and transitions between elements — there should be no steps, burrs, or unevenness here.
After sanding, thoroughly remove all dust — use a vacuum, then wipe the surface with a slightly damp cloth and let it dry. Degrease the surface with mineral spirits or a special wood degreaser. Now you can proceed to apply the protective and decorative coating.
Forof stair handrails and balustersit is optimal to use wear-resistant compositions. Water-based polyurethane varnish — environmentally friendly, has no strong odor, dries quickly, and forms a durable elastic film. Apply thin coats with a brush or spray gun, 3-4 coats. After each coat dries completely (usually 2-4 hours), sand with fine sandpaper (320-400 grit) to remove raised wood fibers.
Oil or oil-wax — an alternative for those who value naturalness and the tactile feel of wood. Oil penetrates deeply into the wood structure, highlights its grain, and gives a silky feel. Apply generously with a cloth pad, remove excess after 15-20 minutes, and after drying (24 hours), polish with a soft cloth. Oil requires periodic renewal every 1-2 years but allows for local repairs without complete re-sanding.
Quality control and structure testing
After completingInstalling wooden balusters yourselfAfter installation and finishing, quality control of the installation must be carried out. Check the verticality of all balusters—none should deviate more than 1-2 millimeters over a height of 900 millimeters. Check the horizontality of the handrail—it should smoothly follow the line of the flight without sagging or protrusions.
Check the strength of the fastening. Grasp the handrail with both hands and try to shake the railing sideways—play should not exceed 5 millimeters, and there should be no creaks or clicks. Load the handrail vertically by leaning your full weight on it—deflection should not be felt, and balusters should not deviate from vertical.
Check the distance between balusters—the clear gap should not exceed 150 millimeters at any point along the flight. Check the height of the railing from the step surface to the top of the handrail—it should be 900-950 millimeters (for children's institutions—at least 1200 millimeters). Check the quality of the finish—the surface should be smooth, without drips, runs, bubbles, or matte spots.
Typical mistakes during installation and how to avoid them
Even experienced craftsmen sometimes make mistakes wheninstalling balusters on a wooden staircase yourself. The first and most common mistake is inaccurate marking. If baluster positions are marked with deviations, the entire structure will look crooked, even if each baluster is installed vertically. Use a laser level, control strings, templates—do not trust measurements by eye.
The second mistake is failing to maintain baluster verticality. A deviation of even 2-3 degrees causes the upper ends not to lie in the same plane, making handrail attachment problematic. Control the verticality of each baluster in two planes with a long level or laser level.
The third mistake is weak fastening. Saving on fasteners, using short screws, insufficient depth of dowel or pin embedding—all this leads to loosening of the structure within a few months of use. Use fasteners of sufficient length and diameter, do not skimp on glue, ensure embedding depth of at least 40-50 millimeters into each part.
The fourth mistake is ignoring wood moisture. Installing damp balusters will inevitably lead to deformations, cracks, and weakened joints after drying. Allow the wood to acclimate indoors for at least a week before installation, control moisture with a moisture meter.
The fifth mistake is poor finishing. Poorly sanded surfaces, thick varnish layers with drips, unpainted areas—all this not only spoils the appearance but also reduces the protective properties of the coating. Do not rush, apply coating in thin layers, sand between coats, control quality at each stage.
Caring for wooden balusters and railings
After completing installation and finishing, your staircase will last for decades with proper care. Regularly (once a week) wipe the handrail and balusters with a slightly damp soft cloth to remove dust. Do not use abrasive cleaners, stiff brushes, solvents—they damage the protective coating.
Inspect the structure once a year. Check the strength of baluster fastenings—if play is found, tighten the fasteners or reinforce the connection with additional screws. Check the condition of the finish—if wear, scratches, or matte spots from abrasion appear, perform local restoration: sand the damaged area with fine sandpaper, remove dust, apply 1-2 coats of varnish or oil.
For handrails that experience maximum load and abrasion, complete coating renewal every 3-5 years is recommended. Remove old varnish with a scraper or stripper, sand the surface, degrease, apply fresh coating. Oil coatings require renewal more often—apply an additional coat of oil every 1-2 years to maintain protective properties and refresh appearance.
Upgrading and replacing railing elements
Over time, it may become necessary to replace individual balusters (e.g., due to mechanical damage) or upgrade the entire railing. Replacing a baluster installed on dowels requires careful knocking out—place a wooden block against the upper end and strike several sharp blows with a hammer. The dowel usually breaks, and the baluster is removed. Dowel remnants are drilled out from the step, and a new baluster is installed using standard technology.
Balusters on threaded pins are dismantled by unscrewing—clamp the baluster in soft-jawed vise or use a pipe wrench with a cloth pad to avoid damaging the surface, and rotate counterclockwise. After unscrewing, the pin either remains in the baluster (then it needs to be unscrewed) or in the step (then a new baluster can be screwed onto it).
Complete railing replacement is a more extensive task. Dismantling begins with the handrail: unscrew the fasteners connecting it to the handrail rail and support posts, remove the handrail. Then dismantle the handrail rail. Balusters and support posts are dismantled last. After removing old elements, fill or plug all holes in steps with wood filler or plugs, sand the surface, and proceed to install new railing using the described technology.
Frequently asked questions
At what distance should balusters be installed from each other? Building codes require that the clear distance between balusters not exceed 150 millimeters. In practice, 2 balusters per step are usually installed, providing a gap of about 100-120 millimeters with a standard step width of 250-300 millimeters.
Which baluster fastening method is the most reliable? Through-fastening with threaded pins secured with a nut underneath is the strongest method. It provides maximum connection rigidity and allows tightening if necessary. Disadvantage—access to the underside of steps is required.
Can balusters be installed without support posts? Theoretically possible, but not recommended. Support posts perform a load-bearing function, provide structural rigidity, and serve as handrail attachment points. Without them, the railing will be less sturdy and may not meet safety requirements.
Is a handrail rail necessary? Not mandatory, but desirable. The rail simplifies installation, increases contact area between balusters and handrail, and enhances structural rigidity. It can be omitted by mortising balusters directly into a handrail groove, but this is technically more difficult.
What handrail diameter is optimal? Standard diameter is 50 millimeters. It is comfortable for most adults. For children, a 40-millimeter diameter handrail can be used; for people with large hands—60 millimeters.
How to cut balusters for a spiral staircase? Each baluster on a spiral staircase has individual height and cutting angle. Measure height from step to control string at each point separately. Cutting angle is determined by handrail slope at that point—it varies throughout the spiral.
Can metal fasteners be used on wooden balusters? Yes, metal pins, brackets, and angles are often used to fasten wooden elements. The main thing is to correctly select fastener size and protect metal from corrosion (use galvanized or stainless steel fasteners).
How to correct baluster misalignment after installation? If balusters are installed on dowels and glue has already set, correcting misalignment is difficult—dismantling and reinstallation will be required. If on threaded pins—try unscrewing the baluster, adjusting position, and screwing back. It is easier to prevent misalignment by carefully controlling verticality during installation.
How long does it take to install railing on a 15-step staircase? For an experienced craftsman, railing installation (30 balusters, 2 support posts, handrail rail, handrail) takes 1-2 full working days, excluding glue setting time and finishing. For a beginner, the process may take 3-5 days.
Is it mandatory to coat balusters with protective finish? Absolutely. Unprotected wood quickly darkens, gets dirty, absorbs moisture, and loses strength. Minimum protection—2-3 coats of varnish or oil impregnation. This will extend railing service life several times.
Conclusion: from craftsmanship to perfection
Installing wooden balusters yourself— is a project that requires precision, patience, and respect for the material. Properly executed installation transforms a staircase from a utilitarian structure into an architectural statement that will serve for decades. Every baluster installed perfectly vertical, every millimeter of measured distance, every precisely fitted joint—all come together into a single harmonious whole.
Yes, you can do this work yourself with basic tools and by following the described techniques. But if the task seems too complex, or you want guaranteed results without the risk of errors, turn to professionals. The company STAVROS has been creatingstaircase components made of woodof the highest quality. The range includes turned and carved balusters, support posts of various shapes and sizes,Wooden handrails for staircases, handrail base rails, all necessary elements made from solid oak, beech, ash.
STAVROS products are distinguished by impeccable geometry, precise dimensions, and selected wood without knots or cracks. All elements are compatible with each other, forming unified style collections—from classic turned to modern minimalist, from strict geometric to luxurious carved. STAVROS consultants will help you select the optimal kit for your staircase, calculate the required amount of materials, recommend reliable fastening methods, and advise on installation techniques.
By choosing STAVROS products, you get not just components, but a complete solution for creating your dream staircase—reliable, safe, beautiful, and durable. Every part is crafted with skill honed over years, and each element undergoes strict quality control. STAVROS is a guarantee that your staircase will delight you and your loved ones for decades, preserving its original beauty and strength.


