Article Contents:
- Wooden Skirting Board vs. Plastic: Advantages and Real Reviews
- Why Wood Beats PVC — and Where It Falls Short
- What Owners of Wooden Skirting Boards Say: Real Experience
- Comparison Table: Wood vs. PVC
- How to Properly Clean a Wooden Skirting Board
- The Golden Rule: Wooden Skirting Boards Fear Water
- Care Instructions: Surface Under Different Coatings
- Cleaning Frequency: Practical Schedule
- Typical Defects of Wooden Skirting Boards: Putty and Repair
- Defect Classification: From Minor to Critical
- Puttying Wooden Skirting Boards: Technique and Materials
- Cracks: Wood Drying or Mechanical Damage
- Gaps in Joints Between Planks
- Varnishing Wooden Skirting Boards: Renewing Over Old Coating
- When Varnishing is Needed — Signs of Wear
- Surface Preparation Before Varnishing
- Applying Varnish to Skirting Boards: Step by Step
- Complete Restoration: Sanding, Primer, New Painting
- When Restoration is Inevitable
- Technology of Complete Restoration of Wooden Skirting Boards
- Painting Skirting Boards White: A Separate Technique
- Frequency of Renewing Wooden Skirting Board Coating
- Care Schedule: Table by Coating Type
- Signs That the Skirting Board Needs Renewing
- FAQ: Answers to Popular Questions About Wooden Skirting Board Care
- About the Company STAVROS

Wood does not forgive negligence — but generously rewards care. This simple truth, known to every experienced carpenter, applies to wooden skirting boards as well: an element remembered last when choosing finishes and first — when it starts to lose its appearance.
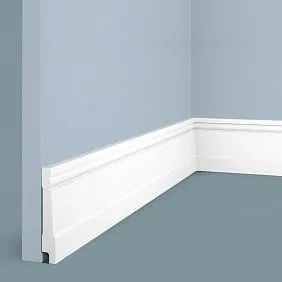
Wooden baseboardSolid oak or beech skirting boards are not disposable consumables, but durable interior elements whose service life is measured in decades. But only under one condition: proper care, timely defect elimination, and periodic coating renewal. What are the advantages of wooden skirting boards over plastic ones, how to clean them properly, what to use to fill chips and cracks, how to varnish and paint — all this in detail, without generalities and empty advice.


Wooden Skirting Board vs. Plastic: Advantages and Real Reviews


Why Wood Beats PVC — and Where It Loses
The question 'what is better — wooden or plastic skirting board' is regularly asked on construction forums. The answer depends on what is more important to you: budget and simplicity or durability and aesthetics.
Advantages of Wooden Skirting Boardover plastic — is not a marketing thesis, but the experience of thousands of people living with wooden skirting boards for 15–20 years:
1. Durability. A high-quality solid oak wooden skirting board with normal care lasts 30–50 years. A PVC skirting board under intensive use loses its appearance in 5–8 years: it yellows (white becomes cream), cracks at the corners, delaminates.
2. Repairability. A chip on a wooden skirting board — is filled with putty, sanded, painted over. A deep scratch — is bleached with oil or painted over. Worn coating — is sanded and varnished anew. A damaged PVC skirting board — is not repaired: only replacement.
3. Texture and aesthetics. Natural wood has a living texture, is warm to the touch, 'breathes'. The most expensive PVC 'wood-look' upon close inspection — is a film. The difference is obvious.
4. Eco-friendliness. Solid wood without coating or with a natural oil coating — is a clean material. PVC when heated (radiators near the floor) releases volatile substances. In children's rooms and bedrooms, this matters.
5. Possibility of painting and repainting. A wooden skirting board can be painted any color — white today, in five years you might want gray. A PVC skirting board cannot be painted: paint does not adhere to it.
Where PVC Wins:
-
Price (3–5 times cheaper)
-
Installation (easy, with clips, no drilling)
-
Moisture resistance (for bathrooms PVC is optimal)
-
Perfect geometry without gaps (PVC is flexible, lays on an uneven wall)
Our factory also produces:


What owners of wooden skirting boards say: real experience
Analysis of owner reviewswooden baseboardsreveals consistent patterns: those who bought a solid wood skirting board do not regret their choice. Those who saved money and took PVC — after 7–10 years change to wood.
Most frequent positive observations: 'after 12 years the skirting board looks almost like new — only slightly darkened', 'scratch from moving furniture — filled with putty, repainted, not visible', 'wooden skirting board together with parquet — is a completely different class of interior'.
Most frequent complaints: 'in the first year cracks appeared at the joints' (reason — unstabilized skirting board, humidity above normal), 'the skirting board's coating darkened slightly near the radiator' (normal aging of varnish under thermal exposure).
Get Consultation
Comparison table: wood vs. PVC
| Parameter | Wooden skirting board | PVC skirting board |
|---|---|---|
| Service life | 30–50 years | 5–12 years |
| Repairability | High | Low (replacement) |
| Ecological | High | Medium |
| Painting | Any color | Impossible |
| Price | Higher | Lower by 3–5 times |
| Moisture resistance | Requires coating | High |
| Aesthetics | Natural texture | Imitation |
| Installation | Requires tools | Simple |
How to properly clean a wooden baseboard
The main rule: wooden baseboards are afraid of water
Before discussing what to clean with — it's important to understand what is strictly forbidden. Wood and water are not enemies, but they require respecting boundaries. There is one rule: wipe the wooden baseboard with a damp cloth, not a wet one.
A wet cloth left on the baseboard for 5 minutes — that's already a risk. Water penetrates the micro-pores of the coating (even varnish), reaches the wood, which swells. After drying — local swelling, whitening of the coating, micro-crack.
With regular cleaning using a wet cloth, the baseboard begins to warp, joints separate, and the coating becomes cloudy.
Care instructions: surfaces under different coatings
Baseboard under varnish (matte or semi-gloss):
-
Weekly maintenance: dry soft cloth or vacuum cleaner brush (floor attachment). Dust on the horizontal top edge of the baseboard accumulates quickly — clean regularly
-
Monthly cleaning: well-wrung cloth (should be damp, not wet) + a few drops of liquid neutral soap or cleaner for varnished surfaces. Wipe along the baseboard, immediately dry with another cloth
-
Stubborn stains (shoe marks, grease stains): cotton pad + small amount of ethyl alcohol (70°). Spot treatment, without rubbing. Alcohol dissolves grease stains without damaging the varnish during brief contact
-
Do not use: solvents (white spirit, acetone, gasoline), abrasive powders and sponges, chlorine-containing products (bleach), steam mop
Baseboard under oil (Osmo, Rubio Monocoat, Biofa):
Oiled baseboard — the most demanding in care, but also the most 'alive' in feel. Oil does not create a film, it impregnates the wood — the surface breathes, tactilely warm.
-
Daily/weekly: dry or slightly damp cloth (microfiber). Oil repels household dust well
-
Cleaning: special soap for oiled surfaces (Osmo Wash & Care, Rubio Monocoat Soap). A few drops in warm water, wipe with a well-wrung cloth. Wood floor cleaners with wax — do not use (wax clogs the surface, oil 'stops breathing')
-
Stubborn stains: Osmo Spray Cleaner applied to the spot, leave for 30 seconds, wipe off
-
Do not use: regular soap-based detergents (they destroy the oil coating), solvents
Baseboard under paint (enamel):
Painted baseboard — the most practical in care. The coating is dense, cleans well.
-
Regular stains: damp cloth + neutral soap
-
Stubborn stains (marker, paint, grease stains): melamine sponge (careful — abrasive, may remove paint under strong pressure) or white spirit applied to the spot
-
Do not use: hard brushes, metal sponge — they leave scratches
Cleaning frequency: practical schedule
| Type of cleaning | Frequency | Method |
|---|---|---|
| Dust removal | 1–2 times a week | Dry cloth / vacuum |
| Damp wiping | 1–2 times a month | Slightly damp cloth + neutral cleaner |
| Local stain removal | As needed | Alcohol / special cleaner |
| Preventive inspection | Once a year | Checking joints, coating, gaps |
Typical wooden skirting board defects: puttying and repair
Defect classification: from minor to critical
Wooden skirting board defectsare divided into three categories by repair complexity:
Minor (fixed in 10–20 minutes):
-
Scratches in the top coating layer (without wood damage)
-
Minor wear on edges and corners
-
Coating contamination resistant to regular cleaning
Moderate (require preparation and time):
-
Chips and dents exposing wood
-
Cracks in solid wood (drying)
-
Gaps in joints between planks
Serious (require partial or complete removal):
-
Plank warping (wood "bent")
-
Deep cracks along the entire plank length
-
Rot or mold (from prolonged moisture)
Puttying wooden skirting boards: technique and materials
Puttying wooden skirting boards— a basic skill everyone working with wooden trim elements should master. Nothing complicated — but there are nuances.
Wood putty: what to choose
Not every putty is suitable for wood. Gypsum putties (Volma, Knauf) are for walls, not wood. They don't adhere to wood: different adhesion, different expansion with temperature changes — will fall out within a year.
Correct options:
| Type of filler | Application | Features |
|---|---|---|
| Acrylic wood filler | Chips, cracks, dents up to 3 mm | Paintable, sandable, flexible |
| Epoxy filler | Deep chips, large dents | Very durable, hard, sandable |
| Wax pencil / stick | Minor scratches, tone-matching scratches | Quick, no sanding required |
| Finish filler + tint | For painting on painted baseboards | Smooth surface for paint |
Chip filling technique:
-
Clean the chip area: remove all loose wood and coating particles with brushes and sandpaper (P120)
-
Degrease the repair area: cotton pad + alcohol, let dry (5 min.)
-
Apply filler: with a narrow spatula, with a slight "plus" (0.5–1 mm above the baseboard surface) — acrylic filler shrinks ~10–15% when drying
-
Curing time: acrylic filler — 2–4 h, epoxy — 12–24 h
-
Sand: P150 → P180 → P220, to the level of the baseboard surface. Use a sanding block (not your finger — finger pressure is uneven, will create a depression)
-
Coat: primer → paint / varnish to match the tone
Wax pencil — for lazy and urgent cases. If the chip is small (up to 3 mm), and the surface is varnished — a wax pencil (colored, matching the baseboard tone) solves the problem in 2 minutes. Fill the chip with wax, level with a plastic card or fingernail, remove excess. Glossy surface — polish. The durability of such repair is 2–3 years.
Cracks: wood shrinkage or mechanical damage
Cracks in wooden baseboards are of two types:
Shrinkage cracks — thin (0.5–2 mm), run along the grain. Cause: the baseboard was insufficiently dried before installation or installed in a low-humidity environment (central heating in winter — humidity 20–30%). Wood that swells in summer dries out in winter — and cracks appear.
Remedy: acrylic wood filler, applied with a spatula into the crack and smoothed level with the surface. After drying — sand with P180, paint or varnish. If cracks recur — install a humidifier (optimal humidity for wooden baseboard is 40–60%).
Mechanical cracks — typically transverse or diagonal. Cause: impact, careless installation (over-tightened screw split the wood at the end), transportation.
Remedy for cracks up to 5 mm: two-component epoxy filler — strong, will prevent the crack from expanding. For cracks over 5 mm — consider replacing the plank.
Gaps in joints between planks
Gaps in joints — the most common "defect" in wooden baseboards. Usually appear in the first year after installation: the wood stabilizes in the room conditions.
Sealing gaps in joints:
-
Acrylic sealant (white or tinted to match the skirting board) — the most durable option: remains elastic, does not crack during seasonal wood movement
-
Wood filler — less preferable for joints: rigid, will crack within 2–3 years due to wood movement
-
Wax crayon — for inconspicuous gaps up to 1 mm in hard-to-reach areas
Varnishing wooden skirting boards: refreshing over the old coating
When varnishing is needed — signs of wear
Varnishing wooden skirting boardsover the old coating — the most delicate way to refresh the skirting board without full restoration. It works when:
-
The varnish has dulled, lost its shine, but is not peeling or yellowed
-
There are minor scratches and wear marks on the surface without exposed wood
-
The skirting board color is satisfactory, only the coating needs refreshing
Varnishing will not solve the problem if:
-
The old varnish is peeling or flaking — complete removal and new coating is needed
-
The skirting board has yellowed unevenly (partial yellowing from UV exposure) — varnish on top will not even out the tone
-
There are deep scratches with exposed wood — filler is needed before varnishing
Surface preparation before varnishing
Preparation — 80% of the result. Varnish applied without preparation will not lay evenly: poor adhesion, bubbles, matte spots in contaminated areas.
-
Degreasing. Wipe the skirting board with a cotton pad or cloth soaked in white spirit or a special anti-silicone degreaser (Antisil). Let dry for 20–30 minutes
-
Sanding with fine paper. P220–P320. The goal is not to remove the old varnish, but to 'open up' the surface for adhesion of the new layer. Move along the grain. Sand the entire skirting board evenly — without skipping areas
-
Dust removal. Use a dry brush or blow off. Then — a dry microfiber cloth that electrostatically collects dust
-
Final degreasing. Once more — white spirit or anti-silicone degreaser. Do not touch the surface with hands after degreasing
Applying varnish to the skirting board: step by step
Varnish selection: for refreshing an existing coating — water-based acrylic varnish (Dulux, Tikkurila Kiva, Hesse Lignal). The same type of sheen as the old one (matte over matte, semi-gloss over semi-gloss). Applying glossy over matte — doesn't work: will result in uneven sheen.
Tool: flat brush (natural hair) 40–50 mm wide for wide skirting boards, 20–25 mm for narrow ones. Or — spray gun (for large-scale work).
Application technique:
-
First coat — varnish diluted with 10% water (for water-based): priming layer, 'reveals' adhesion, shows problem areas
-
Drying time for first coat — 2–4 hours (water-based) or 6–12 hours (alkyd)
-
Intercoat sanding: P320–P400, very light. Remove raised fibers, dust particles embedded in the first coat
-
Second coat — full-strength, undiluted
-
Third coat if necessary — for skirting boards in hallways, entryways, high-traffic areas
Critical mistakes when varnishing:
-
Applying varnish at temperatures below +15°C — varnish becomes 'cloudy', does not dry properly
-
Draft during drying — varnish dries unevenly, leaving matte spots
-
Applying too thick a layer — drips, 'wrinkles' during drying
Complete restoration: sanding, primer, new painting
When restoration is inevitable
Complete restoration — removing old coating down to bare wood and applying new — is required in cases:
-
Old coating is peeling, blistering, flaking
-
Baseboard has been repainted many times, thick paint layer has accumulated, hiding profile details
-
Need to drastically change color (dark to light — cannot be done without removal)
-
Mold or deep fiber damage discovered under coating
Technology of complete wooden baseboard restoration
Stage 1: Dismantling (optional). If baseboard is easy to remove — restoration is more convenient when removed: access from all sides, no need to mask wallpaper and floor. For baseboard on liquid nails, dismantling is impractical — work in place.
Stage 2: Removing old coating. Three methods:
-
Sanding (P80 → P120 → P150): labor-intensive on shaped profile, where belt sander won't fit into grooves. For shaped profile — drill with brush attachments, manual sanding with sandpaper twisted to groove shape
-
Thermal removal (heat gun + scraper): varnish or paint softens → removed with scraper. Effective for thick paint layers. Risk: overheating wood (darkening fiber)
-
Chemical stripping: gel stripper (Syntilor, Profflex) applied to surface, left for 20–40 minutes, old coating softens and is removed with scraper. Good method for removing multiple paint layers without overheating wood
Stage 3: Sanding bare wood. After coating removal — sanding 'clean': P120 → P150 → P180. Always along the grain. Result: smooth surface without fuzz and traces of old coating.
Stage 4: Toning (if needed). If different tone needed — stain (acrylic or oil) applied to bare wood with brush or cloth, left for 5–10 minutes, excess removed against grain. Allow to dry completely (4–12 h depending on stain).
Stage 5: Priming. Sealer primer under varnish (reduces absorbency, prevents 'bald spots' in first layer in porous wood areas). Or first layer of thinned varnish — as primer.
Stage 6: Painting baseboard.Painting wooden baseboard— final stage of restoration. For completely restored baseboard — 2–3 layers with interlayer sanding P320 between layers.
Painting baseboard white: separate technology
Repainting wooden baseboard white — popular task when changing interior style. Nuance: white paint 'doesn't forgive' roughness and missed spots — every scratch, every brush hair is visible on white.
Specifics of painting white:
-
Sealer primer (shellac or special sealer primer) — mandatory: blocks resin secretions and stain spots that would 'bleed through' white paint
-
Paint: alkyd enamel (gloss / semi-gloss) — self-levels better than acrylic; or acrylic enamel with 'flotol' additive (for self-leveling)
-
3 layers: first thinned (priming), second full, third finishing. Interlayer sanding P400 mandatory
Frequency of renewing wooden baseboard coating
Maintenance schedule: table by coating type
| Finish | Current maintenance | Update | Full restoration |
|---|---|---|---|
| Gloss varnish | Weekly (dust) | Every 8–12 years | Every 20–25 years |
| Matte / semi-gloss varnish | Weekly (dust) | Every 6–10 years | Every 18–20 years |
| Oil (Osmo, Rubio) | Weekly (dust) | Every 3–5 years | Every 15–20 years |
| Alkyd paint (enamel) | Weekly (dust) | Every 7–10 years | Every 15–20 years |
| Acrylic paint | Weekly (dust) | Every 5–8 years | Every 12–15 years |
Table explanation:
-
"Current care" — regular cleaning without applying a coating
-
"Update" — applying a new layer of coating without removing the old one (sanding + new layer)
-
"Full restoration" — removing the coating down to the wood + complete cycle from scratch
Signs that the baseboard needs updating
-
The coating has dulled and cannot be restored by polishing
-
Whitish spots have appeared (water marks)
-
Scratches and marks are visible through the coating on the top edge of the baseboard
-
The color has become uneven (darker and lighter areas)
-
After wiping with a damp cloth, the surface does not dry "cleanly," leaving matte streaks
For oiled baseboards — a specific marker for the need to update: perform the "water drop" test. Drop water on the surface. If the drop forms a "bead" — the oil is still working, the coating is protecting. If the drop spreads and absorbs within 30 seconds — the oil is depleted, it's time to update.
FAQ: answers to popular questions about wooden baseboard care
Can you paint a wooden baseboard directly over old varnish?
Painting over varnish without preparation is a bad idea: adhesion is weak, the paint will "peel" within a year. Required: sanding with P220, degreasing, isolation primer (shellac or special), then paint. If the old varnish is in good condition — you don't need to strip it down to the wood, just "open up" the surface by sanding.
How to remove yellowing from a white painted baseboard?
Alkyd white paint yellows after 5–8 years — this is a chemical change in the resin of the coating, irreversible. The only option is repainting. Before repainting: sanding, insulating primer (it will block the yellowness and prevent it from 'bleeding through' the new paint), acrylic white enamel (acrylic paints do not yellow).
Baseboard has 'pulled away' from the wall — how to press it back without removal?
If the gap is up to 5 mm: acrylic sealant in the gap + polyurethane adhesive-sealant along the back of the baseboard in accessible areas. Press with painter's tape for 24 hours. If the gap is more than 5 mm or the baseboard has pulled away over a significant length — removal and reinstallation with adhesive + fasteners.
Mold has appeared behind the baseboard on an exterior wall. What to do?
Mold behind a baseboard is a sign of a problem with the thermal insulation of the exterior wall (condensation). The baseboard itself is a consequence, not the cause. First step — eliminate the source of moisture (insulate the wall from the outside). Second — remove the baseboard, treat the wall with an antiseptic, dry it thoroughly, then install a new baseboard with a ventilation gap (do not press it tightly against the wall at the floor).
How many times can a wooden baseboard be sanded?
A solid wood baseboard 15–20 mm thick — theoretically can be sanded 5–8 times (0.5–1 mm is removed each time). In practice — 3–4 full restorations over its entire service life. For comparison: a veneered baseboard (veneer 1–2 mm) — can only be sanded 1–2 times, after which the veneer wears through to the substrate.
About the company STAVROS
The longevity of a wooden baseboard begins even before its installation — at the production stage.Wooden skirting board K-series STAVROSMade from kiln-dried solid oak and beech (moisture content 8–10%) — this ensures stable geometry without drying cracks, a durable P180 sanded surface, and perfect adhesion to any coating. A baseboard made from damp or improperly stored wood starts to 'warp' within a month after installation — no amount of care will help. Proper raw materials are the foundation.
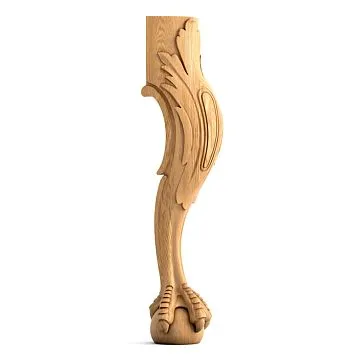
Wide wooden baseboard STAVROSHeight from 40 to 200+ mm, over 30 profiles in the K-series, coating of your choice (oil, varnish, enamel, custom tinting). For a complete wooden decor system —carved wooden casings, wooden cornices KZ-series, wooden handles from solid wood— unified material, unified wood species, unified tone.
Samples: 180 rub./set (credited towards order). Consultation on care and restoration: 8 (800) 555-46-75.
STAVROS — wood that lives long and well.