Article Contents:
- Anatomy of wall molding: elements and compositions
- Moldings: the foundation of panel systems
- Baseboards and cornices: wall boundaries
- Decorative overlays: accents within panels
- Pilasters and Half-columns: Vertical Accents
- Classic boiserie: French elegance with moldings
- Principles of boiserie construction
- Creating boiserie from polyurethane moldings
- 3D polyurethane panels: modern relief
- Types of 3D panel reliefs
- Advantages of 3D panels over traditional materials
- 3D panel installation: step-by-step
- Vertical zoning: architecture without partitions
- Vertical zoning technique with pilasters
- Zoning with vertical moldings
- Protective panels: practicality in hallways and corridors
- Construction of protective panels
- Advantages over other solutions
- Protective panel installation
- Accent wall in the living room: focal point
- Accentuation options with molding
- Color solutions for accent walls
- Wall molding installation: error-free technology
- Wall preparation: substrate requirements
- Marking: Precision Above All
- Cutting and mitering moldings
- Adhesion: adhesive and fixation
- Painting: the final touch
- Installation Mistakes and How to Avoid Them
- Error 1: Installation on an uneven wall
- Error 2: Lack of marking or inaccurate marking
- Error 3: Poor corner joining
- Error 4: Excess glue
- Error 5: Painting without primer
- Frequently Asked Questions about Wall Molding
- How much does it cost to create boiserie in a 20 m² room?
- Can molding be mounted on wallpaper?
- Does molding make a room look smaller visually?
- Is polyurethane molding suitable for bathrooms?
- Can molding be removed without damaging the wall?
- How to care for wall molding?
- Conclusion: The wall as architecture

Bare walls are boring. Even painted in an exquisite shade, even with expensive wallpaper—the plane remains a plane. The eye glides without finding anything to catch onto. The space seems empty, unfinished, devoid of character.Wall polyurethane moldingtransforms walls—moldings create relief panels, three-dimensional compositions, architectural articulation, play of light and shadow. The wall ceases to be a background, becomes a design element, a carrier of style, an object of admiration.
In 2026, wall decor is experiencing a revival. The minimalism of the last two decades (white walls, absence of decor, Japanese emptiness) is giving way to neoclassicism—a return to architectural expressiveness, but with a modern understanding of proportions and color. Boiserie (classical wall panels made of moldings) are relevant again, but executed not in heavy wood costing millions of rubles, but in lightweight polyurethane for tens of thousands. The accessibility of technology has democratized luxury—today, any owner of a standard two-room apartment can create a Parisian apartment in the spirit of Haussmann.
This article is a complete guide to using wall polyurethane molding. We will analyze types of decorative solutions (from classical boiserie to modern 3D panels), functional tasks (zoning, protection, accentuation), installation technology (marking, fastening, joining, painting), specific projects for different rooms (entryway, living room, bedroom, corridor). The goal is to provide a tool for independent implementation or competent ordering from craftsmen.

Anatomy of wall molding: elements and compositions
Wall decor is created by combining several types of elements. Understanding the function of each helps build a harmonious composition.


Moldings: the basis of the panel system
Moldings are narrow, long, profiled strips (width from 20 to 100 mm, length of standard sections 2-2.4 meters). They form panel frames, vertical and horizontal wall articulations, door and window trims.
Molding profiles:
Simple rectangular (flat strip)—minimalism, modern classic, Scandinavian style.
Rounded (quarter circle, bead, cove)—soften geometry, universal, suitable for most styles.
Multi-step (several planes at angles, creating steps)—classicism, architectural rigor, play of light on edges.
Ornamental (beads, egg-shaped elements, dentils, leaves)—Baroque, Empire, luxurious interiors.
Application in wall panels:
Horizontal moldings divide the wall into zones (baseboard, main, frieze), set rhythm, create proportions.
Vertical moldings form panel boundaries, vertical accents, pilasters (flat half-columns).
Frames made of moldings (rectangles, squares) inside panels create recessed or protruding sections, raised panels.
Our factory also produces:


Baseboards and cornices: wall boundaries
Baseboard (floor molding height 80-150 mm) covers the joint between wall and floor, protects the lower part of the wall from mechanical damage, creates a visual foundation for the composition.
Cornice (ceiling molding width 50-200 mm) covers the joint between wall and ceiling, visually completes the wall from above, can conceal hidden lighting.
In wall panel systems, baseboards and cornices are essential elements. They frame the panel field, creating integrity.
Get Consultation
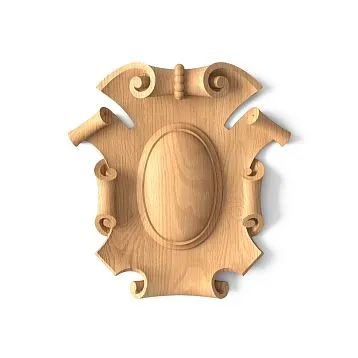
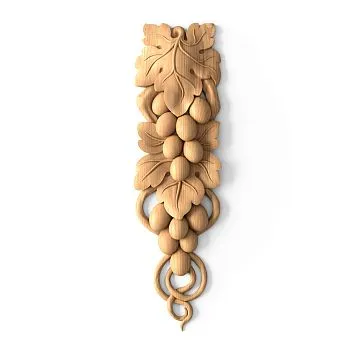
Decorative overlays: accents within panels
Carved overlays (rosettes, cartouches, ornamental elements) are placed in panel centers, corners, and molding intersections. They add detailing, enhance style, and create focal points.
Sizes range from 50×50 mm to 400×400 mm. Ornaments correspond to the chosen style — floral for Baroque, geometric for Classicism, abstract for Art Deco.
Pilasters and half-columns: vertical accents
Pilasters — vertical elements imitating flat columns. Consist of a base (foundation), shaft (vertical part), and capital (top). Height from 1 to 2.5 meters.
Used for vertical division of long walls, framing doorways, and creating rhythm in large spaces.
Classical boiserie: French elegance with moldings
Boiserie — a system of wall panels historically made of wood in French interiors of the 17th–19th centuries. Walls were divided by moldings into rectangular or square sections, inside which were placed raised panels (recessed wooden panels) or fabric.
Principles of constructing boiserie
Three-part vertical division of the wall:
Base zone (from floor to height 80-120 cm) — the lower third of the wall, historically the darkest (protection from dirt), today can be any color.
Main zone (from base to height 2.2-2.6 meters) — the middle part, where the main panels are placed, featuring maximum decoration.
Frieze zone (from main zone to ceiling) — the upper part, a narrow strip 20-40 cm, often smooth or with fine ornamentation.
Zones are separated by horizontal moldings (profiled strips).
Panels within zones:
In the base zone — large rectangular panels 80-120 cm wide, 80-100 cm high.
In the main zone — tall rectangular panels 60-100 cm wide, 100-150 cm high (vertical orientation elongates the space).
Panels are formed by moldings (frames); inside the panel, the wall is either smooth painted, wallpapered, or has additional smaller moldings (nested frames).
Symmetry is mandatory:
Panels on opposite walls are identical in size and placement.
Central panels (opposite the entrance, above the fireplace, behind the sofa) can be wider than side panels — emphasizing the center.
Room corners — panels joined at 45° or corner pilasters concealing the joint.
Creating boiserie from polyurethane moldings
Materials:
Main molding (width 50-80 mm, classic multi-step profile) for panel frames. Consumption: perimeter of all panels + 10% for trimming.
Horizontal dividing molding (width 60-100 mm, more massive profile) for dividing the wall into zones. Consumption: room perimeter × number of horizontal lines.
Baseboard (height 100-150 mm). Consumption: room perimeter.
Ceiling cornice (width 80-150 mm). Consumption: room perimeter.
Corner elements (optional) for frame corners — 4 pieces per frame.
Polyurethane or acrylic mounting adhesive.
Paint (color of moldings + color of walls inside panels, which may match or contrast).
Technology:
Marking is a key step. Draw the layout of all moldings (horizontal zone lines, panel boundaries) on the walls with a pencil. Use a laser level for horizontals, a plumb line or laser for verticals. Symmetry is checked by measuring distances from room corners to panel boundaries—they should be equal on opposite sides.
Baseboard installation—start from the bottom. The baseboard is glued to the wall and floor, creating the foundation of the system.
Installation of horizontal dividing moldings—the next step. The molding separating the base and main zones is glued horizontally around the entire room perimeter at a height of 80-120 cm (depends on ceiling height—the higher the ceiling, the higher the boundary).
Installation of panel frames—cut the molding into segments according to frame sizes, miter corners at 45° (using a miter box or miter saw). Glue the moldings to form rectangular frames on the wall. Temporarily secure with painter's tape until the adhesive sets.
Cornice installation—the finishing element at the top, under the ceiling.
Joint filling—fill and sand the corners of moldings, junctions with baseboard and cornice.
Painting—paint the moldings and walls inside the panels in chosen colors (monochrome—all one color, contrast—moldings white, walls colored or vice versa).
Result: A classic Parisian interior, whose walls speak of the owner's taste and status. Material cost for a 4×5 meter room, ceiling height 2.8 meters: moldings 15-25 thousand rubles, baseboard and cornice 5-8 thousand, adhesive and consumables 2-3 thousand. Total 22-36 thousand rubles + 20-30 hours of work (DIY) or 30-50 thousand for installation (by a crew).
3D panels made of polyurethane: modern relief
An alternative to classic boiserie—3D panels made of polyurethanewith volumetric relief. These are not moldings forming frames, but solid panels typically sized 500×500 mm or 600×600 mm with a three-dimensional pattern on the front surface.
Types of 3D panel reliefs
Geometric: squares, rhombuses, hexagons, waves, zigzags. Modern style, minimalism, hi-tech. Relief depth of 10-30 mm creates shadows that change throughout the day (as the sun moves or with artificial lighting).
Floral: leaves, flowers, branches. Eco-style, Provence, classic with modern interpretation. Relief depth of 15-40 mm, detailed texture of leaves.
Abstract: chaotic lines, spots, swirls. Art interiors, eclecticism, avant-garde. Variable depth relief of 5-50 mm creates complex light play.
Material imitations: brickwork, stone wall, wood (planks, beams). Loft, country, rustic. Relief accurately reproduces the texture of the original material.
Advantages of 3D panels over traditional materials
Weight: a polyurethane 3D panel 600×600 mm weighs 400-800 grams compared to 8-15 kg for a similar gypsum panel. Installation with adhesive without wall reinforcement, does not overload the structure (critical for drywall partitions).
Moisture resistance: polyurethane does not absorb water, does not swell, does not mold. Suitable for bathrooms, kitchens, damp areas (gypsum panels deteriorate there in 2-3 years).
Ease of processing: cut with a handsaw, installed with regular adhesive, painted with acrylic paints. Gypsum panels require special adhesive, are difficult to process (dusty when cutting, crumble).
Price: a polyurethane 3D panel 600×600 mm costs 800-2500 rubles depending on relief complexity. A similar gypsum panel 1500-4000 rubles. Plus savings on installation (polyurethane installs faster, cheaper).
Installation of 3D panels: step by step
Wall preparation—surface must be level (variations no more than 3-5 mm over 2 meters), clean, dry, primed. Irregularities are compensated with a layer of plaster or filler.
Marking—draw a grid of panel placement on the wall. Start from the center of the wall (central panels whole, trimming only at edges—visually more correct) or from a corner (if the wall is fully visible and symmetry is not critical).
Adhesive application—use polyurethane adhesive (Cosmofen, Moment Crystal) or acrylic mounting adhesive (Moment Montage). Apply adhesive to the back of the panel in dots (5-7 points 30-50 mm in diameter around perimeter and center) or in strips (around perimeter + cross in center).
Panel installation—place the panel on the wall according to markings, press firmly for 30-60 seconds (polyurethane adhesive sets quickly). Check horizontality and verticality with a level.
Installation of subsequent panels—panels are installed butt-jointed (gap 0-1 mm) or with minimal seam (1-2 mm). Relief of adjacent panels should match in pattern (if relief is regular—geometric pattern) or create a random pattern (if relief is chaotic).
Seam filling—if seams between panels are 1-2 mm, fill them with acrylic filler, smooth flush with surface using a rubber spatula. After drying, sand with P220. Seams will become invisible.
Painting—3D panels come white primed. Paint with acrylic paint in desired color (roller with short nap for base color, then use brush or sponge to highlight raised relief parts with contrasting shade—creates volume, emphasizes 3D effect).
Result: An accent wall with a three-dimensional relief that changes depending on the lighting. Cost of materials for a 3×2.5 meter wall (area 7.5 m²): 3D panels 600×600 mm, 21 pieces × 1500 rub. = 31,500 rubles. Adhesive, putty, paint 3000 rubles. Total 34,500 rubles + 6-8 hours of work.
Vertical zoning: architecture without partitions
A long wall (4-6 meters) without division looks monotonous.Wall panels made of polyurethanecreate vertical zoning — the wall is divided into sections by vertical moldings or pilasters, each section is perceived separately, monotony disappears.
Vertical zoning technique with pilasters
Pilasters (flat half-columns) are installed on the wall vertically at intervals of 100-150 cm. They form a rhythmic row of vertical accents, dividing the wall into piers.
Components of a pilaster:
Base (footing) height 15-30 cm, width slightly larger than the shaft.
Shaft (vertical part) height from floor to the start of the cornice (e.g., 2.4-2.6 meters with a ceiling height of 2.8 meters), width 80-150 mm, with flutes (vertical grooves) or smooth.
Capital (top) height 20-50 cm, width larger than the shaft, with ornamentation (volutes, acanthus leaves) or simple geometric.
Installation:
Mark the vertical axes of the pilasters on the wall (with a laser level or plumb line strictly vertical).
Glue the pilaster bases at the level of the baseboard (the base can be on top of the baseboard or replace a section of the baseboard).
Glue the shafts — vertically along the axis, from the base to the level of the cornice.
Glue the capitals on top of the shafts.
Result: A long wall in a living room or corridor is divided into sections 100-150 cm wide, each section is an architectural unit. Between the pilasters, paintings, mirrors, furniture (consoles, chests of drawers) are placed. Visual monotony disappears, rhythm and classical architectural character appear.
Zoning with vertical moldings
A more restrained option — instead of pilasters, narrow vertical moldings (width 50-80 mm) are used, running from the baseboard to the cornice. Interval 80-120 cm. The moldings form vertical stripes, breaking the wall into panels.
Inside the panels between the moldings — smooth painted wall, wallpaper, fabric, mirrors. The panels can be identical (regular rhythm) or alternate in width (narrow-wide-narrow — creates dynamism).
Protective panels: practicality in hallways and corridors
The lower part of walls in hallways, corridors, and children's rooms is subjected to mechanical impacts — hits from bags, suitcases, children's toys, friction from clothing, furniture. Paint gets scratched, wallpaper tears, the wall loses its appearance in 1-2 years.
decorative wall panelsmade of polyurethane protect the lower zone, creating a durable decorative layer.
Construction of protective panels
Panel height: 80-120 cm from the floor — the zone of maximum risk of damage.
Material: polyurethane with a density of 300-400 kg/m³ (high strength, does not dent upon impact), thickness of panels or moldings 10-20 mm.
Configuration:
Option 1: solid panels (flat sheets 600×1000 mm, mounted horizontally, forming a lower wall belt).
Option 2: molding frames (moldings form rectangular sections 80-100 cm high, inside the sections the wall is painted with a darker paint or covered with washable wallpaper).
Upper border of panels: a horizontal molding 80-100 mm wide (massive, noticeable), separating the protective zone from the upper part of the wall.
Advantages over other solutions
MDF panels: cheaper (3000-8000 rub/m² with installation), but heavier (mounted on a frame, take up space), afraid of moisture (in the hallway in winter, dampness from snow on shoes — MDF swells).
PVC panels: moisture-resistant, cheap (1500-4000 rub/m²), but look cheap (characteristic plastic shine, seams between panels are visible), not suitable for classic and premium interiors.
Polyurethane panels/moldings: medium price (5000-12000 rub/m² with materials and installation), lightweight (glued directly to the wall without a frame), moisture-resistant, after painting visually indistinguishable from gypsum stucco or wood, suitable for any style from classic to contemporary.
Installation of protective panels
Wall preparation — leveling, priming.
Installation of horizontal border molding at a height of 80-120 cm around the perimeter of the room.
Installation of vertical moldings (if a frame system is used) — form panels 60-100 cm wide.
Painting the lower zone (inside the frames) in a darker or contrasting color. Dark colors hide dirt better than light ones. Use washable paints (latex, acrylic for wet areas).
Installation of baseboard — completes the composition from below.
Result: A hallway or corridor with a protected lower wall zone, resistant to mechanical damage, easy to clean. Visually — a classic panel system, stylish, architectural. Practically — the service life until the next renovation increases from 2-3 years to 10-15 years.
Accent wall in the living room: focus of attention
The living room is the center of the apartment, a place for receiving guests, family gatherings. One wall (usually behind the sofa or TV) is made an accent — highlighted with decor, different from the others.
Options for accenting with stucco
Large central panel: on the wall behind the sofa, moldings form one large rectangular frame (width 2-3 meters, height 1.5-2 meters). Inside the frame — a contrasting color, wallpaper with a pattern, fabric, mirror. The frame attracts attention, creates a compositional center.
Symmetrical panel system: the wall is divided into 3-5 vertical panels of equal width by moldings. The central panel can be wider than the side ones. Inside the panels — different finishes (central — mirror, side — wallpaper) or the same, but with decorative overlays in the centers.
3D panels on the entire wall: the entire accent wall is covered with 3D panels with relief. Creates maximum visual effect, texture, volume.
Combination of moldings and 3D panels: moldings form frames, inside the frames — 3D panels or a smooth wall with large decorative overlays (cartouches, rosettes with a diameter of 300-500 mm).
Color solutions for accent wall
Contrasting color: other walls are white or light gray, accent wall — dark blue, emerald, burgundy. Moldings are white, contrast with the colored background, creating graphic quality.
Monochromatic gradation: all walls are the same color (e.g., beige), accent wall is one or two shades darker (dark beige, brownish). Moldings in the color of the accent wall — only the relief is visible, not the color. Creates subtle, sophisticated accentuation.
Metallic: accent wall is painted with paint with a metallic effect (gold, silver, bronze), moldings are white or in the tone of the metallic. Luxury, glamour, art deco style.
Wallpaper inside panels: moldings are white, form frames, inside the frames — wallpaper with a pattern (damask, floral patterns, geometry). A classic technique, works in traditional interiors.
Installation of wall stucco: error-free technology
The quality of the result is 70% dependent on installation accuracy. Crookedly glued moldings, uneven joints, visible seams ruin the impression, even if the materials are expensive and the design is well thought out.
Wall preparation: requirements for the base
Evenness: deviations no more than 3-5 mm over 2 meters. Checked with a straightedge or a 2-meter level. Large deviations are compensated with plaster or a thick layer of putty.
Cleanliness: dust, grease stains, old wallpaper are removed. The wall is washed and dried.
Primer: mandatory. Primer improves adhesive adhesion, strengthens the base, reduces moisture absorption from the adhesive (the adhesive does not dry too quickly, has time to gain strength). Use an acrylic deep-penetration primer.
Pre-painting (optional): if you plan to paint the walls and moldings in different colors, paint the wall BEFORE installing the moldings. This eliminates the need to carefully paint around the moldings (labor-intensive, requires painter's tape, risk of drips). Moldings are painted separately after installation.
Marking: precision above all
Use a laser level (projects horizontal and vertical lines onto walls) or a regular 1-2 meter bubble level + pencil.
Marking sequence:
Mark the heights of horizontal moldings (boundary of the plinth zone, boundary of the frieze zone, cornice height). Project a horizontal line at the required height using a laser level, trace it with a pencil around the perimeter of the room.
Mark the vertical axes of the panels. Find the center of the wall (wall width ÷ 2), mark a vertical line through the center. From the center, measure distances to the panel boundaries (symmetrically left and right).
Mark the boundaries of molding frames inside the panels. Measure the frame dimensions, mark them from the panel axes, draw rectangles.
Check the markings: measure the diagonals of the frame rectangles — they should be equal (if not, the rectangle is skewed, marking is incorrect). Measure distances from room corners to panel boundaries on opposite walls — they should be equal (symmetry).
Cutting and mitering moldings
Straight cuts (90°): use a regular fine-toothed hacksaw for metal. Cut perpendicular to the length of the molding.
Angled cuts (45°): use a miter box (plastic for 500 rubles or aluminum for 2000 rubles) or a miter saw (from 5000 rubles). 45° angle for joining moldings at frame corners.
Cut cleanliness: after cutting, sand the end with P180-220 sandpaper — remove burrs, make the surface smooth for a tight joint.
Adhesion: glue and fixation
Adhesive: polyurethane (Cosmofen Plus, Moment Crystal) for quick setting (30-90 seconds) or acrylic mounting adhesive (Moment Montage, Titan) for savings (2-3 times cheaper), but requires fixing for 15-30 minutes.
Applying adhesive: apply a thin strip (3-5 mm diameter) along the center of the back side of the molding along its entire length. Do not apply too much — it will squeeze out when pressed and stain the wall.
Gluing: place the molding on the wall according to the markings, press firmly for 30-60 seconds (polyurethane adhesive) or 10-20 seconds + fix with painter's tape (acrylic adhesive). Tape is applied perpendicular to the molding, pressing it to the wall, and removed after 2-4 hours once the adhesive has set.
Molding joints: join tightly, gap 0-0.5 mm. If the gap is larger — fill with acrylic putty, smooth with a finger flush with the surface. After drying, sand with P220, the joint will become invisible.
Painting: the final touch
Primer (if required): if the factory primer on the moldings is damaged during installation (scratches, adhesive stains), re-prime with white acrylic primer using a brush.
Painting moldings: use acrylic paint (water-based for walls and ceilings or special for stucco). Paint with a brush (50-80 mm width, synthetic bristles) or a short-nap roller. Two to three thin coats are better than one thick coat (less drips, more even coverage).
Painting walls inside panels: if the walls were not painted before installing the moldings, paint after installation. Protect the moldings with painter's tape (apply along the molding at the border with the wall), paint the wall with a roller, remove the tape immediately after painting (while the paint is still wet — if tape remains on dried paint, it may peel the paint off when removed).
Installation mistakes and how to avoid them
Error 1: Installing on an uneven wall
The molding follows the wall's unevenness — if the wall is wavy, the molding will also be wavy. This is very noticeable visually, especially with side lighting (shadows emphasize the unevenness).
Solution: level the walls with plaster or a thick layer of putty BEFORE installing the stucco. Variations should not exceed 3 mm over 2 meters.
Error 2: Lack of marking or inaccurate marking
Moldings are glued 'by eye,' without preliminary marking. Result — panels of different sizes, asymmetrical, skewed. Amateurish, cheap look.
Solution: spend 2-3 hours on careful marking. Use a laser level, tape measure, pencil. Check symmetry, right angles (diagonals), horizontality and verticality of lines.
Error 3: Poor corner joining
Moldings at frame corners join with gaps of 2-5 mm, ends do not align in height (step). Joints are visible, spoil the impression.
Solution: use a quality miter box or miter saw for precise 45° cuts. Check angle accuracy with a test cut (cut two pieces of molding, join them — they should form a right angle without a gap). Fill gaps up to 1 mm with putty, sand.
Error 4: Excess adhesive
Adhesive squeezes out from under the molding when pressed, stains the wall, hardens into droplets. Removing dried adhesive is difficult (scratches the wall).
Solution: apply adhesive in a thin strip (3-5 mm diameter). Wipe away squeezed-out adhesive immediately with a damp cloth (before it sets).
Error 5: Painting without primer
Paint on unprimed polyurethane applies unevenly, adheres poorly, peels off after 1-2 years.
Solution: always prime before painting. The factory white primer on moldings is usually sufficient, but if damaged — re-prime.
Frequently Asked Questions about Wall Molding
How much does it cost to create wainscoting in a 20 m² room?
Materials (moldings, baseboard, cornice, adhesive, paint) 25-40 thousand rubles depending on complexity (number of panels, width of moldings, presence of decorative overlays). DIY installation — free + 25-35 hours of work. Installation by a crew 35-60 thousand rubles. Total 25-100 thousand rubles turnkey.
Can molding be mounted on wallpaper?
Not recommended. The adhesive holds onto the wallpaper, but the wallpaper may peel off the wall under the weight of the molding after several months or years. If the wallpaper is sturdy (non-woven on adhesive, holds for 5+ years) and the molding is lightweight (narrow moldings, polyurethane) — the risk is minimal. But it's safer to install on a bare wall (plaster, putty, paint).
Does molding visually reduce a room?
Yes, slightly. Moldings protrude from the wall by 10-25 mm (profile thickness), visually consuming this distance. Plus, dark moldings on light walls create graphics that fragment the space. But the effect is minimal (loss of 2-5 cm around the perimeter, not critical even for small rooms). The visual expressiveness that molding provides compensates for this loss.
Is polyurethane molding suitable for bathrooms?
Yes, polyurethane is moisture-resistant (does not absorb water, does not swell, does not mold). Use moisture-resistant adhesive (polyurethane or acrylic for wet areas), moisture-resistant paint (latex, acrylic for bathrooms). Molding in the bathroom creates a classic style (wainscoting around the bathtub, panels on walls), looks luxurious.
Can molding be removed without damaging the wall?
Difficult. Molding is glued permanently — polyurethane adhesive holds for decades. Removal — cutting off the molding with a sharp knife, removing adhesive residue with a sander or solvent. The wall gets damaged (scratches, chips in paint/plaster), requires repair (putty, sanding, painting). Therefore, molding is a long-term solution, not for temporary decor.
How to care for wall molding?
Dust — wipe with a dry cloth or vacuum with a soft brush attachment once a month. Stains (spots, fingerprints) — damp cloth with soapy solution, then wipe dry. Do not use abrasives (scratch the paint), solvents (soften polyurethane). If the paint has worn off (in areas of frequent contact — corners, protruding elements) — touch up with a brush.
Conclusion: The Wall as Architecture
Walls are not just partitions dividing space. In the hands of someone who understands the possibilities of decor, a wall becomes an architectural element, a bearer of style, a storyteller about the owner's taste and status. A bare plane is silent. A wall with molding says: here lives a person who values classical aesthetics, understands proportions, respects traditions, but is not afraid to adapt them to modernity.
Wall polyurethane molding is the tool for this transformation. Affordable (materials for a 20 m² room cost 25-40 thousand instead of 200-500 thousand for wooden wainscoting), lightweight (installation without wall reinforcement, without frames), versatile (suits any style from strict classic to modern neoclassical), durable (lasts 20-30 years without repair).
Creating wall panels is not just installing moldings. It is designing a composition (panel proportions, their placement, symmetry), selecting profiles (simple or carved, narrow or wide), color solutions (monochrome or contrast, light or dark), working with space (zoning, accenting, visual correction of room proportions). This is a creative process requiring taste, understanding, attention to detail.
The result exceeds expectations. A standard apartment with bare walls turns into a classic interior, worthy of magazines and admiration from guests. A long boring corridor gains architectural articulation, ceases to be a utilitarian passage, becomes part of the living space. The living room gets an accent wall that draws the eye, sets the tone for the entire interior. The hallway — protected lower panels that will retain a fresh look for years, without requiring touch-ups and repairs.
Company STAVROS — your source of materials and expertise for creating wall molding. Over twenty years in the architectural decor market, own production in St. Petersburg, thousands of completed projects from apartments to palaces.
STAVROS polyurethane molding assortment — over 150 profiles for wall panels: from simple rectangular (width 30-60 mm, price from 150 rub./meter) to complex classical with ornament (dentils, egg-and-dart, acanthus leaves, width 80-120 mm, price up to 800 rub./meter). Polyurethane density 300-350 kg/m³ — maximum relief clarity, strength, durability. White factory primer — ready for painting without additional preparation. Strip length 2 meters — minimum joints, saves installation time.
STAVROS pilasters and decorative elements — bases, shafts, capitals for vertical wall zoning, rosettes and overlays for accenting panels. Over 50 designs from simple geometric to lush baroque. Price from 800 to 8000 rubles per element depending on size and complexity.
STAVROS baseboards and cornices — mandatory elements of wall panel systems. Baseboard height from 80 to 200 mm, cornice width from 50 to 250 mm. Profiles from simple to carved. Price from 200 to 1500 rub./meter.
STAVROS design services — designers will create a sketch of wall panels for your space, calculate proportions (ratio of zone heights, panel width, placement of vertical elements), select molding profiles to match the interior style, calculate material quantities down to the meter, prepare an estimate. After approval, all elements are manufactured and supplied as a kit, ready for installation. Design service 5-15 thousand rubles depending on complexity (pays for itself in material savings — no overpayment for excess, no shortage — everything calculated precisely).
Professional installation by STAVROS partners — crews with 10-15 years of experience will perform turnkey wall panel installation: wall preparation (leveling, priming), marking (laser level, symmetry, precision), molding installation (mitering corners, gluing, fixing), joint puttying (invisible seams), painting (moldings + walls, two-three coats, perfect finish). Work timeframe for a 20 m² room — 5-7 days. Price 35-60 thousand rubles depending on complexity. 24-month warranty on materials and work.
Choose STAVROS — choose quality materials for wall molding, proven technologies, expert support from project to implementation. Your walls deserve architecture. Your interior deserves classic. Your home deserves STAVROS molding. Create! Decorate! Create a space that inspires!