Article Contents:
- The 2026 DIY Revolution: Why Handmade is Back in Style
- Sociocultural Reasons for the Handmade Decor Boom
- The Economic Factor: DIY as Smart Savings
- Educational Accessibility: YouTube Masters and Online Courses
- Tool Accessibility: Leroy Merlin Instead of Shortages
- Wood Carving for Beginners: From Simple to Beautiful
- Choosing Wood for First Attempts
- Carver's Tools: The Minimal Set
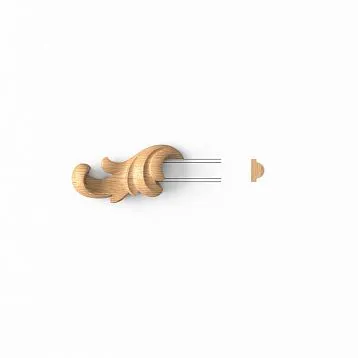
- First Project: Geometric Rosette
- Second Project: Plant Overlay — Leaf
- Typical Mistakes of Beginner Carvers
- Installing Polyurethane Molding: Professional Results by Hand
- Surface Preparation: The Foundation of Quality
- Tools for Installing Molding
- Step-by-Step Ceiling Cornice Installation
- Installing Wall Molding: Creating Panels
- Common Mistakes in Molding Installation
- Decorating Wooden Blanks: Transforming Simple into Beautiful
- Staining: Playing with Color and Texture
- Patination: Noble Aging
- Gilding: A Touch of Luxury
- Brushing: emphasizing texture
- Combining DIY and Professional: A Smart Hybrid
- What to Do Yourself
- What to Buy Ready-Made
- Hybrid Interior Scheme
- Frequently Asked Questions About DIY Decor
- How Much Time Does Creating a Carved Element Really Take
- Can You Learn Carving from Videos or Do You Need a Live Teacher
- What Glue is Best for Installing Polyurethane Molding
- Will the Molding Fall Off if I Glue It Myself
- How much does a basic DIY decor toolset cost?
- Can homemade decor ruin an interior?
- Where to get wood for carving
- Conclusion: hands build a home, and a home builds a soul
- STAVROS: professional materials for your DIY project

There's a special pleasure in touching a wall and knowing: I made this. With my own hands. Myself. From sketch to final nail. In an era when everything can be ordered with a click, when designers are ready to take on every decision,creating decorative elementsby hand is experiencing an incredible renaissance.
Why? Because people are tired of sameness. Of interiors copied from Instagram. Of furniture you see in every third apartment. DIY decor isn't just about saving money (though that's important too). It's a manifesto of individuality, an assertion of the right to uniqueness, a return to the roots when a person was the creator of their space, not a consumer of ready-made solutions.
But DIY in classic decor is no easy task. Wood carving requires skill, tools, patience. Installing polyurethane molding seems simple until you encounter crooked walls, incorrect angles, joints that stubbornly refuse to align. And finishing techniques — patination, gilding, toning — are a whole science where one wrong brushstroke can ruin weeks of work.
Can you master this on your own? Which elements can realistically be made by hand, and which are better tobuy wooden decorready-made? How to followinstructions for installing polyurethane moldingso the result is indistinguishable from professional work? What tools are necessary, which materials to choose, how to avoid typical beginner mistakes?
In this article, we'll walk the full path of a DIY master — from the first sketch on paper to the final stroke of gold paint. We'll analyze why the trend of independentwooden decor by handexploded the interior sphere in 2026. We'll learn to carve simple but effective elements from wood, even if you've never held a chisel. We'll step-by-step install polyurethane molding, avoiding the mistakes that trip up 90% of beginners. We'll master techniques fordecorating wooden blanks— patination, gilding, artificial aging. And we'll learn to combine homemade and professionally made items, creating an interior where handmade soulfulness coexists with impeccable quality.
Ready to roll up your sleeves? Welcome to the workshop.


The 2026 DIY Revolution: Why Working with Your Hands is Back in Style
Ten years ago, admitting you made decor yourself was almost embarrassing. DIY was associated with poverty, inability to hire professionals, amateurism. Today, everything has flipped.


Sociocultural reasons for the homemade decor boom
Pandemic legacy: The quarantines of the 2020s taught people to spend time at home not as in a prison, but as in a creative lab. The inability to go out sparked a wave of home creativity. People baked bread, grew plants, crafted furniture. And discovered: working with your hands is therapeutic, meditative, brings satisfaction unattainable by buying ready-made.
Revolt against mass-market: IKEA, Zara Home, H&M Home flooded the market with identical furniture and decor. Entering an apartment, you have an 80% chance of seeing a familiar chair, a known shelf, a popular painting. People are tired. Homemade decor is a way to break out of the matrix of sameness, to create a space that no one else has.
Environmental consciousness: Mass production = deforestation, CO₂ emissions, labor exploitation. DIY from recycled materials, old wood, secondary raw materials is a manifesto of environmental responsibility. You don't buy new — you transform the old.
Digital fatigue: The generation raised with gadgets paradoxically gravitates toward the analog. After eight hours in front of a monitor, you don't want virtual reality, but tactility — wood under your hands, the smell of sawdust, the marks of a chisel. Working with your hands returns you to physicality, to reality, to presence here and now.
Our factory also produces:


Economic factor: DIY as smart saving
A professional decorator will install polyurethane moldings around a 20 m² room for 80-120 thousand rubles (materials + labor). Self-installation of the same moldings will cost 20-30 thousand (materials only). Savings of 60-90 thousand on one room.
A carved wooden overlay measuring 30×40 cm made of oak by a master costs 15-25 thousand rubles. Carving it yourself (buying a blank for 1500 rubles, tools for 5000) — savings of 10-20 thousand per element. If you make ten elements — savings of 100-200 thousand.
Of course, your time is also worth money. But if the process brings pleasure (and for many it does), you're not paying with time, you're getting a bonus — the joy of creativity plus budget savings.
Get Consultation
Educational accessibility: YouTube masters and online courses
Previously, learning wood carving was only possible at a technical school or from a master (time-consuming, expensive, requires regularity). Today, YouTube is overflowing with channels of master carvers showing every movement of the chisel. Online courses (Skillbox, Coursera, specialized platforms) provide structured training for 5-15 thousand rubles.
Installing molding is even simpler — dozens of detailed video instructions, articles with photos of each step. The information is free, available 24/7, and can be rewatched as many times as you like.
Tool accessibility: Leroy Merlin instead of scarcity
In the USSR, getting a chisel was difficult, quality tools — almost impossible. Today, any construction hypermarket has a full set of chisels, saws, sanding machines, glue guns, paint brushes. Prices are affordable (a basic carving set — 5-8 thousand rubles, for installing molding — 3-5 thousand).
Tool rental (if you don't want to buy) is available in the same stores. A sander for the weekend — 500-800 rubles. Try it, figure out what you need — then buy your own.
Wood carving for beginners: from simple to beautiful
Wood carving is an ancient craft, shrouded in myths about its complexity. Yes, creating an iconostasis at the level of 17th-century masters requires decades of training. But carving a simple yet effective overlay for interior decor is a task achievable within a few weeks of practice.
Choosing wood for first attempts
For learning, you need soft, homogeneous, inexpensive wood. Linden is ideal — soft (the chisel glides like butter), homogeneous (no hard and soft layers, no knots), light (all marking lines are visible). A linden blank 20×30 cm, 2 cm thick — 300-500 rubles.
Alternative — alder (slightly harder than linden, but also good for learning, pinkish hue). Avoid at the initial stage: pine (resinous, chisel sticks, knots), oak (too hard for a beginner, chisel dulls quickly), birch (hard, fibrous, prone to chipping).
Carver's tools: minimal set
You don't need dozens of tools. Initial set:
Chisels (3-5 pieces):
-
Flat chisel 10 mm wide (for straight lines, background removal)
-
Semi-circular chisel 8 mm wide, medium curvature (universal, for most cuts)
-
Cerazik (narrow semi-circular chisel 3-5 mm wide, for fine details)
-
V-tool (V-shaped chisel, for contour carving, cutting lines)
Quality chisels (Russian brands: Tatyanka, Narex, imported: Pfeil) cost 800-1500 rubles each. A set of 5 chisels — 5-7 thousand rubles. Will last decades with proper care.
Sloyd knife: Short knife (blade length 3-5 cm) with a slanted cut, angle 30-45 degrees. For contour carving, fine trimming. Price 600-1200 rubles.
Sharpening stones: Chisels dull, need regular sharpening. A set of water stones (grit 1000, 3000, 8000) — 3-5 thousand rubles. Alternative — diamond stones (more expensive, but more durable).
Auxiliary:
-
Bench vise or clamps (securing the workpiece, both hands free for work)
-
Pencil, tracing paper (transferring the drawing onto the wood)
-
Sandpaper (grit 120, 180, 240 — for sanding the finished carving)
First project: geometric rosette
Don't start with acanthus leaves. Start with geometry — it forgives mistakes, teaches tool control, gives quick results.
Project: Round rosette 12 cm in diameter, workpiece thickness 2 cm, relief 0.5 cm. Pattern — radial rays (12 pieces, radiating from the center), triangular recesses between the rays.
Step 1: Marking. On the workpiece, draw a circle 12 cm in diameter with a compass. Divide the circle into 12 equal parts (30-degree angle), draw radii from the center. You get 12 sectors.
Step 2: Selecting the triangles. Using a semicircular chisel (8 mm wide), we select triangular recesses between the rays. The chisel is held at a 30-40 degree angle to the surface, with the chisel's nose pointing towards the center of the circle. With a light mallet tap (or hand pressure if the wood is soft), we deepen the chisel by 3-5 mm. Repeat around the entire perimeter of the triangle. The volume is gradually removed.
Step 3: Forming the rays. We process the rays (the sectors left unselected) with a flat chisel, chamfering the edges. The ray becomes convex, three-sided. The center of the ray is higher, the edges are beveled towards the triangles.
Step 4: Working on the center. In the center of the rosette (where all rays converge), we carve a small circle 1-1.5 cm in diameter with a skew knife, deepening it by 2-3 mm. Inside the circle, we carve a small rosette (4-6 petals) with a veiner.
Step 5: Sanding. We sand the carving with sandpaper (starting with P120, then P180, finishing with P240), removing fuzz and smoothing transitions. Don't overdo it — perfect smoothness isn't needed; slight roughness (tool marks) adds liveliness to handcrafted work.
Time to make: For a beginner — 3-5 hours. After practice (5-10 rosettes), the time reduces to 1-1.5 hours.
Application: The rosette is glued to a wall (as an accent element), onto a furniture facade (the center of a dresser drawer), or onto a door panel. After finishing (varnish, stain, patina), it looks professional.
Second project: Plant overlay — leaf
After geometry, we move to organic forms. A leaf is a simple, recognizable motif that teaches working with curved lines.
Project: Overlay 10×20 cm, thickness 1.5 cm, relief 0.5 cm. Image — an oak leaf (recognizable shape, doesn't require botanical accuracy).
Step 1: Sketch. We draw an oak leaf on paper (can be copied from the internet, simplified to main lines). Transfer it to tracing paper, then to the wood (tracing paper is placed on the blank, lines are traced with a pencil under pressure, leaving an imprint on the wood).
Step 2: Outline cutting. We cut the leaf outline with a skew knife or V-shaped chisel — a 2-3 mm deep groove along all lines (leaf edge, central vein, side veins). These are boundaries that will not be removed.
Step 3: Background removal. We remove the background around the leaf with a flat chisel — deepen it by 5-7 mm. The leaf remains at the original surface level, the background is lowered — creating relief.
Step 4: Modeling the leaf. We process the leaf surface with a semicircular chisel, creating volume. The central vein is the highest line. From it, the leaf slopes down towards the edges, creating convexity. We cut the side veins with a veiner — thin grooves radiating from the central vein to the edges.
Step 5: Detailing. We trim the leaf edges (characteristic oak leaf serrations) with a knife, creating relief. You can add light texture (small scratches imitating veins) — applied with the tip of a knife or a thin chisel.
Step 6: Sanding and finish. We sand carefully (so as not to erase details). Finish: stain (darkens, emphasizes relief), then varnish (matte or semi-matte, 2-3 coats).
Time: 5-8 hours for a beginner, 2-3 hours after practice.
Typical mistakes of beginner carvers
Dull tool: Carving with a dull chisel is torture. The cutter doesn't cut, it crushes the wood, tearing the fibers. Sharpening should be razor-sharp — test: the chisel easily cuts paper while held in the air.
Carving against the grain: Wood has a grain direction. You must cut with the grain or across it. Carving against the grain leads to chips and tear-outs. Determine the direction: run your hand over the blank — smooth in one direction, fibers feel rough in the other (that's against).
Rushing: Carving requires a meditative state. Rushing leads to cutting off too much (impossible to correct, the blank is ruined). Better to spend an extra hour than to redo it.
Lack of a sketch: Carving without a preliminary drawing guarantees failure. Even professionals draw a sketch, refine details, and only then pick up a tool.
Ignoring safety techniques: A chisel is sharp and can slip. Always cut away from yourself, never place your other hand in front of the blade. Deep cuts, down to the bone, are not uncommon among beginners who ignore the rules.
Installing polyurethane molding: professional results with your own hands
Installing molding seems easier than carving. There's no need to create the form — it's ready, you just need to glue it. But the devil is in the details: crooked walls, uneven corners, joints that must be invisible. By followinginstructions for installing polyurethane molding, you will avoid 90% of mistakes.
Surface preparation: the foundation of quality
Molding is glued to walls/ceilings. If the surface is uneven, dusty, or crumbling — the elements will fall off within a month.
Inspection: Check walls for cracks, bumps, depressions. Place a long straightedge (2 meters) against the wall — gaps over 3 mm are unacceptable.
Leveling: If the wall is crooked (gaps of 5-10 mm), we level it with filler. Apply a layer of finishing filler (gypsum or polymer), smooth it with a wide spatula, let it dry (12-24 hours), sand with a sander using P120-P150 abrasive mesh.
Priming: Mandatory. Primer (acrylic deep penetration) strengthens the surface, reduces absorbency, improves adhesive bond. Apply with a roller in two coats (second after the first dries, interval 2-4 hours). Total drying time before installation — 24 hours.
Marking: Mark installation lines with a pencil and level. For a ceiling cornice — a horizontal line on the wall at a height equal to the cornice width (if the cornice is 10 cm, the line is 10 cm below the ceiling). For wall moldings — vertical and horizontal lines around the perimeter of future panels. Accuracy is critical — a 1 cm deviation over a 3-meter length is noticeable to the eye.
Tools for installing molding
Required:
-
Miter box (for cutting moldings at a 45-degree angle) — 500-1500 rubles, depending on size and precision
-
Fine-toothed saw (for cutting polyurethane) or miter saw (if budget allows, 5-15 thousand rubles)
-
Mounting adhesive (special for polyurethane molding, acrylic or polymer) — 300-500 rubles per 300 ml tube
-
Adhesive gun (if adhesive is in tubes) — 200-400 rubles
-
Putty knives (narrow 5 cm, wide 15 cm) — for applying adhesive, sealing joints
-
Painter's tape (for temporary fixation of elements until adhesive sets) — 50-100 rubles per roll
-
Sponge, container with water (for removing excess adhesive, putty)
-
Sandpaper P150-P220 (for sanding joints before painting)
-
Acrylic putty (for sealing joints) — 150-300 rubles per kilogram
Desirable:
-
Laser level (for precise horizontal/vertical marking) — 2-5 thousand rubles, but can be rented for a day for 300-500 rubles
-
Roller extension pole (for working with ceiling elements without a stepladder)
Step-by-step installation of ceiling cornice
Step 1: Quantity calculation. Measure the room's perimeter. Cornices are sold in 2-meter strips (standard). Divide the perimeter by 2, round up — you get the number of strips. Add 1-2 strips as spare (cutting errors, defects).
Step 2: Cutting corners. Room corners (internal 90 degrees) require cutting moldings at 45 degrees. Place the molding in the miter box (inverted — the part that glues to the ceiling lies at the bottom of the miter box, the part that goes to the wall is pressed against the miter box wall). Insert the saw into the miter box slot at a 45-degree angle, cut smoothly without pressure (polyurethane is soft, breaks with rough cutting).
Important: for the right and left elements of the corner, the cuts are mirrored. First cut the right element (45-degree angle to the left), then the left (45-degree angle to the right). Dry-fit to the corner — the joint should align perfectly. If there's a gap — correct with sandpaper or recut.
Step 3: Applying adhesive. Apply adhesive to both bonding surfaces of the molding (the one against the wall and the one against the ceiling). Apply in a snake pattern (wavy line) from the gun or in dots with a putty knife. Don't skimp — there should be enough adhesive, excess will squeeze out (we'll remove it later), but insufficient adhesive will cause peeling.
Step 4: Installation. Place the molding against the wall/ceiling, aligning the bottom edge with the marked line. Press along the entire length (evenly, without tilting). The adhesive begins to set in 1-2 minutes (depends on type), full setting in 10-20 minutes.
Step 5: Fixation. Until the adhesive sets, the molding may slide (especially if the wall isn't perfectly vertical). Secure with painter's tape — strips of tape every 50 cm, one end attached to the molding, the other to the wall above. Remove tape after 2-3 hours when the adhesive has set.
Step 6: Removing excess adhesive. Immediately remove adhesive that squeezed out from under the molding with a damp sponge (before it dries). Dried adhesive will need to be cut off with a knife and sanded — takes longer and risks damaging the molding.
Step 7: Sealing joints. Molding joints (corner, longitudinal when joining two strips) are rarely perfect — there are small gaps (1-2 mm). Seal with acrylic putty: apply putty into the gap with a narrow putty knife, smooth it, remove excess with a damp sponge. After drying (2-4 hours), sand with fine sandpaper (P220) — the joint becomes invisible.
Step 8: Painting. Polyurethane molding comes white, primed. Can be left as is (if walls/ceiling are white), or painted to match wall color or a contrasting color. Paint with water-based paint (acrylic, latex) using a roller or brush. Two coats with 4-6 hour intervals.
Installing wall moldings: creating panels
Moldings on walls (framing rectangular panels) — classic decor that visually structures the space.
Panel layout: Determine size and placement. Classic scheme: wall divided into 3-5 panels (vertical rectangles) height 120-180 cm, width 60-100 cm, with gaps of 15-25 cm. Panels placed symmetrically relative to the wall center.
Mark with pencil and level: horizontals (top and bottom of panels), verticals (left and right sides of each panel). Precision — millimeter, asymmetry is noticeable.
Cutting moldings: For a rectangular panel, need 4 molding pieces (two horizontals of equal length, two verticals of equal length). Corners cut at 45 degrees (as described above for cornice).
Installation: First glue horizontal moldings (top and bottom of panel), then verticals (left and right). Or vice versa — doesn't matter fundamentally, main thing is corners align. Technology identical to cornice installation: adhesive, pressing, fixation with tape, removing excess, sealing joints.
Typical mistakes when installing molding
Incorrect angle cutting: Angle is not 45 degrees (miter box is inaccurate, hand slipped) — joint with a gap. Correction: sanding adjustment (removing excess) or recutting a new piece.
Crooked marking: Line is not horizontal/vertical — molding is glued crookedly, noticeable. Prevention: use a level (preferably laser), check multiple times.
Insufficient adhesive: Saving on adhesive — molding is weakly glued, will fall off in a month. There should be enough adhesive to completely fill the space between the molding and the surface.
Ignoring preparation: Gluing to a dusty, uneven wall — guaranteed peeling. Preparation (priming, leveling) is not optional.
Rushing with painting: Painting before the adhesive and putty are completely dry (minimum 24 hours after installation) — paint may become blotchy, joints may sag. Patience is key.
Decorating wooden blanks: turning simple into beautiful
You have cut an overlay orpurchased wooden decorready-made. They look... ordinary. Light wood, smooth surface, no soul. Finishing techniquesdecorating wooden blankstransform the mundane into unique.
Staining: play of color and texture
Stain (beize) — a transparent composition that colors wood without hiding the grain. Penetrates the pores, changes color, emphasizes the pattern of annual rings.
Types of stains:
-
Water-based (water-based, eco-friendly, odorless, dry slowly 4-6 hours, raise wood fibers, require subsequent sanding)
-
Alcohol-based (alcohol-based, dry quickly 15-30 minutes, do not raise fibers, strong odor, work in a ventilated area)
-
Oil-based (oil-based, dry medium 2-3 hours, do not raise fibers, penetrate deeply, create rich color)
Application technique:
-
Sanding the blank (P180-P220) — surface should be smooth, without fibers.
-
Wiping with a damp cloth (removing dust), complete drying (30 minutes).
-
Applying stain with a brush (soft, natural bristle) or foam pad. Movements along the grain, evenly, without gaps. One coat is often insufficient (color is pale), apply 2-3 coats with intervals (drying time indicated on the can).
-
After complete drying (24 hours) final coating — varnish or oil (color protection, adding gloss or matte finish).
Effects: Light linden, stained to a walnut tone, looks like walnut (savings). Pine, stained dark brown, imitates stained oak. Colored stains (blue, green, red) are possible — for avant-garde interiors.
Patination: noble aging
Patina — the patina of time that wood acquires over decades. Natural patina — result of oxidation, soiling, wear. Artificial patina — imitation of this process in a few hours.
Classic patination technique:
-
Base painting. The blank is painted with acrylic paint of a base color (white, beige, gray). Paint should be opaque, applied with a brush in 1-2 coats. Drying 2-4 hours.
-
Applying patina. Patinating composition (acrylic paint of another color — gold, bronze, dark brown, diluted with water to milk consistency) is applied with a brush generously, covering the entire surface.
-
Wiping off patina. After 5-10 minutes (patina is still wet but has started to set) take a damp cloth or sponge and wipe the patina off the raised parts of the carving (tops of leaves, ridges of the ornament). Patina remains in the recesses (grooves, carving indentations). Effect: raised parts are light (base color), recesses are dark (patina) — volume is created, carving reads more clearly.
-
Final coating. After complete drying (24 hours) apply matte varnish or wax (patina protection, effect fixation).
Variations: White base + gold patina = French Provence, elegance. Gray base + black patina = loft, industrial style. Dark brown base + gold patina = classic, palatial.
Gilding: A Touch of Luxury
Real gold leaf (ultra-thin 24-karat gold sheets) is expensive (an 8×8 cm sheet costs 300-500 rubles; covering a 20×30 cm area requires 10-15 sheets = 3000-7500 rubles for material alone). For DIY, imitation gold leaf (made of brass, aluminum) is used — it's visually indistinguishable and costs 10 times less (a sheet of imitation gold leaf is 50-80 rubles).
Technique of gilding with imitation gold leaf:
-
Surface preparation. The workpiece must be perfectly smooth (any roughness will be visible under the gold). Sand to P320-P400, apply acrylic primer (2 coats), sand the primer with fine P400 sandpaper.
-
Applying size (adhesive for gold leaf). A special varnish that remains tacky for 1-3 hours (time indicated on the can, varies). Apply the size thinly and evenly with a brush. Wait until it dries to the right stage (test: touch with a finger and pull away — finger is sticky, but the size doesn't string).
-
Applying the gold leaf. The gold leaf sheet is extremely thin (0.0001 mm), tears from a breath. Pick it up with a gilder's tip brush (wide soft brush) or just with hands (in gloves), place it on the sized surface. The leaf instantly adheres. Gently smooth with a soft brush. Apply the next sheet overlapping by 2-3 mm (to avoid gaps). Remove excess leaf (overhanging edges) with a soft brush — it flakes off, leaving only the adhered gold.
-
Polishing. After 24 hours (size fully dried), polish the gold leaf with a soft cloth or cotton wool — the surface becomes shiny, mirror-like.
-
Protection. Gold leaf oxidizes in air (darkens), needs protection. Apply shellac varnish (traditional for gilding) or acrylic varnish (modern, easier to work with). Apply varnish with a soft brush, thin coat, without pressure (otherwise the gold leaf may be damaged).
Effects: Full gilding (entire surface) — for luxurious palace interiors. Partial gilding (only raised carving details, the rest painted) — a more restrained, modern option.
Brushing: highlighting texture
Brushing (from brush) — mechanical removal of soft wood fibers, leaving the hard ones. Creates expressive texture, an aged wood effect.
Technique:
-
Take a metal brush (brass or steel, stiff).
-
Brush along the wood grain with pressure. Soft fibers (light rings in annual rings) are scraped out, hard ones (dark) remain. The surface becomes textured, relief.
-
Remove dust, fuzz with a soft-bristle brush or vacuum.
-
Tone with stain (dark). Stain collects in the grooves (indentations from brushing), coloring them more intensely. The raised areas remain lighter. The texture contrast is enhanced.
-
Final finish with oil or wax (varnish is undesirable — it hides the tactile feel of the relief).
Application: A brushed carved overlay looks antique, a century old. An aged, authentic effect.
Combination of DIY and professional: a sensible hybrid
Doing everything yourself is heroic, but not always practical. Some elements are easier, cheaper, and better quality to buy ready-made.
What to do yourself
Simple geometric carved elements: Rosettes, overlays with rectangular or triangular motifs. Require time, but not high skill. Significant savings (homemade rosette — 500 rubles material + 5 hours labor, ready-made — 3000-5000 rubles).
Installation of ready-made molding: Installing polyurethane moldings, cornices, rosettes. Work is not technically difficult (after watching instructions), saving 50-70% on installer services (labor costs as much or more than materials).
Finishing blanks: Staining, patinating, brushing ready-made elements. A creative process, not requiring special equipment, allowing personalization of decor (your color scheme, your effect).
Decorative shelves, frames:Wooden decor by handas functional items (shelves from old boards, frames from found branches) — creative, unique, cheap.
What to buy ready-made
Complex botanical carved elements: Acanthus leaves, lush Baroque cartouches, multi-layered bas-reliefs. Carving requires years of training. A beginner's attempt will look amateurish. Ready-made elements from professionals are expensive, but look professional.
Large molding (rosettes 80+ cm in diameter, column capitals): Size requires precision hard to achieve at home. Factory casting guarantees geometry, symmetry.
Custom carved furniture: Creating a chair with carved legs and back — a task of months of work, requiring carpentry skills, many tools. Buying ready-made is a sensible choice.
Specialized elements (capitals, consoles of complex shapes): Architectural details requiring knowledge of the order system, proportions. An error in proportions — and the element looks clumsy. Trust manufacturers who know canonical dimensions.
Hybrid interior scheme
Ceiling: Polyurethane cornice (store-bought, 2000 rubles per linear meter) + polyurethane ceiling rosette (store-bought, 4000 rubles). You install it yourself (saving 30-50 thousand on installers). Total: 20-25 thousand for materials + your labor.
Walls: Polyurethane moldings for panels (store-bought, 800 rubles per meter, need 40 meters = 32 thousand) + wooden carved overlays for panel centers (handmade, 6 pieces, 5 hours each = 30 hours of labor + 3000 rubles for materials). You install the moldings yourself. Total: 35 thousand + your labor.
Furniture: Store-bought dresser (classical, without carving, 80 thousand) + handmade carved overlays for the fronts (3 pieces, 15 hours + 2000 rubles for materials), self-patinated (gold + white base). Total: 82 thousand + your labor, but the result is unique, you won't find one like it anywhere.
Savings: A similar interior, done by professionals (designers + installers + carvers) would cost 300-400 thousand rubles. Hybrid DIY + ready-made = 140-150 thousand + your labor (approximately 100 hours, spread over 2-3 months). Savings of 150-250 thousand rubles plus the satisfaction of creating your own space.
Frequently Asked Questions about DIY Decor
How much time does it really take to create a carved element
For a beginner, the first simple rosette — 5-8 hours. After practice (5-10 elements), the time reduces to 2-3 hours. A complex floral element (leaf, flower) — 8-12 hours for a beginner, 4-6 hours for an experienced person.
Can you learn carving from videos or do you need a live teacher
Basic skills can be learned from videos (YouTube abounds with detailed tutorials). For nuances (proper sharpening, complex techniques) a masterclass is desirable (offline or online with feedback). But you can start on your own.
What glue is best for installing polyurethane molding
Specialized acrylic glue for polyurethane (brands: Orac Decor FDP500, Decomaster, Europlast). Price 300-500 rubles per 300 ml tube. Do not use universal construction glue (holds worse), solvent-based liquid nails (dissolves polyurethane).
Will the molding fall off if I glue it myself
It won't fall off if the conditions are met: the surface is prepared (flat, primed), enough glue is used, the element is fixed until the glue sets. Professionals do the same — the difference is only in speed (experience), not in technology.
How much does a minimal set of tools for DIY decor cost
Wood carving: 8-10 thousand rubles (5 chisels, knife, sharpening stones, clamp, sandpaper). Molding installation: 3-5 thousand rubles (miter box, saw, glue, spatulas, level). Finishing: 2-3 thousand (stains, paints, brushes, patinating compounds). Total: 13-18 thousand rubles to start, the tools last for years.
Can you ruin an interior with homemade decor
You can, if you don't observe moderation. Mistakes: overloading (too many disparate elements), low quality of execution (crooked carving, sloppy installation), style mismatch (baroque carving in minimalism). Prevention: do less, but better; study the interior style; ask for feedback (show your work to people with a sense of taste).
Where to get wood for carving
Construction hypermarkets (Leroy Merlin, Maxidom) — blanks made of pine, linden. Specialized stores for carvers (online: Tatianka.ru, Rezba.Market) — choice of species, sizes, quality drying. Recycled wood (old boards, pallets) — free, but requires processing (sanding, resin removal).
Conclusion: hands create a home, and a home creates a soul
creating decorative elementsDIY decor — is not just a way to save money or fill free time. It is a return to the original meaning of a home — a space that a person creates for themselves, into which they invest energy, labor, love.
We live in an era of alienation from the results of labor. Most people work in offices, creating abstractions — spreadsheets, presentations, code. The connection between effort and result is broken. You worked for a month — and what do you have in your hands? Numbers in a banking app. There is nothing material, tangible, that you can touch and say: I made this.
A carved overlay on the wall, moldings framing panels, a patinated mirror frame — this is the materialization of your labor. You see it every day, touch it, show it to guests: I carved this, I installed this, I aged this with gold and patina. This is not bought — it is created. And there is a colossal difference in this for the psyche, for self-esteem, for the feeling of life.
DIY decor teaches patience (carving does not tolerate haste), attentiveness (a mistake of a millimeter is noticeable), respect for the material (wood is alive, you need to negotiate with it, not force it). These qualities transfer to other areas of life, changing you.
Yes, not everything is worth doing yourself. Complex elements requiring years of training are betterbuy wooden decorordered from professionals — quality, time, nerves. But following theinstructions for installing polyurethane moldinghybrid approach is accessible to everyone — and the savings are huge, and the satisfaction is no less.
The hybrid approach is wisdom. We buy the complex (professional carving, large architectural elements), we do what we can (installation, finishing, simple carved details), we combine. Result: an interior that is unique, high-quality, economically sensible, carrying the energy of your labor.
Wooden decor by handDIY decor and working withdecorating wooden blankstransform a house from a place where you sleep and eat into a space that is an extension of yourself. Every carved line, every molding joint, every patina stroke is an imprint of your personality, your vision of beauty, your willingness to invest energy into your surroundings.
Start small. One rosette. One meter of molding. One patinated frame. See the result, feel the joy of creation — continue. In a year, your home will be transformed. Not because millions were spent on designers. But because soul was invested. Your soul. And that is priceless.
STAVROS: professional materials for your DIY project
When you decide to undertake acreating decorative elementsDIY project, the quality of the source materials determines 50% of the success. Even the golden hands of a master cannot save a project if the wood is warped, the polyurethane is brittle, or the glue doesn't hold. STAVROS understands this — and provides DIY enthusiasts access to the same materials professionals use.
Solid Wood Items— blanks for your carving: The company offers not only ready-made carved elements but also blanks — sanded, properly dried (moisture content 8-10%, guarantee against warping), calibrated (thickness uniform across the entire area, deviation ±0.5 mm) boards and blocks made of oak, beech, ash, linden, pine.
Blank dimensions: thickness 15, 20, 25, 30, 40 mm (popular for carving), width 100-400 mm, length 500-2000 mm. Highest grade — free of knots, cracks, blue stain, resin pockets. Prices are reasonable (linden 20×300×500 mm — 800 rubles, oak of the same dimensions — 2500 rubles), but the main thing is the guarantee of material quality. You won't spend 10 hours carving only for the blank to crack from internal stresses a month later.
Cutting and milling service: If you need a blank of a non-standard size (e.g., a 40 cm diameter circle for a rosette, or a board with a shaped edge), the STAVROS workshop will perform cutting and milling according to your drawings. CNC equipment accuracy ±0.1 mm. You get a ready-made base — all that remains is to carve the ornament.
Ready-made wooden decors— for combination with homemade: A catalog of carved overlays, corner elements, rosettes made of solid oak, beech, ash. Over 500 SKUs of various styles (classicism, baroque, modern, art deco), sizes (from 50×50 mm to 400×600 mm), and complexity. Prices from 800 rubles (small corner elements) to 15,000 rubles (large, complex panels).
Buying ready-made complex elements (which you cannot handle yourself) + carving simple ones yourself (which are within your ability) is the optimal strategy. The interior achieves a professional level (complex details are made by masters), but with your personal contribution (simple elements are homemade, unique).
Polyurethane molding — material for self-installation: A collection of 2000+ SKUs of moldings, cornices, rosettes, pilasters, consoles. Production quality is European (density, clarity of relief, geometry), prices are Russian (1.5-2 times lower than imported analogues).
All elements are primed, ready for painting. Packaged carefully (protection against damage during transportation). With each order — detailed written installation instructions (in Russian, with illustrations), recommendations for choosing glue, putty, paint.
Glue, putties, finishing materials: STAVROS offers not only decor but also consumables for installation and finishing. Acrylic glue for polyurethane (own brand, specially developed for molding, holds fast, doesn't yellow) — 350 rubles per 300 ml tube. Acrylic putty for sealing joints (elastic, doesn't crack, easy to sand) — 200 rubles per 500 g.
Stains (water-based, alcohol-based, oil-based) 15 shades (from light oak to black ebony) — 250-400 rubles per 250 ml. Patinating compounds (gold, silver, bronze, copper) — 350 rubles per 100 ml. Waxes, oils for final wood finishing (natural, eco-friendly) — 600-900 rubles per 250 ml.
Specialist consultations: Unsure which wood species to choose for your project? Not sure if this molding will suit your interior? Don't know how to properly cut a 45-degree angle? STAVROS specialists will consult for free (phone, email, online chat on the website). They don't sell, they help — because they are interested in your success (a satisfied customer will return, recommend to friends).
Educational materials: On the STAVROS website, a section of articles, video instructions on working with wood and molding.installation guide for polyurethane molding— step-by-step, with photos of each stage. Articles aboutWooden decor by hand, carving techniques, finishing. All free, all accessible without registration.
Delivery of DIY materials: Ordered blanks, molding, consumables — delivery in Moscow (own transport, carefully, at your convenient time). Across Russia — via transport companies, packaging is reliable (wooden elements in crates, molding in cardboard boxes with cushioning). Delivery price is transparent (calculator on the website), no hidden markups.
Loyalty program for DIY masters: Registered on the website, made your first order — received 'Master' status (5% discount on all subsequent orders). Made orders totaling 50 thousand — 'Pro' status (7% discount). At 100 thousand — 'Expert' status (10% discount + priority consultation support). Your hobby becomes more profitable with each project.
Create interiors with your own hands, relying on quality STAVROS materials. Let your home become a space where every element bears the imprint of your hands, your taste, your energy. We provide the tools, materials, knowledge — you create masterpieces. Welcome to the family of creators, for whom a home is not a purchase, but a creation.