Article Contents:
- Soviet Wooden Skirting Board: What to Do with It
- An Era Cast in Wood
- Condition Diagnosis: Four Scenarios
- When to Replace, When to Restore: Criteria
- Restoration of an Old Wooden Skirting Board
- Paint Removal: Three Methods and Their Comparison
- Surface Restoration After Paint Removal
- Choosing a Finish for a Restored Skirting Board
- Aging Technique for New Skirting Boards: Brushing, Patina, Stain
- Why 'Age' New Wood – Logic and Philosophy
- Brushing: The First Step Towards Age
- Stain as an Aging Tool
- Patination in Gold, Silver, and Dark Colors
- What is Patina in the Context of Wood
- Gold Patina: Step-by-Step
- Silver Patina: Nuances
- Dark Patina: 'Wenge Antique' and 'Ebony Oak'
- Painting a Wooden Skirting Board to Look Like 'Antique'
- Paint as an Aging Tool
- Crackle Technique: Cracks of Antique Enamel
- Dry Brush Technique: Worn Paint on Relief
- Double Aging Technique: Multi-Layer Antique
- Varnishing After Patina: Matte Finish for Sealing
- Why a Finish Varnish is Essential
- Choosing a Varnish for an Aged Skirting Board
- Technique for Applying Varnish Over Patina: Fine Brushes, No Pressure
- FAQ: Answers to Popular Questions About Aging and Restoring Skirting Boards
- About the Company STAVROS

There is one detail in an interior that preserves the memory of a home better than anything else. Not the walls, not the floors—they can be repainted or relaid. It's the skirting board.Old wooden baseboardin an apartment of Soviet construction — it's layers of paint, beneath which lies wood with character: dense, heavy, without a single empty knot. They don't make them like that anymore. Not because the technology is lacking — it's simply that such an attitude toward the material no longer exists.
And here is the paradox of our time: some rush to strip off the Soviet baseboard and throw it away — to install a new PVC one 'wood-look,' which will yellow and peel in three years. Others, on the contrary, take a completely new solid wood baseboard and deliberately make it 'old' — with wear, dark recesses, a golden patina. Because the effect of aged wood is the effect of time, authenticity, which is so lacking in modern interiors.
Both themes — restoring the old and artificially aging the new — are the same philosophy: respect for the material and the ability to work with its history. This is precisely what this article is dedicated to.


Soviet wooden baseboard: what to do with it


An era cast in wood
Soviet wooden baseboard— a separate chapter in the history of domestic construction. From the 1930s to the 1980s, oak or pine baseboards 60–80 mm high with a characteristic rounded or stepped profile were used in residential construction. The wood for it was dense, without unnecessary defects — the OST and GOST standards of those years were strict precisely regarding the quality of wood for finishing trim.
Today, such baseboards are increasingly rare in apartments: major renovations destroy them by thousands of meters. But in 'Stalin-era' housing stock, in apartments with untouched finishes from the 1950s–1970s, it still stands — under five, seven layers of oil paint. And often — in excellent condition.
Question: what to do with it during renovation?
Our factory also produces:


Condition diagnosis: four scenarios
Before making a decision — to replace or restore — an honest diagnosis is needed.
Scenario 1: The baseboard is intact, holding, the profile is discernible. Under the paint — live wood without rot or cracks. This is valuable material. Restoration: remove the paint, restore the surface, apply a modern coating. Result — a baseboard with history that will serve for decades more.
Scenario 2: The baseboard is intact, but the profile is 'eaten away' by layers of paint. Ten layers of oil paint turn any profile into a shapeless lump. Under the paint — wood, but the profile pattern is lost. Solution: remove the paint, assess the preservation of the profile. If the wood is live — restoration. If the profile is completely smoothed out — replacement or restoration with a router.
Scenario 3: The baseboard is cracking, creaking, has come away from the wall in places. Mechanical failure of the fasteners (nails have pulled out of the wall), shrinkage deformations, delamination of the wood. Solution: dismantling, assessment of each plank. Good ones — for restoration, bad ones — for replacement.
Scenario 4: Rot, black spots, crumbling wood. Biological damage. The solution is clear: complete dismantling and replacement. An infected baseboard is a source of spores that, under favorable conditions, will spread to the wooden structures of the house.
Get Consultation
When to replace, when to restore: criteria
| Criterion | Restoration | Replacement |
|---|---|---|
| Condition of the wood | Hard, without rot | Soft, with rot |
| Profile under the paint | Discernible, not smoothed out | Completely lost |
| Fastening | Holding | Pulled out, not holding |
| Geometry | Even, without warping | Severe warping |
| Length of intact fragments | 80%+ of the perimeter | Less than 50% |
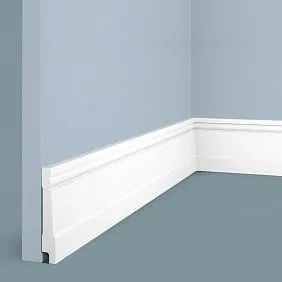
When replacement is inevitable —Wooden skirting board K-series STAVROSmade from chamber-dried oak or beech lumber is a direct functional and aesthetic analog of Soviet-era baseboards: the same wood density, the same geometry of classic profile shapes — K-006, K-009, K-016. Just without the Soviet layers of paint.
Restoration of old wooden baseboards
Paint removal: three methods and their comparison
Restoration of wooden baseboardsbegins with removing the old coating. This is the most labor-intensive stage, on which everything else depends. Three main methods:
Method 1: Thermal (heat gun + scraper)
A heat gun heats the paint to 200–300°C. The paint softens and is removed with a wide flexible scraper. Pros: no chemicals needed, no dust. Cons: slow (1 linear meter of baseboard — 20–40 minutes), risk of overheating and yellowing the wood, inconvenient for deep profile relief.
Optimal for: baseboards with a smooth profile without deep recesses, 3–5 layers of paint.
Method 2: Chemical (paint stripper)
Gel stripper is applied to the baseboard, left for 15–60 minutes. The paint swells and is removed with a scraper and brush. Pros: penetrates into relief, removes all layers in one pass. Cons: chemicals (gloves, ventilation required), neutralization with alkali after stripping, otherwise the wood darkens.
Optimal for: baseboards with a figured profile, 7–12 layers of old oil paint.
Method 3: Mechanical (sanding, scraping)
Disc sanders, delta sanders for corners, manual scraper for relief. Pros: clean result, full control. Cons: dust, noise, with aggressive sanding — risk of 'eating away' the wood and destroying the profile.
Optimal for: final leveling after chemical stripping. Alone as the primary method — only for flat profiles.
Professional approach: combination of method 2 (stripper for removing the main volume of paint) + method 1 (heat gun for residue in relief) + method 3 (sanding P120 → P180 for final leveling).
Surface restoration after paint removal
After paint removal, the wood is exposed. It looks dull: grayish, matte, with traces of old nails, possibly with small cracks and chips in the profile. This is normal. This is living wood that bears the marks of time. Work continues:
Filling cracks and chips: wood filler (Axton, Tikkurila Puumaali) matching the wood species. For thin cracks — acrylic filler applied with a brush, for deep ones — wood filler applied with a putty knife. After drying — sand with P180.
Degreasing (for pine baseboards): apply acetone or a special degreasing compound to the surface, leave for 10–15 minutes, wipe with a dry cloth. This is necessary if painting or varnishing is planned: resin will seep through any coating without this step.
Antiseptic impregnation: mandatory before applying the final coating. Deep penetration, spore elimination — especially important for baseboards in old houses.
Final sanding: P220 along the grain. The surface is ready for coating.
Choosing a final coating for a restored baseboard
Old oak or pine after restoration — material with character. It doesn't need to hide under a film. Optimal coatings:
-
Oil-wax (Osmo Polyx-Oil): reveals the natural color and texture, matte finish, 'living' surface. For restoring Soviet-era oak baseboards — ideal: oak under oil acquires a warm golden-brown tone without a single hint of 'plastic'
-
Toning oil: allows color leveling if different sections of the baseboard vary in tone (inevitable with partial restoration). Osmo Dekorwachs with pigment — 2 coats over a toning base
-
Polyurethane varnish (for kitchens, hallways): if increased mechanical protection is needed, the restored baseboard is coated with PU varnish. But — 2–3 coats after applying a shellac isolating primer, otherwise resin (in pine) will seep under the varnish
Technique for aging new baseboards: brushing, patina, stain
Why 'age' new wood — logic and philosophy
A new solid wood baseboard is straight, light-colored, with a smooth sanded surface. In an interior with aged furniture, hand-applied plaster, and wrought iron, it will look like a foreign object: too 'fresh,' too smooth.
The task of aging: to give new wood that visual and tactile 'biography' that forms over decades of natural use. Darkened pores, emphasized annual ring patterns, whitened edges, dark recesses in the profile relief—all of this can be created artificially, and the result, with the right approach, is indistinguishable from genuine wood 'age.'
Painting wooden baseboardwith an aging effect is a craft that requires understanding of the material. You can't just apply a dark stain and call it 'antique.' A genuine aging effect is layered, multi-stage, reproducing the logic of natural aging.
Brushing: the first step towards age
Brushing (brushing) is the mechanical aging of wood with a brush with metal bristles. Goal: to remove soft fibers (earlywood, spring growth rings) and leave hard ones (latewood, summer rings). In nature, this happens on its own—under the influence of wind, water, ultraviolet light. With brushing—forcibly, in 20–30 minutes.
Tool: angle grinder with a brush attachment with nylon or steel bristles. For fine work on the baseboard relief—a hand brush with brass bristles.
Technique:
-
Secure the baseboard horizontally on a workbench
-
Treat with the brush along the grain—from one end to the other. Pressure—moderate, without forcing. Movement: in one direction, with the grain
-
2–3 passes on one surface. Check: feel the relief with your finger—hard rings have become raised, soft ones have 'receded'
-
Blow the surface with air or a soft brush—remove dust
-
For deeper relief—repeat passes, increasing pressure
Result of brushing: a surface with pronounced texture, resembling old wood washed by rain and dried in the sun. Now—the next stage.
Stain as an aging tool
Wooden baseboard for paintingafter brushing—is ready for stain application. Stain (water-based or alcohol-based) penetrates deeper into the porous surface of brushed wood and creates the effect of a texture 'washed' by time.
Dark stain (walnut, teak, ebony): for imitating wood darkened by time and use. Applied with a sponge or pad—quick movements along the grain. Excess is immediately removed—otherwise streaks.
Gray stain (Ebony, Graphite): for imitating 'oak' aging—oak grays over time. Especially effective in loft, industrial, Scandinavian interiors.
Two-tone technique: first layer—dark stain, after drying—wipe the surface with light wax or white stain 'on the wipe' (apply, immediately remove from raised parts). Dark remains in recesses, light—on edges. This is the principle of patina.
Patination in gold, silver, dark color
What is patina in the context of wood
Patina is a thin decorative coating that imitates the effect of metal oxidation (gilding, silvering, bronze) or natural surface aging. On a wooden baseboard, patination creates the illusion of gilded or silvered decoration—as in furniture from the Louis XVI era or Italian Baroque interiors.
Forof a solid wood baseboardwith a figured profile—patina is especially organic: dark in recesses, gold or silver on raised parts. This contrast creates a visual 'depth' that cannot be achieved with simple painting.
Golden patina: step by step
Materials: acrylic primer, tinted dark (dark brown, umber), golden patinating paste (Viva Decor, Borma Wachs Cera Patinante, Zeffiro Gold), matte finish varnish.
Stages:
-
Priming with dark color. Apply dark brown acrylic primer to the entire surface of the baseboard—in 2 coats. This dark 'underlayer' will be visible in the recesses of the relief after applying gold. It is this that creates 'age'—the feeling that the gilding has worn off over time. Drying 2–3 hours.
-
Applying golden patinating paste. With a dry sponge or almost dry brush, take a small amount of paste. Apply with light dabbing movements—'on the wipe'—to the raised parts of the profile. Dark primer remains in recesses. Gold on raised parts. Do not rub in the paste, do not fill recesses with it—this will ruin the effect.
-
Blending. With a dry soft brush (fitch) lightly blend the edges of the gold layer on flat surfaces—the transition from 'full gold' on the raised part to 'dark' in the recess should be smooth, not stepped.
-
Sealing with varnish. Matte or semi-matte varnish—in 1 thin coat. Protects the paste from abrasion. For hallways and areas with mechanical impact—2 coats of PU varnish.
Result: a baseboard made of new oak looks like a restored antique element with gilding.
Silver Patina: Nuances
Silver patina is a cooler, more restrained option. The logic is the same: dark base layer + silver paste 'on the wipe'. But:
-
Base layer: black or dark gray (not brown — brown gives a warm 'golden' undertone)
-
Silver paste: applied with an even 'drier' sponge than gold. Silver is very active — a bit more pressure, and the recesses will fill, the effect will disappear
-
Finish: matte varnish is mandatory. Silver + glossy varnish = cheap foil. Silver + matte varnish = antique silver.
Silver patina onwhite beech skirting boardwith a classic profile — looks impeccable in 'gray, white, silver' interiors: modern classicism, New York apartment, 'white Scandinavia'.
Dark patina: 'wenge antique' and 'ebony oak'
Dark patina is the most practical option: does not require metallic paste, created only with stains and varnish. Effect: wood, darkened by time and wax, with lightened edges from wear.
Technique 'dark antique':
-
Dark stain (ebony, wenge) — full layer over the entire surface of the brushed skirting board
-
After drying — light wax (white or natural Osmo) 'on the wipe' over the raised areas
-
Wipe with a soft cloth — light wax remains on the protruding edges, dark stain — in the recesses
-
Matte finishing varnish for fixing
Result: very convincing 'aged dark wood', which fits perfectly into interiors with dark furniture, brickwork, leather items.
Painting a wooden skirting board to look like 'antique'
Paint as an aging tool
Painting wooden baseboardwith an 'antique' effect — is not just applying paint of the desired color. It is a technique where paint is applied in several layers of different colors, then partially removed on the raised areas — revealing the lower layer or the wood itself. Multi-layering creates the illusion of years of use.
Technique 'crackle': cracks of antique enamel
Crackle — imitation of cracks in aged lacquer film. For a wooden skirting board:
-
Base layer: base paint (often white or cream). This is the color of the 'substrate' that will be visible in the cracks. Drying until completely dry.
-
Crackle varnish: special varnish (Viva Decor Crackle Aqua, Borma Craquele) — applied to the dried base layer. Drying: to a 'semi-dry' state — this is critical. If the top paint is applied to a completely dry crackle varnish — there will be no cracks. If applied to a wet one — the paint will spread.
-
Top paint: applied quickly, in one pass, without blending — brush 'in one direction'. While the top paint dries, the crackle varnish pulls it, forming a network of cracks through which the base layer is visible.
-
Finish: matte or semi-matte varnish. Crackle coating without protection is fragile.
Result: skirting board with a network of 'cracks' — like antique porcelain or peeling paint from the century before last. Especially organic in Provence, shabby chic, rustic interiors.
Technique 'dry brush': worn paint on the relief
Dry brush — the simplest and fastest technique for aging a painted skirting board.
-
Base painting: dark color (dark brown, gray, dark blue). Drying.
-
Light paint (white, cream, light gray) — on the brush. Wipe off excess on paper until the brush is 'almost dry'.
-
With light, brushing motions, we go over the profile's raised areas. Only the raised parts—the recesses remain dark.
Result: the effect of 'painted wood that has worn down at the corners'—like Soviet painted furniture after twenty years.
Technique 'double aging': multi-layered antique
The most realistic result is a combination of brushing, staining, and dry brushing:
-
Brushing → textured surface
-
Dark stain → dark pores and fibers
-
Light paint 'dry brushed' → whitened raised areas
-
Matte wax → protection and 'living' finish
This four-step approach reproduces precisely that 'multi-layered' aging effect that cannot be imitated with a single coat of paint. And it is exactly what professional furniture restorers use inDIY furniture decorationand when working with classic decor.
Varnishing after patina: matte finish for sealing
Why a finishing varnish is essential
Patina pastes, waxes, tinting stains—they all provide a decorative effect, but not a protective one. Patina paste consists of metallic pigment particles in a fatty base. Without varnish on top, it wears off at the first touch. Wax is a soft coating that wears away within a few months in areas of mechanical impact.
Varnish secures the entire decorative 'construction' and creates a protective film over it.
Choosing a varnish for aged skirting boards
The main rule: matte varnish for aged wood. No gloss—it instantly destroys the illusion of age. Glossy varnish is 'new,' 'plastic,' 'modern.' Matte is 'old,' 'natural,' 'authentic.'
| Varnish type | Sheen | Application for aged skirting boards |
|---|---|---|
| Glossy PU (90 GU) | Mirror-like | No—ruins the effect |
| Semi-gloss (60 GU) | Noticeable | No |
| Semi-matte (30 GU) | Moderate | Possible for 'golden' patina |
| Matte (10–15 GU) | Almost none | Yes—for all aging techniques |
| Ultramatte (5 GU) | No | Ideal for 'aged wax' |
Water-based matte varnish (Tikkurila Unica Aqua Matt, Osmo TopOil Matt): does not change the surface color, does not add yellowness - ideal for silver and cold patina.
Oil-alkyd matte varnish: slightly tints the wood in a warm yellow tone - ideal for golden patina and 'antique' with a warm undertone.
Shellac (natürliches Schellack): historically authentic coating for antique effects. Soft, not completely transparent, with a golden undertone. Ideal for 'Soviet' or 'French antique' on a baseboard with a classic profile.
Technique for applying varnish over patina: thin brushes, no pressure
After patinating paste or decorative wax - the surface is visually delicate. Applying varnish requires precision:
-
Brush: soft, flat or synthetic 'cat's tongue'. No stiff bristle brushes - they will 'lift' the paste
-
Movement: along the grain, 'in one direction', without moving the brush back over fresh varnish
-
Amount of varnish on the brush: a little - the varnish should be applied in a thin layer, not 'pool' in recesses
-
First layer - as thin as possible (can be diluted with 5-10% water for water-based varnish). It 'seals' the paste
-
Second layer - normal consistency, finishing
After complete drying - the surface can be touched with a finger. If the 'gold' does not transfer to the finger - the patina is securely fixed.
FAQ: answers to popular questions about aging and restoration of baseboards
Can PVC baseboard be aged?
No. Patinating pastes, stains, brushing only work with natural wood. On PVC - paint adheres poorly, there is no texture, brushing is impossible. If you want an aging effect - onlysolid wood baseboard.
Is it necessary to remove the baseboard from the wall for aging?
Professional answer: desirable, but not mandatory. Brushing, applying stain and patina on a removed baseboard is significantly easier and cleaner. On an installed baseboard - it is more difficult to protect the floor and wall from stain and varnish. Solution: disassembly during processing, installation after complete drying of the finishing coating.
Which wood species ages best?
Oak is the best material for brushing: dense latewood and soft earlywood provide maximum contrast during brushing. Pine is second in expressiveness: clearly defined annual rings. Beech is less suitable for brushing (uniform density), but ideal for patination: a smooth surface accepts paste without stains.
How to preserve the patina effect on a baseboard in the hallway?
Double layer of matte PU varnish. The hallway is a zone of mechanical impact (bags, shoes, children's toys). Patinating paste without protection in the hallway will not survive until the next renovation. Two layers of PU + annual renewal of matte wax is sufficient protection.
Soviet oak baseboard - restore or replace with a modern analogue?
If the wood is alive - restore. Soviet oak from the 1950s-1960s is slow-grown forest with a dense fiber structure. Replacing it with an equivalent material is difficult even today. But if more than 30% of the perimeter is in poor condition - combination: restore live sections, replace lost ones with K-series profiles from the same oak with subsequent tone matching.
About the company STAVROS
The philosophy of aging is impossible without the correct base material.Wooden skirting board K-series STAVROS - from chamber-dried solid oak and beech with 8-10% moisture, sanded to P180 - accepts any decorative coating without issues: stain applies evenly without stains, patinating paste adheres to the sanded surface, brushing reveals expressive annual ring texture.
For decorating furniture and interiors in classic, antique, Provence, shabby chic styles -decorative overlays and moldings STAVROS from the same solid oak: rosettes, corner elements, friezes, pilasters - all in the same material and geometry system.Carved MouldingsandKZ-series cornices— to create a unified decorative ensemble that looks equally good in natural wood and with a golden patina.
Samples: 180 rub./set. Warehouses in Moscow and St. Petersburg. Consultation: 8 (800) 555-46-75.
STAVROS — because wood with character deserves a finish with history.