Article Contents:
- What is a trim and why is it needed
- Types and profiles of wooden trims
- Triangular trim
- Semi-circular trim
- Rectangular trim
- Decorative trim
- Trim for siding
- Materials of Manufacture
- Coniferous species
- Hardwood Species
- Technical Specifications and Dimensions
- Standard Sizes
- Wood moisture
- Wood Grade
- Applications of wooden trims
- Window structures
- Door structures
- Furniture manufacturing
- Decorative application
- Installation of wooden trims
- Preparation stage
- Fastening technology
- Alternative mounting methods
- Advantages of wooden trims
- Ecological Safety
- Aesthetic qualities
- Technological advantages
- Durability
- Maintenance and operation
- Protective Coatings
- Regular maintenance
- Prevention of Damage
- Selection and purchase of trims
- Quality Criteria
- Calculating required quantity
- Where to buy
- FAQ - Frequently Asked Questions
- Conclusion

There are details in construction and finishing that are often remembered only at the last moment, but it is precisely these that determine the quality and durability of structures.wooden trim- one of such elements, without which it is impossible to imagine quality glazing of wooden windows and doors, making furniture with glass inserts, or creating an exquisite interior decor. This thin wooden strip, seemingly insignificant at first glance, performs critically important functions: securely fastens the glass in the frame, ensures the airtightness of the structure, protects against drafts, and simultaneously serves as a decorative element, completing the look of window or door structures. Why do professional carpenters and restorers invariably choose wooden trims, despite the abundance of modern plastic alternatives?


What is a trim and why is it needed
wooden trimrepresents a narrow, thin strip made of solid wood, which is attached around the perimeter of the glass in the frame of a window, door, or furniture structure. The cross-section of the trim is usually triangular, semi-circular, or rectangular, ensuring tight contact with the glass and secure fastening.
The history of using wooden trims dates back centuries. Even in the Middle Ages, craftsmen used thin wooden strips to secure stained glass in the windows of cathedrals and castles. As carpentry evolved, trims evolved - various profiles appeared, and fastening methods improved. In the 19th century, when glazed windows became a common feature in residential homes, wooden trims became an essential element of window structures.
The main functions performed by this humble element are astonishing in their importance. The fastening function - the trim presses the glass against the frame, preventing it from shifting or falling out even under strong wind loads. The sealing function - in combination with gaskets, the trim creates a tight connection, preventing cold air, moisture, and dust from entering. The protective function - the strip covers sharp glass edges, making the structure safe. The decorative purpose - a properly selected trim gives windows or doors a finished, aesthetically pleasing appearance.
In modern constructionwood trim itemsof this type have not lost their relevance. Despite the emergence of plastic windows with polymer trims, wooden counterparts remain indispensable for wooden structures, restoration work, and creating interiors in classic, country, or eco styles.


Types and profiles of wooden trims
The variety of shapes and sizes allows selecting the optimal option for any task.
Our factory also produces:


Triangular trim
Triangular profile - the most traditional and common type. The cross-section is a right triangle, where one leg is attached to the frame, the other to the glass, and the hypotenuse forms the outer surface. This shape ensures secure glass fastening and natural condensation drainage. TriangularBuy wooden cleatcan be used for standard wooden windows and doors.
The sizes of triangular trims vary from miniature 10x10 millimeters for thin glass to more substantial 20x20 millimeters for thick glass units. The angle of the hypotenuse is usually 45 degrees, providing an optimal balance of strength and aesthetics. The surface can be smooth and sanded or unsanded for painting.
Get Consultation
Semi-circular trim
The semi-circular profile has softer, smoother lines. The outer surface has the shape of a half-cylinder, giving windows or doors an elegant, classic look. Such profiles are especially popular in restoration work for historical objects. Due to the absence of sharp edges, the semi-circular profile is easier to maintain — dust does not accumulate on it, and it is easier to wipe clean.
The dimensions of semi-circular profiles are usually slightly larger than triangular ones — from 12x12 to 25x25 millimeters. The rounding radius is selected proportionally to the overall profile size. Manufacturing semi-circular profiles requires more complex processing on milling equipment, which affects the price.
Rectangular profile
The rectangular profile is the simplest in shape. Its cross-section is an elongated rectangle, which is mounted on the frame with its narrow side. Such profiles are primarily used for decorative purposes — framing panels, creating mullions, finishing joints. For glass mounting, rectangular profiles are used less often due to their smaller contact area.
The dimensions of rectangular profiles are very diverse — from narrow strips of 8x15 millimeters to wide ones of 15x30 millimeters. Thickness is usually 1.5–2 times less than width. The surface can be either absolutely smooth or slightly textured, with beveled edges.
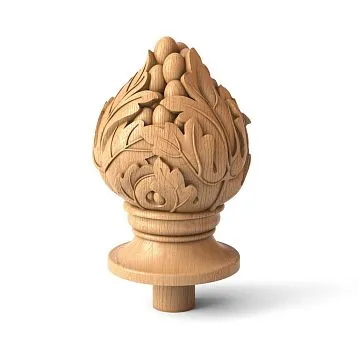
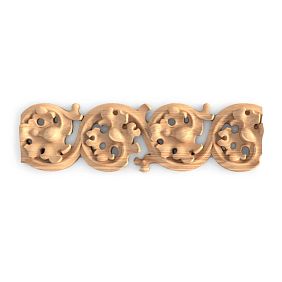
Decorative profile
Decorative profiles have complex profiles with multiple planes, curves, and decorative elements. Such items are manufactured on high-precision equipment and are used in luxury interiors where every detail matters. Decorative profiles can imitate classical moldings, include plant motifs, or geometric patterns.
The dimensions of decorative profiles are usually larger than standard — from 20x20 to 40x40 millimeters. The complexity of the profile determines the cost — the more transitions and details, the more expensive the item. Decorative profiles require careful handling during installation and use due to the fragility of protruding elements.
Profile for siding
A special type of profile was developed for use with siding and other types of cladding materials. The profile has a mushroom shape — a narrow leg for mounting in a groove and a wide cap covering the joint between boards. Such profiles conceal seams, give cladding a finished look, and additionally secure the boards.
The dimensions of the siding profile depend on the groove width — usually the leg has a thickness of 6–8 millimeters, and the cap has a width of 15–25 millimeters. The standard length is from 2 to 3 meters. The material used is usually matched to the siding species for uniform color and texture.
Materials for manufacturing
The quality and durability of the profile directly depend on the selected wood species.
Coniferous species
Spruce is the most popular material for making profiles due to the optimal combination of price and quality. Spruce wood is easy to process, has a pleasant light tone, and contains resins that provide natural protection against moisture.wooden trimSpruce is suitable for most applications — windows, doors, furniture, decorative elements.
The moisture content of spruce profiles after kiln drying is 8–12 percent, ensuring dimensional stability. The density of spruce is 450–500 kg/m³, providing sufficient strength with a low weight. The color varies from light yellow to yellow-pink with characteristic resin streaks, which can be considered defects or natural features depending on the grade.
Pine is used less frequently than spruce but is also a quality material for profiles. Pine wood is lighter than spruce, has a more uniform structure with fewer resin pockets. The density of pine is slightly lower than spruce — 420–450 kg/m³, making it even lighter. Pine is good for painted profiles due to its light, uniform tone.
Larch is a premium choice among coniferous species. The density of larch is 650–700 kg/m³, approaching hardwoods. High resin content makes larch exceptionally resistant to moisture and decay. The wood color is reddish-brown, very expressive. Larch profiles are ideal for windows and doors exposed to moisture.
Hardwood species
Oak is the king among materials for profiles. Hardness and density of 700–800 kg/m³, resistance to moisture and mechanical impacts make oak profiles practically eternal. Elegant color ranging from light brown to dark chocolate, expressive texture with medullary rays, give the items a premium status. Oak profiles are used in luxury interiors and historical object restoration.
Beech is similar to oak in characteristics but has a lighter, more uniform color. The density of beech is 650–700 kg/m³, providing excellent strength. Beech wood is easy to process and takes stain well, making it ideal for painting. Beech profiles are a reasonable alternative to oak at a lower cost.
Birch is used less frequently for profiles due to lower moisture resistance. However, birch wood with a light warm tone and fine uniform texture is excellent for decorative profiles in interiors. The density of birch is 600–650 kg/m³, with medium hardness. After proper protective treatment, birch profiles can last for decades.
Ash is a premium species with an expressive texture and high strength. The density of ash is 650–700 kg/m³, hardness higher than oak. The color is light brown with a grayish tint. Ash profiles are exceptionally beautiful with transparent lacquer, highlighting the natural grain.
Technical Specifications and Dimensions
Understanding technical parameters helps make the right choice.
Standard Sizes
The cross-section of profiles varies widely. Minimum sizes of 8x8 or 10x10 millimeters are used for thin glass (3–4 mm) in small windows, furniture doors. Medium sizes 12x12, 15x15, 18x18 millimeters — the most popular, suitable for standard windows and doors with 4–6 mm glass. Large profiles 20x20, 25x25 millimeters are used for thick glass and glazing units 6–10 mm.
The length of profiles is standardized by manufacturers. The most common options: 1.5 meters, 2 meters, 2.1 meters, 2.5 meters, 3 meters. Shorter profiles are more convenient for transport and storage, while longer ones allow minimizing the number of joints when glazing long openings. For large orders, non-standard lengths can be manufactured for specific projects.
Dimensional tolerances are regulated by GOST. Deviation in thickness and width should not exceed ±0.5 mm for Extra grade and ±1 mm for grades A and B. Curvature along length should not exceed 3 mm per linear meter. High-quality profiles have perfect geometry, ensuring tight fitting without gaps.
Wood Moisture
Moisture is a critically important parameter determining the stability of the profile after installation. Freshly cut wood contains 40–80 percent moisture and is unsuitable for manufacturing.Production of trim elementsIncludes mandatory kiln drying.
The optimal moisture content of profiles for use in heated rooms is 8–10 percent with a permissible deviation of ±2 percent. At this moisture level, the wood is in equilibrium with the room’s atmosphere and does not shrink or expand. Over-dried profiles with moisture below 6 percent will absorb moisture from the air, swell, and may crack. Under-dried profiles with moisture above 14 percent will dry out, forming gaps.
For outdoor structures, moisture content of 12–15 percent is allowed, as outdoor relative humidity is higher. For saunas and steam rooms, wood moisture should be 10–12 percent with mandatory protective impregnation.
Wood Grade
The grade determines the presence and size of allowable wood defects. Extra grade does not allow any visible defects — knots, cracks, resin pockets, color changes, bark marks. The wood is absolutely uniform in color and texture. Such profiles are used in luxury interiors and museum restorations. The price of Extra grade is 1.5–2 times higher than grade A.
Grade A allows small healthy knots up to 10 millimeters in diameter, no more than 1-2 per linear meter, minor resin pockets, light color transitions. This is the optimal choice for most applications, combining good quality with a reasonable price. After painting, minor defects are completely concealed.
Grade B allows knots up to 20 millimeters, cracks up to 30 millimeters in length, resin pockets, more noticeable color differences. Such strips are suitable for utility buildings, temporary structures, or under opaque painting that completely hides the wood texture.
Application of wooden strips
Versatility makes this element indispensable in many areas.
Window structures
Glazing wooden windows - the primary purpose of strips. In traditional windows with single-pane glass,Buy wooden cleata triangular profile of 15x15 or 18x18 millimeters is required. The glass is laid on a layer of sealant or putty in the window frame quarter, and the strip is pressed on top, nailed with thin nails 20-25 millimeters long. Nail heads are countersunk, and fastening points are spackled.
In modern wooden windows with insulated glass units, wider strips of 20x20 or 25x25 millimeters are used. A 24-32 millimeter thick insulated glass unit requires secure fixation around its entire perimeter. A rubber or silicone sealant must be placed between the insulated glass unit and the strip to ensure airtightness and compensate for thermal expansion.
For arched and non-standard windows, curved strips are manufactured. The wood is steamed and bent according to a template, then dried while curved. This technology allows creating strips of any curvature without fiber breaks.
Door structures
Doors with glass inserts also require strips. For interior doors with decorative glazing, strips are selected to match the door panel. Size depends on glass thickness - usually 15x15 or 18x18 millimeters. The profile is chosen according to the door style: triangular for modern, semi-circular or decorative for classic.
Entry doors with glass inserts require heavier strips of 20x20 or 25x25 millimeters for secure fixation of thick tempered glass or triple glazing. Fixing is done at a closer spacing - every 100-150 millimeters instead of 200-250 for interior doors.
Paneled doors traditionally use strips to fix panels in the frame. Sizes are small - 10x10 or 12x12 millimeters, decorative profile matching the overall door style. Strips are glued, not nailed, to preserve repairability.
Furniture manufacturing
In furniture with glass elements, strips perform the same fixing and decorative function. Display cases, cabinets, buffets, glass-fronted bookshelves use thin elegant strips of 10x10 or 12x12 millimeters. Wood species are selected to match the furniture material - pine for pine, oak for oak, beech for beech.
Cabinet facades with glass inserts require strips resistant to moisture and temperature fluctuations. Optimal are hardwoods - oak, beech, ash - with quality lacquer protection. Size 12x12 or 15x15 millimeters, profile matches kitchen design.
Coffee tables and consoles with glass tops use strips as decorative framing, covering fastening elements. Here aesthetics matter - decorative profiles, beautiful wood grain, perfect surface finish.
Interior partitions with carved balusters allow zoning of space without compromising its integrity. Such partitions are especially effective in large rooms, where it is necessary to create cozy zones.
Besides functional use,wooden trimstrips are actively used as decorative elements in interior design. Framing wall panels - a classic wall decoration technique. Strips create rectangular or square frames, within which wallpaper, textiles, or decorative plaster are installed.
Creating panels on smooth doors or wall panels - another popular application. Thin strips are glued to the surface, forming a three-dimensional pattern. After painting to match the base or contrasting color, it creates the effect of a classic paneled door without complex carpentry work.
Framing mirrors with strips creates a finished composition. Wide decorative strips, painted white, gold, or silver, imitate a picture frame. The mirror gains status, becoming an independent decorative interior element.
Masking joints between different materials - a practical application. Strips cover seams between wall panels and wallpaper, between wood and tile, between different types of flooring. This solution looks neat and professional.
Installation of wooden strips
Correct installation ensures the reliability and longevity of the structure.
Preparation Stage
Material acclimatization before installation is mandatory. Strips must remain in the room where they will be installed for at least 48 hours. During this time, the wood will reach equilibrium moisture content matching the room’s microclimate. Installation without acclimatization will result in warping or gaps.
Tool preparation includes checking the sharpness of cutting edges. A dull saw or chisel leaves ragged edges, chips, and hinders work. For cutting strips, an optimal choice is a circular saw with fine teeth or a tenon saw with quality blade. Select a small hammer weighing 200-300 grams for precise strikes. Nails - special finish nails without heads or with very small heads, 20-30 millimeters long.
Frame and glass preparation includes cleaning from dust, dirt, and old paint during restoration. The window frame quarter where the glass is laid must be flat, without scratches or paint buildup. Glass is cleaned of dust and degreased. Around the perimeter of the quarter, a layer of sealant is applied, onto which the glass is laid.
Fastening Technology
Strips are marked according to glass and frame dimensions. Measure the distance between inner edges of the frame quarters vertically and horizontally. Cut four strips exactly to these dimensions. Angles are beveled at 45 degrees for tight fitting. Use a tenon saw or circular saw for precise beveling.
Installation begins with the bottom strip. Place the strip against the glass, lightly press it. Drive the first nail 50 millimeters from the edge, then every 200-250 millimeters. Drive nails at a slight angle to the glass to avoid breaking it. Strike force should be moderate - a strong blow will shatter the glass.
The sequence for installing side and top strips is similar. Ensure tight corner fitting - no gaps should exist. If a corner is not tight, file the end with a file or sandpaper until perfectly fitted. Carefully remove excess sealant with a knife before it dries.
Final finishing includes countersinking nail heads with a nail set 1-2 millimeters below the strip surface. Holes are filled with wood putty matching the wood tone. After drying, putty is sanded with fine sandpaper until completely smooth. Strips are coated with varnish, oil, or paint according to the overall finish of the structure.
Alternative mounting methods
Adhesive mounting is used for furniture assemblies where driving nails through is not permitted. Wood glue or modern polyurethane adhesives are applied. The adhesive is applied in a thin layer to both surfaces being joined — the frame and the stile. The stile is pressed and secured with painter’s tape or clamps until the adhesive dries completely.
Silicone mounting is a compromise between mechanical and adhesive methods. Transparent silicone sealant is applied in a zigzag pattern to the back of the stile. After pressing it against the frame, the silicone forms an elastic joint that compensates for thermal expansion. Removing the stile from silicone is possible without damage — simply cut the sealant with a knife.
Snap-fit mounting is a modern technology for quick assembly and disassembly. Special plastic or metal snap fittings are inserted into the quarter of the frame, and corresponding slots are made on the stile. The stile snaps into place without tools and can be easily removed when needed. This method is used in mass furniture production.
Advantages of wooden stiles
Why professionals choose wood, not plastic or metal?
Oak skirting boards are an indispensable element of classic interior styles. In the English style, oak skirting boards with rich carving emphasize the aristocracy and solidity of the space. Dark wood tones harmonize beautifully with traditional materials — natural stone, leather, bronze.
Natural wood does not emit toxic substances under any conditions of use. Unlike plastic stiles, which may release volatile compounds when heated by sunlight, wooden stiles are completely safe. This is especially important for children’s rooms, bedrooms, and spaces where allergy sufferers reside.
Wood’s ability to regulate humidity creates a comfortable microclimate. Wood absorbs excess moisture when humidity rises and releases it when humidity drops, maintaining balance. No synthetic material possesses this property.
The biodegradability of wood is important for environmentally conscious individuals. At the end of their service life, wooden stiles are fully disposed of without harming nature. Plastic analogs pollute the environment for decades.
Aesthetic qualities
The natural beauty of wood is unmatched by imitations. Unique texture, natural tones, and the warmth of the material create a special atmosphere. Each stile is unique — there are no two absolutely identical ones. This individuality is especially valued in handmade aesthetics.
The ability to stain and paint allows creating stiles of any desired color while preserving or hiding the wood’s texture. Transparent varnishes and oils highlight the natural grain. Stains change the shade while maintaining visibility of the fibers. Covering paints create a smooth, colored surface.
Patination — the natural, noble aging of wood — only enhances the beauty of stiles over time. While plastic yellows and dulls, wood develops deeper tones and the special charm of antique items.
Technological Advantages
The ease of processing allows stiles to be fitted directly onto the object. Wood is easily cut, sawed, and sanded with standard tools. Correcting mistakes, trimming corners, or adjusting dimensions can be done in minutes. Plastic stiles require special equipment for trimming.
Repairability and restorability extend service life. A scratched or damaged wooden stile can be sanded and re-coated. Flaking finishes can be renewed. Such operations are impossible with plastic.
Compatibility with various fasteners and adhesives expands application possibilities. Wood holds nails, screws, and staples equally well and adheres to any adhesive. Plastic requires special fasteners and adhesives.
Durability
The service life of quality wooden stiles made from hardwoods is measured in decades. Stiles from the 18th-19th centuries in historic buildings still perform their function. Properly treated and protected wood practically does not age.
Resistance to temperature fluctuations allows using wooden stiles both indoors and outdoors. Wood does not become brittle in cold and does not soften in heat. Plastic loses its properties at negative temperatures.
Repairability ensures simple maintenance. A damaged stile can be easily replaced with a new one without special skills or equipment. Disassembly and installation take only minutes.
Care and Maintenance
Proper care extends the service life of stiles for decades.
Protective coatings
Varnishing is the most common method of protection. Transparent varnish based on water or alkyd is applied in 2-3 layers with intermediate sanding. Varnish creates a durable film protecting against moisture, dirt, and mechanical impacts. Glossy varnish highlights the texture, while matte varnish creates a natural appearance.
Oil treatment is a modern alternative to varnish. Wood oil penetrates deeply into the structure, creating a breathable coating. Wood retains its ability to breathe and regulate humidity. Oil enhances color saturation and highlights texture. Requires renewal every 2-3 years.
Staining with covering paints is used when a specific color is needed regardless of wood species. Acrylic paints for interior use and alkyd paints for exterior use create durable finishes. Before staining, priming is mandatory for better adhesion and paint economy.
Regular Maintenance
Dust cleaning is performed with a dry, soft cloth or a special brush for wood. Wipe stiles weekly along with general cleaning. Dust accumulating in corners and joints is removed with a soft brush or vacuum cleaner with a crevice tool.
Wet cleaning is allowed for varnished stiles. Use a slightly damp, well-wrung cloth. Water should not pool on the surface or seep into joints. To enhance the effect, add a special wood surface care product to the water.
Finish renewal is performed as needed. Varnished stiles lose gloss and dull after 5-7 years of use. Old varnish is removed by sanding or special strippers, and a fresh finish is applied. Oil-based finishes are easier to renew — the surface is lightly sanded, and a new layer of oil is applied.
Damage Prevention
Protection against moisture is critically important for stiles in windows and doors exposed to condensation. Regularly inspect seals and replace them promptly. Wipe condensation with a dry cloth. Ensure good room ventilation.
Protection against mechanical impacts includes careful handling during window cleaning and furniture moving. Do not use abrasive cleaners, stiff brushes, or scrapers. Immediately treat scratches with sanding and apply a protective finish upon appearance.
Protection against biological damage is relevant for humid areas and outdoor structures. Use antiseptic impregnations to prevent mold and mildew development. Regularly inspect stiles for signs of damage. Immediately treat affected areas with special compounds upon detection.
Choosing and purchasing stiles
Correct selection guarantees quality and longevity of the structure.
Quality criteria
Wood moisture is checked with a special moisture meter. Optimal values are 8-10 percent for interior work, 12-15 for exterior. Too dry or wet wood will cause problems. If a moisture meter is unavailable, assess the weight of the trim — overly dry wood will feel unnaturally light, while wet wood will feel heavy.
The geometry of the strips is checked visually. Place the strip on a flat surface — it should lie flat with its entire surface, without gaps or rocking. Look along the strip toward the light — bends and twists are not allowed. Check the profile angles with a square — they must be exactly 90 degrees.
The absence of defects is critical for visible strips. Inspect each strip for knots, cracks, resin pockets, blue stains, wormholes, mold marks. For Extra grade, no defects are allowed. For Grade A, small healthy knots are permitted. Grade B may have noticeable defects, but no rot or decay.
Surface finish quality is checked by touch. Run your hand along the strip — the surface should be smooth, without scratches, fuzz, or unevenness. Sanded strips are ready for final finishing without additional treatment. Unsanded strips require sanding before painting.
Calculation of required quantity
Opening measurements are taken with a tape measure to the nearest millimeter. For windows, measure the perimeter of each sash — add length and width, then multiply by two. For doors, measure the perimeter of the glass insert. For decorative panels, calculate the total length of the frame.
Allowance must be accounted for. Cutting corners at 45 degrees inevitably results in losses. Standard allowance is 10–15 percent of the calculated quantity. If inexperienced, increase allowance to 20 percent. It is better to have excess than to discover shortage during work.
The length of strips depends on the opening size. For small windows and doors, short strips 1.5–2 meters are convenient. For large openings, longer strips 2.5–3 meters are more economical with fewer joints. Consider transportation and storage conditions — long strips require more space.
Where to buy
Specialized manufacturerswood trimoffer a wide range of profiles, species, and sizes. Purchase directly fromthe trim manufacturereliminates trade markup, guarantees fresh material with correct moisture content. Custom profiles can be manufactured according to the customer’s drawings.
Construction hypermarkets are convenient for accessibility, but their assortment is limited to popular items. Quality depends on the supplier, often being mass-produced products without individual customization. Prices are average or higher due to trade markup.
Sawmills offer large volumes at low prices, but processing quality may be low. Strips are often sold unsanded and require additional preparation. Suitable for experienced builders with the ability to perform their own finishing.
FAQ - Frequently Asked Questions
Can the same strip be used for windows and doors?
Technically, yes, if the dimensions match, but it’s better to consider specifics. For windows, especially exterior ones, strips from more moisture-resistant species — spruce, oak — with quality protective treatment are needed. For interior doors, pine is suitable. The profile also differs: for windows, triangular or semicircular profiles are common; for doors, decorative profiles are acceptable. Strip size is chosen based on glass thickness.
How to choose a strip to match the frame color?
Ideal option — strip from the same wood species as the frame. Pine strip for pine frame, oak for oak. If the species differs, use a stain to tone it to the desired shade. Apply stain to a test strip sample, let it dry, and compare with the frame. Adjust the stain concentration or mix several shades for precise match. After toning, apply varnish or oil.
What tools are needed for self-installation?
Minimum set: handsaw with fine teeth or circular saw, miter gauge for 45-degree corner cuts, 200–300 gram hammer, nail set for driving nails, tape measure, square, pencil. Additional useful tools: sander or 180–220 grit sandpaper, wood putty, brushes for varnish application. Sharp tools are critical — a dull saw leaves ragged edges and hinders work.
How does a glued strip differ from a solid one?
A glued strip is made from short wood segments joined with micro-tenons. Joints are practically invisible. Advantages: no knots or defects, stable geometry, affordable price. Disadvantages: less natural appearance, lower strength at joints. A solid strip is milled from one piece of wood, has continuous fibers, is stronger, but may contain knots. Glued strips are suitable for hidden areas; for visible areas, solid Extra grade is preferable.
How often should protective coating be renewed?
How long do wooden strips last? Indoor strips under normal conditions last 7–10 years with varnish, 3–5 years with oil. Painted strips retain appearance for 5–7 years. Lifespan depends on usage intensity, sun exposure, and moisture. Outdoor strips require more frequent renewal — every 3–5 years regardless of coating type. Signs of needing renewal: dullness, micro-cracks, color change, surface roughness.
Can strips be painted after installation?
Yes, but better to paint before installation. Painting installed strips requires care to avoid staining glass and frame. Use painter’s tape to protect adjacent surfaces. Apply paint in thin layers with a small brush. Carefully paint hard-to-reach corners. If painting before installation, let strips fully dry before mounting. Handle carefully to avoid scratching fresh coating.
What strip size to choose for a double-glazed unit?
For a standard 24 mm double-glazed unit, a 20x20 mm strip is suitable. For a single-chamber 32 mm unit, a 25x25 mm strip is needed. The strip must fully cover the edge of the unit and extend at least 5 mm onto the frame. Too thin a strip won’t provide secure fixation; too thick a strip will protrude beyond the frame plane. Check the frame rebate depth and unit thickness before purchase.
What to do if the strip cracked after installation?
Cracks occur due to excessive wood moisture or excessive force when driving nails. Small cracks can be filled with wood putty, sanded, and varnished — they become invisible. Repairing through cracks is more difficult — better to replace the strip. To prevent: use strips with correct moisture content (8–10%), drive nails carefully with a small hammer, avoid excessive force. Pre-drilling small pilot holes for nails reduces cracking risk.
How long do wooden strips last?
With proper installation and quality protective treatment, coniferous strips last 20–30 years, hardwood strips 40–60 years or more. Functional strips in historic buildings are 100–150 years old. Lifespan depends on wood species, protective coating quality, and usage conditions. Outdoor strips, exposed to weather and temperature fluctuations, last less than indoor ones. Regular coating renewal extends lifespan indefinitely.
What to use instead of wooden nails for attaching strips?
Modern alternatives — special dowels or headless pins, which are nearly invisible after installation. For furniture, adhesive mounting — carpentry PVA or polyurethane glue — is used. Silicone sealant creates an elastic joint, allowing easy removal of the strip. In mass production, plastic latches are inserted into the frame. The choice of method depends on construction, usage conditions, and aesthetic requirements.
Conclusion
wooden trimAn element that combines functionality and aesthetics, reliability and natural beauty. In an era dominated by artificial materials, wooden sills remain indispensable where quality, durability, and eco-friendliness are valued. From simple glass fixing in windows to creating exquisite decorative compositions in interiors — the range of applications for this humble element is breathtaking.
The choice of wood species determines the characteristics of the sill. Coniferous species — pine, spruce, larch — offer the optimal price-to-quality ratio for most applications. Broadleaf species — oak, beech, ash — provide exceptional strength and prestige for premium projects. A properly selected species combined with quality protective treatment guarantees decades of flawless service.
Technical expertise in selecting the size and profile of the sill is critical to project success. Wood moisture at 8-10 percent, geometric precision, absence of unacceptable defects — parameters that cannot be ignored. Cutting corners on material quality leads to problems: gaps, warping, and the need for rework.
Proper installation requires attention to detail, but is accessible even to non-professionals with basic skills and quality tools. Material acclimatization, precise corner trimming, careful fastening without damaging glass, and finishing touches — adherence to technology ensures a professional-level result.
The advantages of natural wood over synthetic analogs are obvious: eco-friendliness, aesthetic superiority, repairability, longevity. Wooden sills create a healthy microclimate indoors, delight with natural texture, are easily restorable, and serve for decades. Plastic analogs cannot offer even half of these advantages.
Company STAVROS — a reliable partner for those who value qualitywood trimUsing premium raw materials from ecologically clean regions and modern high-precision equipment, STAVROS produces sills meeting the strictest quality standards. A wide range of profiles, species, and sizes allows finding the ideal solution for any project — from restoring a historical landmark to finishing a modern apartment.
Production of trim elementsQuality control at STAVROS is built on principles of oversight at every stage. Kiln-drying wood to optimal moisture levels of 8-10 percent, processing on high-precision CNC machines, multi-stage quality sorting — each operation is performed by professionals with years of experience. Result — sills with perfect geometry and flawless surface finish.
Individual approach to each client — STAVROS’s principle of operation. Professional consultations help select the optimal option considering the project’s specifics. The ability to manufacture non-standard profiles according to the client’s drawings opens up limitless possibilities for implementing unique design solutions. Flexible discount system makes the product accessible both to private individuals and large construction companies.
Direct deliveries from the manufacturer eliminate trade markups, ensuring fresh material with correct moisture parameters. Developed logistics network enables delivery to any region of Russia in the shortest time. Reliable packaging protects sills from damage during transport.
Choosingwooden trimChoosing STAVROS, you choose quality proven over time, eco-friendliness of natural material, beauty of natural wood, and reliability that will serve for decades. This is an investment in comfort, health, and aesthetics of the space where your family lives.