


Article Contents:
- Russian Ornamentation and the Role of Linear Elements
- Types of Rafters and Proportions
- Installing Rafters in "Terem" Patterns
- Finishing and Colors Inspired by Folk Motifs
- Errors and Quality Control
- Conclusion: Tradition Through the Lens of Modernity
- Frequently Asked Questions

When one speaks of Russian style in interior design, images of carved door casings, painted shutters, and patterned gables come to mind — all of which have adorned wooden houses from Arkhangelsk to Ryazan for centuries. But how can one transfer this aesthetic into a modern home without turning it into a museum decoration? The answer lies in one of the simplest and most expressive elements — the wooden rafter. It is precisely this element that can create rhythm, build composition, and return the interior to that very soulfulness which distinguishes traditional Russian dwellings.
A rafter is not simply a solid plank. It is a tool with which one can draw an entire story onto walls and ceilings. Vertical lines remind us of the upward striving characteristic of ancient Russian architecture. Horizontal lines — of the calmness and stability of log-frame buildings. Diagonal and intersecting patterns refer to folk ornamentation, which once protected homes from evil forces and attracted prosperity.
Why exactlyWooden plankbecame the main hero of this material? Because it is universal. From it, one can create both strict geometry and smooth transitions. It is equally good both as an accent and as a background. And most importantly — it allows working with volume and light and shadow, which is critically important for recreating the atmosphere of an old terem or estate.


Russian Ornamentation and the Role of Linear Elements
Ornament in Russian culture has never been mere decoration. Every swirl, every line carried meaning. Solar symbols represented life force, wavy lines — water and fertility, rhombuses — sown fields. When we speak of a modern interior in Russian style, it is important to understand: we are not copying the past, but interpreting it. And here, linear elements become the connecting link between history and today.
Verticality and Aspiration. Russian architecture always reached toward the sky. Church domes, kremlin towers, even ordinary residential houses with high gables — all of this created a sense of ascent, upward movement. In interior design, this role is taken on by vertical rafters. Installed on the wall at a certain spacing, they visually raise the ceiling, making the room brighter and more spacious. This is especially relevant in modern apartments with low ceilings, where every centimeter of height counts.
But verticality is not only about height. It is also about rhythm. In traditional Russian interiors, rhythm was created by beams, posts, carved supports. Todaywooden planks on the wallperform the same function. They divide space into zones without destroying its integrity. They create visual pauses that help the eye rest and focus on what is important.
Horizontal lines and stability. If verticality is movement, then horizontality is calmness. In a Russian izba, horizontal lines were defined by the roof ridge, shelves, benches, window sills. They created a sense of reliability, protection, rootedness. In modern interiors, horizontal rafters play a similar role. They calm the space, making it more cozy and lived-in.
Horizontal rafters are good where one needs to emphasize length — in long corridors, in living rooms with panoramic windows, in bedrooms where a sense of calm is important. They visually expand the space, but most importantly — they bring us back to that very "grounded" aesthetic of Russian dwellings, where everything was arranged simply, clearly, and humanely.
Diagonals and pattern dynamics. Diagonal lines — this is already play, excitement, movement. In traditional wooden carving, diagonal elements were often used to create complex geometric patterns: rhombuses, stars, rosettes. These patterns did not merely please the eye — they told stories, conveyed knowledge, served as protective charms.
In modern interiors, diagonal rafters allow one to create an accent wall that will attract attention. Intersecting planks form a rhomboid grid reminiscent of latticed shutters or window frames of old terems. Such a wall becomes not merely a background, but a full-fledged decorative element that sets the mood for the entire space.
The combination of directions. The most interesting begins when vertical, horizontal, and diagonal lines start interacting. This is precisely how many Russian ornaments are structured — through the superposition and intersection of simple elements, a complex, rich pattern emerges. In interior design, this can appear as a system of rafters, where vertical planks serve as the base, horizontal ones as the connecting element, and diagonal ones as decorative accents.
Such a composition requires precise calculation and a good sense of proportion. But the result is worth it: the space acquires depth, multi-layeredness, character. It begins to live, breathe, tell stories — just like an old wooden house, where every board, every beam carries the imprint of time and human labor.
When we speak ofdecoration in Russian stylewe are not calling for literal copying of museum samples. A modern interior is always a synthesis, a dialogue between the past and the present. Linear elements allow us to take the very essence of traditional ornament — its rhythm, its structure, its energy — and adapt it to today's aesthetic and functional requirements.
In this sense, the rafter is an ideal material. It is simple enough not to overload the space, yet expressive enough to create character. It works well in minimalist interiors, eclectic ones, and those fully devoted to the Russian theme. It does not shout about itself, but is always felt. It does not dominate, but organizes. It does not imitate antiquity, but remembers it.


Types of Rafters and Proportions
If ornamentation is the language in which an interior speaks, then the rafter is the alphabet of this language. The choice of rafters not only affects the appearance of the decoration, but also its character, mood, and energy. In Russian style, proportions are especially important: too thin planks will disappear, too massive ones will overwhelm the space. A golden mean is needed, which will create a balance between expressiveness and restraint.
Square-section rafters. This is classic, the foundation of foundations. A square cross-section provides a clear, graphic line that reads well in space. Such rafters are universal: they are suitable for creating vertical lattices, horizontal panels, and diagonal patterns. Thickness can vary from 15 to 40 mm depending on the scale of the room and the design intent.
For small rooms — bedrooms, offices — 20×20 or 25×25 mm boards are suitable. They will create a light, airy pattern without overcrowding the space. For living rooms, halls, and large public spaces, choose thicker boards — 30×30 or even 40×40 mm. They will appear more substantial and imposing, while still maintaining proportionality.
Rectangular-section boards. If a square board is neutrality, then a rectangular one is a choice. A 40 mm wide and 20 mm thick board creates a completely different impression than a 30×30 mm square board, although their cross-sectional area is approximately the same. A rectangular board appears visually lighter and more like a plank, which fits perfectly into the aesthetic of a wooden house.
Such boards are especially good for horizontal compositions. Installed flat, they create the impression of cladding, resembling log walls covered with timber. And if turned edge-on, they form a more graphic, modern pattern, while still maintaining a connection to tradition.
Decorative boards. Here begins the true space for creativity. The board may have rounded edges, beveled edges, or a profiled surface. Such elements are more difficult to process, but they provide a richer play of light and shadow. A decorative board combines well with traditional carved elements — door casings, cornices, rosettes. It becomes a connecting link between a flat wall and volumetric decoration.
Especially interestingWooden planks for decorationwith a light relief — grooves, channels, protruding ribs. Such relief is not noticeable at first glance, but contributes to tactile sensation and the perception of quality and handcrafted nature. Running your hand along a wall clad with decorative boards, you will feel the difference — it is no longer just a smooth surface, but something alive, breathing, filled with texture.
Choice of wood species. In Russian style, local species were traditionally used — pine, spruce, linden, birch. Oak and beech were considered noble materials and used for structural elements. Today, the choice is broader: you can work with beech, walnut, even exotic species. But to create an authentic atmosphere, it is better to stick to traditional options.
Pine — lightness, brightness, resinous aroma. It is easy to process, holds its shape, does not crack. Linden — soft, pliable, ideal for carving. Oak — symbol of strength and durability, its dark texture adds solidity to the interior. The choice depends on the atmosphere you want to create: light and airy or dark and intimate.
Proportions and installation spacing. This is, perhaps, the most important factor. Even the most beautiful boards will not work if installed incorrectly. Too dense a grid creates a feeling of confinement, like a cage. Too sparse — the composition falls apart, loses its structure. The optimal spacing depends on the board thickness and room size.
For square boards with a 25×25 mm cross-section, a spacing of 100–150 mm between axes works well. This gives a dense but not oppressive pattern. For thicker boards — 30×30 or 40×40 mm — the spacing should be increased to 150–200 mm. At this spacing, the boards do not merge into a solid wall, yet they create a clear structure.
If you use boards of different thicknesses — for example, thicker vertical boards and thinner horizontal crossbars — the spacing should also be different. Thick boards are installed less frequently, thin ones — more often. This creates hierarchy, main and secondary elements, and the composition acquires internal logic.
Playing with depth. Boards can be installed not only flush against the wall, but also at some distance from it. This creates additional volume and allows working with light and shadow. You can hide backlighting behind the boards — and then the wall will begin to glow from within, creating almost a mystical atmosphere, like in old churches where light penetrated through patterned lattices.
Installation depth is also important. Too shallow — 10–15 mm — is almost imperceptible. Too deep — 100 mm and more — turns the boards into full-fledged beams, which may be appropriate in large rooms but excessive in ordinary rooms. The optimum is 30–50 mm. This is enough to create a pronounced shadow, but not so much that the boards start protruding into space.
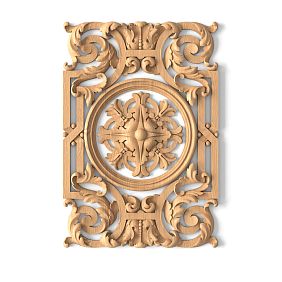
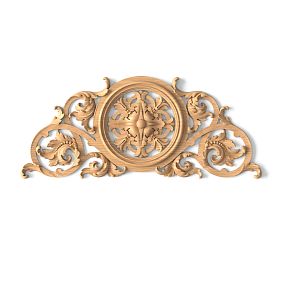
Our factory also produces:


Installing boards in a "terem" pattern
The "terem" pattern is not a specific ornament, but rather a general term for complex geometric compositions that resemble the architecture of old Russian terem houses. Multi-levelness, rhythm, combination of vertical and horizontal elements, diagonal inserts — all this creates a sense of architectural and structural integrity. A wall decorated with such a pattern stops being merely a background and becomes an independent architectural element.
Preparing the base. Before starting installation, carefully prepare the wall. It must be flat, dry, and strong. Any irregularities will become apparent after installing the boards — gaps, misalignments, waves. If the wall is plastered, it must be primed. If covered with gypsum board, ensure the sheets are securely fastened and do not move.
Marking — half the success. For complex patterns, make a full-scale drawing on the wall with pencil or chalk. Mark the positions of the main vertical boards, then horizontal, then diagonal. Check symmetry, angles, and intervals. It is better to spend an extra hour on marking than to later rework already installed elements.
Installing main vertical boards. Start with them — they set the main rhythm of the composition. Boards are attached either with adhesive or hidden fasteners — screws driven at an angle so they are not visible. If the wall is wooden or covered with plywood, you can use finishing nails — they are thin, easy to sink and fill with putty.
It is important to control verticality with a level. Even a slight tilt of a few degrees will be noticeable, especially when boards are installed in rows. If the wall is long, stretch a control string between the outermost boards and use it as a reference when installing intermediate ones.
Horizontal crossbars. They are installed over vertical boards and create a crisscross pattern. Here, precise jointing is crucial. Boards must fit tightly together, without gaps or cracks. If a small gap forms between a vertical and horizontal board, it can be filled with a thin strip of the same wood species.
Horizontal boards can be attached with adhesive — this is the cleanest method, with no visible fasteners. But the adhesive must be high-quality, carpentry-grade, with good adhesion to wood. If the room is humid or subject to vibrations, it is better to reinforce the adhesive joints with hidden screws.
Diagonal elements. This is the most complex part of the work. Diagonal boards must be cut at an angle, and this angle must be precise. A small error — and the joints will not align, leaving gaps. It is better to work with a miter saw, which allows setting any angle with precision down to the degree.
Before installing diagonal elements, lay them out on the floor and check how they fit together. If everything aligns — you can transfer them to the wall. If not — it is better to recut them than to install obviously inaccurate parts. In the "terem" pattern, diagonals often form rhombuses or stars, and any inaccuracy immediately spoils the impression.
Working with room corners. Internal and external corners are always problematic areas. Boards can be joined at a 45-degree angle, like door casings — this gives a neat, clean joint. But you can also simplify: run boards from one wall to another overlapping. This is less elegant, but easier to execute and even closer to traditional carpentry aesthetics, where functionality always outweighed decoration.
Filling the background. The wall remains between the boards, and it also needs to be styled. The simplest option — paint it in a neutral color: white, beige, light gray. But you can go further: apply decorative textured plaster, stick traditional Russian patterned wallpaper, or hand-paint the wall.
The hand-painted option is especially interesting. The spaces between the boards form sorts of frames or panels that naturally invite filling. These can be stylized floral patterns, geometric ornaments, symbolic images — anything that fits the spirit of Russian style. The painting does not have to be bright — even monochromatic images in the tone of the wood will contribute to the overall atmosphere.
Final finishing. After all boards are installed, go over the joints and connections, checking for gaps, unevenness, or irregularities. Minor defects can be filled with wood putty matched to the color. Then — sanding, dust removal, and you can proceed to final finishing.
Get Consultation
Finishing and colors inspired by folk motifs
Wood itself is beautiful. Its texture, color, grain pattern — all this contributes to creating an atmosphere. But in Russian interiors, wood was rarely left in its natural state. It was painted, decorated with patterns, or carved. This was not decoration for decoration’s sake — it was a way to imbue the dwelling with meaning, protect it, and make it unique. Today, we can use these same techniques, adapting them to modern tastes and technologies.
Natural wood and transparent finishes. If the chosen wood species is beautiful — oak, beech, walnut — it makes sense to preserve its natural texture. For this, transparent oils, waxes, and varnishes are used. Oil penetrates deeply into the wood, emphasizing its grain, giving the surface a velvety, pleasant feel. Wax provides a more pronounced sheen and creates a protective film. Varnish is the most durable finish, but also looks most "plastic".
For Russian style, oil or wax is preferable. They leave wood alive, breathable, preserving its aroma. Lacquer is suitable where increased resistance to abrasion and moisture is needed — for example, in hallways or kitchens. But in living rooms, it’s better to avoid it.
Staining and toning. If the natural color of wood appears too light or, conversely, too dark, it can be altered using stains and toning agents. Stain penetrates the wood structure and colors it from within, preserving the visibility of the texture. This allows, for example, to make light pine resemble dark oak or give birch a reddish tint characteristic of cherry.
Warm tones are especially suitable in Russian style: honey-gold, amber, dark brown with a red undertone. Cool gray tones can also be used, but cautiously — they suit Scandinavian aesthetics more than Russian ones. If gray is desired, choose warm gray with a slight beige or olive tint.
Painting with covering paints. White planks on a colored wall — a classic technique that works well in Russian interiors. White symbolizes purity, light, festivity. It refreshes the space, making it lighter. Moreover, white planks visually increase the room’s volume, which is especially important in small rooms.
But white is not the only option. Traditional Russian interiors used other colors: red (symbol of life and joy), blue (sky, water, protection), green (nature, growth), yellow (sun, wealth). These colors can be applied to planks or, conversely, to the background between them.
Red planks on a white wall — a bold solution that immediately sets the tone for the entire interior. Blue — more calm, contemplative. Green — fresh, natural. It’s important not to overdo it: if planks are colored, the background should be neutral, and vice versa.
Painting and ornamentation. Here lies a vast field for creativity. Planks can be hand-painted with stylized floral patterns, geometric ornaments, symbolic signs. It’s meticulous work, but the result is worth the effort: painted planks transform the interior into a work of art.
Painting can be complex and multicolored, or minimalist, with a single color on natural wood. Interesting effects are achieved with contrasting combinations: black on white, red on gold, blue on gray. Such combinations are characteristic of many forms of Russian folk art — from Хохлома to Гжель.
Patina and artificial aging. If you want to create an effect of an old, lived-in house, you can use the patina technique. Wood is lightly brushed (soft fibers are removed with a stiff brush), then toned with a dark stain, and after light sanding, protruding parts become lighter. This results in a relief, aged surface that looks as if the planks have hung on the wall for decades.
Patina is especially suitable for shaped planks with bevels and rounded edges. Dark color accumulates in recesses, while convex parts of wood lighten — the play of light and shadow becomes more pronounced. Such planks fit perfectly into interiors styled as old estates or merchant houses.
Combination of finishes. The richest effect is achieved by combining different types of finishes. For example, main vertical planks are left in natural wood color, covered with oil. Horizontal beams are painted white. Diagonal elements are decorated with delicate ornamentation. Such a composition looks complex, multi-layered, yet not overloaded — each element plays its own role.
The key is moderation. In Russian folk art, there was always restraint, a sense of tact. Yes, bright colors were used, but they didn’t shout — they sang. Patterns were rich, but not chaotic. The same should be true in the interior: colors are chosen harmoniously, patterns are rhythmic, every detail is in its place.
Care for finishes. Wooden planks, especially those covered with oil or wax, require regular maintenance. Every year or so, they need to be refreshed: apply a fresh layer of oil or wax, polish with a soft cloth. This not only restores the protective properties of the finish, but also refreshes the color, returns the wood its luster and richness.
Painted planks are less demanding, but they also require care. Dust settling on the relief surface over time may penetrate the paint. Therefore, planks should be regularly wiped with a slightly damp cloth, and every few years — repaint areas where paint has worn or faded.
Errors and quality control
Even the most thought-out project can be ruined by improper execution. Installing planks is an exacting task requiring care and attention to detail. The slightest carelessness — and the composition loses integrity, the pattern breaks down, the wall looks sloppy. Let’s examine typical errors and how to avoid them.
Inaccurate marking. This is the number one error. If marking is done 'by eye', without a level and tape measure, planks will inevitably be crooked. This is especially noticeable on long walls: a small deviation at the start of the wall becomes a serious skew by the end. The solution is simple: use a laser level, build the marking from base lines, constantly check angles and intervals.
Uneven base. If the wall is wavy, planks will replicate its curves. As a result — gaps, cracks, disruption of the pattern’s geometry. Before installation, the wall must be leveled. If the irregularities are minor, they can be compensated for by the thickness of the adhesive or spacers. If major — plastering is unavoidable.
Poor-quality material. Planks with knots, cracks, warping — this is defective material. Even if the price is attractive, do not economize on material. Such planks are difficult to install, do not hold well, and may crack or warp over time. Work only with quality, calibrated planks that have undergone drying and treatment.
Incorrect choice of fasteners. Too thick screws split the plank. Weak adhesive does not hold weight. Nails driven in the wrong place protrude and spoil the appearance. Fasteners must be chosen according to the specific material and installation method. For thin planks — finish nails or concealed screws. For thick planks — adhesive plus additional fixation. For humid rooms — stainless steel fasteners.
Absence of compensating gaps. Wood is a living material, reacting to humidity and temperature. When humidity increases, wood expands; when it decreases — it contracts. If planks are installed tightly, without gaps, when they expand they will press against each other, bend, and pull away from the wall. Between planks and at corners, compensating gaps — a few millimeters are sufficient.
Incorrect installation sequence. You cannot start with diagonals and finish with verticals. This will result in elements not aligning, gaps forming. The correct sequence: first, main vertical planks, then horizontal, then diagonal, then small decorative elements. Each stage — only after the previous one is fully completed.
Neglecting final finishing. After installation, many forget about final touches. Planks remain with burrs, sharp edges, adhesive marks. This is unacceptable. After installing all elements, sand the ends and edges with fine-grit sandpaper, remove all irregularities, smooth sharp corners. Then — remove dust, degrease the surface, and only then apply the final finish.Ignoring material acclimatization. You brought planks from outside into a warm room and immediately started installing them? This is a gross error. Wood must adapt to the room’s microclimate — it should rest for at least 48–72 hours at the temperature and humidity level where it will remain permanently. Otherwise, after installation, planks may warp, buckle, gaps may form, or excessive stress may occur.
Style mismatch. This is not a technical error, but no less critical. Planks in Russian style must match the overall interior concept. You cannot combine rough, heavy planks with elegant modern minimalist furniture. You cannot apply bright colored painting in a room where everything else is monochromatic. Each element must support the overall idea, enhance it, not contradict it.
Quality control at every stage. To avoid errors, constant control is needed. After marking — check all dimensions and angles. After installing the first planks — check with a level and template. After completing a section’s installation — inspect all joints and connections. It’s better to spend time checking than to redo finished work later.
Special attention to corners and joints. It is here that defects most often appear. The angle must be exactly 90 degrees (or as intended by the project), the joint — tight, without gaps. If the joint is not ideal, it can be masked with fine cladding, a decorative element, or simply carefully spackled in the wood tone.
Checking fastener strength. After installation, ensure that planks are securely held. Gently press on the element — it should not bend, creak, or pull away from the wall. If there is any suspicion that the fastening is weak, it’s better to reinforce it immediately: add more adhesive, drive in an additional screw, install a spacer. Redoing after final finishing will be exponentially more difficult.
Final acceptance. When all work is completed, the finish has been applied and dried, a final acceptance should be conducted. Stand at a distance of 2–3 meters and evaluate the overall picture. Is everything symmetrical? Are there any misalignments? Is the rhythm maintained? Then approach closer and check details: joints, angles, finish quality. Only after everything has been checked and approved can the work be considered complete.
Conclusion: Tradition through the prism of modernity
Russian style in interior design is not a museum reconstruction or theatrical decoration. It is a living tradition that continues to evolve, adapting to new conditions and tastes.Carved wooden window casingsPainted shutters, carved cornices — all of this was not merely decoration, but a way to express oneself, one’s connection to the land, ancestors, and nature.
Today we cannot (and should not) fully copy interiors of the past. Our lifestyle has changed, technologies, materials, and aesthetic preferences have evolved. But we can take the most valuable things — principles, ideas, images — and reinterpret them in a modern context. And here, wooden slats become the ideal tool.
It is simple, as was the peasant dwelling. It is functional, as were all elements of the traditional home. It is beautiful in the beauty that arises from proper proportions, honest material, precise craftsmanship. With slats, you can create an interior that is simultaneously modern and rooted in tradition — an interior where it is pleasant to live, that fills with energy, that tells stories.
Working with slats is not simply mounting boards on a wall. It is a conversation with space, material, and tradition. It is the opportunity to create something unique, personal, yet connected to the culture of many generations. And when you see how a pattern gradually emerges on a smooth wall, how a flat surface gains volume, how light begins to play between the slats — you understand: it works. It is not stylization, not imitation. It is real.
STAVROS company has been producing solid wood items for more than twenty years, bringing to life the most daring design projects. We know wood in all its forms — from selecting the right species to the finest nuances of finishing. Our slats, moldings, cornices, and decorative carvings are made on modern equipment, yet they retain what makes wood a living material — its texture, warmth, soul.
We do not simply manufacture decorative elements. We help create interiors where it is comfortable to live — interiors that reflect the character of their owners, their values, their connection to tradition. Every STAVROS item is the result of careful work, from material selection to final quality control. We use only carefully selected wood, properly dried. We apply proven processing technologies. We pay attention to every detail — because we know: in interiors, as in life, details determine everything.
By contacting us, you receive not just a product, but a partner in creating space. Our specialists will help you select optimal slat sizes and profiles, calculate the required material amount, and provide installation and finishing recommendations. We work with private clients, as well as with designers, architects, and construction companies. The geography of our projects spans all of Russia — from Kaliningrad to Vladivostok.
In the STAVROS catalog, you will find everything needed to create an interior in Russian style: from simple slats to complex carved elements, from classic casings to unique decorative panels. We constantly expand our assortment, follow trends, yet remain true to the main principle — quality above all.
Frequently asked questions
Which wood is best to choose for slats in Russian style?
For creating an authentic atmosphere, traditional species are best: pine, spruce, linden, oak, beech. Pine is the optimal choice in terms of price and quality — it is easy to work with and lasts long. Oak — if maximum strength and expressive texture are needed. Linden — for rooms with painting or carving, as it is very pliable. The choice depends on budget, room purpose, and desired visual effect.
Can slats be mounted on uneven walls?
Technically yes, but the result will be unsatisfactory. Wall irregularities will appear as gaps, misalignments, and distorted patterns. Before mounting, the wall must be leveled — plastered, spackled, or covered with drywall. Minor irregularities (up to 3-5 mm) can be compensated by the thickness of the adhesive layer or spacers, but this is an exception rather than the rule.
How to calculate the required amount of slats?
First, determine the wall area and slat placement scheme. For vertical slats: multiply wall height by the number of boards (depending on spacing). For horizontal: multiply wall length by the number of rows. Diagonal slats are calculated using the Pythagorean theorem, taking into account the angle of inclination. Add 10-15% to the result for trimming and possible defects. It is better to take slightly more material than to later search for slats in exact match.
Is it necessary to treat slats with antiseptic?
In living rooms with normal humidity, it is not necessary, but recommended. Antiseptic treatment protects wood from mold, mildew, and wood-boring insects. It is especially important for rooms with high humidity — bathrooms, kitchens, saunas. Use only water-based compositions, without strong odors, approved for indoor use.
What is the optimal spacing between slats for creating a pattern?
There is no universal answer — it depends on slat thickness and room size. For 25×25 mm slats, optimal spacing is 100-150 mm between centers. For thicker ones (30×30, 40×40 mm) — 150-200 mm. Too dense a grid creates a feeling of confinement, too sparse — loses expressiveness. Before mounting, you can test a sample section and evaluate the visual effect.
How to care for slats coated with oil?
Regularly (once every 1-2 weeks) wipe them with a slightly damp soft cloth to remove dust. Once a year or so, renew the oil coating: clean the surface, lightly sand with fine-grit sandpaper (220-320 grit), remove dust, and apply a fresh thin, even layer of oil. Wipe off excess with a dry cloth. After 24 hours, polish the surface with a soft cloth to achieve shine.
Can slats be used in humid areas?
Yes, but with certain limitations. Wood must be treated with special moisture-protective compositions, and the finish should be oil or lacquer suitable for humid areas. Fasteners must be made of stainless steel. Good ventilation is essential to allow wood to dry. For areas with direct water contact (e.g., shower stalls), wood is not suitable — use moisture-resistant imitations instead.
How to combine slats with other elements of Russian style?
Slats combine well with carved casings, cornices, moldings, decorative rosettes. It is important to maintain consistency in color and texture: if slats are natural wood, carved elements should also be natural. If slats are painted, carving should match in color — either the same or contrasting, but within the same color palette. Avoid mixing styles: Russian carving does not pair well with classical moldings in Empire or Baroque styles.
How long does it take to install slats on one wall?
For a 12-15 m² wall with a simple vertical pattern, one experienced craftsman will take 1-2 working days (including marking and mounting). Complex patterns with diagonals, crossings, and decorative inserts may require 3-5 days. Plus time for preparing the base (if leveling is needed) and final finishing. Overall time from marking to finished wall — 3 to 10 days, depending on project complexity.
Can slats be removed without damaging the wall?
If slats were mounted with adhesive, removal will be difficult — you’ll need to carefully pry them off, risking damage to plaster or wallpaper. If screws or nails were used, removal is easier: unscrew or remove the fasteners, take off the slats, and patch holes with spackle. For removable installations, it’s better to use hidden fasteners on a metal frame — then slats can be removed and reinstalled without damage.


