Article Contents:
- Why make wall panels yourself instead of ordering ready-made ones
- Savings, control, and design freedom
- Unified style: from panels to furniture
- Where to buy interior slats and wooden borders for panels
- Main sections for selecting millwork
- Selection by wood species and finish type
- How to design wall panels: step by step
- Step 1. Determine the height and type of panels
- Step 2. Choose the composition: slats, borders, baseboard
- Step 3. Select the slat cross-section and border width
- Step 4. Plan the connection with the floor, ceiling, and furniture
- Step-by-step guide: how to assemble panels yourself
- Foundation Preparation
- Installation of interior baseboard
- Forming frames from wooden borders
- Filling the fields with slats
- Final finishing of panels
- How to connect homemade panels with furniture
- Dining area or kitchen
- Bar area or kitchen with an island
- Hallway and corridor
- Bedroom
- Frequently asked questions about DIY panel assembly
- STAVROS: how the brand unites panels, millwork, and furniture

When in 2026 someone searches for 'interior slat purchase' and 'wooden borders,' it almost always stems from one desire—to quickly and beautifully assemble wall panels themselves, without expensive renovations and endless contractor teams. And it's achievable: just properly select millwork products, competently design the panel pattern, and rely on ready-made solutions for wood and furniture from a single manufacturer.
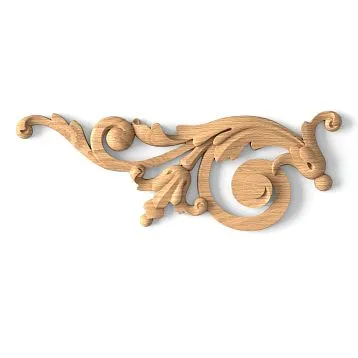
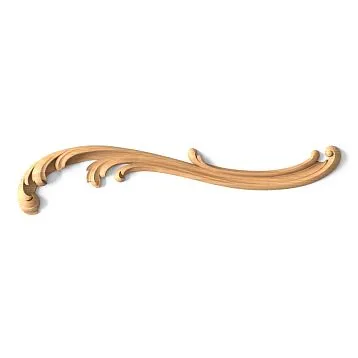
Solid beech and oak wooden slats, available in the sectionmoldings, cornices, baseboards, slatsThey allow for assembly from simple vertical slat panels to complex classical compositions. And decorative border moldings and cornices from the same section help to finish edges, create frames, zone walls, and join panels with the ceiling, doors, and furniture.


Why make wall panels yourself instead of ordering ready-made ones


Savings, control, and design freedom
When buying ready-made panels, you pay not only for the material but also for someone else's time, transportation of bulky slabs, and factory assembly. When you take as a basiswooden slats for wall and ceiling finishing, you pay only for quality solid wood and millwork geometry, while fully controlling the design and installation.
DIY installation gives you:
-
the ability to fit panel sizes to a specific room, rather than 'fitting' the room to ready-made slab sizes;
-
the freedom to combine vertical slats, wooden borders, and interior skirting into your own pattern;
-
budget savings without material compromises — you can afford solid oak or beech, not laminated imitation.
Our factory also produces:


Unified style: from panels to furniture
Another important advantage of on-site work is that you can immediately coordinate wall panels with furniture. For this, it's enough to take furniture bases from the same manufacturer as the millwork.
In the catalogSolid wood furniture framesavailable are bases for chairs, armchairs, bar stools, benches, cabinets, and tables made of oak and beech — the same species used to produce slats, borders, and skirting.
This provides the opportunity to:
-
assemble slatted panels on the wall;
-
place bar stools near them onbar frames;
-
complement the composition with a bench on abench frameor an ottoman on a corresponding base;
-
place a table on a solidtable frame or table base.
This creates a cohesive interior where wall slats, wooden borders, and furniture 'hardware' speak the same visual language.
Get Consultation
Where to buy interior slats and wooden borders for panels
Main sections for selecting millwork
If your goal is specifically wall panels, you should start with the basic sectionmolding products.
Here you will find:
-
wooden slats for walls and ceilings— the primary working tool for slatted panels and vertical geometry;
-
moldings and wooden borders for walls— profiles used to assemble frames, dividers, and decorative belts;
-
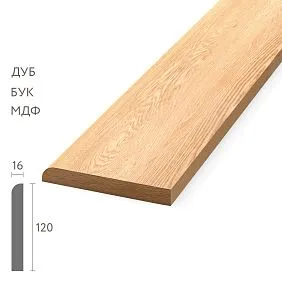
skirting boards and cornices, allowing you to 'tie' the panel to the floor and ceiling in a unified style.
Additionally, it's worth checking the sectionnew slats— new profiles and finishing options appear there, initially designed for modern interior geometry.
Selection by wood species and finish type
The selection logic is simple:
-
If you want to paint panels white, black, or complex shades — focus on beech solid wood battens and border moldings: it sands excellently and evenly accepts enamel tones.
-
If emphasized texture under oil or varnish is needed — choose oak solid wood: the annual ring pattern on battens and borders makes the wall lively, voluminous, and status-worthy.
-
If stability and economy in painting are important — look at MDF solutions with decorative coating from the same molding section.
Combining beech and oak on one wall is possible, but it's reasonable to do so within one species for panels and another — for furniture. For example: wall panels — from oak battens and borders, and chairs and armchairs — onbeech frames of the classic collection.
How to design wall panels: step by step
Step 1. Determine height and panel type
Wall panels can be roughly divided into three types:
-
low — up to 900–1000 mm from the floor (panels along the wall, leaving the top smooth);
-
medium — 1200–1500 mm (classical boiserie height in corridors and dining rooms);
-
high — from floor to ceiling, most often implemented as batten panels or large modules.
If you're tackling the work yourself for the first time, it's optimal to start with low or medium panels: less volume, simpler cutting, easier to control geometry.
Step 2. Choose composition: battens, borders, baseboard
There are three basic compositions:
-
Pure batten panel
Battens are mounted vertically with a set spacing, and rest on an interior baseboard at the bottom. The panel's top edge can be 'closed' with a wooden border or horizontal molding. -
Frame panel with batten infill
First, wooden borders and moldings are mounted around the perimeter of the field, forming rectangular or square 'windows'; then vertical or horizontal battens are installed inside each window. -
Classical boiserie with smooth field and batten inserts
The area inside the frame remains smooth (painted wall), and the batten is used as a thin vertical accent, dividing the panel into submodules.
For modern 2026 interiors, the first and second options are most often chosen — pure geometry and modularity read best.
Step 3. Select batten profile and border width
Visual balance is important:
-
with a panel height of 900–1000 mm, a 20×40 or 25×40 mm batten and a border frame 40–60 mm wide look comfortable;
-
with a height of 1200–1500 mm — a 25×40 or 30×50 mm batten and a 60–80 mm border;
-
for full wall-height panels in combination withsolid wood floor baseboards— 30×50 mm slats and 70–100 mm frame borders.
If you want to emphasize the slats, choose a narrower border; if the goal is a classic frame and a more subdued fill — make the border wider and the slats thinner.
Step 4. Plan the connection with the floor, ceiling, and furniture
An interior stops being random when the walls, floor, and furniture are tied together by a single material or geometry.
-
The bottom line of the panels rests on the interior skirting board: it's logical to take the skirting from the same trim section as the slats and borders — this way you avoid mismatches in profile and shade.
-
At the top, the panel can be finished with a thin cornice or horizontal molding from thewooden cornices and moldingssection, especially if you have high ceilings and want a pronounced line.
-
It's better to rest furniture on ready-made wooden frames:
– for the bar area —bar stools on wooden frames;
– for the hallway — benches and ottomans onbench and ottoman frames;
– for the dining set — tables and chairs ontable and chair frames.
This way, the paneled wall stops being a separate 'decoration' and becomes a background that works together with the furniture.
Step-by-step guide: how to assemble panels yourself
Below is a generalized algorithm for vertical slatted panels with a frame made of wooden borders. It suits most residential spaces.
Foundation Preparation
-
Assess wall evenness.
For slats and molding, what's critical isn't perfect plaster, but the absence of deep 'dips' and 'bumps'. Deviations up to 3–5 mm over 2 linear meters are acceptable — the trim will hide them, but serious depressions are better leveled beforehand with filler. -
Mark the levels.
Measure the panel height from the finished floor. Draw a horizontal line (this takes minutes with a laser level). This line will become the top or bottom of the frame to which you'll attach the wooden borders. -
Determine the slat spacing.
For panels of medium density, a spacing of 100–150 mm is comfortable. For example, with a slat width of 30 mm and a spacing of 120 mm, you get 6–7 slats per meter of wall — the pattern is readable but not overwhelming.
Installing the interior skirting board
-
Cut the skirting board to size.
Use a miter saw or miter box to neatly cut corners at 45°. This is especially noticeable in premium finishes — the joint should be tight and clean. -
Secure the skirting board.
For solid oak and beech, the most reliable method is to combine mounting adhesive and hidden fasteners with finish nails. The adhesive provides continuous support, the nails — fixation until it sets. -
Check for levelness.
You will be 'raising' the entire panel from the baseboard, so its geometry is critical. An error in the baseboard will cause a skew along the entire height.
Forming frames from wooden borders
-
Draw a grid of panels on the wall.
Determine how many modules you want in width and height. Mark the vertical and horizontal axes of the future frames, taking into account the border width. -
Select the border profile.
For wall panels, it is logical to use panel moldings from the sectionof wooden moldings and borders: 40–80 mm wide, with a concise or classic profile. -
Mount the borders.
– first the horizontal elements along the levels;
– then the vertical posts forming the rectangles.
Internal and external corners are neatly trimmed, joints are puttied if necessary.
Filling the fields with slats
-
Cut the slats to the height of the panel.
Example: panel height 1200 mm, top and bottom borders 60 mm each — clear field 1080 mm. Slats are cut 1–2 mm shorter (so they don't press against the border 'in a tight fit'). -
Determine the exact spacing.
Calculate the number of slats and the distance between them so that the pattern is symmetrical on the right and left. It's better to slightly adjust the spacing than to leave a 'scrap piece' at the edge. -
Secure the slats.
Option 1 — with adhesive along the entire length (suitable for thin slats and even walls).
Option 2 — with thin screws with a countersunk head, followed by puttying the holes.
Option 3 — on hidden clips along horizontal base slats (if a light frame is being made).
Final finishing of the panels
After installation:
-
all transitions and puttied areas are sanded with fine-grit abrasive;
-
panels are coated with oil, varnish, or paint — depending on the chosen solution.
It is important to think in advance whether you will paint everything 'in one color' or play with contrast: white borders and baseboard, and the panel field — natural wood.
How to connect homemade panels with furniture
Beautiful wall panels will look incomplete if the furniture turns out to be random. A logical strategy is to use ready-madeFurniture Frames and Pedestalsmade from the same wood species.
Dining or kitchen area
-
Slatted and border panels on the wall behind the dining set.
-
Table on awooden table base or table frame.
-
Chairs onchair frames and armchair framesin the same oak or beech shade.
Bar area or kitchen with an island
-
Vertical slatted panels around the island or along the wall.
-
Bar counter, complemented bybar stool frames.
-
Possibility to useconsole frames or table basesas supports for wall shelves in the same geometry.
Hallway and corridor
-
Low panels with wooden borders along the perimeter.
-
Bench or banquette on aready-made bench or banquette frame.
-
Hanging mirror framed with the same moldings as the panels.
Bedroom
-
Panel wall treatment behind the bed — either fully slatted or framed with borders and slats as infill.
-
Bed based onsolid wood headboard and footboardwith the same wood species.
-
Nightstands onready-made nightstand framesor compact consoles in the same style.
This way you create not just a wall panel, but a cohesive room where the texture and shade of solid wood work in sync.
Frequently asked questions about DIY panel assembly
1. Can panels be assembled without carpentry experience?
Yes, if you choose simple vertical slatted panels and work carefully according to markings. The main skills are clean end cuts and working with a level.
2. Which slats are easiest to install?
Thin 20×40 or 25×40 mm beech slats — they are lighter in weight, easier to cut, and take paint well, which forgives minor imperfections in joints.
3. Is a frame needed or can battens be glued directly to the wall?
If the wall is sufficiently even and you don't plan to remove the panels in the future — you can glue them with strong mounting adhesive. For heavy oak battens and complex patterns, using a hidden frame is more reliable.
4. How do wooden borders differ from regular moldings?
Essentially, they are the same moldings, but selected specifically in width and profile for panels: they set frames, divide walls into modules, and create an expressive outline.
5. How to combine panels with existing laminate or tile?
Choose interior skirting boards and borders not to match the floor pattern, but to suit the future overall style: oiled oak — for warm interiors, white beech — for minimalism, dark tones — for contrast.
6. Can the same battens be used on the ceiling?
Yes, most battens from the sectionwooden battens for finishingare designed for both walls and ceilings. This is one way to create a cohesive spatial 'box'.
STAVROS: how the brand unites panels, trim, and furniture
In conclusion, it's logical to end where everything comes together — with the STAVROS brand.
This manufacturer doesn't just sell individual items — battens, borders, skirting boards, or chair frames. It offers the ability to assemble complete interior systems: from trim and wall panels to table, chair, bench, and bed frames made of solid oak and beech.
On one website you can:
-
choose and buy interior battens for walls and ceilings;
-
select matching wooden borders and moldings of the required profile;
-
coordinate all this with interior skirting boards made from the same solid wood;
-
immediately take furniture frames from the 'Classic' or 'Modern' collections so that panels and furniture speak the same language.
As a result, you get interiors that look significantly more expensive than the invested budget — not through expensive finishing 'magic,' but through proper work with wood, geometry, and a single source of quality. And this is exactly what users value today when visiting the STAVROS website: the ability to assemble their own interior — with their own hands, but at a professional level.