Article Contents:
- What is a DIY Slat Panel — Construction Principle
- Anatomy of a Slat Panel
- Why MDF Backing is Better Than Direct Slat Mounting on Wall
- Two Types of Slat Panel Construction
- Tools and Materials: Slats, MDF Backing, Glue, Screws
- Slats for Panel: Wood Species and Cross-Section Selection
- MDF Backing: Selection Parameters
- Glue for Fixing Slats to MDF
- Screws: When Needed, When Not
- Installation Tools
- Calculation: Number of Slats, Spacing, Panel Size
- Determining Panel Size
- Formula for Calculating Number of Slats
- Calculating Slat Length
- Calculating Panel Weight on Wall
- Painting Slats Before Installation — Why It's More Convenient
- Three Reasons to Paint Slats Before Installation
- Work Sequence: Backing and Slats Painted Separately
- Color Solutions: Backing and Slats
- Attaching Backing to Wall — Levelness and Plumb
- Marking Panel Position on Wall
- Methods for Attaching MDF Backing to Wall
- Checking Backing Levelness After Attachment
- Fixing Slats to Backing — PVA Glue + Tape Until Dry
- Work area preparation
- Step-by-Step PVA Glue Slat Application Technique
- Tape Alternative: Brad Nailer
- Finishing Treatment After Gluing Slats
- Application Options: Bedroom, Living Room, Children's Room, Hallway
- Slat Panel in Bedroom Behind Headboard
- Slatted panel for TV
- Slatted panel in living room: accent wall behind sofa
- Slatted panel in children's room
- Slatted panel in hallway
- Slatted panel on ceiling: DIY features
- Difference between ceiling and wall panel
- Ceiling panel mounting
- Ready-made panel vs DIY: honest comparison
- FAQ - answers to popular questions
- About the Company STAVROS

There is special satisfaction in taking a slat, base, glue and screw – and creating an interior detail with your own hands that will bring joy for years.DIY slatted panel– one of those rare DIY projects where the result exceeds expectations, and the complexity turns out lower than it seemed at the beginning.
Wooden slats on wall DIY – it's not just budget saving. It's full control over the result: you choose the slat width, spacing, wood species, finish, panel size and its position on the wall. Factory-made industrial slatted panels don't offer such freedom – the choice is limited to standard configurations.
This article is a complete step-by-step guide. Not 'buy slats and attach to wall', but detailed technological breakdown of each stage: from calculation to final finish, from base selection to fixing the last slat. Read sequentially – each section prepares for the next.


What is DIY slatted panel – construction principle
Before buying materials, you need to understand what exactly you're working with. Slatted panel is not just 'slats on wall'. It's a construction with clear anatomy.


Anatomy of slatted panel
Slatted panel consists of two fundamental elements:
Base – rigid sheet forming the panel plane and serving as surface for slat attachment. Standard base material – MDF sheet 6–12 mm thick. Less commonly – plywood, chipboard, drywall.
Slats – decorative wooden elements attached to base with specified spacing. These are what the observer sees – they form the panel's visual appearance.
Between slats remains 'gap' – space where base surface is visible. Base color in gaps is no less important design parameter than the slats themselves.
Our factory also produces:
Why MDF base is better than direct slat mounting on wall
Logical question: why make panel on base if you can just attach slats directly to wall? Panel on base has several fundamental advantages:
Flatness. MDF sheet itself is perfectly flat. Slats glued to it form perfectly even plane – regardless of how crooked the wall is. Direct slat mounting on crooked wall gives 'wavy' result.
Mobility. Panel on base is separate object that can be removed and rehung. Ideal for rental housing or those unsure about design permanence.
Installation speed. Panel is assembled on floor or worktable – horizontally, conveniently, without overhead work. Finished panel is attached to wall as single unit – quickly.
Acoustics. Gap between MDF base and wall (if panel mounted on spacer pads) – additional acoustic layer. Space behind panel can be filled with acoustic material.
Get Consultation
Two types of slatted panel construction
Type A: Panel flush to wall. MDF base placed directly against wall and secured with anchors. Slats on base – 6–12 mm from wall plane (MDF thickness). Minimal protrusion, simple installation.
Type B: Panel with air gap. Between MDF base and wall – spacer pads 15–30 mm. Panel 'protrudes' from wall by 21–42 mm (MDF + gap). Cables or acoustic material can be hidden behind panel. More complex installation, richer visual effect (panel 'floats' on wall).
For most DIY tasks – Type A: simpler, cheaper, equally effective.
Tools and materials: slats, MDF base, glue, screws
Choosing the right materials is half the battle. Let's examine each component.
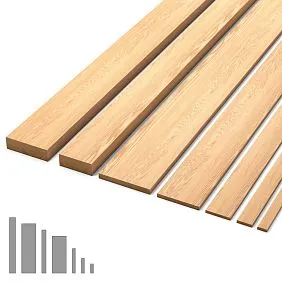
Slats for the panel: wood species and cross-section selection
Wooden planks for the slatted panel — the main visual element. The requirements for them are fundamentally higher than for construction slats.
What's critical:
-
Moisture content: 8–10% (kiln-dried) — a slat with 18–20% moisture will warp after gluing to MDF
-
Geometry: tolerance ±0.2–0.3 mm in cross-section — a 1 mm thickness variation is visible on the finished panel
-
Surface: sanded P180–P320, without tear-outs or micro-splinters
-
Straightness: a "crooked" slat in a horizontal panel is visually striking
Recommended cross-sections:
| Slat cross-section | Visual effect | Application |
|---|---|---|
| 15×40 mm | Flat "strokes" | Japanese style, lightweight panels |
| 20×40 mm | Universal balance | All styles, primary application |
| 20×60 mm | Wide stripes | Scandinavian, modern |
| 30×40 mm | "Volumetric" slats | Loft, classic |
| 30×60 mm | Monumental slats | Living room, large formats |
Decorative slat 20×40 STAVROS — the optimal choice for most slatted panels. This is a standard cross-section with perfect geometry and a sanded surface, ready for painting or oil application.
MDF base: selection parameters
MDF — medium-density fiberboard — is the optimal material for the base of a slatted panel:
-
Perfectly flat surface (tolerance ±0.2 mm)
-
Good adhesion for PVA glue and construction adhesive
-
Easy to work with: cuts, sands, paints well
-
Availability and low cost
MDF thickness for the base:
| MDF Thickness | Application | Weight per 1 m² |
|---|---|---|
| 6 мм | Small panels up to 0.5 m² | ~4.3 kg/m² |
| 9 мм | Medium panels 0.5–2 m² | ~6.5 kg/m² |
| 12 мм | Large panels > 2 m² | ~8.6 kg/m² |
| 16 мм | Heavy large-format panels | ~11.5 kg/m² |
For most wall panels in residential interiors — 9 mm MDF. Sufficient rigidity without excessive weight.
MDF base color: standard MDF — beige-gray, unpainted. For slatted panels, the base is painted the desired color BEFORE gluing the slats — this is much more convenient than painting the base through the gaps after the slats are already installed.
Adhesive for fixing slats to MDF
Adhesive selection is a fundamental issue that determines the panel's durability.
Carpenter's PVA (D3 or D4): classic choice for gluing wood to MDF. D3 — moderate water resistance (for dry rooms), D4 — moisture-resistant (for kitchens, hallways). Open time: 5–10 minutes. Full curing: 24 hours. Provides a rigid bond.
Construction adhesive (acrylic, elastic): faster setting (15–30 minutes), elastic bond. Less clamping pressure required. Optimal if the slats are made of oak (a dense wood with lower PVA absorption).
Contact adhesive (neoprene): instant bonding upon contact. Rigid, irreversible. Used by experienced craftsmen — no possibility to adjust the slat position after contact.
Recommendation: PVA D3 + temporary fixation with painter's tape — this is a reliable, budget-friendly, and forgiving method for a DIY project.
Screws: when needed, when not
For small and medium panels (up to 1 m²) — slats are fixed with adhesive only. Screws are not needed — the adhesive provides sufficient bonding.
For large panels (> 1 m²) and for slats wider than 60 mm — additional fixation with a finishing nail (40–50 mm) or a thin screw 3×35 mm through the MDF base from below into the slat body. The nail/screw is not visible from the front side — only adhesive is visible.
Tools for installation
Complete set of tools for DIY slatted panel assembly:
Mandatory:
-
Miter saw or hand saw + 90° square
-
Tape measure
-
Pencil
-
Painter's tape (3M 2090 or equivalent)
-
Brush or spatula for adhesive
-
Level work table (size of the panel or larger)
-
Level (for mounting the panel to the wall)
-
Drill/driver + drill bit set
Desirable:
-
Laser level (for mounting multiple panels in the same plane)
-
Brad nailer (finish nail gun) — speeds up slat fixation by 3–4 times
-
Spacing template - a piece of batten of the required width to maintain an equal gap
Calculation: number of battens, spacing, panel size
Precise calculation is not boring math, but a guarantee that you will buy exactly the right amount of material and achieve precisely the visual result you intended.
Determining panel size
First of all — determine the panel placement zone. Options:
Full wall. The panel occupies the entire wall from corner to corner. The MDF base is cut to the width of the wall (accounting for the deduction of the baseboard thickness at the floor and molding at the ceiling).
Accent zone. The panel occupies part of the wall — for example, behind a sofa (sofa width + 400–600 mm) or behind a bed (bed width + 300–500 mm). The panel is 'framed' by the wall on the sides.
Lower panel zone. A panel 900–1200 mm high at the floor — an analogue of a classic wood panel. Above — a clean wall.
Formula for calculating the number of slats
For a panel of width W, slat width b, gap g:
-
Step: s = b + g
-
Number of slats: n = (W + g) / s (round to the nearest whole number)
-
Final gap: g_final = (W − n × b) / (n − 1)
Example: panel 1,200 mm wide, slat 20×40 mm (width 40 mm), desired gap 30 mm.
-
Step: 70 mm
-
Number: (1200 + 30) / 70 = 17.57 → 18 slats
-
Final gap: (1200 − 18 × 40) / 17 = (1200 − 720) / 17 = 480 / 17 = 28.2 mm
The gap turned out to be 28.2 mm instead of 30 mm — a practically unnoticeable difference. Accept: 18 slats, gap ~28 mm.
Calculating slat length
Length of each slat = panel height (for vertical slats) or panel width (for horizontal). Accounting for cutting allowance (+5 mm for each end for precise cut):
Slat for a panel 2,400 mm high: each slat = 2,400 mm + 10 mm (2 ends) = 2,410 mm → order slats 2,500 mm long, cut to size 2,400 mm.
Total slat length for the panel: n × slat_length + 12% allowance. Allowance is mandatory — accounts for possible defects and cutting errors.
Calculating panel weight on the wall
This is an important parameter for choosing the wall mounting method. Total panel weight (MDF + slats):
Example: panel 1,200 × 2,400 mm, MDF 9 mm, 18 slats 20×40 mm, length 2,400 mm, oak (700 kg/m³):
-
MDF weight: 1.2 × 2.4 × 0.009 × 750 = 19.4 kg
-
Slat weight: 18 × 0.020 × 0.040 × 2.400 × 700 = 18 × 1.344 = 24.2 kg
-
Total: 43.6 kg
Almost 44 kg — a serious load. Wall mounting: minimum 6 dowels 8×80 mm into the load-bearing base, or a hanging system with hooks.
Painting slats before installation — why it's more convenient
Painting slats before installation is one of the key professional techniques that distinguishes a neat DIY panel from 'handmade with flaws.'
Three reasons to paint slats before installation
First reason: access to ends and back surface. After gluing the slats to the MDF, the slat ends are covered by the MDF base, and the back surface is also inaccessible. Unpainted ends — a dark 'strip' at the panel edge that catches the eye. Painting before installation eliminates this problem.
Second reason: quality of edge coating. The slat edges are the most difficult place to paint: paint runs off here, applies thinly, and peels first. When painting the slat 'in the air' (before mounting on MDF) — there is full access to the edges from all sides. Two coats of paint on the edge are applied without difficulty.
Reason three: the cleanliness of the MDF base. The base is painted in its own color before attaching the slats. After attachment—no touch-up painting "through the gaps," which always causes stains and streaks.
Work sequence: the base and slats are painted separately.
Step 1. Preparation and painting of the MDF base.
-
Prime the MDF with acrylic primer—1 coat, let dry for 2 hours.
-
Apply acrylic paint of the desired color—2 coats with a drying interval of 4 hours.
-
The MDF base is ready. Set aside on a flat surface.
Step 2. Preparation of slats.
If the slats are factory-sanded (likeSTAVROS decorative slats)—proceed directly to painting. If planed—sanding P120→P220, rounding the edges.
Step 3. Painting the slats.
-
Softwood (pine, spruce): shellac sealer → acrylic paint 2 coats.
-
Oak, larch: acrylic paint 2 coats or oil 2 coats.
-
Layout: slats are placed horizontally on spacers (so they don't touch the surface), paint the front side and edges. After 4 hours, flip over—paint the back side.
Step 4. Drying and conditioning.
Painted slats dry for 24–48 hours until the paint is fully cured before attachment. Acrylic paint feels dry to the touch in 2 hours, but chemical adhesion completes within a day—no need to rush.
Color solutions: base and slats
Monochromatic: slats and base are the same color—difference only through shadow relief. A delicate, "intelligent" effect.
Contrast: dark slats on a light base (the most popular option) or light slats on a dark background. The stronger the contrast—the more expressive the geometry.
Neutral background + natural wood: base is painted (white, gray, green), slats—under natural oil. A combination of a painted background and live wood—"warm minimalism."
Attaching the base to the wall—levelness and plumb
The base is the "foundation" of the panel. If it is installed crookedly or unreliably—the entire structure will be unstable or unattractive, regardless of the quality of the slats.
Marking the panel position on the wall
Before drilling, you need to precisely determine where the panel will be.
For an accent zone (part of the wall): using a laser level, mark on the wall:
-
A horizontal line along the top edge of the panel
-
Vertical lines along the side edges of the panel
-
A horizontal line along the bottom edge
The marking rectangle must be strictly rectangular—check the diagonals: they must be equal.
For a full wall: a horizontal line along the bottom edge of the panel (along the top edge of the baseboard) and a horizontal line along the top edge (usually at ceiling or molding level).
Methods for attaching MDF substrate to the wall
Method 1: Through fastening with dowels and screws. The simplest and most reliable. Drill holes in the MDF substrate at the attachment points, countersink for a countersunk head. Use 8×60 mm dowels on the wall. Sink the screws below the MDF surface — later cover with battens or filler.
Attachment point spacing: 400–500 mm around the perimeter + 1–2 points in the center of the panel for panels > 0.5 m². Minimum number of attachment points: 4 (at the corners).
Method 2: Mounting adhesive + dowels. Apply mounting adhesive in a zigzag pattern to the back of the MDF, press the substrate against the wall, secure with 4–6 dowels around the perimeter. The adhesive ensures uniform adhesion across the entire area — eliminates "drumming" when tapped.
Method 3: Hanging system. Attach furniture hinges or dovetail-type hangers to the back of the MDF. Mount corresponding strips on the wall. The panel is hung and easily removed if necessary. Ideal for rental housing.
Method 4: "French cleat" brackets. A metal strip with a 45° bevel is attached to the wall, the corresponding strip is attached to the back of the MDF. The panel is hung with one motion. Maximum reliability for heavy panels (> 20 kg).
Checking substrate flatness after attachment
After installing the MDF substrate, be sure to check flatness with a two-meter straightedge:
-
Tolerance: no more than 2 mm over 2 meters
-
If there is a bulge: loosen the dowel, add/remove a shim, tighten back
-
If there is a concavity: add a spacer washer at the attachment point
Substrate flatness is critical: even a slight "wave" in the MDF "transfers" to the battens, making them uneven.
Fixing battens to the substrate — PVA glue + tape until dry
This is the most critical stage — panel assembly. Work is performed on a horizontal surface (workbench, floor), with good lighting.
Workplace Preparation
Place the MDF substrate face up on a flat surface. Apply markings: mark the axis of each batten with a pencil — a line along the center of the batten on the substrate. These are "anchor lines" for precise positioning.
Prepare a spacing template: a piece of batten or block whose width equals the required gap (e.g., 30 mm). The template will maintain an equal gap between battens without constant tape measure measurements.
Step-by-step PVA batten gluing technique
Step 1. Apply PVA D3 to the back of the first batten — an even thin layer with a brush or spatula along the entire length. Important: apply PVA in a thin layer, not in drops.
Step 2. Place the batten on the MDF substrate according to the markings. Check position: the batten must lie exactly on the marked line (center or edge — depending on your marking).
Step 3. Press the batten against the MDF substrate with your hands with even pressure along the entire length — 30–60 seconds.
Step 4. Secure the batten with painter's tape across it at 200–250 mm intervals. The tape must hold the batten in the pressed position until the glue dries. Pull the tape with moderate force — excessive tension may "lift" a thin batten in the center.
Step 5. Place the spacing template against the first batten, set the second batten against the template. Repeat steps 2–4.
Step 6. Continue until all battens are glued.
Step 7. Leave the panel horizontally for 24 hours — until the PVA fully cures. Do not move, lift, or flip.
Step 8. After 24 hours, remove the painter's tape slowly at a 45° angle — this minimizes the risk of peeling paint.
Alternative to tape: brad nailer
A brad nailer (finish nail gun, "nailer") allows driving a 1.2×40 mm finish nail through the batten into the MDF substrate in a fraction of a second. The nail provides immediate fixation — no tape needed. The nail head (1.5–2 mm diameter) is practically invisible on the batten surface or can be covered with wood filler.
If you have a brad nailer (or a compressor with a nailer) — panel assembly productivity increases 4–5 times.
Finishing after gluing battens
After removing the tape — visual inspection: check if any glue has seeped from under the battens onto the MDF surface. Remove excess glue with a sharp spatula and sand with P220.
If necessary, touch up spots where tape may have removed paint from the MDF base. Use a fine brush and apply a coat of the main color paint.
Flip the finished panel over and drill mounting holes from the back side (if through-anchor mounting is planned). Countersink for a flush head from the front side — the slats will hide these holes with proper placement of mounting points under the slats.
Application options: bedroom, living room, children's room, hallway
Slatted panel — a versatile decorative tool. But it works differently in every room.
Slatted panel in the bedroom behind the headboard
Bedroom — the most popular room for a DIY slatted panel. The wall behind the bed headboard is the 'accent point' of the bedroom, and the slatted panel here works in several dimensions simultaneously.
Visual effect: the panel creates a 'frame' for the bed, structures the wall, and adds the warmth of natural wood to the rest space.
Parameters for the bedroom:
-
Panel width: bed width + 300–400 mm on each side
-
Height: from floor to ceiling (maximum effect) or from the top edge of the headboard to the ceiling
-
Slats: vertical, width 20–40 mm, gap 30–50 mm
-
Wood species/finish: natural oak with oil, whitewashed oak, white slats on a white background
Oak slatted panel in the bedroom pairs well withsolid wood baseboardanddoor casingsof the same wood species — an interior system where all wooden elements 'speak' the same language.
Slatted panel for TV
Slatted panel as a backdrop for the TV — an alternative to a wall-mounted MDF module or a drywall niche. Simpler to execute, more visually interesting.
Parameters for the TV panel:
-
Width: wall-to-wall or the width of the viewing area
-
Height: full (to the ceiling) or up to the TV height + 300 mm
-
Slats: vertical — visually elevate the 'screen wall'; horizontal — create a 'cinema lounge' atmosphere
-
The TV is mounted on a bracket attached to the MDF base through or between the slats
Important: if the TV bracket carries a load > 15 kg — be sure to reinforce the bracket mounting: through the MDF and slats into the wall, into the load-bearing base (10×100 mm anchor into concrete/brick).
Slatted panel in the living room: accent wall behind the sofa
wooden planks on the wallin the living room — a social statement: everyone sees this wall. The slatted panel behind the sofa is the 'calling card' of the interior.
Panel options for the living room:
Coffered panel: a grid of horizontal and vertical slats on an MDF base forming cells. The cells can be painted in a matching or contrasting color. Effect —decorative cofferingwithout complex construction.
Full-height panel: slats from floor to ceiling across the entire width of the living room wall. Monumental, expressive.
"Lower zone": a slatted panel 1,000–1,200 mm high at the floor with molding along the top edge — a modern interpretation of the classic wooden panel. Above — a clean wall or other finishing material.
Slatted panel in a children's room
A children's room is a space where a slatted panel is especially appropriate: a safe natural material, no sharp corners with rounded slat edges, an environmentally friendly coating.
Features for a children's room:
-
Slats must have rounded edges R2–R3 — no sharp edges
-
Wood species: pine or birch (softer and lighter for a children's room) or oak (more durable)
-
Coating: children's water-based acrylic paints without odor, or natural oil without solvents
-
Panel height: up to 1,200–1,500 mm — "child's height", above — a white wall
Popular solution: a thematic "house" panel — an arched MDF base with vertical slats, imitating a house facade behind the child's bed.
A slatted panel in a children's room pairs well withwooden furniture legs STAVROS— a unified "wooden language" in a space safe for a child.
Slatted panel in an entryway
The entryway is the "first impression" of an apartment. A slatted panel here serves a dual function: decorative and protective (the wood protects the wall from accidental impacts by umbrellas, bags, strollers).
Features for an entryway:
-
Wood species: larch (moisture-resistant — the entryway is an area with variable humidity from outdoor clothing) or oak with a varnish coating
-
Panel height: 900–1,200 mm — "protective" height
-
Horizontal slats: entryways often have low ceilings — horizontals "expand" the space
-
Coating: matte varnish or oil with wax — easy to clean
Proper installation and care of wooden productsin spaces with variable humidity — is a separate topic, covered in detail in STAVROS materials.
Slatted panel for the ceiling: DIY features
Slatted ceilingDIY based on an MDF panel — more complex than the wall version, but the principle is the same.
Difference between ceiling and wall panels
On the ceiling, slats work "in tension" under their own weight — gravity constantly tries to pull them away from the base. This means:
-
Stronger adhesive is needed (PVA D4 or mounting adhesive with high tensile strength)
-
Final fixation with nails/screws — mandatory for all slats without exception
-
Panel weight — critically important: it is undesirable to hang panels > 15 kg/m² on the ceiling
For ceiling panels: 6 mm MDF (lighter) + pine slats (lighter than oak) + frequent nail fixation (every 150–200 mm along the slat length).
Ceiling panel mounting
The ceiling panel is attached to the ceiling slab or to a frame (metal profile or wooden beams attached to the ceiling slab).
For small panels (up to 0.5 m²): mounting adhesive + 4 umbrella anchors into the ceiling slab. For large panels (> 0.5 m²): a system of vernier hangers, leveling — similar to the installation ofceiling slats.
Ready-made panel vs. DIY: an honest comparison
An honest question: when should you make it yourself, and when should you buy a ready-made panel?
| Criterion | DIY | Ready-made |
|---|---|---|
| Cost | 30–50% lower | Higher |
| Time | 1–2 days + drying | Delivery 1–3 days |
| Size | Any (custom order) | Standard |
| Wood Species | Any | Limited selection |
| Geometry quality | Depends on skill | Manufacturing precision |
| Finish | Any of your choice | Standard or custom order |
| Experience/skill | Minimal required | Not required |
Conclusion: for non-standard sizes, non-standard wood species, specific color solutions — a DIY panel wins. For standard configurations with high requirements for geometry — a ready-made panel from a manufacturer.
STAVROS decorative slats— is the 'construction material' for a DIY panel of professional quality: precise calibration, sanded surface, oak with controlled tone. With such material, a DIY panel is not inferior to a ready-made one in geometry and surpasses it in design flexibility.
FAQ — answers to popular questions
Can a slatted panel be made without an MDF base?
Yes — the slats are attached directly to the wall. But only on a flat wall (tolerance < 3 mm over 2 m). For uneven walls, an MDF base is the only way to get a flat panel.
Which adhesive is better — PVA or mounting adhesive?
PVA D3/D4 — for slats made of softwood species (pine, spruce, birch) on an MDF base. Acrylic mounting adhesive — for oak and larch (dense species absorb PVA poorly). Combination: mounting adhesive + finish nail — the most reliable option for any wood species.
How long does a slatted panel on PVA take to dry?
PVA "sets" in 30–60 minutes, full curing — 24 hours. Tape can be removed and panel lifted after 4–6 hours, but full load should only be applied after 24 hours.
Should the back side of MDF be painted?
Recommended: painting the back side reduces the hygroscopicity of MDF — it "absorbs" less moisture from the wall and deforms less. One coat of acrylic paint or primer is sufficient.
Can a slatted panel be installed in a bathroom?
Moisture-resistant MDF (MMDF) + larch or thermally modified wood slats + waterproof varnish — a panel in the bathroom is possible with good ventilation and no direct water contact.
About the company STAVROS
DIY slatted panel— is a project that requires the right material. Warped slats, uneven tone, poor geometry — and even the most careful installation won't save the result.
STAVROS is a Russian manufacturer of decorative wooden products made from solid oak and beech.STAVROS decorative slatsare produced with calibration of ±0.2 mm, chamber drying 8–10%, sanding P320 — this is material with which a DIY panel succeeds on the first try.
In the STAVROS catalog — a complete system of wooden decor for any interior project:decorative battens, Moldings and cornices, baseboards and moldings from solid wood, door casings, Furniture legsandDecorative handles for furniture. One species — oak. One production standard. One interior with history.
STAVROS: material that makes DIY professional.