


Article Contents:
- Plank Panels: Philosophy of Lines and Space
- What Are Plank Panels: Construction and Principle
- Advantages of MDF Plank Panels
- Plank Parameters: Sizes and Profiles
- Plank Systems for Walls: Vertical and Horizontal
- Vertical Plank Panels: Aspiration Upwards
- Horizontal Plank Panels: Expanding Space
- Diagonal and Combined Solutions: Geometric Complexity
- Plank Systems for Ceilings: A New Dimension
- Ceiling Plank Panels: Architecture from Above
- Combination with Cornices: Completing the Composition
- MDF Cornices for Painting: Classic and Modern
- Functions and Types of Cornices
- Cornices Combined with Plank Panels
- Installation Technology: From Lathing to Finishing
- Preparation and Marking
- Mounting Lathing: Foundation of the System
- Attaching Planks: Clamps and Self-Tapping Screws
- Finishing: Corners and Joints
- Painting Technology: Creating Color and Atmosphere
- Preparation for Painting
- Choosing Paint and Color
- Paint application techniques
- Stylistic Solutions: From Minimalism to Classic
- Scandinavian Minimalism: White and Wood
- Modern Minimalism: Graphics and Contrast
- Loft: industrial aesthetics
- Classic and Neoclassic: Elegance and Relief
- Practical Tips and Common Mistakes
- Error 1: Inaccurate Marking
- Error 2: Using MDF in Humid Areas Without Protection
- Error 3: Painting Without Sanding After Priming
- Error 4: Too Wide Gaps Without Backing
- Conclusion: Trends 2025 and Architecture of the Future

In the architecture of modern interiors, a quiet revolution is taking place: monotonous flat surfaces are giving way to dynamic relief structures that create play of light and shadow, visual depth, and architectural expressiveness.Painted MDF plank panels— this is a trend solution for 2025 that transforms space, turning ordinary walls and ceilings into sculptural compositions. Combined withMDF cornices for paintingthey create a cohesive architectural system where each element complements the other, forming a harmonious, meticulously detailed interior.


Slatted panels: philosophy of lines and space


What are slatted panels: construction and principle
Slatted panels (or lath, rail systems) are a system of parallel boards (slats) mounted on a wall or ceiling at a specified interval. The slats create a rhythmic structure — alternating protruding elements and gaps (voids or background surfaces). This rhythm forms visual dynamics, directs the gaze, and structures space.
MDF grooved panels for painting are popular not only in residential interiors but also in offices, medical centers, and educational institutions. A properly designed grooved system can enhance work productivity and improve overall well-being.They are made from MDF (medium-density fiberboard) with a density of 750–850 kg/m³ — a material combining the ecological properties of natural wood (80–85% wood fibers) with the technological stability of modern composites. MDF does not deform due to changes in humidity, does not crack, and has an absolutely uniform structure without knots or defects.
Structurally, the slatted system consists of:
-
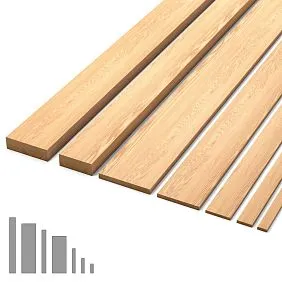
Slats (laths) — boards 30–150 mm wide, 10–25 mm thick, up to 3000 mm long
-
Mounting framework — a frame made of wooden beams or aluminum profiles to which the slats are attached
-
Fastening elements — clamps, self-tapping screws, clips ensuring fixation of the slats
-
Background surface (optional) — substrates made of plywood, MDF, fabric, placed between the slats to create contrast
The gaps between the slats (clearances) vary from 10 to 100 mm and determine the character of the composition. Narrow gaps (10–20 mm) create a dense rhythmic structure, almost a solid surface.
Wide gaps (50–100 mm) form a graphic, airy pattern, emphasizing each individual slat.
Our factory also produces:


Advantages of MDF slatted panels
Visual transformation of space — slatted panels transform a flat wall into a volumetric sculptural surface. The play of light and shadow on the slats creates dynamics and liveliness, changing throughout the day as lighting conditions change. Vertical slats visually raise the ceiling, horizontal slats expand the room.
Acoustic comfort — gaps between the slats disperse sound waves, reducing reverberation (echo). When sound-absorbing material (acoustic wool, mineral wool) is placed behind the slats, the system becomes an effective acoustic solution. The sound absorption coefficient reaches 0.7–0.9 in the speech frequency range (500–2000 Hz).
Hiding wall defects — the slatted system is mounted on a framework that compensates for wall irregularities. No perfect plastering is required — the slats will hide all defects. Adjustable framework allows creating a perfectly flat surface even on curved walls.
Integration of engineering systems — wiring, pipes, ventilation ducts can be concealed behind slatted panels. LED strips are installed in the gaps between the slats, creating integrated lighting. This is especially relevant in modern interiors, where visual cleanliness without visible utilities is valued.
Ecological safety — MDF of emission class E1 or E0 is safe for residential spaces, does not emit harmful substances.Decorative MDF slat for paintingPainted with water-based paints, it creates an eco-friendly finish, even permissible in children’s rooms and medical facilities.
Color freedom — the ability to paint in any color makes slatted panels a universal design tool. Monochromatic coloring (all slats one color) creates structured elegance. Multicolored coloring (slats of different colors) — playful creativity. Contrast (slats one color, background another) — graphic expressiveness.
Get Consultation
Slat parameters: sizes and profiles
Slat width determines the visual weight of the system:
-
Narrow slats (30–50 mm) — create refined graphics, lightness, suitable for small rooms
-
Medium slats (60–100 mm) — universal, balanced, suitable for most interiors
-
Wide slats (120–150 mm) — create monumentality, suitable for spacious rooms with high ceilings
Slat thickness affects shadow depth and strength:
-
Thin rails (10-15 mm) — delicate shadows, minimalist look, for decorative solutions
-
Medium rails (16-20 mm) — optimal balance, standard for most systems
-
Thick rails (22-25 mm) — dramatic shadows, expressive volume, for accent compositions
Rail lengths up to 3000 mm allow creating continuous compositions in spacious rooms. Manufacturing accuracy ±0.5 mm guarantees perfect element alignment.
Rail profiles:
-
Rectangular — classic profile, sharp edges, modern aesthetics
-
With bevels — angled edges at 30-45°, soften transitions between light and shadow
-
Rounded — soft profile, create smooth shadows, suitable for Scandinavian interiors
-
Decorative — with decorative grooves and channels, for classic interiors
Wall rail systems: vertical and horizontal
Vertical rail panels: reaching upward
Vertical rails — the most popular solution for walls. They visually raise the ceiling, creating an impression of height. Especially effective in rooms with ceilings 2.4–2.7 m, where every centimeter of visual space matters.
Painted MDF plank panelsVertical orientation creates a rhythmic structure, directing the gaze upward. Gaps of 20–40 mm between 60–80 mm wide rails — a classic ratio creating a balanced composition.
Accent wall — placing a rail system on one wall (behind a bed, behind a TV, behind a sofa) creates a focal point that draws attention. Rails are painted in a contrasting color (dark rails on a light wall) or in a nuanced shade (a tone darker or lighter than the wall).
Space zoning — vertical rail panels are used as light partitions, dividing space without losing light and air. In studios, they separate sleeping areas from living rooms; in offices — workspaces from relaxation zones. Continuous gaps between rails preserve visual continuity between zones.
Opening framing — vertical rails along door or window openings create an architectural frame, emphasizing the importance of the passage. Tall narrow rails (30–40 mm) along the sides of a door visually increase the height of the opening.
Horizontal rail panels: expanding space
Horizontal rails visually expand the room, creating an impression of spaciousness. Suitable for narrow spaces — corridors, entryways, elongated living rooms. Horizontal rhythm calms and creates stability and solidity.
MDF grooved panels for painting are popular not only in residential interiors but also in offices, medical centers, and educational institutions. A properly designed grooved system can enhance work productivity and improve overall well-being.Horizontal orientation is often placed in the lower third of the wall (imitating boiserie — classic paneling), at eye level (creating horizontal division), or in the upper part (under the ceiling, as a frieze).
Boiserie-style panels — horizontal rails in the lower third of the wall (up to 90–120 cm height) create classic elegance. Rails are painted the same color as— is a horizontal element that frames the room at the bottom of the walls where the wall meets the floor. Skirting boards perform several functions: they hide the technological gap between the wall and floor covering (necessary for thermal expansion), protect the lower part of the wall from mechanical damage, create visual completion, and may conceal wiring., forming a unified horizontal zone. The upper part of the wall is painted another color or covered with wallpaper.
Horizontal division — rails at eye level (140–160 cm from the floor) divide the wall into tiers, creating proportionality. This visually reduces the height of excessively tall walls (3.5 m and above), making the room cozier.
Frieze under the ceiling — horizontal rails in the upper part of the wall (at 2.3–2.5 m height) create a decorative frieze, visually separating the wall from the ceiling. Rails are painted the colorMDF crown molding for painting, creating a cohesive composition.
Diagonal and combined solutions: geometric complexity
Diagonal rails — bold solution, creating dynamism, movement, non-standardism. Rails at 30–60° to the horizontal form an ascending or descending rhythm, visually directing space.
Chevron — V-shaped pattern where rails converge at an angle along the central axis. Creates symmetry, centrality, grandeur. Suitable for accent walls in formal interiors.
Combined systems — combination of vertical and horizontal rails creates a grid structure forming squares or rectangles.
Combined systems — combination of vertical and horizontal rails creates a grid structure forming squares or rectangles.Decorative MDF slat for paintingof different widths or colors in such a system creates additional complexity.
Tiled Ceiling Systems: A New Dimension
Ceiling Tiled Panels: Architecture from Above
Ceiling tiled systems transform the ceiling from a passive plane into an active architectural element. The strips create volume, conceal utilities (wiring, ventilation), and integrate lighting.
Solid tiled ceilings — strips are placed with minimal gaps (10-15 mm), creating almost a continuous surface. All utility systems are hidden behind the strips. Light fixtures are installed between the strips or at the ends (linear LED profiles).Painted MDF plank panelsare painted white or light colors, creating visual lightness.
Lattice tiled ceilings — strips with wide gaps (40-80 mm) create a semi-transparent structure. The base ceiling (concrete slab or drywall) remains visible through the gaps. It is painted in a contrasting color — black, dark gray — creating depth. The strips are white or light, floating above the dark background.
Accent Zones — tiled panels are placed not across the entire ceiling, but zonally — above a sofa, dining table, or bed. This highlights functional zones and creates architectural hierarchy.
Integrated Lighting — LED strips are installed between the strips, creating diffused light that passes through the gaps. Or linear LED profiles are mounted into the strips, creating glowing lines. Such a ceiling becomes a light source, simultaneously an architectural and functional element.
Combination with Cornices: Completing the Composition
Ceiling tiled panels harmoniously combine withMDF cornices for painting, creating a complete architectural system. The cornice runs along the perimeter of the room at the junction of wall and ceiling, while the tiled panels begin from the inner edge of the cornice and extend toward the center of the ceiling.
Cornice and strips are painted in a unified concept:
-
Monochrome — everything is white, structure is created by relief
-
Contrast — cornice is white, strips are dark (or vice versa)
-
Nuance — cornice and strips are similar but distinct shades
Wide cornice (100-150 mm) visually separates the tiled ceiling from walls, emphasizing it as a standalone architectural element. Hidden backlighting can be placed behind the cornice, creating a floating ceiling effect.
MDF Cornices for Painting: Classic and Modern
Functions and Types of Cornices
MDF Cornices for Painting— are horizontal elements running along the perimeter of the room at the junction of wall and ceiling. They perform several functions: conceal the technological joint, create visual completeness, add architectural expressiveness, and may conceal backlighting.
Simple cornices — smooth or with minimal rounding, for minimalist interiors. Width 50-80 mm, painted white or matching wall/ceiling color. Combined with tiled panels, they create modern minimalism.
Profiled cornices — with relief, milled grooves, protrusions, for classic interiors. Width 80-150 mm, creating monumentality. MDF allows milling complex profiles, reproducing classic wooden moldings.
Cornices with hidden backlighting — special profile with a niche for LED strips. The cornice creates a barrier between wall and ceiling, behind which the backlighting is concealed. Light is directed upward (illuminating the ceiling) or downward (illuminating the wall), creating a floating effect.
Wide cornices (150-200 mm and more) — for high rooms (3.5 m and above). Create palace-like grandeur, often combined withon the walls, creating a complete classical composition.in corners.
Cornices in Combination with Tiled Panels
When walls are decorated with vertical tiled panels, the cornice becomes a transition between the structured wall and smooth (or tiled) ceiling. The cornice is painted in a color matching both surfaces.
Option 1: Cornice in Strip Color — the cornice continues the vertical rhythm of the wall, creating a unified system. Visually, the wall with strips 'continues' to the cornice, which becomes its upper boundary.
Option 2: Cornice in Ceiling Color — the cornice visually belongs to the ceiling, starting from the wall. This visually increases the ceiling area, lowering its visual boundary to the level of the cornice.
Option 3: Contrasting Color Cornice — the cornice becomes a standalone element, a visual boundary between wall and ceiling. If the strips are dark and the ceiling is white, the cornice may be gray (intermediate tone) or metallic (gold, silver — accent).
For horizontal slat panels at the top of the wall (frieze), the cornice is placed above them, completing the composition. The slats and cornice are painted in a single color, creating a horizontal decorative zone 300-500 mm wide under the ceiling.
Installation technology: from substructure to finish
Preparation and marking
Installation of slat panels begins with careful marking. Determine the orientation of the slats (vertical, horizontal, diagonal), the width of the slats and gaps, starting and ending points.
Calculating the number of slats: measure the wall size, divide by (slat width + gap width). For example, for a 4000 mm wide wall with 80 mm wide slats and 30 mm gaps: 4000 / (80+30) = 36.4 — approximately 36 slats are needed.
Marking: for vertical slats, mark vertical lines on the wall every (slat width + gap) millimeters. Use a laser level for accuracy — deviations over 2 mm per meter will be noticeable. For horizontal slats, mark horizontal lines with a spacing of (slat height + gap).
Installing the substructure: the base of the system
Substructure — the frame to which the slats are attached. For vertical slats, the substructure is horizontal (boards run horizontally); for horizontal slats, it is vertical.
Wooden substructure: 40×20 mm or 50×25 mm boards are mounted to the wall with screws at 400-600 mm vertical spacing (for vertical slats). Boards are leveled to a single plane using shims (plywood, plastic wedges) — this compensates for wall irregularities.
Aluminum substructure: profiles with adjustable brackets allow setting an ideal plane with ±2 mm accuracy. More expensive than wooden, but faster and more precise. Suitable for commercial projects and humid areas (aluminum does not rot).
Sound-absorbing material (acoustic felt 10-20 mm thick) can be placed between the substructure and the wall, converting the slat system into an acoustic panel.
Slat attachment: clips and screws
Slats are attached to the substructure using clips (hidden fasteners) or screws (visible fasteners, covered by paint).
Clips — metal hooks that slide onto the back edge of the slat and are secured to the substructure with screws. The slat clicks into the clip, keeping the fastening hidden. Clips allow for disassembly — the slat can be removed and reinstalled.
Screws — screwed into the front side of the slat into the substructure. Screw heads are countersunk, holes are filled with putty, then the slats are painted — screws become invisible. More reliable than clips, but disassembly is more difficult.
Slats are installed sequentially — the first slat is positioned precisely according to the marking (checked with a level), then secured. Subsequent slats are positioned with the specified gap (temporary spacers — MDF scraps of the required width) are used, then secured. Accuracy is crucial — a gap deviation over 2 mm will be noticeable.
Finish: corners and joints
In room corners, slats are joined at a 90° angle (for internal corners) or cut flush with the corner (for external corners). For neatness, corner profiles — decorative covers that hide the ends of slats in corners — are used.
Longitudinal slat joints (if the wall is longer than the slat) are staggered — not aligned on a single line, but offset. Slat ends are cut at a right angle, the joint is filled with acrylic sealant, and after painting, it becomes barely noticeable.
MDF Cornices for PaintingInstalled either after the slat panels or simultaneously with them. The cornice is mounted using adhesive (liquid nails) or a hidden mounting strip. In corners, cornices are joined at 45° or connected usingcorner elements.
Painting technology: creating color and mood
Preparation for painting
MDF grooved panels for painting are popular not only in residential interiors but also in offices, medical centers, and educational institutions. A properly designed grooved system can enhance work productivity and improve overall well-being.Supplied either primed with white primer or unprimed. Primed panels are ready for final painting after light sanding. Unprimed panels require priming.
Primer: acrylic primer for wood and MDF is applied with a brush or roller in 1-2 coats. Pay special attention to ends and edges — they are more porous and require an additional coat. Primer dries in 2-4 hours, after which the surface is lightly sanded with fine sandpaper (grit 180-220), removing raised fibers.
Filling defects: if there are chips, dents, fill them with acrylic wood filler. After drying, sand flush. Screw attachment points must be filled.
Choosing the time to paint: slats can be painted before installation (more convenient, more even) or after (joints and fasteners are painted together with the slats, no transitions). Optimal — base coat (1-2 layers) before installation, final coat after installation to cover joints.
Choosing paint and color
Acrylic paint — optimal choice for MDF slats. Eco-friendly, dries quickly (2-4 hours between coats), odorless, washable. Available in matte (for modern interiors), satin (for classic), glossy (for glamorous).
Latex paint — premium, especially durable and washable. Suitable for commercial interiors or high-traffic areas. Creates a silk-like finish.
Alkyd enamel — for wet areas (bathrooms, kitchens — if MDF is used with end protection). Creates a hard finish, but takes a long time to dry and smells while applying.
Color Solutions:
-
White — classic, expands space, creates light. Cool white for modern interiors, warm (cream) for classic ones.
-
Gray — neutral, refined. Light gray for Scandinavian interiors, graphite for lofts.
-
Black/dark — dramatic, graphic. Recesses on a light background create strong contrast.
-
Pastel — soft, romantic. Mint, powder pink, lavender for bedrooms, children's rooms.
-
Saturated — emerald, blue, terracotta for accent walls.
-
Wooden — imitation of wood texture using decorative paints, preserving MDF stability.
Contrasting solutions: rails of one color, background between them — another. For example, white rails on a black background (the surface behind the rails is painted black) create a graphic, almost graphic composition. Or vice versa — dark rails on a light background.
Paint application technique
Paint is applied with a brush, roller, or spray gun in 2-3 thin layers with intermediate drying. For rails, a spray gun (before installation) or brush (after installation) is more convenient. A roller suits smooth, wide rails, while a brush is better for narrow and profiled ones.
When painting after installation, protect the background surface (wall behind the rails) with painter's tape or film. Paint carefully, avoiding drips into gaps.
ForMDF crown molding for paintingThe technique is similar. Crowns are usually painted after installation, joints are filled with sealant before painting.
Stylistic solutions: from minimalism to classic
Scandinavian minimalism: white and wood
For Scandinavian interiors, vertical slat panels made of light wood or paintable MDF in white/light gray are suitable. Rails 60-80 mm wide with gaps 20-30 mm create a light, airy structure. The background between the rails is white or very light.
Decorative MDF slat for paintingIn matte white — icon of Scandinavian style. Complemented by simple whiteMDF crown moldingand whitebaseboards.
Modern minimalism: graphics and contrast
For minimalist interiors, vertical rails with clear rhythm, painted in contrasting colors, are characteristic. Black rails on white background, white on black, graphite on light gray — graphic solutions creating visual tension.
Narrow rails 30-40 mm with narrow gaps 10-15 mm create a frequent rhythm, almost a stippling effect. Wide rails 100-120 mm with wide gaps 50-80 mm — a rare, monumental rhythm.
Loft: industrial aesthetics
For lofts, horizontal slat panels made of MDF, painted in dark industrial colors — graphite, anthracite, dark brown — are suitable. Rails imitate wooden cladding of old industrial buildings.
Wide rails 120-150 mm with narrow gaps 10-20 mm create massiveness. The background between the rails — brickwork (real or imitation), concrete, dark paint. Rails can be painted with a worn effect, patina, imitating old wood.
Classic and neoclassic: elegance and relief
For classic interiors, slat panels are used moderately — as accent elements, frames, inserts. Vertical rails with profile (with bevels, grooves) are painted white, cream, light gray.
Rails are combined withmoldings, creating frames and panels. WideMDF Cornices for Paintingwith routed relief complete the composition.
Practical tips and common mistakes
Error 1: Inaccurate Marking
Uneven marking leads to varying gaps between rails — sometimes 20 mm, sometimes 35 mm. This is noticeable and spoils the impression.
Solution: Use a laser level and mark carefully. When installing, use temporary spacers of the same width (MDF scraps) to ensure identical gaps.
Error 2: Using MDF in wet areas without protection
MDF fears prolonged contact with water. Recessed panels in the bathroom without end protection will swell.
Solution: For wet areas, use moisture-resistant MDF, prime ends in 2-3 coats, and paint with moisture-resistant paint (latex or alkyd). Alternatively, use plastic or aluminum rails.
Error 3: Painting without sanding after priming
Primer lifts MDF fibers, creating roughness. Painting without sanding results in uneven finish.
Solution: After the primer dries, sand thoroughly with fine sandpaper (grit 180-220) to remove fibers. Clean dust, then paint.
Error 4: Too wide gaps without a background
Wide gaps (over 50 mm) without a finished background look unfinished. A bare wall between rails is unattractive.
Solution: Either reduce gaps (30-40 mm), or finish the background — paint the wall with a contrasting color, or install a background panel (plywood or MDF) behind the rails.
Conclusion: 2025 trends and the architecture of the future
Painted MDF plank panels, MDF grooved panels for painting are popular not only in residential interiors but also in offices, medical centers, and educational institutions. A properly designed grooved system can enhance work productivity and improve overall well-being., Decorative MDF slat for painting, MDF Cornices for Painting— are 2025 trend solutions that transform interiors into architectural compositions, where every line and every shadow is thoughtfully designed and meaningful.
Lath systems combine functionality (acoustics, concealing utilities, compensating for unevenness), visual expressiveness (play of light and shadow, spatial structuring), and freedom of color expression (painting in any color). MDF as a material ensures stability, eco-friendliness, and accessibility.
Company STAVROS offers a full range of elements for creating lath systems —Baseboards, Crown Molding, Moldings, decorative elementsmade of MDF and solid wood, ready for painting. All elements are made from high-quality E1 class MDF, primed, and ready for final painting. Experienced consultants will help select sizes, profiles, calculate exact quantities accounting for gaps and waste. Delivery to Moscow, Saint Petersburg, and throughout Russia makes purchasing convenient. Create interiors where architecture becomes art — choose STAVROS!


