Article Contents:
- Visual noise in finishing: sources and consequences
- Installing planks: techniques for hidden mounting
- Adhesive compositions: selection for different substrates and conditions
- Microrelief and texture: surface consistency
- Color matching: working with wood color
- Professional techniques for defect elimination
- Systemic approach: planks as part of a unified composition
- Conclusion: philosophy of silence in details

Visual noise — it is an excess of elements, details, lines, colors that overload perception, create discomfort, prevent the gaze from finding a point of focus. In interior design, visual noise arises where there is a lot of heterogeneous, inconsistent, random elements. Careless material joints, visible installation defects, contrasting transitions between surfaces, protruding screw heads, uneven seams, mismatched tones of elements — all this creates visual irritation that cannot be ignored. Professional finishing is finishing where visual noise is minimized or completely eliminated. Where surfaces flow into each other smoothly, where joints are neat, where details are coordinated, where nothing distracts from the overall perception of space.
Wooden molding— is a tool for creating clean, quiet, professional finishing. They do not add visual noise — they eliminate it. Chaotic gaps between materials become neat lines. Rough panel edges are covered with elegant edges. Uneven angles become sharp edges. Planking does not shout about its presence — it works quietly, delicately, creating order where there was chaos. This is the philosophy of minimalism applied to details: fewer elements, but each in its place, performing its function flawlessly.
The key to professional planking finishing is attention to four aspects: mounting without visible defects, correct adhesive compositions for hidden fastening, consistency of microrelief and texture, precise color matching. When all four aspects are considered, planking becomes invisible in a functional sense — it does its job without drawing attention. The space is perceived as a whole, ordered, calm.


Visual noise in finishing: sources and consequences
Visual noise does not arise out of nowhere — it has specific sources that can be identified and eliminated. Understanding the nature of visual noise allows working with it consciously, turning potential problem areas into flawless details.
Careless joints — the main source of visual noise. When two materials meet on a wall — siding and painted drywall, tile and plaster, wood and wallpaper — a joint line is formed. If this line is uneven, with variable gaps, if materials are not aligned on the plane (one surface protrudes relative to another by 2-3 mm), if edges are poorly cut — this creates visual irritation. The gaze latches onto the unevenness, the brain registers the defect, and a feeling of poor workmanship arises.
Visible fastening — the second powerful source of noise. Screw heads, nail heads, staple heads visible on the surface of finishing create a visual grid of points that overload perception. Even if fastening is functionally necessary, visually it is excessive. In classical and minimalist interiors, where surface purity is valued, visible fastening is unacceptable. In industrial, loft styles, visible fastening may be part of the aesthetic, but this must be an intentional decision, not a result of carelessness.
Mismatched tones of elements — a source of chaos in material perception. When planks from different batches of wood are installed on one wall, differing by half a tone or more, this creates mottling, non-uniformity. Even if each plank individually is of high quality, together they create visual dissonance. Wood is a living material, and different boards from the same trunk may differ in color. A professional approach requires sorting materials and selecting elements so that tonal transitions are smooth or absent.
Inconsistent textures — a subtle but significant source of noise. When on one surface there are elements with different degrees of sanding (some smooth, others rough), different finishes (some matte, others glossy), different expressions of wood texture (some with bright rings, others uniform) — this creates visual disorder. Professional finishing requires uniformity of textures or, if texture variety is intended — a clear logic in their distribution.
Excessive profile complexity — when using planks with overly decorative, complex cross-sections where the task is simply to cover a joint. Ornamental planks with grooves, ribs, carvings attract attention, creating visual activity. If such planks are numerous and used haphazardly — this overloads the space. The principle of professional noise-free finishing — use the minimally sufficient profile. A simple rectangular or slightly rounded profile solves the task of covering a joint, without creating visual excess.
Consequences of visual noise — a feeling of unease, inability to relax in space, impression of cheap, unprofessional work. Even if materials are of high quality, careless installation and inconsistency of details diminish their value. Professional finishing is not necessarily expensive materials — it is primarily attention to details, neat execution, consistency of elements.


Installing planks: techniques for hidden mounting
Installing planks determines whether they will be a source of visual order or chaos. Professional installation — is installation where fastening is hidden, where plank lines are clear, where joints are tight, where there are no visible defects.
Surface preparation — the foundation of quality installation. The surface must be clean — free of dust, grease, remnants of old coatings. Dust reduces adhesive bond, grease creates a film that hinders adhesion, peeling areas of old paint or plaster — these are zones where planks will not adhere. Cleaning is done with a putty knife (to remove peeling), a brush (for dust), a degreaser (for grease stains). After mechanical cleaning, the surface is wiped with a damp cloth and dried.
Surface leveling is critical for thin planks. A 8-12 mm thick plank is flexible and follows the contours of the base. If the wall is wavy (deviation of 5-10 mm per meter of length), the installed plank will be wavy, which looks careless. Irregularities are revealed by applying a long level or straightedge — gaps indicate depressions, contact points indicate protrusions. Depressions are filled with putty, protrusions are trimmed or sanded. For planks, it is sufficient to level the surface to a deviation of no more than 2 mm per meter — this will ensure a visually straight line.
Priming improves adhesive bond to the substrate. Porous surfaces (drywall, plaster, wood) actively absorb adhesive, reducing its effectiveness. Primer creates a film that reduces absorption, ensuring even distribution of adhesive. Use a penetrating acrylic primer, applied with a roller or brush in one coat. Drying time — 2-4 hours. After priming, the surface is ready for installation.
Marking determines geometric accuracy. For vertical planks, use a plumb bob or laser level — mark a strictly vertical line along which the plank will be installed. For horizontal planks — use a water or bubble level, for diagonal planks — calculate the angle and mark two points at opposite ends of the wall. Marking is done with a thin pencil or chalk line (tied string) — the line should be barely visible, so it does not show through the plank, but sufficiently clear to orient during installation.
Cutting planks requires precision. A circular saw with a fine-toothed blade ensures a clean cut without chipping. The cutting angle (90° for end joints, 45° for corner joints "on the edge") is set using the built-in protractor of the saw with accuracy to 0.5°. Each cut piece is checked at the installation site — placed against the wall, checked for length and tightness of fit at the ends against adjacent surfaces. If the length is slightly excessive — the piece is trimmed by 1-2 mm. If the end does not fit tightly — it is refined with sandpaper or a second cut.
Adhesive mounting — the primary method for professional finishing without visible fastening. Adhesive is applied to the back of the plank in a zigzag or grid pattern (depending on the type of adhesive and plank weight). The plank is placed against the marked line and pressed for 10-20 seconds for initial adhesion. Excess adhesive protruding at the edges is immediately wiped away with a damp cloth — dried adhesive is harder to remove and creates visible blobs.
Temporary fixation until adhesive sets — an important stage. Even high-quality adhesive requires 30-60 minutes to reach sufficient strength to prevent the plank from sliding under its own weight. Temporary fixation is achieved using painter’s tape (tape strips are attached to the wall every 30-50 cm), clamps with soft pads (for horizontal planks), supports (for vertical planks). After 1-2 hours, temporary fastening is removed, and the adhesive continues to gain strength for another 24 hours.
Combined adhesive + hidden nail mounting is used for heavy or long panels where adhesive alone is insufficient. Finish nails (thin nails with a small cylindrical head of 1.5 mm diameter) are driven through the panel into the base at 40-60 cm intervals. The nail is not driven all the way — the last 2-3 mm of the head is pressed down using a nail set (a metal rod with a flat end, which is pressed against the nail head and tapped with a hammer). The head ends up 1-2 mm below the panel surface. The recess is filled with wood putty matching the panel color, then sanded flush after drying. The nail location becomes virtually invisible.
Hidden clip mounting — an advanced system for removable structures. Metal clips (clamps) are mounted to the wall with screws every 50-70 cm. The panel has a groove on the reverse side that clicks into the clip. The mounting is mechanical, secure, and adhesive-free. The panel holds firmly but can be easily removed by releasing the clip when needed. This system is used in commercial interiors where quick installation/removal is required; in residential spaces — less frequently due to higher cost.
Our factory also produces:


Adhesives: Selection for Different Substrates and Conditions
Adhesive for panel mounting — not just a secondary material, but a critical component determining the reliability and longevity of the mounting. Different adhesives have different properties, and selecting the right adhesive for a specific substrate and operating conditions — is a sign of professionalism.
PVA (polyvinyl acetate adhesive) — classic for bonding wood to wood and wood to porous surfaces. PVA forms a strong, elastic bond, penetrates wood pores, and creates a chemical bond with cellulose. Advantages of PVA: eco-friendliness (water-based, no solvents), no odor, ease of use, affordable price (150-300 rubles/kg). Disadvantages: low water resistance (standard PVA softens with prolonged water contact), 30-60 minute setting time requires temporary fixation, dried adhesive cannot be removed (making disassembly difficult).
PVA for panel mounting is used as type D3 (water-resistant) — it withstands short-term moisture exposure and is suitable for interiors, including kitchens and bathrooms with good ventilation. PVA is applied in zigzag or dot patterns on the back of the panel, then the panel is pressed against the substrate. Excess adhesive protruding at the edges is immediately wiped away with a damp cloth. Full bond strength is achieved after 24 hours at 20-25°C and 40-60% humidity.
Mounting adhesive (liquid nails) — a universal composition based on synthetic rubber or polymers, creating a strong bond between wood and various substrates: concrete, brick, drywall, ceramic, metal. Mounting adhesive fills substrate irregularities up to 3 mm, compensates for minor movements, and quickly sets (initial setting in 10-20 minutes). Advantages: universality, high adhesion to dissimilar materials, resistance to moisture and temperature, fast installation. Disadvantages: higher price (300-600 rubles per 310 ml tube), presence of solvents and odor (requires ventilation), less eco-friendly than PVA.
Mounting adhesive is dispensed in tubes for mounting guns. Adhesive is applied in lines or dots onto the panel, the panel is pressed against the substrate, and held for 20-30 seconds for initial setting. Temporary fixation with tape for 15-30 minutes ensures immobility until full strength is achieved. Full strength — after 24-48 hours. Mounting adhesiveof wooden planksto concrete, brick walls, ceramic tiles — primary choice.
Polyurethane adhesive — premium composition for maximum strength, water-resistant, and heat-resistant bonding. Polyurethane forms a chemical bond with the surface, polymerizes under air moisture, creating an elastic bond capable of withstanding movements up to 5-10%. Advantages: extreme strength (failure occurs in wood, not in the adhesive joint), full water resistance (withstands direct water contact), heat resistance up to 100°C, longevity of 50+ years. Disadvantages: high price (800-1500 rubles per 310 ml), adhesive foams during setting (requires strong panel pressing), difficulty removing excess (cured polyurethane can only be removed mechanically).
Polyurethane adhesive is used for critical applications: wet areas, outdoor use, vibration or temperature fluctuation zones. The adhesive is applied in a thin line (it expands 2-3 times upon curing), and the assembly is clamped with weights or clamps for 2-4 hours. Gloves are mandatory — the adhesive does not wash off skin and can only be removed mechanically after curing.
Epoxi adhesive — two-component composition (resin + hardener) for maximum strength, rigid, chemically resistant bonding. After curing, epoxy becomes as hard as plastic, shows no shrinkage, resistant to solvents, acids, alkalis, temperatures up to 150°C. Advantages: maximum strength, chemical resistance, ability to work with large gaps (up to 5 mm). Disadvantages: rigidity (does not compensate for movement — may crack if the substrate deforms), requirement to mix components, toxicity until curing, high price.
Epoxi adhesive is used rarely, in specific cases: mounting panels to metal, glass, ceramic, where maximum strength is required and movement is not expected. Components are mixed according to instructions (usually 1:1 or 2:1), mixed for 2-3 minutes until homogeneous, applied to surfaces, joined, and fixed. Working time with mixed adhesive is 15-40 minutes (depends on composition), curing time is 12-24 hours.
Adhesive selection is determined by the substrate and conditions. Wood to wood in dry rooms — PVA D3. Wood to concrete, brick, drywall — mounting adhesive. Humid rooms, outdoor use — polyurethane. Special requirements (chemical resistance, mounting to metal/glass) — epoxy. Correct adhesive selection ensures reliable bonding for decades; incorrect selection — panel detachment within months.
Get Consultation
Microrelief and texture: surface consistency
Microrelief — a fine-scale surface structure, perceptible by touch and visible under certain lighting. For wood, microrelief is determined by fiber texture, sanding degree, and finish coating type. Professional finishing requires consistent microrelief across all elements ——main cladding, other wooden details.
Fiber texture of wood — natural microrelief depending on species. Oak has a coarse-pored structure with distinct annual rings and radial rays — contrasting, active texture. Beech has a fine-pored, uniform structure — calm, even texture. Pine occupies an intermediate position — visible but not aggressive texture. When selecting species for panels, consider the texture of the main cladding. If the wall is clad with oak paneling, oak panels create a unified texture. Pine panels on oak paneling create dissonance — different texture expression, different fiber patterns.
Sanding degree determines surface smoothness. Coarse sanding (grit 80-100) leaves visible scratches, roughness, tactile unevenness. Medium sanding (120-150) creates visually smooth, but slightly rough to the touch surface. Fine sanding (180-220) — visually and tactilely smooth surface with a slight silk-like feel. Finish sanding (240-320) — perfectly smooth, almost polished surface.
For professional finishing, all elements must have the same sanding degree. If the main paneling is sanded to 180, panels must also be sanded to 180. Panels with coarser sanding (120) will appear rough and uneven. Panels with finer sanding (320) will appear foreign, too smooth compared to the background. Uniform sanding creates the impression that everything is made from one material, by one craftsman, in one process.
Brushing — a technique to emphasize texture by removing soft fibers with a metal brush. Hard areas of annual rings remain, soft fibers are removed, creating a pronounced relief depth of 0.5-1 mm. Brushed wood has a tactile texture, rough, natural. If the main cladding is brushed, panels must also be brushed — this creates unity. Smooth panels on brushed paneling create a contrast in textures, which may be interesting (intentional technique), but often appears as material inconsistency.
Finish coating affects microrelief through gloss level. Matte finish preserves natural texture, does not create glare, surface is perceived as velvety. Semi-matte (satin) provides a slight silk-like gloss, emphasizing texture. Glossy creates a mirror-like surface, glare, visually smooths texture (though tactilely it remains).
For professional finishing without visual noise, matte and semi-matte finishes are preferred. Gloss attracts attention with glare, creating visual activity. Matte surface is calm, non-distracting, allows the eye to glide without hesitation. If the main cladding is coated with matte oil, panels must be coated with the same oil (or a similar gloss level). Glossy panels on matte cladding will stand out with glare, creating visual noise.
Patination — applying pigment into texture recesses to create an aging effect, emphasizing relief. Patinated wood has contrasting texture — recesses dark, protrusions light. This is an expressive technique, but it requires consistency: if cladding is patinated, panels must also be patinated, with matching patina color (dark brown, black, gray). Different patina colors create visual chaos.
Consistency of microrelief — this is tactile and visual unity of all wooden elements. When texture, sanding degree, surface treatment are consistent, the space is perceived as a single, unified whole made from one material. When inconsistent — as assembled from disparate elements. Professionalism — lies in details that a non-specialist may not consciously notice, but subconsciously feels.
Color selection: working with wood color
Wood — a living material, and even boards from the same trunk may differ in shade. Sapwood (outer layers) is lighter than heartwood (central part). Annual rings alternate between light and dark bands. Knots create dark spots. Exposure to light, air, and time changes wood color — pine yellows, oak darkens, linden fades. Color selection — is the process of selecting and combining elements so that color transitions are smooth, harmonious, and do not create visual noise.
Material sorting before mounting — first stage of selection. All panels are laid out on a flat surface and visually assessed by color. Light panels are separated from dark ones, warm (with yellow or reddish undertones) from cool (with gray or greenish undertones). Groups of similar tones are formed. Elements from each group are selected for specific mounting zones. Goal — use panels from the same tonal group on one wall, within one composition.
Orientation of elements by tone creates smooth gradients or uniformity. If panels have a small tone variation (half-tones), they can be arranged from light to dark left to right or bottom to top — this creates a smooth gradient perceived as a play of light, not as tonal variation. If light and dark panels are mixed chaotically — this creates mottling, visual noise. If panels with the closest tone have been selected — they can be arranged in any order, uniformity will be preserved.
Toning for tone leveling — a technique to eliminate tonal differences. If a panel batch has noticeable tone variation and sorting is impossible (insufficient material, or this batch is required), selective toning is applied. Lighter elements are toned with stain 1-2 tones darker, approaching the color of darker elements. Or all elements are toned to a single color, completely eliminating natural differences.
Staining requires testing. Stain is applied to a sample board, dried, and evaluated. The stain concentration (diluted with water for water-based stains, solvent for oil-based) and number of coats (1–3) are adjusted to achieve the desired tone. After testing, all elements of one batch are stained with the same stain to ensure uniformity.
Painting with opaque paint is a radical method for completely eliminating tonal differences. Paint fully covers the wood’s texture and color, creating a uniform colored surface. White, gray, black, or colored boards—all have identical tones regardless of the original wood color. Painting is used when tonal matching is impossible or impractical, when a specific color is required (white boards in Scandinavian interiors, black in modern styles).
Painting requires quality preparation: sanding 180–220, priming (acrylic or alkyd), 2–3 coats of paint with intermediate drying and light sanding 280–320. Result: a perfectly smooth, uniform surface. The quality of painting determines visual cleanliness: poor painting with streaks, uneven tones, visible brush marks creates visual noise; quality painting with even color and smooth surface—order.
Coordinating boards with other elements —baseboards, plinth, doors, furniture— is important for interior cohesion. If a room has a light oak oak door, baseboards and boards must match the same tone. Different tones of wooden elements (oak door, natural oak baseboards, yellow pine boards) create chaos. Either all elements are matched in one tone, or all are stained/painted to a single color.
Matching tools: stain color fans (show results on different species), stained wood samples, paint tinting systems. Professional finishers have sample collections showing how a specific stain or paint appears on a specific wood species after 1, 2, or 3 coats. This allows precise prediction of results and selection of a tone matching the task.
Tonal matching is meticulous work requiring time and attention. But the result — visually clean, harmonious space without spots, uneven tones, visual noise — justifies the effort. Professionalism is evident when the viewer does not notice the matching work — they simply see a beautiful, orderly space.
Professional defect correction techniques
Even with careful installation, minor defects may arise: gaps at joints, surface scratches, small chips, uneven coating. Professional techniques allow these defects to be corrected, making them invisible.
Gap filling — for gaps up to 2–3 mm at board joints. Wood filler matching the board tone is used. Modern acrylic fillers are available in a wide palette — pine, oak, walnut, wenge, white. Filler is applied with a rubber spatula, pressed into the gap, excess is removed. After drying (2–4 hours), the filled area is sanded with fine sandpaper 220–280 flush with the surface. If the filler tone is correctly matched, the repair area is invisible.
For wide gaps (over 3 mm), filler shrinks and cracks. Wood insert adhesive is used: a thin sliver or strip, coated with glue, inserted into the gap, the protruding part is trimmed flush with a knife or chisel, then sanded. An insert of the same wood species visually blends with the board.
Scratch and chip retouching — for surface damage. Minor scratches are sanded with 220–320 grit sandpaper along the grain until gone. Deeper scratches (up to 0.5 mm) are filled with wood wax pencil (available in various colors), excess wax is removed, and the area is polished with a soft cloth. Chips are filled with filler, sanded, and retouched.
Color retouching — a delicate technique for masking tonal differences. If one board is lighter by half a tone, the area stands out. Retouching with markers or fine brush with stain allows darkening the light area. A thin layer of stain is applied, rubbed with cloth for smooth transition, and after drying, the result is evaluated. If needed, it is repeated. The goal is not a perfectly matching color (impossible), but a smooth transition where the difference is not noticeable.
Matching finish in tone — for boards with different gloss levels. If some boards are glossy (coated with glossy varnish), others matte (oil), this creates visual mismatch. Solution — cover all boards with a single finish. Glossy boards are coated with matte varnish (gloss remains under the matte layer but is not visible). Matte boards receive an additional layer of oil for refreshment. Result — uniform gloss.
Localized resanding and recoating — for areas with coating defects (varnish buildup, spots, unevenness). The defective area is sanded 220–280 to remove the defective layer, then a fresh coat of the same finish is applied. Transition boundaries are feathered to avoid visible lines between old and new finish. The technique requires skill but allows correcting local defects without recoating the entire board.
Professional defect correction techniques are not hiding shoddy work, but refining good work to perfection. Minor defects are inevitable (wood is a living material, installation conditions are not ideal), but they can be corrected so they become invisible. The difference between good and excellent work lies in these final touches.
Systemic approach: boards as part of a unified composition
Professional finishing is not just neatly installed boards, but a systemic approach where boards are part of a unified composition, coordinated by all parameters: material, color, texture, profile, rhythm, proportions.
Material unity — all wooden interior elements (cladding, boards, baseboards, moldings, doors, furniture) are made of one species or species with similar color and texture. Oak interior: oak cladding, oak boards, oak baseboards, oak doors. This creates material unity. Mixing species (pine cladding, oak boards, beech baseboards) creates visual mismatch, even if all are stained the same color — different textures remain, a sense of foreignness persists.
Color unity — all elements have the same or similar tone. Light gray interior: walls painted light gray, boards painted the same light gray, baseboards also. Or natural interior: everything coated with transparent matte oil preserving the natural wood color — pine light yellow, everything light yellow. Contrasting colors (white boards on dark walls) — an intentional technique creating graphic contrast, but it must be systemic: if boards are white, baseboards and moldings must also be white, creating a unified white graphic grid.
Profile unity — boards, baseboards, moldings have coordinated profiles. Simple rectangular boards match simple rectangular baseboards. Decorative boards with rounded edges match decorative baseboards with similar rounded edges. Mixing simple and decorative profiles creates stylistic mismatch. In classical interiors, all elements are decorative; in minimalist interiors, all are simple.
Rhythm unity — boards are installed with a specific spacing coordinated with other rhythmic interior elements. Vertical boards spaced 600 mm match 100 mm wide cladding (6 boards between boards). Horizontal boards at 900 mm from floor match window sill and chair back heights — creating a unified horizontal band. Chaotic board placement without rhythm creates disorder.
Proportion unity — board width corresponds to room and other element scale. In small rooms (10–15 m²), narrow boards 20–30 mm are appropriate — they create delicate structure without overwhelming space. In large rooms (40–50 m²), narrow boards disappear — wider 40–60 mm boards are needed for readability. Board proportions match baseboard and molding widths: if baseboard is 80 mm, boards 30–40 mm are harmonious; if baseboard is 120 mm, boards 50–60 mm.
Systemic approach requires planning during design phase. Specification of all wooden elements is prepared: species, tone, finish, profile. Material is purchased in one batch (or batches of similar tone selected). All elements are processed identically: sanded to one grit, stained with one stain, coated with one finish. Installation proceeds sequentially, with quality control at each stage.
Result of systemic approach — an interior where everything is coordinated, no random elements exist, every detail is in its place, performs its role, does not create visual noise. This is felt but not consciously recognized — the viewer sees a beautiful space, not analyzing why it is beautiful. Professionalism lies in the work being invisible, while the result is obvious.
Conclusion: philosophy of silence in details
Professional finishing — is finishing without visual noise, where every detail is in its place, joints are neat, colors are coordinated, textures are uniform.Wooden molding— is the tool for creating such finishing, transforming technological gaps into neat lines, rough edges into finished edges, chaos into order.
Installing paneling without visible defects requires surface preparation, precise marking, careful cutting, and proper fastening. Hidden adhesive fastening creates a clean surface without visible fasteners. Adhesives are selected based on the substrate and conditions — PVA for wood, general-purpose construction adhesive, polyurethane for wet areas, epoxy for special requirements. The correct adhesive ensures durability for decades.
Micro-relief and texture are coordinated across all elements — paneling has the same level of sanding, the same finish (brushing, patination), and the same coating (matte, satin) as the main cladding. Uniform textures create a sense of material continuity. Color matching eliminates visual discrepancies — paneling is sorted, tinted, or painted to achieve a unified tone. Professional techniques eliminate minor defects — gaps are filled, scratches are retouched, and finishes are leveled.
A systematic approach unifies all elements into a single composition — unity of material, color, profile, rhythm, and proportions. When everything is coordinated, the space is perceived as cohesive, calm, and complete. This is the philosophy of silence in details: not silence, but the absence of visual noise; not emptiness, but the purity of lines; not minimalism for its own sake, but the deliberate elimination of excess.
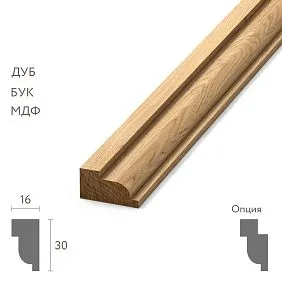
Company STAVROS offers a full range ofwooden mouldingsFor professional finishing. Pine, linden, oak, ash, beech — all species are air-dried to a moisture content of 8–12%, ensuring dimensional stability. Precision machining on four-sided machines with a tolerance of ±0.3 mm. Wide selection of profiles, from simple rectangular to decorative shapes. Diverse finish options — natural wood under oil, stained, painted, brushed, or patinated.
STAVROS professional consultants will help select paneling matched in species, tone, and texture with other interior elements. They will calculate the required quantity including a reserve. They will recommend adhesive formulations and installation techniques for specific conditions. They will organize delivery while preserving material quality.
Investing in high-quality paneling and professional installation is an investment in visual silence, in a space free of noise, where the eye rests, where details function without drawing attention. This is the choice of those who value not showy luxury, but quiet perfection of execution, where quality manifests in details that do not shout, but create a sense of order, completeness, and professionalism.