


Article Contents:
- What is trim: definition and functions
- Types of trim by cross-section shape
- Simple rectangular trim
- Corner trim (angle)
- T-profile (cap, mushroom cap)
- Decorative profiled trim
- Corners: how to finish properly
- Internal angle between walls
- External angle (projection, pilon)
- Angle between wall and ceiling
- Angle between wall and floor
- T-profiles: application nuances
- Vertical boarding: board joints
- Change in boarding direction
- Panels of different colors
- Decorative zoning
- Niche finishing: creating depth
- TV niche
- Decorative niche (for vase, sculpture)
- Shelf niche (open shelves)
- Heating radiator niche
- Materials: Choosing Wood Species
- Trim installation: practical aspects
- Practical Tips
- Conclusion

Details decide everything. You can achieve perfect wall finishing, install expensive boarding, lay parquet — and ruin it all with sloppy joints, gaps in corners, crooked transitions between materials. It is precisely in these areas — at joints, in corners, in niches — that the quality of work is revealed. And it is precisely here that wooden trim — a thin board from solid wood — turns a technical defect into an elegant decorative element, invisibly hides what needs to be hidden, and emphasizes what deserves attention.
Trim is not a patch or a way to mask defects. It is a full-fledged decorative element, as important as baseboards, window casings, or cornices. It creates completeness, structures space, introduces rhythm, and emphasizes architectural lines. And when it comes to corners, T-profiles, and niche finishing — trim becomes not just a functional element, but a design tool capable of changing the perception of a room.


What is trim: definition and functions
Wooden trim (also called baseboard, stop, or strip) is a solid wood molding with rectangular, triangular, T-shaped, or decorative cross-sections. Width is usually from 16 to 60 millimeters, thickness from 5 to 22 millimeters, length from 1 to 3 meters. Made from various species — pine, oak, beech, ash, linden, aspen.
Main functions of trim:
Joint masking. When two materials meet — boarding and drywall, wood and tile, panels of different colors — a gap forms at the joint. Technological, inevitable, but unsightly. Trim covers this joint, creating a clean line.
Sealing gaps and joints. When installing wood paneling, boards, or planks between elements, gaps may form. Especially at corners, where wall geometry is rarely perfect. Layout compensates for these irregularities, filling gaps.
Corner finishing. Internal and external corners are vulnerable areas. Here materials join poorly, and damage or chipping can occur. Corner layout protects the corner, gives it a neat appearance, and strengthens the structure.
Decorative applications. Layout is used not only for masking but also for creating decorative compositions. Wall frames, surface paneling, space zoning — all of this is achieved using layouts.
Transitions between planes. When the finishing material changes, when a wall transitions to a ceiling, when a niche is built into a wall — layout creates a visual boundary, emphasizes the transition, and makes it a deliberate design element.
Protection against mechanical damage. Wall corners, furniture edges, protruding elements are prone to impacts and abrasion. Layout absorbs these impacts, protecting the main finish.


Types of layouts by cross-section shape
The cross-section shape of the layout determines its functionality and application area. Let's consider the main types.
Our factory also produces:


Simple rectangular layout
The most universal type — a rectangular-section plank with a smooth, flat surface. Section from 5x20 mm to 20x60 mm. No profiles, protrusions, or grooves — simply a clean wooden plank.
Application:
-
Sealing joints between different materials on flat surfaces
-
Creating decorative frames on walls
-
Dividing panels of different colors
-
Framing mirrors and pictures
-
Decorating furniture facades
Simple layout accounts for 80% of all applications. Its universality lies in its suitability for any task requiring a clean straight line without additional effects.
Installation is simple — it is attached with glue, finishing nails, or self-tapping screws (if thickness allows). Joints are made at 45 degrees (for frames) or flush (for straight transitions).
Get Consultation
Corner layout (angle bracket)
L-shaped or triangular cross-section layout, specifically designed for corner finishing. Two planes joined at a 90-degree angle (for internal corners) or at a variable angle (for external corners with different geometries).
Types of corner layouts:
Equilateral. Both arms of the angle bracket have the same width — for example, 20x20 mm, 30x30 mm. Used when both walls forming the corner are visually equally significant.
Unequal. One arm is wider than the other — for example, 40x20 mm, 50x30 mm. Used when one wall is primary and the other is adjacent. The wider arm goes on the primary wall, the narrower — on the adjacent one.
Triangular (angled cove). Cross-section in the shape of a right triangle. Covers the corner, creating a rounded transition. Used to soften sharp corners, for interiors where smooth lines are needed.
Applications of corner layouts:
Internal corners of rooms. When walls are covered with wood paneling, panels, or drywall, a joint forms at the corner. Corner layout covers this joint, creating a clear vertical line and emphasizing the corner.
External corners (pilasters, columns, protrusions). External corners are the most vulnerable areas. Here finishes easily chip or get damaged. Corner layout protects the corner, strengthens it structurally, and creates a neat appearance.
Niche finishing. When a niche is built into a wall, internal angles form between the wall and the niche sides, and between the sides and the back wall. Corner layouts finish these joints.
Beam and column cladding. If a wooden beam or column has a square or rectangular cross-section, the corners are covered with corner layouts, creating a finished look.
Installation of corner layouts:
The angle bracket is pressed against both planes of the corner and fastened with finishing nails (small nails with small heads) or glue. For heavy layouts, self-tapping screws are used, which are then spackled and painted.
Important point — corner geometry. A perfect 90-degree angle is rare. Often, the angle is sharper or wider. Corner layout compensates for these deviations through its width — one arm presses tightly, the other covers the gap.
When joining corner panels at a corner (for example, at a height of two and a half meters from floor to ceiling), the upper end is beveled at 45 degrees to avoid a blunt edge.
T-profile (mushroom, mushroom cap)
T-section panel, where the vertical part (leg) fits into the gap between elements, and the horizontal part (cap) covers the joint. It resembles a mushroom externally — hence the name.
Dimensions: The leg is usually 6–10 mm thick and 10–15 mm high. The cap is 20–40 mm wide and 4–8 mm thick.
Applications of T-profiles:
Covering joints of siding. Main application. Siding is installed vertically or horizontally, but at corners, when transitioning to another wall, or when changing the direction of boards, a joint forms. The leg of the T-profile fits into the gap between boards, and the cap covers the joint from above, creating a neat line.
Joining panels of different colors or textures. If one wall has light panels and another has dark ones, the T-profile covers the joint, creating a clear boundary.
Decorating transitions between materials. Siding on one part of the wall, plaster on another — the T-profile masks the transition, creating a decorative vertical or horizontal line.
Decorative wall division. T-profiles are used to create rhythm on large flat surfaces. The wall is divided into sections using vertical or horizontal T-profile lines, breaking monotony.
Installing T-profiles:
The leg of the profile is inserted into the gap between elements. If the gap is narrow (3–5 mm), the leg fits tightly and holds by friction. If the gap is wider, the leg is glued. The cap may be additionally secured with finish nails every 40–50 cm.
When installed vertically, the T-profile is mounted from bottom to top, tightly inserted into the gap. When installed horizontally, installation locations are marked first, then the profile is pressed and secured.
Important: The leg of the T-profile must match the width of the gap. If the gap is 5 mm, the leg should be 4–5 mm. If the leg is thicker, the profile won’t fit. If thinner, it will wobble.
Decorative profiled panels
Panels with complex cross-sections — semicircular (round), concave (ovolo), multi-step, with bevels, with decorative protrusions. Used in classic interiors where decoration, volume, and play of light and shadow are needed.
Semicircular panel (round cap). Cross-section in the shape of a half-circle. Creates a soft convex line. Used for framing panels, creating frames, and decorating transitions. In classic interiors — often on furniture facades, for creating dados.
Concave panel. Concave, in the shape of a quarter circle. Creates a smooth transition between two planes. Used as baseboard (floor or ceiling), for decorating the junction between wall and ceiling, for softening corners.
Multi-step panel. Has several levels, steps, protrusions. Creates a complex relief and play of light. Used in grand interiors, for decorating walls, ceilings, and furniture. More expensive than simple panels and more complex to install.
Panel with bevels. Rectangular strip with edges beveled at a 45-degree angle. Creates a more elegant appearance than a simple rectangular panel. Universal, suitable for most interiors.
Decorative panels are used where decoration is needed, where style matters, where details create atmosphere. In plain balcony cladding — a simple rectangular panel. In a classic living room — decorative panels with round caps and bevels.
Corners: How to properly finish
Corners are a critical area of finishing. Here, planes meet, any geometric errors are visible, and the finish experiences maximum stress. Let’s consider typical situations and solutions.
Internal angle between walls
Situation: Two walls, clad with siding or panels, meet at an internal corner. Boards/panels are beveled, but the joint is not ideal — there is a gap, unevenness.
Solution: Equilateral corner panel (e.g., 25×25 mm). The corner is inserted into the angle, both flanges pressed against the walls, secured with finish nails. The gap is covered, and the corner looks neat and tidy.
Alternative: If the angle is not right (acute or obtuse), use an unequal corner panel, where one flange is wider and compensates for geometric deviation.
Alternative: Instead of a corner panel, use two simple panels installed flush in the corner. But this is less reliable and less neat.
External angle (projection, pilaster)
Situation: The wall has a projection (e.g., a pilaster to conceal utilities, a column, a ventilation box). The external angle is clad with panels. This is the most vulnerable spot — here, it’s easy to bump into, hit, or scratch the material.
Solution: Corner panel for both external angles of the projection. The panel protects the angle and absorbs impacts. It is secured with adhesive and finish nails. For heavily loaded areas (hallways, children’s rooms), use panels made of hardwood (oak, beech) or even metal angles clad with wood.
Important: The external angle is often not exactly ninety degrees. When installing the angle bracket, one flange fits tightly, while the other may have a gap. The gap is filled with wood-colored sealant, then the layout is secured.
Angle between wall and ceiling
Situation: The wall is clad with veneer, the ceiling is also. Between them, there is a gap, an uneven joint.
Solution: Ceiling molding (casing) — essentially, an angular layout of a special profile. It is mounted to the wall and covers the joint with the ceiling. The width selection depends on the room height — the higher the room, the wider the molding (from forty to one hundred twenty millimeters).
Alternative: A simple triangular molding, creating a rounded transition from wall to ceiling. Softens the sharpness of the angle, suitable for interiors where smoothness is desired.
Angle between wall and floor
Situation: The wall meets the floor. Between them — a technological gap (to compensate for floor covering expansion), an uneven joint, visible defects.
Solution: Baseboard — molding of a special profile, covering the joint.Solid wood skirting boardIt is mounted to the wall, the bottom edge covers the gap with the floor. Height ranges from forty to one hundred fifty millimeters depending on room height and interior style.
Important: The baseboard is selected to match the floor covering or wall color — depends on the design concept. Classic — baseboard matching the floor color. Modern approach — baseboard matching the wall color (creates visual continuation of the wall, increases perceived room height).
T-profiles: nuances of application
T-profile — a specific element requiring understanding of nuances.
Vertical veneer: board joints
Situation: The wall is clad with vertical veneer. Boards have standard length of two and a half to three meters. If the wall is higher, boards join vertically. The joint is a weak spot, and a gap may form due to wood drying.
Solution: Horizontal T-profile at the joint height. The leg fits into the gap between board ends, the head covers the joint. Additional effect — horizontal line divides a tall wall, creating proportion.
Change in veneer direction
Situation: On one part of the wall, the veneer is horizontal, on another — vertical (for example, zoning, accent area). At the direction change — a complex angle, difficult to join.
Solution: Vertical T-profile at the direction change boundary. Creates a clear division line, masks the complexity of the joint, turns a technical node into a design solution.
Panels of different colors
Situation: The wall is divided into zones — lower panel is dark (plinth), upper panel is light. Between them — a joint that wants to be emphasized, not hidden.
Solution: Horizontal T-profile of contrasting color. For example, dark and light panels are separated by a white T-profile. Or vice versa — light panels are separated by a dark profile. This creates graphic elements, structuring the wall.
Additional: T-profile can be combined with simple moldings. For example, above the T-profile separating panels, a horizontal simple molding is placed at a distance of five centimeters. This creates a double line, enhancing the effect of division.
Decorative zoning
Situation: A large flat wall — monotonous, boring. Want to divide into zones, create rhythm.
Solution: Vertical T-profiles with even spacing (for example, every sixty to eighty centimeters). The wall is divided into vertical stripes. The effect can be enhanced by painting the stripes in different tones or using panels of different textures between the profiles.
Alternative: Horizontal T-profiles dividing the wall into levels. For example, at ninety centimeters (plinth level) and two hundred ten centimeters (below ceiling). Between profiles — three zones: lower, middle, upper. Each zone can have its own finish.
Niche decoration: creating depth
Niche in the wall — is volume, depth, opportunity for decoration. But a niche requires proper finishing, otherwise it looks like a hole in the wall.
TV niche
Construction: Niche depth of fifteen to twenty centimeters, width to match TV size plus ten centimeters on each side, height to match TV size plus twenty centimeters above (for ventilation).
Casing with trim:
Inside corners of the niche: Between the side walls and the back wall, inside corners are formed. If the niche is clad with wood, these corners are finished with narrow corner trim (15×15 mm or 20×20 mm). This creates neatness and covers the joints of the cladding.
Inner angles of the niche: Between the side walls of the niche and the back wall, inner angles are formed. If the niche is clad with wood, these angles are finished with narrow corner trim (15×15 mm or 20×20 mm). This creates neatness and covers the joints of the cladding.
Bottom shelf of the niche: If the niche has a shelf (for mounting a receiver or decor), the edge of the shelf is finished with simple trim, creating a sense of completion.
Color: Trim around the niche can be in the same tone as the wall (niche blends into the plane) or contrasting (niche stands out). For modern interiors — in the same tone. For classic interiors — contrasting (light wall, dark niche frame).
Decorative niche (for vase, sculpture)
Construction: Shallow niche (ten to fifteen centimeters deep), small size (forty by sixty centimeters, fifty by fifty centimeters). Designed for placing decorative objects.
Casing:
Perimeter: Decorative trim with profile (semi-circular, beveled) runs along the perimeter, creating a decorative frame. The width of the trim may be greater than for standard applications — sixty to eighty millimeters. This enhances the decorative effect, making the niche resemble a picture frame.
Back wall of the niche: May be painted in a contrasting color, covered with patterned wallpaper, or finished with another material (stone, tile). Trim around the perimeter emphasizes this contrast.
Lighting: An LED strip can be installed along the top perimeter inside the niche, hidden behind a small trim. The light is directed onto the object in the niche, creating a dramatic effect.
Several niches: If there are several decorative niches on the wall (for example, three niches arranged vertically or horizontally), all are framed with identical trim. This creates rhythm and compositional unity.
Niche-shelf (open shelves)
Construction: A niche thirty to forty centimeters deep, divided into several levels by horizontal shelves. Used for books, decor, collections.
Casing:
Outer perimeter: Wide trim (sixty to eighty millimeters) frames the entire shelf, creating a single unified frame.
Vertical posts: If the shelf is wide, it may be divided into several sections by vertical posts. The front edges of the posts are finished with simple trim, protruding forward by five to ten millimeters. This creates structure and graphic lines.
Shelves: The front edges of the shelves are also finished with trim. This enhances horizontal lines and makes the shelf more expressive.
Side and back walls: Inside the niche, joints of the cladding are covered with narrow corner trim or T-profiles.
Color: A niche-shelf can be in the same tone as the wall or contrasting. Classic solution — white wall, dark wood (oak, wenge) for the shelf and trim. Modern — everything in one light tone (white, light gray), graphics created by trim lines and shadows from shelves.
Niche for radiator
Construction: The radiator is hidden within the niche or behind a decorative screen. Air circulation must be ensured, but the installation must be neat.
Casing:
Perimeter of the niche: Trim frames the niche from above and on the sides. Below — baseboard that runs along the niche.
Grille: The front part of the niche is covered with a grille (wooden, metal, MDF) for air circulation. The grille frame is made from the same trim as the niche frame. This creates unity.
Important: Trim around the radiator niche must not impede heat dissipation. Use thin profiles, install at least five centimeters away from the radiator.
Materials: Choosing Wood Species
Trim is made from different wood species, and the choice depends on usage conditions, budget, and aesthetic preferences.
Spruce: The most affordable species. Light, soft, easy to work with, easy to paint and stain. Disadvantage — softness, prone to dents. Suitable for areas with no high loads — ceiling trim, decorative elements on walls. Not recommended for corners where there is a risk of impact.
Linden and aspen: Traditional species for saunas and steam rooms. Do not release resin when heated, do not burn skin, resistant to moisture. Used rarely in regular living spaces — more expensive than spruce, yet still soft.
Linden and aspen: Traditional species for saunas and bathhouses. Do not release resin when heated, do not burn skin, and are resistant to moisture. Used rarely in ordinary living spaces — more expensive than pine, yet softer.
Birch: Medium hardness, light color, uniform texture. Easily painted, suitable for staining to resemble premium species. Stronger than spruce. Used for trim in living spaces, for furniture decoration.
Oak: Hard, durable, long-lasting. Expressive texture, beautiful color (from light brown to dark brown). Expensive.Solid Oak ProductsLasts decades without deformation. Used for layouts in prestigious interiors, for corner layouts in high-load areas, for classic furniture.
Beech: Hardness and strength close to oak, but cheaper. Light, with a pinkish tint, uniform texture. Easy to process and paint. Popular for furniture layouts and interior elements.
Ash: Hard, flexible, with a beautiful texture. Lighter than oak, with a grayish tint. Strong, suitable for heavily loaded elements. More expensive than pine and birch, cheaper than oak. Versatile.
Walnut: A noble wood, dark, with a beautiful grain. Expensive. Used in premium interiors, for decorative layouts where aesthetics matter.
Wood species selection:
-
For budget projects, where layouts are on ceilings or walls out of reach — pine.
-
For living spaces, where layouts may be touched but not struck — birch, ash.
-
For corners, furniture, high-load areas — oak, beech, ash.
-
For prestigious interiors, where aesthetics matter — oak, walnut, ash.
-
For saunas and steam rooms — linden, aspen.
Layout installation: practical aspects
Correct installation determines longevity and appearance.
Surface preparation: The layout is attached to a clean, dry, flat surface. Dust, dirt, and grease stains reduce adhesive bond. Surface is dusted, and primed if necessary.
Marking: Before installation, locations for layout placement are marked. Level (for vertical and horizontal lines), tape measure, pencil are used. Marking is especially important for decorative compositions, where layouts form frames or grids.
Cutting: Layouts are cut to size. For straight joints — a flat end at 90 degrees. For corner joints (frames) — at 45 degrees. A try square (for manual cutting) or a miter saw (for precise cutting at any angle) is used.
Adhesive mounting: Wood glue (PVA) or construction adhesive ("liquid nails") is applied to the back of the layout in dots or lines. The layout is pressed against the surface and held for several seconds. Excess glue is immediately wiped off with a damp cloth.
Nailing: Finishing nails (length 23–30 mm, small head) are driven through the layout into the base at 40–60 cm spacing. Nail heads are pressed down with a nail set 1–2 mm below the surface. Holes are filled, sanded, and painted.
Screw mounting: For heavy layouts, use thin screws (2.5–3 mm diameter). Drill a small pilot hole (to prevent cracking), then screw in. Head is pressed down and filled.
Combined mounting: Glue plus nails. Most reliable method. Glue ensures full contact, nails provide temporary fixation during glue setting and additional strength.
Layout joints: End joints must be perfectly flat. Gaps over 1 mm are noticeable and ruin appearance. Joints are filled with acrylic sealant matching wood color, excess is removed.
Post-installation treatment: Installed layouts are sanded with fine-grit sandpaper (if roughness remains), then coated with protective finish — oil, wax, varnish. Painted layouts are touched up at joints and fasteners.
Practical Tips
Buy with allowance. Material is lost during corner cutting or mistakes. Add 10–15% to calculated quantity.
Check geometry. Before installation, verify that room angles are square (or measure actual angle). This affects layout cutting.
Acclimatization. Wooden layouts must rest in the room for 2–3 days before installation. Wood adapts to humidity and temperature, achieving stable dimensions.
Do not compromise on quality. Cheap layouts made from poorly dried wood will warp and deform.Quality solid wood productsUndergo kiln drying, have stable geometry.
Combine with other elements. Layouts harmonize withmoldings, cornices, baseboards. Use elements of the same wood species and tone to create interior unity.
Protective coating is mandatory. Even in dry rooms, wood requires protection. Oil, wax, varnish prevent dirt, fading, and protect against moisture.
Conclusion
Wooden trim is not a secondary detail. It is an element that transforms finishing from amateur to professional, from sloppy to neat, from generic to distinctive. Corners finished with corner trims cease to be problematic zones and become clear architectural lines. T-profiles turn technical joints into decorative elements, creating rhythm and structure. Niches framed with trims attain completeness, becoming intentional parts of interior composition.
The correct choice of trim type, wood species, and installation method determines the result. Simple rectangular trim is universal; corner trim protects and finishes corners; T-profiles cover joints and create decoration; decorative profiles add classic elegance and luxury. Oak, beech, and ash ensure strength and durability; pine offers affordability; walnut conveys nobility.
Company STAVROS has been working with natural wood for more than twenty years, offering qualitySolid Wood Itemsfor interior finishing and decoration. The assortment includes wooden trims of various cross-sections, sizes, and profiles made from oak, ash, beech, and pine.
All STAVROS products are made from carefully selected solid wood, kiln-dried to a moisture content of 8–10%. This guarantees dimensional stability, absence of warping or cracking. Processing includes meticulous sanding, optional toning, oil or lacquer finish.
The catalog features various types of trims: simple rectangular trims in different sizes, equal and unequal corner trims, T-profiles for covering joints, decorative profiles for classic interiors. Custom manufacturing is possible — desired length, width, thickness, profile.
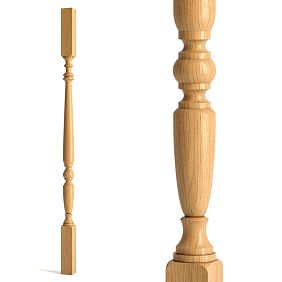
In addition to trims, STAVROS offers other finishing elements:Solid wood baseboards, Ceiling cornices, Wall moldings, Furniture legs, balusters for staircases— everything for creating a harmonious interior from natural materials.
STAVROS consultants will help you select trims to suit your needs, calculate the required quantity, recommend wood species and mounting method. Delivery available in Moscow, Saint Petersburg, and throughout Russia. The company works with both private clients and professional builders, finishers, and designers.
Create an interior where every detail is thought out. Where corners are neat, joints are covered, niches are finished. Where wood creates warmth, structure, and character. Wooden trim from STAVROS — a tool to transform an ordinary space into an environment worthy of admiration.


