Article Contents:
- Assessment of Structural Integrity
- Determining the Type of Finish
- Master's Toolkit: Arsenal for Transformation
- Tools for Surface Preparation
- Painting Tools
- Specialized Tools
- Color Revolution: Painting Techniques for Stylish Refresh
- Preparation for Painting
- Paint Application Techniques
- Decoupage and Artistic Painting: Creative Self-Expression
- Decorative Effects
- Decoupage Technique
- Upholstery Restoration: New Life for Soft Furniture
- Artistic painting
- Removing Old Upholstery
- Choosing New Materials
- Reupholstering Technology
- Replacing Hardware: Small Details That Change Everything
- Choosing Hardware Style
- Technical Aspects of Replacement
- Structural Changes: When More Than Cosmetic Work Is Needed
- Modifying Cabinet Furniture
- Changing Furniture Purpose
- Ecological Aspects of Furniture Refresh
- Workshop Layout
- Use of Eco-Friendly Materials
- Waste Disposal
- Workspace Organization
- Lighting and Ventilation
- Safety When Working with Chemical Materials
- Working with Solvents
- Personal protective equipment
- Working with Solvents
- Stylistic Directions in Furniture Refresh
- Scandinavian minimalism
- Industrial loft
- Provençal Romanticism
- Economic Efficiency of Updating
- Cost calculation
- Comparison with Buying New Furniture
- Advanced Techniques for Experienced Craftsmen
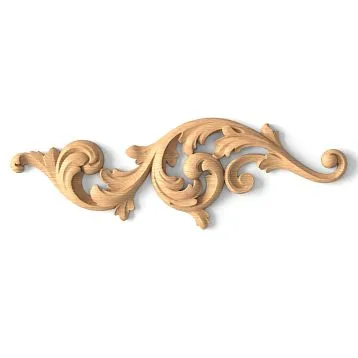
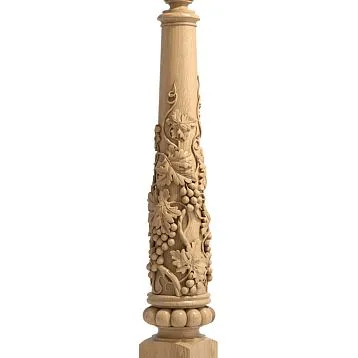
- Wood Carving
- Inlay and Marquetry
- Gilding and Silvering
- Modern Trends in Furniture Restoration
- Ecology and sustainability
- Technology integration
Each piece of furniture in your home holds memories of the years lived. But what to do when your favorite chest loses its original beauty, and once stylish chair looks outdated? It’s sad to throw away, and buying new is expensive. That’s precisely when it’s time to learn, how to update old furniture yourself and turn forgotten items into designer masterpieces.
Furniture restoration is not just repair, it’s the art of resurrection. Every scratch tells a story, every scratch bears memories. Your task is not to erase this history, but to add a new chapter, full of beauty and functionality.
Modern trends in eco-friendliness and mindful consumption make updating old furniture not just an economically advantageous solution, but also a fashionable trend. Vintage and restored items are valued by designers above new factory-made products. And the uniqueness of the result will exceed any expectations.


Diagnosis of Condition: Where to Start the Transformation
Before picking up brushes and sandpaper, it is necessary to conduct a thorough diagnosis of the furniture’s condition. Each item requires an individual approach, and understanding the scope of work will help choose the right update strategy.


Assessment of Structural Integrity
Checking joints is the top priority. Loose chair legs, sagging cabinet doors, squeaky mechanisms — all of this requires attention before beginning decorative work. No beautiful finish can save furniture with compromised geometry.
Pay attention to the condition of the wood. Areas with rot, deep cracks, or insect damage may require replacement. Surface defects are easily remedied with putty and sanding, but structural damage requires serious repair.
Hardware also requires assessment. Sticking hinges, broken handles, worn drawer guides are better replaced before beginning finishing work. Otherwise, even the most beautiful paint won’t hide functional flaws.
Our factory also produces:


Determining the Type of Finish
Understanding what your furniture is covered with is critically important for choosing the method of updating. Lacquered surfaces require complete removal of the old finish for proper application of the new one. Painted furniture can be updated over the old paint provided good adhesion.
Oil-based finishes are easily identified by their characteristic gloss and tactile feel. Such surfaces are well-suited for partial updating without full repainting. Wax finishes require complete removal before applying other types of finishes.
A simple test will help determine the type of finish: drop a small amount of water on an inconspicuous area. If the water is absorbed — the wood is unprotected or covered with oil. If it beads — the surface is lacquered or painted.
Get Consultation
Master’s Toolkit: Arsenal for Transformation
A quality result is impossible without proper tools. How to update old furniture yourself professionally? Prepare a complete arsenal of necessary equipment.
Tools for Surface Preparation
A sander is the primary tool for removing old finishes and leveling surfaces. An eccentric model will provide quality sanding without deep scratches, while a belt sander handles rough scraping of large flat surfaces.
Hand sanders of various sizes are indispensable for processing hard-to-reach areas, profiled surfaces, and carved elements. A set of sandpaper ranging from coarse grit (80-120) to fine (220-320) will ensure quality preparation for any finish.
Scrapers and scrapers will help remove thick layers of old paint or lacquer. Chemical strippers will speed up the process, but require careful handling and good ventilation in the room.
Painting Tools
Brushes of various sizes — from fine artist brushes for detailing to wide flannel brushes for covering large surfaces. A quality brush leaves no bristles and ensures even application of material.
Rollers will speed up painting flat surfaces. Velvet rollers provide a smooth finish, while foam rollers create a textured one. Mini rollers are convenient for painting door panels and narrow details.
Spray gun or airbrush will provide a perfectly even finish without brush or roller marks. Especially effective when working with metallics and pearlescent paints.
Specialized Tools
A construction hair dryer will help remove old paint, speed up drying of coatings, soften glue when replacing upholstery. Chisels of various widths are necessary for cleaning grooves, removing damaged wood, and fitting parts.
A syringe glue will ensure precise application of glue in hard-to-reach areas when reinforcing joints. Clamps will hold parts in place while the glue dries or during replacement of structural elements.
Color Revolution: Painting Techniques for Stylish Refreshment
Painting is the most accessible and effective way to transform furniture. Modern materials allow creating finishes of any shades and textures, from classic glossy to trendy matte and metallic.
Preparation for Painting
Priming is a mandatory step for a quality result. Primer ensures paint adhesion to the surface, equalizes the surface's absorbency, and prevents stains and resin from showing through.
For coniferous species, use isolating primers that block resin exudation. For tannin-containing woods, use primers that neutralize tannins and prevent yellow stains.
Filling defects is done after priming. Acrylic wood putties are easy to sand and paint well. Deep dents should be filled in multiple layers with intermediate drying.
Paint Application Techniques
Classic painting involves applying 2-3 thin coats with intermediate sanding. Each layer must be fully dry before applying the next. The final coat is applied undiluted for maximum coverage.
Glazing technique creates semi-transparent layers through which the wood grain or previous paint layers are visible. Achieved by diluting paint with special mediums or applying very thin coats.
Dry brush technique involves applying paint with a nearly dry brush to create a worn, aged effect. Paint is applied only to raised parts of the relief, creating a natural wear effect.
Decorative Effects
Patina technique creates an effect of noble antiquity. Dark paint or special patina is applied into recesses and then partially removed from raised areas. The result is a natural darkening effect from aging.
Crackle technique creates cracks on the paint surface. A special crackle lacquer is applied between paint layers, creating controlled cracks. The effect is enhanced by filling with contrasting paint.
Metallic effects are achieved using paints with metallic pigments or by applying metallic foil onto a special adhesive. Bronze, silver, and gold tones give furniture a luxurious look.
Decoupage and Artistic Painting: Creative Self-Expression
For those who want to create truly unique items, decoupage and painting open up boundless creative possibilities. These techniques allow transforming simple furniture into works of art.
Decoupage Technique
Decoupage is a decoration technique involving attaching cut-out images followed by lacquering. Its simplicity makes it accessible even to beginners, and the result can impress with its elegance.
Material selection is critically important. Special decoupage papers yield the best results, but you can also use napkins, prints on thin paper, even pages from old books or sheet music. The key is to properly prepare the image.
Application technique requires patience and care. The image is adhered using special decoupage glue or diluted PVA. Avoid bubble or crease formation, and carefully smooth the image from center to edges.
Artistic Painting
Stencil painting is an accessible method for creating complex patterns. Ready-made or homemade stencils allow creating repeating elements with high precision. Use special stencil paints and flat brushes.
Freehand painting requires artistic skills but allows creating truly unique works. Acrylic paints are ideal for painting on wood, dry quickly, and do not fade.
Imitating various materials through painting — an advanced technique. You can imitate marble, valuable wood, metal, fabric. Requires studying texture characteristics and mastering special techniques.
Upholstery Restoration: New Life for Soft Furniture
Soft furniture requires a special approach when updating. How to refresh old furniture by yourself, if it's sofas, chairs, or stools with upholstered seats? Reupholstering can completely transform the appearance at relatively low cost.
Removing the old upholstery
Photographing the removal process will help during reassembly. Capture each stage, especially how the upholstery is attached, the placement of decorative elements, and the sequence of removing parts.
Careful removal of the old upholstery will allow you to use it as a pattern for the new one. Try not to damage parts during removal, mark the grain direction, and number parts for easier cutting.
Assessing the condition of the filling will help determine whether it needs replacement. Foam that has lost its elasticity must be replaced. Spring blocks are checked for integrity and proper operation.
Choosing new materials
Upholstery fabrics vary in composition, density, and durability. For heavily used furniture, choose fabrics in category A or B with high wear resistance. Natural fabrics are beautiful but require delicate care.
Synthetic materials are more practical and durable. Modern microfibers do not fall short of natural fabrics in appearance but surpass them in performance characteristics. They are easy to clean, do not fade, and are resistant to wear.
Eco-leather and natural leather give furniture a sophisticated look. Eco-leather is more affordable and easier to maintain, while natural leather is more durable and develops a noble patina over time.
Reupholstery technology
Cutting the new upholstery is done using the old parts as a pattern, adding seam allowances. Consider the direction of the nap and the fabric pattern. Symmetrical parts must have identical pattern placement.
Assembly and fastening are performed in reverse order relative to disassembly. Start with the least visible areas, gradually moving to visible surfaces. The upholstery should be evenly stretched, without wrinkles or misalignment.
Final finishing includes installing decorative elements, trim, buttons. These details not only enhance the furniture's appearance but also conceal fastening points, giving it a polished, professional look.
Replacing hardware: small details that change everything
Sometimes, a simple replacement of hardware can dramatically refresh the furniture's appearance. New handles, hinges, and locks can transform an outdated chest into a stylish interior piece.
Choosing hardware style
Classic hardware in brass or bronze suits traditional interiors. Carved elements, patinated surfaces, and elegant shapes highlight the nobility of solid wood furniture.
Modern hardware features minimalist shapes and functionality. Chrome, matte black, or white elements fit perfectly into minimalist interiors.
Vintage hardware creates an authentic feel. Artificially aged surfaces and deliberately rough shapes emphasize the character of furniture in loft or Provence styles.
Technical aspects of replacement
Marking new holes requires precision and care. Use templates for identical elements, check distances between holes, and account for the thickness of doors and drawers.
Drill holes using sharp drills of the appropriate diameter. To prevent chipping, place a piece of wood under the drill or drill from both sides until they meet.
Hardware installation must ensure secure fastening and proper mechanism operation. Use quality fasteners; if needed, apply wall plugs or anchors to increase connection strength.
Structural changes: when more than cosmetic is needed
Sometimes, complete furniture transformation requires more serious interventions: changing configuration, adding new elements, or reconfiguring internal space.
Modifying case furniture
Adding shelves or changing their placement allows adapting furniture to new needs. Modern mounting systems allow height adjustment of shelves without drilling additional holes.
Installing pull-out drawers instead of standard shelves significantly increases cabinet functionality. Modern guides ensure smooth movement and full drawer extension.
Integrating lighting turns an ordinary cabinet into a stylish interior element. LED strips consume minimal energy and barely heat up, making them safe for wooden furniture.
Changing the purpose of furniture
Repurposing — using furniture for purposes other than its original design — is a trendy approach. An old chest can become a TV stand, a bookcase can become a display cabinet for dishes, and a dining table can become a desk.
Combining elements from different furniture allows creating unique items. A tabletop from one table on legs from another, cabinet doors as a tabletop — imagination is limited only by common sense.
Transforming dimensions changes the functionality of furniture. A tall cabinet can be divided into two shorter ones, a narrow shelf can be supplemented with side sections to increase width.
Environmental aspects of furniture refurbishment
Restoring old furniture is not only cost-saving, but also environmentally responsible. Each restored item represents a ton of wood not ending up in a landfill, and a ton of CO2 not released into the atmosphere during the production of new furniture.
Use of eco-friendly materials
Water-based paints contain no toxic solvents, have no strong odor, and dry quickly. Modern water-emulsion paints do not fall short in quality compared to traditional oil-based paints.
Natural oils and waxes highlight the natural beauty of wood, create a breathable finish, and are safe for health. Linseed oil, tung oil, carnauba wax — time-tested materials.
Formaldehyde-free adhesives provide strong bonding without releasing harmful substances. Water-based PVA adhesives and casein adhesives from natural raw materials are safe for use in living spaces.
Waste disposal
Proper disposal of old finishes and materials is crucial for ecology. Old paints and varnishes cannot be poured into drains or thrown with household waste. Take them to designated hazardous waste collection points.
Reusing removed elements reduces waste. Old hardware can be useful for other projects, fabric scraps — for small crafts, sawdust — as mulch for the garden.
Workshop organization
Quality furniture renovation is impossible without a properly organized workspace. How to comfortably and safely update old furniture yourself? Plan every detail of your workshop.
Workshop Layout
Zoning space increases work efficiency. Designate an area for rough work (sanding, cutting), an area for precision operations (assembly, fitting), and an area for finishing work (painting, drying).
Tool storage must ensure quick access to the required tool. Wall-mounted panels with tool outlines, pull-out drawers with dividers, magnetic holders — all of this saves time and space.
Work surfaces of different heights are convenient for different operations. A high workbench for assembly, a low table for sanding, an inclined surface for painting — each operation requires its own ergonomics.
Lighting and ventilation
Natural light is preferable for assessing color and finish quality. Position your work area near a window, but provide protection from direct sunlight, which can distort color perception.
Artificial lighting must be sufficiently bright and even. Minimum illumination for precision work — 500 lux. Combine general lighting with localized lighting of work zones.
Ventilation is critically important when working with paints and solvents. Natural ventilation through windows is often insufficient. Install an exhaust fan or local exhaust above the work area.
Safety when working with chemical materials
Many materials used in furniture restoration can be hazardous to health if mishandled. Adhering to safety rules is not a formality, but a necessity.
Personal protective equipment
Respirators protect the respiratory tract from dust and solvent vapors. Simple gauze masks are ineffective. Use FFP2-class respirators for dust and activated carbon filters for organic vapors.
Safety goggles prevent paint and chemical splashes from entering the eyes. Choose goggles with side protection and solvent-resistant lenses.
Gloves protect skin from aggressive substances. Nitrile gloves are resistant to most solvents and paints. Replace gloves at the first sign of damage.
Working with solvents
Solvents must be stored in original packaging, in a cool place, away from heat sources. Do not allow water-emulsion materials to freeze.
Using solvents requires good ventilation. Never work with solvents in an enclosed space without exhaust. Most solvent vapors are heavier than air and accumulate in the lower part of the room.
Waste disposal must comply with local regulations. Store oily rags in metal containers with lids — they may spontaneously ignite.
Stylistic directions in furniture renovation
Style selection determines not only the appearance of renovated furniture, but also technical methods, materials, and color solutions. Each style has its own characteristics and requirements.
Scandinavian minimalism
Light shades are the foundation of Scandinavian style. White, light gray, beige colors create a sense of space and cleanliness. Matte finishes are preferable to glossy ones.
Natural materials and textures emphasize the eco-friendliness of the style. Unfinished or lightly stained wood, visible grain, minimal decorative elements.
Functionality is paramount. Each element must serve a practical purpose. Hidden storage systems, multifunctional furniture, thoughtful ergonomics.
Industrial loft
Rough textures and deliberate incompleteness are characteristic features of the style. Signs of sanding, wear, metallic elements with patina create the desired atmosphere.
Dark colors dominate the color palette. Black, dark gray, brown, rust color. Contrasting combinations with bright accents.
Combining materials — wood with metal, leather with fabric, rough wood with smooth surfaces. Eclecticism as the main principle.
Provençal romanticism
Pastel tones create a romantic atmosphere. Lavender, mint, powder, cream — colors of French Provence. Must include a slight worn effect.
Floral motifs in decoration emphasize the connection with nature. Painting, decoupage, stencils with botanical ornaments. Elegance of lines and forms.
Artificial aging is a mandatory technique. Patination, craquelure, brushing create a sense of antiquity and value.
Economic efficiency of updating
Furniture restoration can be both a cost-saving method and an expensive hobby. It all depends on the scale of work, selected materials, and complexity of techniques.
Cost calculation
Material costs include paints, brushes, sandpaper, hardware, consumables. Quality materials cost more but provide better results and longevity.
Time costs often exceed initial expectations. Complex techniques require mastering, and quality surface preparation takes more time than expected. Assess your real capabilities.
Tool costs can be significant when purchasing professional equipment. Consider renting expensive tools for one-time jobs.
Comparison with buying new furniture
The operational qualities of restored furniture often surpass those of new furniture in the same price category. Old furniture was made from quality materials and has a time-tested construction.
The uniqueness of the result is an undeniable advantage of restoration. You receive an item that no one else has. Individuality and exclusivity are priceless.
The emotional value of furniture restored by hand is much higher than purchased. Every detail carries memories of the work, effort, and creative process.
Advanced techniques for experienced masters
After mastering basic techniques, you can move on to more complex techniques that allow you to create true works of art.
Threaded connections for wood
Adding carved elements transforms simple furniture into exclusive pieces. Start with simple geometric ornaments, gradually moving to botanical and figurative motifs.
Carving tools require proper sharpening and maintenance. Chisels, skew chisels, gouges must be sharply honed and correctly adjusted. Dull tools ruin work and are dangerous.
Safety during carving is especially important. Always cut away from yourself, securely clamp the workpiece, and use special fixtures to hold small parts.
Inlay and marquetry
Inlay technique — inserting pieces of wood from different species into a base to create a pattern. Requires precise marking, careful sawing, and meticulous fitting of elements.
Marquetry — gluing thin veneer strips onto a base to create a decorative pattern. A more accessible technique allowing creation of complex multi-colored compositions.
The choice of wood species determines the color palette and contrast of the pattern. Combine light and dark species, consider grain direction, and stability of dimensions.
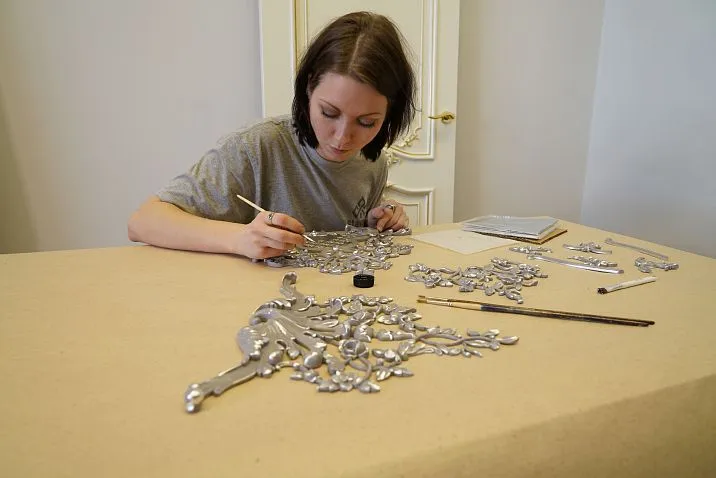
Gilding and silvering
Patté — imitation of gilt, an affordable alternative to real gold. The application technique is similar to real gilding, but the material is cheaper and easier to work with.
Surface preparation for gilding requires perfect smoothness. Multi-layer priming, sanding with fine abrasives, polishing — each step is critically important.
Protecting the finished coating extends the lifespan of the gilding. Special lacquers prevent darkening and abrasion of the metallic coating.
Modern trends in furniture restoration
The world of design is constantly changing, new trends, materials, and techniques emerge. Following modern trends will help create current and stylish furniture.
Ecological and sustainable design
Using recycled materials is not only fashionable but also necessary. Paints from natural pigments, formaldehyde-free adhesives, plant-based coatings.
Minimizing waste is a principle of modern production. Plan projects to use materials fully, find uses for scraps and leftovers.
Durability of the result is more important than quick updates. Create furniture that will last for decades, not requiring replacement within a few years.
Integration of technologies
Hidden lighting transforms furniture into an interior lighting element. LED strips, spotlights, and touch switches make furniture smart and functional.
Built-in wireless charging in countertops and cabinets — a requirement of the future. Modern furniture must consider the needs of the digital generation.
Smart hardware with closers, dampers, and soft-close systems enhances user comfort and extends furniture lifespan.
Restoring furniture is not merely a way to save money or obtain a unique item. It is a philosophy of mindful consumption, creative self-expression, a connection to history and craftsmanship traditions. Every restored item is a small victory over the disposability of the modern world.
How to update old furniture yourself — a question whose answer lies not only in the technical aspect but also in the psychology of creativity. This is a process that changes not only the appearance of objects but also the craftsman themselves. It develops patience, neatness, artistic taste, understanding of materials and technologies.
Start simple, don’t be afraid to experiment, learn from mistakes. Every project is an experience, every success motivates new achievements. And remember: in a world of mass production, an item created by your own hands possesses special value and energy.
STAVROS understands the importance of quality furniture updates and offers a wide range of materials and tools for restoration. Professional paints, brushes, hardware, decorative elements — everything necessary to create masterpieces with your own hands. Choosing STAVROS means choosing quality, reliability, and the opportunity to bring the most daring creative ideas to life.