Article Contents:
- Anatomy of a Ceiling Cornice: Form and Function
- Basic Functions of a Cornice
- Profile typology: from simple to complex
- Size Matters: The Mathematics of Proportions
- Basic Rule of Proportions
- Influence of room area
- Profile height
- Light Architecture: Cornices as a Lighting Tool
- Cornice Construction for Lighting
- Choosing LED strip
- Effects of Hidden Lighting
- Floor Skirting Boards: Completing the Vertical
- Height of Floor Skirting Boards
- Profile of Floor Skirting Boards
- Combining Ceiling and Floor Elements
- Flexible Cornices: Decor for Curved Surfaces
- Flexibility Technology
- Application of Flexible Cornices
- Installation of Flexible Cornices
- Corner Joining: The Geometry of Precision
- Internal corners
- External corners
- Non-Standard Angles
- Frequently Asked Questions
- Conclusion: The Perimeter as an Architectural Work

The boundary is where two worlds meet. The wall transitions into the ceiling, the floor touches the wall. These joints—technically necessary, functionally mandatory—remain bare and unadorned in most interiors. A white strip of sealant along the ceiling perimeter, a plastic strip along the floor. The function is fulfilled, but aesthetics are ignored.Polyurethane Crown Moldingtransform technical necessity into an architectural statement, a boundary into a compositional element, a joint into a line that organizes the perception of space.
Upon entering a room, a person instinctively reads the boundaries—where the wall ends, where the ceiling begins, how the floor connects to the vertical. The clarity of these boundaries affects the sense of completeness, quality of finishing, and architectural definition. A room without cornices and skirting boards seems unfinished, temporary, accidental—even if the wall and ceiling finishes are impeccable.Polyurethane Ceiling Skirting Boardcreates this definition, fixes the boundary, and gives the space architectural logic. But the choice of cornices and skirting boards is not arbitrary. Width, height, profile, and color are determined by the proportions of the room, interior style, and functional tasks.


Anatomy of a Ceiling Cornice: Form and Function
A ceiling cornice is a horizontal profiled element mounted along the perimeter of a room at the junction of the wall and ceiling. Its historical origin lies in classical architectural orders, where the cornice (entablature) crowned the column, completing the composition. The modern interior cornice inherits this principle—to create a crowning element that visually completes the vertical of the wall.


Basic Functions of a Cornice
The decorative function is primary in perception but not the only one. The cornice masks the joint between the wall and ceiling—rarely does a wall meet the ceiling perfectly evenly, without gaps, level differences, or plaster irregularities. The cornice conceals these defects, creating the illusion of flawless geometry. Filling the gap between the wall and ceiling with sealant or putty without a cornice leaves a visible seam—a white strip that draws attention. The cornice hides the seam beneath it.
The visual function—changing the perception of room height. A narrow, light-colored cornice painted to match the ceiling visually raises the ceiling—the cornice line is perceived as the beginning of the ceiling plane, making the wall appear taller. A wide, dark cornice painted to match the walls lowers the ceiling—the boundary descends. This effect is used to correct proportions—low ceilings are raised with light, narrow cornices, excessively high ceilings (old buildings with ceilings three meters eighty and above) are lowered with wide, dark ones.
The functional role of modern cornices—creating a niche for hidden lighting.Cornice for hidden lightingis mounted with a gap from the ceiling, forming a niche where the LED strip is placed. The light is directed at the ceiling, reflected, diffused — creating a floating ceiling effect, soft ambient lighting, and a visual increase in height.
Architectural function — structuring space. The cornice creates a horizontal line that runs along the perimeter of the room — a clear outline that organizes perception. A room without a cornice is perceived as a volume with blurred boundaries. A room with a cornice — as an architecturally defined space with clear geometry.
Our factory also produces:


Profile typology: from simple to complex
Cornice profile — the shape of its cross-section. The profile determines the visual mass, style, and play of light and shadow on the relief.
Simple smooth profiles consist of one or two coves (concave arcs) and straight sections. Width from three to twelve centimeters, relief minimal — one to three millimeters deep. Such cornices are suitable for minimalist, modern, Scandinavian interiors — they create a clear boundary without decorative load. Painted white or the color of the walls/ceiling, they stand out only with a thin shadow at the transition of the profile.
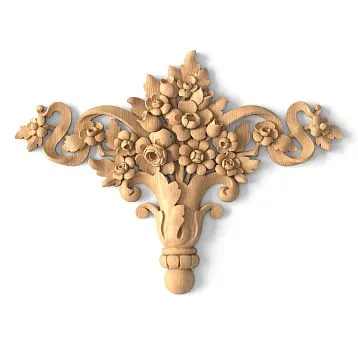
Classical profiles include dentils (tooth-like — a row of rectangular projections with equal intervals), egg-and-dart (egg-shaped elements alternating with arrows), modillions (carved brackets supporting the cornice projection). Width eight to twenty centimeters, relief pronounced — five to fifteen millimeters. Suitable for classical, neoclassical interiors. Painted white, highlighting the relief with gilding or patination is possible.
Ornamented profiles are rich in plant motifs — acanthus leaves, laurel wreaths, rosettes, scrolls, grape clusters. Width twelve to thirty centimeters, relief deep — ten to thirty millimeters. Stylistics — Baroque, Rococo, Empire. Require high ceilings (from three meters) and large areas — in standard apartments they visually overwhelm.
Modern geometric profiles — stepped forms, asymmetrical sections, combinations of right angles and arcs. Width five to fifteen centimeters. Stylistics — Art Deco, contemporary, high-tech. Painted in contrasting colors — black, graphite, metallic paints.
Get Consultation
Dimensions matter: the mathematics of proportions
Choosing the width of a cornice is not an arbitrary decision, but a calculation based on ceiling height, room area, and interior style.
Basic rule of proportions
The width of the cornice (distance from the wall to the protruding edge) should be from 1/40 to 1/20 of the ceiling height. For a standard apartment with ceilings two meters seventy centimeters, the calculation gives a range of six to thirteen and a half centimeters. Less than six — the cornice is visually lost, not perceived as a significant element. More than fourteen — it overwhelms, visually lowers the ceiling, creates disproportion.
For low ceilings (two meters forty — two meters sixty) narrow cornices four to eight centimeters are optimal. The profile is simple, smooth or with minimal relief. Color white or matching the ceiling — visually raises the boundary.
For standard ceilings (two meters seventy — three meters) — cornices six to twelve centimeters. Profile from simple to classical with dentils. Color optional — white, matching the walls, contrasting.
For high ceilings (three meters twenty — three meters eighty) — cornices twelve to twenty centimeters. Profile classical or ornamented. Complex multi-level cornices are acceptable — a combination of two profiles installed one above the other.
For very high ceilings (four meters and above — historical buildings, mansions) — cornices twenty to thirty-five centimeters. Lavish ornamented profiles, multi-level systems.
Influence of room area
Area adjusts the choice of cornice width. In small rooms (ten to fifteen square meters) a wide cornice is disproportionate — even with high ceilings, it is worth choosing two to four centimeters narrower than the calculated value. Narrow space enhances the visual mass of the cornice — what looks proportionate in a large hall overwhelms in a small bedroom.
In spacious rooms (thirty to fifty square meters and more) a narrow cornice is lost — you can choose two to four centimeters wider than the calculation. Large volume requires more massive elements to maintain proportions.
Profile Height
In addition to width (horizontal projection from the wall) the cornice has height (vertical size from the lower to the upper edge of the profile). Height is usually from half to two-thirds of the width. A cornice ten centimeters wide has a height of five to seven centimeters. Height affects visual mass — a high profile seems heavier than a low one with the same width.
Light architecture: cornices as a lighting tool
Hidden lighting through cornices — a technology that turned a decorative element into a functional lighting fixture. The essence — an LED strip, hidden behind the cornice, directs light onto the ceiling or wall. The light reflects, diffuses, creating soft ambient lighting without a visible source.
Construction of a cornice for lighting
A cornice intended for installing an LED strip is mounted not flush with the ceiling, but with a gap. Typical scheme: the cornice is attached to the wall, the upper edge of the cornice is five to twelve centimeters below the ceiling. A horizontal niche is formed between the cornice and the ceiling. The LED strip is placed on the upper plane of the cornice (shelf) or attached to the wall inside the niche. The light is directed upward, onto the ceiling.
The width of the cornice shelf should be sufficient to accommodate the LED strip with a small margin — minimum five centimeters, optimally seven to ten. Narrow cornices (three to four centimeters) are not suitable for lighting — the strip does not fit or protrudes beyond the edge, the light is visible from below (undesirable effect — blinds the eyes).
The height of the cornice gap from the ceiling (niche depth) affects light distribution. A small gap (three to five centimeters) gives a narrow strip of light along the perimeter of the ceiling — a clear outline. A large gap (ten to fifteen centimeters) allows the light to diffuse wider — the light zone occupies thirty to fifty centimeters from the edge of the ceiling. For low ceilings (two meters forty — two meters seventy) a small gap is optimal — less height is consumed, the light outline is clearer. For high ceilings (three meters and above) a large gap is acceptable — the light diffuses softer, the floating ceiling effect is enhanced.
Choosing LED strip
Strip power determines brightness. For background decorative lighting, seven to ten watts per meter is sufficient. For functional lighting (lighting as the main light source in the evening) fourteen to twenty watts per meter is required. Color temperature: warm white (2700-3000K) creates coziness, suitable for living rooms. Neutral white (4000-4500K) — universal, suitable for any rooms. Cool white (5000-6500K) — for work areas, offices.
RGB strip (colored) allows changing the lighting color according to mood — creating light scenarios for different situations (party — bright colors, relaxation — muted blue, dinner — warm amber). Controlled by remote or smartphone via a controller.
The strip is installed on an aluminum profile (dissipates heat, extends diode lifespan), the profile is glued or screwed to the cornice shelf. Wires are hidden in the niche behind the cornice, the power supply is placed in an accessible location (behind a cabinet, in a niche, on a mezzanine) — access for maintenance is required.
Effects of hidden lighting
Floating ceiling — the main visual effect of cornice lighting. A light strip along the perimeter separates the ceiling from the walls, the ceiling seems to be floating in the air, weightless. The effect is enhanced if the ceiling is light (white, cream), and the walls are darker — contrast emphasizes the light boundary.
Visual height enhancement — upward-directed light lifts the gaze, making the ceiling appear higher than it actually is. For low rooms (two meters forty), cornice lighting adds ten to fifteen centimeters of visual height.
Soft ambient lighting — light reflected from the ceiling disperses without harsh shadows. Creates a comfortable atmosphere for evening time. Dimming (brightness adjustment) allows setting the intensity from barely noticeable glow to bright light.
Space zoning — lighting does not necessarily run along the entire perimeter. One or two walls can be illuminated, leaving the others without light — a zone is highlighted, creating asymmetry and dynamism.
Floor skirting boards: completing the vertical
Polyurethane floor skirting boardperforms functions mirroring the ceiling cornice. Masks the joint between wall and floor — the gap between flooring and wall, irregularities of the lower wall edge, the edge of wallpaper or plaster. Protects the lower part of the wall from damage — impacts from vacuum cleaners, mops, feet, furniture. Creates a visual completion of the wall from below — without a skirting board, the wall appears truncated, unfinished.
Height of floor skirting board
Skirting board height (vertical dimension from floor to top edge) is determined by room proportions, style, and functional tasks.
Low skirting boards (four to seven centimeters) — minimalist, modern interiors, Scandinavian style. Create a thin border, almost unnoticeable, not drawing attention. Painted white on white walls or to match the wall color.
Medium skirting boards (eight to twelve centimeters) — universal choice for most interiors. Noticeable enough to create completeness but do not dominate visually. Classical, neoclassical, eclectic interiors. Painting varies — white, matching wall color, matching floor color, contrasting.
High skirting boards (fourteen to twenty-five centimeters) — classical interiors, rooms with high ceilings, stylization to historical architecture. Create monumentality, architectural solidity. Often painted in contrast to walls — white on colored walls, dark on light ones.
Very high skirting boards (thirty to forty centimeters and above) — specific cases: imitation of panels (lower part of the wall is decorated with a high skirting board of contrasting color, the upper part with another — classic panel decoration scheme), masking of utilities (wires, pipes are laid inside the wide skirting board), architectural experiments.
Profile of floor skirting board
Simple rectangular — rectangular cross-section strip, possibly with rounded top edge. Minimalist aesthetic.
Classical profiled — curves, steps, beads. Moderate relief. Versatility.
Ornamented — floral motifs, geometric patterns. Classical styles.
With built-in cable channel — the back part of the skirting board is hollow, wires (electrical, telephone, internet) are laid there. Practicality for modern interiors with an abundance of technology.
With lighting — similar to ceiling cornices, floor skirting boards can have a niche for LED strip. Light is directed downward, toward the floor. Creates an effect of floating walls, soft floor lighting in the evening (convenient for orientation at night — no need to turn on bright light). The skirting board is mounted with a gap from the floor (one to two centimeters), the strip is placed in the gap.
Combination of ceiling and floor elements
A harmonious interior coordinates ceiling cornices and floor skirting boards by height, profile, color. Classical approach — identical profile of cornice and skirting board, identical width (cornice ten centimeters — skirting board ten centimeters), identical color (both white). Creates visual framing of the room from top and bottom, symmetry, completeness.
Modern approach allows differences. Cornice narrow simple white, skirting board high rectangular dark (matching floor color). Asymmetry, contrast, individuality. The main thing — avoid randomness: differences should be conscious, justified by stylistic concept.
Flexible cornices: decor for curved surfaces
Most rooms have rectangular layout — four straight walls, four right angles. Standard rigid cornices easily go around such perimeter — straight sections join in corners via a 45-degree miter cut. But architecture is not limited to rectangles. Bay windows, columns, arches, semicircular walls, oval rooms require curved cornices.Flexible cornice made of polyurethanesolves the task.
Flexibility Technology
Standard polyurethane is rigid — attempting to bend the cornice leads to cracking, breakage. Flexible polyurethane contains rubber additives that increase elasticity. The material bends along an arc without destruction, holds shape after fixation.
Bending radius (how sharp a bend the cornice withstands without deformation) depends on profile thickness and construction. Thin narrow cornices (width four to six centimeters, thickness one and a half to two centimeters) bend with a radius from thirty centimeters — go around small-diameter columns. Medium cornices (width eight to ten, thickness three centimeters) — radius from fifty centimeters. Wide massive ones (width twelve to twenty, thickness five to seven centimeters) — radius from a meter and more.
Application of flexible cornices
Bay windows — semicircular or polygonal projections of the facade, forming a curved wall inside. A rigid cornice would have to be assembled from many short segments with frequent joints — labor-intensive, joints visible. A flexible cornice is installed as a single piece, following the wall curve — one joint at the beginning and end of the curve.
Columns — round or elliptical vertical elements. Going around a column with a cornice creates completeness — the column integrates into the room architecture. A flexible cornice wraps around the column, joins with straight sections on the walls.
Arches are curved openings. An archway without decoration looks unfinished. A flexible cornice installed along the inner arc of the arch frames the opening, emphasizes its shape, and adds detail.
Oval and round rooms are rare but impressive architectural solutions (round living rooms, oval dining rooms in mansions). A flexible cornice runs along the entire perimeter in one or two pieces (depending on the profile length and room size), with minimal joints.
Radius wall sections are design solutions where part of the wall is made curved (wave, convexity, concavity). A flexible cornice follows the shape, maintaining a continuous line.
Installation of flexible cornices
Flexible cornices are supplied straight. Before installation, they must be bent to the required radius. Two methods: cold bending and bending with preheating.
Cold bending is applicable for radii larger than the minimum allowed for a given profile. The cornice is applied to the wall at the installation location, gradually glued, following the curve. Adhesive is applied to the cornice, the element is pressed against the wall, and secured with painter's tape or supports until the adhesive sets. It is important not to force the bend—excessive stress deforms the profile, and cracks may occur.
Bending with heating increases elasticity, allowing the cornice to be bent to a radius smaller than the nominal minimum. The cornice is heated with a construction heat gun (temperature 50-70 degrees Celsius—do not overheat, otherwise the material will soften excessively and lose shape) at the bend point. The warm cornice is bent using a template or directly at the installation location and secured until it cools. After cooling, it holds the given shape and is glued in the standard way.
Corner joining: geometry of precision
The cornice runs along the perimeter of the room, meeting perpendicular walls at corners. Corner joining is a critical moment of installation. An improper joint—a gap, step, or pattern mismatch—catches the eye and ruins the impression of quality finishing.
Internal angles
An internal corner is where two walls converge inward into the room (standard room corners). Joining is done with a 45-degree miter cut—each of the two joining cornice pieces is cut at a 45-degree angle, the cuts are placed against each other, forming a 90-degree right angle.
The tool for mitering is a miter box (a saw guide with fixed angles) and a fine-toothed saw. The cornice is placed in the miter box in a position corresponding to its orientation on the wall (top edge up, the plane adhering to the wall pressed against the side wall of the miter box). The saw is inserted into the miter box slots at a 45-degree angle, and the cornice is cut. The second piece is cut mirror-image—a 45-degree angle in the opposite direction.
Critical precision: a deviation of one to two degrees creates a gap. Causes of inaccuracy: walls not exactly 90 degrees (a common situation in real construction), miter box inaccuracy, cornice shifting during sawing. Compensation: after a trial fit (place the cut pieces against the wall, check the joint), adjustment is possible—light sanding of the cut with sandpaper, correcting the angle. Small gaps are filled with acrylic sealant or putty after installation.
External corners
An external corner is where two walls converge outward from the room (protruding wall corners, columns, boxes). The joining principle is similar to internal corners—a 45-degree miter cut, but the orientation of the cuts is opposite. External corners are more difficult than internal ones—the joint is exposed to view from many angles (an internal corner is only visible when looking directly at it), any inaccuracy is more noticeable.
For external corners, ready-made corner elements are often used—manufacturers offer decorative corner pieces designed for specific cornice profiles. The corner piece mimics the joint of two cornice pieces but is made as a single element. Installation is simpler—straight cornice pieces approach the corner piece from both sides, are cut at a right angle (not 45 degrees), and butt-joined to the corner piece. The joint is less noticeable, and precision is higher.
Non-standard angles
Not all room corners are right angles. Acute angles (less than ninety degrees) and obtuse angles (more than ninety) occur. A standard miter box is oriented for ninety degrees—not suitable. Solutions: a miter saw with adjustable angle (professional tool allowing any cutting angle to be set) or manual mitering by marking.
Manual mitering: measure the exact wall angle with a protractor or sliding bevel. Divide it in half (for an eighty-degree angle, each cornice piece is cut at forty degrees). Mark the cutting line on the cornice, saw manually, holding the saw at the required angle. Skill is required, precision is lower than when using a miter box or miter saw.
Frequently asked questions
How does a polyurethane cornice differ from a polystyrene (expanded polystyrene) one?
Polyurethane is denser (280-350 kg/m³ vs. 25-40 kg/m³ for polystyrene), stronger, and the relief is sharper. Polystyrene cornices are lighter, cheaper, but brittle—they break under pressure, crumble when cut, and the relief is less detailed. Polyurethane does not break, cuts without crumbling, and ornament details are sharp. For high-end interiors, the choice is polyurethane. For budget projects, polystyrene is acceptable with an understanding of quality limitations.
Can polyurethane cornices be installed on a stretch ceiling?
The cornice is mounted to the wall, not the ceiling (the ceiling is an unreliable base, especially a stretch fabric). A gap remains between the top edge of the cornice and the ceiling (technical or for lighting). When installing with a stretch ceiling, the sequence is: install the cornice, then stretch the fabric. The stretch ceiling track is attached to the wall above the cornice, and the fabric meets the cornice closely or with a gap. For cornice lighting, a gap is mandatory.
How much does a meter of polyurethane cornice cost?
Prices vary depending on width, profile complexity, and manufacturer. Simple smooth cornices four to six centimeters wide—from two hundred to four hundred rubles per linear meter. Classic profiles with dentils, eight to twelve centimeters wide—five hundred to nine hundred rubles. Ornamented wide cornices (twelve to twenty centimeters, lush relief)—one thousand to two thousand rubles. Flexible cornices are thirty to fifty percent more expensive than rigid ones (production complexity). Standard element length is two to two and a half meters.
What adhesive to use for installing crowns?
Specialized polyurethane adhesive or universal liquid nails for plastics and polyurethane. The adhesive must be white (remains white after drying, excess is unnoticeable) or transparent, without solvents (solvents corrode polyurethane). Popular brands: polyurethane adhesive for moldings (specialized product), liquid nails Moment Montage or Tytan (universal). Consumption: a three hundred to four hundred milliliter tube for eight to twelve meters of cornice (depends on element width and wall evenness).
Is additional fastening with screws necessary?
For narrow, lightweight cornices (width up to eight centimeters, weight up to one kilogram per linear meter), adhesive is sufficient. For wide, heavy cornices (width twelve centimeters and more, ornamented, weight one and a half to three kilograms per meter), additional fixation with screws through the cornice into the wall is recommended. After the adhesive sets, screws can be removed (the adhesive holds), and holes filled with putty. Or leave the screws, sinking the heads and puttying over them. On ceiling cornices, screws are not visible from below (heads face upward).
Can polyurethane cornices be painted?
Absolutely. Cornices are supplied white or in a factory primer of light gray color—a technological color, not a finish. Painting is necessary to protect the material, create the final color, and integrate into the interior. Water-based paints are used—acrylic or latex. Paint after installation and joint sealing. Two to three thin coats with intermediate drying give an even coverage without drips. Painting before installation is possible, but joints still need touch-up after mounting.
How to care for polyurethane cornices?
Minimal care. Dust is removed with a dry soft cloth or vacuum cleaner brush with a soft attachment every three to six months. Dirt (cobwebs, stains) is removed with a damp cloth and neutral detergent. Deep ornament is cleaned with a soft brush. The painted surface is not afraid of moisture (after the paint is completely dry) and withstands light damp cleaning. Abrasives and aggressive chemicals are prohibited—they scratch the coating.
Conclusion: Perimeter as Architectural Work
Polyurethane Crown Moldingtransform technical room boundaries into architectural elements that shape the character of the space. From simple joint finishing to creating a light perimeter, from minimalist lines to lavish classical framing—the range of solutions fits any stylistic tasks and budget constraints. Selecting dimensions, profiles, constructions, and colors requires understanding proportions, considering ceiling heights, room areas, and functional needs.
Hidden lighting through cornices opens a new dimension of interior lighting—soft, controllable, visually transformative. Floating ceilings, light contours, zoning through light—effects unattainable with traditional fixtures are easily achieved with cornices featuring niches for LED strips. Combining ceiling and floor elements creates complete room framing, symmetry from top to bottom, and visual integration of all surfaces.
Flexible cornices expand the applicability of decor to curvilinear architectural forms—bay windows, columns, and arches cease to be problematic areas, becoming opportunities to emphasize layout uniqueness. The precision of corner joints determines the quality of the final result—professional installation with a miter box or miter saw yields invisible seams, turning the perimeter into a continuous line.
Company STAVROS manufactures a full range of ceiling cornices and floor skirting boards from high-density polyurethane. The catalog includes over one hundred twenty cornice models—from minimalist smooth profiles three centimeters wide to luxurious ornamented cornices thirty centimeters wide. Thirty models are specifically designed for hidden LED lighting—with wide shelves, optimal niche geometry, and precise dimensions for accommodating standard-width LED strips.
Floor skirting boards are represented by eighty models with heights from five to thirty centimeters. Profiles range from simple rectangular to classical multi-level, from smooth to ornamented. Twenty models feature built-in cable channels for wire routing. Fifteen models have niches for floor LED lighting.
Flexible cornices STAVROS are made from special elastic polyurethane, capable of bending radii from thirty centimeters (for narrow profiles) to one and a half meters (for wide ones). Thirty-five flexible cornice models cover all stylistic directions and size ranges. Element length is two meters—sufficient to navigate most curved sections with a single piece.
Corner elements—pre-made internal and external corners for forty popular cornice profiles. Simplify installation, improve joint accuracy, save time. The corner is installed in the room corner, straight cornice pieces butt-join to it—no need for 45-degree cuts.
All STAVROS products are manufactured from polyurethane with a density of 300-330 kg/m³ at a Russian plant with German equipment. Clarity of relief, geometric precision, strength—characteristics controlled at every production stage. The surface is primed with white acrylic primer—ready for final painting without additional preparation. Packaging in polyethylene film protects against damage during transportation.
Design studio STAVROS develops comprehensive solutions for room perimeter design. Selection of cornices and skirting boards to match interior style, dimension calculation based on room proportions, design of hidden lighting systems with LED strip power calculation, power supply unit placement, and control schemes. 3D visualization shows how chosen elements will look in your space. Estimate with precise calculation of material quantities, fasteners, adhesive, and paint.
Professional installation services are available in Moscow, Saint Petersburg, and million-plus cities. STAVROS crews specialize in polyurethane decor installation—mastering precise corner jointing techniques, flexible cornice installation, and LED lighting integration. Two-year installation warranty covers element detachment, joint cracking, and installation defects.
Educational materials for DIY installation are published on the STAVROS blog and YouTube channel. Video instructions show all stages—marking, cutting angles in a miter box, applying adhesive, installation, joint finishing, painting. Text guides detail nuances and provide solutions to typical problems. Technical support via phone and online chat answers questions during the work process.
Choosing STAVROS, you get European-quality materials at Russian prices, professional expertise, and support at all stages from selection to final painting. The room perimeter ceases to be a forgotten boundary, becoming an architectural work where every centimeter contributes to interior integrity, where function and aesthetics unite in elements that serve for decades without quality loss. From classical palace cornices to minimalist lines, from light perimeters to curvilinear column navigation—STAVROS implements any solution, transforming boundaries into art.