


Article Contents:
- Ceiling rosette: functions and style
- Square and oval rosettes: alternative shapes
- Scale rules: the ratio of rosette to chandelier
- Scaling errors: typical imbalances
- Cornices: creating a visual frame for the ceiling
- Corner elements: accentuating key points
- Coffers: structuring the ceiling plane
- Molding layout: geometric patterns
- Interaction of ceiling and furniture: vertical composition
- Color Solutions: Unity or Contrast
- Installation: sequence of creating a composition
- Finishing: painting and patination
- Examples of compositions: stylistic scenarios
- Conclusion: the ceiling as the fifth wall

The ceiling — an architectural plane perceived as a neutral background or as a formal surface depending on the degree of articulation — defines the character of an interior more strongly than is commonly believed. A smooth white ceiling without decoration creates a sense of modernity, minimalism, sometimes emptiness, where the eye finds no anchor points.Ceiling moldings made of polyurethane— a system of cornices, rosettes, coffers, moldings that create a relief structure — transforms the ceiling into an architectural object that organizes space vertically. The central element of this system is the rosette, framing the chandelier, turning a utilitarian light source into the compositional core of the room, a focal point around which the entire visual hierarchy is built. A correctly chosen rosette enhances the impression of the chandelier by 2-3 times — a 60-centimeter diameter light fixture against a 90-centimeter rosette is perceived as a monumental object, while the same fixture on a bare ceiling gets lost, seems insufficient.ceiling moldingcreates not only a visual center above, but also a vertical connection between the ceiling and the furniture group below — when a chandelier framed by a rosette hangs above a dining table withclassic furniturethe eye reads an axis of symmetry, uniting the top and bottom of the space into a single composition.
Historically, ceiling moldings were made of plaster — a material that allows creating any shape, but is heavy, fragile, requires professional installation, and is expensive. An 80-centimeter diameter plaster rosette weighs 8-12 kilograms, requires reinforced anchor fastening, and is installed by two or three specialists using scaffolding. A polyurethane rosette of the same size weighs 600-900 grams — 10-15 times lighter — installed by one person with adhesive in 30-40 minutes without special tools. The cost of a polyurethane rosette is 3-5 times lower than a plaster one of similar complexity, durability is higher — polyurethane does not crack due to building settlement, does not crumble over time, does not yellow, does not absorb moisture.Plaster ceilingmade of polyurethane is accessible to a wide range of customers, installed during cosmetic renovation without construction work, transforms the interior over a weekend, and lasts for decades without maintenance.
Ceiling rosette: functions and style
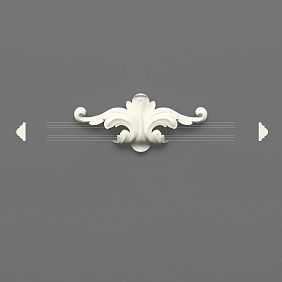
A ceiling rosette performs several functions simultaneously. The first — masking the chandelier's mounting assembly, where wires, a hook, or a mounting bracket exit the ceiling — unsightly technical elements. A rosette with a diameter exceeding that of the chandelier's decorative cup completely conceals the mounting, turning a technical necessity into a decorative solution. The second function — visually enlarging the chandelier, creating the sensation that the light fixture grows from the ceiling's architecture, is an organic part of it, not a suspended object. The rosette's relief — beads, leaves, garlands, geometric patterns — casts shadows when the chandelier is lit, creates a play of light and shadow that enhances the three-dimensionality of the composition.
is arranged around the central axis, marked by the rosette and chandelier, the space is perceived as balanced, harmonious. The fourth function — stylistic identification: a simple rosette with geometric ornament signals classicism, a lush one with acanthus leaves — Baroque, a laconic one with concentric circles — neoclassicism.Classic FurnitureRound rosettes — the most common type, where the ornament radiates from the center — create a universal base for most chandeliers. The diameter of round rosettes from 30 to 150 centimeters allows selecting an element for any room — from a compact bedroom to a formal living room. The ornament varies from simple — concentric circles with beads, simple petals — to complex — multi-layered compositions with acanthus leaves, garlands, rosettes, imitating palace moldings. The round shape corresponds to the shape of most classic chandeliers — multi-arm with circular arrangement of shades — creating geometric unity.
Square and oval rosettes: alternative shapes


Square rosettes — decorative panels with sides from 40 to 120 centimeters with symmetrical ornamentation arranged along axes — suit rooms with emphatically geometric architecture. A square rosette harmonizes with square or rectangular coffers, moldings that divide the ceiling into geometric cells, with rectangular dining tables placed under the chandelier. The ornament of square rosettes is often geometric — meanders, interwoven squares, coffer recesses — characteristic of strict classicism, where geometry dominates over organic forms.
Oval rosettes — elements elongated along one axis, 60-150 centimeters long, 40-100 centimeters wide — are intended for rectangular rooms where the directionality of space is emphasized. An oval rosette above a dining table, elongated along the table, enhances the horizontal axis, creates a sense of spaciousness along the long side. The ornament of oval rosettes often includes garlands, ribbon compositions, elongated leaves, emphasizing the direction of the form. Oval rosettes are characteristic of neoclassicism and Empire style, where smooth curved forms combine with geometric rigor.
Composite rosettes — compositions of several elements installed concentrically or in a pattern — create maximum decorativeness for formal spaces. A central round rosette 60 centimeters in diameter is surrounded by a wreath of small rosettes 15-20 centimeters in diameter, arranged in a circle 80-100 centimeters from the center. Between the central and peripheral rosettes, moldings are placed, forming an ornamental grid. Such a composition is characteristic of Baroque and Rococo, where decorative excess is a stylistic principle.
Composite rosettes—compositions of multiple elements arranged concentrically or in a pattern—create maximum decorativeness for formal spaces. A central round rosette with a diameter of 60 centimeters is surrounded by a wreath of small rosettes 15-20 centimeters in diameter, positioned in a circle 80-100 centimeters from the center. Moldings are placed between the central and peripheral rosettes, forming an ornamental grid. This composition is characteristic of Baroque and Rococo, where decorative excess is a stylistic principle.
Our factory also produces:


Scale Rules: Chandelier and Ceiling Medallion Ratio
The diameter of a ceiling medallion is determined by three factors: the size of the chandelier, the room area, and the ceiling height. A professional rule: the medallion diameter is 120-160 percent of the chandelier's diameter, measured at its widest part—typically the top tier of shades or the middle of the frame. A 60-centimeter chandelier requires a 70-95 centimeter medallion. An 80-centimeter chandelier requires a 95-130 centimeter medallion. This ratio creates visual balance, where the medallion is noticeably larger than the chandelier, providing a frame without overwhelming the fixture with excessive size.
An alternative rule—the medallion diameter is one-seventh to one-fifth of the room's width. A room 4 meters wide gets a medallion 57-80 centimeters in diameter. A 6-meter room gets an 85-120 centimeter medallion. This rule ensures the medallion's proportionality to the room's scale, independent of the chandelier size. When both rules are applied simultaneously—the ratio to the chandelier and to the room size—a compromise diameter is chosen that satisfies both criteria. For a 5-meter room with a 70-centimeter chandelier: by the room rule—medallion 70-100 centimeters; by the chandelier rule—85-110 centimeters. The optimum is 90 centimeters.
Ceiling height affects the perceived size of the medallion. In a room with 2.7-meter ceilings, a 90-centimeter medallion is perceived as large and dominant. In a room with 3.5-meter ceilings, the same medallion appears proportionate and balanced. For high ceilings of 3.5-4.5 meters, it is recommended to increase the calculated medallion diameter by 15-25 percent, compensating for the visual reduction of elements at great height. For low ceilings of 2.5-2.7 meters, the medallion can be reduced by 10-15 percent to avoid visual pressure.
Get Consultation
Scaling Errors: Typical Imbalances
A medallion that is too small—a diameter less than 100 percent of the chandelier's diameter—creates the impression that the chandelier outgrows its frame; the medallion fails to serve as a visual base. An 80-centimeter chandelier with a 60-centimeter medallion looks disproportionate—the medallion gets lost behind the fixture and fails to create a frame. An exception is modern minimalist interiors, where compact medallions are intentionally used as delicate accents that do not compete with the chandelier.
An excessively large medallion—a diameter over 200 percent of the chandelier's diameter—overwhelms the fixture, creating the impression that the chandelier is too small for its frame. A 50-centimeter chandelier with a 120-centimeter medallion looks like a small fixture on a huge decorative panel—the visual hierarchy is disrupted, attention is drawn to the medallion, not the chandelier. If a large medallion is architecturally necessary—for a large room—the chandelier must be scaled accordingly.
A mismatch in the stylistic design of the medallion and chandelier destroys visual unity. A Baroque medallion with lush acanthus leaves and gilding under a modern minimalist chandelier made of chrome-plated metal creates a stylistic conflict. A simple classical medallion with geometric ornamentation under a crystal Baroque chandelier looks insufficiently grand. Stylistic coordination—the medallion and chandelier from the same era, with proportionate decorativeness—is critical for harmony.
Cornices: Creating a Visual Ceiling Frame
A ceiling cornice—a horizontal element along the room's perimeter at the junction of the wall and ceiling—creates a frame that separatesCeiling with moldingthe ceiling from the walls, emphasizing the boundary between vertical and horizontal planes. Without a cornice, the ceiling merges with the walls, and the central medallion is perceived as an isolated element, disconnected from the architecture. The cornice creates a context for the medallion—the perimeter frame and the central element form a system where each component enhances the other. The cornice width is determined by the ceiling height: for 2.7-meter ceilings, a cornice with a projection width on the ceiling of 60-80 millimeters is optimal; for 3-3.5 meters—80-120 millimeters; for above 3.5 meters—120-180 millimeters.
The cornice profile is coordinated with the medallion style. A simple cornice with one or two elements—a cavetto and a shelf—pairs with a laconic medallion of geometric design, characteristic of Neoclassicism and modern classicism. A complex multi-tiered cornice with four to five elements—alternating beads, cavettos, cymas, and shelves—requires a medallion of corresponding complexity with multi-layered ornamentation, characteristic of Classicism and Empire style. A carved cornice with botanical motifs—laurels, acanthus, garlands—harmonizes with a Baroque medallion where carving dominates.
Hidden lighting in the cornice—an LED strip installed in a niche between the cornice and ceiling, directed upward—creates a floating ceiling effect, where the plane separates from the walls with a line of light. The light reflected from the ceiling illuminates the medallion from below, creates additional play of light and shadow on its relief, and enhances three-dimensionality. When the chandelier is off, the cornice's hidden lighting creates soft, diffused illumination, turningPlaster ceilingthe ceiling into a glowing surface. A color temperature of 2700-3000 Kelvin creates warm light suitable for classical interiors; 4000 Kelvin—neutral white for modern ones.
Corner Elements: Accentuating Key Points
Corner elements—decorative fragments installed in room corners at the junction of cornice strips—serve a dual purpose: they simplify installation by eliminating the need for complex 45-degree miter cuts on cornices, and they create decorative accents in the corners. A corner element measuring 120x120 millimeters with a relief ornament—a rosette, acanthus leaf, geometric pattern—covers the cornice joint, turning a structural node into a decorative detail. Four corner elements in the four corners of a room create additional focal points on the ceiling, enrich the composition, and enhance symmetry.
For rectangular rooms, it is possible to install additional decorative elements in the center of the long sides—midway along the cornice between corners. This creates eight focal points around the perimeter—four corners and four midpoints of the sides—plus the central medallion, forming a nine-part composition characteristic of palace interiors. Decorative elements at the cornice midpoints can be smaller than the corner ones—80x80 millimeters versus 120x120—creating a hierarchy: corners dominate, midpoints support.
Stylistic unity between corner elements, cornice, and medallion is critical. All elements should contain related ornamentation—if the medallion is decorated with acanthus leaves, the corner elements contain the same leaves on a smaller scale. If the cornice has a bead with a diameter of 20 millimeters, the corner elements include a bead of the same diameter. This visual connection creates the feeling that all elements are carved from a single block, parts of one sculptural composition.
Coffers: Structuring the Ceiling Plane
Coffers—rectangular or square recesses on the ceiling, framed by moldings, creating a rhythmic grid—transform a flat ceiling into a structured surface with pronounced geometry. Historically, coffers were structural elements—beam ceilings formed cells filled with decoration. Modern coffers areceiling moldingpurely decorative—moldings are glued onto a smooth ceiling, imitating a three-dimensional structure. A typical coffer cell size is 60x60 or 80x80 centimeters; the depth of the visual recess is created by painting the inner part of the cell a darker shade or installing thin panels that simulate depth.
The central ceiling zone with the medallion and chandelier is usually free of coffers—the medallion is placed on a smooth plane, and the coffer grid frames the center, creating a frame within a frame. An alternative—the medallion is inscribed into a central coffer of increased size—120x120 or 150x150 centimeters—standing out in scale among the surrounding standard cells. This creates a visual hierarchy where the central coffer dominates, and the peripheral ones support the composition. Inside the central coffer is the medallion; inside the others, small medallions 20-30 centimeters in diameter are possible, creating a rhythmic repetition of the motif.
Lighting the coffers enhances their three-dimensionality. Recessed spotlights installed inside each cell illuminate the inner surface, creating a contrast between lit recesses and shadowed frames. An LED strip along the perimeter of the coffer moldings creates a light outline for each cell, turning the ceiling into a glowing grid. Combining the central chandelier in the medallion with coffer spotlights creates a multi-level lighting system—formal central lighting for special occasions and diffused coffer lighting for everyday comfort.
Molding Layout: Geometric Patterns
Simple grid—rectangular or square cells formed by moldings intersecting at right angles—a universal pattern suitable for most rooms. Moldings 40-60 millimeters wide are placed parallel to the walls with a spacing of 80-120 centimeters, forming a regular grid. The central cell contains the medallion with the chandelier; the others remain empty or are filled with small medallions. This pattern is characteristic of Classicism, where geometric regularity is a fundamental principle.
Diagonal layout—moldings placed at a 45-degree angle to the walls, forming diamond-shaped cells—creates dynamism, visually expands the space, and is suitable for square rooms where diagonals are perceived as longer than the sides. The central medallion is placed at the intersection of the diagonals—the geometric center of the room. The diagonal pattern is more complex to install—requiring precise marking and mitering moldings at an angle—but creates an expressive, non-standard effect.
Radial layout—moldings radiating from the central medallion like rays to the corners and midpoints of the walls—creates a star or sun effect, emphasizing the central medallion as the compositional core. Eight radial moldings—four to the corners, four to the midpoints of the walls—divide the ceiling into eight sectors, each of which can be further articulated with paint or decorative elements. The radial pattern is characteristic of Empire and Baroque styles, where central symmetry dominates.
Interaction of Ceiling and Furniture: Vertical Composition
Ceiling with moldingThe ceiling composition creates not only a horizontal arrangement of elements on the upper plane but also a vertical connection between the ceiling and the furniture below. The central medallion with the chandelier marks the main vertical axis of the room—under it is placed the dining table in a dining room, the coffee table with sofa and armchairs in a living room, or the bed in a bedroom. This axis organizes the furniture arrangement,classic furniturecreating symmetry and visual order. When the eye moves from top to bottom—from the medallion through the chandelier to the furniture group—it reads a unified composition where top and bottom are connected by an axis.
The size of the ceiling medallion should correspond to the size of the furniture grouping below. A dining table measuring 120x240 centimeters with six chairs around it forms a furniture grouping with a conditional diameter of about 300 centimeters. A medallion with a diameter of 90-120 centimeters above this table is proportionate—it is smaller than the furniture grouping, does not compete in scale, but is large enough to define the center. A small 50-centimeter medallion over a large table will get lost and fail to create a visual anchor. A large 150-centimeter medallion over a compact 90x90 centimeter table will dominate and create imbalance.
Stylistic coordination between ceiling moldings and furniture is critical for the integrity of the interior.Classic FurnitureFurniture with carved cornices, pilasters, and profiled elements requires ceiling moldings of corresponding complexity and style. Baroque furniture—with curved legs, carved overlays, gilding—harmonizes with a Baroque medallion featuring acanthus leaves, a complex multi-tiered cornice, and coffers with decoration. Minimalist modern furniture—with straight lines, smooth surfaces, and no ornamentation—pairs with a simple medallion of geometric design and a laconic cornice without excessive detailing.
Color solutions: unity or contrast
A monochromatic solution—where all elements of the ceiling molding, the ceiling, and the walls are painted in one color or close shades—creates visual unity, where the relief of the elements is read through the play of light and shadow, not through color contrast. White molding on a white ceiling in a room with white or light cream walls forms a light, airy space where the form of the elements is expressed delicately. This is characteristic of Scandinavian style and modern classicism, where restraint and the absence of color overload are valued.
A contrasting solution—ceiling moldingpainted in a color different from the ceiling—creates expressive highlighting of the elements. White molding on a blue ceiling, cream on gray, gold on white form clear boundaries where each element is maximally noticeable. A contrasting solution is characteristic of Baroque and Empire styles, where decorativeness should be obvious, not requiring close scrutiny. Gilding of carved medallion elements and corner cornice details against a main white tone creates luxury, formality, and a palatial feel.
The color of the ceiling molding is coordinated with the color of the wooden elements of the furniture. If the furniture is painted white or cream, the molding is painted in the same shade, creating material unity. If the furniture is made of natural wood with a visible grain, the molding is painted in a neutral white or cream that does not compete with the warm tone of the wood. Patinating the molding—applying a dark pigment into the recesses of the ornament—is coordinated with the patination of the furniture, creating a visual connection through the unity of the finishing technique.
Installation: The sequence of creating the composition
Ceiling preparation is critical for the quality of the result. The surface must be level—variations of more than 2 millimeters per linear meter create gaps under cornices and moldings that are visible under side lighting. The ceiling is puttied, sanded, and primed with a deep-penetration primer to enhance adhesive adhesion. Marking is done with a laser level and chalk line—horizontal lines for the perimeter cornice, center axes for the medallion, lines for moldings when creating coffers. The accuracy of the marking determines the symmetry of the composition—a 5-10 centimeter shift of the medallion from the geometric center is noticeable and disrupts the visual balance.
Installation begins with the cornice—it is installed first, creating a frame within which the remaining elements are placed. Adhesive for polyurethane—a specialized polyurethane compound or universal liquid nails—is applied to the back of the cornice in a dotted line with a spacing of 80-100 millimeters. The cornice is pressed against the ceiling and wall, held for 30-60 seconds for initial adhesion, and secured with painter's tape for 12-24 hours until the adhesive fully cures. Cornice joints in corners are mitered at 45 degrees with a miter saw, glued, excess adhesive fills the joint, and is smoothed with putty after curing.
After the cornice, the medallion is installed. The center of the ceiling is determined by the intersection of the diagonals and marked with a pencil. Adhesive is applied evenly over the entire back surface of the medallion in a layer 2-3 millimeters thick. The medallion is lifted to the ceiling by two people for elements with a diameter over 70 centimeters, pressed into place, and its position is checked relative to the center axes. Large medallions with a diameter over 100 centimeters may require temporary propping with wooden blocks until the adhesive cures—the blocks rest on the floor, with the top end pressing the medallion against the ceiling. After 24 hours, the props are removed, the adhesive has cured, and the medallion is securely held.
Finishing: Painting and patinating
Joints between elements—cornices, moldings, medallions—are filled with acrylic sealant or putty, creating a seamless surface. Putty is applied with a rubber spatula, excess is removed, and the joint is smoothed with a damp sponge. After drying, the joints are sanded with fine-grit sandpaper P220-P320 to create smoothness. If elements come with a factory-applied white primer, painting is optional—white is universal for most interiors. For a colored solution, the surface is painted with water-based acrylic paint in two coats with intermediate drying of 4-6 hours.
Patination is performed after the base coat of paint has completely dried. The patinating compound—acrylic paint of a contrasting color, diluted with water to a milk-like consistency—is applied generously with a brush, filling all recesses of the ornament. After 5-10 minutes, excess patina is removed from the raised parts with a damp cloth, leaving pigment in the recesses. The result is pronounced relief, where each detail of the ornament is emphasized by the contrast of light and shadow. The patina is sealed with a matte acrylic varnish to prevent pigment wear.
Chandelier installation is performed after the complete installation and painting of the moldings. The mounting hole in the center of the medallion is drilled to the diameter of the light fixture's canopy—typically 80-120 millimeters. A hook or mounting plate is attached to the concrete slab through the medallion, the chandelier is hung, and the decorative canopy is pressed against the medallion, concealing the mounting hardware. If the diameter of the chandelier's canopy is smaller than the mounting hole in the medallion, the gap is filled with a decorative overlay—a round plate painted to match the medallion or in a contrasting color.
Composition examples: Stylistic scenarios
A 25-square-meter Neoclassical living room with 3-meter ceilings receives a 100-millimeter-wide cornice with a simple profile—cavetto, torus, fillet—around the entire perimeter. A central medallion with an 80-centimeter diameter and geometric ornamentation—concentric circles, stylized leaves, beads—frames a 60-centimeter diameter crystal chandelier. The corners of the cornice are accentuated with 100x100 millimeter decorative elements featuring rosettes. All moldings are painted matte white, the ceiling is white, and the walls are light gray. Beneath the medallion is a grouping of a sofa, two armchairs, and a coffee table made of light ash—a vertical axis connects the ceiling and furniture into a single composition.
An 18-square-meter Empire-style dining room with 2.8-meter ceilings has a 90-millimeter-wide cornice with a complex profile—three tori, two cavettos, two fillets—with laurel ornamentation. An oval medallion measuring 100x70 centimeters with imperial symbolism—eagles, wreaths, military trophies—frames a 70-centimeter diameter chandelier in an antique style. The cornice and medallion are painted cream, with relief accents gilded. The ceiling is cream, and the walls are olive. Beneath the medallion is a 120x200 centimeter dining table made of dark oak with six chairs—the axis of symmetry passes through the medallion, chandelier, and the center of the table.
A 20-square-meter Classicism-style study with 3.2-meter ceilings receives a 110-millimeter cornice with a complex profile, a coffered grid made of 50-millimeter moldings forming nine square cells of 100x100 centimeters. The central cell contains a 70-centimeter diameter medallion with classical ornamentation and a 55-centimeter chandelier. The four corner cells contain small medallions with a 25-centimeter diameter, and the four side cells are empty. All moldings are white, and the inner surfaces of the coffers are painted light brown, a shade darker than the walls. The furniture—a desk, bookcases—is made of solid oak with a natural stain. The vertical axis passes through the central medallion and the desk beneath it.
Conclusion: The ceiling as the fifth wall
Ceiling moldings made of polyurethanetransform the ceiling from a neutral background into an architectural surface that organizes the space. The medallion, framing the chandelier, creates a compositional center around which the entire visual hierarchy of the room is built. The cornice forms a frame, separating the ceiling from the walls and emphasizing the boundaries. Coffers structure the plane, creating a geometric grid. The entire system of elements works to create formality, monumentality, and a sense of historical rootedness in the interior.
STAVROS offers a full range ofceiling moldingmade from high-quality European-manufactured polyurethane. The catalog includes hundreds of medallions with diameters from 30 to 150 centimeters in various styles—Classicism, Neoclassicism, Empire, Baroque. Cornices with widths from 50 to 200 millimeters and profiles ranging from simple to complex multi-tiered. Moldings, corner elements, coffered systems, decorative panels—everything needed to createmolded ceilingof any complexity.
All elements are made from polyurethane with a density of 280-320 kilograms per cubic meter, ensuring sharp relief, strength, and durability. Factory priming with white primer makes the elements ready for installation without additional processing. The weight of the elements is 10-15 times less than that of plaster counterparts, simplifying installation and making it accessible for DIY. Moisture resistance, tolerance to temperature fluctuations, and zero shrinkage ensure decades of operation without cracks, deformation, or color loss.
. STAVROS specialists consult on selecting the medallion size for a specific chandelier and room, choosing a cornice of the appropriate profile, creating coffered compositions, and coordinating ceiling moldings withclassic furniture. Create interiors where the ceiling is no less important than the walls and floor, where the chandelier does not just hang in emptiness but grows from architectural framing, where the eye finds beauty not only at eye level but also above—on theceiling with moldings, transforming the room into a formal space worthy of the classic furniture below.


