Article Contents:
- The Fifth Wall: The Philosophy of Ceiling Space in Interior Design
- Why the Ceiling is Not Just the Upper Boundary of a Room
- From a Static Plane to a Dynamic Light Field
- Molded Rosettes: Architectural Scriptwriters of Central Lighting
- Rosette as a Light Reflector and Architectural Accent
- Size, Profile, and Light Characteristics
- Multi-Level Lighting Scenarios with Multiple Rosettes
- Cornices with Hidden Lighting: Creating a Floating Ceiling
- The Principle of Cove Lighting and Its Effects
- Cornice Profiles for Integrating LED Strips
- Installing a Cornice with Lighting: Technical Nuances
- Technical Side: Running Wiring Through Molding
- Preparing a Rosette for Chandelier Cable Passage
- Hidden Wiring in Moldings and Cornices
- Safety and Regulations
- Lighting Scenarios for Different Rooms
- Living Room: Multi-Level Lighting Dramaturgy
- Bedroom: Lighting for Rest and Intimacy
- Kitchen-Dining Room: Functionality and Atmosphere
- Entryway and Hallway: Visually Expanding Narrow Spaces
- Color Temperature and the Psychology of Lighting Comfort
- How Light Temperature Affects the Perception of Molding
- Dynamic Temperature Changes Throughout the Day
- Lighting Control: From Switches to Smart Homes
- Dimmers and Multi-Channel Systems
- Integration into a Smart Home System
- Frequently Asked Questions
- Conclusion: The Ceiling as a Canvas for Light Painting

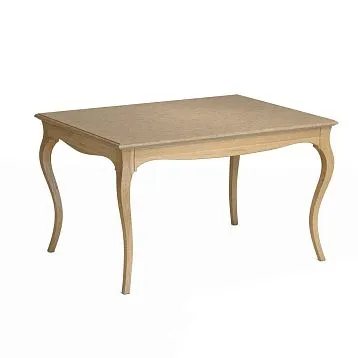
They say the devil is in the details. But in interior design, divine revelation also hides there—in the elements that an ordinary person doesn't notice immediately, but which shape the entire atmosphere of a space. The ceiling—that very fifth wall—has been ignored for centuries, content with white paint and a lonely chandelier in the center. But times are changing. ModernCeiling moldingtransformed the forgotten plane overhead into a full-fledged participant in the interior drama, where light plays the leading role, and architectural elements become the directors of the light spectacle. A well-designedCeiling decorationcombined with thoughtful lighting can change the perception of a space more radically than any reconfiguration. The question is not whether you needCeiling molding for chandelier, but how to turn it into a tool for creating light scenarios that transform the space from dawn until midnight.


The Fifth Wall: The Philosophy of Ceiling Space in Interior Design


Why the Ceiling is Not Just the Upper Boundary of a Room
Ancient architects understood what modern apartment owners often forget: the ceiling defines the character of a space no less than the walls or floor. Look at temples, palaces, theaters — there, ceilings are painted with frescoes, adorned with stucco, coffers, and complex architectural compositions. Why? Because when a person enters a space, they subconsciously assess its volume, and the ceiling plays a key role in this assessment.
The psychology of spatial perception works simply: the more expressive the ceiling, the more significant the space appears. Even a modestly sized room with a ceiling height of 2.7 meters gains monumentality when a cornice with lighting runs along the perimeter and a stucco rosette framing a chandelier is placed in the center. The gaze rises upward, reads the architectural details, and the brain receives a signal: this is not a faceless cube, this is a thoughtfully designed architectural space.
The concept of the fifth wall implies the active use of the ceiling as an equal element of the interior composition. Not just a white surface with the function of reflecting light, but a full-fledged architectural plane that can be divided, decorated, and illuminated. And here is where the most interesting part begins: the combination of stucco with modern lighting solutions creates effects unattainable by any other means.
Our factory also produces:


From a Static Plane to a Dynamic Light Field
The traditional approach to the ceiling is static: painted white, hung a chandelier, forgotten. The modern approach is dynamic: the ceiling changes depending on the time of day, the function of the space, and the mood of the occupants. In the morning, natural lighting works, emphasizing the relief of the stucco. During the day, diffused accent lighting is turned on, creating a soft background. In the evening, dramatic accent lighting is activated, turning the ceiling into a light installation. At night, delicate cove lighting provides comfortable nighttime illumination.
Stucco plays a key role in this dynamic. It doesn't just decorate the ceiling — it structures the light field, creates planes, directs light flows, and forms shadows. A cornice with a niche for an LED strip becomes a source of cove lighting. A rosette becomes a reflector, amplifying the light from the chandelier. Moldings work as light guides, creating a geometry of light on the ceiling.
LED lighting technologies with dimming and color temperature change capabilities add another level of flexibility. In the morning, cool white light invigorates, creating a work atmosphere. In the evening, warm light relaxes, setting the mood for rest. RGB lighting allows you to radically change the mood of the space with the press of a button. And all this light magic unfolds on the ceiling, organized with the help of architectural elements.
Get Consultation
Stucco Rosettes: Architectural Scriptwriters of Central Lighting
The Rosette as a Light Reflector and Architectural Accent
A ceiling rosette in the classical sense is a decorative framing of the chandelier mounting point, concealing wiring, and creating a smooth transition from the ceiling plane to the pendant light fixture. But in the context of a light scenario, the rosette acquires additional functions, becoming an active participant in the lighting design.
The first function is reflection and amplification of light. A white or light-coloredsocket for chandelierworks as a reflector, casting light back into the space. This is especially noticeable when using chandeliers with upward-facing shades: light hits the textured surface of the rosette, reflects at different angles, creating additional illumination and a play of highlights. The deep relief of a Baroque rosette with numerous protrusions and recesses works more effectively than a flat one — each facet reflects light in its own way.
The second function is creating a light composition on the ceiling. A rosette with a diameter of 60-80 centimeters forms a light spot of corresponding size around the chandelier. This spot becomes the visual center of the ceiling, the point from which all other light architecture is built. If the ceiling has a complex shape — multi-level, coffered, with niches — there may be more than one rosette, creating a system of light accents.
The third function is interaction with the type of lighting. A chandelier with crystal pendants combined with a relief rosette creates a spectacle of highlights and reflections — light refracts in the crystal, hits the stucco, scatters, creating a shimmering light cloud. A modern chandelier with directional light works differently — the rosette is illuminated locally, creating clear light-shadow contrasts that emphasize the geometry of the ornament.
Size, Profile, and Light Characteristics
The diameter of the rosette determines the scale of the light scenario. A small rosette of 30-40 centimeters creates a compact light spot, concentrated around the chandelier — this is suitable for small spaces or situations where a local light accent is needed. A medium rosette of 50-70 centimeters is a universal solution for standard-sized living rooms. A large rosette of 80-120 centimeters requires high ceilings and a large room area, otherwise it looks disproportionate.
The profile of the relief influences the character of the reflected light. A flat rosette with minimal relief of 5-10 millimeters creates uniform diffused reflection — light is distributed smoothly, without sharp shadows. A deeply relief rosette with protrusions of 30-50 millimeters creates dramatic chiaroscuro: protruding elements are brightly lit, recesses remain in shadow, creating a three-dimensional light picture.
The material of the rosette also plays a role.Polyurethane ceiling rosettes...with a white primed surface have a high light reflection coefficient — up to 80-85 percent. This means that most of the incident light returns to the room, increasing the overall illumination. Rosettes painted in dark colors, on the contrary, absorb light, creating a contrast between the bright chandelier and the dark frame.
Scenarios for Multi-Level Lighting with Multiple Rosettes
In large spaces — living rooms with an area of thirty square meters or more, halls, dining rooms — one central chandelier is insufficient for uniform lighting. Here, a scheme with multiple light sources is used, each framed by a rosette. The central chandelier is the main character, the largest, with a correspondingly large rosette. Additional light fixtures around the perimeter or in functional zones are secondary characters with rosettes of smaller diameter.
It is important to maintain stylistic unity: all rosettes should be from the same collection or have similar ornamentation and profile. A mix of styles creates visual chaos. Three rosettes in a classical style with acanthus leaves, placed along one axis — a large central one, two smaller side ones — create rhythm, order, and architectural logic.
A light scenario with multiple rosettes allows for flexible lighting control. In the evening, only the central chandelier is turned on — creating an intimate atmosphere with a bright center and shaded corners. When hosting guests, all fixtures are turned on — the room is flooded with light, becoming formal and solemn. For watching movies, the center is turned off, leaving side fixtures at minimum brightness — creating subdued background lighting.
Cornices with Hidden Lighting: Creating a Floating Ceiling
The Principle of Cove Lighting and Its Effects
One of the most spectacular solutions in modern lighting design is hidden cove lighting placed behind a ceiling cornice. The concept is simple: the cornice is installed not flush with the ceiling but with a 5-10 centimeter gap. An LED strip, directed upward toward the ceiling, is placed in this gap. The light reflects off the ceiling and diffuses into the room, creating soft, even, shadowless illumination.
The visual effect is stunning: the ceiling appears separated from the walls, floating in the air. The boundary between wall and ceiling is blurred by a band of light, giving the space additional depth and airiness. This technique is especially valuable for rooms with low ceilings of 2.5-2.7 meters—hidden cove lighting visually raises the ceiling, creating an illusion of an extra 10-15 centimeters in height.
The color temperature of the lighting determines the character of the effect. Cool white light (5000-6500K) creates a sense of spaciousness, height, and modernity—ideal for minimalist interiors where graphic lines and purity are important. Warm white (3000-4000K) creates coziness and intimacy, suitable for classic interiors where atmosphere and comfort are valued. RGB lighting adds the possibility of color scenarios—blue for relaxation, warm amber for a romantic dinner, cool white for concentration.
Cornice profiles for integrating LED strips
Not every cornice is suitable for creating hidden cove lighting. A special profile with a shelf or niche for mounting the LED strip is required. The width of such a shelf is typically 10-20 millimeters—enough for a strip 8-10 millimeters wide. It's important that the top edge of the cornice conceals the strip from direct view from below—otherwise, individual LEDs will be visible, and the hidden effect will be lost.
The optimal cornice width for hidden cove lighting is 80-120 millimeters. Narrower cornices do not always effectively conceal the strip, while wider ones look bulky and are suitable only for rooms with high ceilings. The profile can be simple—a smooth surface without ornamentation—or decorative, with subtle grooves or chamfers that create additional light play.
The material for the cove lighting cornice is typically polyurethane or polystyrene. Both materials are lightweight, do not deform from the heat of the LED strip (modern strips generate almost no heat), and take paint well.Ceiling cornices for hidden cove lightingare produced in specialized collections where the structure for lighting installation is already provided—no need to improvise, everything is thought out by the manufacturer.
Installing a cornice with cove lighting: technical nuances
Installing a cornice for hidden cove lighting requires precision and an understanding of lighting physics. The first stage is marking. The cornice must run strictly horizontally around the entire perimeter of the room. Even a minimal tilt of one or two degrees will be noticeable when the lighting is on—the light band on the ceiling will be uneven. Use a laser level to create a perfectly horizontal marking line.
The second stage is determining the distance from the ceiling. The standard is 8-12 centimeters from the bottom edge of the cornice to the ceiling. This creates a 5-8 centimeter gap for the strip (considering that the top shelf of the cornice extends 3-4 centimeters). If the gap is smaller, the light band will be narrow and the light concentrated. If larger—the band is wider, but brightness decreases, and dark zones may appear.
The third stage is wiring. The LED strip needs to be connected to a power supply, which in turn is connected to the 220V mains. Plan the placement of the power supply in advance—it must be accessible for maintenance but not visible. Power supplies are usually hidden behind furniture, in niches, or in special enclosures. Wiring from the power supply to the strip runs concealed—in a chase, behind baseboards, or in cable channels.
The fourth stage is mounting the cornice. Special polymer adhesive or construction adhesive like liquid nails is used. The adhesive is applied to the back of the cornice, and the cornice is pressed against the wall strictly along the marking line. For reliability, long sections of cornice are additionally secured with countersunk-head screws, which are later filled and become invisible.
The fifth stage is installing the LED strip. The strip has an adhesive backing—the protective film is removed, and the strip is adhered to the cornice shelf. It's important to run the strip continuously, avoiding breaks and joints—they create dark spots. If one strip is not long enough for the entire perimeter, splicing is done with special connectors or soldering.
The sixth stage is testing and adjustment. Before final finishing, be sure to turn on the lighting, check for even illumination, absence of dark zones, and correct color. If using a dimmer or RGB controller, test all modes. Only after confirming everything works perfectly, proceed to painting the cornice.
Technical aspect: running wiring through rosettes
Preparing a ceiling rosette for cable passage for a chandelier
Most ceiling rosettes have a central hole 8-15 centimeters in diameter, intended for passing the chandelier cable and mounting hardware. This is sufficient for standard chandeliers with ceiling hook or mounting plate installation. But sometimes the hole needs to be enlarged—if the chandelier has non-standard mounting, a wide mounting cup, or a built-in transformer.
A polyurethane rosette is easy to work with: the hole is enlarged with a utility knife, a hacksaw with fine teeth, or even a common kitchen grater. It's important to cut carefully, avoiding chips and ragged edges—they will be visible after installation. The hole should be 2-3 centimeters wider than the chandelier's mounting cup so the cup completely conceals the edge of the hole.
After mounting the rosette on the ceiling and before installing the chandelier, electrical work is carried out. The cable is fed through the rosette hole and connected to the mounting plate or hook. Modern electrical safety standards require a three-core cable: live, neutral, and ground. Connections are made with terminal blocks, soldering, or certified connectors like WAGO. Twisted connections are unacceptable—fire hazard and unreliable.
Concealed wiring in moldings and cornices
For LED cove lighting in cornices, low-voltage 12V or 24V wiring from the power supply to the strip is required. This wiring can run concealed in special channels if the cornice profile is designed for it. Some manufacturers produce cornices with integrated cable channels—a groove on the back where the wire is laid. This is convenient, aesthetic, and safe.
If the cornice does not have a built-in channel, the wiring is run in a wall chase, brought up to the cornice level, and exits at the strip installation point. The chase is filled with filler before mounting the cornice. After installing the cornice, the wire is fed out, connected to the strip, and concealed behind the cornice. The main thing is to ensure access to the power supply and controller for possible maintenance.
For complex lighting systems with several independent cove lighting zones, a well-thought-out electrical wiring diagram is required. Each zone is a separate circuit with its own power supply or a shared powerful supply with distribution to zones. Control is via individual dimmers for each zone or a central controller with programmable lighting scenarios. All this requires professional design and installation.
Safety and regulations
Electrical safety is not a matter for compromise. All work with electrical wiring must be performed by a qualified electrician with appropriate certification. Modern regulations (PUE-7) clearly specify requirements for wiring installation, cable cross-section selection, overload protection, and grounding.
For LED strips up to 100W, a cable with a cross-section of 0.75 square millimeters is sufficient. For more powerful systems—1.5-2.5 square millimeters. The power supply should have a 20-30 percent power reserve relative to the total power of connected strips—this ensures longevity and stable operation.
All connections must be reliably insulated. Terminal blocks are enclosed in insulating housings. Exposed wire sections are unacceptable. The power supply must have short-circuit and overload protection—quality units have built-in fuses and circuit breakers.
For wet areas—bathrooms, saunas—LED strips and power supplies with an IP65 protection rating or higher are required. This provides protection against moisture ingress and eliminates the risk of short circuits. In living rooms, IP20 is sufficient, but IP44 provides additional reliability.
Lighting scenarios for different rooms
Living room: multi-level lighting design
The living room is a formal space where lighting should be flexible and adaptable to different situations. The basic scenario is a central chandelier with a plaster rosette 70-90 centimeters in diameter, providing the main lighting. An additional scenario is cornice lighting around the perimeter, creating ambient diffused lighting. An accent scenario is spotlights highlighting paintings, shelves, and architectural details.
Morning: only cornice lighting at 50 percent brightness is turned on — soft, unobtrusive lighting that doesn't strain the eyes after sleep. Day: natural lighting is used, artificial lighting is off. Evening: the central chandelier at full power plus cornice lighting at 30 percent — bright, comfortable lighting for socializing, reading, and work. Night: only cornice lighting at 20 percent warm light — atmospheric lighting for watching movies and relaxation.
Ceiling molding organizes this lighting symphony: the rosette enhances the chandelier's light, the cornice creates a floating ceiling effect, and moldings, if used for zoning, are highlighted with lighting, creating a geometric structure on the ceiling.
Bedroom: lighting for rest and intimacy
The bedroom requires delicate lighting that promotes relaxation. A central chandelier with a rosette — yes, but it is rarely used, mainly during cleaning or when getting ready. The main lighting is warm-toned cornice lighting, creating a soft diffused glow without harsh shadows. Local lighting includes bedside lamps and wall sconces.
Wake-up scenario: cornice lighting gradually turns on, simulating dawn. Brightness increases gradually over 10-15 minutes, helping to wake up naturally. Bedtime scenario: brightness gradually decreases, color temperature shifts to warm amber — this stimulates melatonin production and improves sleep onset. Night scenario: minimal lighting at 5-10 percent for orientation in the dark.
Molding in the bedroom is usually more restrained than in the living room — a small rosette for the central chandelier, a narrow cornice for lighting. Emphasis on functionality rather than decorativeness. But even delicate molding creates a sense of thoughtfulness and completeness in the interior.
Kitchen-dining room: functionality and atmosphere
The kitchen requires bright functional lighting for work areas and softer atmospheric lighting over the dining table. If the dining area is separate or combined with the kitchen in a studio, ceiling molding helps visually divide the space. Over the dining table — a classic chandelier with a rosette, creating a lighting accent. Over the kitchen work area — recessed lights without molding, providing bright directional light.
Cornice lighting in the kitchen-dining room works as additional ambient lighting in the evening when the main lighting is excessive. Warm light creates a cozy atmosphere for dinner, transforming the functional kitchen space into a comfortable dining area. A dimmer allows adjusting brightness depending on the situation: bright light for cooking, subdued light for meals.
The specifics of the kitchen — high humidity, grease vapors, temperature fluctuations. Polyurethane molding is ideal for these conditions: it is moisture-resistant, easy to clean, and does not deform from temperature. LED strips with IP44 protection or higher ensure the longevity of the lighting.
Hallway and corridor: visual expansion of narrow spaces
The hallway and corridor are usually the most problematic areas of an apartment: narrow, dark, without natural lighting. Cornice lighting works especially effectively here: it visually expands the space, raises the ceiling, and compensates for the lack of windows. A continuous light strip around the perimeter creates a sense of volume and airiness.
The rosette for the central chandelier in a long corridor may not be just one — two or three smaller-diameter rosettes, placed at equal distances, create rhythm and organize the space. Under each rosette — a compact ceiling chandelier or surface-mounted light. Turning on all lights creates bright lighting, turning on every other light — an economical mode for everyday use.
Motion sensors in the hallway automate lighting: you enter — the light turns on, you leave — it turns off after a minute. This is convenient and economical. Cornice lighting can operate in two modes: standby — 10 percent brightness constantly, main — 100 percent when the sensor is triggered.
Color temperature and the psychology of lighting comfort
How light temperature affects the perception of molding
Color temperature of light, measured in kelvins, radically changes the perception of the same interior. Cool white light 5000-6500K emphasizes details, creates sharp shadows, and makes the relief of molding more expressive and graphic. This is light for concentration and activity, suitable for work areas, offices, and modern minimalist interiors.
Neutral white 4000-4500K is a universal option, imitating daylight. It does not distort colors, is comfortable for the eyes, and suitable for most living spaces. Molding under such light looks natural, without excessive dramatization or, conversely, blurring of details.
Warm white 3000-3500K creates a cozy, relaxing atmosphere. The relief of molding becomes softer, shadows are less deep, and the overall impression is calm, homely comfort. This is light for bedrooms, living rooms, dining rooms — spaces where a relaxing atmosphere is important.
Very warm light 2700K and below imitates candlelight, fireplace light, creating intimacy and romance. Molding in such light seems to lose the sharpness of edges, becoming picturesque, almost impressionistic. This is light for special occasions, for evenings when you want to disconnect from the hustle and bustle of the world.
Dynamic temperature change throughout the day
Modern LED systems with the ability to change color temperature (CCT — Correlated Color Temperature) allow simulating the natural lighting cycle. In the morning, the light is cooler — 5000-5500K, invigorating, helping to wake up. During the day — neutral 4000-4500K, maintaining activity. In the evening — warm 3000-3500K, preparing for sleep. At night — very warm 2700K, not suppressing melatonin production.
This is called circadian lighting — a system synchronized with the natural biological rhythms of humans. Research shows that such lighting improves sleep quality, increases daytime productivity, and reduces stress. Cornice lighting with CCT adjustment turns the ceiling into a tool for maintaining health.
Molding in a circadian lighting system works as a light modulator: morning cool light, reflecting off the relief, creates sharp graphic shadows — the space looks structured and organizing. Evening warm light blurs shadows — the same molding creates a soft, relaxing atmosphere. One interior, two completely different moods.
Lighting control: from switch to smart home
Dimmers and multi-channel systems
The simplest way to control brightness is a dimmer, a regulator installed instead of a regular switch. Turning a knob or pressing a button changes brightness from zero to maximum. For cornice LED lighting, special dimmers for LED strips are required — regular dimmers for incandescent bulbs are not suitable, as they cause flickering.
A multi-channel control system allows independent regulation of multiple lighting zones. Channel 1 is the central chandelier. Channel 2 is the cornice lighting. Channel 3 is accent spotlights. Each channel is controlled by a separate dimmer or button on a common panel. This provides the freedom to create various lighting combinations: only the chandelier, only cornice lighting, everything together, combinations with different brightness levels for each channel.
RGB controllers add color control. In addition to brightness, you adjust the hue: red, green, blue, and all their possible combinations. Lighting scenarios are created: cool blue for concentration, warm orange for relaxation, pink for romance, dynamic color changes for parties. Moldings under colored lighting acquire fantastic shades, turning the ceiling into a light installation.
Integration into a smart home system
A smart home is the next level of lighting control. All lighting zones are connected to a central controller, which is programmed for various scenarios. The 'Morning' scenario: at 7:00 AM, a gradual turn-on of cornice lighting with cool light. The 'Movie' scenario: dimming all sources to 10 percent warm light. The 'Reception' scenario: all fixtures at maximum. The 'Sleep' scenario: complete shutdown of everything.
Control via smartphone or voice assistants (Alice, Google Assistant, Siri) adds convenience. Lying in bed, not wanting to get up to turn off the light — a voice command, and the light goes out. Returning home, still in the elevator, you turn on the hallway light via the app — you enter an illuminated apartment.
Automation via presence sensors, light sensors, and time of day makes the system autonomous. A light sensor determines that it has gotten dark — cornice lighting automatically turns on. A presence sensor detects that you have entered the room — the chandelier turns on. You leave, the sensor detects no movement for five minutes — the light turns off.
Integration with other smart home systems creates complex scenarios. Morning scenario: the alarm goes off, the light gradually turns on, the coffee maker starts brewing coffee, the curtains open. Evening scenario: pressing the 'Good Night' button turns off all lights, closes the curtains, activates the security alarm, and turns on standby lighting in the hallway.
Frequently asked questions
What power LED strip is needed for cornice lighting?
For residential spaces, a strip with a power of 9-14 W per meter is optimal. This is sufficient to create bright but not blinding lighting. For high ceilings from 3 meters, a strip of 18-20 W per meter can be used. More important than power is the number of LEDs per meter: 60-120 pieces create uniform illumination without visible dots.
Can a standard ceiling rose be used if the chandelier has a non-standard mounting?
Yes, the ceiling rose can be adapted. If the central hole is insufficient, it can be enlarged with a knife or saw. If the chandelier has a wide mounting plate that does not fit under the ceiling rose, the ceiling rose is installed after mounting the chandelier, carefully threading it over the cable. The main thing is that the chandelier's mounting cup completely covers the edge of the ceiling rose hole.
How to choose a power supply for an LED strip?
Calculate the total power: length of the strip multiplied by the power per meter. The power supply should have a power 20-30 percent greater than the total power of the strip. For example, 10 meters of strip at 10 W = 100 W, a 120-130 W power supply is needed. For damp rooms, a protection class of IP65 or higher is mandatory.
Is it necessary to paint polyurethane moldings or can they be left as is?
Polyurethane moldings are supplied primed with white primer. They can be left as is — white is universal. But painting provides additional advantages: you can match the exact shade to the ceiling or walls, create patina or gilding effects, or coat with matte or glossy varnish for additional protection.
How many ceiling roses are needed for a room with an area of 20 square meters?
For a standard room of 20 square meters with a ceiling height up to 3 meters, one central ceiling rose with a diameter of 60-80 centimeters for the chandelier is sufficient. If several fixtures are used — a central one and two to four additional ones around the perimeter — a ceiling rose of appropriate size is placed under each: a large central one, smaller peripheral ones.
Can cornice lighting be installed if the ceiling is already painted?
Yes, it can. The cornice is mounted on the wall with a gap from the ceiling, the LED strip is placed in the niche. The only condition is that the ceiling must be light, preferably white or close to white. A dark ceiling absorbs light, and the lighting effect is lost. If the ceiling is dark, it needs to be repainted in a light shade before installing the lighting.
How often does the LED strip in cornice lighting need to be replaced?
A quality LED strip lasts 30,000-50,000 hours. With use of 4 hours per day, that's 20-35 years. In practice, the strip is more likely to become obsolete (more efficient models will appear) than to physically fail. But cheap strips can degrade faster — after 3-5 years, brightness decreases, and uneven illumination appears.
Is it difficult to install a cornice with lighting yourself?
Installing a cornice is a medium-complexity process, accessible to a DIYer with basic skills. Tools needed: laser level, miter box, saw, spatula for applying adhesive. The electrical part — connecting the strip to the power supply — requires basic electrical knowledge or an electrician's help. The most difficult part is ensuring perfect horizontal alignment of the cornice and uniformity of the gap for lighting.
Conclusion: The ceiling as a canvas for light painting
The ceiling has ceased to be a forgotten plane. It has become a fifth wall, an equal participant in the interior composition, a canvas for creating light painting that changes from dawn to dusk. Skillful use of ceiling moldings combined with well-thought-out lighting scenarios can transform even a modest room into a space where each hour of the day creates its own mood, its own atmosphere.
Ceiling roses have ceased to be mere frames for chandeliers — they have become light reflectors, amplifying and directing light. Cornices have acquired a new function — carriers of hidden lighting, creators of the floating ceiling effect. Moldings have turned into architectural dividers of lighting zones. All these elements work in symphony, where the conductor is your understanding of light, space, and mood.
Technology has made the complex simple. LED lighting with its efficiency, durability, and flexible control has opened up possibilities that could only be dreamed of ten years ago. Smart control systems have turned lighting scenarios from a professional luxury into an accessible solution for any home. Polyurethane moldings have combined the beauty of classics with the practicality of modern materials.
The result is an interior that lives, breathes, and changes. In the morning, it invigorates with cool light and clear shadows of the moldings. During the day, it fills with natural light, allowing the ceiling relief to play with sunbeams. In the evening, it relaxes with the warm glow of cornice lighting, turning the ceiling into a light cloud. At night, it creates delicate standby lighting that does not disturb sleep.
Investing in proper ceiling design using moldings and thoughtful lighting is an investment in quality of life. In daily aesthetic enjoyment. In comfort that affects mood, productivity, and relationships. A space that is pleasant to be in makes you happier. This is not an exaggeration — it is a fact confirmed by psychologists.
Do not postpone the transformation for later. Every day spent under a bland white ceiling with a bare bulb is a missed opportunity for inspiration. Start small: one ceiling rose for a chandelier, a narrow cornice with lighting. Feel how the space changes. And you will want more. Because when you understand that the ceiling is not a boundary but a possibility, it is impossible to stop.
For over twenty-three years, STAVROS has been creating decorative elements that transform ordinary ceilings into architectural masterpieces. The widest range of ceiling rosettes — from compact 30 centimeters to monumental 120 centimeters, from classic Baroque to modern minimalist. Cornices of all profiles and sizes, including specialized ones for hidden LED lighting. Mouldings, panels, coffers — everything for creating complex ceiling compositions.
In-house production guarantees consistent quality. Modern equipment, European raw materials, multi-stage control at every stage. High-density polyurethane with clear relief that captures the finest details of the ornament. Primed surface, ready for painting or installation as is.
A large stock program ensures shipment of popular items on the day of request. No need to wait for production — pick up immediately. Delivery throughout Russia, possibility to order from a single unit. Flexible pricing policy, discounts for designers and construction companies. Professional consulting support — STAVROS specialists will help select elements for your project, calculate quantities, and recommend installation options.
With STAVROS, creating a lighting masterpiece on the ceiling is no longer a task for the select few. It is accessible to everyone who values beauty, comfort, and quality of life. Turn your ceiling into a fifth wall, telling a story of light, architecture, and your impeccable taste.