Article Contents:
- Extruded Polystyrene and Its Behavior
- Production Technology: From Granules to Profile
- Physical Properties: Strengths and Weaknesses
- Behavior Over Time: Aging and Degradation
- Ecological Safety
- When to Choose Polystyrene: Optimal Scenarios
- Ceiling Trim: The Ideal Niche for Polystyrene
- Temporary Housing: Rational Minimalism
- Budget Repair: Maximum Effect for Minimum Cost
- Non-Living Spaces with Low Loads
- When Polystyrene Is Not Suitable
- Basic Profiles: Variety of Shapes and Sizes
- Ceiling Molding and Moldings
- Floor skirting boards
- Moldings and decorative elements
- Installation and Painting: Proper Installation Technology
- Preparation: Tools and Materials
- Installation of Ceiling Molding
- Installation of Baseboards
- Painting: Transforming into Aesthetics
- Limitations and Mistakes: What to Avoid
- Critical Mistakes When Choosing Adhesive
- Installation Errors
- Operational errors
- Realistic Expectations
- Conclusion: a reasonable choice for reasonable conditions
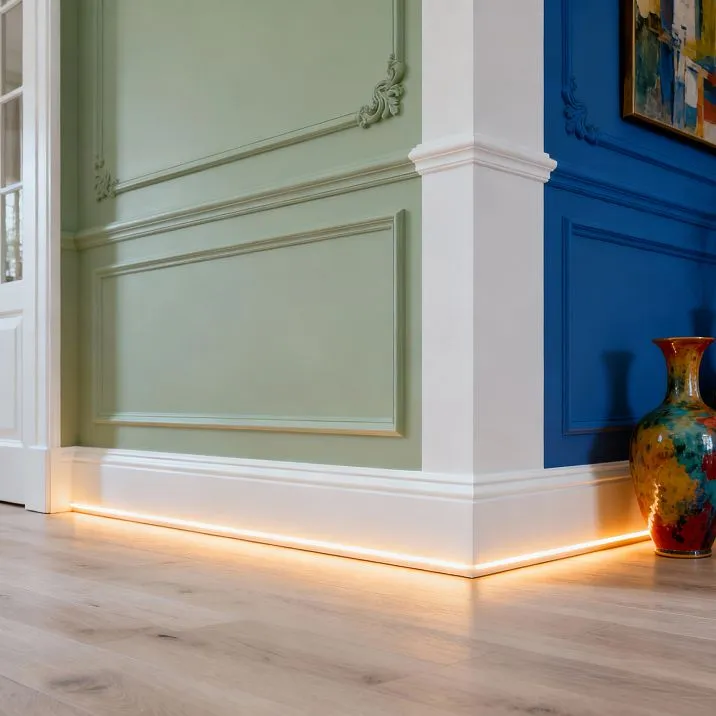
Limited repair budget. Major works consumed most of the funds — floors, walls, ceilings. Only crumbs remain for finishing touches. But without decorative trim, the interior looks unfinished. Gaps between floor and walls, between walls and ceiling are exposed, revealing the technical side of the repair. These joints must be sealed, framed, and completed aesthetically.
Expensive materials are out of reach. Durapolymer, polyurethane, wooden trim — all of these cost a lot. But there is an alternative that many underestimate, considering it a "cheap" material without legitimacy. Polystyrene — a material that, when used correctly, delivers a worthy result at reasonable prices.
The ceiling molding creates a frame around the perimeter. Between them is a smooth ceiling surface. This scheme suits rooms of any size and is universally stylish. It is important to correctly choose the proportions — the rosette should not be too large relative to the room's perimeter. и Polystyrene Cornice — not a compromise of the "better something than nothing" kind. It is a conscious material choice, optimal for specific conditions and budget. Lightweight, easy to install, paintable in any color, affordable. Yes, it has limitations. Yes, it is not universal. But where conditions match its properties, polystyrene performs for decades, visually rivaling expensive alternatives. Let’s explore what extruded polystyrene is, when to choose it, how to work with it, and what mistakes to avoid.


Extruded Polystyrene and Its Behavior
Understanding the material at the molecular level helps use it correctly, extracting maximum benefits and avoiding critical drawbacks.


Production Technology: From Granules to Profile
Ceiling baseboard made of extruded polystyrene Produced by extrusion. Polystyrene granules are heated to 180–200°C, a foaming agent (usually carbon dioxide or isobutane) is added, and the mixture is extruded under pressure.
The foamed melt is forced through a forming head — a die with the profile of the future product. The output is trim of the required cross-section. It cools in air or in a water bath and is cut to standard lengths of 2–2.4 meters.
Foaming creates a porous structure. The material consists of 95-98% air enclosed in tiny closed cells measuring 0.1-0.2 mm. It is precisely the air that provides lightness — density of only 25-35 kg/m³.
Closed cell structure — the key difference between extruded polystyrene and ordinary foam. The cells do not communicate with each other, water does not penetrate. Water absorption is less than 2% even after prolonged immersion.
Our factory also produces:


Physical properties: strengths and weaknesses
Density of 25-35 kg/m³ makes the material incredibly light. A two-meter-long ceiling crown profile 100 mm high weighs 150-250 grams — less than a glass of water. This simplifies transportation, installation, and does not create load on structures.
Bending strength is low — 2-5 MPa. The profile easily breaks under rough handling and requires careful handling during transportation and installation. On floors in high-traffic areas, it quickly develops dents from shoes and furniture.
Heat resistance is limited to 80°C. When heated, the material begins to soften, deform, and lose its shape. It cannot be installed near heat sources — radiators, fireplaces, powerful lamps. Distance must be at least 30-50 cm from heated surfaces.
Chemical resistance is low. Organic solvents — acetone, gasoline, white spirit, toluene — dissolve polystyrene instantly. The material melts and loses its shape. This is critical when selecting adhesives and paints — only water-based formulations are acceptable.
High moisture resistance due to closed cell structure. The material does not absorb water, does not swell, does not rot, and is not susceptible to mold. Can be used in bathrooms, kitchens, basements — anywhere with high humidity.
Get Consultation
Behavior over time: aging and degradation
Ultraviolet radiation — the main enemy of polystyrene. Direct sunlight breaks polymer bonds, causing the material to yellow, become brittle, and start crumbling. At large windows, especially southern ones, polystyrene crown molding may yellow within 3-5 years.
Painting protects against UV. A paint layer acts as a physical barrier preventing UV rays from reaching the polymer. Painted polystyrene lasts 10-15 years even at large windows without significant yellowing.
Temperature fluctuations cause linear expansion and contraction. Linear expansion coefficient 6-8×10⁻⁵ 1/°C — relatively high. With a temperature difference of 30°C (winter to summer), a two-meter profile changes length by 3-5 mm. Joints may separate and form gaps.
Mechanical loads over time cause irreversible deformations. On floors in hallways and entryways, polystyrene baseboards develop dents, chips, and cracks after 3-5 years of use. The material is not optimal for such zones.
Service life of polystyrene depends on conditions. On ceilings, protected from UV by painting — 15-20 years. On floors in residential rooms with low traffic — 10-15 years. In hallways and entryways — 5-7 years. In commercial spaces with high traffic — 3-5 years.
Oak skirting boards are an indispensable element of classic interior styles. In the English style, oak skirting boards with rich carving emphasize the aristocracy and solidity of the space. Dark wood tones harmonize beautifully with traditional materials — natural stone, leather, bronze.
Under normal conditions, polystyrene is inert and does not emit harmful substances. Certificates confirm compliance with sanitary and hygienic norms for residential spaces. Can be used in children’s rooms and bedrooms without concerns.
Above 80°C, thermal degradation begins. Styrene — an organic compound with a characteristic odor — is released. At concentrations above permissible limits, styrene is toxic. However, under normal use, temperatures do not reach such levels.
When burning, polystyrene releases toxic gases — carbon monoxide, styrene, benzene. Fire hazard class of combustion products T2 (moderately hazardous). Smoke is black, dense, and smoky. Do not use polystyrene in evacuation routes or ventilation shafts.
Flammability class G3-G4 (normally to strongly flammable). The material supports combustion and spreads flame. There are self-extinguishing grades with antipyrene of class G2, but they are 30-50% more expensive and less common.
When to choose polystyrene: optimal scenarios
Understanding optimal application zones helps extract maximum benefit with minimal problems.
Ceiling crown molding: ideal niche for polystyrene
Polystyrene crown molding On the ceiling — the main area of application for the material. Here, its drawbacks are not critical, and its advantages are fully realized.
Mechanical loads on the ceiling are minimal. No one will kick the crown molding with their foot, bump it with furniture, or scratch it with a vacuum cleaner. The material’s brittleness is not an issue — it simply hangs under the ceiling, serving a decorative function.
Lightness is critically important for ceiling installation. A heavy profile creates load on fasteners, requires frequent self-tapping screws, and risks falling off. Polystyrene stays in place using adhesive without additional fixation due to its low weight.
Painting protects against UV. Ceiling crown molding is painted after installation — the paint layer becomes a barrier to UV rays. Yellowing is eliminated even at large windows.
Price makes polystyrene accessible for any budget. A ceiling crown molding 80-100 mm high costs 200-500 rubles/m. For a room with 20 m perimeter, it will cost 4000-10000 rubles. Durapolymers would cost 12000-24000 rubles — a twofold difference.
Temporary housing: rational minimalism
Temporary apartments, dormitories, cottages where people live intermittently — places where investing in expensive crown molding is irrational. Polystyrene provides an acceptable result at minimal cost.
You are not the owner — why pay extra for materials that will remain with the owner? Polystyrene crown molding costing 5000-8000 rubles per apartment creates a finished interior without significant investment.
At a dacha where people live seasonally, expensive materials are unnecessary. Polystyrene lasts 10-15 seasons — that’s enough. It withstands temperature fluctuations between winter and summer, and freeze-thaw cycles do not damage its structure.
Budget repair: maximum effect at minimum cost
When the budget is strictly limited, polystyrene is a way to achieve a finished interior without going into debt. After installation and painting, it visually appears indistinguishable from expensive materials to an untrained eye.
Comprehensive apartment finishing with polystyrene trim costs 10,000–20,000 rubles compared to 30,000–60,000 rubles for duroplastic. Savings of 20,000–40,000 rubles — that’s a month’s worth of life for an average family or money for furniture.
DIY installation further reduces costs. Polystyrene is lightweight, cuts with a stationery knife, and adheres with ordinary glue. No expensive tools or special skills required. You can finish the entire apartment over the weekend.
Non-living spaces with low load
Cabinets, technical rooms, garages, workshops — places where aesthetics are secondary, but minimal finishing is desirable. Polystyrene provides an acceptable appearance at minimal cost.
In a storage room, wear resistance is irrelevant — foot traffic is zero. What matters is price and installation speed. Polystyrene profiles can be glued in an hour and cost 1,000–2,000 rubles per room.
In a garage or workshop, polystyrene trim conceals technical gaps and gives a finished look. Possible damage is not critical — this is not a formal interior.
When polystyrene is NOT suitable
Floor skirting in hallways, entryways, commercial spaces with high foot traffic. The material quickly develops damage and requires replacement after 3–5 years. Savings on material will result in additional repair costs.
Near heat sources — radiators, fireplaces, oven cabinets, powerful lamps. Heat resistance of 80°C is insufficient; the profile will deform. Minimum distance of 30–50 cm from heated surfaces.
In premium interiors where tactile quality matters. After painting, polystyrene visually appears indistinguishable, but it feels light and hollow when tapped. Quality enthusiasts can recognize the material.
For integrating powerful LED backlighting (14–18 W/m). Heat resistance is insufficient; the profile may deform due to heating. For backlighting, choose duroplastic or aluminum profiles.
Basic profiles: variety of shapes and sizes
Polystyrene trim is available in hundreds of profiles of different heights, widths, and relief patterns.
Ceiling cornices and moldings
Polystyrene molding — traditional name for a ceiling cornice in the shape of a quarter circle. Simplest profile, connecting wall and ceiling with a smooth arch. Height 30–80 mm, width similar.
Advantages: minimal price (150–300 rubles/m), ease of installation, versatility. Disadvantages: visually plain for prestigious interiors, limited height unsuitable for high rooms.
Profiled cornices have complex cross-sections with several smooth transitions, creating play of light and shadow. Height 50–150 mm, width 40–100 mm. Look more luxurious than simple moldings, suitable for classic interiors.
Advantages: decorative appeal, variety of shapes, sufficient height for rooms 2.5–3.0 m. Disadvantages: higher price (250–600 rubles/m), more glue required due to increased contact area.
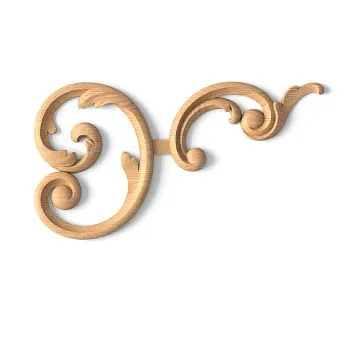
Ornamented cornices with classical decorative elements — meanders, acanthus, rosettes, modillions. Mimic plaster moldings; after painting, they are visually indistinguishable.
Advantages: luxurious appearance, wide selection of historical styles. Disadvantages: maximum price for polystyrene (400–800 rubles/m), dust accumulates in relief grooves, harder to paint.
Cornices for backlighting with built-in shelf for LED strips. Shelf width 20–40 mm, profile height 70–120 mm. Allow integrating hidden backlighting at reasonable cost.
Advantages: affordable price (300–600 rubles/m vs. 600–1200 for duroplastic), functionality. Disadvantages: limited heat resistance, suitable only for low-power strips (5–10 W/m).
Floor skirting boards
Classic skirting boards 50–70 mm high with simple profile. Inexpensive (80–200 rubles/m), universal, suitable for most living rooms with low foot traffic.
Advantages: accessibility, ease of installation. Disadvantages: brittleness, quickly damaged in active movement zones, visually plain.
European skirting boards 80–100 mm high with more complex profile. Visually elongate the room, create a modern look. Price 150–350 rubles/m.
Advantages: current height, variety of profiles. Disadvantages: same as classic ones, but at a higher price.
Wide baseboards 100-150 mm for rooms with high ceilings. Polystyrene at such heights is risky — the profile may sag under its own weight in sections over 2 meters. Better choose duroplastic.
Moldings and decorative elements
Wall moldings for horizontal and vertical wall divisions. Width 20-80 mm, various profiles from simple to ornate. Price 100-400 rubles/meter.
Application: framing wallpaper, creating panels, picture and mirror frames, horizontal wall division. The lightness of polystyrene simplifies mounting on walls without risk of peeling.
Corner elements, outlets, brackets, pilasters — decorative details for interior decoration. Made of polystyrene, they cost pennies (50-300 rubles each vs. 300-1500 for equivalents in duroplastic).
Installation and painting: proper installation technology
Ease of working with polystyrene — one of the key advantages. But there are nuances that affect the result.
Preparation: tools and materials
Tools are minimal: a sharp office knife or a fine-toothed hacksaw for metal, a 45-degree miter saw, a tape measure, a pencil, a level (preferably laser), and a construction glue gun.
An office knife cuts polystyrene cleanly, without chips. Guide the knife along the line several times, deepening the cut, then snap the profile along the cut line. For thick profiles, use a fine-toothed hacksaw.
A miter saw ensures an accurate 45-degree cut. A plastic miter saw costs 300-500 rubles, a professional wooden one 1000-2000. Without a miter saw, achieving an accurate angle is difficult — gaps at corners ruin the entire job.
Adhesive MUST be water-based. Polymer adhesives (Titan, Dragon), acrylic sealants, special compositions for polystyrene foam. Liquid nails on an acrylic base — universal choice, a 300-400 ml tube costs 200-300 rubles.
DO NOT use adhesives with organic solvents. Moment adhesive, epoxy compositions with thinners, polyurethane foams — all of these will destroy polystyrene. It will melt and lose its shape.
Installation process for ceiling cornices
Mark the perimeter with a laser level 1-3 cm from the ceiling (depending on cornice width). The horizontal line serves as a guide for the bottom edge of the profile.
Start with the internal corner of a long wall. Cut the first profile at 45 degrees for the corner, place it against the mark, and check. Apply adhesive to both surfaces of the profile — the one facing the wall and the one facing the ceiling. Apply in a zigzag or dots every 10-15 cm.
Place it against the corner, align the bottom edge with the mark, press it firmly against the wall and ceiling simultaneously. Hold for 30-60 seconds until the adhesive sets. Immediately wipe away any excess squeezed out from under the profile with a damp cloth.
Join subsequent profiles tightly to the previous ones. Cut straight joints at 90 degrees strictly perpendicular. The geometric precision of polystyrene gives a gap less than 1 mm — fill it with acrylic sealant.
Corners are the most critical area. Both profiles at 45 degrees, join them in the corner, check for tightness from both sides. Fill any micro-gaps up to 0.5 mm with sealant, smooth with a wet finger.
Allow the adhesive to fully dry for 24 hours before painting. Do not load the profiles before this — they may peel off under their own weight, ruining the entire job.
Installation of baseboards
No marking is required — the baseboard is installed flush against the floor. But check wall verticality with a level. If the wall is leaning, a gap will form between the baseboard and the wall.
Apply adhesive only to the vertical surface adjacent to the wall. Do NOT glue to the floor — flooring may "move" due to temperature and humidity deformations, causing the glued baseboard to detach or deform.
Mechanical fastening is not necessary for polystyrene baseboards due to their low weight. Adhesive is sufficient. But if you want extra assurance, you can fix them with finishing nails 30-40 mm long every 60-80 cm.
Painting: transforming into aesthetics
Fill all joints with white acrylic putty. Smooth with a wet putty knife, let dry for 2-4 hours. Sand lightly with 180-220 grit sandpaper. Remove dust with a dry cloth.
Priming is recommended for polystyrene. Acrylic primer seals pores, equalizes absorption, and improves final color. Apply with a brush or roller, let dry for 1-2 hours.
Paint MUST be water-based — water-emulsion, acrylic, latex. Alkyd and oil-based paints with organic solvents will destroy the material. Use quality paint — it covers in 2 coats; cheap paint requires 3-4.
First coat is thin, dilute paint with water by 10%. Apply with a 40-50 mm brush or small roller along the profile. Let dry for 2-4 hours. Second coat without dilution, evenly. After 2-4 hours, evaluate — if it shows through, apply a third.
Protect adjacent surfaces with painter's tape. Apply tightly against the profile, paint, then remove the tape once the paint is fully dry. This will result in a clean, sharp edge.
Limitations and mistakes: what to avoid
Understanding the material's weak points prevents disappointment and unnecessary expenses.
Critical errors when selecting adhesive
Error #1: using adhesive with solvents. Moment adhesive, solvent-based liquid nails, polyurethane foam — all of these destroy polystyrene. The profile melts, loses its shape, and the work is irreversibly ruined.
Signs of incorrect adhesive: sharp solvent odor, label on packaging stating "not for polystyrene", base — organic solvents. Use ONLY water-based adhesives marked "for polystyrene".
Installation errors
Error #2: mounting on uneven walls without leveling. Polystyrene is rigid and does not conform to wall waves. Gaps form, through which the wall is visible. Attempting to fill large gaps with putty results in thick, noticeable seams.
Solution: level walls with putty before mounting. Local irregularities up to 3-5 mm are acceptable; anything larger requires leveling.
Error #3: cutting corners "by eye" without a miter gauge. Even a 2-3 degree deviation creates a gap of several millimeters. Attempting to fill the gap with putty creates a noticeable seam.
Solution: use a miter gauge or a circular saw for precise 45-degree cuts. Check angles on scrap pieces before cutting finished profiles.
Error #4: painting immediately after mounting, without waiting for the adhesive to dry. The weight of paint and brush pressure may shift the profile while the adhesive is still wet. The line will be compromised, requiring redoing the work.
Solution: allow the adhesive to fully dry for 24 hours. Then paint. Patience at this stage will save hours of redoing work.
Errors in Operation
Error #5: installing polystyrene near heat sources. Radiators, fireplaces, ovens, powerful lights heat the material above 80°C. It softens, sags, and undergoes irreversible deformation.
Solution: maintain a minimum distance of 30-50 cm from heated surfaces. For areas near heat sources, choose heat-resistant materials — duroplastic, polyurethane.
Error #6: using polystyrene on floors in high-traffic zones. Corridors, entryways, commercial spaces. The material quickly develops dents and scratches, requiring replacement every 3-5 years.
Solution: in such zones, use durable materials — duroplastic, MDF, wood. Reserve polystyrene for living rooms with low traffic or for ceiling applications.
Error #7: integrating powerful LED lighting into polystyrene profiles. Strips of 14-18 W/m heat up to 60°C, close to the material's heat resistance limit. The profile may deform over time.
Solution: for lighting, use low-power strips of 5-10 W/m, or choose heat-resistant profiles made of duroplastic or aluminum.
Realistic expectations
Polystyrene does not replace premium materials in tactile quality. It is lightweight, produces a dull sound when tapped, visually indistinguishable after painting, but the tactile difference is noticeable. For most, this is insignificant; for perfectionists, it is critical.
Service life is limited to 10-15 years on ceilings, 5-10 on floors in living rooms. This is not 25-30 years for duroplastic, but sufficient for many. Within 10-15 years, you may want to refresh the interior, repaint walls — then replace the trim.
Polystyrene is not suitable for commercial spaces with high loads. Offices, stores, hotels require wear-resistant materials. Saving on material will result in frequent replacement costs.
Conclusion: A reasonable choice for reasonable conditions
The ceiling molding creates a frame around the perimeter. Between them is a smooth ceiling surface. This scheme suits rooms of any size and is universally stylish. It is important to correctly choose the proportions — the rosette should not be too large relative to the room's perimeter. и Polystyrene Cornice — materials for those who understand the balance of price and quality. Not universal, not premium, but optimal for specific conditions.
Ceiling trim — the ideal niche for polystyrene. Minimal mechanical loads, painting protects against UV, lightweight nature simplifies installation, price is accessible to any budget. After installation and painting, visually indistinguishable from expensive materials.
Polystyrene crown molding Lasts 15-20 years on ceilings without problems. This is not 30 years for duroplastic, but sufficient for most projects. Significant savings — 2-4 times cheaper than premium alternatives.
Polystyrene molding — classic solution, proven over decades of use. Simple profile at minimal cost creates neat transitions between ceiling and walls.
Understanding limitations is critical. Do not use polystyrene where its weaknesses are critical — on floors in high-traffic zones, near heat sources, for powerful lighting, in premium interiors where tactile quality matters.
Correct installation guarantees longevity. Water-based adhesive, precise corner cuts, leveled base, quality painting — follow the technology, and the result will be professional.
Company STAVROS offers a wide range of polystyrene trim. Ceiling moldings, cornices, moldings, decorative elements — hundreds of profiles in various sizes and styles. From simple to ornate, from minimalist to classic.
Professional consultations will help select optimal profiles for your project. Material quantity calculation, mounting recommendations, adhesive and paint selection — receive expert support.
Choose polystyrene thoughtfully. Understand its properties, apply it where it is optimal, avoid zones where its shortcomings are critical. Then the material will serve for years, delivering a worthy result at reasonable cost.