Article Contents:
- Role of trim and moldings in professional finishing
- Wooden trim and door trim: closing joints of door frames
- Trim for interior doors: door set as a unified system
- Wooden moldings: when flat, when decorative, when corner
- Oak molding and beech molding: influence of species on appearance and durability
- Wooden stopper and oak stopper: fixing glass, panels, and decorative inserts
- How to buy wooden trim, moldings, and stoppers in one project
- Step-by-step example of a node: door + casing + door trim + moldings + stopper
- Conclusion: STAVROS company — trim system for professional finishing

Joints, seams, junctions — this is a technological necessity of any construction. Two boards are never infinite; they must be connected — a joint appears. A wall is not perfectly flat, and a door frame abuts it — a gap appears. Glass is inserted into a frame — a gap appears, which must be covered and secured. Non-professional finishing leaves these joints visible and sloppy: gaps are filled with sealant (which darkens, cracks, and flakes over time), seams are filled with putty (which peels off during settling), junctions are loose (air leaks, look careless).Trimming Items, Wooden trim, Wooden molding, wooden trimThese are professional finishing tools that transform technical joints into decorative elements, mechanically (not chemically) cover gaps, create neatness, completeness, and quality of execution.Wood TrimThis is not an extravagance, but a standard of quality repair, where every joint is properly finished and will serve for decades without losing its appearance.


Role of trim and moldings in professional finishing
Buy wooden profiled productsThese are needed to solve three tasks: closing joints (technological gaps, gaps between construction elements), protecting vulnerable zones (corners, edges, edges that are easily damaged), decorative finishing (transforming a technical necessity into an aesthetic element). Joints are inevitable in any construction made of separate elements: wall panels join each other (with a 2-5 mm gap between them), the floor abuts the wall (a 10-15 mm technological gap — for compensating thermal expansion), doors are inserted into openings (a 10-30 mm gap between frame and wall, filled with construction foam). All these joints must be covered — otherwise they spoil the appearance, dust, cold, and moisture penetrate through them.
Closing a joint can be done in two ways: chemically (sealant, putty, foam) or mechanically (wooden strip — trim or molding). The chemical method is cheaper and faster, but unreliable: sealant darkens from UV, cracks from temperature changes, flakes during building settlement. Putty crumbles if the gap is movable (wood dries and swells with humidity changes, putty is rigid and does not compensate for movement). The mechanical method is more expensive (requires trim and installation), but long-lasting: a wooden strip presses against both surfaces, physically covers the gap, compensates for minor movements (wood is elastic and adapts to changes), serves for decades without losing its appearance.Wooden moldingThis is mechanical joint closure, a professional standard that guarantees longevity.
Protection of vulnerable zones — the second function of trim. Corners of walls (external, protruding) are easily hit, scratched, chipped. Edge of countertop, edge of shelf, end of panel — all these are vulnerable areas where material is exposed and unprotected. Without protection, corners and edges quickly wear out and lose their appearance. Corner molding (L-shaped strip) covers the corner, absorbs impacts, protects the wall or panel. End edge covers the end of the panel, protects from moisture (which penetrates the end faster than the face), from chipping.Wooden corner veneerThis is protection that extends the life of the structure by 2-3 times.
Decorative finishing — the third function of trim. A joint covered with sealant looks like a forced measure, like a patch. A joint covered with a beautiful contrasting wooden molding looks like a decorative element, part of the design.wooden veneer with a decorative profileMolding with carved profile turns the joint into a decoration, a line that structures the plane, creates a pattern.Decorative wooden moldingThis is when a technical necessity becomes an aesthetic solution, when joints are not hidden but emphasized, becoming part of the composition.
Compensatory gaps — are intentionally left gaps between finishing elements, allowing materials to expand and contract without deformation. Wood is a living material: with increased humidity, it absorbs moisture, swells, increases in size; with decreased humidity, it dries, shrinks. If wooden panels are installed without gaps, tightly against each other, when they swell, they will push against each other, warp, and pull away from the wall. If a 2-5 mm gap is left, panels have space to expand, nothing deforms. But the gap must be covered — otherwise it spoils the appearance.Wooden moldingMolding covers this gap, turns it into a decorative line that divides the plane, creates rhythm. The gap is technically necessary, molding makes it beautiful.


Wooden trim and door trim: closing joints of door frames
Door TrimThis is a system of elements that form the door frame and close all joints related to door installation: frame (the frame holding the door panel), casing (strip covering the gap between frame and wall), door jamb (expands the frame if the wall is thicker than standard), threshold (covers the bottom of the opening, optional element), door stop (covers the gap between two leaves of a double door). Each of these elements closes a specific joint, turns the gap into a neat node. Without trim, the door is installed but not finished — gaps, construction foam, wall irregularities are visible. With trim, the door is complete, all joints are closed, the structure looks unified and professional.
Door frame — this is a frame made of three strips (two vertical, one horizontal — the headboard), connected at right angles, into which the door panel is inserted and held. The frame is installed in the opening, with a 10-30 mm gap (depending on the opening's flatness) between the frame and the wall, filled with construction foam. The foam expands, fills the gap, secures the frame in the opening, provides sound and thermal insulation. But foam looks unattractive and must be covered. Casing covers this joint from the outside (from the room side), creating a decorative frame around the door. Casing width is 60-90 mm (covers the frame and foam with allowance), thickness 10-18 mm, profile flat or raised (bevel, rounded, groove). Casing is attached to the frame or wall with finish nails (thin nails without heads) or adhesive.
Door jamb — this is a strip that expands the frame if the wall thickness exceeds the frame width. A standard frame has a width of 70-100 mm, corresponding to the wall thickness with finish (brick + plaster + wallpaper = 80-100 mm). But if the wall is thicker (e.g., load-bearing wall 250 mm thick or wall with additional insulation), the frame does not cover the entire thickness, leaving a 50-150 mm gap between the frame edge and the wall surface. Door jamb covers this gap, expands the frame to the required width. Door jamb joins the frame in a groove or flush, forming a continuation of the frame. Door jamb thickness is 10-20 mm, width is selected as needed (50, 100, 150 mm — standard options, custom width available). Door jamb must be the same species as the frame and casing, same color, same finish — otherwise the difference is noticeable, and the structure appears assembled from different elements.
Door threshold — a strip covering the bottom of the opening, the joint between the floor and the bottom edge of the door panel. Threshold performs three functions: closes the gap (there is always a 5-10 mm gap between floor and door to prevent the door from rubbing against the floor), protects the bottom of the door from impacts (threshold absorbs impacts, the door is not damaged), provides sound insulation (threshold presses against the door from below, compressing the gap). Threshold is not always used: in interior doors, it is often omitted (to avoid tripping, for easier passage), in entrance doors and doors in wet areas (bathroom, toilet) it is mandatory (sound insulation and sealing are more important than convenience). Threshold height is 10-30 mm, width equals frame width, length equals opening width, profile beveled (to avoid tripping) or rectangular.
trim for interior doorsSold in sets: box (three planks 2.1–2.2 meters), casing (five planks 2.2 meters: two per side of the opening, one cut in half for horizontal top sections), dados (optional, if needed). The set is chosen to match the specific door: if the door is oak, the set is oak; if the door is beech, the set is beech. Species, color, finish must match — otherwise, the door and trim will look mismatched, like elements from different projects.Buy door trimMust be purchased simultaneously with the door, from the same manufacturer — guarantee of compatibility.
Our factory also produces:


Door trim for interior doors: door set as a unified system
Door set as a unified system — this is an approach where the door panel, box, casing, and dados are designed and manufactured as a single unit, not assembled from separate elements. A unified system means: one wood species (oak, beech, ash), one wood grade (Grade A, B, or "Extra"), one surface treatment (planed, sanded), one finish (varnish, oil, paint of one color), coordinated profiles (casing profile matches door panel profile). A unified system guarantees that all elements match in color (oak tone from one batch is identical across all elements), texture (wood grain pattern is similar), sheen (finish is applied uniformly). Separate elements (door purchased from one manufacturer, box from another, casing from a third) almost never match perfectly — there are always differences in tone, texture, sheen, revealing amateurism.
trim for interior doorsThe door trim elements serve different purposes, but all must be visually coordinated. The box — a load-bearing element that holds the door, transfers load to the opening, works under bending and torsion (door weighs 20–40 kg, creates torque when opening). The box must be strong, made of hardwood (oak, beech, ash), 30–40 mm thick, with a rebate (groove into which the door panel is inserted). The casing — a decorative element that does not bear load, works only on aesthetics. The casing can be thinner than the box (12–18 mm vs. 30–40 mm), made of the same species or even softer wood (if painted with opaque paint, species is not critical). The dado board — an intermediate element that extends the box, partially bears load (the edge of the door panel may rest on it when opening). The dado board must be of the same strength, species, and thickness as the box.
Door trim profiles must match each other and profiles of other interior elements (baseboards, moldings). If the floor baseboard has a rounded top, the door casing should have a similar rounded top (not necessarily identical, but related — from the same family of shapes). If the baseboard has a complex profile (multi-step), the casing should also be complex. If the baseboard is simple (flat plank with bevel), the casing should also be simple. This creates visual unity in the interior, where the door is not an alien element, but part of the system. The thickness of the casing and baseboard should be close (difference no more than 5 mm), otherwise, at the corner where the baseboard meets the door, there will be a step — visually unattractive, indicating poor planning.
Joining of door trim elements — a critical moment that determines quality of execution. Casing joints in corners (two vertical casings and horizontal top form a frame) at 45 degrees or 90 degrees butt joint. 45-degree joint is more elegant, classic method, requires precise cutting (any error in angle is visible, joint is not tight, gap is noticeable). 90-degree joint is simpler, faster, horizontal casing lays on top of vertical ones, forming a T-joint. For complex profiles (decorative casings with relief) 45-degree joint is the only correct option (profile matches on both planks, pattern is uninterrupted). For simple profiles (flat plank) butt joint is acceptable.
Box joins with dado board in a groove (groove is cut into the box, dado board edge fits in — most reliable connection, no gap) or butt joint (dado board edge is glued to box edge — simpler, but less reliable, may have a gap). Groove joint requires milling the groove on production, but ensures quality, durability, no gaps. Butt joint is easier to install, but requires precise fitting (if edges are not straight, gap is inevitable). Threshold joins with box from below, usually butt joint (threshold abuts vertical box stiles, glued and screwed). Threshold and box joint may be visible (if not covered by door in closed position), so must be neat, no gaps, no height discrepancies.
Get Consultation
Wooden trim: when flat, when decorative, when corner
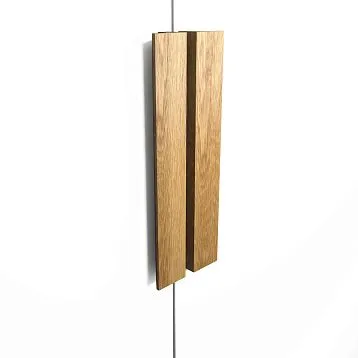
Flat wooden plank— simplest trim type: rectangular plank without profile, simply planed small-section stock (width 10–25 mm, thickness 5–10 mm). Flat trim is used to cover panel joints on walls (between two veneer panels, gap 2–3 mm, trim covers it, creates vertical line), to frame simple frames (rectangular frame on wall, contrasting insert inside), to create decorative lines (trim is glued to surface, forming graphics, grid). Flat trim suits modern interiors where minimalism, lack of decoration, clean lines are important. It does not distract with relief, works as a thin graphic line that structures the surface.
When flat trim is needed: panel joints where invisibility is important (trim painted to match panels, only a thin shadow is visible), frames in minimalist interiors (where any relief would be excessive), zoning of surface with thin lines (trim divides wall into rectangles, creating graphic pattern without volume). Flat trim — it’s about graphics, about two-dimensionality, about line on surface. It does not create volume, does not protrude, does not cast strong shadows. It’s the cheapest trim type (price from 50 to 150 rubles per linear meter), fastest to install (cut with regular saw, glued to any surface), most versatile (suitable for any style if color is chosen correctly).
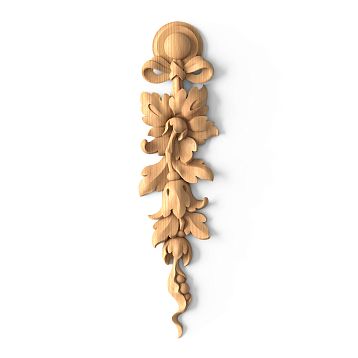
wooden veneer with a decorative profile— trim with complex curved profile, resembling miniature molding (width 30–50 mm, thickness 10–20 mm, profile multi-step: three to four transitions, protrusions, recesses, rounded corners). Decorative trim is used to frame panels in classic doors (trim glued around panel, creating relief frame), to finish furniture facades (flat facade becomes framed-panel with decorative trim), to create decorative wall panels (trim forms complex geometric relief patterns). Decorative trim — it’s about volume, about play of light and shadow, about decoration. It protrudes above the surface, casts shadows, creates relief that changes depending on lighting.
When decorative trim is needed: classic interiors (baroque, empire, classicism), where decoration is part of style, panel doors and furniture (where trim emphasizes construction, creates visual complexity), walls with framed panels in classic style (where frames should not be thin lines, but volumetric elements). Decorative trim is 3–5 times more expensive than flat trim (price from 300 to 700 rubles per linear meter), as it requires complex processing on milling machines. Installation is more complex: 45-degree corner joints must be perfect (profile on both planks must match exactly, otherwise pattern is interrupted, error is visible). Coloring is more complex: paint must fill all profile recesses, leaving no gaps.
Wooden corner veneer— L-shaped profile trim for covering internal or external corners (shelf width usually 15×15 mm, 20×20 mm, 25×25 mm, standard length 2–2.5 meters). Corner trim is used to cover corner joints of two panels (wall panels meet at corner, gap of variable width, trim covers it, creates clear edge), to protect external corners (protruding wall corner is easily damaged, corner trim absorbs impacts, protects the corner), to finish internal corners (corner trim creates neat transition between two planes). Corner trim — it’s about geometry, about clear edges, about protection and finishing simultaneously.
When corner trim is needed: panel joints at corners (veneer, MDF, plywood panels — corner joints are especially noticeable, corner trim covers them, makes corner neat), external corners in traffic zones (where corner is exposed to impacts, scratches — trim protects), internal corners where visual clarity is needed (trim creates pronounced edge that structures space). Corner trim is mounted with glue (liquid nails, PVA) or finish nails (thin nails, driven into both trim shelves, nail heads are spackled). Corner trim must be of the same species as panels or painted the same color. Price from 100 to 300 rubles per linear meter (depends on species, shelf size).
Decorative wooden molding— general term for trim with profile (not flat): bevel (slanted edge), rounded edge (rounded edge), groove (recess along plank), combination transitions (bevel + rounded edge, rounded edge + groove). Decorative trim is used in interiors where detail, visual richness of forms is important. Profile creates relief, shadow, complicates trim shape, makes it noticeable, expressive. The more complex the profile, the more expensive the trim, the more complex the installation, the more expressive the result.Buy wooden trim— must be of the type matching interior style: flat for minimalism, decorative for neoclassicism, decorative for classicism, corner for any style (functional element).
— premium choice for trim where displaying natural wood texture is important. Oak has large-pored texture with contrasting growth rings, transitions between early and late wood. This texture is visible even on narrow trim 20 mm wide, especially with transparent finish (oil, varnish). Oak is hard (Brinell hardness 3.7–4.0), does not fear moisture (with proper treatment), does not deform, lasts decades.
Oak veneerPremium choice for veneers where displaying natural wood texture is important. Oak has a large-pored texture with contrasting growth rings and transitions between early and late wood. This texture is visible even on narrow veneers as thin as 20 mm, especially with transparent finishes (oil, lacquer). Oak is hard (Brinell hardness 3.7–4.0), resistant to humidity (when properly treated), does not warp, and lasts for decades.Buy oak veneer— 1.5–2 times more expensive than beech, 3–4 times more expensive than pine, but this premium is justified by aesthetics (expressive texture, status) and durability (oak does not wear, does not scratch, retains shape under humidity changes).
Influence of oak species on trim appearance: oak trim under transparent finish (oil, varnish) shows full beauty of texture — large pores, contrasting rings, color shifts from light yellow to dark brown. This texture works as decoration, as visual accent. Oak trim painted with opaque paint loses texture — only shape and paint color remain. Painting oak with opaque paint is irrational (texture is oak’s main advantage, hiding it is wasteful), but if style requires (Scandinavian style with white wooden elements), oak is painted. Oak trim is used in interiors where oak is the main species: oak doors, oak parquet, oak baseboards. Trim connects all these elements, creating visual unity.
Influence of oak species on trim durability: oak does not wear (even in traffic zones where trim is subject to friction, oak retains shape for decades), does not scratch (high hardness, scratches are superficial, easily sanded), does not deform under humidity changes (oak is stable, dries and swells less than pine or beech). Oak trim lasts 30–50 years without loss of appearance (with proper treatment and care), while pine trim lasts 10–15 years (soft wood wears, scratches, deforms). Oak — an investment in durability that pays off because replacement is not needed after 10–15 years.
Beech trim— balanced price and quality for trim in modern and neoclassical interiors. Beech is hard (hardness 3.8), almost matches oak in strength, but 30–50% cheaper. Beech texture is fine-pored, uniform, without clearly expressed growth rings. Wood is light, rose-beige, calm, neutral. Beech trim is used in interiors where light wood without aggressive texture is important: Scandinavian style (light wood, minimal decor), neoclassicism (light tones, moderate detailing), modern style (neutral wood without pronounced pattern).Beech strips for sale— can be 30–40% cheaper than oak, which, with large volumes (covering walls with panels and trim requires dozens of linear meters), provides significant savings.
Influence of beech species on trim appearance: beech trim under transparent finish (oil, varnish) shows uniform light texture without contrasts, calm, neutral. Beech does not dominate texture (like oak), but creates background on which other elements (furniture, decor, wall color) stand out. Beech trim painted (white, gray, black paint) gives even coverage without contrasting spots (uniform texture accepts paint well). Beech is often painted in Scandinavian interiors, where white wooden elements are preferred. Beech trim is used with beech doors, beech casings, beech baseboards — species unity creates visual connection.
Influence of beech species on trim durability: beech wears slower than pine (high hardness), but faster than oak (oak is still harder). Beech scratches less than pine, but more than oak. Beech is sensitive to humidity: at high humidity it may swell, at low humidity — dry out, crack. Therefore, beech trim is not suitable for humid rooms (bathroom, sauna), but works excellently in living rooms, bedrooms, offices. Beech trim lasts 20–30 years (with proper treatment and normal humidity), less than oak (30–50 years), but more than pine (10–15 years). Beech — optimal choice for most projects where balance of price, quality, durability is important.
Comparison of species for trim: pine (budget option, soft, with knots, suitable only for opaque paint, price 50–150 rubles per linear meter, durability 10–15 years), beech (mid-range, hard, uniform, suitable for paint or transparent finish, price 150–300 rubles, durability 20–30 years), oak (premium, hard, with pronounced texture, suitable for transparent finish to display texture, price 250–500 rubles, durability 30–50 years). Species choice depends on budget, interior style, whether texture will be visible (transparent finish) or hidden (opaque paint). For transparent finish in classic style — oak, for transparent finish in modern style — beech, for opaque paint — beech or pine (texture not visible, paying extra for oak is unnecessary).
Wooden stop — thin small-section element (8×8 mm, 10×10 mm, 12×12 mm, 15×15 mm), used to fix glass in window, door, furniture frames, as well as to fix panels, decorative inserts in framed structures. Stop performs three functions: mechanical fixation (stop presses glass or panel against frame, holds during vibrations, impacts, temperature changes), sealing (stop presses gasket or sealant between glass and frame, creating airtight contour), decorative finishing (stop covers edge of glass or panel, creates smooth transition from frame to insert, visually completes the structure).
wooden trimWooden stop — thin small-section element (8×8 mm, 10×10 mm, 12×12 mm, 15×15 mm), used to fix glass in window, door, furniture frames, as well as to fix panels, decorative inserts in framed structures. Stop performs three functions: mechanical fixation (stop presses glass or panel against frame, holds during vibrations, impacts, temperature changes), sealing (stop presses gasket or sealant between glass and frame, creating airtight contour), decorative finishing (stop covers edge of glass or panel, creates smooth transition from frame to insert, visually completes the structure).Buy wooden cleatThe same section as required by the construction (the depth of the rebate in the frame determines the thickness of the stop), of the same species as the frame (if the frame is oak, the stop is oak).
Fixing glass with a stop: the glass is inserted into the rebate of the frame (a recess around the opening 10-20 mm deep), placed on the sealing strip or sealant, and pressed from the back by the stop, which is secured with small nails (15-20 mm nails without heads) or glued (liquid nails, polyurethane glue). The stop must fit tightly against both the glass and the frame, without gaps — otherwise, there will be air leakage and the glass will rattle. The stop’s cross-section is chosen so that it overlaps the edge of the glass by 5-8 mm on each side (if the rebate depth is 15 mm and the glass thickness is 4 mm, the stop should be 10×10 mm or 12×12 mm). The stop profile is usually rectangular (simple, universal) or rounded (softens the line, tactilely pleasant), rarely beveled (classic style).
Fixing panels with a stop: framed-panel constructions (doors, furniture facades, wall panels) consist of a frame and panels (inserts). The panel is inserted into the frame’s groove and secured from the back by the stop, which presses the panel against the frame, preventing it from falling out and compensating for thermal expansion (the panel may shrink or swell, the stop holds it in place under any conditions). The stop for panels is usually thinner than for glass (8×8 mm, 10×10 mm), since panels are lighter than glass and do not require the same secure fixation. The stop is secured with small nails or glue, flush with the frame or protruding 1-2 mm (creating a decorative protrusion).
Fixing decorative inserts with a stop: mirrors, pictures, photographs in wooden frames are held by the stop from the back. The frame has a rebate (recess) into which the mirror or picture under glass is inserted, and from the back it is pressed by the stop and backing (plywood, orgalite, which covers the back of the frame). The stop secures the mirror, preventing it from falling out, and protects the mirror edge from chipping. The stop for frames is usually of small cross-section (8×8 mm, 10×10 mm), inconspicuous, since it is located on the back of the frame. It is secured with small nails (15-20 mm nails) driven into the frame through the stop.
Oak trimOak frames, doors, furniture — the stop must match the species and color of the frame. Oak is hard, durable, does not crack (with proper treatment), lasts for decades. An oak stop is 3-4 times more expensive than pine, but for oak constructions, it is the only correct choice — material unity is more important than cost savings. An oak stop has a pronounced texture (visible growth rings, pores), making it visually more interesting than pine (even if the stop is on the back side, during repair or glass replacement, the texture is visible). Under transparent varnish or oil, the oak texture acts as a decorative element; under paint, it is hidden (in that case, the extra cost for oak is not justified — you can take pine or beech).
Installing the stop: the stop is installed after the glass or panel is inserted into the frame. The glass lies on the sealing strip, is pressed, and from the back, the stop is installed, which is nailed with 15-20 mm nails (driven with a pneumatic stapler or hammer with a punch, heads almost invisible) or glued (liquid nails, thin layer, pressing for 10-20 minutes). The stop’s corners are joined at 45 degrees (at the frame’s corners, forming a neat frame around the glass) or at 90 degrees butt joint (simpler, but less elegant). Joining at 45 degrees requires precise cutting with a circular saw; any error in the angle is visible. After installation, the stop is painted or varnished to match the frame’s color (if the frame is painted, the stop is painted the same color).
How to buy trim, moldings, and stops for one project
Buy wooden profiled products, Wooden molding, Buy wooden cleatMust be purchased from one manufacturer in one batch — guarantee that all elements are made from the same batch of wood, the tone matches, the texture is uniform. Buying from different manufacturers almost always leads to differences in tone (even within the same oak species, batches vary from light to dark), texture (wood grain pattern differs), and processing (one manufacturer sands better, another worse). One manufacturer, one batch, one order — this is a guarantee of visual unity.
Procurement algorithm for trim, moldings, and stops for a project: determine the complete list of elements (baseboards, casings, door frames, filler boards, panel joint moldings, glass stops), calculate the quantity of each element (perimeters, lengths, number of doors), select one wood species for all elements (oak, beech, or pine), select the finish (sanded, polished), select the coating (uncoated for painting on-site, coated with oil or varnish, pre-painted). Prepare a specification (table: element name, cross-section, length, quantity, species, finish, coating), send to the manufacturer, receive cost and delivery estimates.
Quality check upon receipt: each board must be straight (no bends, no twisting along the axis), with precise dimensions (width and thickness are uniform along the entire length, tolerance ±0.3 mm), with a smooth surface (no scratches, no chips, no wood splinters), with moisture content 8-12% (measure with a moisture meter — if moisture exceeds 15%, the trim will dry out after installation, causing gaps). Grade must match the order (Grade A, B, or 'Extra' — the higher the grade, the fewer defects). Check each board before accepting the batch, prepare an act upon discovering defects, request replacement. Do not accept defective items — problems will appear during installation, and rework will cost more than replacement at the delivery stage.
Color and coating coordination: if transparent coating (varnish, oil) is ordered, request the manufacturer to show color samples (small boards coated with the same oil or varnish). Check how the texture looks, whether the tone matches across different elements (casing, baseboard, molding). If the tone does not match (one darker, another lighter), request correction: use tinted oil (oil with pigment that equalizes tone), or choose another coating (opaque paint that hides differences). If opaque paint is ordered, ensure that the color is the same for all elements (one paint from one manufacturer, applied in one batch either at the factory or on-site).
Storage until installation: trim, moldings, and stops must be stored in a dry, heated room (humidity 40-60%, temperature 18-25°C), horizontally (on a flat surface to prevent warping), wrapped in stretch film or cardboard (protection from dust, moisture, mechanical damage). Do not store outdoors, even under a canopy — wood will absorb moisture, swell, and after installation, dry out, causing gaps. Do not store vertically leaning against walls — thin boards (moldings, stops) will bend under their own weight. Storage time until installation — no more than 2-3 months (wood remains stable under proper storage conditions, but prolonged storage increases the risk of deformation).
Step-by-step example of a joint: door + casing + door trim + moldings + stop
Joint of an interior door with a glass insert in classic style — example where all types of trim work together. The door panel is oak, panelled (framed-panel construction: frame made of solid oak, inside two wooden panels at the bottom and one glass insert at the top). Door height 2000 mm, width 700 mm, thickness 40 mm. The door frame consists of 100×40 mm beams (two vertical, three horizontal — top, middle, bottom). Panels are inserted into 10 mm deep grooves in the frame and secured from the back with moldings. The glass insert, 600×300 mm, is inserted into the frame’s rebate and secured with a stop.
Step 1 — installing panels: wooden panels (two pieces, 600×300 mm, 12 mm thick, solid oak) are inserted into the bottom grooves of the frame. Panels have a 2-3 mm clearance around the perimeter (clearance to compensate for thermal expansion — wood shrinks and swells, the clearance prevents panels from jamming against the frame and deforming). From the back of the door, panels are secured with 10×10 mm oak stops: the stop is cut around each panel, nailed with 15 mm nails, pressing the panel against the frame, preventing it from falling out. The stop is painted to match the frame’s tone (dark oil that darkens oak to brown). The stop’s corners are joined at 45 degrees, forming a neat frame around the panel.
Step 2 — installing the glass insert: glass is transparent, 4 mm thick, 600×300 mm, edges processed (sanded, no chips). The glass is inserted into the top rebate of the frame (rebate — recess 12 mm deep, 8 mm wide), placed on a 2 mm thick transparent silicone sealing strip (prevents glass from rattling). From the back of the door, the glass is pressed by a 12×12 mm oak stop, which is nailed with 20 mm nails, tightly pressing the glass against the frame and sealing the joint. The stop is painted to match the frame’s tone, corners joined at 45 degrees. The stop overlaps the glass edge by 6 mm on each side, securely fixing it and visually covering the edge.
Step 3 — installing the door in the frame: the door frame is oak (three boards: two vertical 2100 mm, one horizontal 750 mm, 90×30 mm cross-section, with a rebate for the door panel). The frame is assembled (joined at 90 degrees, connected with screws), installed in the opening (opening width 800 mm, height 2100 mm, wall thickness 100 mm). Between the frame and wall, a 10-20 mm gap is filled with construction foam (polyurethane foam, expands, fills the gap, secures the frame in the opening, provides sound insulation). The frame is set level (vertically, without misalignment), secured to the wall with anchors, foam is injected, expands, and cures. Excess foam is cut with a knife.
Step 4 — installing casings: oak casings (width 70 mm, thickness 16 mm, profile with one rounded edge) are cut to opening dimensions. Two vertical casings 2100 mm long are attached to the frame sides, one horizontal casing 800 mm long (cut from a 2200 mm board) is attached on top. Casings are joined at 45 degrees (circular saw, precise cut, profile matches on both boards, tight joint without gap). Casings are secured with 35 mm finish nails (driven with a pneumatic stapler, heads pressed 1 mm down, filled with wood-colored putty, sanded flush). Casings cover the gap between the frame and wall, hide construction foam, and create a decorative frame around the door. Casings are painted with the same oil as the door and frame — uniform tone.
Step 5 — finishing the joint with baseboard: the oak baseboard (height 100 mm, thickness 18 mm, profile similar to casing — one rounded edge) fits the door on both sides. The baseboard rests against the casing, joined at 90 degrees butt joint (the baseboard’s end is cut perpendicular to the casing’s side face). The joint is neat, tight, without gaps. The baseboard is painted with the same oil as the door, frame, and casings — everything in one tone. The baseboard, casings, frame, and door visually connect: one species (oak), one color (dark oil), related profiles (rounded edge repeats in casing and baseboard). The joint looks complete, professional, finished.
Final joint: door with panels (secured with back-mounted moldings-stops), with glass insert (secured with stop), installed in frame (finished with casings, joined with baseboard). All joints are covered with trim: gap between frame and wall — casing, joint between baseboard and casing — neat butt joint, panels — stop, glass — stop. No visible gaps, no sealant, no putty — only wood, only mechanical connections that last for decades. This is professional finishing of joints, seams, and junctions, where each element is in its place, performs its function, coordinated with others.
Conclusion: STAVROS — a trim system for professional finishing
Trimming Items, Wooden trim, Wood Trim, Wooden molding, wooden trimThis is not minor details bought at the last minute. This is a system of elements that transforms joints, seams, and junctions from problematic zones into neat joints, turning technical necessity into decorative solutions.Door Trim, trim for interior doors, Flat wooden plank, wooden veneer with a decorative profile, Wooden corner veneer, Oak trimEach element performs its function, but together they create professional finishing, where no visible gaps, no sealant, no putty — only wood, only mechanics, only quality.
door framesDoor boxes, Casingsof all profiles,filler boards, layoutsflat, decorative, shaped, corner,trimof all sections. Species: pine (budget option for painting), beech (balance of price and quality, universal), oak (premium, expressive texture, durability).Oak veneer, Beech trim— for interiors where showcasing natural texture or uniform light wood is important.Buy oak veneer, Beech strips for sale, Buy wooden cleat— all from one manufacturer, from one batch of wood, with guaranteed color match.
Production: kiln-dried to 8-12% moisture content (will not dry out after installation), processed on modern equipment (precise geometry with tolerance ±0.3 mm), machine or hand-sanding (smooth surface, ready for painting or varnishing), quality control at every stage. Packaging in stretch film, delivery to St. Petersburg, Moscow, Russia.Buy wooden profiled productsfrom stock (standard profiles available) or order from production (custom profiles, non-standard lengths).
Consultations for selecting trim: STAVROS specialists will help prepare a specification for the door (frame + casings + fittings), calculate panel joint layouts, select the appropriate section of trim for glazing. Showrooms in St. Petersburg and Moscow: samples of all profiles and species, you can touch, compare, and choose. Contact: 8 (800) 555-46-75, websitestavros.ruSTAVROS — trim, layouts, and trim pieces for professional finishing of joints, seams, and connections. Where every element is in place, every joint is neat, every detail is thought out. Quality is seen in the details — STAVROS creates these details.