Article Contents:
- Why LED profiles have become a trend in interior design
- Revolution of LED technology
- Psychology of hidden lighting
- Architectural space modeling
- Economic feasibility
- Design possibilities
- Features of duro-polymer baseboards for hidden lighting
- Ideal geometry
- Thermal resistance for powerful lighting
- Smooth reflective surface
- System longevity
- Wide range of profiles
- Light placement options: ceiling, walls, floor
- Ceiling lighting: classic of the genre
- Wall lighting: vertical accents
- Floor lighting: floating surfaces
- Multi-level lighting: volumetric lighting environment
- Compatibility with stretch ceilings
- Installation Technology
- Choice of fabric type
- Operating features
- Installation and selection of LED strip power
- Lighting power calculation
- Choosing a Power Supply
- System installation
- Setup and control
- Frequently Asked Questions
- How much does it cost to organize LED lighting?
- Is it possible to install lighting in an already finished interior?
- What color temperature to choose?
- Can lighting be used as primary lighting?
- How often should LED strips be replaced?
- Does the lighting get hot?
- Is the lighting safe for children?
- Can brightness and color be adjusted?
- What to do if part of the strip has stopped glowing?
- Is it difficult to install the system yourself?
- Conclusion: Light as an architectural element
Turn on the light — and the room is flooded with bright light from the central chandelier. Turn off — you plunge into complete darkness. There is nothing between these extremes. No half-tones, no atmosphere, no control over the mood of the space. Ordinary lighting works on the principle of 'all or nothing', and this is no longer sufficient for modern interiors.
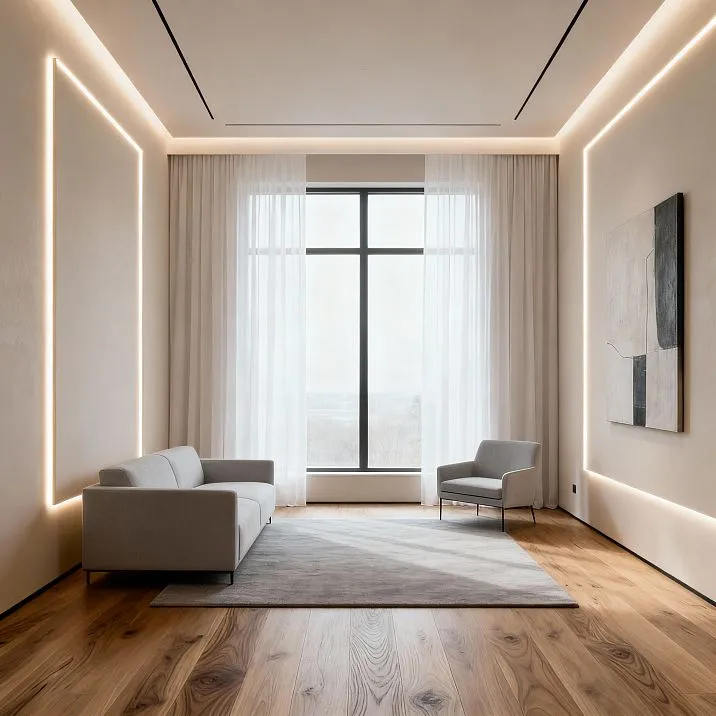
Imagine another picture. A thin line softly glows along the perimeter of the ceiling. The ceiling seems to float above your head. Walls near the floor are subtly illuminated — the space gains depth, the room appears larger. No visible fixtures, only the result of their work. Light emanates from the architecture itself, as if built into the walls and ceiling from the start.
Ceiling trim for LED lighting LED profiles have turned this fantasy into an accessible reality. Special profiles with built-in channels for LED strips have changed the perception of light's role in interior design. This is not just lighting — it is an architectural tool for shaping space, controlling perception, and creating emotional states. Let's explore why this technology has become a trend and how to use it most effectively.


Why LED profiles became a trend in interior design
Hidden lighting existed even before LEDs. Fluorescent lamps and neon tubes were used to create lighting effects. But it was LED technology that made hidden lighting widely accessible, energy-efficient, and safe.


The revolution of LED technology
LEDs changed the rules of the game. Energy consumption is 8-10 times lower than incandescent lamps at the same light output.
LED ceiling trim A 10 W/m strip around a 20-meter room consumes 200 W — like two ordinary bulbs, but creates even lighting throughout the entire space.
Service life reaches 50,000 hours — that’s 15-20 years with daily use of 8 hours. During this time, ordinary lamps would need to be replaced dozens of times. Savings on replacements are enormous, especially in rooms with high ceilings, where each replacement is a costly event.
Low voltage (12-24V) makes the system absolutely safe. Even in case of accidental insulation damage, there is no risk of electric shock. Can be installed in children’s rooms, wet areas, wooden houses without any concerns.
Minimal heating — a critical advantage. LEDs heat up to 40-60°C, which is safe for any materials. Can be mounted on wood, plastic, polystyrene without risk of deformation. Fluorescent lamps heated up to 100-120°C, creating a fire hazard.
The compactness of LED strips opened up new possibilities. Strip thickness of 2-3 mm allows hiding it in profiles of minimal width. Create thin light lines, integrate lighting into the most compact structures. With lamps, this was impossible.
Our factory also produces:


Psychology of hidden lighting
The human brain perceives hidden light sources as natural. A light line without a visible source does not irritate the eyes, does not create glare, does not cause visual strain. Psychologically more comfortable than the sharp, directional light of a chandelier.
Soft diffused lighting relaxes. In a room with hidden lighting, a person relaxes faster, stress levels decrease. This is especially important in bedrooms, relaxation zones, and meditative spaces, where relaxation is the primary function.
Controlling brightness and color gives control over mood. Bright cool light activates, energizes, and prepares for work. Dimmed warm light calms, creates intimacy, prepares for sleep. RGB lighting adds emotional color — each color affects the psyche differently.
The absence of shadows from a single source creates volumetric lighting. Light lines along the ceiling perimeter evenly flood the room with light without sharp shadow boundaries. Faces appear natural, the interior is perceived harmoniously.
Get Consultation
Architectural modeling of space
LED strip trim — it is a tool for changing the perception of architecture. A light line along the ceiling visually lifts it by 20-30 cm. The room appears higher, more spacious, and airier. Critically important for apartments with standard ceilings of 2.5-2.7 m.
Lighting along the floor creates the effect of floating walls. Light lines at the base expand the space horizontally, making the room appear wider. In narrow corridors, this technique compensates for the lack of width.
Light zoning divides space without physical barriers. In studios and open-plan apartments, different lighting scenarios define functional zones. Living room — bright neutral light, dining area — warm medium brightness, relaxation zone — dimmed.
Light highlights architectural details, emphasizing design solutions. Multi-level ceilings, niches, columns, moldings — all of this is enhanced by backlighting, becoming more expressive. During the day, form is read through shadows, at night — through light.
Economic feasibility
The initial costs of the hidden lighting system pay for themselves within 2-3 years. The electricity savings are significant — LED strips consume 8-10 times less than equivalent incandescent lamps. When used 4-6 hours daily, the annual savings per room amount to 500-1000 rubles.
The absence of the need to replace lamps for 15-20 years saves time and money. The cost of an electrician’s work to replace lamps in a chandelier on a high ceiling — 1000-2000 rubles. Over 20 years, you save 10,000-20,000 rubles solely on maintenance.
Increases property value at sale. Professionally installed hidden lighting is a competitive advantage for the property. Buyers are willing to pay more for a modern solution that creates a wow effect upon viewing.
Design Possibilities
Light lines create graphics in space. Straight, curved, or radial — any configuration is realized using profiles and LED strips. Light becomes a design material on par with concrete and glass.
Colored lighting transforms the interior. RGB strips offer millions of shades. Today, the room is in cool blue tones, tomorrow — in warm amber, the day after — in purple. One interior, infinite variations in perception.
Dynamic scenes are programmed via controllers. Smooth color transitions, pulsing to music, simulating sunrise and sunset, festive programs. Light becomes an interactive element, responding to events and mood.
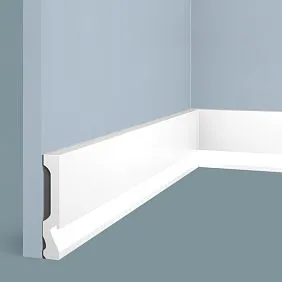
Features of duroplastic skirting boards for hidden lighting
Not every material is suitable for integrating LED lighting. Requires geometric stability, heat resistance, and longevity. Duroplastic meets all these requirements.
Ideal geometry
Duroplastic is 8-10 times denser than polystyrene, with a density of 350-420 kg/m³. This ensures absolute rigidity of profiles.
Skirting board for LED lighting Duroplastic does not sag over 5-7 meter sections, maintaining an ideal horizontal line.
Polystyrene profiles sagging over long sections create waves. When lighting is on, these become very noticeable — the light strip repeats the profile’s curves, revealing all geometric defects. Duroplastic eliminates this problem.
Duroplastic profile dimensions are more accurate. Deviations do not exceed 0.5-1 mm per 2-meter section. When profiles are joined, minimal gaps form, easily concealed with putty. Polystyrene is less stable — deviations reach 2-3 mm.
Stability under temperature fluctuations is critical. The linear expansion coefficient of duroplastic is 1.5-2 times lower than that of polystyrene. In rooms with large windows, where sunlight heats surfaces, duroplastic profiles do not deform, and joints do not separate.
Heat resistance for powerful lighting
LED strips with 14-18 W/m are used to create bright lighting. They heat up to 50-60°C during prolonged operation. Polystyrene may soften and sag at such temperatures. Duroplastic withstands temperatures up to 90-110°C without deformation.
Prolonged exposure to heat does not affect duroplastic. Lighting operates 6-8 hours daily for years — the profile remains in its original form. Polystyrene profiles with powerful strips may gradually change geometry over time.
Heat dissipation from LEDs through the profile improves their performance. Duroplastic is denser, dissipates heat more effectively than porous polystyrene. LEDs operate in a more comfortable temperature regime, extending their lifespan.
Smooth reflective surface
Duroplastic has a dense, smooth surface without visible pores. After painting, it becomes almost glossy, reflecting light more efficiently than porous polystyrene. More light is directed into the room, less is absorbed by the material.
Surface cleanliness is important for even lighting. Any irregularities, pores, or roughness create local shadows and glare when LEDs are closely spaced. The smooth surface of duroplastic ensures even light distribution.
The whiteness of the material is preserved for decades. Polystyrene may yellow under UV exposure from large windows. A yellowed profile alters the color temperature of the lighting, distorting perception. Duroplastic remains stable and stays white.
System longevity
Duroplastic profiles last 25-30 years without losing properties. Quality LED strips operate 30-50 thousand hours — that’s 10-20 years with daily use of 4-8 hours. The system enters its second service cycle simply by replacing the strips in existing profiles.
Duroplastic’s impact resistance protects against accidental damage during furniture installation, equipment setup, or accidental impacts. A polystyrene profile can easily crack, while a duroplastic one withstands without consequences.
Absolute moisture resistance. Duroplastic does not absorb moisture, does not swell, and does not lose strength in humid environments. Can be installed in bathrooms, kitchens, and pool areas — the lighting will operate for decades.
Wide range of profiles
Manufacturers offer dozens of duroplastic profiles for lighting. Height ranges from 50 to 200 mm, shelf width for LED strips from 20 to 50 mm. You can select a profile suitable for any lighting power and ceiling height.
The front surface can be smooth or textured. Smooth surfaces suit modern minimalist interiors. Textured profiles with classic ornaments fit historical styles but require more careful maintenance.
Special profiles for specific tasks expand capabilities. Shadow profiles for creating glowing gaps, two-level profiles for combined lighting, corner profiles for multi-level ceilings — all available in duro-polymer.
Light placement options: ceiling, walls, floor
Hidden lighting is not limited to the ceiling. Light can be integrated into any plane of the room, creating a multi-level lighting environment.
Ceiling lighting: the classic of the genre
Ceiling trim for LED strip lighting Installed along the perimeter of the room, 7-12 cm from the ceiling. The LED strip is directed upward, light reflects off the ceiling and diffuses into the space.
The floating ceiling effect — the main advantage. The light strip visually separates the ceiling from the walls, creating a sense of lightness. Especially impressive with stretch ceilings — the glossy fabric reflects light, doubling brightness and depth.
The height of profile installation determines the character of the backlighting. A 7-8 cm setback creates a bright, concentrated light strip. A 10-12 cm setback provides soft, diffused illumination. The optimal gap of 9-10 cm ensures a balance of brightness and uniformity.
LED strip power is selected based on ceiling color. A white ceiling reflects 80-90% of light, so 7-10 W/m is sufficient for bright illumination. A dark ceiling absorbs most of the light, requiring 14-18 W/m for noticeable effect.
Light color temperature affects perception. Warm white 2700-3000K creates a cozy atmosphere, suitable for bedrooms and living rooms. Neutral 4000-4500K is universal and comfortable for any room. Cool 6000-6500K visually increases space, used in bathrooms and kitchens.
Wall lighting: vertical accents
Profiles with backlighting are installed vertically or horizontally on walls to create light accents. Light is directed upward, downward, or sideways depending on the desired effect.
Lighting niches and shelves highlights them from the general space. Profiles are mounted along the niche contour, LED strips illuminate the contents. Books, decor, collections become eye-catching exhibits.
Backlighting behind the TV reduces contrast between the bright screen and dark wall. Eyes tire less during prolonged viewing. RGB strips synchronized with the image are used to create a screen expansion effect.
Wall light panels are created by profiles installed in rectangular or other geometric shapes. The interior space is painted in contrasting color, profiles are illuminated along the perimeter. This creates a volumetric light object.
Vertical division of high walls with molding and backlighting breaks monotony. Light lines create rhythm, guide the gaze, and structure the space. Especially effective in rooms with 3.5-4 meter ceilings.
Floor lighting: floating surfaces
Light lines along the floor create a floating wall effect. Profiles are mounted 3-5 cm above the floor with clearance from the wall. Light passes through the gap, illuminating the lower part of the wall.
In long corridors, floor lighting acts as night orientation lighting. Enough light to avoid tripping, but not so bright as to wake up. Motion sensors can be used for automatic activation.
Staircase backlighting increases safety. Steps are illuminated from below, boundaries are clearly visible, risk of slipping is minimal. Especially important in homes with children and elderly people.
Backlighting under kitchen cabinets illuminates the work surface with directional light. Cooking is more comfortable than with overhead diffuse lighting. Aluminum profiles with matte diffusers are used for uniformity.
Multi-level lighting: volumetric lighting environment
Combination of ceiling, wall, and floor lighting creates a volumetric lighting space. Each level is controlled separately, allowing different lighting scenarios to be created.
Upper level — ceiling lighting — serves as primary evening lighting. Middle level — wall accents — highlight zones and objects. Lower level — floor lighting — creates night orientation lighting.
Independent control of contours provides flexibility. In the evening, all three levels are on — bright festive lighting. At night, only the lower level — minimal light for safety. During the day, only accent lighting can be turned on to create an atmosphere.
Smart control systems program scenarios. Morning — gradual increase in brightness, simulating dawn. Evening — smooth dimming, preparing for sleep. Movie night — dim backlighting behind the TV, everything else off. One system, many possibilities.
Combination with stretch ceilings
Stretch ceilings and hidden lighting — the ideal pair. Smooth fabric evenly reflects light, creating soft illumination without spots or dips.
Installation technology
Ceiling trim for LED lighting Backlighting is installed before stretching the fabric. The profile is mounted on the wall at the selected height, the LED strip is laid on the shelf. Then the ceiling is stretched, leaving a gap between the fabric and the top edge of the profile.
The gap size is critical. A narrow gap of 3-5 cm creates a bright, directional light strip, emphasizing the contour. A wide gap of 10-15 cm provides soft, diffused illumination, visually lifting the ceiling. The optimal gap of 7-10 cm ensures brightness and uniformity.
Wiring is laid out before installing the profile. Wires run from the power supply to the start of the LED strip, secured to the wall or ceiling. After installing the profile and strip, the wires are concealed behind the structure.
Wiring is laid out before installing the profile. Wires run from the power supply to the start of the LED strip, secured to the wall or ceiling. After installing the profile and strip, the wires are concealed behind the structure.
Choosing the type of fabric
Glossy fabric reflects light like a mirror, doubling the brightness of the backlighting. The floating ceiling effect is most pronounced. However, gloss shows all imperfections of the base ceiling, requiring an ideally prepared surface.
Matte fabric softly diffuses light, creating a calm, even glow. Imperfections of the base ceiling are less noticeable. The floating effect is less pronounced than with gloss, but many prefer matte finish for its natural appearance.
Satin fabric is a compromise between gloss and matte. A gentle silk-like sheen reflects light delicately, without harsh glares. It looks elegant and suits classic and neoclassical interiors.
The color of the fabric affects the efficiency of the backlighting. White reflects the most, providing bright lighting. Colored fabric alters the color temperature of the light — beige warms it, blue cools it. Dark fabric absorbs most of the light, making the backlighting function more as an outline.
Operating Features
Access to the LED strip for replacement is maintained. The fabric is tensioned with a gap from the profile, leaving the strip accessible. You can replace a faulty section without dismantling the ceiling.
Heat from LEDs does not affect the fabric. A 7-10 cm gap ensures sufficient ventilation. Even powerful strips of 14-18 W/m do not heat the fabric to dangerous temperatures. PVC fabric begins to soften at 60-70°C, but at a distance of 10 cm, the temperature does not exceed 30-35°C.
Static electricity on the fabric attracts dust. Dust settles on the lighting profile as well. Regular dry cleaning with a soft cloth or feather duster maintains cleanliness and brightness of the backlighting.
Installation and Selection of Strip Power
Correct installation of the system is a guarantee of longevity and effectiveness. Follow proven recommendations for an ideal result.
Calculating Lighting Power
For decorative backlighting, 5-7 W per meter is sufficient. It creates a soft glow and ambiance, but does not illuminate the room. Used as background evening lighting in addition to main lighting.
For functional lighting, 10-14 W/m is required with a white ceiling. This is already a full light flux, sufficient for reading, working, and daily life. Can be used as primary lighting in small rooms.
For dark ceilings, power is increased to 14-18 W/m. Dark surfaces absorb most of the light, requiring a more powerful source for a noticeable effect. Either paint the ceiling in light tones or increase the strip’s power.
Total system power = perimeter length × power per meter of strip. For a room with 20 meters of perimeter and a 10 W/m strip: 20 × 10 = 200 W. This is total consumption, less than three standard bulbs.
Choosing a power supply
The power supply block should exceed the total strip power by 20-30%. This provides a margin for startup currents and long-term stable operation. For a 200 W system, a 240-260 W block is needed; the nearest standard is 250 W.
Install the power supply in an accessible location for maintenance — in a ceiling niche, technical cabinet, or under the suspended ceiling on the raw surface. It must be ventilated; overheating shortens its lifespan.
Use 12V blocks for 12V strips and 24V blocks for 24V strips. Voltage is critical — mismatch will disable the strip. 24V is preferable for long runs — less voltage drop, more uniform brightness.
The protection class of the power block is selected based on the installation location. In dry rooms, IP20 (no protection) is sufficient. In humid areas, IP44 (splash protection) or IP65 (full waterproofing) is required. Avoid paying for excessive protection.
System Installation
Marking the installation line for the profile — the first step. Use a laser level to draw a strictly horizontal line around the room perimeter. Height from the ceiling is 7-12 cm depending on strip power and desired effect.
Install the profile using adhesive and self-tapping screws. Apply adhesive to the back, attach to the wall along the line, and fix every 40-50 cm with self-tapping screws. Sink screw heads and fill holes with spackle. Make profile joints tight and seal gaps with sealant.
Run wiring before laying the strip. From the power supply to the start of the strip, use 1.5-2.5 mm² wire. Secure to the wall or ceiling, lead to the profile rail. Observe polarity — mark positive and negative terminals.
Lay the LED strip on the profile rail. The strip has an adhesive layer, but for added security, apply transparent silicone sealant in dots every 20-30 cm. Lay the strip without tension or bends. Cut only at designated points.
Join strip segments using soldering or connectors. Soldering is more reliable but requires skill and a soldering iron. Connectors are easier, snap into place without tools, but contact may weaken over time. For critical installations, soldering is preferable.
Connect to the power supply while observing polarity. Connect the strip’s positive to the block’s positive, negative to negative. If reversed, the strip won’t light up but won’t burn out. Simply reconnect correctly. Test operation before final fixation.
Paint the profile after installing the strip. Fill joints and mounting areas with spackle, sand smooth. Optionally prime. Paint with water-based or acrylic paint in 2-3 thin coats. The painted profile blends seamlessly with the wall, and the strip is securely concealed.
The dimmer for adjusting brightness is installed between the power supply and the strip. Simple rotary dimmers cost 500-1000 rubles. Models with remote control — 1500-3000 rubles. Smart dimmers controlled via smartphone — 3000-6000 rubles.
RGB controller for color strips allows changing color and brightness. Basic models with remote control cost 1500-2500 rubles, providing access to basic colors and modes. Advanced controllers with Wi-Fi and smart home integration — 5000-10000 rubles.
Programming lighting scenes via the app. Morning scene — gradual brightness increase from 0 to 100% over 30 minutes, simulating sunrise. Evening — smooth dimming to prepare for sleep. Festive — dynamic color changes according to a preset program.
How much does it cost to organize LED lighting?
Frequently asked questions
How much does it cost to organize LED lighting?
For a room 20 m² (perimeter 18 m) you will need: profiles 10800-24000 rubles (duropolymers), LED strip 3000-6000 rubles, power supply 1500-3000 rubles, dimmer/controller 1000-5000 rubles. Total materials cost 16300-38000 rubles. Installation by yourself or +50-100% for professional labor.
Can lighting be installed in an already finished interior?
Yes, partial removal of ceiling skirting boards is required if they exist. Install profiles with a ledge for LED strips, run wiring, and connect. With careful work, wallpaper and ceiling won’t be damaged. Minimal dust, work time 1-2 days per room.
What color temperature to choose?
For bedrooms and living rooms — warm white 2700-3000K, creating a cozy atmosphere. For kitchens and bathrooms — neutral 4000-4500K, universally comfortable. For spaces where visual cleanliness is important — cool 6000-6500K. RGB strips offer all colors but are more expensive.
Can lighting be used as primary lighting?
Yes, if the strip’s power is 10-14 W/m and more. For a 15-20 m² room, this is sufficient for daily use. However, it’s more comfortable to combine with other light sources — resulting in a flexible system for various usage scenarios.
How often should LED strips be replaced?
Quality strips last 30-50 thousand hours — that’s 10-20 years with daily use of 4-8 hours. Brightness degradation begins after 70% of the lifespan. Replacement is simple — peel off the old one, stick on the new, connect. Profiles remain in place.
Does lighting get hot?
LED strips heat up moderately. Low-power 5-7 W/m — up to 30-40°C, barely noticeable. High-power 14-18 W/m — up to 50-60°C, warm to the touch but safe. No fire hazard. Duropolymers profiles withstand these temperatures without deformation.
Is lighting safe for children?
Absolutely. 12-24V voltage is not dangerous upon accidental contact. LED strips do not contain mercury, unlike fluorescent lamps. Minimal heating, no risk of burns. All materials are certified for residential use, including children’s rooms.
Can brightness and color be adjusted?
Yes, for this you need a dimmer (for single-color strips) or RGB controller (for color strips). Simple models with manual adjustment cost 500-1500 rubles. Models with remote control — 1500-3000 rubles. Smart systems with smartphone control — 3000-10000 rubles.
What to do if part of the strip stopped working?
Locate the break — where the light ends. Check solder joints or connectors. It may be enough to restore contact. If the section is faulty, cut it out and connect the working parts with a new strip segment. The strip can be cut and soldered anywhere.
Is it difficult to install the system yourself?
Installing profiles is accessible for a homeowner with basic skills. The electrical part requires understanding of how it works — cutting and connecting wires, connecting the power supply. If unsure, hire an electrician for this stage. Cost 3000-5000 rubles.
Conclusion: light as an architectural element
LED ceiling trim Transformed lighting from a utilitarian function into an architectural design tool. Light no longer merely enables visibility — it shapes space, controls perception, and creates emotions.
LED technology has made hidden lighting accessible, energy-efficient, and long-lasting. Costs are recouped through energy savings within 2-3 years. A 15-20 year lifespan eliminates the hassle of replacing lamps. The low-voltage system’s safety allows installation anywhere without risk.
Duropolymers profiles — optimal choice for integrating lighting. Ideal geometry, heat resistance, longevity, smooth reflective surface. Profiles last 25-30 years; the system enters its second cycle simply by replacing the LED strips.
LED strip trim Opens up limitless possibilities for light design. Ceiling lighting creates the effect of floating planes. Wall-mounted lighting highlights accents. Floor-mounted lighting acts as directional lighting. Multi-level systems with independent control create a volumetric lighting environment.
Combining with stretch ceilings enhances the effect. Smooth surface evenly reflects light, doubling brightness with glossy texture. Installation technology is refined; profiles serve as a base for mounting ceiling cornices.
STAVROS company offers a full range of duropolymers profiles for LED lighting.
ceiling trim of various heights and configurations, wall moldings, baseboards — everything necessary to create lighting systems of any complexity.
Professional consultants will help you design lighting tailored to your needs. Power calculation, selection of optimal profile sizes, choice of LED strips and electrical components, installation recommendations — receive expert support at every stage.
Quality guarantee, certified products from leading manufacturers, competitive prices, delivery across Russia.
Skirting board for LED lighting From STAVROS — this is quality proven over time, and innovations that redefine lighting.
Transform your interior with the power of light. Create a space that surprises, inspires, and adapts to your mood. LED lighting is not just a technology — it’s a new language of architecture, where light becomes a building material on par with concrete and glass.