


Article Contents:
- Stair Railing Structure: Components and How It Works
- System Components: From Support Post to Handrail
- System Operation Principle Under Load
- Safety Standards and Baluster Spacing: What Cannot Be Ignored
- Regulatory Gap
- Railing Height
- Handrail Diameter
- Load-bearing capacity
- Choosing Wood Species for Balusters and Railings
- Oak: The Standard for Serious Staircases
- Beech: For Turned Balusters with Complex Profiles
- Pine: Budget Option with Limited Lifespan
- Tools for Installation: What You Really Need
- Step-by-Step Installation of Wooden Balusters and Railings
- Stage 1: Measurements and Preparation
- Step 2: Installing support posts
- Stage 3: Marking Baluster Positions
- Stage 4: Cutting Balusters to Angle
- Stage 5: Drilling Holes for Fasteners in Balusters
- Stage 6: Installing Balusters
- Stage 7: Handrail Installation
- Types of Baluster Fasteners: Stud, Dowel, Bracket
- Metal Stud: Maximum Strength
- Wooden Dowel: Traditional Joinery Method
- Bracket with Self-Tapping Screws: Budget Installation for Wooden Stairs
- Comparative Table of Fastener Types
- Final Finishing and Varnish Coating
- Surface Preparation: Three Stages
- Varnish: Selection and Application Technique
- Varnish Application Technique: Without Rush
- Toning: How to Change Color Without Hiding the Grain
- Common Installation Mistakes: Analysis of Specific Failures
- FAQ: Popular Questions About Railings and Balusters
- STAVROS: Solid Wood Balusters, Posts, and Railings

The staircase is the backbone of the house. It is the only route between floors used daily, for carrying items, and for nighttime ascents. And it is precisely here that most people make one of the most costly renovation mistakes: they buy good treads, good parquet flooring—and then stop halfway, installing cheap, flimsy railings or even postponing them 'for later.'
Handrails and balustersWooden railings are not just a barrier. They are an architectural element that defines the character of the entire staircase area. Turned oak balusters, a warm handrail, perfectly fitted joints—these are what transform a staircase from a functional passage into a statement about who lives in the house. And all of this can realistically be done by hand—if you understand exactly what you are doing.


Stair Railing Structure: Components and How They Work
Before picking up a measuring tape, you need to understand exactly what you are building. A stair railing is a system of interconnected elements, and understanding the role of each is critical to the result.


System Components: From Support Post to Handrail
Support posts (newel posts) are the load-bearing elements of the railing, installed at the beginning and end of each flight of stairs, as well as on landing platforms. These are the most heavily loaded structural elements: they bear the horizontal load from the handrail and the vertical load from a person leaning on it. The cross-section of a support post is typically from 100×100 mm, and in Baroque and classical staircases—up to 150×150 mm or more. Fastening must be done only through metal hardware into the tread or floor structure, never 'with glue.'
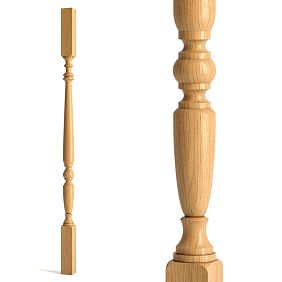
Balusters (intermediate posts) are the vertical elements between support posts. They carry a decorative load and the function of filling the span (preventing falls). The cross-section of balusters is significantly smaller than that of support posts: a classic turned baluster in its 'body' has a diameter of 45–80 mm with lower and upper bases of 45–80 mm. Woodenbalusters and postsSTAVROS balusters are made from solid oak and beech on professional lathes with a tolerance of ±0.2 mm.
Handrail (the railing in the strict sense) is the horizontal or sloped element that the hand grips. Functionally: support for movement, a safety element. Aesthetically: the 'crown' of the entire structure, by which the quality of the staircase is primarily judged. The handrail profile is rounded (oval, D-shaped), width 55–80 mm, height 40–60 mm.
Sub-rail / bottom rail (baluster shoe) is a horizontal element on which the lower ends of balusters rest when mounted on a wooden tread via a shoe. Not always used—depends on the staircase design.
Handrail support post (transitional elements) are special transition parts on turns and landings: 'gooseneck,' 'knee,' 'handrail return.'
Our factory also produces:


System Operation Principle Under Load
When a person leans on the handrail, the horizontal load is transferred through the handrail to the support posts, and through the support posts—to the tread or floor structure. Intermediate balusters primarily work in bending under impact loads (a kick, shoulder impact). This is precisely why:
-
The rigidity of support post fastening is paramount
-
Baluster fastening must be resistant to pull-out and bending
-
The handrail must be securely connected to the balusters, without play
Understanding this mechanics prevents common mistakes: 'baluster mounted on glue,' 'support post fixed with just one screw,' 'handrail screwed only to the two end balusters.'
Get Consultation
Safety Standards and Baluster Spacing: What Cannot Be Ignored
The distance between balusters is not an aesthetic decision. It is a safety requirement stipulated in building codes.
Regulatory Gap
According to current standards for residential premises, the maximum gap between balusters (clear distance—i.e., measured between the nearest surfaces of adjacent balusters) must not exceed 120 mm. This is the 'child's head' rule: a child under 6 years old should not be able to stick their head between the posts and get stuck.
In practice, the optimal gap is 100–110 mm. With a baluster diameter (or width) of 45 mm, the center-to-center spacing is 145–155 mm. With a 60 mm baluster—160–170 mm.
Railing height
The minimum height of a staircase railing in a residential building is 900 mm from the tread level to the top plane of the handrail. For staircases used by children and for balcony railings—at least 1100 mm.
Handrail Diameter
The handrail must be comfortable for a hand to grip. The optimal diameter of the circumscribed circle is 50–80 mm. A handrail wider than 80 mm cannot be grasped by the hand and does not provide support function in case of a fall.
Load Capacity
According to standards, stair railings must withstand a concentrated horizontal load of 100 kgf applied to the handrail at any point, without failure and without permanent deformation exceeding 10 mm.
Choosing Wood Species for Balusters and Railings
The material question is decided once — and determines everything else.
Oak: the standard for serious staircases
Oak is a species with a density of 650–750 kg/m³, Brinell hardness of 3.7–4.0. This means an oak baluster withstands mechanical impacts and loads where a pine one would already have split. Oak's natural tannins make it resistant to fungus — an important property for entrance groups and staircases leading outdoors.
Oak's texture is expressive: with radial sawing, characteristic 'mirrors' of medullary rays create a lively surface pattern. This is wood that 'reads' — and that's precisely what makes it indispensable in classical and baroque interiors.
The service life of oak balusters with proper treatment and normal operating conditions is at least 50 years.
Beech: for turned balusters of complex profile
Beech is denser than pine, slightly softer than oak, but crucially important in one aspect: it is homogeneous. Beech does not have a pronounced layered pattern — its structure is fine-pored and predictable. This is precisely what makes beech ideal for turning: a turned beech baluster comes out with a perfectly clean surface without chips or fuzz.
Beech takes paint and tinting excellently — evenly, without stains. If balusters are planned to be painted white or any other color — beech is preferable to oak.
Beech's limitation: it is more hygroscopic than oak. For staircases in rooms with unstable humidity (country houses, unheated entrance groups) — it's better to choose oak.
Pine: a budget option with limited lifespan
Pine is soft (380–550 kg/m³) and easy to work with. But in a structure that experiences impact loads daily, soft wood wears out quickly. After 5–7 years, pine balusters in areas of contact with feet, walls, or when moving furniture get noticeable dents and chips. Not the best choice for the main staircase of a residential house.
Tools for installation: what you really need
List of tools without which installation will turn into torture:
-
Miter saw (electric, with tilting base table) — for trimming balusters to the staircase angle
-
Drill (600+ W) with Forstner wood drill bits 10, 12, 14 mm and metal drill bits 6, 8 mm
-
Screwdriver
-
Laser level (self-leveling) — for marking the baluster installation line
-
Tape measure and angle template (bevel gauge) for measuring the staircase slope angle
-
Nail set
-
Hammer
-
13 and 17 mm wrenches for tightening studs
-
Carpenter's square
-
Pencil, painter's tape
-
Wood filler (for covering fastener holes)
-
Acrylic sealant
Step-by-step installation of wooden balusters and handrails
Let's move to practice. We'll break down the full technological cycle for a straight-flight staircase — as the most common case.
Stage 1: measurements and preparation
Measure the flight slope angle. Place the bevel gauge against the side surface of the tread and the landing — fix the angle. It is precisely to this angle that the lower and upper ends of the balusters will be trimmed (if you are attaching them directly into the tread and the handrail, not via a sub-baluster rail).
Determine the number of balusters. Measure the horizontal length of the flight (from the first to the last step). Divide by the chosen spacing (e.g., 150 mm) — you'll get the number of balusters without support posts. Standard: 1–2 balusters per step.
Check the horizontality of the treads. Some wooden and concrete staircases have a slight deviation of treads from horizontal. This is important: if a tread 'slopes' by 3 mm, the baluster will stand at an angle. Record the deviation values for each tread.
Stage 2: Installing support posts
This is the most critical stage. A mistake here cannot be corrected without disassembly.
Mark the positions of the posts. The first post is at the beginning of the flight by the bottom step, the second is at the end by the top step. On turns and landings, install additional support posts.
Select the fastening method. For wooden steps, use an M12 or M16 metal stud, screwed into the step through a through hole in the post base, with a nut and washer underneath. For concrete or stone bases, use a chemical anchor with a metal stud.
Drill a hole in the step. Diameter: 1 mm less than the stud diameter. Depth: 80–100 mm. Clean the hole of dust with a vacuum and blow it out.
Screw in the stud. For wooden steps: use epoxy or wood glue for additional fixation. For concrete: use a chemical anchor (injected into the hole, insert the stud before polymerization).
Place the post onto the stud. Pre-drill an axial hole in the post base with a diameter exactly equal to the stud diameter (not 1 mm less—the post should fit without a gap but without excessive force). Hole depth in the post: 70–90 mm. Apply glue to the stud, place the post, check vertical alignment with a level in two perpendicular planes. Secure with temporary braces until the glue cures.
Curing time. Two-component epoxy glue polymerizes in 24–48 hours at 20°C. Only after full polymerization, remove the temporary supports.
Step 3: Marking the positions of the balusters
Stretch a string or laser beam between the top points of the two support posts. This is the line of the handrail's lower plane.
Mark the centers for installing each baluster on the steps (or on the sub-baluster rail). Use a square to transfer points from the horizontal line to the step. Check: distances between marks should be equal (with a tolerance of ±2 mm).
Important marking rule: the center of the first and last baluster in the flight must be at least 50–60 mm from the support post (so the fastener does not enter the already occupied zone at the post base).
Step 4: Cutting balusters at an angle
Balusters in a stair flight have a lower end perpendicular to the step (i.e., horizontal when installed on a horizontal step) and an upper end cut at the angle of the handrail's slope.
Set the miter saw to the flight's slope angle (measured with a bevel gauge in the first step). For standard stairs, this is 30°–40°. Cut the upper ends of all balusters at this angle. Lower ends: horizontal cut (0°).
Verification method: place the cut baluster against the step and apply the handrail to the upper end. If the angle is correct, the handrail's lower plane will rest on the baluster end without a gap.
Step 5: Drilling holes for fasteners in balusters
Select the fastening method (detailed in the next section). For an M8 or M10 stud: drill an axial hole in the baluster's lower end with a diameter of 8 or 10 mm to a depth of 60–70 mm. The hole must be strictly along the baluster's axis—otherwise, misalignment will become apparent as tilting after installation. Use a jig or drill press.
Step 6: Installing balusters
Apply wood glue into the hole in the step and into the lower hole of the baluster (if using a dowel) or onto the stud (if using a stud). Place the baluster. Check vertical alignment with a level. Temporarily secure with painter's tape.
Proceed to the next baluster. Do not finalize fixation until the entire line is installed—after installing the full row, visually check the overall alignment and adjust if necessary.
Step 7: Installing the handrail
Measure the distance between support posts along the top (along a line parallel to the flight). Cut the handrail with a 10–15 mm allowance for end fitting.
Place the handrail on the upper ends of the balusters. Mark and create grooves in the handrail's lower plane for the baluster upper ends (if the handrail has a groove, it is already provided). Check: the handrail should fit without gaps.
Attach the handrail to the balusters with 4×50 mm screws from below (through the handrail's lower groove into the baluster end). Spacing: each baluster. Pre-drill pilot holes with a 2.5–3 mm drill bit to prevent splitting the baluster end.
Handrail ends are connected to support posts via special shaped screws ('confirmat' 7×80 mm) or with an M8 stud.
Types of baluster fasteners: stud, dowel, bracket
Choosing the baluster fastening method is a key technical decision. Each method has its own area of application.
Metal stud: maximum strength
An M8 or M10 stainless steel stud is screwed into the step (wooden or concrete), and the baluster is placed onto it. The connection works for both pull-out and bending.
Pros: disassemblable structure (the baluster can be removed and replaced if necessary), maximum load-bearing capacity, ability to precisely adjust baluster height if needed.
Cons: requires precise axial drilling, labor intensity is higher than with a dowel.
Application: mandatory for support posts, for intermediate balusters under heavy loads.
Nuance: the stud is screwed into the step to a depth of at least 60 mm; into the baluster — it goes in 60–70 mm. Total working length of the stud — 130–140 mm plus the gap between the baluster and the step (if any) 5–10 mm. Stud diameter is selected based on the diameter of the baluster base: for balusters with a base of 45–50 mm — M8; for 60–80 mm — M10.
Wooden dowel: traditional joinery method
Wooden dowel (cylindrical wooden key) with a diameter of 10–14 mm and a length of 80–100 mm is inserted into a hole in the step and into the axial hole in the baluster with glue.
Pros: fully wooden construction without metal, simple implementation, low cost of fasteners.
Cons: connection is not dismountable (without destruction), load-bearing capacity is lower than that of a stud, requires precise coaxiality of holes.
Application: for intermediate balusters on stairs with moderate load (cottage, bedroom house), on wooden steps.
Rule: the diameter of the dowel should be at least 25% of the width of the baluster base. For a 45×45 mm baluster — dowel 10–12 mm. For a 70×70 mm baluster — dowel 14–16 mm.
Corner bracket with self-tapping screws: budget installation for wooden stairs
Metal mounting bracket (90°, perforated) is attached to the step and to the side surface of the baluster base. The simplest method, not requiring precise drilling.
Pros: fast installation, simplicity, zero tool requirements.
Cons: the bracket is visible from the outside (if not covered by a decorative element), load-bearing capacity compared to a stud is lower, low resistance to lateral loads.
Application: for balusters on open terraces and verandas, where aesthetics are not a priority, or for temporary structures.
Comparative table of fastener types
| Parameter | Stud M8/M10 | Wooden dowel | Corner bracket |
|---|---|---|---|
| Load Capacity | Very High | Medium | Below average |
| Dismountability | Yes | No | Yes |
| Installation difficulty | Medium | Medium | Low |
| Application | All types | Wooden steps | Open areas |
| Fastener visibility | No | No | Yes |
| Fastener cost | Medium | Low | Low |
Final finishing and varnishing
Installation completed. Before you are straightHandrails and balusters— geometrically precise, securely fastened. Now begins the work that everyone sees.
Surface preparation: three stages
Stage 1: concealing fasteners. All holes from self-tapping screws and installation marks are filled with wood putty, matched to the tone of the wood species. For oak — light brown; for beech — beige-yellow. After the putty is completely dry (2–4 hours) — sanding flush with the main surface using P180 sandpaper.
Stage 2: sanding. All elements are sanded sequentially: P120 → P180 → P240. Along the grain — always. Turned balusters are sanded along their longitudinal axis — do not sand across, as this leaves circular scratches that will be visible under varnish.
Pay special attention to the joints between balusters and the handrail and tread. There may be minor gaps or "steps" at the connection points. Apply wood filler, let it dry, then sand.
Step 3: Dust removal. After final sanding with P240 grit, blow the entire surface with compressed air (or thoroughly wipe with a soft brush). Then degrease the surface with isopropyl alcohol or mineral spirits and let it dry for 30–40 minutes. Only after that — apply the coating.
Varnish: Selection and Application Technique
Three main types of coatings are used for wooden stairs:
Water-based polyurethane varnish — the optimal choice for most cases. Does not yellow, dries quickly (2–3 hours between coats), high hardness of the finish coat, abrasion resistance. Applied with a synthetic bristle brush or mini roller in 3–4 coats. Intermediate sanding with P320 grit between coats 2 and 3. Full curing — 7 days.
Oil-wax for wood — for those who want a "living" matte surface without a film. Penetrates the wood structure, does not create a surface layer. Tactilely softer than varnish. Requires renewal every 1–2 years on heavily loaded surfaces (handrail, treads). Applied in 2 coats; the second coat is applied after 24 hours, excess is polished off with a soft cloth.
Two-component solvent-based polyurethane varnish — a professional option for maximum wear resistance. König hardness of such coatings reaches 150–180 s. Applied with a spray gun. Strong odor, requires good ventilation. However, the result is an almost "glass-like" surface that is resistant to both loads and moisture.
Varnish application technique: Without haste
First coat — primer-sealer (acrylic primer or varnish diluted in a 1:3 ratio with water for water-based systems). The primer "raises" the wood grain. After drying — light sanding with P320 grit (just to remove the raised grain). Second-third coats — working varnish without dilution. Fourth coat — finish coat, the thinnest. Each coat — complete coverage without going back over areas that are already starting to dry.
Handrail — a special area: it is touched by hands daily. Apply 4–5 coats of varnish here with intermediate sanding between coats 2–3 and 3–4.
Toning: How to change the color without hiding the grain
If you want to change the wood tone (give beech balusters a "dark walnut" or "American walnut" color), use stain before varnishing:
-
Water-based stain is applied with a brush or cloth, left for 5–10 minutes, excess is removed with a dry cloth
-
After drying (2–4 hours) — sanding with P240 grit (light, just to remove the raised grain)
-
Then — varnishing as per standard procedure
Important: on oak, stain applies unevenly due to the different density of earlywood and latewood. A test on a hidden end is mandatory before working on the visible surface.
Typical installation mistakes: Analysis of specific failures
There are only a few mistakes when installing balusters — but each one is critical.
Mistake 1: Support post glued without metal fasteners. After a year, the adhesive joint develops micro-play. After three — squeaking. After five — the support post moves under load. Solution: always use metal fasteners (stud, anchor) for support posts.
Mistake 2: Misaligned drilling of the axial hole in the baluster. The baluster stands at a tilt visible to the naked eye. Solution: use a drilling jig or drill press.
Mistake 3: Handrail screwed on "as is" — without pre-trimming the baluster ends. The handrail rests not on all balusters, but on two or three. Under load — it sags. Solution: all upper ends of the balusters must lie in the same inclined plane — check with a string or laser before installing the handrail.
Mistake 4: Varnish applied to damp wood (moisture content over 12%). Coating delamination after 6–12 months. Solution: let the installed balusters acclimate in the room conditions for 3–5 days, check moisture content with a moisture meter (normal range — 8–12%).
Mistake 5: Gap between balusters not checked with a template. Discovered during inspection — it turns out, in one spot the distance is 135 mm instead of 120 mm. Solution: use a measuring template made of plywood (120×120 mm) and check every gap before final fastening.
FAQ: Popular questions about handrails and balusters
Can wooden balusters be installed on tile or stone?
Yes, but only with a chemical anchor. A regular dowel-stud into tile risks cracking the tile when tightened. A chemical anchor through the tile into the concrete base is the correct solution. Minimum depth into concrete — 80 mm.
What should be the distance from the first baluster to the support post?
The first intermediate baluster is installed at a distance equal to the spacing between balusters — that is, one "step" from the axis of the support post. Not right next to the post: this creates a visually "cramped" look.
How to calculate the number of balusters for a staircase with a turn?
Each flight is calculated separately. On the landing — a separate support post. Sum the number of balusters for each flight plus the number of support posts (2 per flight, minus shared ones on adjacent flights).
Is it necessary to remove balusters for painting or can they be painted in place?
In place - acceptable if you have experience with a brush. For quality application on turned balusters - it's better to paint before installation (trim, varnish, and only then install). Fastening ends are not painted - these are gluing zones.
How many days after varnishing can the staircase be used?
Water-based polyurethane varnish - initial strength after 24 hours (can be walked on carefully), full curing 7 days. Two-component solvent-based varnish - can be loaded after 3-4 days, full curing - 10-14 days.
balustersAlready with coating or do I need to paint it myself?
STAVROS supplies balusters and posts in white acrylic primer for painting - the surface is ready for applying varnish or enamel without additional sanding. This saves time and ensures uniformity of the finish coating.
How to calculate the length of a stud for a baluster 900 mm high?
Total stud length = depth in step (70 mm) + gap (5 mm) + depth in baluster (70 mm) = 145 mm. Take a 150 mm M8 or M10 stud.
STAVROS: balusters, posts and handrails from solid wood
A good staircase starts with the right materials. And here STAVROS is not an advertisement, but the logic of choice.
STAVROS is a Russian manufacturer of wooden products from solid oak and beech with its own production. In the catalog -balusters and support postsvarious profiles: classic turned with multi-level relief, square faceted, figured with carved elements. All items are made from selected solid oak or beech, turned on professional lathe equipment with a tolerance of ±0.2 mm.
The STAVROS production program is not limited to balusters. For the complete design of the staircase space —Wooden moldingsfor finishing openings and walls of the staircase area,floor skirting boardsfor steps and on landings,Wooden cornicesfor ceiling transition of the staircase hall,Furniture legsandDecorative Insertsfor sliding wardrobe doors and consoles in the hallway.
All products are supplied in white acrylic primer - ready for finishing coating without additional processing. Minimum order - from one item. Delivery across Russia and CIS.
A staircase is a structure that works every day. That's why its elements must be made from the right material and properly installed. STAVROS provides the first. This article is the second.


