Article Contents:
- What are polyurethane panels: a material without compromises
- Types of decorative panels: from geometry to abstraction
- Geometric panels: rhythm and structure
- 3D panels: sculpture on the wall
- Panels with ornament: classic in a modern interpretation
- Fluted panels: vertical or horizontal rhythm
- Smooth panels with texture: texture instead of relief
- Why now: trends of 2026
- Moving away from flatness: volume as the new norm
- Tactility: interiors you want to touch
- Speed of transformation: renovation in a day, not a month
- Economic efficiency: luxury at an affordable price
- Where to apply: scenarios for every room
- Living room: TV zone as an architectural accent
- Bedroom: headboard as the center of composition
- Hallway: first impression through texture
- Kitchen: decor in the work area
- Bathroom: luxury in the space of water
- Installation: from purchase to finished result
- Step 1: Choosing panels and calculating quantity
- Step 2: Surface preparation
- Step 3: Marking
- Step 4: Installing panels
- Step 5: Sealing joints and painting
- Combining with other materials
- Polyurethane + wood: technology and warmth
- Polyurethane + wallpaper: texture on texture
- Polyurethane + paint: color blocks
- Questions and Answers: Everything You Need to Know
- How much do polyurethane wall panels cost?
- Can panels be installed independently without experience?
- How to care for polyurethane panels?
- Can panels be used in a children's room?
- Do panels fade in the sun?
- Can panels be dismantled and reinstalled on another wall?
- Are polyurethane panels suitable for commercial premises?
- How long does it take to install a wall made of panels?
- STAVROS: where materials become solutions

How many times have you looked at the walls of your apartment and thought: 'Something needs to change'? Tired paint, faded wallpaper, bland surfaces that evoke no emotions. You want change, but renovation is expensive, lengthy, messy. Demolishing old finishes, leveling walls, searching for materials, waiting for craftsmen, weeks in construction dust. Stop. What if there's another way?
Polyurethane wall panels— is a solution that revolutionizes the concept of interior transformation speed. In the morning, you have an ordinary room. In the evening — a space with architectural relief, volume, character. Without major renovation, without a construction crew, without weeks of waiting. Just panels, adhesive, a few hours of work — and a result that looks as if it took months to create.
Why is 2026 becoming the year ofdecorative panels? Because technology has reached the point where polyurethane has ceased to be a cheap imitation of something else and has become a premium-class material in its own right. Because designers worldwide have found new ways to use it, turning utilitarian molding into a tool for creating unique interiors. Because the very philosophy of renovation has changed — from 'break everything and rebuild from scratch' to 'intelligently transform what exists.'


What are polyurethane panels: a material without compromises
Let's start with an honest conversation about the material. Polyurethane is a polymer created by the reaction of polyol and isocyanate under high pressure and temperature. Sounds complicated? In practice, this means a material with a unique combination of properties not found in wood, plaster, or MDF.
Density 280-320 kg/m³ — this is the golden mean between lightness and rigidity. A panel measuring 600×600 mm with a relief depth of 30 mm weighs only 800-1200 grams. For comparison: a similar plaster panel weighs 8-10 kilograms, a carved wooden one — 5-7 kilograms. A difference of 7-10 times — these aren't just numbers, it's fundamentally different logistics, different installation, different application possibilities.
Polyurethane does not absorb water. Water absorption coefficient less than 1%. A panel can be immersed in a bathtub of water, kept there for a day — it won't swell, deform, or lose its shape. After removal, just wipe it and install. This opens up applications in kitchens, bathrooms, hallways, basements, attics — anywhere wood rots, plaster gets soggy, MDF swells.
Polyurethane does not age. After 10, 20, 30 years, it looks the same as on the day of installation. Doesn't yellow, doesn't crack, doesn't deform from temperature fluctuations. Service life is limited not by material degradation, but by changes in interior fashion.
But the main advantage is technological. High-pressure molding reproduces relief of any complexity with an accuracy of up to 0.5 mm. If a designer creates a panel with an ornament consisting of 200 small elements, each 5-15 mm deep — polyurethane will reproduce this absolutely accurately. And each subsequent panel will be identical to the previous one down to micron-level errors. This provides perfect joints during installation, precise pattern repeatability, predictable results.


Types of decorative panels: from geometry to abstraction
Polyurethane wall panels— is not a monolithic category. It's a family of different types, each solving its own tasks, creating its own aesthetic.
Our factory also produces:
Geometric panels: rhythm and structure
Square or rectangular panels with relief in the form of geometric shapes: concentric circles, nested squares, rhombuses, hexagons, trapezoids. The relief deepens towards the center (creating a funnel effect) or, conversely, protrudes (creating a pyramid effect).
Standard sizes: 300×300, 400×400, 500×500, 600×600 mm. Relief depth: 10-40 mm. Installed in a grid — 3×3, 4×4, 5×5 panels, creating a rhythmic field. Each panel is independent, but together they form a unified composition.
Effect: the wall gains structure, rhythm, mathematical beauty. Light falling at an angle creates a system of shadows that changes throughout the day. In the morning, when the sun is on the left, shadows on one side. In the evening, when the light is on the right, shadows shift. The wall lives, transforms, tells a visual story.
Get Consultation
3D panels: sculpture on the wall
3D Wall Panels— are elements with complex three-dimensional relief, where forms protrude or deepen by 20-50 mm, creating an almost sculptural volume.
Relief types:
-
Waves: smooth horizontal or vertical curves, like a frozen water surface
-
Pyramids: many small pyramidal protrusions, creating a crystalline structure effect
-
Spherical segments: depressions in the shape of hemispheres, creating a lunar surface effect
-
Diagonal ribs: lines running diagonally, creating dynamic tension
3D panels are installed as an accent — one wall in a room, the area behind the TV, the headboard of a bed. They are so expressive that an entire room of 3D panels would be overloaded. Principle: one accent surface with volume, the rest — neutral, smooth.
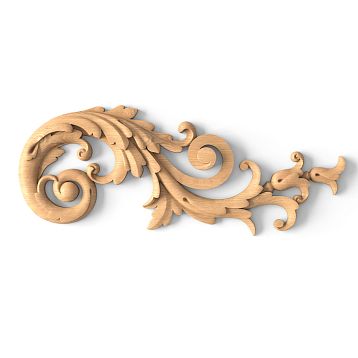
Panels with ornament: classic in modern interpretation
Panels with botanical or abstract ornaments — stylized leaves, flowers, swirls, interweavings. The ornament can be symmetrical (the center of the panel is the focal point, from which elements radiate symmetrically) or asymmetrical (a dynamic composition without a rigid axis).
Relief depth: 5-20 mm. Detailing: from large forms (leaves 50-70 mm wide) to small ones (swirls 5-10 mm thick). Panels with ornament work in neoclassical interiors, modern eclecticism, Provence and shabby chic styles.
Effect: the wall gains decorativeness, but not a heavy one like historical stucco, but a lightened, modernized one. The ornament is read as texture, not as a detailed drawing. This creates a balance between decorativeness and restraint.
Fluted panels: vertical or horizontal rhythm
Panels with parallel flutes (grooves) — vertical or horizontal. Flute width: 10-30 mm, depth: 8-15 mm, distance between flutes: 5-20 mm. The result is a relief surface with a clear linear rhythm.
Vertical flutes visually raise the ceiling, create a sense of height, slenderness. Horizontal ones — expand the space, create a sense of calm, stability. Diagonal (a rare variant) — add dynamics, movement.
Fluted panels are mounted tightly butt-to-butt, creating a continuous surface. The joints between panels are almost invisible if the panels are from the same batch (identical relief). The result is a continuous fluted wall, which is perceived as a single architectural element.
Smooth panels with texture: texture instead of relief
Panels without deep relief, but with a textured surface — imitation of fabric (burlap, linen, velvet), leather (with pores and folds), stone (with small irregularities), wood (with annual rings and knots). The texture is created at the casting stage — the mold has a textured, not smooth, surface.
Texture depth: 1-3 mm. This is not relief, but micro-relief, which is read upon close inspection and tactilely (if you run your hand over it). From a distance, the panel looks smooth, but with proper lighting, the texture creates a subtle play of light.
Such panels are used in minimalist interiors, where deep relief would be excessive, but texture, tactility, materiality are needed.
Why right now: trends for 2026
What's happening with interior design right now? Whypolyurethane wall panelsare becoming the main trend?
Moving away from flatness: volume as the new norm
The 2010s decade was a time of total minimalism. White walls, smooth surfaces, no decor. This was a reaction to the excess of the 2000s with their stucco, gilding, maximalism. But the pendulum has swung back.
In 2026, minimalism is not rejected, but evolves. The space remains clean, airy, uncluttered. But flat white walls are replaced by volumetric, textured ones. Decorative panels provide this volume without visual noise. Relief creates shadows, play of light, architectural expressiveness — but remains restrained, not loud.
Tactility: interiors you want to touch
The trend of biophilic design (connection with nature) includes not only plants and natural materials, but also tactility. A person wants not only to see the interior, but also to feel it. Smooth walls do not provide this sensation. Relief panels — do.
Running your hand over a panel with wavy relief — feeling the curves, depressions, ridges. This creates a physical connection with the space, a sense of materiality, presence. The interior ceases to be a visual picture, becomes a living environment.
Speed of transformation: renovation in a day, not a month
The pace of life is accelerating. No one wants to live in renovation for three months. Polyurethane panels solve this problem radically. A standard accent wall (3×2.5 meters) made of 500×500 mm panels is installed in 4-6 hours by one person. Without construction dust, without demolition of old finishes (panels are glued over painted or plastered walls), without multi-day waiting for drying.
In the morning, you decided to update the living room. Bought panels. Installed them in the evening. Painted the next day. In two days, you're living in a renewed interior. This is not fantasy, this is the reality of polyurethane panels.
Economic efficiency: luxury at an affordable price
Wooden carved panels cost 15,000-40,000 rubles per square meter. Gypsum stucco — 10,000-25,000 rubles. Polyurethane — 3,000-8,000 rubles per square meter depending on the complexity of the relief and size. A difference of 3-5 times with a visually comparable effect.
To finish a 6 sq.m accent wall with wood, you need 90,000-240,000 rubles just for the material. With polyurethane — 18,000-48,000 rubles. Savings of 70,000-190,000 rubles — this is a substantial amount that can be directed to furniture, lighting, textiles.
Where to apply: scenarios for every room
Theory is wonderful, but let's get to specifics. Where, in which rooms, for which tasks to use decorative panels?
Living room: TV zone as an architectural accent
The wall behind the TV is the natural focal point of the living room. The gaze is constantly directed there. Making this area expressive is task number one.
Option 1: A solid panel wall. The entire wall (width 3-4 meters, height 2.5-2.7 meters) is clad with 500×500 mm panels featuring geometric relief (concentric squares). The panels are mounted flush, creating a continuous relief field. The TV is mounted on a bracket over the panels. Effect: the TV is perceived not as an appliance, but as a screen integrated into an architectural surface.
Option 2: A panel frame around the TV. The TV is framed with panels — two 600×300 mm pieces on the sides, one 1800×300 mm piece on top, and one on the bottom. The panels create a portal, inside which is the TV. The rest of the wall is smooth, painted in a contrasting color. Effect: the TV is highlighted, the wall is structured, the composition is complete.
Option 3: Asymmetric composition. Panels are placed not symmetrically around the TV, but on one side (e.g., to the right) — a vertical strip of five 400×600 mm panels. The TV is on the left, on a smooth wall. The panels on the right create visual balance, asymmetry adds dynamism.
Bedroom: The headboard as the center of the composition
The area of the bed's headboard is the place you look at before sleep and after waking up. Aesthetics are critically important, but should be calm, not stimulating.
Option 1: Full-wall panel headboard. The wall behind the bed (width 3-4 meters) is clad with panels featuring a soft, wavy relief (horizontal, gentle waves). The panels are painted in a calm color — gray-blue, dusty pink, lavender, beige. The relief creates texture, but not an aggressive one. Effect: the bedroom gains intimacy, the sleeping area is highlighted, the atmosphere is conducive to rest.
Option 2: Panel niche-frame. A frame measuring 2200×1400 mm is created behind the bed's headboard using wide moldings (120 mm width). Inside the frame — panels with an ornament (stylized leaves, abstract curls). The panels and moldings are painted the same color, the relief is read through shadows. Effect: the headboard becomes a work of art, the bedroom gains character.
Option 3: Vertical panel strips. Three vertical strips of 300×600 mm panels (4-5 panels high each) are mounted behind the bed. The strips are separated by 200 mm gaps, creating rhythm. Panels with vertical fluting enhance the vertical effect. Effect: the ceiling is visually raised, the bedroom seems taller, lighter.
Hallway: First impression through texture
The hallway is the face of the house. An impression is formed within the first 3 seconds of entry. Panels on the wall opposite the door are a way to instantly declare: every element here is thoughtfully considered.
Option 1: Accent panel on the end wall. The wall opposite the entrance door (usually narrow, 1-1.5 meters) is clad with 600×600 mm panels featuring a hexagonal relief. The panels are painted a dark color (graphite, dark blue), contrasting with the light side walls. Effect: the gaze is immediately directed to the accent wall, the hallway seems deeper, more spacious.
Option 2: Panel strip on the side wall. The long wall of the hallway (4-5 meters) is adorned with a horizontal strip of panels at a height of 100-120 cm from the floor. The strip consists of 250×1000 mm panels with horizontal fluting. Effect: the hallway is visually widened, the horizontal line creates a coordinate, the space is structured.
Option 3: Mirror in a panel frame. A large mirror (1000×1800 mm) is mounted on the end wall, framed by panels 150-200 mm wide with an ornament. The panels create a frame that looks monumental, yet lightweight (polyurethane weighs 10 times less than wood). Effect: the mirror becomes an architectural element, the hallway is visually doubled.
Kitchen: Decor in the work zone
The kitchen is a wet room with grease splashes, condensation, and temperature fluctuations. Ordinary molding quickly loses its appearance here. Polyurethane panels are not afraid of these conditions.
Option 1: Accent wall in the dining area. The wall next to the dining table is clad with panels featuring relief that stylizes gastronomic motifs (abstract forms reminiscent of fruits, grains, textures). The panels are painted in warm colors — terracotta, mustard, olive. Effect: the dining area is highlighted, the kitchen ceases to be a purely utilitarian space.
Option 2: Panels instead of a backsplash. The area between the countertop and wall cabinets (backsplash) is clad not with tiles, but with moisture-resistant panels featuring fine relief (3-5 mm depth for easy cleaning of splashes). The panels are painted with washable paint. Effect: a unique backsplash that no one else has, a modern alternative to tiles.
Option 3: Decorative niche for appliances. If the kitchen has a niche for built-in appliances or open shelves, their back wall is clad with panels featuring an ornament. The panels create a background against which appliances or dishes look like exhibits. Effect: utilitarian elements become part of the design.
Bathroom: Luxury in the space of water
The bathroom is polyurethane territory. Absolute moisture resistance makes it ideal for this room.
Option 1: Panel wall behind the bathtub. The wall behind the bathtub (usually the end wall) is clad with panels featuring a wavy relief, reminiscent of water waves. The panels are painted in sea shades — turquoise, aquamarine, blue with a gradient (darker at the bottom, lighter at the top). Effect: the bathroom gains thematic integrity, the wall becomes an extension of the water element.
Option 2: Panels around the mirror. The mirror above the sink is framed with panels — four narrow 150×800 mm panels on the sides and top/bottom. Panels with an ornament in the form of stylized shells or sea stars. Painted in metallic colors — silver, white gold. Effect: the mirror turns into an art object, the bathroom looks like a spa zone.
Option 3: Panel niches. If the bathroom has storage niches, their inner surfaces are clad with panels featuring stone or wood texture. This creates a visual contrast with the smooth tile of the main walls. Effect: the niches are highlighted, the space is structured, the bathroom gains architectural complexity.
Installation: From purchase to finished result
How does the process from idea to implementation happen? Let's break it down step by step.
Step 1: Choosing panels and calculating quantity
Determine the accent wall. Measure its width and height. Calculate the area (width × height). If the wall is 3 meters wide and 2.5 meters high, the area is 7.5 sq.m.
Choose the panel size. Let's say, 500×500 mm (0.25 sq.m per panel). Divide the wall area by the panel area: 7.5 / 0.25 = 30 panels. Add a 10% reserve (for trimming, possible defects) = 33 panels.
Check how the panels will fit on the wall. Wall width 3000 mm, panel 500 mm: 3000 / 500 = 6 panels in a row exactly. Height 2500 mm: 2500 / 500 = 5 rows exactly. Perfect. If it doesn't divide evenly, the edge panels will have to be trimmed.
Step 2: Surface Preparation
The wall must be clean, dry, and sturdy. Remove wallpaper (if present), wash off dust, degrease the surface with alcohol or a degreaser. Check the paint's adhesion: apply painter's tape and rip it off sharply. If the paint peels off — remove it completely.
Prime the wall with deep-penetration acrylic primer. Apply with a roller in 1-2 coats, drying time 6-12 hours. Primer improves the adhesive's bond, making the panels hold significantly stronger.
Check the wall's evenness with a level. Polyurethane wall panels are flexible and can compensate for irregularities up to 5 mm. If the wall has pits or bumps deeper/higher than 5 mm, level them with filler.
Step 3: Marking
Find the center of the wall horizontally. Mark the vertical axis of symmetry. If panels will be mounted symmetrically (from the center outwards), this is critically important.
Mark horizontal lines for each row of panels. Use a laser level or a long ruler. The first row usually starts at a height of 100-200 mm from the floor (to account for the baseboard).
Double-check the markings. A 2-3 cm error at the start will cause the entire composition to skew.
Step 4: Panel Installation
Use polyurethane adhesive or acrylic liquid nails. Apply the adhesive to the back of the panel in a zigzag pattern (4-5 strips) or in dots (9-12 dots for a 500×500 mm panel). Do not apply adhesive to the edges — it may squeeze out when pressed.
Place the panel against the wall precisely according to the markings, press firmly over the entire area for 30-60 seconds. The adhesive sets quickly, but full polymerization takes 2-3 hours. Secure the panel with painter's tape (strips from the panel to the wall) during the setting time.
Mount panels sequentially: the first row completely, then the second row, then the third. Check the horizontality with a level after each row.
Step 5: Seam Filling and Painting
After the adhesive dries (after 24 hours), inspect the seams between panels. If there are small gaps (1-2 mm), fill them with acrylic sealant. Squeeze the sealant into the seam, remove excess with a damp sponge. After drying (2-3 hours), lightly sand the seam with sandpaper (grit 220).
Panels are sold pre-primed, but an additional primer before painting improves the result. Apply acrylic primer with a brush or roller, let it dry (4-6 hours).
Paint the panels with high-quality interior paint. Use a roller for smooth areas, a brush for textured ones. Apply 2-3 coats for even coverage, drying time between coats 2-4 hours.
To enhance the relief, you can use a two-tone painting technique: the base color over the entire panel, then a darker or lighter shade with a dry brush only on the raised parts of the relief. This creates a depth and volume effect.
Combining with other materials
polyurethane wall decordoes not exist in a vacuum. It combines beautifully with other materials, creating multi-layered, expressive compositions.
Polyurethane + Wood: Technology and Warmth
Wooden slats or panels (warm, natural, with wood texture) are combined with polyurethane panels (lightweight, moisture-resistant, with clear relief). A contrast of textures is created: the smoothness of polyurethane versus the roughness of wood, geometric relief versus organic wood grain.
Example: The lower part of the wall (up to 120 cm high) is clad with wooden panels of oak or ash. The upper part — with polyurethane panels with geometric relief. The border between them is a wide molding. Effect: the wall is divided into a warm, natural lower zone and a modern, textured upper zone.
Polyurethane + Wallpaper: Texture on Texture
Polyurethane panels are mounted not on a smooth painted wall, but on textured wallpaper (burlap, linen, fabric imitation). A two-layer perception is created: the background texture of the wallpaper + the volumetric relief of the panels.
Example: The wall is covered with light gray linen-textured wallpaper. Polyurethane panels 400×400 mm with concentric circle relief, painted dark gray, are mounted over the wallpaper. The contrast of colors and layers of texture creates visual depth.
Polyurethane + Paint: Color Blocks
The wall is divided into color zones using paint. Panels are mounted at the borders of zones or inside one of them, enhancing the color drama.
Example: A 4×2.5 m wall is divided vertically into three parts: the left third painted dark blue, the middle third white, the right third mustard. On the white middle part, polyurethane panels with an ornament, painted gold, are mounted. Effect: the wall becomes a triptych, where the central part with panels is the focal point.
Questions and Answers: everything you need to know
How much do polyurethane wall panels cost?
Prices depend on size, relief complexity, and manufacturer. Panels 500×500 mm: 800-2500 rubles per piece. Panels 600×600 mm: 1200-3500 rubles. 3D panels with deep relief: 2000-5000 rubles per piece. To cover a 6 sq.m wall, you need 24 panels 500×500 mm, material cost 19,000-60,000 rubles.
Can panels be installed independently without experience?
Yes, if you follow the instructions and work carefully. Installing panels is easier than laying tiles or wallpapering. The key is precise marking, quality surface preparation, and the right adhesive. Mount the first panel slowly, checking each step. By the second or third panel, you'll get the hang of it.
How to care for polyurethane panels?
Wipe with a damp cloth 1-2 times a month to remove dust. If the panels are painted with washable paint, you can use mild detergents (dish soap, all-purpose cleaners). Do not use abrasives, stiff brushes, or solvents—they can damage the paint or relief.
Can panels be used in a children's room?
Yes, high-quality polyurethane is certified for residential premises, including children's rooms. It does not emit toxins or cause allergies. Check for compliance certificates when purchasing. Avoid cheap Chinese panels without certificates.
Do panels fade in sunlight?
Polyurethane does not fade, but the paint can. Use quality interior paints with UV protection. They retain color for 5-10 years even on a wall with direct sunlight. Cheap paints may fade in 1-2 years.
Can panels be dismantled and reinstalled on another wall?
Theoretically yes, but with caveats. If panels were glued with acrylic adhesive, they can be carefully removed with a spatula. Adhesive residue is cleaned off, and the panel can be reinstalled. However, the risk of damaging the relief during dismantling is high. In practice, panels are considered single-use for installation.
Are polyurethane panels suitable for commercial premises?
Yes, they are an excellent fit. Shops, offices, restaurants, hotels, beauty salons—anywhere that requires quick installation, moisture resistance, and durability. In commercial projects, panels are often used for zoning (highlighting VIP areas, cashier zones) and branding (panels with logos, custom relief).
How long does it take to install a wall of panels?
Surface preparation: 1 day (cleaning, priming, drying). Marking: 1-2 hours. Panel installation: 4-6 hours for a 6-8 sq.m. wall. Painting: 1 day (applying coats, drying). Total: 2-3 days from start to finished result. For comparison: finishing the same wall with wood—5-7 days, with gypsum molding—7-10 days.
STAVROS: where materials become solutions
When it's time to choose panels for your interior, the question arises: who to trust? The market is flooded with offers—from cheap to premium, from Chinese to European. How to avoid making a mistake in your choice?
STAVROS has been working in the architectural decor field for over twenty years, offering materials for the most demanding projects.Polyurethane wall decorSTAVROS is not just panels. It's a system of elements designed by professional designers, with precise dimensions, stable geometry, and impeccable relief quality.
Production on European equipment with multi-stage quality control. Polyurethane density of 280-320 kg/m³—guaranteeing rigidity without excessive weight. Pressure casting at 150 atmospheres ensures relief detailing up to 0.5 mm. Surface primed with white acrylic primer—ready for painting without additional processing.
The STAVROS catalog features over 100 models of decorative panels: geometric, 3D, with patterns, ribbed, textured. Sizes from compact 300×300 mm to large-scale 1000×2500 mm. Relief from delicate 5 mm to dramatic 50 mm. Each model has undergone design development, testing in interiors, and evaluation by professionals.
STAVROS offers not only materials but professional support at all stages. Company designers consult on selecting panels for specific interiors, create visualizations, and show how a wall will look with the chosen decor. Technologists provide recommendations on installation, adhesive selection, and painting techniques. Logisticians ensure timely delivery with transportation conditions observed.
The professional tinting service allows obtaining panels in any color from the RAL catalog or according to the customer's sample. Matte, satin, glossy, metallic finishes—any option. Decorative effects like patination, aging, gradient—for exclusive projects.
Own showrooms in Moscow and St. Petersburg—spaces where you can see panels in person, assess relief quality, touch the material, compare different painting options. Exhibitions demonstrate ready-made compositions—how panels work in interiors, how light plays on the relief, how different panel types combine.
STAVROS quality guarantee—confidence that each panel is manufactured without defects, with precise dimensions, clear relief, and stable geometry. If a defect is found—replacement without questions. Professional support at all stages—from selection to finishing.
Working with STAVROS, you get not just materials, but a partner in creating your interior. A partner who understands: decor is not mere embellishment, but a tool for shaping space. Who provides materials of the highest quality and expert knowledge so that your interior becomes exactly as you envisioned.
Entrust the transformation of your home to STAVROS—and get a space where every wall tells a story, every relief creates an emotion, every detail is thought out to the millimeter. Because quick interior updates in 2026 are not a compromise with quality, but a new standard where speed and perfection go hand in hand.