


Article Contents:
- 3D trend 2026: texture versus smoothness
- Why flat surfaces lost
- What is 3D effect in finishing
- Material combination as eclectic philosophy
- Wooden battens: vertical rhythm and horizontal zoning
- Anatomy of a batten: size matters
- Vertical battens: looking up, higher ceiling
- Horizontal battens: dynamics and expansion
- Zoning with battens: wall as partition
- Molding as accent: classical frames of modern content
- Molding is not just framing
- Frame around batten panel: dialogue of eras
- Rosettes and decorative overlays: accents of accents
- Technical nuances: how to do it right
- Wall preparation: foundation for texture
- Batton installation: precision and parallelism
- Molding installation: corners and joints
- Painting and finishing: color defines perception
- Color and light: physics of texture perception
- Contrast scheme: dark on light
- Monochromatic scheme: shades of one color
- Warm wood on cold background
- Lighting: sculpture with shadows
- Implementation examples: from living room to hallway
- Living room: accent wall behind the sofa
- Hallway: battens as coat rack
- Bedroom: headboard as art object
- Practical side: budget and timelines
- Material calculation for 3×2.5 meter accent wall
- Implementation timelines
- Frequently Asked Questions
- Conclusion: texture as new normal

Flat is boring. Flat walls painted in one color, devoid of texture and relief, turn a room into a box where the eye has nothing to catch on. The 2026 trend is volume, depth, layering.Plank wall claddingbrings vertical or horizontal lines that create rhythm, guide the eye, and structure space. Polyurethane moldings add classic frames, border slatted panels, and bridge modernity with tradition. When wood meets molding on a single wall, a new generation of eclecticism is born—not a chaotic mix of styles, but a thoughtful dialogue of materials where each enhances the other.3D wall finishingdoes not necessarily mean expensive 3D panels made of plastic or plaster. It is the combination of simple elements (slats, moldings, paint) in the right composition that creates an illusion of depth, interplay of light and shadow, and visual richness. In this article, we explore how wooden slats and polyurethane moldings come together in modern interiors, what technical nuances are important during installation, how color and light transform materials into a work of art, where to find quality materials, and how much it costs. We dive into the world of textured walls, where every millimeter of projection matters.
3D Trend 2026: Texture vs. Smoothness


Why the Flat Surface Lost
A decade ago, minimalism dominated in its most radical form: smooth white walls, no decor, furniture with simple geometric shapes. It was a reaction to the clutter of the 2000s, when interiors suffered from an excess of decorative elements. Minimalism freed up space, gave it air, and created visual calm. But the human psyche cannot exist for long in absolute emptiness. Smooth white walls began to be perceived as cold, clinical, and lacking character.
Architectural psychology shows: humans need visual anchors, points for focusing the gaze, and a variety of textures. In nature, there are no perfectly smooth surfaces: tree bark is textured, stone is rough, water creates ripples. An interior that mimics nature in its diversity of textures is perceived as more comfortable, lively, and humane.
The trend for textured walls is a return to tactility and visual richness without a return to excess. Not total wall cladding with complex carved panels, but local textured zones: one accent wall with slats framed by moldings, the other walls smooth. Not overload, but a targeted accent that creates the desired effect.
Our factory also produces:


What is the 3D Effect in Finishing
The 3D effect is an illusion of depth created by the interplay of light and shadow on a textured surface. When light falls on vertical slats at an angle, dark stripes (shadows) form between the slats, and the slats become light stripes (highlights). The eye perceives this as volume, even though the physical depth is only 20-50 mm (the thickness of the slat). The more contrasting the light and shadow, the stronger the 3D effect.
Moldings enhance the effect by creating an additional level of texture. If a slatted panel is surrounded by a molding 70-90 mm wide, projecting 15-20 mm from the wall, a two-level texture arises: the first level is the molding, the second level is the slats inside the frame. Between the frame and the slats is a gap (smooth painted wall), the third level. Three levels of depth create a complex interplay of shadows that changes throughout the day.
Painting elements in different colors enhances the 3D effect. If the slats are dark (walnut, wenge), the background between them is light (beige, gray), and the molding frame is white, each level is visually separated from the others not only by texture but also by color. The brain perceives this as a true three-dimensional structure, not a flat wall with overlays.
Get Consultation
Combination of Materials as a Philosophy of Eclecticism
Why wood plus polyurethane? Why not an entire wall of wood or entirely of molding? The answer lies in contrast. Wood is an organic material with texture, warmth, scent, and history. Polyurethane is a synthetic material, perfectly smooth, cool to the touch, and geometrically precise. The contrast between organic and synthetic creates tension that holds attention.
Classical polyurethane moldings reference palace architecture of the 17th-19th centuries, the European tradition of stucco decor. Wooden slats reference Japanese minimalism, Scandinavian simplicity, and modern architecture. When these two languages sound simultaneously on one wall, eclecticism arises—not a random mix, but a conscious combination of different eras and styles in a single composition.
Buy polyurethane molding for wallsand installing it means joining a classical tradition without astronomical costs. Plaster molding would cost 5-7 times more, weigh 8-10 times more, and require highly skilled specialists. Polyurethane has democratized classicism, making it accessible for standard apartments and middle-class country houses.
Wooden Slats: Vertical Rhythm and Horizontal Zoning
Anatomy of a Slat: Size Matters
Buy wooden skirting boardis the first step. But what cross-section, what wood species, what treatment? The final effect depends on this.
The cross-section of the slat determines the scale of the composition. Thin slats 20×30 mm or 25×40 mm create a light, graphic structure with delicate, almost Japanese lines. Suitable for small rooms 12-18 m², where massive slats would overload the space. Medium slats 30×50 mm or 40×50 mm are a universal solution for living rooms, bedrooms 18-30 m². Expressive enough to create noticeable texture but not overwhelming. Thick slats 40×60 mm or 50×70 mm are for spacious rooms 30+ m² with high ceilings 3.0+ meters. They create a monumental effect, pronounced texture, and a rugged look.
The wood species determines color, texture, and cost. Pine is the most affordable (350-550 rub/m), light (yellow-white), with pronounced knots and resin pockets. Suitable for budget projects, painting in opaque colors (when texture is hidden). Oak is expensive (650-950 rub/m), hard, with pronounced texture (large pores, contrasting annual rings), shades from light golden to dark brown. Ideal for projects where natural texture and respectability are important. Ash is mid-priced (580-780 rub/m), with pronounced texture, light (white-gray, white-yellow). A good alternative to oak when texture is needed but the budget is limited.
The treatment of the slat affects the visual and tactile effect. Planed slat—smooth, without roughness, ready for painting or oil finish. Brushed slat—with soft fibers removed (soft part of wood removed with a mechanical brush, leaving hard annual rings), creates a textured surface, emphasizes wood structure. Thermally treated slat—wood heated to 180-210°C in an oxygen-free environment, acquires a dark brown color (like bog oak), stability (does not deform from humidity), aroma (light smoky scent).
Vertical Slats: Gaze Upward, Ceiling Higher
Vertical placement of slats creates an optical effect of increasing room height. The eye follows the lines upward, and the ceiling appears higher than it actually is. This is especially important for standard apartments with ceilings 2.6-2.7 meters, where every centimeter of visual height is valuable.
The spacing between slats (distance between centers of adjacent slats) determines the density of the structure. Small spacing 50-80 mm creates an almost continuous surface with narrow gaps—a modern, graphic, slightly rugged effect. Medium spacing 100-150 mm—a balanced structure where slats and gaps are roughly equal—a universal solution for most interiors. Large spacing 180-250 mm—a sparse structure where slats are rare vertical accents, gaps dominate—suitable for spacious minimalist interiors where visual lightness is important.
The height of the slatted panel determines whether it will be perceived as full wall cladding or a decorative insert. A panel from floor to ceiling (2.5-3.0 meters) creates the impression of a full wooden wall—modern, eco-friendly, but requires a large amount of material. A panel 1.5-2.0 meters high (from 30-50 cm above floor level to 180-230 cm) is an optimal solution where slats cover the central part of the wall, visible when sitting and standing. Below and above the slats are smooth painted walls or molding frames.
Horizontal Slats: Dynamics and Expansion
Horizontal placement of slats creates an effect of expanding space. The eye follows along horizontal lines, and the wall appears longer, the room wider. Suitable for narrow rooms (hallways, corridors, elongated bedrooms) where space needs to be visually widened.
Spacing between horizontal slats is usually larger than for vertical ones (due to gaze orientation): 150-250 mm for dense structure, 250-400 mm for sparse. Too small spacing for horizontal slats (less than 120 mm) creates a feeling of blinds or grating—not always appropriate in a residential interior.
Combining vertical and horizontal slats on one wall creates a grid—a solution for eclectic, art-oriented interiors. Vertical slats with 200 mm spacing, horizontal with 250 mm spacing form a rectangular grid with 200×250 mm cells. Inside the cells, there can be a contrasting background color, decorative overlays, or lighting.
Zoning with Slats: Wall as a Partition
A slatted wall can serve not only as decoration but also as a functional element—a semi-transparent partition that divides space into zones without blocking light and air. In a 40 m² studio, a slatted partition separates the sleeping area from the living room: vertical slats measuring 40×60 mm with a 100 mm spacing form a screen 2.2 meters high and 3.0 meters wide. The screen stops 30-40 cm short of the ceiling (maintaining visual connection and air circulation) and is attached to the floor and partially to the wall. From the living room, the outlines of the bedroom are visible, but details are concealed. From the bedroom, the living room is visible through the gaps between the slats, yet a sense of privacy is created.
In a living-dining room, a slatted partition separates the dining area from the lounge: horizontal slats measuring 30×50 mm with a 200 mm spacing form a screen 1.5 meters high (at eye level for a seated person). The screen creates a visual boundary but does not isolate—the family at the dining table can see the TV in the living room, and light passes through freely.
Molding as an accent: classical frames with modern content
Molding is not just framing
Polyurethane decorative molding for walls—a universal tool for structuring space. Molding is a linear product (a strip 2.0-2.4 meters long) with a profile: simple (rectangular cross-section with one rounded edge or bevel) or complex (cavetto + torus + straight shelf + ornament).
The width of the molding determines its visual weight. Narrow molding (30-50 mm) creates a delicate, barely noticeable frame that defines a boundary without drawing attention. Medium molding (60-90 mm) is an expressive frame that is visible, creates structure, but does not dominate. Wide molding (100-140 mm) is a monumental frame that becomes a decorative element in itself, attracts attention, and imparts a classical character.
The molding profile defines the style. A simple profile (60×15 mm rectangle with a rounded front edge) suits modern, minimalist interiors where clean lines are important. A classical profile (40 mm cavetto + 15 mm torus + 20 mm straight shelf) suits neoclassical, classical interiors where connection to tradition is important. A carved profile (ornament—floral, geometric—on the molding surface) suits luxurious, eclectic interiors where decorative richness is important.
Frame around a slatted panel: a dialogue of eras
The most striking application of moldings with slats is creating a frame around a slatted panel. A wall 4.0 meters long and 2.8 meters high. The central part of the wall (a rectangle 2.5 meters wide and 2.0 meters high, positioned 40 cm from the floor) is covered with vertical oak slats measuring 40×50 mm with a 120 mm spacing. Around the perimeter of this rectangle, a white polyurethane molding 80 mm wide with a classical profile (cavetto + torus) is installed. The rest of the wall is smooth, painted light gray.
Effect: modern content (slats—a nod to minimalism, Japanese design) in a classical frame (molding—a nod to European palaces, Empire style). The contrast between modernity and classicism creates tension, making the composition interesting, not banal. The natural wood texture inside the frame contrasts with the perfectly smooth polyurethane surface. The warm tones of oak contrast with the cold white of the molding.
The molding also serves a practical function: it covers the ends of the slats (top, sides), creating a neat finish for the structure. Without molding, the slat ends are visible, which may look unfinished. The molding conceals technical details, leaving only aesthetics.
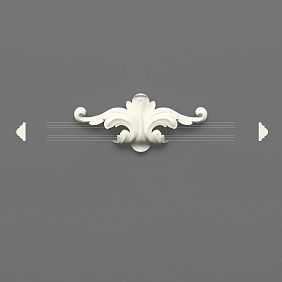
Rosettes and decorative overlays: accents within accents
If a slatted panel with a molding frame is already a strong accent, rosettes and decorative overlays are accents within the accent, enhancing decorative richness for luxurious eclectic interiors.
A ceiling rosette 60-80 cm in diameter, installed on the wall (not on the ceiling) centered above the slatted panel, creates an additional decorative layer. A rosette with a classical ornament (acanthus leaves, roses, concentric circles) painted white or gold draws the eye, creating a compositional center. Below the rosette on the wall, a mirror, painting, or light fixture may hang—the rosette frames them, creating a frame within a frame.
Decorative corner overlays measuring 12×12 cm, 15×15 cm are installed at the corners of the molding frame around the slatted panel. Overlays with ornament (leaves, scrolls, geometric patterns) are painted the same color as the molding or a contrasting one (gold overlays on a white frame). The corners become decorative accents, enhancing the classical character of the composition.
Technical nuances: how to do it right
Wall preparation: the foundation for relief
Before installing slats and moldings, the wall must be prepared. Requirements depend on the type of slat attachment.
Direct gluing of slats to the wall requires a perfectly even surface. If the wall has irregularities exceeding 2-3 mm per meter, the slats will follow these irregularities, creating waves and gaps. Leveling the wall with plaster or drywall is mandatory. After leveling, the wall is primed (to improve adhesive adhesion) and painted in a base color (the background color visible between the slats). Only after the paint has completely dried are the slats glued.
Attaching slats to a frame (battens) does not require a perfectly even wall. Horizontal battens 40×40 mm or 50×50 mm are mounted on the wall with a spacing of 60-80 cm (for vertical slats) or vertical battens with a spacing of 80-100 cm (for horizontal slats). The battens are leveled (each batten strictly horizontal or vertical) and attached to the wall with dowels. Wall irregularities are compensated with shims under the battens. After the frame is installed, the slats are attached to it with screws or nails.
The frame method is preferable if hidden lighting is planned behind the slats (LED strip installed on the frame between the wall and slats, light emerges through the gaps between slats) or if the walls are very uneven.
Slat installation: precision and parallelism
Wall marking is the first and critical step. The center of the slatted panel is determined (usually at the wall center), and distances are marked outward in both directions according to the chosen spacing. Each slat must be strictly vertical (for vertical) or horizontal (for horizontal). Even a 1-2° deviation is noticeable to the eye, creating a sense of carelessness.
Tools for control: laser level (projects a strictly vertical or horizontal line onto the wall), long spirit level (2.0 meters), plumb line (for verticals). Each slat is checked with a level before final fixation.
Slat attachment depends on the method. Gluing: mounting adhesive (Moment Montage, Titebond) is applied in a zigzag line to the back of the slat, the slat is pressed against the wall, aligned with the markings, and held for 30-60 seconds. The adhesive sets in 4-6 hours, fully cures in 24 hours. Frame attachment: the slat is placed against the frame and attached with screws (for thick slats 40×60 mm) or finish nails (for thin slats 25×40 mm) at intersections with the frame battens. Screw or nail heads are countersunk 1-2 mm, then filled (if slats are to be painted) or left visible (if slats are to be oiled—the heads become part of the industrial aesthetic).
Slat trimming: the top and bottom ends of the slats are cut squarely at 90° (if the slats run from floor to molding level) or at an angle (if the top of the slatted panel has a decorative finish). Tools: miter saw (for precise cuts at the required angle) or hand saw with a miter box.
Molding installation: corners and joints
Molding is installed after the slats (if the molding frames the slatted panel) or before the slats (if the slats run over molding frames—an alternative scheme). Classic scheme: slats first, molding on top, covering the slat ends.
Cutting molding to size: the perimeter of the slatted panel is measured, the molding is cut into four parts (two vertical, two horizontal). Molding corners are mitered at 45° (for right angles) using a miter saw or miter box. Miter precision is critical: if corners do not align, a gap or overlap occurs, which looks unprofessional.
Gluing moldings: polyurethane adhesive (specific for polyurethane molding) or universal mounting adhesive is applied to the back of the molding, the molding is pressed against the wall according to markings, and fixed with temporary supports (if the molding is heavy) or painter's tape (if light). After 24 hours, the adhesive fully sets, and supports are removed.
Sealing joints: corner joints of moldings and joints between molding and wall are filled with white acrylic sealant (if the molding will be white) or transparent (if it will be painted). Sealant is applied from a syringe in a thin line, smoothed with a wet finger or rubber spatula. After drying (2-4 hours), the sealant is sanded with fine sandpaper, making the joints invisible.
Painting and finishing: color determines perception
Battens can remain natural (coated only with oil or varnish that preserve the wood texture) or painted in opaque colors (white, black, gray, any RAL). The choice depends on the concept.
Natural batten finishing with oil: oil (Osmo, Biofa, Tikkurila) is applied with a brush or roller in 2-3 coats with intermediate drying of 8-12 hours. The oil penetrates the wood, emphasizes the texture, creates a matte or satin surface. The oil color can be transparent (preserves the natural wood color) or tinted (changes the shade: amber, walnut, wenge). Advantages: wood texture is visible, surface is tactilely pleasant, warm. Disadvantages: requires renewal every 2-3 years (oil wears off).
Painting battens with enamel: enamel (acrylic, alkyd) is applied with a brush or spray gun in 2 coats after priming. Any color from the RAL catalog. The surface is smooth, glossy or matte (depends on the enamel type). Advantages: better protection than oil, any color, does not require renewal for 5-8 years. Disadvantages: wood texture is hidden, surface is colder to the touch.
Moldings are painted after installation. Standard color is white (creates classic purity, contrasts with colored walls and dark battens). Process: primer (if the molding is not pre-primed by the manufacturer), two coats of acrylic paint with intermediate drying of 4-6 hours, light sanding with fine sandpaper between coats (for smoothness). Alternative colors: gold (for luxurious interiors, molding is painted with gold paint or patinated — gold is applied to the protruding parts of the relief), gray, beige, black (for contrasting modern interiors).
Color and light: the physics of relief perception
Contrast scheme: dark on light
The most effective color scheme for batten finishing: dark battens on a light background. Oak battens tinted in dark walnut or wenge (bitter chocolate color), background between battens is light gray or beige, frame molding is white. The contrast of dark and light creates maximum shadow depth, the relief is readable from any distance and under any lighting.
This scheme is suitable for spacious rooms 25+ m², where dark elements do not consume space. In small rooms 12-18 m², dark battens on a light background can visually reduce space, create a sense of heaviness.
Monochromatic scheme: shades of one color
Monochromatic scheme: battens, background, and molding in different shades of the same color. For example, battens light gray (RAL 7035), background medium gray (RAL 7038), molding dark gray (RAL 7016). Or vice versa: battens dark gray, background light gray, molding white (which reads as the lightest gray).
Monochromatic scheme creates restraint, elegance, absence of visual noise. The relief is read through shadows, not color contrast. Suitable for minimalist, Scandinavian interiors where harmony and tranquility are important.
Warm wood on a cold background
Classic scheme: natural battens (oak or ash under oil, amber-brown or honey-yellow color) on a cold gray background. Molding is white. The contrast of warm and cold creates visual tension that makes the composition lively. Warm wood is associated with coziness, cold gray background with modernity, white molding with classicism. All three elements work on different levels of perception, creating multi-layeredness.
Lighting: sculpture with shadows
A relief wall with battens and moldings is revealed through lighting. Frontal light (chandelier or fixture opposite the wall) creates weak shadows, relief reads poorly. Side light (wall sconce, floor lamp to the side of the wall) creates deep oblique shadows, relief is maximally expressed.
Hidden backlighting behind battens (LED strip on the frame between wall and battens) creates a glowing wall effect: light emerges through gaps between battens, creating vertical light stripes. The background between battens glows, battens look like dark silhouettes on a glowing background. The effect is dramatic, futuristic, suitable for bars, showrooms, avant-garde interiors.
Accent lighting from above (spot or track light directed at the batten panel at a 45-60° angle) creates a theatrical effect: battens are illuminated, shadows are long and expressive, frame molding is also in the light. The entire composition is perceived as an exhibit, a work of art.
Implementation examples: from living room to hallway
Living room: accent wall behind the sofa
Wall 4.5 meters long, 2.7 meters high behind a three-seater sofa. The central part of the wall (rectangle 3.0×2.0 meters, from 40 cm above floor level to 240 cm) is covered with vertical ash battens 30×50 mm with a pitch of 120 mm, battens coated with amber-colored oil. Around the perimeter of the rectangle — white molding 70 mm with a classic profile. The rest of the wall is painted gray-beige. Above the batten panel on the wall is a rosette 70 cm in diameter with a floral pattern, painted white with gold accents. Below the rosette is a mirror in a thin gold frame.
Effect: luxurious eclecticism, where modern battens, classic molding, and decorative rosette create a multi-layered composition. The sofa (gray velour) against this wall looks like a throne. The living room gets a focal point that organizes the entire space.
Hallway: battens as a coat rack
Wall in hallway 2.5 meters long, 2.6 meters high. Across the entire wall width, horizontal oak battens 40×50 mm with a pitch of 180 mm at a height of 80-220 cm (8 battens total). Battens are mounted on a frame, protruding 60 mm from the wall. Metal hooks for clothes are hung on the battens (every 40 cm). Battens are tinted dark walnut. The wall above and below the batten zone is painted light gray. Above (over battens) and below (under battens, at baseboard level) white moldings 60 mm are installed, framing the batten zone horizontally.
Effect: functional beauty. Battens are not just decor, but also a coat rack. Horizontal lines visually widen the narrow hallway. White moldings create classic accents, linking the hallway with the rest of the apartment's classic interior.
Bedroom: Headboard as an Art Object
Wall behind bed headboard 3.0 meters long, 2.8 meters high. Rectangle 2.4×1.5 meters (from bed headboard level 120 cm to 270 cm) covered with vertical pine battens 25×40 mm with a small pitch of 70 mm (dense structure), battens painted white. Around the perimeter of the rectangle — white molding 50 mm with a simple profile (rectangular cross-section with a chamfer). The rest of the wall is painted deep blue (night sky color). Behind the battens (between battens and wall) hidden warm white LED backlighting.
Effect: the headboard turns into a glowing panel. In the evening, the backlight turns on, light emerges through narrow gaps between white battens, creating a magical effect. Deep blue background enhances contrast. The bedroom gains intimacy, coziness, and simultaneously futurism.
Practical side: budget and timelines
Material calculation for an accent wall 3×2.5 meters
Batton panel 2.5 meters wide, 2.0 meters high. Vertical oak battens 40×50 mm, pitch 120 mm. Number of battens: 2.5 / 0.12 = 21 battens. Height of each 2.0 meters. Total 21 × 2.0 = 42 meters of battens × 750 rub/m = 31,500 rub.
Frame (if frame method is chosen): horizontal bars 40×40 mm, 4 bars 2.5 meters each = 10 meters × 180 rub/m = 1,800 rub.
Panel molding trim: perimeter 2.5+2.0+2.5+2.0 = 9.0 meters, molding 70 mm × 680 rub/m = 6120 rub.
Decorative rosette with a diameter of 70 cm: 8500 rub.
Installation materials (adhesive, screws, sealant, primer): 3500 rub.
Paint (for molding and rosette): 2 liters of acrylic paint × 850 rub/l = 1700 rub.
Oil for slats: 1.5 liters × 1200 rub/l = 1800 rub.
Total materials: 31500+1800+6120+8500+3500+1700+1800 = 54920 rub.
Installation (wall leveling if necessary, frame installation, slat installation, molding and rosette installation, painting): 28000-38000 rub depending on region and crew qualification.
Total: 54920 + 33000 (average) = 87920 rub for an accent wall 3×2.5 meters with slats, moldings, and a rosette.
Implementation Timeline
Day 1: wall preparation (leveling if necessary, priming, base background painting). Day 2: frame installation (if a frame method is chosen). Days 3-4: slat installation, leveling, fastening. Day 5: molding cutting, mitering, gluing. Day 6: rosette installation, joint sealing. Day 7: molding and rosette painting (first coat). Day 8: molding and rosette painting (second coat), oil application on slats (first coat). Day 9: oil application on slats (second-third coat), final sanding. Total time: 9-10 days of work for one master or 5-6 days for a 2-person crew.
Frequently asked questions
Can slats and molding be combined in one room?
Not only can they be combined, but they should be to create eclectic interiors. Slats provide modernity and naturalness, molding provides classicism and structure. Together they create visual richness.
What spacing between planks is optimal?
For vertical slats — 100-150 mm (balance of density and airiness). For horizontal — 180-250 mm (due to the horizontal orientation of the gaze). Too small a spacing creates a grid-like feel, too large — the slats get lost.
Is a frame needed under the slats or can they be glued directly to the wall?
Depends on wall evenness and the need for hidden lighting. If the wall is perfectly even and lighting is not needed — they can be glued. If the wall is uneven or lighting is needed — a frame is mandatory.
How much does polyurethane molding cost?
From 350 rub/m (narrow 30-40 mm, simple profile) to 1200 rub/m (wide 100-140 mm, carved profile). Average molding 60-80 mm with a classic profile costs 550-750 rub/m.
How to care for a plank wall?
Oil-finished slats are wiped with a damp cloth once a month, oil is renewed every 2-3 years. Enamel-finished slats are wiped with a damp cloth, repainted as needed every 5-8 years. Moldings are dusted, do not require special care.
Is a slat wall suitable for a bathroom or kitchen?
Yes, but with caveats. Slats must be made of moisture-resistant species (larch, thermally treated wood) or treated with moisture-protective compounds. Polyurethane moldings are moisture-resistant by definition. In areas of direct water exposure (shower), slats are undesirable; in other areas of the bathroom and kitchen — quite suitable.
Conclusion: relief as the new norm
Wall finishing with slats and polyurethane molding is not a designer's whim, but a response to the demands of the time. People are tired of smooth, featureless walls that offer no food for the eyes and soul. Relief brings volume, texture, play of light and shadow back into the interior. Wooden slats bring the warmth of natural material, vertical or horizontal rhythm, and the possibility of zoning without partitions. Polyurethane molding adds classical forms, structures space, frames modern content in a traditional frame.
The 3D effect in wall finishing is achieved not with expensive panels made of exotic materials, but with simple elements in the right composition. Slats create the first level of relief, moldings — the second, painting in contrasting colors enhances the perception of depth. Light falling at an angle creates shadows that turn the wall into a sculpture.
Implementation cost varies from 60000 rubles for a simple accent wall with slats and molding to 180000-250000 rubles for full living room decoration with slat panels on all walls, rosettes, complex molding compositions. The average budget for an accent wall in a living room 3×2.5 meters is 85000-110000 rubles for materials and installation.
Company STAVROS offers a full range of materials for creating relief walls. Wooden slats made of solid oak, ash, pine — with cross-sections from 20×30 mm to 60×80 mm, length up to 3 meters. More than 25 variants of cross-sections and profiles. Possibility of painting, tinting, brushing. Slats are manufactured on precision equipment, geometry is perfect, moisture content 8-12% (stable material, does not deform).
Polyurethane molding over 700 items — moldings width from 20 to 150 mm, simple and carved profiles, flexible moldings for curved surfaces. Ceiling rosettes diameter from 30 to 150 cm, classical and modern ornaments. Decorative overlays, corner elements, consoles, pilasters. All products made of dense polyurethane (density 250-300 kg/m³ for interior molding), primed with white primer, ready for painting.
Design studio STAVROS develops relief wall projects with 3D visualization. You see how slats combine with moldings, how colors interact, how light creates shadows. Corrections are made at the project stage, saving time and money. The project includes the layout of each slat, calculation of all materials with accuracy to the meter, estimate, installation recommendations.
When ordering a set of materials (slats + moldings + rosettes) for wall finishing worth from 40000 rubles, STAVROS provides a 7% discount on decorative elements. For orders from 80000 rubles — a 10% discount plus free delivery in Moscow and Moscow region. For orders from 150000 rubles — a 12% discount plus free delivery across Russia. Savings 5000-22000 rubles.
STAVROS installation crews — specialists with experience in wood and polyurethane. Installation of slat panels with marking, frame installation, precise slat fastening. Installation of moldings with mitering, joint sealing. Installation of rosettes and decorative overlays. Painting and oil treatment. Work in Moscow, St. Petersburg, travel to regions for large projects, 3-year warranty.
Choosing STAVROS, you get a partner in creating interiors where walls cease to be a background and become works of art. Where modernity meets classicism not in a museum, but in your living room. Where wood and polyurethane work together, creating relief that pleases the eye and warms the soul. Create volume. Give walls a third dimension. With STAVROS it is real, affordable, beautiful.


