Article Contents:
- Anatomy of Protection: Why baseboard is more than decoration
- Corner Elements: Where craftsmanship is revealed
- Seam Strips: The Art of Invisible Joints
- Neat Joints: Details that create the picture
- Master’s Tools: What is needed for perfect seams
- Technology of Flawless Installation
- Mistakes That Ruin Beauty
- Materials and Wood Species
- Protection and Finishing: Extending the Life of Joints
- Special Cases: Non-Standard Solutions
- Quality Control Tools
- Care for Joints
- Joints in Different Interior Styles
- Economics of Quality
- Frequently Asked Questions
- Conclusion

When finishing a renovation, we often underestimate the importance of details. Yet it is precisely these details that create the difference between a simply finished room and a space where everything is thought out down to the millimeter.wooden baseboards for flooring— it is not just a decorative strip at the base of the wall. It is an engineering solution that protects the lower part of walls from mechanical damage, hides technological gaps, and gives the interior a finished look. But all this works only under one condition: the baseboard must be installed flawlessly. Especially this applies to corners and joints — places where true craftsmanship is revealed.
— why exactly corners and joints require such close attention? Because any inaccuracy, any gap, any misalignment of planes is immediately noticeable. Even the most expensivewith a classic profile creates a sense of solidity, reliability.will look cheap and sloppy if corners are cut carelessly. Conversely, properly executed joints transform an ordinary baseboard into a professional design element. This is the art of invisible connections, where every millimeter matters.


Anatomy of Protection: Why baseboard is more than decoration
Baseboard is often perceived as purely decorative. This is a fundamental misconception. Yes, aesthetic function is important, but it is far from the only one.wooden baseboards for floorperform a whole range of practical tasks, each of which is critical for the durability and functionality of the interior.
Wall protection — the primary function. The lower part of the wall is subjected to constant mechanical impacts: vacuum cleaner hits, mop strokes, accidental bumps from furniture during rearrangement. Without a protective strip, plaster or wallpaper in this area quickly deteriorate. A wooden baseboard takes on all these impacts, preserving the wall finish in its original state.
Hiding technological gaps — the second most important task. Any floor covering requires a compensatory gap between the floor and the wall. Laminate, parquet, solid wood — all of them expand and contract depending on temperature and humidity. A 10-15 mm gap is mandatory, but it looks unattractive. The baseboard elegantly covers this technological gap, creating visual continuity.
Masking utilities — the third function, especially relevant in modern interiors. Electrical cables, internet cables, antenna runs — all of this can be hidden behindWooden baseboard, freeing the space from the visual chaos of wires. Special profiles with cable channels exist, but a wooden baseboard of sufficient width can handle this task as well.
Sealing the floor-wall joint — a function rarely considered but critical for maintaining cleanliness. Without a baseboard, dust and dirt accumulate in the gap between the floor and the wall, and moisture penetrates during cleaning. All this creates a breeding ground for bacteria and unpleasant odors. A properly installed baseboard solves this problem once and for all.


Corner Elements: Where craftsmanship is revealed
Corners — this is where truth is revealed in baseboard installation. It is here that professionals are distinguished from amateurs. There are two types of corners: internal and external, and each requires its own approach. In a standard rectangular room, the angle between walls is 90 degrees, so each baseboard strip must be cut at a 45-degree angle. Sounds simple, but in practice requires precision and experience.
Internal corners are found in any room — these are places where walls form the corner space of the room. Here, two baseboard strips meet, forming a joint. The task is to make this joint completely invisible, without gaps or height differences. To do this, each strip is cut at a 45-degree angle, but not just any way — according to direction. The first strip is cut with a leftward tilt, the second — rightward. When properly fitted, they form a perfect right angle.
External corners — a more complex case. These are protruding parts of walls, columns, bay windows. Here, the baseboard must wrap around the obstacle, and both strips are cut so that their outer edges meet at the required angle. External corners are more noticeable than internal ones, so any inaccuracy is immediately obvious. Professionals use a miter saw with a rotating table, which allows setting the exact cutting angle.
Non-standard angles are a separate topic. Not all rooms have perfect 90-degree angles. Older buildings often feature non-right angles, and even in modern design, unconventional solutions are encountered. Here, a simple miter saw won't suffice. You need to measure the actual angle between walls, divide it in half, and cut the baseboards to match that value. For example, if the angle between walls is 92 degrees, each board is cut at 46 degrees.
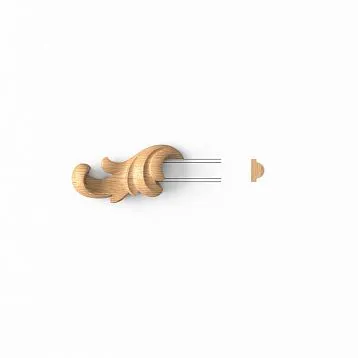
Corner connectors are an alternative solution used in some baseboard systems. These are special plastic or wooden elements inserted into the corner, with straight-cut boards attached to both sides. This approach is easier to install but less aesthetically pleasing.Buy decorative elementsCan be used for various purposes, but for high-quality wooden baseboards, it's better to avoid additional inserts — a classic 45-degree miter cut looks more elegant.
Our factory also produces:


Joint boards: the art of invisible connections
Walls are rarely shorter than the standard baseboard length, but in spacious rooms, it's inevitable that several boards must be joined on a straight section. Joining boards is no less critical than corner finishing. An improperly executed joint creates a gap that collects dirt, or conversely, a step that catches the eye.
Direct connection — the most common method. The ends of two boards are cut precisely at a right angle and pressed tightly together. Sounds elementary, but requires absolute precision. Any deviation from perpendicularity creates a gap. Professionals use a miter saw, which ensures an ideal straight cut. After fitting, the joint is further refined with fine-grit sandpaper for perfect alignment.
Beveled joint — less noticeable but more labor-intensive method. Both boards are cut at a 45-degree angle, but in the same direction. When joined, a diagonal seam forms, which is less noticeable to the eye than a straight joint. This method is especially good forwide wooden baseboardwhere a direct joint would be too noticeable.
Joint profiles — special elements used in some systems. These are plastic or metal inserts glued into the ends of both boards, ensuring a rigid connection. This method is reliable, but the joint remains visually noticeable. For high-quality wooden baseboards, this is not the best solution.
Joint sealing — mandatory step, regardless of the connection method. Even perfectly fitted boards may develop micro-gaps over time due to natural wood shrinkage. Professionals use transparent acrylic sealant or specialized wood glue. The compound is applied in a thin layer before final baseboard fixation, and excess is immediately wiped away with a damp cloth. After drying, the joint becomes completely monolithic and waterproof.
Get Consultation
Accurate transitions: details that create the picture
Baseboards don't exist in a vacuum — they interact with other interior elements. Doorways, built-in furniture, staircases, radiators — all these create transition points where the baseboard must finish correctly. It is precisely the quality of these transitions that distinguishes professional work from amateur work.
Transition to door casing — the most common and simultaneously most visible joint. There are several ways to solve this. The simplest is a direct 90-degree cut so the baseboard rests against the casing. It works, but looks rough — the baseboard's end is visible. A more elegant solution is a 45-degree cut along the baseboard's thickness, followed by creating a decorative 'heel'. This small triangular element, cut from leftover baseboard, covers the transition, creating a visually seamless structure.
Transition to built-in furniture requires precise measurements. Kitchen cabinets, sliding wardrobes, built-in shelves — all have a plinth that must harmonize withwooden skirting board purchase. The ideal option is when the furniture plinth height matches the baseboard height. Then they form a single line around the entire room perimeter. If heights don't match, the baseboard is neatly trimmed or extended using an additional profile.
Transition to stairs — a complex joint, especially if the staircase is wooden. Here, not only technical execution but also stylistic unity matters.Balusters for staircaseAnd baseboards must be made of the same wood species, with identical finishing. The baseboard either abuts the lower step directly or smoothly transitions into a decorative element that wraps around the staircase run.
Transition to radiators — a headache for many homeowners. How to elegantly wrap baseboards around a radiator? There are two approaches: either make complex cuts around the radiator legs, or simply cut the baseboard before the radiator and start again after it. The second option is simpler but less aesthetic. Professionals prefer the first, usingDecorative brackets for shelvesAnd other elements for smooth transitions.
Tools of the master: what you need for perfect joints
The quality of joints directly depends on the tools used. Attempting to cut a baseboard at 45 degrees with a regular hacksaw 'by eye' is doomed to fail. Even an experienced craftsman cannot achieve perfection without appropriate equipment. Let's consider the toolset required for professional installation.
Miter saw — the king of tools for baseboard work. This is a specialized disc saw with a rotating table that allows setting an exact cutting angle from 0 to 45 degrees in both directions. Professional models feature a laser guide that shows the cut line before turning on the saw. This allows precise positioning of the workpiece. The price of a miter saw starts at 10,000 rubles for household models and can reach 100,000 for professional ones. For one-time repairs, it's not necessary to buy it — you can rent it.
Miter box — a budget alternative to a miter saw. This is a simple device made of plastic, wood, or metal with slots for different angles. The baseboard is placed in the miter box, the hacksaw is inserted into the required slot, and the cut is made. Simple miter boxes have only two angles — 45 and 90 degrees. Professional models allow angle adjustment. Cost ranges from 300 to 3,000 rubles. The main drawback of a miter box is difficulty holding the workpiece strictly vertically, which can lead to deviations.
Metal hacksaw — the optimal tool for cutting wooden baseboards. Its fine teeth leave a clean cut without chips or scratches. A wood hacksaw with large teeth is unsuitable — it produces a rough cut that requires extensive sanding later. It's important that the blade is well-tensioned and free of play — any vibration during cutting results in an uneven cut.
A jigsaw can be used for straight cuts and simple miter cuts, but it is unsuitable for precise angled joints. Even with a guide, it's difficult to achieve a perfectly flat cut at the desired angle. A jigsaw is good for cutting complex contours, for example, when navigating around pipes or other obstacles.
Sanding machine or sandpaper — essential tools for final joint finishing. Even perfectly mitered ends require light sanding for absolute alignment. Fine-grit sandpaper — 180-240 grit — is used. Coarse-grit sandpaper will leave scratches visible on the finished product.
Measuring tools — tape measure, square, protractor — are necessary for accurate marking. Professionals use a laser level, which projects a perfectly straight line onto the wall. This is especially important when working withand paint it to the desired shade — standard practice in modern design. It is important to use special wood finishes that allow the material to breathe., where any curvature is immediately noticeable.
Technology of flawless installation
Even the most expensive tools do not guarantee a perfect result without proper technology. Installing wooden baseboards is a sequence of clearly defined operations, each affecting the final outcome. Let's examine the process from start to finish.
Surface preparation — the first and most important stage. Walls must be flat, dry, and free of dust and construction debris. If walls are uneven, with bumps and hollows, the skirting board will not fit tightly, leaving gaps. Ideally, walls should be leveled with plaster or drywall. If this is not possible, you will need to use a flexible skirting board or fill gaps with sealant.
Material acclimatization — an important step often ignored.wooden baseboards for floorBefore installation, materials must rest in the room for at least 48 hours. Wood absorbs or releases moisture depending on conditions, slightly changing its dimensions. If you install the skirting board straight from a cold warehouse, it may deform after installation.
Marking and cutting — a stage requiring attention and precision. Start with the longest wall, measuring the distance from corner to corner. Do not add a margin — the skirting board must fit perfectly between walls. Then, mark the skirting board precisely with a pencil, check with a square, and only then cut. Professionals first perform a "dry" layout of all elements around the room, checking all joints, and only then proceed with installation.
Cutting angles — the most critical operation. For an internal corner, place the first board in the miter saw with the bottom part facing up, press it against the back wall, and cut at a 45-degree angle to the left. Cut the second board similarly, but at a 45-degree angle to the right. For an external corner, the order is reversed — boards are cut so their outer edges are longer than the inner ones.
Mounting to the wall — the final stage.buy wooden skirting boardThis is half the job — it must be properly secured. There are three main methods: using screws, adhesive, or clips. Screws are the most reliable method for wooden skirting boards. First, drill holes with concealed heads in the skirting board, then position it against the wall, mark the screw points, and drill holes for wall plugs. The screw spacing should be 40–60 centimeters. It is important not to overtighten screws, as this may deform the skirting board.
Final joint finishing — the last touch. All corner joints and straight joints are treated with acrylic sealant of the appropriate color. Sealant is applied in a thin line, excess is immediately wiped away with a damp cloth. After drying, joints become invisible. Screw heads are covered with decorative caps matching the wood color or filled with specialized wood putty followed by sanding.
Mistakes that ruin the appearance
Even understanding the theory, it's easy to make mistakes that spoil the skirting board's appearance. Let's consider the most common errors and how to avoid them.
Incorrect miter cut — a classic mistake. Both boards are cut at 45 degrees, yet there's still a gap in the corner. The reason — walls are not perfectly straight, the actual angle is not 90 degrees. Solution — measure the actual angle with a protractor and adjust the cut. Or use a template: place two skirting board pieces in the corner, mark the cut lines directly on the spot.
Gaps between skirting board and wall — result of uneven walls. If the unevenness is minor (up to 5 mm), it can be hidden by pressing the skirting board with weight during the adhesive setting time. If greater, either level the wall or use a special skirting board with a soft edge that adapts to unevenness.
Visible screw heads — result of rushing or improper fastener selection. Screw holes must be countersunk — expanded at the surface — so the screw head sits flush. After installation, they are covered with caps or filled with putty. Some craftsmen pre-paint screw heads to match the wood color — making them less noticeable.
Scratches and dents on ends — result of using dull tools or incorrect saw selection. The saw blade must be sharp with fine teeth. When cutting, do not rush — move the saw smoothly without jerking. If a scratch does form, carefully sand it and tone it with a wood-colored marker.
Uneven skirting board height at joints — result of an uneven floor or improper mounting. During installation, constantly monitor vertical and horizontal alignment using a level.Wooden beamThe ceiling trim and skirting board on the floor must be strictly parallel to each other.
Materials and wood species
Joint quality depends not only on skill but also on the material itself. Different wood species behave differently during cutting and installation. Let's examine the characteristics of the main options.
Spruce — the most popular wood species for skirting boards. Soft, easy to cut, does not produce scratches with proper tools. The downside — softness makes it vulnerable to mechanical damage. SpruceWooden baseboardis easy to scratch or dent. However, spruce holds screws well, does not crack when mounted.
Oak — a premium choice. Hard, dense, practically eternal. Oak skirting boards last for decades without visible wear. However, hardness creates difficulties during processing. Cutting oak is more difficult, requiring powerful tools. When mounting with screws, pre-drilling is necessary — otherwise, the skirting board may split. Oak skirting board joints are perfect — hard wood does not compress, maintains shape.
Ash — similar to oak in properties, but lighter and with a more pronounced texture. Easy to cut, produces clean joints without scratches.Furniture legsand ash skirting boards — a choice for modern interiors where natural wood beauty is valued.
Beech — the golden middle ground between spruce and oak. Sufficiently hard for longevity, but not overly difficult to process. Beech skirting boards hold their shape well, do not warp, and produce neat joints.Beech balustersand skirting boards create a sense of quality and reliability.
Larch — a unique species that does not fear moisture. It becomes harder over time. Larch skirting boards can be installed even in rooms with high humidity — bathrooms, kitchens, saunas. During cutting, it produces minor scratches due to high density, but the right tool solves this problem.
Protection and finishing: extending the life of joints
Even perfectly executed joints require protection. Unprotected wood quickly absorbs moisture, dirt, and loses its original appearance. Final finishing is not just aesthetics — it is longevity.
Varnishing — a classic protection method. Varnish creates a transparent film that does not allow moisture and dirt to pass through, while preserving the natural wood texture. For skirting boards, use high-wear-resistant polyurethane or acrylic varnishes. An important point — skirting board ends must be painted especially carefully. Wood absorbs moisture fastest through ends. At joint areas, it is recommended to apply two to three layers of varnish for reliable sealing.
Painting opens up endless design possibilities. Whiteand paint it to the desired shade — standard practice in modern design. It is important to use special wood finishes that allow the material to breathe.and paint — standard practice in classic and Scandinavian interiors. The paint must be special, for wood, with elastic properties. This is important because wood slightly 'breathes,' and ordinary paint may crack. Joints are painted with a fine brush, with special care.
Wax-oil — a natural alternative to varnish. It penetrates the wood structure, highlights the texture, and gives a silk-like finish. The oil coating preserves the tactile qualities of wood — the skirting board remains warm and pleasant to the touch. The downside — it requires periodic renewal. However, local repairs are simple: it's enough to re-oil the damaged area.
Patination — a technique of artificial aging that turns a new skirting board into an antique item. It looks especially effective at joints and corners, where dark pigment accumulates in cracks, emphasizing the relief. Patina is ideal for classic interiors, Provence, and vintage styles. Process: base color, patinating compound, removal of excess, sealing with varnish.
Sealing joints with acrylic compound — mandatory final step. Even under a layer of varnish or paint, micro-cracks may remain. Acrylic sealant, matched to the finish color, is applied as a thin line along all joints. This is not only protection against moisture, but also additional strength of the joint.
Special Cases: Non-standard Solutions
Skirting board installation does not always follow a standard scheme. There are situations requiring non-standard solutions. Let's consider the most common ones.
Curved walls — a nightmare for those working with rigid wooden skirting boards. Bay windows, round columns, wavy walls — all of this requires a special approach. Option one — use a thin flexible skirting board that can be bent to the radius. Option two — assemble the curve from short straight segments, making frequent joints. Option three — order a bent skirting board to size, which is expensive but gives an ideal result.
Very uneven walls with height differences exceeding 5-7 millimeters require preliminary leveling. But if this is impossible, use a flexible skirting board with a soft edge or fill gaps with acrylic sealant. Some masters use a trick: make longitudinal grooves-compensators on the back of the skirting board, which allow the board to slightly bend, following the wall's relief.
Underfloor heating creates special conditions. The floor covering expands more than usual, and the compensatory gap must be larger. The skirting board is attached only to the wall, never to the floor. This allows the covering to move freely.legs for a table to buyand skirting boards must account for the presence of underfloor heating.
Pipes emerging from walls or floors require careful routing. Option one — make a semicircular cutout in the skirting board to fit the pipe diameter. Option two — cut the skirting board lengthwise into two parts, route the pipe from both sides, and glue the parts back together. Option three — use decorative rose covers that conceal the pipe exit and skirting board junction.
Joint between different floor coverings — an area requiring special attention. If one room has parquet and another has tiles, their levels may not match. The skirting board must account for this height difference. Either use two different skirting boards, each for its respective level, or one with a transition strip at the joint.
Quality control tools
How to understand that joints are perfectly executed? There are objective criteria by which you can assess the quality of work.
Visual inspection — the first and most obvious method. Stand 2-3 meters away from the wall and carefully examine all corners and joints. Gaps should not be visible. Then approach closer, sit down, look from different angles, under different lighting. Any unevenness, step, gap should be noticed.
Tactile check — run your hand along the joint. Fingers can feel even small height differences that the eye may not notice. The joint should be absolutely smooth, without steps or protrusions.
Moisture resistance check — drop water on the joint and observe. Water should not be absorbed; it should run off or dry on the surface. If water is absorbed — the sealant is insufficient, moisture will penetrate through this joint during wet cleaning.
Strength check — light pressure on the skirting board at the joint should not cause movement, creaking, or gap opening. The joint should be monolithic, like a single board.
Photo control — take photos of all corners and joints immediately after installation. Repeat this after a month. If gaps appear, it means the sealant was insufficient or insufficiently dried wood was used.
Care for joints
Properly executed joints require almost no maintenance, but a few simple rules will keep them looking flawless for decades.
Regular dry cleaning — the minimum required for wooden skirting boards. Dust should not accumulate in joints. Once a week, vacuum with a soft attachment or wipe with a microfiber cloth.
Wet cleaning is allowed, but without excess water. The cloth should be well wrung out, almost dry. Excess moisture may penetrate micro-cracks, causing wood swelling. Use special wood cleaning agents that do not contain aggressive solvents.
Periodic inspection of joints — inspect all corners and joints every six months. If micro-cracks appear in the sealant, renew it. If a section of wood darkens — it's a sign of moisture penetration, and it needs immediate treatment with a protective compound.
Reapplication of finish — every few years, depending on the type of finish. Varnished skirting boards require reapplication every 7-10 years, oiled ones every 3-5 years. The finish wears out first at joints, where the boundary between boards passes.
Local repair — if a scratch or chip appears at the joint, there's no need to replace the entire skirting board. Simply sand the damaged area with fine-grit sandpaper, apply a drop of stain matching the wood tone, and seal with varnish.Wooden furniture handleand skirting boards require similar care.
Joints in different interior styles
The approach to joint finishing depends on the overall interior style. What is appropriate in classic design may look ridiculous in minimalism.
Classic style requires perfection. Here, joints must be absolutely invisible.Furniture for bedrooms in classic styleIt implies the same attitude toward skirting boards. High-profile designs, white or natural wood with a deep lacquer finish, perfect corner joints without any gaps. If patina is used, it should accentuate the relief but not conceal installation flaws.
Scandinavian style loves simplicity and honesty. Visible joints are acceptable here if executed neatly. White or light-colored, simple-profile skirting boards with matte finish and minimal decoration. However, execution quality must be top-notch — any carelessness destroys the concept.
Loft and industrial styles allow more freedom. Here, contrasting joints can be used, even intentionally emphasized. Dark metallic profiles for joining wooden planks, visible fasteners, rough finishes — all within the style’s scope. But even here, the line between stylized roughness and carelessness is very thin.
Provence and country styles require a special approach. Here, skirting boards with an aged effect, patina, and wear marks are appropriate. Joints may be slightly emphasized with dark patina pigment, creating an effect of long-term use.Wooden moldingIn such an interior, they should harmonize with the skirting boards.
Modern style values clean lines. Hidden skirting boards, where the plank is mounted flush with the wall, creating a shadow line instead of a protrusion — a trend of recent years. This solution requires perfectly flat walls and professional installation.Wooden boards in interiorOften used together with such skirting boards.
Economy of quality
How much does it cost to make perfect joints? Let’s consider the economic aspect of the question.
The cost of material —wooden baseboards for flooringSkirting boards made of pine cost from 300 rubles per linear meter, oak — from 1500 rubles. But you need to add 10-15% for waste during cutting angles. Thus, for a 20-square-meter room with a 18-meter perimeter, approximately 20 meters of skirting board will be needed, including allowance.
The cost of consumables — fasteners (screws, dowels), sealant, lacquer or paint, sandpaper. On average, this adds 20-30% to the cost of the skirting board itself. Do not economize on sealant — cheap compositions crack quickly, and joints will lose their appearance.
The cost of tools — if you do it yourself and no tools are available, you will need to buy or rent them. A circular saw for rent — 500-1000 rubles per day. A miter gauge — 500-2000 rubles purchase. A hand saw, sander, measuring tools — another 2000-5000 rubles.
The cost of labor — professional skirting board installation costs 150-400 rubles per linear meter, depending on region and complexity of work. Complex joints, curved sections, many corners increase the price. But a professional will make perfect joints the first time, without rework.
Saving on quality costs dearly. Poorly executed joints will need to be redone, which means buying new skirting boards, spending time and nerves. It’s better to do it right from the start, using quality material and professional installation.Wooden staircase components for saleAnd skirting boards are better from a proven manufacturer.
Frequently asked questions
Can skirting boards of different wood species be joined?
Technically yes, but aesthetically it looks strange. Different species have different colors, textures, and wood grain patterns. The joint will be very noticeable, even if executed perfectly. If necessary, use a transition element — a decorative insert that visually separates the two species.
After how much time after laying the floor can skirting boards be installed?
Minimum one day after laying laminate or parquet, three days after laying on adhesive. The floor covering must "settle" and adopt its final dimensions. If skirting boards are installed earlier, the floor may still expand slightly and hit the skirting board, causing deformation.
What to do with joints if the skirting board is already painted?
Ideal — paint the skirting board after installation, so all joints will be painted evenly. If the skirting board is already painted, joints after fitting should be touched up with a fine brush. Use the same paint as for the main surface. After drying, lightly sand the joints with fine sandpaper for smoothness.
Is it necessary to prime joints before applying sealant?
For acrylic sealant, priming is not mandatory — it adheres well to wood. For silicone, priming is recommended, otherwise it may peel off later. But it’s better not to use silicone for wooden skirting board joints — acrylic is preferable, as it is more elastic and easier to paint.
Can wooden skirting boards be glued instead of screwed?
Yes, if walls are perfectly flat. Use special mounting glue or liquid nails. The downside — when removing the skirting board, it will likely break. The upside — no drilling, no visible fasteners. A combined option — glue plus a few screws at key points.
What to do if gaps appear in joints after installation?
This may occur due to wood drying, especially if it was insufficiently dried. Gaps up to 1 mm are filled with acrylic sealant in the wood tone. Gaps larger than 2 mm are better filled with wood splinters on adhesive, then sanded and lacquered. If the gap is very large — the joint will need to be redone.
How to join skirting boards of different heights?
This situation arises when different skirting boards are used in different rooms. Options: use a transition strip in the door frame, or cut both skirting boards at an angle to create a smooth transition. The second option is more complex but looks more elegant.
What gap is needed between the skirting board and the floor?
Ideally, none. The skirting board should fit tightly against the floor. However, if the floor is uneven, a small gap up to 1-2 mm is acceptable. It can be filled with acrylic sealant. A gap larger than 3 mm indicates improper installation or a very uneven floor.
Are expansion gaps needed in the skirting board on long walls?
For walls longer than 6 meters, it is recommended to make a technical gap of 2-3 mm every 4-5 meters. Wood slightly expands and contracts depending on humidity, and over a long length this may be noticeable. The gap is filled with elastic sealant that compensates for movement.
Can corner caps be used instead of a 45-degree bevel?
Yes, but it looks less elegant. Corner caps are a solution for plastic skirting boards. For qualitywooden baseboards for floorclassic bevel is preferable. Caps are appropriate only in cases where walls are very uneven and precise beveling is impossible.
Conclusion
The quality of joints and corners is what distinguishes professional work from amateur work. You can buy the most expensivebuy wooden skirting boardwood from elite species, but if the joints are poorly executed, the entire effect will be ruined. Conversely — even a simple pine skirting board, installed with jewel-like precision, creates the impression of a costly, thoughtfully designed interior.
Perfect joints are the result of the correct combination of quality material, professional tools, and the craftsman's skill. It is attention to detail, understanding of wood properties, and knowledge of technology. This is not work where you can rush or cut corners. Every millimeter, every degree of angle, every saw movement affects the final result.
wooden baseboards for flooring— it is not just a utilitarian element. It is a frame that frames the space, giving it completeness. It is wall protection that serves for decades. It is visual cleanliness that creates a sense of order and harmony. And all this works only under one condition: the joints must be flawless.
STAVROS offers a full range of wooden skirting boards for any interior design. From budget pine profiles to exclusive items made from noble woods. In-house production allows us to control quality at every stage. Each skirting board plank undergoes careful geometric inspection — ends are strictly perpendicular, edges are parallel, dimensions are accurate to the millimeter. This guarantees that the joints will be perfect.
. Everything made of natural wood, everything with quality guarantee.Wooden cornices, Moldings, decorative elements, staircase components, furniture legsAll made of natural wood, all with quality guarantee.
STAVROS consultants will help you choose the optimal solution for your project. They will calculate the required amount of material, taking into account all angles and joints. They will recommend installation and finishing methods. They will advise you on how to avoid typical mistakes. Because STAVROS is not just selling materials — it is a partnership in creating a quality interior. Choose professionals, choose quality, choose STAVROS.