Article Contents:
- What are furniture overlays and why are they needed
- From neutral to classic: style transformation
- Example 1: chest of drawers from neutral to baroque
- Example 2: kitchen set from modern to Provence style
- Adding relief: play of light and shadow
- Example 3: wall panels from flat to three-dimensional
- Creating accents: focal points in the interior
- Example 4: mirror from simple to luxurious
- Overlay installation technology: step-by-step instructions
- Step 1: Surface Preparation
- Stage 2: fitting and marking
- Stage 3: selecting and applying adhesive
- Stage 4: fixing the overlay
- Stage 5: removing excess adhesive
- Stage 6: curing until completely dry
- Finishing: paint, stain, patina
- Painting to match furniture color: blending elements
- Contrast painting: highlighting decor
- Stain and tinting: emphasizing texture
- Patina: effect of antiquity
- "Before and after" examples: visual transformation
- Project 1: children's room from standard to fairy-tale
- Project 2: living room from modern to classic
- Project 3: study from office to executive
- Mistakes when installing overlays and how to avoid them
- Mistake 1: incorrect adhesive selection
- Mistake 2: insufficient fixation during drying
- Mistake 3: installing overlays on dirty or greasy surfaces
- Mistake 4: asymmetrical placement
- Mistake 5: excess adhesive
- Where to buy quality overlays and how to choose
- Overlay selection criteria
- Frequently Asked Questions
- Can overlays be installed on chipboard furniture?
- Do I need to remove old varnish before installing overlays?
- How to fix a mistake if the overlay is glued crookedly?
- Can overlays be painted after installation on furniture?
- How much does furniture transformation with overlays cost?
- Are overlays only suitable for classic interiors?
- How to care for furniture with overlays?
- Can overlays be removed if you get tired of them?
- Where is it better to buy overlays — at a hardware store or from the manufacturer?
- Are special tools needed for installing overlays?
- Conclusion: new life for furniture without extra costs

Tired of standard furniture? Want to change the style of the room but don't have the budget for new cabinets and tables?Inlays for furniture— this is your secret transformation tool, capable of turning a simple structure into a work of art without major renovations and huge investments. These small carved elements made of solid oak and beech radically change the character of an item: a neutral facade becomes classic, a flat surface gains volume, boring furniture turns into an accent piece of interior.
Imagine: yesterday you had a simple IKEA cabinet, and today — a luxurious item with carved details that looks as if it was custom-made in a furniture workshop. Magic? No, skillful application ofof furniture decorwooden overlays. In this article, we will reveal all the secrets of working with overlays: from selecting elements and installation methods to finishing and specific examples of interior transformation.


What are furniture overlays and why are they needed
Inlays for furniture— these are decorative elements made of natural wood or MDF that are attached to cabinet fronts, doors, countertops, wall panels, creating relief, volume, and ornament. Historically, overlays were used in the production of elite furniture for palaces and estates: carvers would cut the most complex compositions from solid wood — acanthus leaves, grapevines, rocaille, cartouches, mascaron — and attach them to the furniture body, turning a functional item into a decorative masterpiece.
Today, overlays are available not only to aristocrats but to everyone who values beauty, individuality, and quality. Modern CNC cutting technologies allow creating complex carved elements with high precision and reproducibility, making them affordable in price but no less quality than hand carving. Overlays solve several tasks simultaneously:
-
Aesthetic transformation: turn simple furniture into designer pieces, add style, character, individuality.
-
Concealing defects: mask scratches, chips, wear, old handle holes, unsuccessful restoration attempts.
-
Creating accents: highlight certain areas of furniture — the center of the facade, corners, upper or lower parts of the cabinet.
-
Zoning: divide large planes into sections, creating rhythm, structure, visual interest.
-
Increasing value: expensive furniture looks even more luxurious, simple furniture looks more expensive and of higher quality.
Furniture decorwooden overlays are not only suitable for classic interiors. Modern designers use carved overlays in eclectic spaces, where classic elements are combined with minimalist furniture, creating contrast, depth, and layering.


From neutral to classic: style transformation
The most common task is to turn neutral modern furniture into classic. Do you have a simple sliding wardrobe with smooth fronts? Add carved overlays to the center of each door, frame them with moldings — and you'll get a classic wardrobe in the style of Louis XIV.
Our factory also produces:


Example 1: dresser from neutral to baroque
Before: a simple dresser made of light MDF, three drawers, minimalist chrome handles, flat fronts without decoration. Functional but boring, looks cheap, doesn't match the classic bedroom style.
Result: a luxurious Baroque-style chest of drawers. The center of each front is adorned with a symmetrical carved overlay featuring acanthus leaves and volutes. Thin moldings are applied around the perimeter of the fronts, creating a frame. Chrome handles are replaced with bronze ones with a patina. The entire chest is painted in a cream color with a light gold patina on the carved elements. Result: furniture that looks significantly more expensive, fits organically into a classic interior, and becomes the focal point in the bedroom.
What was used:
-
3 symmetrical central overlays (each 200x150 mm)
-
Moldings with a profile for framing the fronts
-
Professional wood glue
-
Cream acrylic paint, gold patina
-
Bronze hardware with patina (6 handles)
Get Consultation
Example 2: kitchen set from modern to Provence
Before: a standard MDF kitchen set, painted white, flat fronts, modern integrated handles. Clean, functional, but bland.
Result: a kitchen in Provence style. Carved overlays with botanical motifs—small elements in the form of leaves, flowers, twigs from the 'Summer Garden' collection—were added to the upper wall cabinets. The lower cabinets are decorated with thin vertical overlays at the corners of the fronts, creating the effect of paneled doors. Integrated handles are replaced with ceramic 'mushroom' knobs with floral patterns. Wooden cornices were added under the upper cabinets. Result: the kitchen gained rustic charm, warmth, coziness, and individuality.
What was used:
-
12 small botanical overlays (40-60 mm each)
-
16 vertical overlays for lower fronts (500x30 mm)
-
Carved wooden cornices (3 linear meters)
-
PVA wood glue, headless finishing nails
-
Provence-style ceramic handles (24 pieces)
Adding relief: play of light and shadow
Flat surfaces are visually boring; they do not create a play of light, depth, or interest. Carved overlays add relief, which changes the perception of the furniture depending on the lighting. In the morning, when light falls from the side, the carving casts deep shadows, creating drama. In the evening, under soft artificial lighting, the relief softens, becomes velvety and warm.
Example 3: wall panels from flat to three-dimensional
Before: a wall in the living room, painted light gray, flat, without architectural articulation. A TV hangs on the wall, with a console below it, but the composition looks unfinished.
Result: the wall is transformed into an architectural element using moldings and central overlays. Moldings form rectangular frames around the TV and on its sides. A large carved rosette overlay with a symmetrical pattern is placed in the center of each side frame. The frames are painted a shade darker than the main wall, the overlays—a shade lighter with gilding on the protruding elements. Result: the wall gained structure, depth, and became the focal point of the living room. The TV no longer 'hangs in emptiness' but is integrated into a well-thought-out composition.
What was used:
-
Smooth wide moldings (12 linear meters)
-
2 large rosette overlays (diameter 250 mm)
-
Polyurethane glue for moldings
-
Two-tone gray acrylic paint, gilding paste
Creating accents: focal points in the interior
Overlays work as visual magnets, drawing attention to specific areas of furniture or walls. A large central overlay on a cabinet door makes that door the main one, even if the cabinet is in a corner. A symmetrical pair of overlays on the sides of a mirror turns a simple mirror into a decorative panel.
Example 4: mirror from simple to luxurious
Before: a rectangular mirror in a thin metal frame, hanging on the wall in the hallway. Functional, but does not decorate the space in any way.
Result: the mirror is framed by wooden moldings forming a wide frame. Corner overlays with botanical ornamentation are placed at the corners of the frame. In the upper central part of the frame—a decorative overlay in the form of a shell (rocaille). The entire composition is painted white with silver patination. Two symmetrical lamps are installed on the console below the mirror, illuminating the carving from below, enhancing the play of shadows. Result: the mirror has become the main decorative element in the hallway, setting the tone for the entire space.
What was used:
-
Carved moldings for the frame (2.5 linear meters)
-
4 corner overlays (each 80x80 mm)
-
1 central rocaille overlay (150x100 mm)
-
PVA wood glue, finishing nails
-
Matte white paint, silvering paste
Overlay mounting technology: step-by-step instructions
Installationinlays for furnituredoes not require professional woodworking skills. Basic tool handling skills, care, and patience are sufficient. The process is divided into several stages: surface preparation, fitting and marking, glue application, fixation, and finishing.
Stage 1: Surface preparation
The surface where the overlay will be attached must be clean, dry, and degreased. Dust, dirt, and grease reduce glue adhesion; the overlay may fall off after a few months. If the furniture is varnished or laminated, the surface is lightly sanded with fine sandpaper (grit P180-P220) to create roughness that improves adhesion. After sanding, the surface is wiped with a damp cloth to remove dust, then dried, and degreased with alcohol or acetone.
If there are defects at the overlay installation site—chips, deep scratches—they are pre-filled with putty, sanded, and primed. The overlay will hide the defect, but an uneven surface underneath will create gaps through which glue or the base will be visible.
Stage 2: fitting and marking
Before applying glue, the overlay is fitted to the installation site. It is important to find the perfect position: center of the facade, symmetry relative to axes, distance from edges. Use a tape measure, level, and square. Outline the overlay or mark key points (corners, center) with a pencil.
If installing several overlays (e.g., symmetrical elements on two cabinet doors), it is important to ensure identical positioning on all elements. Measurements are taken from the same reference points (from the top edge of the facade, from the side edges), distances are checked twice. An error of 2-3 mm will be noticeable to the eye and disrupt symmetry.
Stage 3: selecting and applying glue
Glue selection is critical for mounting durability. Forof solid woodwood on a wooden or MDF base, the best choice is professional PVA wood glue (moisture resistance class D3 or D4). This glue creates a strong, elastic bond, is resistant to temperature and humidity fluctuations, dries clear, and excess is easily removed with a damp cloth.
For overlays on laminated or varnished surfaces, contact glue ("Moment Stolyar", "88-Lux"), polyurethane glue, or epoxy glue are suitable. Contact glue is applied in a thin layer to both surfaces, left for 10-15 minutes until tacky, then the surfaces are pressed together. Epoxy glue is the strongest but does not allow adjustment—the overlay must be positioned correctly on the first try.
Glue is applied in an even, thin layer to the back of the overlay using a brush, spatula, or glue gun. It is important not to overdo it: excess glue will squeeze out at the edges when pressed, stain the front side, and require laborious cleaning. The optimal layer thickness is 1-2 mm; glue is distributed over the entire back area, especially carefully along edges and protruding carving elements.
Stage 4: fixing the overlay
The overlay is placed on the marked spot, aligned with the marks, and pressed firmly against the entire area. Pressure should be uniform, strong (but without risk of breaking thin carving elements), and prolonged—at least 2-3 minutes until the glue begins to set.
If the overlay is large, heavy, or has deep carving, glue alone may not be sufficient—additional fixation is required. Use headless finishing nails (length 15-25 mm, diameter 1-1.5 mm), driven into inconspicuous places—carving recesses, under ornament leaves, on the back of volutes. Nails are driven in 2/3 of their length, the remaining part is countersunk with a nail set, and the hole is filled with putty matching the wood color or future finish.
An alternative to nails is painter's tape, which secures the overlay to the surface while the glue sets (from 30 minutes to 12 hours depending on glue type and temperature). Tape leaves no marks on unfinished wood but may damage varnish when removed—test on an inconspicuous area.
For very large overlays (panels, central compositions larger than 300x300 mm), clamps or weights are additionally used to evenly press the overlay against the base across the entire area. Soft pads (felt, rubber, cardboard) are placed under clamps to avoid damaging the carving.
Stage 5: removing excess glue
Immediately after fixing the overlay, inspect the edges—has glue seeped out? If yes, excess is immediately removed with a damp cloth or sponge (for PVA glue), or solvent (for contact glue). Dried glue is harder to remove—mechanical cleaning (scraper, knife, sanding) will be required, which may damage the wood or carving.
Pay special attention to carving recesses where glue may have flowed. Use a thin brush, toothpick, or wooden stick to remove glue from hard-to-reach places. Cleanliness at this stage is critical for a quality appearance after finishing.
Stage 6: curing until fully dry
After fixation and cleaning, the overlay is left undisturbed until the glue is fully dry. Drying time depends on glue type, temperature, and air humidity:
-
PVA wood glue D3: 4-6 hours to set, 24 hours to full strength
-
Contact glue: 1-2 hours to become tacky, 12 hours to full strength
-
Polyurethane glue: 4-8 hours, full strength after 24 hours
-
Epoxy glue: 12-24 hours to set, 72 hours to maximum strength
During the drying period, do not touch the overlay, move furniture, or subject it to vibration. Ideal conditions: temperature 18-22°C, humidity 50-60%, no drafts.
Finishing: paint, stain, patina
Installed overlays can be left in the natural wood color (if the furniture is wooden and the colors match) or painted to match the furniture color, a contrasting color, treated with stain, patina, or gilding. Finishing is not just decoration, but also protection of the wood from moisture, dirt, and mechanical damage.
Painting to match the furniture: merging elements
If the goal is to make the overlays part of the furniture, not a contrasting accent, they are painted exactly to match the base color. The same paint used for the furniture is applied in several thin layers with intermediate drying and light sanding. The first layer is primer (acrylic wood primer), which seals the pores and evens out absorbency. The second and third layers are paint (acrylic, alkyd, or oil-based depending on the type of furniture finish). The final layer is varnish (acrylic, polyurethane) for protection and to add gloss or matte finish in accordance with the furniture coating.
Paint is applied with a brush, roller (for flat areas), or spray (for even coverage without brush marks). Special attention is paid to the recesses of the carving, where the paint must penetrate completely, without gaps. A thin brush is used, applying paint with dabbing motions into the recesses, then smoothing it out.
Contrast painting: highlighting decor
An alternative approach is to paint the overlays in a contrasting color, highlighting them as decorative accents. Examples of contrasts:
-
White furniture — dark (brown, black) overlays
-
Dark furniture — white or gold overlays
-
Gray furniture — overlays with colored paint (blue, green, burgundy)
Contrast painting makes the overlays visible from a distance, turning them into focal points. This technique works in eclectic interiors where styles, eras, and colors are mixed.
Stain and tinting: emphasizing texture
Stain (water-based, alcohol-based, oil-based) penetrates the wood pores, changes the color, but preserves the visible texture and grain pattern. This is the optimal choice if overlays made of oak or beech are installed on wooden furniture, but the colors do not match. Stain evens out the shades, creating harmony.
Stain is applied with a brush, sponge, or cloth along the wood grain. The first layer gives a light tint, the second and third enhance saturation. After the stain dries, the surface is sanded with fine sandpaper (P320-P400), raised fibers are removed, and a protective coating — oil, wax, or varnish — is applied.
Patina: effect of aging
Patina is a technique of artificial aging that creates an effect of wear, the patina of time, and noble antiquity. Patina is especially good for overlays in classic styles (Baroque, Rococo, Empire), where vintage appeal and history are valued.
There are several patination techniques:
Wax patina: the surface is painted in a base color (white, cream, gray), after drying, dark wax (brown, black) is applied and rubbed into the recesses of the carving, creating contrast between the raised (light) and recessed (dark) areas. Excess wax is removed with a soft cloth, and the surface is polished.
Paint patina: a base light layer of paint is applied to the entire overlay, after drying, a second layer (contrasting, usually dark) is applied, which is partially sanded off with sandpaper, exposing the base layer on the raised areas. This creates an effect of wear, layering, and history.
Gilding and silvering: raised elements of the carving are coated with gold or silver paste, powder, or leaf. This adds luxury, shine, and formality. Gilding is characteristic of palace interiors, Baroque, and Empire styles. Silvering is for colder, more restrained styles (Neoclassical, Art Deco).
Patination requires artistic taste and a sense of proportion. Excessive patination makes overlays look dirty and sloppy. Proper patination creates depth, nobility, and the feel of an expensive antique item.
Examples of 'before and after': visual transformation
Project 1: children's room from standard to fairy-tale
Before: a children's room with standard IKEA furniture — white wardrobe, white bed, white dresser. Clean, functional, but boring, doesn't excite the child.
After: the furniture is transformed into fairy-tale with small carved overlays. On the wardrobe doors — overlays in the shape of butterflies, birds, flowers from the 'Summer Garden' collection. On the bed headboard — a central overlay with a crown (for a girl) or a heraldic shield (for a boy). On the dresser drawers — small leaf-shaped overlays in the corners. All overlays are painted in pastel colors (pink, blue, mint, lavender) with a pearlescent sheen. Handles are replaced with bright ceramic or wooden ones in the shape of animals. Result: the room came to life, became magical, children are delighted, the furniture transformed from standard to unique.
Project 2: living room from modern to classic
Before: a living room in minimalist style, gray walls, white modern furniture (modular system from IKEA), flat fronts, no decor. Clean, laconic, but cold, impersonal.
After: classic elements are added with overlays and moldings. On the central fronts of the TV stand, symmetrical carved overlays with acanthus leaves are installed. The wall behind the TV is decorated with moldings forming panels, with a rosette overlay in the center of each panel. Wooden cornices are added under the ceiling around the perimeter of the living room. Overlays and cornices are painted the same white as the furniture, but with a light gray patina creating depth. Result: the living room retained minimalism (no extra items) but acquired classic accents, warmth, and architectural character.
Project 3: study from office-like to executive
Before: a home study with office furniture — a simple particleboard desk, a bookcase with flat fronts, all in dark brown. Functional, but looks cheap, doesn't create an impression of status.
After: furniture transformed with classic decor. Vertical carved overlays were added to the edges of the bookcase facades (pilaster imitation) and central overlays on each door. The tabletop is framed with thin moldings around the perimeter, and a horizontal carved overlay is on the front panel of the table. All elements are painted the same dark brown color, but the carving is highlighted with gold patination. Hardware is replaced with bronze with patina. Wooden cornices are added to the top of the bookcase. Result: the study acquired a representative appearance, began to resemble an executive office, creating a sense of status and solidity.
Errors during overlay installation and how to avoid them
Error 1: incorrect glue selection
Using low-quality or unsuitable glue is a common cause of overlays falling off after a few months. PVA for paper (office glue) is not suitable — it cannot withstand loads and is afraid of moisture. Superglue (cyanoacrylate) creates a brittle connection and cannot withstand vibrations. Hot glue (glue gun) is only suitable for light overlays on vertical surfaces; on horizontal surfaces, it falls off under its own weight.
Solution: use professional woodworking PVA D3/D4, contact adhesive for complex surfaces, or polyurethane or epoxy for maximum strength.
Error 2: insufficient fixation during drying
The overlay was glued, pressed with hands for 10 seconds, released — after an hour it fell off or shifted. Glue needs time to set; pressure must be constant for at least 30 minutes, preferably several hours.
Solution: use painter's tape, clamps, or weights to fix the overlay for the entire glue setting period. Do not touch the furniture until completely dry (24 hours).
Error 3: installing overlays on a dirty or greasy surface
The furniture was not cleaned before installing overlays — there is dust, grease, or polish residue on the surface. Glue does not adhere to contaminants; the overlay holds poorly.
Solution: thoroughly clean the surface, degrease with alcohol or acetone, and let it dry. For laminated surfaces — light sanding to create roughness.
Error 4: asymmetrical placement
Overlays are installed "by eye," without precise measurements — as a result, they are asymmetrical, placed at different heights on adjacent facades, or offset from the center. Asymmetry is noticeable and ruins the entire appearance.
Solution: use a tape measure, level, and square for precise marking. Measure distances from the same reference points, double-check before gluing. For multiple overlays — create a cardboard template and apply it to each facade.
Error 5: excess glue
Too much glue was applied — when pressing the overlay, excess squeezed out along the edges, stained the front side, and dried on the carving. Dried glue is difficult to remove, spoils the appearance, and interferes with painting.
Solution: apply glue in a thin, even layer, no more than 1-2 mm thick. Immediately after pressing the overlay, inspect the edges and remove any squeezed-out glue with a damp cloth. Keep a bucket of water and rags handy for immediate cleaning.
Where to buy quality overlays and how to choose
The quality of overlays determines the final result. Cheap overlays made from softwood (pine, spruce) with rough carving, poorly dried, and with defects are wasted money. Professional overlays made from hardwood (oak, beech) with detailed carving, proper drying (moisture content 8-12%), and without defects are an investment in a quality result.
Overlay selection criteria
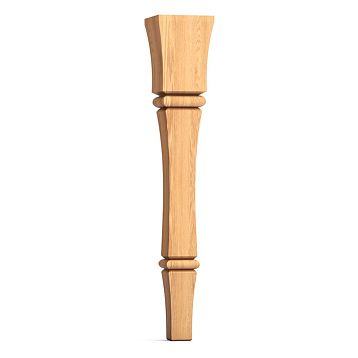
Material: the bestInlays for furnitureare made from solid oak or beech. Oak is harder, more durable, and has a pronounced grain. Beech is softer, easier to process, and has a uniform grain. Both materials hold carving well, can be painted, and patinated.
Carving quality: details should be clear, deep, without chips, tears, or undercut areas. Carving can be done on a CNC machine (reproducible, affordable) or by hand (unique, expensive). High-quality CNC carving is not inferior to hand carving in detail.
Wood moisture content: overlays should be made from kiln-dried wood with a moisture content of 8-12%. Over-dried wood (less than 6%) will crack in a humid environment. Under-dried wood (more than 15%) will warp, shrink, and crack after installation.
Size and proportions: the overlay should be proportionate to the furniture. A too-small overlay on a large facade will get lost; a too-large one will overwhelm and disrupt proportions. Guideline: the width of the central overlay on a facade should be 40-60% of the facade width, height — 30-50% of the height.
Style: the overlay should match the interior style or be an eclectic contrast (if it is a conscious design decision). For classic — acanthus leaves, volutes, rocaille. For Provence — floral motifs, flowers, birds. For modern — smooth lines, asymmetrical shapes. For contemporary eclecticism — any elements that match in scale and mood.
Frequently asked questions
Can overlays be installed on particleboard furniture?
Yes, overlays attach perfectly to particleboard and MDF. It is important that the surface is clean and degreased. For laminated particleboard, light sanding is recommended to create roughness, improving glue adhesion. Use contact or polyurethane adhesive for maximum strength when attaching to smooth surfaces.
Is it necessary to remove old varnish before installing overlays?
Not necessarily, if the varnish coating is in good condition (not cracking or peeling). It is enough to degrease the surface with alcohol and lightly sand with fine sandpaper to create roughness. If the varnish is damaged or peeling — it is better to remove it locally in the area where the overlay will be installed.
How to fix an error if the overlay is glued crookedly?
If the glue is not yet dry (first 10-30 minutes), the overlay can be carefully detached, the glue removed, a new layer applied, and reinstalled correctly. If the glue has dried, you will have to tear off the overlay (risk of breaking the thread), clean off the remaining glue, apply new glue, and reinstall. That's why careful marking before gluing is so important.
Can overlays be painted after installation on furniture?
Yes, this is standard practice. Overlays are installed unpainted (or primed), then the furniture is painted entirely along with the overlays. This ensures color unity and the absence of visible boundaries between the overlay and the base. Use painter's tape to protect areas that should not be painted.
How much does furniture transformation with overlays cost?
The cost depends on the quantity and size of overlays, the type of glue, and the finishing method. Approximately: small overlay (50-100 mm) — from 500 to 2000 rubles, medium (100-200 mm) — from 2000 to 7000 rubles, large (200-400 mm) — from 7000 to 20000 rubles. Overlay kits (central + corner) — from 7000 to 30000 rubles. Glue, paints, varnish — an additional 2000-5000 rubles. Total: transforming a sliding wardrobe will cost 15000-50000 rubles compared to 100000-300000 rubles for a new classic wardrobe.
Are overlays only suitable for classic interiors?
No, overlays are universal. They are in their place in classic interiors, but they also work as contrasting accents in eclectic, modern interiors. The key is the correct choice of shape, size, and finishing method. Minimalist geometric overlays suit modern interiors. Carved floral ones suit Provence, country, and eco-style. Baroque lush ones suit classic and eclectic styles.
How to care for furniture with overlays?
Care is standard, as for any wooden furniture. Wipe with a dry or slightly damp soft cloth to remove dust. Do not use abrasive products or stiff brushes. Treat with furniture polish or wax every few months. Protect from direct sunlight, excessive humidity, and sudden temperature changes. If scratches or chips appear, use a furniture pencil or restoration wax.
Can overlays be removed if you get tired of them?
Theoretically yes, practically difficult. Overlays are glued with wood glue, which creates a strong bond. When removing, there is a high risk of damaging both the overlay and the furniture base. If the overlays were additionally secured with nails, removal will leave holes requiring putty. Therefore, choose overlays consciously, with a long-term perspective in mind.
Where is it better to buy overlays — at a hardware store or from a manufacturer?
From the manufacturer.of solid woodHardware stores offer a limited assortment, often of low quality (pine, rough carving, poor drying). Manufacturers offer hundreds of models, professional quality (oak, beech, detailed carving, proper drying), the possibility of custom orders, and consultations on selection and installation.
Are special tools needed for installing overlays?
Minimum set: tape measure, level, square, pencil for marking; brush or spatula for applying glue; hammer and nail setter (if finishing nails are used); sandpaper, rags, bucket of water for cleaning. Additionally useful: clamps or painter's tape for fixation, glue gun (if using hot melt or contact glue in tubes). All of this is accessible, most items are available in every home or can be easily purchased.
Conclusion: new life for furniture without extra costs
Inlays for furniture— these are not just decorative elements, they are a transformation tool capable of radically changing the character of an interior without major renovations and huge budgets. Simple standard furniture turns into designer furniture, neutral into classic, flat into three-dimensional, boring into accent. All that's needed is the right choice of overlays, careful installation, and thoughtful finishing.
The installation technology is simple, accessible to anyone who can hold a tape measure and brush. No professional woodworking equipment, special education, or years of practice are required. Attention, patience, and following instructions are enough — and the result will exceed expectations.
Furniture decoropens limitless possibilities for creativity. You can create a unique composition by combining different overlays, moldings, and painting methods. You can regularly update the interior by changing overlays according to season, mood, or new trends (although this is more difficult than the initial installation). You canfix furniture, hiding defects, damage, and signs of aging under beautiful carved elements.
The economic effect is obvious: transforming existing furniture costs 3-5 times less than buying new. At the same time, you get a unique result unavailable in mass production. Exclusivity, individuality, the ability to realize your vision of the interior — that's priceless.
The environmental aspect is also important: instead of throwing old furniture into a landfill, you give it new life. This is conscious consumption, respect for resources, and care for the environment.Solid Wood Itemswood overlays are eco-friendly, safe, durable — they will last for decades, preserving beauty and functionality.
Company STAVROS is a leading manufacturer of decorative elements from solid oak and beech for furniture and interiors. Over 400 models of carved overlays in various styles, sizes, shapes — from classic acanthus leaves to the modern author's collection "Summer Garden" with botanical motifs. Central and corner elements, symmetrical and asymmetrical, large panels and small accents — everything needed to realize any design idea.
STAVROS works only with quality wood, uses modern CNC equipment and traditional hand-carving methods, and controls every stage of production — from wood drying to finishing. The result is overlays that delight with carving detail, dimensional accuracy, absence of defects, and durability.
Wide assortment, stock program (shipment from 1 piece), delivery throughout Russia and CIS, professional consultations on selection and installation, possibility of custom orders based on sketches — STAVROS provides a full range of services to realize your ideas. Prices are affordable, quality is premium, service is professional.
Don't be afraid to experiment, create, transform!Inlays for furniture— is a simple, accessible, effective way to change the interior, breathe new life into old furniture, create a space that reflects your taste, style, personality. STAVROS will help bring this to life by providing quality materials, expert support, and inspiration for creativity.