Article Contents:
- Preparation for installation: choosing tools and materials
- Assessing the scope of work and calculating materials
- Choosing quality baseboard
- Required tools
- Choosing adhesive and fasteners
- Room preparation
- Material acclimatization
- What adhesive to use and what to adhere baseboard to
- Assessing the type of surface
- Preparing adhesive
- Technique of applying adhesive
- Specifics of adhering to different surfaces
- How to mount to walls and floors: self-tapping screws, adhesive, putty
- Adhesive mounting: primary method
- Mechanical mounting: when necessary
- Mounting on putty: professional method
- Specifics of mounting floor baseboard
- Specifics of mounting ceiling baseboard
- How to join corners and fill joints
- Marking and cutting corners: foundation of quality installation
- Joining Straight Sections
- Filling joints and gaps
- Using ready-made connecting elements
- Installation on stretch ceilings and specifics of working with corners
- Specifics of stretch ceilings
- Choosing baseboard for stretch ceilings
- Installation technology
- Specifics of corners with stretch ceilings
- Baseboard with lighting
- Common mistakes when working with stretch ceilings
- Common installation mistakes and ways to fix them
- Mistakes during preparation stage
- Cutting mistakes
- Errors during installation
- Mistakes when working with corners
- Errors after installation
- How to fix errors: general principles
- Conclusion
Imagine: repair is almost complete, walls are straight, the floor shines, furniture is arranged. But something doesn't give a sense of completion. Your gaze lingers on the wall-floor joint, on uneven wallpaper edges, on technological gaps. It is precisely here that baseboard comes to the rescue — that very element that puts the final touch on the repair, transforming the room into a finished composition.
Many believe that installing baseboard is a job for professionals. In fact, it is one of the most accessible stages of repair, within reach of anyone who can handle a saw and a brush.Installation of polystyrene baseboardIt does not require special education or expensive equipment. You only need patience, care, and knowledge of the correct technique. This is exactly what we will discuss in this detailed guide.


Preparation for installation: selection of tools and materials


Assessing the scope of work and calculating materials
Before heading to the store, you must accurately calculate the amount of material. Start by measuring the room. Equip yourself with a tape measure and a sheet of paper for notes. Measure the length of each wall where baseboard will be installed. Do not rely on memory — record all dimensions.
Add up the lengths of all walls — this is the room's perimeter. Subtract the width of doorways where baseboard is not installed. The resulting number is the net length of baseboard. But this is not all. Add 10-15% to this value for cutting angles and possible defects. At corners, pieces are joined at 45 degrees, which 'eats up' the length of each strip.
For example, a 4x5 meter room with one door 0.9 m wide:
-
Perimeter: (4+5) x 2 = 18 m
-
Minus door: 18 - 0.9 = 17.1 m
-
Plus 15% reserve: 17.1 x 1.15 = 19.7 m
-
Round up to 20 m
Standard baseboard length is 2 meters. That means 10 strips are needed. Add 1-2 extra just in case — total of 11-12 strips.
Our factory also produces:


Choosing quality baseboard
The quality of the material determines 50% of the installation success. Quality baseboard from reputable manufacturers such as Hi Wood has stable geometry, a smooth surface, and is easy to work with. Budget options may be warped, have imperfections, or uneven structure.
When choosing, pay attention to:
-
Color — should be uniform, snow-white, without yellow spots
-
Geometry — place two strips end-to-end — they should match perfectly
-
Surface — smooth, without imperfections, bulges, or chips
-
Density — quality baseboard does not compress under light finger pressure
-
Packaging — strips must be protected from damage during transport
Hi Wood products feature increased material density (32-35 kg/m³), making the baseboards stronger and easier to install. Clear profile geometry ensures perfect corner joints.
Get Consultation
Required tools
For installing polystyrene baseboard, you will need a minimal set of tools, most of which are available in any household:
For measuring and marking:
-
Tape measure at least 5 meters long
-
Pencil or marker for marking
-
Square for checking right angles
-
Level (laser or bubble) for horizontal control
For cutting:
-
Miter box - special device for angled cutting (mandatory!)
-
Metal hacksaw with fine teeth
-
Or a circular saw (for professional installation)
-
Construction knife with replaceable blades (for thin baseboards)
-
Fine-grit sandpaper (180-240) for cleaning ends
For installation:
-
Adhesive caulking gun for tubes
-
Trowels of different widths (for applying adhesive putty)
-
Brushes for applying adhesive or primer
-
Painter’s tape for temporary fixation
-
Clean cloth or sponge for removing excess adhesive
Additional tools:
-
Ladder or stable stand (for ceiling baseboards)
-
Containers for adhesive and water
-
Gloves for hand protection
-
Goggles (when using a saw - dust flies)
Professional installers use a circular saw with angle adjustment - it gives a perfectly clean cut. But for occasional jobs, a miter box and hacksaw costing a few hundred rubles are sufficient.
Choosing adhesive and fasteners
The main question of installation: what to glue the baseboard with? Choosing the adhesive is critically important for polystyrene, as many compositions dissolve it.
Polymer construction adhesives (liquid nails):
-
The most popular option for polystyrene
-
Fast setting (5-15 minutes)
-
Strong bond
-
Ease of application (tube with gun)
-
Choose white formulations without solvents
-
Brands: Moment Montazh, Titan, Quelyd
Acrylic putty:
-
Professional installation method
-
Glues and levels simultaneously
-
Excess forms a smooth transition to the wall
-
Economical consumption
-
Requires some skill
-
After drying, everything paints together
Special adhesives for polystyrene:
-
Developed specifically for expanded polystyrene
-
Guaranteed compatibility
-
Optimal adhesion
-
Often produced as powder for water dilution
-
Brands: Ceresit CT 83, Knauf Perlfix
Silicone sealants:
-
White or transparent
-
Elasticity compensates for gaps
-
Suitable for small rooms
-
Long setting time (requires fixation)
-
Good adhesion to various surfaces
WHAT CANNOT BE USED:
-
Solvent-based adhesives
-
“Moment” and similar nitro adhesives
-
Hot glue (glue gun) - too high temperature
-
Construction foam (only as additional fixation on uneven walls)
For mechanical fastening (used rarely):
-
Self-tapping screws 3.5-4.5 mm long 25-40 mm (for uneven walls)
-
Plastic anchors 6 mm (for concrete and brick)
-
Nails without heads (for wooden surfaces)
Room preparation
Before starting installation, prepare the room:
Surface cleaning:
-
Remove dust from walls and floor/ceiling at installation sites
-
Remove construction debris
-
Vacuum clean corners
-
Wipe surfaces with a damp cloth
Checking flatness:
-
Attach a long rule or straightedge to the wall
-
Assess the degree of unevenness
-
Significant unevenness (more than 5-7 mm) is best leveled with spackle
-
Minor unevenness is compensated for by adhesive during installation
Priming:
-
If walls are loose or crumbling, prime them definitely
-
Use a penetrating primer
-
Allow to dry completely (4-6 hours)
Work area organization:
-
Clear space along walls (minimum 1 meter)
-
Prepare a flat surface for cutting (table, workbench)
-
Place tools in an accessible location
-
Ensure good lighting
Material acclimatization
Important nuance often overlooked: styrofoam baseboard must acclimate in the room before installation. Bring the material into the room and leave it for 12-24 hours at room temperature. This is especially important if the baseboard was stored on a cold warehouse or in an unheated space.
Acclimatization allows the material to adjust to the room's temperature and humidity, minimizing subsequent deformations. Unpack the baseboard, lay the planks horizontally, avoid direct sunlight and heat sources.
What adhesive to use and what to adhere the baseboard to
Surface type assessment
The choice of adhesive and installation technique depends on the type of surface to which the baseboard will be attached. Different materials require different approaches.
Gypsum board:
-
Ideal surface for adhesion
-
Smooth, flat, with good adhesion
-
Use any styrofoam adhesive
-
Apply adhesive in dots or in a snake pattern
-
Press for 10-15 seconds
-
Avoid excessive pressure — gypsum board may dent
Concrete and brick walls:
-
Often have unevenness
-
May be dusty or loose
-
Priming is mandatory before installation
-
Use spackle adhesive to fill unevenness
-
Or polymer adhesive with high fill content
-
For significant unevenness - additional mechanical fixation
Plastered walls:
-
Quality depends on the type of plaster
-
Gypsum plaster - excellent adhesion
-
Cement plaster - primer is mandatory
-
Check plaster strength - if it flakes off, reinforce with primer
-
Standard mounting adhesive holds well
Painted walls:
-
Depends on the type and strength of paint
-
Oil-based paint - poor adhesion, better to remove the strip under the baseboard
-
Water-emulsion - good if paint adheres strongly
-
Check strength: apply tape and sharply pull off - if paint peels off, remove it
-
Slightly sand glossy paint to improve adhesion
Wallpaper:
-
Not recommended to glue onto wallpaper
-
Baseboard adheres to wallpaper, not to the wall
-
When wallpaper peels off, the baseboard will fall
-
Correct order: level walls, install baseboard, then glue wallpaper flush
-
If wallpaper is already glued - remove a strip slightly wider than the baseboard
Wooden surfaces:
-
Good adhesion on clean, untreated wood
-
Lacquered or painted wood - reduce slipperiness by sanding
-
Polymer adhesive holds very well
-
Can be additionally secured with small nails
Tile (ceramic):
-
Smooth glossy surface with low adhesion
-
Treat with primer for smooth surfaces
-
Use high-strength adhesive
-
Or two-component epoxy adhesive
-
Press longer - 30-60 seconds
Adhesive Preparation
Proper adhesive preparation affects the quality of installation:
Adhesive in tubes (liquid nails):
-
Insert the tube into the caulking gun
-
Trim the tube tip at a 45-degree angle
-
Nozzle diameter - 5-7 mm (larger for wide baseboards)
-
Make several "dry" presses to let the adhesive reach the tip
-
Check consistency - should extrude evenly like a sausage
Putty adhesive:
-
If ready, simply mix until homogeneous
-
If powder-based, dilute with water according to instructions
-
Consistency - thick sour cream, does not drip off the trowel
-
Do not dilute the entire volume at once - putty sets in 30-40 minutes
-
Prepare portions for 3-4 baseboards
Special adhesive for polystyrene:
-
Usually comes in powder form
-
Dilute with water in the specified proportions
-
Mix thoroughly until lumps disappear
-
Let it rest for 5 minutes
-
Mix again before use
-
Use within the specified time (usually 2-3 hours)
Technique for Applying Adhesive
The strength of the bond and material consumption depend on how the adhesive is applied:
Spot application:
-
Adhesive is applied in dots with a diameter of 2-3 cm
-
Distance between dots - 10-15 cm
-
Suitable for flat walls
-
Economical adhesive consumption
-
Sufficient for light polystyrene baseboards
Snake application:
-
Continuous wavy line of adhesive
-
Wave amplitude - 1-2 cm
-
Suitable for walls with minor irregularities
-
Provides more secure adhesion
-
Average adhesive consumption
Continuous application:
-
Adhesive is applied as a thin, continuous layer
-
Use putty applied with a trowel
-
Suitable for uneven walls
-
Simultaneously levels and adheres
-
High consumption, but better quality
Combined application:
-
Adhesive strip along edges + dots in center
-
Optimal choice for most cases
-
Reliability + economy
Application rules:
-
Adhesive is applied to the skirting board, not to the wall (except for putty)
-
Do not apply too much - excess will squeeze out and stain the wall
-
But also not too little - the skirting board may detach
-
For ceiling skirting boards, apply adhesive to both surfaces (to the wall and to the ceiling)
-
For floor skirting boards - only to the surface adjacent to the wall
Features of adhesion to different surfaces
To smooth surfaces (tile, glossy paint, plastic):
-
Must degrease with alcohol or special solution
-
Use primer for smooth surfaces
-
Choose adhesive with increased strength
-
Increase pressing time to 30-60 seconds
-
Two-component adhesives can be used
To loose surfaces (old plaster, porous concrete):
-
Deep-penetration primer in 2 coats is mandatory
-
Use putty adhesive or adhesive with high adhesion
-
Apply a thicker layer for better penetration into pores
-
For heavy shedding - reinforce the surface or remove a weak layer
To uneven surfaces:
-
Use putty adhesive - it simultaneously levels
-
Apply a thicker layer in recessed areas
-
Press the skirting board until it reaches the desired position
-
Form excess adhesive into a smooth transition to the wall
-
For very large unevenness - additional mechanical fastening
To wet surfaces:
-
Ideal - let it dry completely
-
If installation is required in a wet area - use a moisture-resistant adhesive
-
Silicone sealants work better in a humid environment
-
Acrylic adhesives also allow for slight humidity
How to mount to walls and floors: self-tapping screws, adhesive, putty
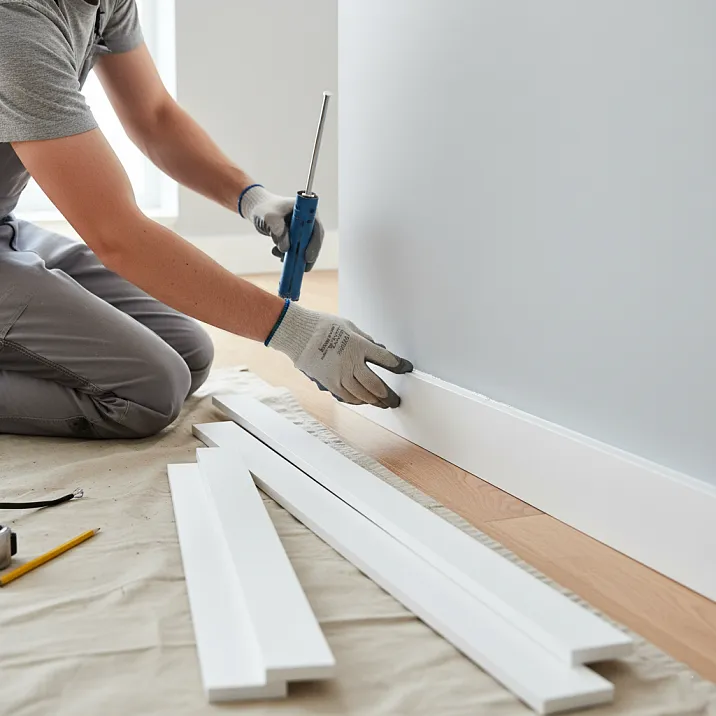
Adhesive mounting: primary method
For lightweight polystyrene skirting board, adhesive mounting is the primary and sufficient method.Installation of polystyrene skirting boardMounting on adhesive does not require drilling, does not damage the material, and provides an aesthetic appearance without visible fasteners.
Step-by-step adhesive mounting technology:
-
First plank preparation:
-
Start from the corner (inside or outside)
-
Measure the required length, accounting for the corner
-
Cut at 45 degrees using a miter saw
-
Sand the end with sandpaper
-
-
Applying adhesive:
-
Apply adhesive to the back of the skirting board using the chosen method
-
For ceiling skirting board - on both adjacent surfaces
-
For floor skirting board - only on the surface facing the wall
-
Do not apply adhesive to the very edge - it will squeeze out during pressing
-
-
Plank installation:
-
Position the skirting board at the installation site
-
Align the corner with the room's corner
-
Press firmly against the wall/ceiling evenly along the entire length
-
Do not press point-wise - distribute pressure with your palms
-
Hold for 15-30 seconds (depending on the adhesive)
-
-
Excess removal:
-
Wipe away excess adhesive immediately with a damp cloth
-
When using putty - smooth with a trowel, forming a transition
-
Do not leave excess - it is harder to remove after drying
-
-
Temporary fixation (if needed):
-
If the baseboard is detaching from the wall - secure with painter's tape
-
Apply tape strips every 30-40 cm
-
Press the tape against the wall/ceiling through the baseboard
-
Remove after 12-24 hours, once the adhesive has fully set
-
-
Installation of the next strip:
-
The next strip is installed flush with the previous one
-
Apply adhesive to the end for a strong joint connection
-
Align strips by height - any height discrepancy will be very noticeable
-
Monitor even positioning along the entire length
-
Mechanical fastening: when necessary
In most cases, adhesive is sufficient, but there are situations when additional mechanical fastening is needed:
When to use screws:
-
Very uneven walls (height differences over 10 mm)
-
Loose, crumbling surfaces
-
Rooms with vibration (near roads, railways)
-
Temporary installation (when easy removal is required)
-
Wide and heavy baseboards with large cross-sections
Combined fastening technology:
-
Drill hole marking:
-
Mark screw locations with 30-50 cm intervals
-
First screw - 5-10 cm from the edge of the strip
-
Avoid relief areas - fasten in smooth zones
-
For ceiling baseboards - closer to the wall (upper part)
-
-
Drilling holes in the baseboard:
-
Use a drill bit slightly smaller than the screw (2.5-3 mm)
-
Drill carefully, without heavy pressure — polystyrene easily cracks
-
Make a countersink — a slight expansion under the screw head
-
Countersink depth — 2-3 mm, so the screw head sits flush
-
-
Marking on the wall:
-
Position the skirting board at the installation site
-
Mark points on the wall through the holes with a pencil
-
Remove the baseboard
-
-
Drilling the wall:
-
For concrete/brick — use a 6 mm concrete drill bit
-
Hole depth — 40-50 mm
-
Insert plastic anchors into the holes
-
For drywall, use special butterfly anchors
-
-
Installation:
-
Apply adhesive to the baseboard (optional but recommended)
-
Place the baseboard, aligning the holes
-
Drive in the screws without over-tightening
-
Polystyrene is soft — excessive force will create dents
-
The screw heads should be slightly recessed
-
-
Fastener concealment:
-
Fill holes with acrylic putty
-
Smooth to match the surface
-
After drying, sand with fine-grit sandpaper
-
Paint the baseboard — screws will become invisible
-
Mounting on putty: professional method
Many professional finishers use acrylic putty as an adhesive. This provides several advantages:
Advantages of the method:
-
Glues and levels simultaneously
-
Fills all wall irregularities
-
Excess forms a smooth transition — no need for additional sealing
-
Economical consumption
-
After painting, results in a monolithic structure
-
Easy to fix errors before it sets
Technology:
-
Spackle preparation:
-
Use finishing acrylic putty
-
Consistency - thick sour cream
-
Do not mix too much at once - work in portions
-
-
Application:
-
Apply putty with a trowel in a continuous layer of 2-3 mm on the skirting board
-
Grab both adjacent surfaces
-
Or apply a strip slightly wider than the skirting board to the wall
-
-
Installation:
-
Position the skirting board at the installation site
-
Press and align position
-
Putty will squeeze out along the edges
-
-
Forming the transition:
-
Do not wipe excess putty, smooth it with a trowel
-
Form a smooth transition from the skirting board to the wall/ceiling
-
Fill all gaps and unevenness
-
Smooth with a damp sponge for an ideal surface
-
-
Finishing:
-
After drying (4-6 hours), sand if necessary
-
Prime and paint together with the skirting board
-
Results in a monolithic structure without visible joints
-
Features of installing floor skirting boards
Installing floor skirting boards yourselfhas its nuances:
Important rule: Floor skirting board is glued ONLY to the wall, the bottom edge remains free. This is critically important for flooring materials that require an expansion gap for thermal expansion (laminate, parquet).
If you glue the skirting board to the floor:
-
You will block the floor's thermal expansion
-
Laminate/parquet will start to swell and warp
-
The covering may detach from the substrate
-
Gaps will appear between the boards
Correct technique:
-
Apply adhesive only to the surface adjacent to the wall
-
The lower part rests freely on the floor but is not fastened
-
The skirting board simply covers the expansion gap (10-15 mm)
-
When the floor expands, the skirting board remains stationary
Working with an uneven floor:
-
If the floor has waves, the skirting board may not fit completely
-
Do not try to force the skirting board onto the floor with screws
-
Or use a more flexible skirting board
-
Or accept small gaps - they will be hidden behind furniture and carpet
Ceiling skirting board mounting features
The ceiling skirting board (casing, cornice) has two mounting surfaces - to the wall and to the ceiling:
Adhesive distribution:
-
Apply adhesive to both adjacent surfaces
-
More adhesive on the wall (it is usually less even)
-
Less adhesive on the ceiling
Working at height:
-
Use a stable ladder
-
Work in a comfortable position
-
A helper is needed for long boards
-
You need to press longer - hands get tired
Temporary fixation:
-
Painter's tape is especially important for ceiling skirting boards
-
Gravity works against you
-
Apply tape immediately after installing the board
-
Leave until the adhesive fully sets
How to join corners and fill gaps
Marking and cutting corners: the foundation of quality installation
Quality corner joints are what distinguish professional work from amateur work. Gaps in corners are immediately noticeable and spoil the entire appearance.
Understanding the geometry of corners:
The standard interior angle of a room is 90 degrees. For two skirting board strips to fit neatly in a corner, each must be cut at 45 degrees. In total, 45+45=90 - perfect joint.
The problem is that real room angles are rarely exactly 90 degrees. Old houses, building settlement, construction inaccuracies - all of this creates angles of 85, 92, 88 degrees. When both pieces are cut at standard 45 degrees, a gap appears.
Measuring the real angle:
For non-standard angles, measure the actual value:
-
Use a protractor (available in construction apps on smartphones)
-
Or a simple method: attach two strips to the corner, mark the intersection point, and measure the resulting angle with a protractor
-
Divide the obtained angle in half — this is the cutting angle for each piece
-
For example, an 88-degree angle: cut each piece at 44 degrees
Using a miter saw:
A miter saw is a simple device that ensures accurate cuts. It consists of a tray with slots for different angles.
Correct orientation of the baseboard in the miter saw:
This is critically important! Incorrect orientation is the main cause of errors for beginners.
For ceiling baseboard:
-
Place the baseboard in the miter saw "upside down"
-
The part that will be glued to the ceiling should lie on the bottom of the miter saw
-
The part that will be glued to the wall should be pressed against the rear wall of the miter saw
-
Imagine the bottom of the miter saw as the ceiling, and the rear wall as the wall
For floor baseboard:
-
Place the baseboard in the miter saw as it will stand
-
The bottom part (which stands on the floor) — on the bottom of the miter saw
-
The part that will be glued to the wall should be pressed against the rear wall of the miter saw
Cutting an inside corner:
An inside corner is a standard room angle where two walls form an inward angle.
Left piece:
-
Place the baseboard in the miter saw with the correct side facing up
-
The left end of the baseboard extends beyond the miter saw
-
Cut through the RIGHT groove at 45 degrees (from yourself, right-down)
-
The short side of the cut will be on the outer (front) side of the baseboard
Right piece:
-
Place the baseboard in the miter saw
-
The right end extends beyond
-
Cut through the LEFT groove at 45 degrees (from yourself, left-down)
-
The short side of the cut will be on the outer side
Remember: for an inside corner, both pieces are cut so that the short side of the cut is on the front (visible) side of the baseboard.
Cutting the outer corner:
Outside corner - protruding part (column, wall protrusion, bay window).
Left piece:
-
Place the baseboard in the miter saw
-
Left end protrudes.
-
Cut through the LEFT groove (from yourself, left-down).
-
The short side of the cut will be on the inner (back) side of the skirting board.
Right piece:
-
Right end protrudes.
-
Cut through the RIGHT groove (from yourself, right-down).
-
The short side of the cut is on the inner side.
For the outside corner, the short side of the cut is on the back (invisible) side of the skirting board.
Cutting technique:
-
Use a sharp saw with fine teeth.
-
Cut smoothly without heavy pressure.
-
Do not rush - haste leads to uneven cuts.
-
Hold the part being cut to prevent it from breaking at the end.
-
After cutting, обязательно зачистите торец мелкой наждачной бумагой
Test fit:
Before final installation:
-
Place both parts against the corner.
-
Check the fit tightness.
-
If there is a gap, trim one or both parts.
-
It's better to spend time fitting than to install with gaps.
Jointing straight sections.
On long walls, one skirting board is not enough. You need to join several boards:
Correct jointing:
-
The ends of both boards must be cut at 90 degrees.
-
Use a miter gauge for a straight cut.
-
Check the fit - the ends must match perfectly.
-
Minor irregularities can be sanded smooth.
Joint placement:
-
Do not place the joint in the center of the wall - it is the most noticeable spot.
-
Place joints closer to corners.
-
Or in places where furniture will be placed.
-
On one wall, there should not be two joints - use a longer baseboard instead
Joint installation:
-
Apply adhesive to the end of the first strip
-
Install the second strip flush
-
Press the joint tightly, ensuring height alignment
-
Any height discrepancy will be very noticeable
-
Remove excess adhesive
Filling joints and gaps
Even with perfect trimming, micro-gaps may remain. They must be filled:
Filling materials:
Acrylic sealant:
-
White color
-
Elastic
-
Easy to paint
-
Does not yellow over time
-
Ideal for gaps up to 5 mm
Acrylic putty:
-
For wider gaps
-
Less elastic
-
May shrink slightly after drying
-
Requires sanding before painting
Sealing technology with sealant:
-
Clean the gap of dust and debris
-
Trim the nozzle of the tube at an angle, making a 2-3 mm opening
-
Extrude sealant into the gap, filling it completely
-
Smooth with a wet finger or rubber spatula
-
Wipe away excess with a damp sponge
-
Allow to dry (2-4 hours)
-
Repeat if necessary for deep gaps
Filling technology with putty:
-
Prepare putty to the required consistency
-
Apply with a putty knife, pressing into the gap
-
Smooth to match the surface
-
Remove excess
-
After drying (4-6 hours), sand with fine grit
-
Remove dust
-
Prime and paint
Working with corners:
Corners require special attention:
-
Even a small gap is very noticeable
-
Fill with sealant or spackle
-
Form a neat joint with a damp finger
-
For wide gaps, trimming one of the parts may be required
Filling gaps between baseboard and wall:
If the wall is uneven, gaps form between the baseboard and wall:
-
Small gaps (up to 3-5 mm) fill with acrylic sealant
-
Apply sealant into the gap
-
Smooth and form a gradual transition from baseboard to wall
-
When using spackle as adhesive, gaps are automatically filled
What NOT to use:
Silicone sealant:
-
Does not paint
-
Remains visible after painting
-
Use only acrylic
Construction foam:
-
Expands significantly
-
Difficult to control
-
Excess is difficult to remove
-
Visible after painting
Use of ready-made connecting elements
For easier installation, special elements are produced:
Internal angles:
-
Ready-made corner element with grooves for baseboard
-
Insert ends of strips cut at 90 degrees
-
No need for precise 45-degree trimming
-
Downside: more noticeable than quality trimming
External angles:
-
Similar to internal ones
-
Protect corners from damage
-
Suitable for high-traffic areas
Connectors for straight sections:
-
Hide the joint between two strips
-
Create a neat, inconspicuous transition
-
Used rarely - easier to make a quality joint
End caps:
-
For finishing baseboards (doorways)
-
Cover the end, giving a finished look
-
Protect against dirt entering the cavity
All elements are attached with the same adhesive as the baseboard.
Installation on stretch ceilings and working with corners
Specifics of stretch ceilings
Stretch ceiling - a thin PVC or fabric sheet stretched over a frame. Between the sheet and the ceiling - empty space. This creates special conditions for installing baseboards.
Main rule: Baseboard CANNOT be glued to a stretch ceiling!
Why:
-
The sheet cannot support the weight of the baseboard
-
The adhesive will damage the film surface
-
The sheet stretches or sags with temperature changes
-
The baseboard will detach, damaging the ceiling
Correct method:
Baseboard is glued ONLY to the wall. The top edge simply covers the gap between the wall and the sheet, creating the illusion that the baseboard is holding onto the ceiling.
Choosing baseboards for stretch ceilings
Not every baseboard is suitable. Requirements:
Lightweight:
Critically important. The baseboard holds only to the wall, so the lighter, the better. Polystyrene is ideal - the lightest material.
Wide supporting surface:
The contact area with the wall must be maximum. Narrow baseboards with small adhesive surface are unsuitable - they will detach under their own weight.
Special profiles:
For stretch ceilings, there are baseboards with an extended mounting flange. They have a wide base for the wall and a narrow decorative part directed toward the ceiling.
Not suitable:
-
Heavy, wide cornices
-
Baseboards with narrow mounting surface
-
Gypsum molding
-
Heavy polyurethane moldings
HiWood products include special series for stretch ceilings — lightweight profiles with optimal geometry.
Installation technology
Work sequence:
Ideal to install the baseboard BEFORE stretching the ceiling:
-
Adhere the baseboard to the wall
-
Then install the stretch ceiling
-
The edge of the fabric is tucked behind the baseboard
But more often you have to work with an already installed ceiling:
-
Protect the fabric from glue and paint
-
Install the baseboard
-
Paint (if needed)
-
Remove the protection
Step-by-step instructions:
-
Wall preparation:
-
Clean the wall to the width of the baseboard
-
Prime for better adhesion
-
The wall must be as flat as possible
-
-
Ceiling protection:
-
Critical step
-
Lay a strip of polyethylene between the baseboard and the ceiling
-
Or apply painter's tape to the ceiling along the installation line
-
The protection should extend 5-10 cm — paint splashes will fly during painting
-
-
Applying adhesive:
-
Glue is applied ONLY to the part that adheres to the wall
-
The upper part remains WITHOUT glue
-
If you apply glue to the top, it will squeeze out onto the ceiling when pressing down
-
-
Baseboard installation:
-
Press against the wall
-
Press ONLY against the wall, do not press against the ceiling
-
The top edge may not touch the ceiling - this is normal
-
A small gap (1-2 mm) will be unnoticed
-
DO NOT try to press the skirting board against the ceiling - you will damage the fabric
-
-
Fixation:
-
Secure with painter's tape to the wall
-
Not to the ceiling!
-
Hold until the adhesive sets
-
-
Painting:
-
Ceiling protection must remain in place
-
Paint carefully, avoiding contact with the ceiling
-
Brush from the ceiling to the wall, not the other way around
-
After painting, remove the protection before the paint is fully dry
-
Features of corners with stretch ceilings
Corners - the most difficult area when working with stretch ceilings:
Problem:
In corners, the fabric may sag or, conversely, be overly stretched. This creates unevenness that the skirting board must 'avoid' while being glued only to the wall.
Solution:
-
Use more flexible, thinner skirting boards in corners
-
Do not attempt to pull the skirting board toward the ceiling
-
Carefully fill the gap with white acrylic sealant after installation
-
Or use special corner elements
Cutting corners:
The technique is the same as for regular ceilings:
-
Internal corners - both parts at 45 degrees
-
Accuracy is important - the gap in the corner is very noticeable against the stretch ceiling
-
Make a test fit before final installation
Skirting board with lighting
Popular solution - LED strip behind the skirting board:
Principle:
-
The skirting board is installed at a distance of 5-15 cm from the ceiling
-
The LED strip is placed into the groove of the skirting board
-
Light is directed toward the ceiling
-
Creates a floating ceiling effect - soft glow along the perimeter
Mounting specifics:
-
Use a special groove-edged baseboard for the strip
-
Install the power supply in an accessible location
-
Run wires before installing the baseboard
-
LED strip is installed after baseboard installation
-
Check operation before final fixation
LED strip selection:
-
Power of 4.8-9.6 W/m is sufficient for backlighting
-
Color: warm white for coziness, cool for modern style, RGB for color effects
-
Density: 60 LEDs per meter is optimal
-
Check heating - the strip should not be hot (max 50-60°C)
Errors when working with stretch ceilings
Error 1: Adhering to the ceiling
The most common and critical error. Leads to damage of the fabric, sagging, and the need to redo the ceiling.
Error 2: Using a heavy baseboard
A wide, heavy baseboard cannot stay on one wall. Over time, it peels off, especially at corners.
Error 3: Painting without protection
Paint gets on the fabric, leaving permanent stains. The only way to fix it is to replace the section or the entire ceiling.
Error 4: Attempting to force-fit the baseboard to an uneven ceiling
The fabric has minor waves. Attempting to press the baseboard onto them damages the ceiling or causes the baseboard to detach.
Error 5: Insufficient wall preparation
The baseboard holds only to the wall. If the wall is uneven, dusty, or weak, the baseboard will detach.
Common installation errors and ways to fix them
Errors during preparation stage
Error 1: Incorrect material calculation
Bought insufficient material, had to purchase more. The new batch differs in shade.
How to avoid: Always buy 10-15% extra. It’s better to have extra material than to search for an identical baseboard.
How to fix: If it already happened — install baseboards from different batches in different rooms or on different walls. Do not alternate strips of different shades on the same wall.
Error 2: Installation without acclimatization
The skirting board was brought from a cold storage and immediately started to be glued. After heating in the room, the material expanded, gaps and deformations appeared.
To avoid this: Let the material acclimate in the room for 12-24 hours at room temperature.
Cutting Errors
Glued onto a dusty, dirty, loose wall. The skirting board peeled off a few days or weeks later.
To avoid this: Thorough preparation - cleaning, priming, leveling.
To fix: Remove the skirting board, properly prepare the surface, and reinstall.
Cutting Errors
Error 4: Incorrect orientation in the miter saw
Turned the skirting board upside down, resulting in a mirror-image cut. The parts do not align.
To avoid this: Carefully orient the skirting board - the part that adheres to the wall should be pressed against the far side of the miter saw. Before cutting, think about which side goes where.
To fix: The cut piece cannot be used. You will need to take a new board and cut it correctly.
Error 5: Cutting with a dull tool
A dull hacksaw crushes and tears polystyrene, resulting in an uneven cut with chips.
To avoid this: Use a sharp tool. A metal hacksaw with fine teeth cuts polystyrene perfectly.
To fix: Sand the end with sandpaper to remove irregularities. In case of severe damage, cut off another 5-10 mm and sand again.
Error 6: Cutting without considering the actual angle
Cut both parts at standard 45 degrees without checking the actual room angle (92 degrees). A gap resulted.
To avoid this: Check the actual angles of the room, especially in older houses. If the deviation exceeds 2-3 degrees, adjust the cutting angle accordingly.
To fix: Trim one or both parts to correct the angle. Alternatively, fill the gap with acrylic sealant or putty.
Installation Errors
Error 7: Using an inappropriate adhesive
Used nitro glue or solvent-based glue. The skirting board melted, developed dents and marks.
To avoid this: Use only water-based adhesives without solvents! Check the composition.
To fix: Damaged areas must be replaced. Polystyrene dissolved by solvent cannot be restored.
Error 8: Using too much glue
Applied a thick layer of glue. When pressed, it squeezed out, staining the wall, floor, and ceiling. Material waste.
To avoid this: Use only the amount of glue necessary to ensure a secure bond. A thin layer or spot application is sufficient for lightweight polystyrene.
To fix: Immediately wipe away fresh glue with a damp cloth. Scrape off hardened glue with a knife, sand, and repaint.
Error 9: Insufficient pressing time
Applied the skirting board, held it for 3 seconds, and released it. The glue did not set, and the skirting board detached from the wall.
How to avoid: Press for at least 15-30 seconds. For heavy baseboards and uneven walls - up to a minute. Use painter's tape for temporary fixation.
How to fix: If the baseboard has come loose before the glue has set, remove it, reapply glue, and reinstall correctly.
Error 10: Installation with height discrepancies
Planks installed at different heights, creating noticeable steps at joints. Very obvious, especially on long walls.
How to avoid: Use a level and draw a marking line. Monitor the position of each plank. When joining, ensure height alignment.
How to fix: If the glue hasn't set yet, remove and reinstall correctly. If the glue has already set, you'll need to dismantle and redo the installation.
Error 11: Gluing floor baseboard to the floor
Glued the baseboard to both the wall and the laminate. After several months, the laminate swelled and gaps appeared.
How to avoid: Floor baseboard is glued ONLY to the wall! The bottom edge rests freely on the floor.
How to fix: Immediately remove the baseboard and free the laminate. Let the floor "settle" before reinstalling the baseboard correctly.
Errors when working with corners
Error 12: Gaps in corners
Parts do not fit tightly, forming a noticeable gap.
How to avoid: Precise cutting, test-fit before final installation, use sharp tools.
How to fix: Fill the gap with white acrylic caulk. Push the caulk into the gap and smooth it with a damp finger. After drying, paint over it.
Error 13: Overlapping parts in corners
Incorrectly cut, parts overlap instead of fitting together.
How to avoid: Correct orientation in the joint, understanding which part (left or right) you are cutting.
How to fix: You will need to trim the excess or redo one of the parts.
Errors after installation
Error 14: Premature removal of painter's tape
Removed tape after 2-3 hours, glue had not yet set. Baseboard came loose from the wall.
How to avoid: Keep the tape on for at least 12 hours, preferably 24. Check the strength of the bond before removing it.
Error 15: Delayed removal of tape
Left tape on for several days. When removing, paint peeled off along with the tape.
How to avoid: Remove tape 12-24 hours after glue has set, but paint has not yet fully cured.
How to fix: Touch up the damaged areas.
Error 16: Unfilled joints
Left gaps and joints unfilled. Very noticeable, collect dust and dirt.
How to avoid: Always fill all joints with acrylic caulk or putty.
How to fix: Never too late - clean joints of dust, fill with sealant, smooth, paint if necessary.
How to fix errors: general principles
If the error is noticed immediately (glue hasn't set):
-
Carefully remove the skirting board
-
Remove old glue from skirting board and wall
-
Fix the error (trim, reprepare)
-
Apply fresh glue
-
Install correctly
If the glue has already set:
-
Assess: can it be fixed in place (fill gaps, touch up)
-
Or disassembly and reinstallation is needed
-
When removing, act carefully — use a putty knife to gently pry it off
-
Polystyrene often breaks during disassembly - be prepared to use new material
Local repair:
-
Gaps - sealant/putty
-
Scratches - putty + sanding + painting
-
Glue stains - cut, fill with putty, paint
-
Small chips - putty + painting
When a redo is needed:
-
Large gaps in corners (more than 5 mm)
-
Significant height discrepancies
-
The baseboard has come unglued over a large section
-
Visible deformations
-
Use of inappropriate glue causing material damage
Conclusion
Installation of polystyrene baseboard- a task that seems complex at first glance. In reality, it is one of the most accessible stages of repair, requiring no special training or expensive equipment. Just attention, care, and following the correct technique.
The key to success is proper preparation. The time spent cleaning surfaces, accurate marking, priming pays off with an ideal result and long-lasting adhesion. Don't rush, don't skip steps - each is important for the final quality.
Choosing quality material determines half the success. Skirting boards from reliable manufacturers such as Hi Wood (Hi Wood) provide stable geometry, smooth surface, and easy processing. Saving money on materials leads to problems during installation - warped boards, uneven structure, chipping during cutting. Collaboration between HiWood and STAVROS guarantees access to quality products with professional technical support.
Choosing the right glue is critically important for polystyrene. Only water-based compositions, without solvents - this rule has no exceptions. Polymer mounting adhesives, acrylic putty, special polystyrene compositions will ensure reliable adhesion for decades. Using inappropriate glues not only worsens the result - it destroys the material.
Accuracy in cutting corners - what distinguishes professional work from amateur work. A quality miter saw, sharp tools, correct skirting board orientation, test fitting before final installation - these simple rules guarantee perfect corners without gaps. Even if it's not perfect the first time, don't give up. Small gaps are easily fixed with acrylic sealant, and experience comes with practice.
Patience during installation pays off. Press the skirting board firmly for long enough, use painter's tape for temporary fixation, let the glue fully set before applying load. Rushing is the enemy of quality. It's better to spend an extra 10 minutes on each board than to discover peeled sections a week later.
Working with stretch ceilings requires special attention and strict adherence to the rule: glue only to the wall, never to the ceiling. Protection of the ceiling fabric from glue and paint is mandatory. Choosing lightweight skirting boards with wide adhesive surfaces is the key to long-lasting construction.
Errors are inevitable, especially during the first attempt. It's not the absence of errors that matters, but the ability to notice and correct them in time. Most minor flaws can be easily corrected on-site — with sealant, putty, or touch-up paint. Serious mistakes require redoing, but even these are valuable experience for future projects.
STAVROS company, working in partnership with the manufacturer Haywood, offers not only high-quality polystyrene skirting boards but also a full range of installation materials. The assortment includes specialized adhesives, putties, sealants, primers, optimally suited for working with polystyrene. Professional consultants will help you choose everything necessary, advise on installation nuances, and share professional tips.
Installing skirting boards yourself is not only a saving on professional services (which can cost from 150 to 300 rubles per linear meter), but also an invaluable experience, confidence in your abilities, and pride in your own work. Once you install skirting boards in one room, you’ll easily handle the entire apartment. This skill will stay with you forever, be useful in future renovations, and help friends and acquaintances.
Following the recommendations of this guide, using quality materials, and not rushing, you will achieve a professional-level result. A carefully installed skirting board will be the final touch that transforms a renovated room into a harmonious interior, pleasing to the eye and creating a sense of completion and comfort for many years.