Article Contents:
- Surface preparation - the foundation of quality installation
- Cleaning walls and ceiling
- Surface leveling
- Priming
- Choosing adhesive and preparing molding
- Types of adhesives for polyurethane molding
- Calculating adhesive quantity
- Processing the backside of molding
- Technique for achieving clean corners
- External corners - cutting at 45 degrees
- Internal corners - beveling and trimming method
- Checking before gluing
- Gluing molding - art and practice
- Applying adhesive
- Pressing molding
- Setting time
- Concealing joints - craft and skill
- Leveling molding at joints
- Filling gaps with putty
- Masking joints with proper painting
- Preparing molding for painting
- Surface cleaning
- Priming molding
- Filling defects with putty
- Painting molding - paint selection and application technique
- Choosing paint
- Color selection and tinting
- Application technique
- Drying and curing
- Special techniques - creating effects
- Two-tone painting
- Gilding and silvering
- Aging (patination)
- Common Mistakes and How to Avoid Them
- Error 1: Incorrect surface preparation
- Error 2: Incorrect adhesive selection
- Error 3: Insufficient adhesive quantity
- Error 4: Incorrect corner trimming
- Error 5: Neglecting priming
- Error 6: Too thick paint layer
- Error 7: Rushing during drying
- FAQ
- Conclusion

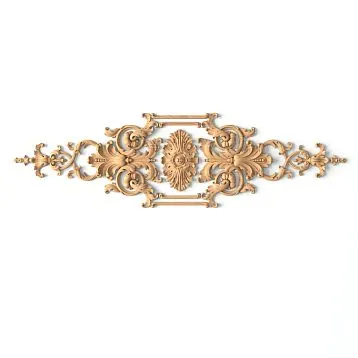
Polyurethane molding is one of the most versatile materials for interior finishing, if you know how to work with it. The beautiful result depends less on the quality of the material and more on the installation technique.Buy polyurethane wall moldingsThis is only half the job. The second half is proper installation, ensuring clean corners without gaps, invisible joints, and professional painting. It is precisely these three aspects that transform a good molding into an element that impresses with its perfection.
Installing polyurethane molding seems like a simple process — glue, paint, done. In practice, simplicity is an illusion. Incorrectly executed corners reveal unprofessionalism at first glance. Poorly concealed joints create the impression that the work was done by an amateur. Poorly chosen and applied paint makes expensive molding look cheap. But with proper attention to detail, the result becomes ideal and lasts for decades.
This article reveals all the secrets of professional polyurethane molding installation. You will learn about surface preparation, selecting the right adhesive, techniques for achieving perfect corners, methods for hiding joints so they are undetectable. We will discuss preparing molding for painting, selecting paints, applying coatings. And most importantly — learn to spot the mistakes that 90% of amateurs make, and avoid them.


Surface preparation — the foundation of quality installation
Quality molding installation begins long before you touch the molding itself. Surface preparation is a critical stage that determines the reliability of the bond and the appearance of the result.


Cleaning walls and ceilings
Before starting installation, the surface must be perfectly clean. Dust, dirt, old paint — all of this will interfere with adhesive bonding. Wipe the wall and ceiling with a damp cloth, remove dust with a vacuum cleaner, and allow to dry completely.
If the surface has old paint that is peeling, remove it with a scraper or putty knife. Loose paint will not provide reliable molding attachment. Dense, solid paint is suitable, but it is better to perform light sanding with medium-grit sandpaper — this will improve adhesive bonding.
If the wall is plastered, check the plaster for strength. Press with your finger — if the plaster flakes, remove weak areas, treat with putty or primer, and dry. Loose plaster cannot support the weight of the molding — it will eventually detach over time.
Our factory also produces:
Surface leveling
Molding highlights all surface irregularities. A 5-millimeter bulge on a wall will become obvious when the molding adheres only to protruding points, leaving gaps in other areas.
If the ceiling or wall has waves, irregularities exceeding 3 millimeters per meter of length, the surface must be leveled. Use putty to fill depressions. After drying, sand the surface and check flatness with a long level or straightedge.
For an ideal result, use a 2-meter level to check the surface in multiple directions. Deviations exceeding 2-3 millimeters over such a length will become a problem.
Get Consultation
Priming
After cleaning and leveling, apply a penetrating primer. The primer strengthens the surface, improves adhesive bonding, and reduces the material’s hygroscopicity.
For porous surfaces (plaster, drywall), use an acrylic-based primer. For smooth surfaces (paint, ceramic), a high-adhesion primer is suitable. Apply in a thin layer and allow to dry completely before installing the molding.
Choosing adhesive and preparing molding
The correct adhesive is the guarantee of reliable molding attachment for years. The wrong adhesive may cause molding to peel off within a few months.
Types of adhesives for polyurethane molding
Polyurethane adhesive — the optimal choice for installing polyurethane molding. Polyurethane adhesive is applied in intermittent lines (not as a continuous layer), ensuring strong bonding and is universal for most surfaces.
Acrylic adhesive is suitable for lightweight moldings, smooth walls, and low ceilings. High-strength acrylic adhesive ensures reliable bonding provided the surface is properly prepared. The downside of acrylic adhesive is that it does not handle moisture well, so for bathrooms, polyurethane is better.
Liquid nails (polymer adhesives) are used as additional fastening, not primary. On their own, they are not strong enough for molding, but in combination with another adhesive, they provide additional reliability.
Calculating adhesive quantity
Approximately 150-200 grams of adhesive are required per linear meter of molding when applied in intermittent lines every 100-150 millimeters. For a 5x4 meter room with molding only on the ceiling (perimeter 18 meters), approximately 3 kilograms of adhesive will be needed.
It's better to have a reserve - a shortage of adhesive will require redoing the work, while excess can be stored in airtight containers for future use.
Processing the back side of the molding
Apply acrylic primer to the back side of the molding one to two days before installation. This equalizes the material's porosity and improves adhesive bonding. The molding will absorb moisture, swell minimally, and stabilize before installation.
Some masters moisten the back side of the molding with water immediately before gluing. This works, but less predictably - the molding may swell unevenly.
Technique for obtaining clean corners
Perfect corners are the hallmark of professional installation. Incorrectly executed corners ruin the entire appearance, even if the rest of the work is flawless.
External corners - cutting at 45 degrees
External corner - when the molding wraps around a protruding element (column, wall protrusion). The correct solution is to cut both pieces of molding at 45 degrees, creating a triangular profile when viewed from the front.
The marking is correct if you place the molding against the corner, visually determining where it should be cut. Usually, the cut is made at 45 degrees so that the two pieces of molding meet at the corner point, creating a continuous pattern line.
For precise cutting, use a 45-degree miter saw or a hand hacksaw for drywall, guiding it at an angle. A jigsaw gives a less precise cut on polyurethane.
After cutting, check the joint by fitting both pieces together. If a gap is visible, refine the cut with a file or medium-grit sandpaper.
Internal corners - method of beveling and trimming
Internal corner - a more complex task. The classic method is to cut the molding at an angle so that the profile of one piece matches the profile of the other.
For this, you need to understand the molding profile. Take a piece of molding, place it against the corner, determine which part needs to be cut. Usually, the back part of the molding is cut so that the front decorative part remains intact and continues the line from the adjacent molding.
The complex method requires experience. The simple method is to use corner inserts (transition elements for internal corners). These pre-made parts ensure a perfect connection without fitting.
If there are no inserts, there is an old proven method - one molding is cut precisely to the corner (90 degrees), the second molding is cut so that its profile matches the first, creating a continuous pattern. This requires care and experience.
Checking before gluing
Before applying adhesive, check the corners in dry form. Place the molding pieces against the wall or ceiling at the corner, ensuring they align and there are no visible gaps. If there are issues, refine the cuts.
This step takes time, but it will save you hours of redoing work if you discover a problem after gluing.
Gluing molding - art and practice
After preparing the corners comes the gluing stage. The accuracy and care at this stage determine the longevity of the entire work.
Applying adhesive
Polyurethane adhesive is applied in intermittent lines to the back side of the molding. The distance between lines is 100-150 millimeters. Too sparse - the molding may detach. Too frequent - adhesive will squeeze out, creating mess.
The adhesive line thickness is approximately 3-5 millimeters. If applied too thinly, adhesion is insufficient. If too thick, adhesive will squeeze out, creating drips.
When applying adhesive to ceiling molding, apply adhesive to both the molding and the surface it will be glued to (ceiling and wall simultaneously). This ensures better adhesion.
Pressing the molding
After applying adhesive, the molding must be firmly pressed against the surface. For ceiling molding, use a support - a stick or pole that holds the molding for 5-10 minutes while the adhesive sets.
Press the molding evenly along its entire length, without concentrating on one spot. Wipe away excess adhesive as you glue.
For wall molding, press by hand along the entire length, ensuring the molding adheres tightly to the surface. Do not leave air bubbles under the molding.
Setting time
Polyurethane adhesive sets in 5-10 minutes and fully dries in 24 hours. Do not move the molding for 24 hours after application. Even slight movement may compromise adhesion.
If you are applying multiple pieces of molding simultaneously, work sequentially — apply one section, wait 10-15 minutes, then move to the next. This ensures even curing of the adhesive.
Hiding joints — an art and skill
Joints between molding pieces are inevitable. The question is only whether they are visible. Professional installation implies that joints are practically invisible.
Aligning molding at joints
After applying the molding, the first step is to check whether the surface level at the joints matches. If one piece of molding is higher than the other, this will be visible even after painting.
If the height difference is small (up to 1 mm), you can ignore it — paint will cover it. If the difference exceeds 2 mm, you need to adjust. Use medium-grit sandpaper and gently sand the protruding area, leveling it.
Filling gaps with putty
Even with perfectly cut corners, small gaps may remain. This is normal — they are filled with putty.
Use acrylic putty for polyurethane or universal putty. Apply putty with a narrow putty knife into the gap, smoothing it along the joint.
After drying (2-3 hours), sand the putty with fine-grit sandpaper to match the molding surface. If the gap is deep, two layers of putty may be required.
Masking joints with proper paint
Even perfectly executed joints may be visible if the paint is incorrect. Glossy paint reveals all irregularities, while matte paint hides them.
To hide joints, use matte or semi-matte paint. It creates soft light diffusion, concealing minor irregularities.
When painting, apply paint in two to three thin layers, not one thick layer. Thin layers better conceal irregularities.
Preparing molding for painting
Moldings made of polyurethaneRequire proper preparation before painting. Rushing this stage will result in poor outcome, despite quality installation.
Surface cleaning
After applying and drying the adhesive, clean the molding of dust and dirt. Wipe with a lint-free damp cloth to remove dust. Allow to fully dry.
If there are adhesive droplets that have squeezed out, remove them with a sharp knife or scraper. Do this carefully, without damaging the molding.
Priming the molding
Apply primer before painting. Primer equalizes the absorption of polyurethane, ensures better paint adhesion, and reduces paint consumption.
Use water-based acrylic primer. Apply in one thin layer with a roller or brush. Allow to dry for 2-3 hours.
If the molding is porous, two layers of primer may be required. Apply the second layer after the first has dried.
Filling defects with putty
After priming, minor defects — small dips or irregularities — may be visible. Fill them with putty, let dry, then sand with fine-grit sandpaper.
The goal is to achieve a perfectly smooth surface before painting.
Painting molding — paint selection and application technique
Painting is the final stage, determining the appearance. The right paint and application technique will make the molding flawless.
Paint Selection
Water-based acrylic paint is suitable for polyurethane. It is safe, odorless, easy to apply, and washable.
Latex paint provides a smoother gloss than acrylic, but is less resistant to moisture.
Alkyd paint (solvent-based) provides greater hardness and a more glossy finish, but has an unpleasant odor and requires ventilation.
For most interiors, matte or satin acrylic paint is optimal. Glossy paint reveals all imperfections, while matte paint hides them.
Color selection and tinting
White paint is a classic choice, suitable for most interiors, and hides imperfections better than dark colors.
If you need colored molding, order paint tinting at the store. Ensure the paint is tinted to be compatible with polyurethane—some pigments are incompatible with polyurethane.
Check the color on a piece of molding before painting all molding. The color may differ from the sample in the store depending on lighting.
Application technique
Use a brush and roller in combination. Apply the base coat with a roller on smooth areas, and use a brush for recessed areas and corners of the molding.
Apply paint in two to three thin coats, not one thick coat. Each coat must dry before applying the next—usually 2-3 hours for acrylic paint.
After applying each coat, lightly sand the surface with fine sandpaper before applying the next coat. This ensures better adhesion and a smoother surface.
Drying and curing
After applying the final coat of paint, allow the molding to dry for at least 24 hours before contact with moisture or mechanical stress. Full curing of acrylic paint takes about one week.
Avoid direct sunlight and drafts during drying—this may cause uneven drying and defects.
Special techniques - creating effects
Simple single-color painting is only the beginning. Professionals use various techniques to create visual effects.
Two-color painting
Paint the molding with one color, then carefully repaint the raised relief elements with another color. This creates depth and emphasizes the molding’s shape.
Use a narrow brush and work carefully. If paint runs, wipe it off with a damp cloth.
Gilding and silvering
Apply the base color paint, then use a brush to apply a thin layer of metallic paint (gold, silver) to the raised relief elements. This creates a luxurious effect suitable for classic interiors.
Metallic paint must be compatible with the acrylic base—confirm this at the store.
Aging (patination)
Paint the molding with the base color, then apply dark paint or stain into the recessed areas of the relief, creating an aged effect. This highlights the molding’s detailing and gives the interior a historical feel.
After the dark layer dries, lightly wipe the raised parts with a dry cloth to remove excess paint, creating a worn effect.
Typical mistakes and how to avoid them
In practice, most problems arise from typical mistakes that are easy to avoid if you know about them.
Error 1: Incorrect surface preparation
Dirty, uneven surfaces are the first cause of molding peeling. Spend time on preparation, and the molding will last for decades.
Error 2: Incorrect adhesive selection
Using construction adhesive instead of special polyurethane adhesive leads to weak bonding. Use the correct polyurethane adhesive.
Error 3: Insufficient adhesive quantity
Saving on adhesive is a false economy. The molding will peel off, requiring redoing. Use the required amount.
Error 4: Incorrect corner trimming
Hastiness during corner trimming leads to visible gaps. Spend time on precise fitting.
Error 5: Neglecting priming
Painting without primer leads to uneven coverage, increased paint consumption, poor adhesion. Always prime.
Error 6: Too thick paint layer
One thick layer instead of two or three thin ones leads to unevenness, drips, visible defects. Apply thin layers.
Error 7: Rushing during drying
Trying to speed up drying with drafts or heat leads to uneven drying and defects. Allow natural drying time.
FAQ
How long does molding installation take?
Surface preparation - 1-2 days. Installing molding (10 meters) - 2-3 hours. Glue drying - 24 hours. Preparation for painting - 1-2 days. Painting (2-3 coats) - 2-3 days with drying time between coats. Total for a medium-sized room - 5-7 days.
Can molding be installed on an uneven wall?
If unevenness exceeds 5 millimeters per meter, the molding will not adhere properly and gaps will be visible. It is better to first level the wall.
Which adhesive is better - liquid nails or polyurethane?
Polyurethane adhesive is stronger, more versatile, and more reliable for polyurethane. Liquid nails are a supplementary option.
Is it necessary to prime the molding before painting?
Yes, priming ensures better paint adhesion, saves paint, and prevents uneven coating.
Which paint to choose - matte, satin, or glossy?
Matte and satin paint hide defects and unevenness. Glossy paint reveals all imperfections and is rarely used for molding.
How to avoid visible seams?
Properly cut corners, fill gaps with putty, prime, and paint with matte paint in several thin layers.
What to do if the molding peels off after installation?
This indicates problems with surface preparation or incorrect adhesive. Remove the molding, clean the surface, prime, and reapply with the correct adhesive.
How much does professional molding installation cost?
On average, 300-800 rubles per linear meter, depending on region and work complexity. DIY installation saves these costs but requires skills.
Conclusion
Installing polyurethane molding is an art that can be learned by following proper principles. Surface preparation, choosing the right adhesive, achieving perfect corners, hiding seams, professional painting — each step is important.
You can buy ready-made stucco matching the Baroque style. Calculate the quantity: linear meters of cornices and moldings, number of rosettes, pilasters, consoles, corner elements. Add a ten to fifteen percent allowance for trimming.High-quality material is half the job. The other half is proper installation. Only when both components are combined do you get a result that delights for years.
STAVROS provides not only high-quality molding but also consultation on proper installation.polyurethane wall moldingsSTAVROS products are manufactured with precision that allows achieving perfect seams when properly prepared and installed.
STAVROS professional consultants will answer questions about molding selection, provide advice on preparation, and assist with calculating required quantities.molded decoration made of polyurethaneSTAVROS — an investment in quality, beauty, and longevity of your interior.
Choose STAVROS — work with material that delivers results professionals are proud of. Your interior with STAVROS molding will delight guests and bring you joy every day.