


Article Contents:
- Purpose of wall and ceiling moldings
- Functional use of moldings
- Ceiling moldings: special category
- Specialized types of moldings
- How to choose a profile for the interior
- Stylistic compatibility of moldings
- Choosing molding sizes
- Choosing relief and texture
- Combining with baseboards and cornices
- Principles of harmonious combination
- Classic combination schemes
- Practical tips for combining
- Installing moldings: from preparation to finish
- Preparation stage
- Molding installation technology
- Finishing moldings
- Painting moldings: techniques and effects
- Basic painting
- Decorative painting techniques
- Care for polystyrene moldings
- Regular Cleaning
- Prevention and Repair
- Hi Wood products: benchmark of quality
- Conclusion

Walls of modern interiors are no longer just vertical surfaces covered with paint or wallpaper. They have become canvases for architectural creativity, where each element plays its role in creating a harmonious space. Moldings — decorative polystyrene strips — have become a universal designer tool, allowing to transform the most ordinary interior into an elegant home with character and individuality.
polystyrene molding on the wallThey are not just decorative elements, but multifunctional components capable of solving a wide range of practical and aesthetic tasks. With their help, you can visually change the proportions of a room, create classic wall panels, frame paintings and mirrors, mask defects in finishing, divide space into zones, protect vulnerable wall areas from damage. At the same time, the cost of such transformations remains affordable due to the low price of polystyrene and the simplicity of self-installation.
But how to choose moldings correctly among thousands of options? Which profiles suit classic interiors, and which suit modern ones? How to properly combine moldings with baseboards and cornices to create a unified stylistic composition? What mounting secrets ensure a flawless result? All of this is covered in our detailed guide.


Purpose of wall and ceiling moldings


Functional use of moldings
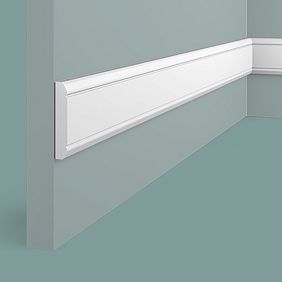
wall molding polystyreneMoldings perform far more functions than may appear at first glance. They are not just decorative accents, but practical elements with multiple applications.
Zoning and material separation — the first and most common function. Moldings serve as a visual boundary between different types of finishes. The lower part of the wall is covered with wallpaper, the upper part is painted — the molding elegantly separates these zones. The wall is clad with decorative panels up to a certain height — the molding creates a clear boundary. Such zoning gives the interior structure, making it thoughtful and professional.
Creating wall panels — a classic decoration technique inherited from palace interiors. Rectangles or squares are marked on the wall, and moldings are glued along their contours. The resulting panels can be painted in contrasting colors, covered with patterned wallpaper, filled with fabric, or left in the wall’s tone to create a three-dimensional relief. Such decoration adds depth, architectural expressiveness, and historical charm to the interior.
Framing decorative elements — moldings are ideal for creating frames around paintings, mirrors, photographs, panels, televisions, decorative niches. Framing turns an ordinary object into a significant interior element, draws attention to it, and integrates it into the overall style of the room. Groups of small paintings or photographs, each in an individual molding frame, look especially striking.
Masking defects and irregularities — a practical function often underestimated. An uneven boundary between different materials, a crack on the wall, a mark from moving furniture, the junction of old and new renovations — moldings neatly cover all these imperfections. This is especially relevant during cosmetic repairs, when you don’t want to redo the entire finish due to local defects.
Protecting vulnerable areas — moldings installed at the height of chair backs protect walls from damage when furniture is moved. In hallways, moldings at 90–100 cm protect walls from bags, umbrellas, and clothing. In children’s rooms, moldings can serve as protective belts, protecting wallpaper from children’s mischief. Impact-resistant high-density polystyrene moldings withstand significant mechanical impacts.
Visually altering room proportions — a design technique based on perceptual characteristics. A horizontal molding installed on a wall visually expands the space, making a narrow room appear more spacious. Vertical moldings visually raise the ceiling, which is especially valuable in rooms with low ceilings. A molding installed at two-thirds the height of the wall divides it into proportional sections, creating a classic harmony.
Hiding communications and technological elements - in moldings of sufficient thickness, wires, internet cables, phone lines can be concealed. Wide moldings mask joints of gypsum board structures, boundaries of suspended ceilings, edges of decorative panels. This allows achieving perfect visual cleanliness of the interior without costly wall drilling.
Our factory also produces:


Ceiling moldings: a special category
Ceiling moldings, often called cornices or coves, deserve separate attention. Their main task is to decorate the transition between wall and ceiling, but in practice, their functionality is much broader.
Visual correction of ceiling height is achieved by proper selection of molding width and color. A narrow molding in ceiling color visually raises it, creating an impression of additional height. A wide molding of contrasting color visually lowers a too-high ceiling, making the space more cozy and proportionate. A molding in wall color creates an effect of the wall continuing above its actual boundary.
Masking technological gaps - a critically important function in modern renovation. Suspended ceilings require a gap between the fabric and the wall - molding perfectly covers it. Multi-level gypsum board structures have joints - molding makes the transition smooth and elegant. Old ceilings with uneven edges - molding hides all imperfections.
Base for LED backlighting - special moldings with a structural ledge for placing LED strips create an effect of a floating ceiling or contour lighting. Hidden backlighting adds modernity to the interior, creates a romantic atmosphere, and serves as an additional source of soft light.
Architectural expressiveness - ceiling moldings with rich relief, rosettes, corner elements transform an ordinary ceiling into an architectural masterpiece. Classical ornaments, stucco patterns, multi-level compositions create a palace-like interior impression at a quite democratic budget.
Get Consultation
Specialized types of moldings
The modern market offers moldings not only for general use, but also specialized ones for solving specific tasks.
Corner moldings are designed to protect and decorate external corners - protruding parts of walls, columns, boxes, niches. They absorb impacts and abrasion that corners are subjected to, especially in high-traffic areas. Impact-resistant corner moldings serve for decades, maintaining an impeccable appearance.
Flexible moldings are made of special elastic polystyrene, allowing them to wrap around curved surfaces - arches, columns, bay windows, rounded niches. They are indispensable in rooms with complex architecture, where rigid straight profiles are inapplicable.
Cable channels in the form of moldings combine decorative and utilitarian functions. A channel runs inside the profile, into which wires are laid. The front side looks like a standard decorative molding. This elegant solution for wiring without wall drilling is especially relevant during cosmetic renovation or in historic buildings.
Moldings for door and window openings - special profiles that serve as casings, creating a beautiful frame for openings. They are wider and heavier than standard wall moldings, often with more pronounced relief. Installing such moldings transforms standard doors and windows into architectural accents.
Molding-pilasters represent an intermediate option between wall moldings and baseboards. Installed at the junction of wall and floor, they have a more decorative appearance than standard baseboards. Suitable for interiors where special expressiveness is required even in such utilitarian elements.
How to choose a profile for the interior
Stylistic harmony of moldings
Polystyrene moldingmust harmoniously fit into the interior's style, emphasizing its character and enhancing the overall impression.
Classic style requires moldings with pronounced decorative relief, imitating traditional plasterwork. Ornamental motifs of plant themes - acanthus leaves, grapevines, rosettes, scrolls. Geometric motifs - beads, Ionic columns, meanders, fluting. Profile widths are significant - from 50 to 150 mm, creating a sense of solidity and monumentality. Relief is three-dimensional, clearly readable, casting shadows. Color traditionally white or ivory tones, possibly patinated with gold or silver to enhance historical resonance.
Neoclassicism - a modern interpretation of classical forms with greater restraint. Moldings have classical proportions and motifs, but ornamentation is simplified, stylized, not overloaded with details. Width is medium - 40-100 mm, sufficient for creating architectural character without overwhelming. Symmetry and rhythm are more important than abundance of decoration. Color is usually white, but noble shades of gray or beige are permissible, creating nuanced combinations with walls.
Scandinavian style rejects decorative excesses, preferring functionality and simplicity. Moldings of simplest forms - rectangular or with barely noticeable bevel, narrow 20-50 mm, smooth without relief. Task - to create neat zoning, light spatial structure, without drawing attention. Color exclusively white, matte surface. Number of moldings minimal - only where functionally necessary.
Minimalism requires maximum simplicity of forms. Moldings are used rarely, only to solve specific tasks - separating different materials, protecting corners, creating hidden lighting. Profiles are strictly geometric, without any hint of decoration, narrow 20-40 mm. Color matches wall or ceiling tone, creating a monolithic space with barely noticeable relief.
Loft and industrial style traditionally do without moldings - deliberate incompleteness and brutality as part of the concept. If moldings are used, they are maximally simple, often painted in dark colors - graphite, black, dark gray. Metallic finishes imitating steel, rusted iron can be used. Width is small 30-50 mm, strict lines.
Provence and country styles lean toward natural simplicity with a light decorative accent. Moldings of medium width 40-80 mm with delicate plant-themed relief. Simple floral motifs, not overloaded with details. Color is usually white, cream, possible light patina or pastel coloring - lavender, mint, peach. Effect of slight wear and aging adds charm.
Art Deco and modern styles - styles where moldings become full-fledged heroes of the interior. Unusual profiles with geometric patterns, zigzags, stepped forms, asymmetrical lines. Width from medium to significant 60-150 mm, expressive relief. Metallic effects - gold, bronze, copper, chrome. Possible black, emerald, sapphire tones. Molding must be a noticeable, attention-grabbing element.
Modern eclectic style allows bold experiments and unexpected combinations. Simple and decorated moldings can be combined, playing with contrasts of width and color, creating original compositions. The key is a sense of proportion and understanding of balance. Eclecticism does not mean chaos; it is a thoughtful combination of different elements into a harmonious whole.
Choosing molding sizes
Correct selection of molding sizes is critically important for visual harmony of the interior. Too narrow moldings will disappear, too wide ones will overload the space.
For small rooms up to 15 sq. m, narrow moldings 20-50 mm wide are optimal. They will create the necessary structure without cluttering limited space. In a small room, bulky moldings will look inappropriate, visually reducing an already modest area.
Standard rooms 15-25 sq. m - the most common option, suitable for moldings of medium width 40-80 mm. This is the golden middle ground, allowing for expressive decoration without overloading. Experimentation with different compositions - wall panels, framing, zoning is possible.
Spacious rooms 25-40 sq. m require more substantial elements. Moldings 70-120 mm wide will appear proportionate to large walls. Narrow moldings in such a space will disappear, failing to make the desired impression. Combinations of moldings of different widths can be used to create complex multi-level compositions.
Very large rooms of 40 sq.m and above, typical for country houses, lofts, and commercial spaces, allow the use of the widest moldings 100-200 mm. Here, decoration should be proportionate to the architecture; otherwise, the scale and impression will be lost.
Ceiling height also affects the choice. With low ceilings of 2.4-2.6 meters, it is better to use narrow moldings that do not consume visual height. With standard ceilings of 2.7-3.0 meters, any option is suitable. With high ceilings of 3.0 meters and above, wider moldings are required, which are clearly visible from floor level.
The distance from the floor for wall moldings follows certain rules. The classic height for a dividing molding is at one-third the height of the wall from the floor (approximately 80-90 cm with a standard ceiling). This proportion creates a harmonious division. A molding at two-thirds height (approximately 180 cm) also works well, especially if the lower part has panels or contrasting finish.
Choice of relief and texture
The degree of relief of the molding determines its visual activity and the character of the interior.
Smooth moldings without relief — a minimalist solution, creating structure without drawing attention. Their role is neat division, clear lines, geometric purity. Suitable for modern interiors, Scandinavian style, minimalism. Easy to maintain — easily wiped, do not collect dust in grooves.
Moldings with slight relief have shallow grooves, barely noticeable protrusions, simple geometric grooves. The relief is readable but does not dominate. They create a balance between decorativeness and restraint. Suitable for neoclassicism, modern classicism, transitional styles. A universal option that rarely errs.
Moldings with pronounced relief have volumetric ornaments, clearly visible even from afar. Plant motifs, scrolls, beads, complex geometric patterns. The relief casts shadows, creating a play of light. Such moldings become an interior accent, requiring appropriate surroundings. Suitable for classical styles, palace interiors, luxurious spaces.
Moldings with material imitation can replicate the texture of wood, stone, leather, fabric. After applying special techniques, they create an illusion of expensive natural materials at a democratic polystyrene price. Require a professional approach to finishing.
Combining different types of relief in one room creates visual hierarchy. More relief moldings are used for accent zones — framing a fireplace, central wall, ceiling decoration. Less relief moldings are for secondary zones. This creates dynamics without overloading the space with identical activity.
Combining with baseboard and cornice
Principles of harmonious combination
Creating a unified decorative system from baseboards, cornices, and moldings requires understanding of composition principles and stylistic unity.
Unity of style — the first and main rule. All elements must belong to one stylistic group. If classic ornamental cornices are chosen, baseboards and moldings must have similar decoration. Mixing classicism with minimalism within one room appears eclectic and unprofessional.
Proportionality of elements creates visual harmony. A wide, massive cornice requires corresponding in scale baseboards and moldings. An elegant, thin cornice better matches delicate moldings. A crude violation of proportions — a 150-mm wide cornice with a 30-mm baseboard — creates imbalance.
Repetition of motifs strengthens stylistic unity. If the cornice has an ornament of plant scrolls, moldings with similar scrolls create compositional rhyme. Full replication is not necessary — sufficient are general motifs, echoing details.
Color solution can be either unified or contrasting. Classic option — all elements are white, creating a monolithic architectural structure. Alternative — cornice and baseboard are white, moldings match wall color or contrast. This creates a more complex, multi-layered composition.
Hierarchy of elements determines their visual weight. Usually, the ceiling cornice is the largest element, setting the tone of the composition. Moldings — medium level of activity. Baseboard — basic element, completing the composition from below. Violation of hierarchy — when moldings are wider and more decorative than the cornice — creates compositional disruption.
Classic combination schemes
There are time-tested schemes for combining decorative elements that guarantee a harmonious result.
Three-level system — cornice, moldings, baseboard — classic scheme for rooms of standard height. Ceiling cornice 80-120 mm wide sets the upper boundary. Molding at 90-100 cm from the floor (chair back level) divides the wall into proportional parts. Baseboard 80-120 mm high completes the composition from below. This scheme creates a classic English panel system.
Two-level system — cornice and baseboard without intermediate moldings — a more restrained option. Suitable for medium-sized rooms where a full three-level system may be excessive. Cornice and baseboard must be well proportioned to each other in width and style.
System with accent panels uses moldings to create decorative rectangles or squares on walls. Cornice and baseboard frame the wall perimeter, moldings create panels in the middle. Panels can be painted contrastively, covered with patterned wallpaper, or filled with fabric. A rich architectural composition is created.
Asymmetric system is applied in modern eclectic interiors. One wall may have full treatment with cornice, moldings, and baseboard. Other walls — minimalist, with only baseboard. Creates dynamics, focusing attention on the accent wall.
Vertical system uses vertical moldings to zone long walls. They run from baseboard to cornice, dividing the wall into sections. Creates rhythm, visually structures space. Especially effective in corridors, galleries, long living rooms.
Practical tips for combining
Decorative molding from polystyreneshould not only look beautiful but also be practically selected.
Purchase all elements from one manufacturer’s collection — this guarantees stylistic unity, matching white shade, identical surface texture. The South Korean brand Hi Wood (Hai Wood, Hai Wood) produces complete collections where cornices, baseboards, moldings, and additional elements perfectly complement each other.
Order material with 15-20% extra over calculated amount. Allowance for trimming corners, possible installation errors, reserve for future repair of damaged sections — all this requires additional material. Buying an identical molding several years later may be difficult — models are discontinued, collections change.
Make a test layout before installation. Lay out elements on the floor in the sequence they will appear on the wall. Assess visual compatibility, check profile joints, ensure ornaments match. This will help avoid disappointment after installation.
Use corner pieces for complex joints. Pre-cut corner pieces eliminate the need for precise 45-degree trimming, ensuring perfect corner alignment. Especially important for molded profiles, where even the slightest cut error disrupts the pattern match.
Plan electrical wiring in advance if the moldings will serve as cable channels or bases for hidden lighting. Running wires after installing moldings may be difficult. It’s better to plan the entire system during the project stage.
Molding Installation: From Preparation to Finishing
Preparation Stage
Quality installation begins with careful preparation, which determines 70 percent of the final result.
Cleaning and leveling the surface — the first and critically important step. The wall must be clean, dry, and strong. Remove old wallpaper, peeling paint, and whitewash. Check plaster strength — tap the wall; remove and re-plaster any flaking areas. Clean grease stains on kitchen walls with a degreaser.
Checking wall flatness is critical for tight molding fit. Place a long level or straight board against the wall in different directions. Remove bumps and hollows deeper than 3-5 mm. Flatten bumps or sand them down; fill hollows with spackle. After drying, sand until smooth.
Surface priming is essential for good adhesive bond. Use an acrylic deep-penetration primer. Apply with a roller or brush in an even layer on a wall section 10 cm wider than the molding on each side. Allow the primer to dry completely — usually 4-6 hours.
Marking molding positions is done using a laser level, spirit level, or long straightedge with a bubble level. For horizontal moldings, strict horizontal alignment is critical — even a slight tilt will be noticeable. Draw a thin pencil line along the entire wall length. For vertical moldings, use a plumb bob or laser level to ensure strict verticality.
Material acclimatization is necessary if moldings were stored in a cold room or delivered during winter. Bring packaged items into the room where installation will occur and leave them for 24-48 hours. This allows the material’s temperature to equalize with room temperature, preventing thermal deformation after installation.
Tool and material preparation includes checking that all necessary items are available. Required: a miter saw, fine-tooth hacksaw, tape measure, pencil, caulking gun, putty knives, sandpaper, painter’s tape, clean cloth for wiping excess adhesive.
Molding Installation Technology
Correct sequence of actions and adherence to technology guarantee a long-lasting and beautiful result.
Miter cutting is the most critical step in installation. For joining moldings at interior and exterior corners, cut them at a 45-degree angle. Use a miter box — a special tool with slots for required angles. Place the molding face-up in the miter box, press it against the back wall, and carefully saw at the required angle. For interior corners, the bottom part of the molding should be longer than the top; for exterior corners, it’s the reverse.
Check the joint before gluing — fit two mitered pieces together at the corner and check how tightly they join. The gap should not exceed 0.5–1 mm. If the joint is not ideal, adjust the miter cut using sandpaper or a second saw cut.
Apply adhesive to the back surface of the molding that will contact the wall. Use an acrylic-based polystyrene adhesive or a universal liquid nail-type adhesive. Apply adhesive in a snake or dotted line along the entire length. Do not apply excessive amounts — when pressed, adhesive will squeeze out, creating unnecessary drips.
Attach the molding to the wall by carefully pressing it exactly along the marked line. Press evenly along the entire length, without excessive pressure — this could deform the polystyrene. Hold the press for 30–60 seconds until the adhesive begins to set. Immediately wipe away any excess adhesive squeezed out at the edges using a damp cloth or sponge.
Temporary fixation is required until the adhesive fully dries. Attach painter’s tape strips to fix the molding to the wall every 50–70 cm. Remove the tape after 12–24 hours, when the adhesive is completely dry. For heavy, wide moldings, use temporary supports made of a board or a floor brace until the adhesive dries.
Joining elements along the length is done butt-to-butt with adhesive applied to the ends. If the molding is shorter than the wall, you will need to join several pieces. Apply adhesive to the end of the first piece, attach the second piece, press firmly, and achieve minimal gap. Ideally, the joint should fall in a less noticeable area — behind furniture, in a dark corner.
Mounting on different substrates requires adjustments to the technology. On plastered walls, installation is easy — standard technology works perfectly. On drywall, acrylic adhesives also work well. On painted walls, thorough degreasing and possibly light sanding are required for better adhesion. On wallpaper, mounting is not recommended — wallpaper may peel off along with the molding, but if no other option exists, use a strong adhesive and additionally secure with thin finishing nails in inconspicuous areas.
Finishing Molding Work
After the adhesive dries, moldings require finishing touches for a flawless appearance.
Joint filling is done with acrylic spackle. Check all joints — corner, end, and junctions with cornices and baseboards. Fill any gaps with spackle using a narrow putty knife. Apply spackle carefully, filling the gap flush with the molding surface. Immediately wipe away excess with a damp sponge.
After spackle dries (2–4 hours), sanding ensures smooth joints. Use fine-grit sandpaper P180–P240, sanding gently in circular motions without pressure. Goal: make spackled joints invisible, blending seamlessly with the main surface. After sanding, wipe moldings with a dry cloth to remove dust.
Priming before painting is essential for even paint application and paint savings. Use acrylic primer, applying a thin coat with a brush over the entire molding surface. Especially carefully prime spackled areas — they are most absorbent. Primer drying time: 2–4 hours.
Painting is done with water-based acrylic paint in 2–3 thin coats. Apply the first coat along the molding with long, even strokes. Allow 3–4 hours to dry. Apply the second coat with crosswise strokes for better coverage. Apply a third coat if needed. Use a 4–7 cm wide brush with soft synthetic bristles. For smooth moldings, a small velvet roller may be used.
Protecting adjacent surfaces is essential for neat work. Before priming and painting, apply painter’s tape along the molding on the wall and ceiling, leaving 1–2 mm from the molding edge. After painting and drying, carefully remove the tape. This ensures clean, sharp edges without accidental paint drips.
Painting Moldings: Techniques and Effects
Basic Painting
Standard single-color painting of moldings — the most common and safe option, suitable for most interiors.
White color — classic, never going out of style. Painting in white makes moldings universal, matching any wall or ceiling color. Choose the white shade according to the interior’s color temperature — cool white for modern styles, warm for classic. Use high-quality paint with good coverage — two coats should produce a perfectly white surface without revealing the substrate.
Painting the walls in the same color creates a monolithic surface where moldings are perceived only through relief and shadow play. This visually increases the wall size, making the room appear more spacious. Suitable for modern interiors where moldings serve a functional rather than decorative role. It is important to precisely match the paint color — even the slightest difference will be noticeable.
Contrasting painting creates a graphic effect. Dark moldings on light walls clearly structure the space, making it more dynamic. Light moldings on dark walls create elegant frames, preventing the dark color from dominating. Popular combinations include white on gray, black on white, dark blue on light gray.
Painting in the tone of the furniture creates a visual connection between architectural decor and furnishings. If the furniture is dark brown, moldings of the same shade will link architecture with furniture. If the furniture is gray with graphite undertones, gray moldings will create harmony.
Decorative painting techniques
To create unique effects, special techniques requiring skill and patience are used, but they yield impressive results.
Patination creates an effect of noble antiquity. The base layer is white or light paint. After drying, patina — paint of contrasting color (gold, silver, copper, dark brown, green) — is applied to protruding relief parts. Patina can be applied with a brush, sponge, or finger. Then, it is partially wiped off with a soft cloth, leaving color in the recesses and on the protrusions. This creates an illusion of darkening from time, touch, and oxidation.
The effect of aged wood is achieved through multi-layer painting. The first layer is dark (brown, gray). The second layer is light (beige, white), applied incompletely with gaps. After drying, the surface is lightly sanded, partially revealing the dark lower layer. This creates an effect of peeling paint, wear, characteristic of old wooden finishes.
Metallic effects are created using special paints with metallic pigment or metallic powder. Gold, silver, bronze, copper, steel — the choice is vast. Applied in 2-3 thin layers for even metallic sheen. Can be combined — base white, relief elements gold. This creates a luxurious effect typical of palace interiors.
Dry brush technique creates a light contrasting color overlay. The base layer dries completely. Dip a stiff brush lightly into contrasting paint, wipe almost dry on paper. With quick, light strokes, apply to protruding parts of the relief. Paint leaves only a light trace on the most prominent points, emphasizing volume and texture.
Glazing creates semi-transparent colored layers through which the base color is visible. Moldings are painted white or light color. After drying, a transparent or semi-transparent glaze of desired shade is applied. Glaze provides a light color tone while preserving the visibility of the relief. Multiple layers of different shades can be applied to create complex color effects.
Care for polystyrene moldings
Regular cleaning
Proper care extends the lifespan of moldings and preserves their original appearance.
Dry cleaning is performed weekly. Wipe moldings with a soft dry microfiber cloth or a special dust brush. Pay special attention to relief areas where dust accumulates in recesses. You can use a soft vacuum cleaner attachment on low power — work carefully, avoiding pressing the attachment firmly against the molding.
Wet cleaning is performed monthly or as needed. Use a slightly damp (not wet) microfiber cloth. To enhance the effect, add a drop of mild dish soap to the water. Wipe the molding with gentle motions without heavy pressure. Then, wipe with a clean damp cloth to remove soap residue. Allow to dry naturally.
Cleaning relief areas requires more attention. Use a soft toothbrush or brush to clean deep ornament recesses. Wet the brush in a mild soap solution, gently scrub the relief in circular motions. Wipe away residue with a clean damp cloth. Do not use stiff brushes — they may scratch the surface or damage the paint.
Remove stains immediately upon detection. Fresh stains are easily removed with a damp cloth. For stubborn stains, use a soft melamine sponge — it effectively removes dirt without chemicals. Work carefully, avoiding vigorous rubbing of one spot — this may remove paint. After cleaning, wipe with a clean damp cloth.
Prevention and repair
Prevention is easier than repair.
Protection against mechanical damage includes caution during cleaning, moving furniture, and children’s play. Explain to household members that moldings are fragile and require careful handling. When moving tall furniture, be careful not to catch moldings with the top edge of a cabinet or shelf.
UV protection is achieved using high-quality paints with UV filters. This is especially important for rooms with large windows on the sunny side. Low-quality paint fades within 2-3 years, leaving yellowish spots. High-quality paint retains color for 10-15 years even under constant sun exposure.
Adhesion control includes periodic inspection of mounting points. Check every six months for any peeling areas. If you detect initial peeling — immediately reattach, without waiting for complete detachment. Gently lift the peeled edge, apply fresh adhesive, press down, and secure with painter’s tape for 12 hours.
Repairing minor damage is simple. Fill chips and scratches with acrylic putty, sand after drying, prime, and repaint. Choose paint as close as possible to the original color. Apply with a fine brush only to the repair area, blending edges for a seamless transition.
Recoating may be required after 7-10 years of intensive use or when changing the interior concept. Light sanding with fine-grit sandpaper, priming, and two fresh coats of paint will restore moldings to their original appearance. It is not necessary to repaint in the same color — changing molding colors allows updating the interior without major renovation.
Hi Wood products: quality standard
The South Korean brand Hi Wood (Hai Wood, Hai Wood) is a globally recognized leader in producing decorative elements from high-density polystyrene. Over 30 years of experience, hundreds of collections, shipments to 40 countries worldwide — all of this confirms the company’s status.
Hi Wood molding assortment includes over 200 profiles of various purposes, sizes, and styles. From simple smooth strips 20 mm wide for minimalist interiors to luxurious decorated profiles 200 mm wide with rich ornamentation for palace styles. Each collection is meticulously designed — moldings perfectly coordinate with cornices, baseboards, and rose outlets from the same series.
Product technical specifications are impressive. The density of the fitopolymer from which moldings are made is 50-65 kg per cubic meter — 2-3 times higher than standard polystyrene. This ensures exceptional strength, impact resistance, and durability. The material withstands mechanical impacts, does not deform under temperature fluctuations, and is completely moisture-resistant.
Ecological safety is confirmed by the international Korea Eco-Label — the highest degree of eco-friendliness awarded after rigorous testing. Hi Wood moldings do not emit harmful substances, are safe for human health, suitable for children’s rooms, medical facilities, and food production.
Geometric accuracy is a distinctive feature of the product. Computer-controlled extrusion lines ensure dimensional deviation of no more than 0.3-0.5 mm over the entire profile length. This guarantees perfect element alignment during installation, minimal gaps at corners, and matching ornamentation on complex profiles.
Specialized lines include flexible moldings for curved surfaces, impact-resistant profiles for commercial spaces, moldings with cable channels, corner protective elements. For every task, there is an optimal solution.
Conclusion
Polystyrene moldings have evolved from a simple decorative element to a universal tool for architectural interior transformation. Modernwall molding polystyrenesolves a wide range of tasks — from purely aesthetic to practical, from zoning space to protecting vulnerable wall areas.
Correct profile selection, matching the interior style and room proportions, is key to success. Harmonious combination of moldings with baseboards and cornices creates a cohesive architectural system, transforming an ordinary dwelling into a thoughtfully designed space with character. It is important to follow principles of stylistic unity, proportional harmony, and motif repetition.
Quality installationToday, it is available in an extensive range — from classic moldings with stucco to modern minimalist solutions. The Chelyabinsk market for construction and finishing materials offers a variety of options for any budget and design task.Installation requires careful preparation, precise marking, and meticulous execution. Adhering to technology at every stage — from wall leveling to final finishing — guarantees a result that will delight for decades. The possibility of self-installation makes interior transformation accessible without hiring expensive specialists.
Decorative painting techniques open boundless creative possibilities. From classic white to patina, metalization, and antiquing effects — everyone can create a unique decor reflecting personal preferences and interior stylistic concepts.
The South Korean brand Hi Wood (HiWood, Hi Wood) represents the benchmark of quality in the segment of polystyrene decorative elements. Environmentally pure high-density phytopolymer, the widest range of profiles, precise geometry, durability — all this makes HiWood a choice for professional designers and discerning homeowners.
The company STAVROS — official partner and supplier of Hi Wood products in Russia — offers a full range of moldings, cornices, skirting boards,ceiling roseand other decorative elements for implementing projects of any complexity. Working with leading global manufacturers, STAVROS guarantees product authenticity, professional consultations, and organized logistics with delivery throughout Russia.
Creating a beautiful interior with architectural expressiveness has become accessible to everyone thanks to modern materials and technologies. Polystyrene moldings — a sensible investment in the beauty and comfort of your home, which will pay off with aesthetic pleasure for many years.


