


Article Contents:
- What is boiserie and why is it back in fashion
- Advantages of polyurethane moldings over wood
- Choosing the right moldings for boiserie
- Planning and marking: where to start
- Installing Moldings: Step-by-Step Instructions
- Step one: surface preparation
- Step two: cutting moldings
- Step three: applying adhesive
- Step four: gluing
- Step five: joints and corners
- Step six: finishing
- Painting boiserie: techniques and methods
- Monochrome painting
- Contrasting coloring
- Patination and aging effects
- How boiserie highlights an area with classic furniture
- Boiserie in different interior styles
- Classic and neoclassical style
- Scandinavian Style
- Loft and Industrial Style
- Provence and shabby chic
- Modern and art deco
- Project budget: how much does it cost to create boiserie
- Mistakes when creating boiserie: what to avoid
- Incorrect proportions
- Asymmetry
- Sloppy joints
- Unsuitable color
- Ignoring outlets and switches
- Boiserie and lighting: an important nuance
- Boiserie and wallpaper: can they be combined
- Wooden wall panels: when to choose them
- How to care for polyurethane boiserie
- Boiserie in small rooms: does it work
- DIY boiserie: is it realistic
- Frequently asked questions about polyurethane boiserie
- Can boiserie be created on an uneven wall?
- How long does it take to create boiserie?
- Can polyurethane moldings be glued onto wallpaper?
- Do moldings need to be primed before painting?
- Can boiserie be created in a bathroom or kitchen?
- Does polyurethane boiserie differ visually from wooden boiserie?
- Can boiserie be removed if you get tired of it?
- How long does polyurethane boiserie last?
- Conclusion: your home is your boiserie

Wall paneling boiserie has always been associated with palace luxury, aristocratic residences, and unaffordable prices. But what if I told you that you can create this exquisite decorative element yourself, and for a reasonable price? The secret is simple: instead of expensive wooden panels, polyurethane moldings are used. Lightweight, durable, affordable—they allow you to recreate a classic atmosphere without turning to a carpentry workshop and without astronomical costs.
Boiserie is not just decorative wall paneling. It's a way to zone space, highlight a specific area, and create a focal point. Imagine: in the living room, there's an antique chest of drawers or an elegant console with carved legs, and behind it—a wall decorated with elegant frames made of moldings. The gaze is drawn precisely there,Classic Furnitureit becomes the center of the composition, and the interior gains depth and character. At the same time, you'll spend dozens of times less than on real carved wooden panels.


What is boiserie and why is it back in fashion
Boiserie originated in France during the Renaissance as a way to protect walls from dampness and cold. Wooden panels covered the lower part of the wall, creating additional thermal insulation. Over time, the utilitarian function faded into the background, and the decorative one came to the forefront. Panels began to be covered with carvings, gilded, and decorated with paintings. Boiserie became a symbol of status and taste.
Today, boiserie is experiencing a new wave of popularity. Modern designers value it for its ability to structure space, add vertical and horizontal lines to an interior, and create rhythm. But if boiserie used to be made exclusively from wood, alternative materials are now available. And the first place among them is polyurethane.
Why does boiserie work so effectively in an interior? It creates depth. A flat wall, even painted in a noble color, remains flat. But add three-dimensional frames made of moldings—and the wall comes to life. Shadows appear, play of light, visual complexity. That's whybuy polyurethane moldingfor creating boiserie is a smart investment in the aesthetics of your home.


Advantages of polyurethane moldings over wood
Wood is a noble material, but it's finicky and expensive. Wooden moldings require professional processing, precise fitting, thorough sanding, and multi-layer coating. They are heavy, which complicates installation. And most importantly—the price. A quality wooden molding can cost several thousand rubles per linear meter, and decorating one wall requires dozens of meters.
Polyurethane moldings are free from these drawbacks. They are lightweight—a linear meter weighs only 200-400 grams, allowing them to be glued even onto drywall partitions without risk of collapse. They are moisture-resistant—not afraid of condensation, steam, or direct contact with water. They are easy to cut with a regular handsaw or miter saw. And the most pleasant part—the price is several times lower than wooden counterparts.
Moreover, visuallyMoldings made of polyurethaneafter painting, they are indistinguishable from wood. They have clear relief, a smooth surface, and can imitate any texture. Paint them the same color as the walls—and you'll get an elegant monochrome. Paint them a contrasting color—and the boiserie will become a bright accent. Add patina or gilding—and you'll create the effect of antique carving. The possibilities are endless.
Our factory also produces:


Choosing the right moldings for boiserie
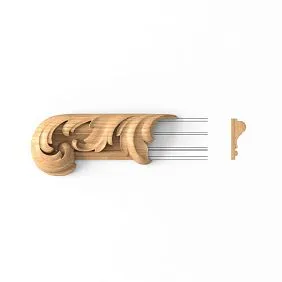
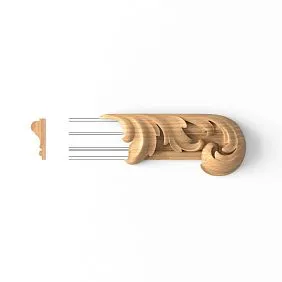
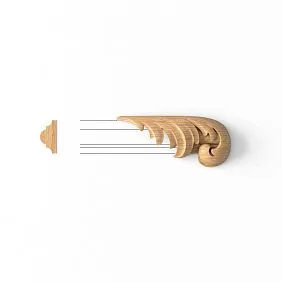
Not all moldings are equally suitable for creating wall panels. It's important to consider the width, profile height, and degree of relief. For boiserie, moldings with a width of 40 to 100 mm and pronounced but not overly ornate relief are best.
Too narrow moldings (up to 30 mm) will get lost on the wall, especially if the room is large. They are more suitable for decorating doorways or furniture fronts. Too wide moldings (over 120 mm) can look bulky, especially in compact rooms. The optimal width is 50-80 mm. Such moldings create noticeable but not overloaded frames.
Relief also matters. For classic interiors, moldings with plant motifs—scrolls, leaves, fluting—are suitable. For modern styles—geometric ones, with clear lines and minimalist protrusions. If you plan to paint the boiserie the same color as the wall, choose moldings with more pronounced relief—so they will be more readable. If you plan to paint them in a contrasting color, flatter profiles will also work.
Don't forget about corner elements. There are ready-made corner overlays available for sale that cover the joints of moldings at corners, making the composition complete. This is especially relevant for complex configurations where boiserie frames turn at an angle. When you decide toBuy polyurethane wall moldings, immediately plan the layout scheme and calculate the number of straight elements and corners.
Get Consultation
Planning and marking: where to start
Before running to the store for moldings, it's important to carefully plan the future boiserie. Take a sheet of paper or open a graphic editor and draw a scaled diagram of the wall. Mark the placement of furniture, windows, doors, sockets, and switches. This will help understand which areas need to be highlighted and which should remain neutral.
The classic boiserie option consists of rectangular or square frames arranged symmetrically. Typically, the wall is divided into three horizontal parts: the lower third (plinth), the middle (main panel), and the upper (frieze). Several vertical frames can be placed in each part. But this is not dogma—modern interiors allow for asymmetry, large single frames, and vertical division.
After creating the sketch, transfer it onto the wall. Use a tape measure, level, and pencil. Start by determining the height of the upper horizontal line. Traditionally, it is placed at one-third of the wall height from the floor (approximately 80-100 cm) or at two-thirds (180-200 cm). The first option creates a classic 'plinth' effect, while the second gives a more modern, elongated look.
Draw horizontal lines around the entire perimeter of the room (or only on the selected wall). Then mark the vertical elements. If you plan to have several frames, ensure symmetry and equal intervals. Use the rule: the distance between frames should be less than their width, otherwise the composition will fall apart. For example, if a frame is 60 cm wide, the interval between frames should be 40-50 cm.
Molding installation: step-by-step instructions
When the marking is ready, the most interesting part begins—installation. For the job, you will need: polyurethane moldings, mounting adhesive (special for polyurethane or universal acrylic), a miter saw or miter box with a handsaw, tape measure, pencil, level, putty knife, fine-grit sandpaper.
Step one: surface preparation
The wall must be clean, dry, and degreased. If there is wallpaper on it, it is better to remove it in the areas where the moldings will be attached—otherwise, the molding will adhere to the wallpaper, not the wall, which is unreliable. If the wall is painted with glossy paint, lightly sand it with sandpaper to improve adhesion. Remove dust after sanding with a damp cloth.
Step two: cutting the moldings
Measure the length of each section according to the markings. Cut the moldings to the required length. For straight joints (where two moldings meet end-to-end), make a 90-degree cut. For corner joints (at the corners of frames)—make a 45-degree cut. Use a miter box or miter saw for accuracy. An uneven cut will be noticeable after installation.
Step three: applying adhesive
Apply adhesive to the back of the molding. If the molding is wide (over 70 mm), apply adhesive over the entire surface. If narrow—it is enough to apply two strips along the edges. Do not skimp on adhesive, but do not overdo it—excess will squeeze out when pressed and will need to be removed.
Step four: gluing
Place the molding on the wall exactly according to the markings. Press along the entire length, hold pressure for 30-60 seconds until the adhesive sets. If the molding is long, ask an assistant to hold the other end. Check the horizontality (for horizontal moldings) or verticality (for vertical ones) with a level. If necessary, slightly adjust the element before the adhesive dries.
Step five: joints and corners
The most difficult part is joining moldings at the corners of frames. If you have precisely cut the corners at 45 degrees, the joints will align perfectly. If there are small gaps, do not panic—they can be filled with acrylic sealant or putty after the adhesive dries. The main thing is to ensure that the outer edges of the moldings are level, without steps.
Step six: finishing
After the adhesive has completely dried (usually 24 hours), inspect all joints. If there are gaps, fill them with white acrylic sealant. Remove excess immediately with a damp sponge. After the sealant dries, lightly sand with fine sandpaper to remove roughness. Now the boiserie is ready for painting.
Painting boiserie: techniques and methods
Painting is the moment when boiserie acquires its final character. There are several main approaches to choosing color and painting techniques.
Monochromatic painting
The most elegant and modern option is to paint the moldings and wall the same color. This creates an effect of a three-dimensional relief surface without sharp contrasts. The boiserie is perceived through the shadows in the recesses of the frames. This technique works in any style: from classic to minimalism. Choose noble, complex shades—gray-blue, dusty pink, olive, graphite.
For monochromatic painting, use matte or semi-matte paint. Gloss can create highlights that 'eat up' the relief. Apply paint with a roller on the wall and a brush on the moldings. It is important to paint all the recesses of the relief, otherwise white spots will remain.
Contrast painting
If you want the boiserie to stand out, use contrast. The classic combination is white moldings on a dark wall (gray, blue, green). Or vice versa—dark moldings on a light wall. Contrast emphasizes the architecture of the boiserie, making it graphic and clear.
For contrast painting, the order of work is as follows: first, paint the entire wall along with the moldings in the base color. After drying, carefully paint only the moldings with the contrasting color using a fine brush. To avoid staining the wall, you can use painter's tape, but remove it immediately after painting, without waiting for the paint to dry—otherwise, the paint may peel off with the tape.
Patina and aging effects
For interiors in Provence, shabby chic, or vintage styles, the patination technique is suitable. First, paint the moldings in a base color (usually white or light gray). After drying, apply patina (a special compound or simply dark paint diluted with water) with a brush into the recesses of the relief. Remove excess immediately with a damp cloth, leaving patina only in the recesses. This creates an effect of aged patina, emphasizing the depth of the relief.
Another option is dry brushing. Paint the moldings in a dark base color. After drying, take an almost dry brush with a small amount of light paint and lightly brush over the raised parts of the relief. This creates a worn effect, as if the paint has rubbed off over time on the raised areas.
How boiserie highlights an area with classic furniture
Now the most important part: how does boiserie work in the context of an interior? Why does it so effectively highlightclassic furniture? The answer lies in architectural logic and visual hierarchy.
When you place wainscoting on the wall behind a dresser, console, armchair, or sofa, you create a distinctive frame for the furniture. The human eye is designed to be drawn to frames and boundaries. We instinctively perceive a framed area as important and significant. Therefore, furniture placed against wainscoting automatically becomes a focal point in the interior.
Furthermore, wainscoting establishes scale. If furniture stands against a simply painted wall, it can visually 'get lost,' especially if the wall is large. Molded frames create a proportional coordinate system that connects the furniture to the wall, making the composition cohesive. For example, a tall console with a mirror fits perfectly within the vertical frame of wainscoting. A low dresser harmonizes with a horizontal panel.
Wainscoting also allows for zoning space without physical partitions. Imagine an open-plan living room where you need to visually separate the dining area from the lounge area. Decorate the wall behind the dining table with wainscoting—and the dining area will gain clear boundaries. At the same time, the space will remain unified, without bulky walls or screens.
Wainscoting in different interior styles
Classic is not the only style where wainscoting is appropriate. Modern designers have adapted this technique to suit a wide variety of aesthetics.
Classic and neoclassical style
Here, wainscoting is a natural element. Use moldings with pronounced relief, multi-layered compositions, symmetrical frames. Paint in light tones—white, cream, light gray. Add gilding or patina for greater luxury. Combine wainscoting with ceiling stucco, cornices, pilasters.
Scandinavian style
In Scandinavian interiors, wainscoting is used sparingly. Simple rectangular frames, narrow moldings (40-50 mm), monochrome painting in white or light gray. No gilding or patina—only clean lines and minimalism. Here, wainscoting creates structure but does not dominate.
Loft and industrial style
It might seem that wainscoting and loft are incompatible. But that's not the case. In a loft, wainscoting can be painted in dark colors—graphite, anthracite, black. Or used contrastingly—black moldings on a brick wall. This adds graphic quality to the interior, making it more cohesive.
Provence and Shabby Chic
The perfect environment for wainscoting. Use pastel tones—lavender, mint, peach. Apply patination, aging effects, distressing. Moldings can be painted a tone lighter or darker than the wall, creating soft contrast. Combine wainscoting with vintage furniture, textiles with floral prints.
Modern and Art Deco
In these styles, wainscoting takes on a geometric character. Use moldings with clear lines, create asymmetrical compositions, play with proportions. Paint in saturated colors—emerald, sapphire, burgundy. Add metallic accents—gold, copper, brass.
Project budget: how much does it cost to create wainscoting
One of the main questions: how much will it cost to create wainscoting? Let's calculate using a wall 4 meters wide and 2.7 meters high as an example.
Let's assume we want to create three vertical frames, each 1.5 meters high and 0.8 meters wide. We will need horizontal moldings (top and bottom of each frame) and vertical ones (side sides).
Molding calculation:
-
Horizontal: 3 frames × 2 (top and bottom) × 0.8 m = 4.8 m
-
Vertical: 3 frames × 2 (left and right sides) × 1.5 m = 9 m
-
Total: 13.8 m of moldings
Average price of polyurethane molding 60 mm wide—about 300-500 rubles per linear meter. Let's take 400 rubles. Total: 13.8 × 400 = 5520 rubles.
Adhesive: 1-2 tubes at 300-400 rubles each = 600 rubles.
Paint: 1 liter of good acrylic paint (enough for the wall and moldings in two coats)—800-1000 rubles.
Total: about 7000-7500 rubles.
For comparison: custom wooden wainscoting panels will cost at least 50-70 thousand rubles for the same wall. The difference is 7-10 times! At the same time, polyurethane wainscoting is visually not inferior to wooden, and in some aspects (moisture resistance, ease of installation) even surpasses it.
Mistakes when creating wainscoting: what to avoid
Despite its apparent simplicity, it's easy to make mistakes when creating wainscoting that will ruin the result. Let's examine the most common ones.
Incorrect proportions
Too small frames on a large wall will get lost. Too large ones in a small room will feel oppressive. Pay attention to scale. Frames should be proportional to the size of the wall and ceiling height. For standard apartments (ceiling height 2.7 m), the optimal frame height is 100-150 cm, width—60-100 cm.
Asymmetry
If you've chosen a symmetrical wainscoting layout, ensure precise marking. Frames should be the same size, placed at equal distances. Use a tape measure and level at every stage. Even slight asymmetry will be noticeable.
Sloppy joints
Poorly fitted corners, gaps, steps in the joints—all of this spoils the impression. Use a miter saw for precise 45-degree cuts. Fill small gaps with sealant. Sand down unevenness before painting.
Unsuitable color
The color of the moldings should harmonize with the overall interior palette. Too bright, flashy colors can look out of place. Too pale on a light wall—unnoticeable. Test the color on a small area before painting the entire wall.
Ignoring outlets and switches
When planning boiserie, don't forget about outlets, switches, heating pipes. Either build the frames so that these elements are outside the moldings, or integrate them into the composition—for example, place them in the center of the frame. A molding 'cut' by an outlet looks sloppy.
Boiserie and lighting: an important nuance
Lighting plays a critical role in the perception of boiserie. The relief of moldings is visible only thanks to the play of light and shadow. Therefore, it is important to consider the placement of light fixtures.
Boiserie looks best with side lighting. Light falling from the side creates expressive shadows in the recesses of the frames, emphasizes the relief of the moldings. If there is a window to the side of the wall with boiserie—great. Daylight will work for you.
If the window is opposite or the lighting is exclusively overhead (chandelier), boiserie may look flat. In this case, add additional light sources—wall sconces, floor lamps directed at the wall. You can use LED strips hidden behind a cornice or under moldings—this creates dramatic lighting, emphasizing the depth of the composition.
Avoid direct bright light directed perpendicular to the wall. It 'eats up' the relief, makes boiserie unnoticeable. Light should glide over the surface, not hit it directly.
Boiserie and wallpaper: can they be combined
Yes, boiserie combines excellently with wallpaper. Moreover, the combination of moldings and wallpaper is a classic technique that adds richness and variety to the interior.
The most common option is a painted lower part of the wall (baseboard) with boiserie, and the upper part is wallpapered. Or vice versa—wallpaper inside the boiserie frames, and the surrounding wall is painted. The second option is especially effective: wallpaper becomes like 'paintings' in frames made of moldings.
When choosing wallpaper to combine with boiserie, consider the style of the moldings. If the moldings are classic, with plant relief, wallpapers with traditional patterns—damask, monograms, plant motifs—are suitable. If the moldings are laconic, modern—choose geometric prints or solid-color textured wallpapers.
It is important to maintain color harmony. Wallpaper and moldings should not clash with each other. Either they are in the same color scheme (different shades of one color), or one element is neutral (white, gray), and the other is accent.
Wooden wall panels: when to choose them
Despite all the advantages of polyurethane moldings, there are situations where it is better to choose genuineWall Panelswooden ones.
If your house is designed in a high-level classic style, if you value authenticity and are willing to invest significant funds—wooden panels will be a justified choice. Wood has a special energy, warmth, tactile pleasantness. It ages beautifully, acquiring a patina of time.
Wooden panels are suitable for projects where sound insulation and additional thermal insulation are important. Massive wooden boiserie 15-25 mm thick significantly improves room acoustics, dampens noise, insulates walls. Polyurethane moldings do not provide such an effect—they are purely decorative.
Also, wood is the choice for interiors with high operational loads. In public spaces, halls, corridors, wooden panels are more resistant to accidental impacts, scratches. Polyurethane, although durable, is still less resistant to mechanical damage.
But for most residential interiors, polyurethane moldings are the optimal choice. They allow achieving the desired aesthetic effect for reasonable money, are easy to install, and do not require special care.
How to care for polyurethane boiserie
Caring for polyurethane moldings is simple. It is enough to periodically wipe them with a damp soft cloth to remove dust. If the moldings are painted with high-quality acrylic or latex paint, you can use mild cleaning agents.
Avoid abrasive cleaning agents, stiff brushes—they can scratch the surface. Do not use solvents, acetone, alcohol in high concentrations—they can damage polyurethane.
If a molding is accidentally damaged (chip, crack), it is easy to repair. Minor defects are filled with acrylic putty, sanded after drying, and touched up with paint. Major damage—a reason to replace a section of the molding. Fortunately, this is not difficult: cut out the damaged piece, glue in a new one, paint—and no traces of repair are visible.
Polyurethane is not afraid of moisture, so boiserie in the bathroom or kitchen does not require special protection. You can wipe it with a damp cloth as much as you like—the material will not swell or deform.
Boiserie in small rooms: does it work
A common misconception: boiserie is only suitable for large spaces. In fact, with the right approach, boiserie can visually expand even a small room.
The main rule for small spaces—do not overload. Use large but few frames. One or two vertical frames on a wall are better than five small ones. Large shapes create a sense of spaciousness, small ones—fragment the space, make it feel cramped.
Choose light colors. White or light gray boiserie in monochrome painting visually pushes the walls apart. Dark contrasting moldings in a small room can create a feeling of claustrophobia.
Place boiserie on one accent wall, not on all four. This creates a focal point without overwhelming the space. For example, decorate the wall behind the bed in the bedroom or behind the sofa in the living room.
Use vertical frames — they stretch the space upward, making ceilings appear visually higher. Horizontal frames, on the contrary, can make a room feel grounded.
DIY boiserie: is it realistic?
Absolutely realistic. Creating boiserie from polyurethane moldings does not require professional carpentry or finishing skills. If you know how to use a tape measure, level, and handsaw — you can handle it.
The main thing is not to rush. Thorough marking, precise cutting, careful gluing. It's better to spend an extra hour on marking than to redo unevenly glued moldings later.
If you're making boiserie for the first time, start with a simple scheme: several rectangular frames on one wall. Master the basic skills — then move on to more complex compositions with asymmetry, layering, combination with wallpaper.
Don't be afraid to experiment with color. Paint can always be repainted if the result doesn't suit you. Try different shades, painting techniques, effects. Boiserie is a creative process with no strict rules.
And remember: even if something goes wrong, it's not a catastrophe. Polyurethane moldings are easy to remove (though they will have to be thrown away afterward), the wall can be leveled and started over. Or simply adjust the composition by adding or removing elements.
Frequently asked questions about polyurethane boiserie
Can boiserie be created on an uneven wall?
Yes, but with caveats. Minor unevenness (variations up to 5 mm) will be hidden due to the adhesive's elasticity. Major unevenness (more than 1 cm) is better to level with plaster or drywall before installing the moldings. Otherwise, the moldings will follow the wall's curves, and the boiserie will turn out crooked.
How long does it take to create boiserie?
For a 4×2.7 meter wall with three frames: marking — 1-2 hours, cutting and installing moldings — 3-4 hours, finishing joints — 1 hour, painting (two coats with drying) — 2 days. Total: can be done in one weekend plus a day for painting.
Can polyurethane moldings be glued onto wallpaper?
Yes, but not advisable. The molding will adhere to the wallpaper, and the wallpaper — to the wall. If the wallpaper peels off, the molding will fall off with it. It's better to remove the wallpaper in the areas where the moldings will be installed, glue the moldings to the wall, and then, if needed, re-adhere the wallpaper flush against the moldings.
Do moldings need to be primed before painting?
If the moldings are white, factory primer is usually already applied. If the moldings are gray or unpainted, it's better to apply a coat of acrylic primer — this improves paint adhesion and reduces its consumption.
Can boiserie be created in a bathroom or kitchen?
Yes, polyurethane is ideal for wet areas. It is not afraid of water, steam, or temperature fluctuations. The only thing — use moisture-resistant paint (latex or acrylic for wet areas) for painting the moldings.
Does polyurethane boiserie differ visually from wooden boiserie?
After quality painting — practically no. From a distance of more than a meter, the difference is not visible. Up close, if you look carefully, you may notice that polyurethane has a more uniform texture, no wood grain. But for most people, this is insignificant.
Can boiserie be removed if it becomes tiresome?
Yes, polyurethane moldings can be removed. Carefully pry the edge of the molding with a putty knife, peel it off the wall. Remove adhesive residue with a putty knife or sandpaper. You may need to touch up the wall paint where the moldings were. The moldings themselves cannot be reused after removal.
How long does polyurethane boiserie last?
With proper installation and care — decades. Polyurethane does not deteriorate over time, does not lose shape, does not peel off. The only thing that may be needed — repainting every 5-10 years if the color has faded or you want a change.
Conclusion: your home — your boiserie
Boiserie is not a luxury accessible only to palace owners. It is an affordable, DIY-friendly technique that transforms an interior, adding depth, character, and sophistication. Using polyurethane moldings, you can create boiserie over a weekend and for a reasonable cost, achieving a result visually indistinguishable from expensive wooden panels.
Boiserie is a way to highlight the area where your favorite %s is located,Classic Furnituremaking it the center of visual attraction. It's an opportunity to zone space without partitions, structure walls, and add architectural logic to the interior.
Don't be afraid to experiment. Boiserie is not a museum exhibit, it's a living, flexible design tool. It works in classic and modern styles, in large living rooms and small bedrooms, in monochrome interiors and bright eclectic spaces. Find your version, your proportions, your color.
And remember: when you decidebuy polyurethane moldingto create boiserie, you're not just investing in finishing materials. You're investing in the beauty of your home, in the atmosphere, in that sense of completeness and harmony that arises when every interior detail is thoughtfully designed and in its place.
STAVROS Company offers a wide selection of polyurethane moldings, cornices, baseboards, and decorative elements for creating boiserie of any complexity. High-quality materials, clear relief, precise geometry — all this guarantees that your boiserie will look impeccable. STAVROS works with both professional designers and construction companies, as well as private clients, offering convenient delivery throughout Russia and consultative support at all project stages. ChooseMoldings made of polyurethanefrom STAVROS — and create interiors that inspire!


