Article Contents:
- What is molding and its multifaceted role in interior design
- Historical overview: from palaces to modern apartments
- Functional roles of molding in modern interiors
- Types of molding by application area
- Features of polystyrene as a material for molding
- Physical and chemical properties of polystyrene
- Technology of producing polystyrene molding
- Comparison with other molding materials
- Ecological safety and myths
- Profiles and sizes of molding: variety for any task
- Classification by Profile Shape
- Size grid: from miniature to giant
- Specialized profiles for specific tasks
- Molding collections: stylistic unity
- Combinations with cornices and baseboards: creating an ensemble
- Principles of combining decorative elements
- Classic combinations for different styles
- Creating wall panels: step-by-step scheme
- Combinations for visually altering room proportions
- Interior styles and examples of molding applications
- Classic style: palace elegance
- Neoclassicism: restrained luxury
- Baroque and Rococo: ornate forms
- Provence: charm of French countryside
- Scandinavian style: minimalism with warmth
- Loft: industrial aesthetics
- Art Deco: Geometry and Glamour
- Modern (Art Nouveau): natural lines
- Surface preparation and installation: technology of perfect mounting
- Surface Preparation: The Foundation of Quality
- Choosing adhesive: what really holds
- Cutting and fitting techniques
- Installation process: step-by-step algorithm
- Special Installation Cases
- Joint Sealing: The Final Touch
- Painting and Final Finishing: The Last Touch of Craftsmanship
- Preparing for painting
- Choosing paint
- Painting technique
- Painting in wall and ceiling color
- Decorative painting options
- Care for painted elements
- Project budget: from economical to premium
- Economical variant: beautiful and affordable
- Mid-range variant: balance of price and quality
- Premium variant: luxury in details
- Factors affecting the budget
- How to save without sacrificing quality
- Practical schemes for different rooms
- Living room: grandeur and elegance
- Bedroom: comfort and harmony
- Children's room: safety and functionality
- Kitchen: practicality above all
- Bathroom and toilet: moisture resistance
- Hallway and corridor: durability
- Office: strictness and solidity
- Frequently Asked Questions
- Conclusion: style accessible to everyone

Interior design is the art of details. You can paint walls in trendy shades, choose expensive furniture, but without finishing touches, a room remains lifeless. Polystyrene molding has become the universal tool that transforms an ordinary apartment into a thoughtfully designed space with character. These lightweight decorative strips allow you to create frames, panels, break up monotonous wall surfaces, zone spaces, and add architectural expressiveness even to the simplest room.
Modern polystyrene interior molding fundamentally differs from heavy plaster moldings of the past. It is as light as a feather, easy to install, affordable, yet creates a visual effect indistinguishable from classical architectural elements. This type of wall decoration is universal: it fits seamlessly into classical interiors, modern minimalist spaces, and eclectic studios where different eras and styles blend.
Decorative molding solves numerous practical tasks. It conceals joints between different finishing materials, hides wiring and cables, visually corrects room proportions, and protects walls from damage in high-traffic areas. Installation of molding does not require special construction skills — any handyman with a basic set of tools and our instructions can handle it. Painting the molding allows creating an ideal color solution that unifies all interior elements into a harmonious composition.


What is molding and its multifaceted role in interior design
Molding is a decorative applied strip mounted on walls, ceilings, furniture, or doors to create relief and architectural expressiveness. The word comes from the English 'molding' — shaping, casting. Initially, moldings were made of wood, plaster, or stone and were a privilege of palaces and mansions. Today, polystyrene profiles have made this type of decoration accessible to everyone.


Historical note: from palaces to modern apartments
In ancient architecture, moldings were used to divide building levels, frame columns, and create cornices. Romans and Greeks developed a complex system of profiles: a cove, a cyma, a gusset, a shelf — each element had its own name and purpose. The Renaissance revived interest in these forms, and Baroque took them to their opulent peak.
In classical interiors of the 17th–19th centuries, moldings were an essential element. They divided high walls into panels, created frames for paintings and mirrors, emphasized door and window openings. Master plasterers manually cast plaster elements or carved them from wood — this was meticulous and expensive work.
The 20th century simplified technologies. Polymer materials emerged, enabling mass production of decorative elements of any complexity. Polystyrene became a revolution in interior decoration — lightweight, durable, safe, and incredibly cheap to produce. Today, moldings are accessible to anyone who wants to add elegance and style to their home.
Our factory also produces:


Functional roles of molding in modern interiors
Visual correction of proportions. Long, narrow rooms appear unbalanced. Horizontal moldings on short walls visually expand them. Low ceilings can be 'raised' with vertical moldings running from floor to ceiling. Too-high ceilings can be 'lowered' with a wide molding at 2/3 wall height.
Creating panels and frames. Moldings form geometric shapes on walls — rectangles, squares, arches. Within these frames, you can use contrasting paint colors, patterned wallpaper, decorative plaster. This creates a panel effect characteristic of classical interiors.
Zoning space. In studios and studio apartments, moldings help visually divide functional zones without erecting walls. Vertical molding lines separate the living area from the sleeping zone, horizontal lines separate the kitchen from the dining area.
Wall protection. Molding installed at the height of chair backs (90–100 cm from the floor) protects walls from furniture damage. In hallways, it protects finishes from bags, umbrellas, and children’s bicycles.
Masking defects. Cracks, joints between different materials, unevenness — all of this is hidden behind molding. You don’t need perfectly level walls — simply cover problematic areas with decorative strips.
Hiding utilities. Electrical wires, internet cables, antennas can be run behind molding. Some profiles have a special cable channel. This results in a neat and aesthetically pleasing look.
Framing elements. Doors, windows, arches, mirrors, paintings — all of these look more complete with molding framing. A simple door opening becomes an architectural portal, a plain mirror becomes an elegant decorative element.
Creating accents. In minimalist interiors, molding can be the only decorative element drawing attention. A contrasting molding frame highlights the TV zone, headboard, fireplace portal.
Get Consultation
Types of moldings by application area
Wall moldings. The most common type. Mounted horizontally or vertically on walls. Width from 2 to 12 centimeters. Used for creating panels, frames, dividing zones.
Ceiling moldings (cornices). Installed in the corner between wall and ceiling. Essentially, this is a type of cornice, but narrow — 3–8 cm. Creates a smooth transition between planes.
Door and window moldings. Frame openings, adding architectural significance. May have complex profiles imitating classical casings.
Floor moldings. Essentially, these are baseboards, but in the context of decoration, they are also called moldings. Frame the lower part of walls.
Furniture moldings. Small strips used to decorate cabinet and chest facades, creating panels and frames. Especially popular in kitchen furniture production.
Corner moldings. Special profiles for decorating external and internal wall corners. Protect corners from chipping and damage.
Features of polystyrene as a molding material
Polystyrene (expanded polystyrene, extruded polystyrene) has become the number one material for producing interior decorative elements. Let’s explore why it is so popular and what properties make it ideal for molding production.
Lightweight. The material density is 25-40 kg per cubic meter. This is 50-70 times lighter than plaster and 20-30 times lighter than wood. A molding 2 meters long and 8 cm wide weighs only 100-150 grams. It can be held with one hand, easily lifted to the ceiling, and installed alone without helpers.
Strength. Despite its lightness, the material is remarkably strong in bending and compression. It does not break under normal loads and withstands moderate impacts without cracks. Modern polystyrene is reinforced with special additives that enhance its mechanical properties.
Flexibility. Narrow and medium moldings (up to 8 cm in width) have a certain degree of flexibility. They can replicate smooth wall curves with radii of 1.5-2 meters. This simplifies installation on non-ideal surfaces.
Water resistance. Polystyrene does not absorb water due to its closed-cell structure. It can be used in rooms with high humidity — kitchens, bathrooms, swimming pools. The material does not swell, deform, or lose its shape.
Temperature stability. From -50 to +75 degrees Celsius, polystyrene retains all its properties. It does not crack in cold weather or soften in heat. This allows moldings to be used even on unheated balconies and verandas.
Chemical inertness. The material does not react with most household substances. It can be washed with soap solutions, wiped with alcohol, and treated with water-based primers and paints.
Durability. The service life of quality polystyrene is 25-30 years and more. It does not rot, does not develop mold, is not attractive to rodents and insects. It retains its shape and color for decades.
Ecological safety. Modern food-grade polystyrene is absolutely safe for health. It does not emit harmful substances at normal temperatures, has no odor, and is hypoallergenic. Approved for use in children's and medical facilities.
Ecological. Modern food-grade polystyrene is absolutely safe for health. It does not emit harmful substances at normal temperatures, has no odor, and is hypoallergenic. Approved for use in children's and medical facilities.
Production technology of polystyrene moldings
Extrusion. Polystyrene granules are heated to the melting point (around 200 degrees) and extruded through a die with a specified profile. The output is a continuous profile of the required cross-section, which cools and is cut into standard lengths (usually 2 meters).
Molding. For complex decorative profiles, the molding method in molds is used. The expanded mass is poured into the mold, where under pressure it takes the required shape. After cooling, a finished product with a clear relief is obtained.
Cutting and milling. Additional processing of blanks with milling cutters creates small ornamental details — swirls, rosettes, geometric patterns. Modern CNC machines ensure the highest precision and repeatability of the pattern.
Quality control. Each batch is checked for compliance with dimensions (tolerance no more than 0.5 mm), material density, and absence of surface defects. Profiles from leading manufacturers, such as partner STAVROS — company Hi Wood (HiWood, Hi Wood, Hiwood), undergo multi-stage quality control.
Comparison with other molding materials
Polystyrene vs plaster:
Polystyrene is 50 times lighter, does not fear moisture, does not crack over time, and is 3-5 times cheaper. Plaster provides a sharper relief, but requires professional installation, is heavy, brittle, and afraid of water.
Polystyrene vs wood:
Polystyrene does not rot, does not warp from humidity, is 5-10 times cheaper, and is easier to process. Wood is more eco-friendly (although polystyrene is also safe), has a natural texture, but requires protection from moisture and pests.
Polystyrene vs polyurethane:
Both materials are lightweight and moisture-resistant. Polyurethane is stronger and has a sharper relief, but is 30-50% more expensive. For most interior tasks, polystyrene is sufficient.
Polystyrene vs MDF:
MDF moldings are strong and have a smooth surface, but are 10 times heavier, fear moisture, and are more expensive. They are mainly used for door casings and furniture.
Ecological safety and myths
Myth: "Polystyrene emits harmful substances"
At normal temperatures (up to 75 degrees), quality polystyrene is completely inert. It does not emit styrene or other volatile compounds. This is confirmed by dozens of studies and hygiene certificates.
Myth: "Polystyrene does not breathe and creates a greenhouse effect"
Moldings occupy less than 1% of wall area. They do not affect air exchange in the room. Ventilation is provided by windows, doors, and ventilation systems.
Myth: "Polystyrene easily ignites"
Modern polystyrene contains flame retardants — additives that prevent burning. It belongs to fire hazard class G3-G4 (moderately flammable), which allows its use in residential spaces. It does not support combustion — it extinguishes when the source of fire is removed.
Fact: polystyrene is recyclable
This is an environmentally responsible material. Polystyrene waste can be handed in for recycling, where it is re-melted and reused.
Profiles and sizes of moldings: variety for any task
The modern market offers hundreds of molding profile options. Let's explore the classification and understand which profile suits which task.
Classification by profile shape
Smooth rectangular. The simplest shape - a rectangular or slightly convex cross-section plank without decoration. Width 2-10 cm, thickness 0.5-2 cm. Ideal for minimalist and modern interiors. Creates clear geometric lines.
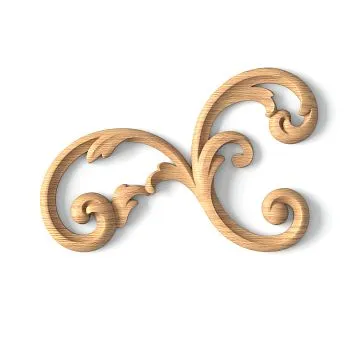
Smooth curved. Features a smooth profile curve - semicircular, teardrop, wavy. No ornament, but the cross-section shape creates play of light and shadow. Universal, suitable for most styles.
With simple relief. One or two grooves or protrusions along the plank. Slight decoration barely noticeable but adds volume. Good choice for neoclassical interiors.
With geometric ornament. Repeating geometric figures - diamonds, squares, zigzags, meanders. Rhythmic pattern characteristic of ancient and art deco interiors.
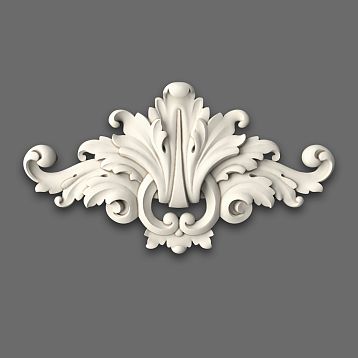
With floral ornament. Scrolls, leaves, flowers, grapevines. Various levels of detail - from suggestion of vegetation to detailed rendering of each leaf. Classic, baroque, modern.
With combined decoration. Combination of geometry and vegetation. Complex multi-level profiles with alternating types of relief. Suitable for luxurious, status-oriented interiors.
Size grid: from miniature to giant
Narrow moldings 2-4 cm. Miniature planks for creating thin frames, framing small elements (photos, posters, switches), dividing large surfaces. Subtle, suitable for small rooms.
Medium moldings 4-8 cm. Universal size for most interior tasks. Creating wall panels, zoning, framing doors and windows. Optimal for rooms with standard ceilings 2.5-2.7 meters.
Wide moldings 8-12 cm. Expressive planks for spacious rooms with high ceilings. Create solid, substantial decoration. Suitable for classical interiors, living rooms, halls.
Extra-wide moldings 12-20 cm. Essentially these are no longer moldings but cornices or friezes. Used for creating large decorative compositions, multi-level panels. For mansions, museums, public spaces.
Plank length. Standard length 2 meters - convenient for transportation and installation. Some manufacturers offer 2.4-meter or 1.5-meter planks. Custom lengths up to 6 meters are available upon request.
Thickness. From 0.5 to 3 cm. Affects visual volume and strength. Thin moldings look elegant, thick ones look solid and textured.
Specialized profiles for specific tasks
Moldings with cable channel. Have a cavity on the reverse side for wiring. Channel width 1-3 cm, sufficient for several cables. A removable plank at the bottom may provide access to wiring. Ideal for home offices, media centers, areas with lots of equipment.
Flexible moldings. Made from special elastic polystyrene with additives. Can be bent along a radius of 30-50 cm. Used for decorating arches, round columns, curved walls, bay windows.
Corner moldings. L-shaped cross-section for decorating exterior wall corners. Protect corners from chipping and give them a finished look. Especially relevant in hallways and kitchens.
Joint moldings. Flat planks for masking joints between different finishing materials. For example, transitioning from wallpaper to paint, tiles to plaster. Create neat dividing lines.
Molding frames. Ready-made rectangular or square frames for quickly creating panels. No need to cut corners - simply stick them to the wall.
Ceiling rose. Round or oval elements for decorating the center of the ceiling under a chandelier. Technically not moldings, but often included in molding assortments as an additional element.
Molding collections: stylistic unity
Manufacturers releaseMoldingscollections, where all profiles harmonize with each other in style, relief, and proportions. The company High Wood, partner STAVROS, offers several main lines:
Classic collection. Profiles with moderate decoration, floral motifs, strict geometry. Width 4-10 cm. Universal for most interiors.
Baroque. Richly decorated moldings with lavish relief, scrolls, floral compositions. Width 6-15 cm. For luxurious interiors.
Modern. Smooth asymmetrical lines, floral motifs with characteristic curves of the modern style. Width 5-12 cm.
Art Deco. Geometric patterns, zigzags, stepped forms. Graphic and clear. Width 3-8 cm.
Minimalism. Smooth straight or with one or two grooves. Width 2-6 cm. For modern interiors.
Provence. Light profiles with hints of vegetation, flowers, scrolls. Gentle, not overloaded. Width 3-7 cm.
Choosing moldings from one collection guarantees stylistic unity in decor.
Combinations with cornices and baseboards: creating an ensemble
Moldings do not exist in interiors in isolation. They work in ensemble with ceiling cornices, baseboards, door casings. Proper combination of these elements creates a harmonious picture.
Principles of combining decorative elements
Style unity. All elements — cornices, moldings, baseboards — must belong to one stylistic group. A baroque cornice with ornamental stucco requires similar moldings. A minimalist smooth cornice — smooth moldings.
Profile matching. It is desirable that the cross-sectional shape of the elements correspond. If the cornice has a certain curvature, the molding may repeat this curvature on a smaller scale.
Proportionality of sizes. Classical rule: cornice width is 1.5-2 times wider than molding width, molding width is 1.2-1.5 times wider than baseboard width. This creates visual harmony and logical reduction of elements from top to bottom.
Single color. Decorative elements are most often painted in one tone — white or wall/ceiling color. This creates a monolithic effect, as if decor is part of architecture.
Permissible exceptions. Contrasting solutions are also possible. For example, white walls and ceiling, dark gray moldings and baseboards. Or vice versa — dark walls, white decor. The key is intentional choice, not randomness.
Classic combinations for different styles
Classicism:
-
Ceiling cornice 12-15 cm with moderate ornamentation
-
Wall moldings 6-8 cm, creating rectangular panels on walls
-
Horizontal molding 5 cm at chair back height (90 cm from floor)
-
Baseboard 10-12 cm, repeating cornice profile
-
Door casings 8-10 cm with classic cross-section
-
All in one white or cream color
Baroque:
-
Wide cornice 18-20 cm with rich stucco
-
Moldings 8-12 cm with lavish decoration, forming oval and round frames
-
Vertical moldings in room corners, imitating pilasters
-
High baseboard 12-15 cm with relief
-
Gilding of decorative protrusions
-
Ceiling rose 50-80 cm under chandelier
Neoclassicism:
-
Medium cornice 10-12 cm with restrained decoration
-
Moldings 5-7 cm, creating strict rectangular frames
-
Symmetrical compositions, clear geometry
-
Baseboard 8-10 cm
-
Unified light tone, possibly with gold or silver accents
Minimalism:
-
Narrow smooth cornice 5-7 cm
-
Moldings 3-5 cm, few, only for functional zoning
-
Smooth baseboard 5-7 cm
-
All in wall and ceiling colors, creating barely noticeable lines
-
Emphasis on line purity, not on decorative abundance
Provence:
-
Light cornice 8-10 cm with delicate decoration
-
Moldings 4-6 cm with floral motifs
-
Small frames around mirrors, clocks, pictures
-
Baseboard 7-9 cm
-
Pastel tones coloring - white, cream, lavender, mint
-
Patina effect (antique finish) is possible
Creating wall panels: step-by-step scheme
Classic approach - dividing walls into decorative panels with moldings. Here is a universal scheme:
Step 1: Planning. Determine the size and quantity of panels. Classic option - 3-4 rectangles per wall, elongated vertically (proportions approximately 2:3). Distance between panels and from wall corners - 15-30 cm.
Step 2: Marking. Mark the outlines of future panels on the wall with a pencil. Use a level - lines must be strictly vertical and horizontal. All panels on the wall must be the same size.
Step 3: Preparing moldings. Cut the strips to the required length. Cut the corners at 45 degrees using a miter box. Four strips form a rectangular frame.
Step 4: Installation. Attach moldings according to the marking. Start with horizontal strips, then vertical ones. Joints must fit tightly.
Step 5: Sealing. Fill the joints with acrylic sealant. Smooth with a wet finger.
Step 6: Painting. Option 1 - entire molding and walls in one color. Option 2 - molding in one color (e.g., white), contrasting or wallpapered inner panel. Option 3 - molding and inner panel white, colored wall around.
Result: elegant wall with architectural details, characteristic of classic interiors.
Combinations for visually altering room proportions
Low ceiling. Use vertical moldings from floor to ceiling. They visually elongate walls upward. Choose a narrow ceiling cornice to avoid a heavy appearance.
High ceiling. A wide molding at 2/3 wall height divides it into two parts and visually lowers the ceiling. Also helps contrasting paint color for upper wall section (darker than lower).
Narrow long room. Horizontal moldings on short end walls, vertical on long walls. Or create large square panels on long walls - squares visually shorten the plane.
Small room. Minimal decoration. Narrow moldings, unified light tone. Excessive decorative elements will overload and reduce space.
Large room. Can allow wide moldings, complex compositions, multi-level frames. Space permits experimentation.
Interior styles and examples of molding applications
Moldings are design chameleons. They blend organically into any style, from historical to ultra-modern. Let's look at how decorative moldings work in popular styles.
Classic style: palace elegance
Classic style is the natural habitat of moldings. Here, they are mandatory and numerous.
Application:
-
High rectangular panels on walls (from floor to 1.5-2 meters high)
-
Horizontal molding at chair back height
-
Door and window frames with molding trim
-
Vertical moldings in corners, imitating pilasters
-
Trim around fireplace opening
-
Frames for mirrors and paintings
Profiles: medium to large width (6-12 cm) with moderate classical ornamentation — Ionic, meanders, plant scrolls.
Color: white, cream, bone. Possible gilding or patina.
Effect: grand, noble interior evoking palace halls.
Neoclassicism: restrained luxury
Modern interpretation of classicism — more laconic, but no less elegant.
Application:
-
Symmetrical panels on the main wall of the living room or headboard of the bed
-
Clear rectangular shapes, without excess
-
Trim around TV or media zone
-
Accent wall with moldings, others smooth
Profiles: 5-8 cm, restrained profile, often simple cross-section without ornament.
Color: monochrome — all in wall color. Or contrast — white moldings on gray/beige walls.
Effect: elegance without pomp, modern classicism.
Baroque and Rococo: lavish forms
For those who are not afraid of luxury and abundance of details.
Application:
-
Oval and round frames from curved moldings
-
Multi-level compositions — frame within a frame
-
Abundant decoration — many moldings on each wall
-
Combined with stucco, rosettes, cartouches
-
Gilding, patina, artificial aging
Profiles: wide (8-15 cm), with rich stucco, scrolls, flowers.
Color: white with gold, cream with silver, pastel tones with patina.
Effect: luxury, theatricality, palace grandeur.
Provence: charm of a French village.
Soft, romantic style with a touch of antiquity.
Application:
-
Small frames around mirrors, clocks, family photos.
-
Window and door trim.
-
Wall panels, but not heavy, but light.
-
Moldings on furniture - cabinets, chests of drawers.
Profiles: narrow and medium (3-7 cm), with light floral decoration.
Color: white, slightly aged; pastel tones - lavender, mint, pink, blue.
Effect: cozy, warm interior with the romance of French Provence.
Scandinavian style: minimalism with warmth.
Northern restraint and functionality.
Application:
-
Minimum moldings, only where functionally necessary.
-
Door frames with simple smooth strips.
-
Rare accent frames on walls.
-
Protective moldings at furniture level.
Profiles: narrow (2-5 cm), absolutely smooth or with one groove.
Color: white or light gray, matching walls. Complete blending into the surface.
Effect: cleanliness, light, air, functionality.
Loft: industrial aesthetics
It seems moldings and loft are incompatible. But here too they find their place.
Application:
-
Contrasting frames on brick or concrete walls.
-
Framing mirrors and pictures
-
Zoning of open space without partitions.
-
Moldings painted in dark colors or metallic.
Profiles: simple, geometric, without ornament. Width 4-8 cm.
Color: black, dark gray, graphite, bronze, copper (metal imitation).
Effect: unexpected combination of industrial roughness and classical forms.
Art Deco: geometry and glamour.
Style of the 1920s-30s, experiencing a new rebirth.
Application:
-
Geometric compositions - zigzags, steps, symmetrical patterns.
-
Vertical molding lines creating rhythm.
-
Mirror and picture frames with strict forms
-
Combination with gold and chrome elements
Profiles: medium (5-10 cm), with geometric ornament.
Color: contrasting combinations - black and gold, white and silver, dark blue and bronze.
Effect: glamour, luxury, geometric clarity, rhythm.
Modern (Art Nouveau): natural lines
Style of the turn of the 19th-20th centuries with characteristic smooth curves.
Application:
-
Asymmetrical compositions
-
Arch and curved opening framing
-
Plant motifs - climbing stems, flowers, leaves
-
Stained glass and panel framing
Profiles: medium and wide (6-12 cm), with plant decoration in characteristic modern forms.
Color: natural tones - green, brown, terracotta; gold accents are possible.
Effect: smoothness, organic feel, harmony with nature.
Surface preparation and installation: technology of ideal mounting
Quality molding installation determines 80% of success. Even the most expensive profiles will look cheap if installed crookedly or with gaps. We will break down the technology step by step.
Surface preparation: the foundation of quality
Cleaning. Remove all dust, dirt, cobwebs from the future installation site. Vacuum, then wipe with a damp cloth. Let it dry completely. Any dirt between the molding and the wall will reduce adhesion.
De-greasing. Especially important for kitchens. Wipe mounting areas with alcohol or degreaser. Grease is the enemy of any adhesive.
Checking the strength of the base. Run a fingernail or putty knife along the wall. If paint is peeling or plaster is flaking, remove the weak layer until you reach a solid base. The molding must adhere to the wall, not to old paint.
Leveling. Minor irregularities (up to 3-5 mm) are not critical — the adhesive compensates for them. However, serious holes and protrusions are better filled with putty. Especially important if you plan to create geometric frames — they will reveal all defects.
Priming. Treat the installation site with a penetrating primer. This strengthens the base, binds residual dust, and improves adhesive bonding. Use a roller or brush. Let it dry (2-4 hours).
Marking. This is the key stage. An error in marking = a crooked result.
For horizontal moldings, use a laser or water level. Mark the line along the entire wall length. Check several times — the line must be perfectly horizontal.
For vertical moldings, use a plumb bob or laser level in vertical mode. The line must be strictly perpendicular to the floor.
To create frames, sketch outlines with a pencil. Check that opposite sides are parallel and equal, and angles are right (90 degrees).
Choosing adhesive: what really holds
Polymer mounting adhesive. "Moment Montage", "Titan", "Quelyd" and analogs. Universal, sets in 30-60 seconds, full cure in 24 hours. Suitable for most surfaces. Minus — requires pressing.
Acrylic putty. Thinned to the consistency of thick sour cream. Simultaneously adheres and levels. Sets slower (5-10 minutes), allowing time for adjustments. After drying, easily sandable. Ideal for drywall and plaster.
Foam adhesive in cans. Special mounting adhesive for polystyrene. Applied quickly, fills voids, holds securely. Convenient for large volumes. Important: regular mounting foam is not suitable — you need specifically polystyrene foam adhesive.
Liquid nails. Powerful adhesive for complex bases (concrete, brick, tile, metal). Sets permanently. Minus — more expensive than other options.
What NOT to use: solvent-based adhesives (super glue, epoxy), construction PVA. They either corrode polystyrene or do not provide adequate adhesion.
Cutting and trimming techniques
Straight cuts. Use a sharp utility knife or a fine-toothed saw. The cut must be strictly perpendicular to the length of the molding. Use a square as a guide.
45-degree cuts. To create frames, you need miter joints. Use a miter box — a device with slots for standard angles. Place the molding with the front side facing you, press it firmly, and cut.
Joint check. Before gluing, try fitting two strips together. They must meet tightly, without gaps. If there is a gap, trim the edges with a knife or sandpaper.
Installation process: step-by-step algorithm
Installation process: step-by-step algorithm
Step 1: Applying adhesive. Apply adhesive to the back of the molding. If the surface is flat — apply in a thin, continuous zigzag pattern down the center. If the surface is uneven — apply in zigzag or dot pattern with 5-10 cm intervals. Don’t be stingy with adhesive, but also don’t overdo it.
Step 2: Dwell time (for some adhesives). Polymer adhesives often require 2-3 minutes of dwell time after application — the adhesive should slightly "grab". This is indicated in the instructions. Acrylic putty and adhesive foam do not require dwell time.
Step 3: Installation. Place the molding exactly along the marked line. Start from one end and gradually press it against the wall along its entire length. Don’t rush.
Step 4: Pressing. Firmly press the molding against the wall. Hold for 30-90 seconds depending on the type of adhesive. If the molding is long, ask for help or use supports.
Step 5: Fixation. Secure the molding with painter’s tape until the adhesive dries. Apply tape strips every 40-50 cm, connecting the molding to the wall. Leave for 24 hours.
Step 6: Removing excess adhesive. Immediately wipe away squeezed-out adhesive with a damp cloth (if the adhesive is water-based) or a putty knife. Do not wait for it to dry.
Step 7: Inspection. Step back a few meters and evaluate the result. The molding must run strictly along the marked line, without misalignment or warping.
Special installation cases
Installation on wallpaper. Possible, but not recommended. The molding will adhere to the wallpaper, not the wall. It’s better to remove a strip of wallpaper at the mounting point and glue to a clean wall.
Installation on tile. Use liquid nails or special tile adhesive. Pre-clean the glazed surface.
Installation on uneven walls. Use more adhesive or acrylic putty, which will fill gaps. After installation, fill gaps between the molding and wall with sealant.
Installation on curved surfaces. Use flexible moldings or narrow standard ones (they are more pliable). Apply in 30-40 cm sections, pressing each section until the adhesive sets.
Installation of heavy, wide moldings. Additionally, mechanically fasten with finishing nails or screws with anchors. Fastening spacing: 40 cm. Sink the heads and patch them over.
Sealing joints: final touch
After 24 hours, when the adhesive is fully dry, proceed to sealing.
Material: white acrylic sealant or paintable. NOT silicone — it cannot be painted.
Technique:
-
Cut the tip of the tube at a 45-degree angle, opening 2-3 mm
-
Insert the tube into the caulking gun
-
Smoothly guide the tip along the joint, extruding sealant in a continuous bead
-
Smooth the joint with a wet finger or rubber putty knife in one motion
-
Wipe away excess with a damp cloth
What to seal:
-
Molding miter joints
-
Straight joints between strips
-
Gaps between molding and wall (if any)
-
Minor chips and defects
After sealing, moldings appear monolithic, as if carved from a single piece.
Painting and finishing: the final touch of craftsmanship
Painting the molding — the finishing stage that unites decor with interior and protects the material.
Preparation for Painting
Cleaning. Remove dust, glue residue, sealant. Wipe with a dry or slightly damp cloth.
Filling defects. All joints are already sealed with sealant. Check for chips, scratches, dents. If found, fill with finishing putty.
Sanding. When the putty dries, sand with fine-grit sandpaper (180-220 grit). Surface should be smooth. Remove dust after sanding.
Priming. Mandatory step. Primer creates an even base, reduces paint consumption, improves adhesion. Use acrylic primer. Apply with brush in thin layers. Drying time: 2-4 hours.
Protecting adjacent surfaces. Apply painter’s tape along the molding to protect walls. Cover the floor with plastic sheeting.
Paint Selection
Paint type:
-
Water-based acrylic — universal, inexpensive, suitable for most rooms
-
Latex — more durable, washable, recommended for kitchens and hallways
-
Water-dispersive — economical option for living rooms
Gloss level:
-
Matte — hides minor defects, gives a soft, elegant look
-
Satin (semi-gloss) — compromise between practicality and aesthetics
-
Glossy — highlights relief, but reveals all imperfections
Tools:
-
Flat brush 5-7 cm for general surfaces
-
Round brush 2-3 cm for textured areas
-
Foam roller with short nap for smooth, wide elements
-
Paint tray
-
Ladder
Painting Technique
First layer — base:
-
Dilute paint slightly with water (5-10%) for better penetration into pores.
-
Start with textured areas. Use brush to paint all recesses and ornament protrusions. Use short, dabbing motions.
-
Then, cover smooth surfaces with roller or wide brush. Use single-direction strokes without stopping.
-
Do not load brush with too much paint — better two thin layers than one thick layer with drips.
-
Pay special attention to joints and corners — paint adheres poorly there.
Drying time: 4-6 hours at room temperature. Do not accelerate drying with heaters — rapid drying causes cracking.
Second layer - finish:
-
Inspect the first layer. Sand any roughness with fine-grit sandpaper. Remove dust.
-
Apply the finish layer with undiluted paint. Use the same technique, but work even more carefully — this is the final layer, and all defects will remain visible.
-
Monitor the evenness of coverage. There should be no gaps, streaks, or variations in color saturation.
Third layer (if necessary): If painting with a dark color or if the paint is not sufficiently opaque, a third layer may be required. This is normal.
Painting in wall and ceiling colors
To create a monolithic effect, paint decorative elements with the same paint as the main surfaces.
Sequence:
-
First, paint the ceiling and walls. Do not tape baseboards and moldings — minor imperfections at the edges are acceptable.
-
After the ceiling and walls have dried, apply painter’s tape along the edges of decorative elements.
-
Paint the baseboards and molding with the same paint. In the final pass, blend the edge by simultaneously brushing along the ceiling/wall and the molding/baseboard. The edge will become invisible.
Decorative painting options
Contrast decoration: ceiling and walls are white, moldings and trim are dark gray or colored. This emphasizes architecture and makes decor more expressive. Suitable for modern interiors.
Gilding: a classic technique for luxurious interiors. The entire molding is painted in a base color (white, cream), then the raised parts of the relief are touched up with gold or silver paint using a dry brush method. This creates an effect of expensive molding.
Patina: an aging effect. Dark accents are applied to recessed areas over a light base tone, simulating the patina of time. Suitable for Provence, vintage, and shabby chic interiors.
Gradient: a smooth color transition from ceiling to walls through the molding. A complex technique requiring skill, but the result is impressive.
Care for painted elements
A painted ceiling design with decorative elements requires no complex care:
-
Wipe dust every 2-3 months with a dry or slightly damp cloth
-
Do not use abrasives or stiff brushes
-
Remove stains with a soft sponge and soapy water
-
Refresh the paint every 5-7 years — simply apply a new layer of paint
Quality paint retains color and does not yellow for decades.
Project budget: from economical to premium
Decorating a room with baseboards, moldings, and trim is accessible at any budget. We’ll explore options from minimalist to luxurious.
Economical option: beautiful and affordable
Materials: simple polystyrene, smooth profiles without ornamentation.
Room set for 20 sq. m:
-
Ceiling molding 5 cm, 20 meters — 1200 rubles
-
Floor molding 7 cm, 20 meters — 1500 rubles
-
Adhesive 2 tubes - 400 rubles
-
Sealant 2 pieces - 300 rubles
-
Primer 1 liter - 200 rubles
-
Paint 3 liters - 900 rubles
Total materials: 4500 rubles
DIY installation - 0 rubles. Total cost for the room - 4500 rubles.
Style: minimalist, modern, neat. Suitable for student housing, rental apartments, budget renovations.
Mid-range option: balance of price and quality
Materials: improved polystyrene from Hi Wood, profiles with moderate decor.
Kit for the same room:
-
Ceiling cornice 8 cm with light ornament, 20 m - 3000 rubles
-
Floor skirting 9 cm, 20 m - 2500 rubles
-
Moldings for creating wall panels, 20 m - 2000 rubles
-
Corner elements 8 pcs - 1200 rubles
-
Adhesive, sealant, primer - 800 rubles
-
Quality latex paint 5 liters - 2000 rubles
Total materials: 11500 rubles
Professional installation - 8000 rubles (400 rubles/m for 20 meters).
Total cost: 19500 rubles
Style: classic, elegant, thoughtfully designed. Suitable for major renovations in apartments, private homes.
Premium option: luxury in details
Materials: high-density polystyrene, complex multi-level profiles with rich moldings, combinations of different elements.
Kit for the room:
-
Wide ceiling cornice 15 cm with lavish ornament, 20 m - 7000 rubles
-
Cornice for hidden lighting 10 cm, 20 m - 4000 rubles
-
High floor skirting 12 cm, 20 m - 4000 rubles
-
Moldings of different widths for creating panels, 40 m - 5000 rubles
-
Corner elements, outlets, decorative inserts - 3000 rubles
-
Professional adhesive, sealants - 1500 rubles
-
Premium paint + gilding - 4000 rubles
-
LED strip and power supply - 3000 rubles
Total materials: 31500 rubles
Installation by professionals with lighting setup - 25000 rubles.
Total expenses: 56500 rubles
Style: palace-like, luxurious, impressive. Suitable for status-oriented spaces, luxury residences, public interiors.
Factors affecting the budget
Room area. The larger the room, the more linear meters of trim required. However, the cost per square meter decreases due to bulk discounts.
Ceiling height. For ceilings higher than 3 meters, wider cornices are needed, increasing material usage and cost.
Profile complexity. The price difference between a plain and elaborately decorated cornice can be threefold.
Region. Materials and labor are more expensive in major cities. Delivery to remote regions adds 10-20% to the cost.
DIY or professional installation. Professional labor accounts for 30-50% of material costs.
Additional elements. Lighting, outlets, pilasters, and complex compositions significantly increase the budget, but the result is worth it.
How to save without sacrificing quality
Buy directly from suppliers. Avoid intermediaries. STAVROS works directly with manufacturer HiWood, reducing prices by 15-20%.
Choose optimal width. Do not pursue the widest cornices if ceilings are standard. A 8-10 cm profile delivers excellent results at reasonable cost.
DIY installation. If you have time and desire to learn, installing baseboards and cornices is not overly complex. Save 30-40% of your budget.
Combine materials. Use expensive decorative cornices only on main walls, and simple baseboards in less noticeable areas.
Buy during sales. Construction companies often run seasonal promotions. Purchasing materials in winter can save 20-30%.
Avoid unnecessary items. If budget is limited, choose a quality ceiling cornice without wall moldings, rather than a cheap, all-in-one solution.
Practical schemes for different rooms
Each room has its own functions and requires an individual approach to decoration.
Living room: grandeur and elegance
Living room - the face of the house. Bold solutions are appropriate here.
Recommended scheme:
Ceiling: wide polystyrene cornice 12-15 cm with ornamentation along the perimeter. Niche for hidden LED lighting, creating a floating ceiling effect. Center - decorative socket for a chandelier with 40-60 cm diameter.
Walls: horizontal moldings at 30 cm from the floor (height of sofa backrest) and at 150-170 cm, creating a panel effect. Vertical moldings in corners and along window sides, visually raising the ceiling.
Floor: high baseboard 10-12 cm, matching the ceiling cornice profile.
Color scheme: single light tone (white, cream, light gray) for ceiling, cornices, and upper wall sections. Lower wall sections may be slightly darker or contrasting.
Effect: grand, spacious, elaborately decorated interior, highlighting the homeowners' status.
Bedroom: comfort and harmony
Bedroom requires a more restrained, relaxing decor.
Recommended scheme:
Ceiling: medium crown 8-10 cm with shallow relief or smooth profile. Hidden warm white lighting to create an intimate atmosphere. No central fixture (a chandelier in the bedroom is often unnecessary).
Walls: minimum molding. You can highlight the headboard area with a 40-50 mm molding frame, creating a decorative panel.
Floor: medium baseboard 7-9 cm, smooth or with slight relief.
Color scheme: monochromatic, pastel tones. All elements in wall and ceiling colors, creating a unified calming space.
Effect: cozy, relaxing atmosphere conducive to quality rest.
Children's room: safety and functionality
Children's room requires a special approach - safety and practicality.
Recommended scheme:
Ceiling: narrow smooth crown 5-7 cm. No sharp angles or small decorative elements that may chip. Hidden RGB LED lighting, allowing color change according to mood.
Walls: molding as a zoning element. Horizontal line at 100-120 cm height, dividing the room into zones. Vertical moldings creating "houses," "windows," and other playful elements.
Floor: durable baseboard 7-8 cm with cable channel for safe wire routing.
Color scheme: bright, cheerful colors. You can paint moldings in contrasting colors, creating a playful interior.
Effect: safe, playful space stimulating children's imagination.
Kitchen: practicality above all
Kitchen - high humidity, grease, and temperature zone. Decor must be practical.
Recommended scheme:
Ceiling: narrow smooth ceiling baseboard 4-6 cm. Easy to clean, does not accumulate grease. No complex relief where dirt accumulates.
Walls: minimum molding or none. You can use a narrow molding as a divider between tile backsplash and painted wall.
Floor: moisture-resistant baseboard 6-8 cm with dense structure.
Color scheme: white or light tones, easy to clean. Use moisture-resistant paint (latex or acrylic).
Effect: clean, neat, easy-to-maintain interior.
Bathroom and toilet: moisture resistance
Rooms with extreme humidity require a special approach.
Recommended scheme:
Ceiling: narrow smooth crown 4-5 cm made of high-density polystyrene. Mandatory moisture-resistant primer and moisture-resistant paint.
Walls: usually covered with tiles, minimal decor. Molding can be used as a divider between different tile types or as mirror trim.
Floor: moisture-resistant baseboard, preferably with additional joint sealing using silicone caulk.
Color scheme: white or matching tile color. Glossy paint, easy to clean.
Effect: neat, hygienic interior.
Hallway and corridor: durability
High-traffic zones require durable decor.
Recommended scheme:
Ceiling: medium crown 7-10 cm. Preferably not white, but light gray or beige - less visible dirt.
Walls: horizontal moldings at a height of 90-100 cm, protecting walls from bags and umbrellas. Creates a panel effect.
Floor: high durable baseboard 8-10 cm with reinforced mounting. Additionally fix with self-tapping screws.
Color solution: practical tones - beige, gray, cream. Matt or semi-matt paint.
Effect: durable, practical interior, resistant to daily wear and tear.
Office: strictness and solidity
Home office requires a serious, professional atmosphere.
Recommended scheme:
Ceiling: medium cornice 9-12 cm with classic restrained relief.
Walls: vertical zoning with tall moldings, creating a library effect. Horizontal moldings at desk height (75 cm) and bookshelf height (180 cm).
Floor: solid baseboard 10-12 cm, possibly with wood imitation.
Color solution: classic noble tones - white with gray, beige, dark green. Possible gilding of individual elements.
Effect: solid, working atmosphere, promoting productivity.
Frequently asked questions
How does polystyrene differ from polyurethane?
Polystyrene has a granular structure of fused granules, while polyurethane has a uniform cellular structure. Polyurethane is stronger, denser, has a more defined relief, but is also more expensive. For most tasks, both materials are suitable, the choice depends on budget and requirements for decorative detail.
Can polystyrene cornice be used in the kitchen and bathroom?
Yes, it can. Modern polystyrene is moisture-resistant and does not fear steam. It is important to choose smooth profiles without deep relief (where dirt accumulates) and paint with moisture-resistant paint. Regularly wipe off condensation and grease deposits.
How long do polystyrene baseboards and cornices last?
With proper installation and maintenance - 20-30 years or more. The material does not rot, does not yellow (if quality), does not deform from temperature fluctuations. The only thing that may be needed is repainting every 7-10 years.
What adhesive to use for installation?
Polymer mounting adhesive ("Moment Montage", "Titan"), acrylic putty, or special polystyrene adhesive. The main thing is to avoid solvent-based compositions that corrode the material. For additional reliability, floor baseboards can be mechanically fastened with anchors.
Is it necessary to paint baseboards and cornices?
Not necessary, but desirable. Painting protects the material from ultraviolet rays, makes the surface smoother and easier to clean, allows creating a unified color scheme with the interior. Unpainted white polystyrene may gradually acquire a grayish or yellowish tint over time.
How to care for painted elements?
Wipe with a dry or slightly damp soft cloth every 2-3 months. Do not use abrasive cleaning agents or stiff brushes. Remove stains with soapy water. If necessary (every 5-7 years), repaint.
Can baseboards be installed on uneven walls?
Yes. Polystyrene is sufficiently flexible and follows smooth irregularities. For serious defects, use more adhesive to fill gaps. After installation, fill gaps between the baseboard and wall with acrylic sealant.
How to choose cornice width based on ceiling height?
For ceilings 2.5 m - cornices 5-8 cm. For ceilings 2.7 m - 7-10 cm. For ceilings 3 m and higher - 10-15 cm. The higher the ceiling, the wider the cornice can be. In low rooms, a wide cornice visually "presses down".
How much does professional installation cost?
On average, 200-400 rubles per linear meter depending on region and profile complexity. Installation of simple smooth baseboards is cheaper, while complex cornices with ornamentation and lighting are more expensive. Minimum crew dispatch is usually 3000-5000 rubles. The cost includes trimming, installation, and sealing joints. Painting is usually charged separately - plus 50-100 rubles per meter.
Are corner elements needed, or can we do with trimming?
Corner elements simplify installation and guarantee perfect pattern alignment, but they are not mandatory. An experienced craftsman can make flawless corners using standard 45-degree trimming. Corner elements are worth using for particularly complex profiles with elaborate moldings or when installation is performed by an inexperienced person.
Use a cornice with a niche for LED backlighting. Install it with a 5-10 mm gap from the ceiling (mandatory for stretch ceilings). Lay an LED strip with power 9.6-14.4 W/m into the niche, directed upward. The light reflects off the ceiling and creates a levitation effect. Works best on white or light glossy/satin ceilings.
Technically possible, but not recommended. The skirting board will adhere to wallpaper, not to the wall. If the wallpaper detaches over time, the skirting board will come off with it. Professionals advise: either glue the skirting board before wallpapering (then trim the wallpaper along the bottom edge), or remove the wallpaper strip at the mounting point and glue it to a clean wall.
Can baseboard be glued to wallpaper?
Which is better - wide or narrow skirting board?
Depends on ceiling height and interior style. Wide (10-15 cm) visually lowers the room but looks more substantial and better hides imperfections. Narrow (4-7 cm) visually raises the ceiling but is less expressive. For standard apartments, the optimum is 7-10 cm.
Conclusion: style accessible to everyone
Skirting boards and cornices made of polystyrene — a universal solution for creating a finished, thought-out interior. They are affordable, easy to install, durable, and allow you to realize any design ideas. A properly selected decorative set unifies the ceiling and walls into a harmonious composition, hides construction defects, and creates striking lighting solutions.
Choosing between polystyrene and expanded polystyrene depends on your budget and requirements for detail. For most projects, improved polystyrene from reputable manufacturers, such as STAVROS’s partner Hi Wood (HiWood, Хай Вуд, Хайвуд), is ideal. Hi Wood products feature stable quality, precise geometry, clear relief, and affordable pricing.
A comprehensive approach — using cornices, skirting boards, and moldings from the same collection — ensures stylistic unity. Professional installation of skirting boards and cornices, careful sealing of joints, and painting in one tone create the effect of monolithic architecture, as if decorative elements are part of the building.
STAVROS offers a full range of services: from consultation to delivery and professional installation. The catalog features hundreds of profiles for any style — from strict minimalism to lavish baroque. Cooperation with manufacturer Hi Wood ensures optimal price-to-quality ratio.
Create the interior of your dreams with polystyrene interior decor. It is affordable, practical, and beautiful. Properly selected elements can transform even the simplest room, adding elegance, volume, and character. Start small — install a ceiling cornice in one room, and you’ll see how details change the perception of space. Quality materials, thoughtful design, and neat installation — the formula for your project’s success.
Create the interior of your dreams with polystyrene interior decor. It’s affordable, practical, and beautiful. Properly selected elements can transform even the simplest room, adding elegance, volume, and character. Start small — install a ceiling cornice in one room, and you’ll see how details change the perception of space. Quality materials, thoughtful design, and neat installation — the formula for your project’s success.