Article Contents:
- Anatomy of a Stair Railing: Understanding the System
- Main Elements and Their Functions
- Interaction of Elements Under Load
- Methods of Attaching Handrails to Balusters: Comparative Analysis
- Attachment via Handrail Bracket: Classic Standard
- Direct Attachment of Handrail to Balusters: Simplified Method
- Attachment to Metal Brackets: Technical Solution
- Detailed Technology: Attaching Round Handrail via Handrail Bracket
- Preparing Balusters: Creating the Base
- Fabrication and Installation of Handrail Bracket
- Installing Round Handrail
- Concealing Fasteners: Finishing Treatment
- Attachment Features for Different Wood Species
- Oak: Working with Dense Structure
- Beech: Accounting for Hygroscopicity
- Ash: Strength and Elasticity
- Attaching Handrail Ends to Support Posts
- Groove Insertion Method
- Platform Mounting Method
- Angular Connection Method
- Typical Attachment Errors and Prevention Methods
- Insufficient Screw Length
- Absence of Glue in Joints
- Over-tightening Screws
- Insufficient Number of Attachment Points
- Incorrect Drilling Angle for Holes
- Installing Elements with Unsuitable Moisture Content
- Checking Attachment Quality: Structure Testing
- Visual Inspection
- Strength Test
- Creak Test
- Frequently Asked Questions About Attaching Handrails to Balusters
- Is it possible to do without a handrail mounting strip?
- Which fasteners are better — screws or dowels?
- How to attach wooden handrails to balusters if the balusters are of different heights?
- Is it necessary to prime the attachment points before installation?
- How to attach wooden balusters to steps and ensure handrail reliability?
- How many screws are needed to attach one baluster to the handrail mounting strip?
- How to ensure the straightness of the handrail on a long flight?
- How to install balusters and handrails on a wooden staircase with winder steps?
- Is it possible to attach metal balusters with a wooden handrail?
- What is the cost of professional installation of handrails and balusters?
- How does the attachment of balusters on a wooden staircase affect the overall rigidity of the handrail?
- Conclusion: Reliability Through Professionalism

Connecting handrails to balusters is not just assembling components, but creating a unified, rigid system that must withstand daily loads for decades. Every day you lean on this structure, entrusting it with your body weight and the safety of your loved ones. There is no room for half-measures, approximations, or skimping on fasteners here.
The paradox is that a seemingly simple task — screwing a handrail to posts — turns out in practice to be a whole complex of technical solutions. Which fastening method provides maximum strength while remaining invisible? How to connect a round handrail to vertical balusters to avoid play, squeaks, or shifts? Which fasteners to use for oak, and which for beech? Is a handrail mounting strip needed, or can it be attached directly?
This article is the result of analyzing dozens of professional installations carried out by craftsmen with years of experience. There are no theoretical discussions here — only proven technologies, precise dimensions, specific fastener brands, and step-by-step algorithms. We will examine classic and modern fastening methods, show typical mistakes, and reveal professional tricks that turn a set of wooden parts into a monolithic, reliable structure.


Anatomy of a Stair Railing: Understanding the System


Main Components and Their Functions
Wooden balusters and railings— is not just three separate components, but an integrated system where each element works in conjunction with the others.
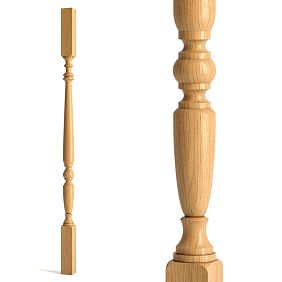
Balusters — vertical posts whose main function is to create a protective barrier and transfer lateral loads from the handrail to the steps. The standard height of balusters for interior staircases is 850-900 mm, ensuring an overall railing height of 900-950 mm from the step nosing to the top of the handrail. Balusters work in bending under lateral loads and in compression under vertical loads. A typical baluster with a diameter of 40-50 mm made of oak or beech can withstand a lateral load of 80-120 kg without permanent deformation.
Handrail — the horizontal element held onto when moving along the staircase. A round handrail with a diameter of 40-50 mm is optimal for an adult's grip. The handrail works in bending under the weight of a leaning person, in torsion under lateral loads, and in shear at the attachment points to balusters. A high-quality oak handrail with a diameter of 50 mm on a 3-meter span deflects no more than 8-10 mm under a 100 kg load, which is within comfortable perception limits.
Handrail mounting strip — an intermediate element installed between balusters and the handrail. This is a rectangular block, typically with a cross-section of 40×20 mm or 50×25 mm, attached to the top ends of balusters and serving as a base for the handrail. The strip performs several critical functions: it evens out minor height inaccuracies of balusters, creates a wide contact area for the handrail, provides additional rigidity to the entire structure, and simplifies handrail installation and removal.
Support posts — robust vertical elements installed at the beginning, end, and turns of the staircase. Post cross-sections are typically 80×80 mm, 100×100 mm, or 80-100 mm in diameter for turned posts. Posts bear the main load; handrail ends are attached to them. One properly anchored support post can withstand a load of 300-400 kg.
Our factory also produces:


Interaction of Components Under Load
When a person leans on the handrail, the load is distributed throughout the system. The vertical component of the force is transmitted through the handrail to the mounting strip, then to the balusters, and further to the steps. The horizontal component (when a person pushes the handrail sideways or pulls it toward themselves) creates a bending moment in the balusters and tends to pull them away from the steps or shift the handrail relative to the balusters.
The critical points of the system are the attachment points of balusters to steps and the attachment points of the handrail to balusters (or the mounting strip). This is where maximum stresses concentrate, and these connections must be executed with utmost care.
A properly assembled system works as a single unit. The load is evenly distributed across all balusters in the flight, rather than concentrating on one or two closest to the point of force application. This is achieved through rigid connections of all elements — the handrail must not slide on the strip, the strip must not shift relative to balusters, and balusters must have no play in their attachment to steps.
Get Consultation
Methods of Attaching Handrails to Balusters: Comparative Analysis
Attachment via a Handrail Mounting Strip: The Classic Standard
This is the most common and reliable method, used in 80-90% of professional installations. The technology has been refined over decades and delivers predictably high-quality results.
The essence of the method: A handrail mounting strip is installed on the top ends of the balusters, creating a continuous horizontal platform. A round handrail is placed and secured onto this platform.
Advantages:
-
Compensation for inaccuracies — if the balusters have slight height variations (±2-3 mm), the rail evens them out, creating a perfectly level base for the handrail.
-
Increased contact area — the handrail contacts the rail along its entire length, rather than point-by-point with each baluster.
-
Simplified installation — the handrail is fastened with long screws through the rail into the balusters, which is technically easier than individual attachment to each baluster.
-
Additional rigidity — the rail ties the upper parts of all balusters into a single system, preventing independent wobbling.
-
Removability option — the handrail can be removed for repair or replacement by unscrewing the screws, while the balusters remain in place.
Installation technology:
Balusters are installed on the steps and leveled in height. The ideal scenario is when all upper ends are at the same height with a tolerance of ±1 mm. Deviations up to 3 mm are acceptable. More significant differences require trimming the protruding balusters.
The upper ends of the balusters must be cut at an angle matching the staircase slope to create a horizontal platform for the rail. If the staircase has a 35° slope, the ends are cut at 35° to the vertical axis of the baluster.
The handrail mounting rail is placed on the baluster ends, centered (with even overhangs on both sides), and temporarily secured with clamps. Using a square, the positions of the baluster centers are marked on the rail.
Holes for screws are drilled at the marked points. Drilling is done with a 3-4 mm drill bit (slightly smaller than the screw shank diameter). Each baluster is secured with two screws, positioned symmetrically relative to the baluster's central axis, 20-25 mm apart.
On the upper side of the rail (which will contact the handrail), the holes are countersunk with a larger diameter drill bit (8-10 mm) to a depth of 8-10 mm. This creates recesses for flush placement of the screw heads.
A thin layer of PVA wood glue is applied to the upper ends of the balusters. The rail is placed in position, pressed down, and 50-60 mm long screws are driven in. The screws pass through the rail and penetrate the baluster ends to a depth of 40-50 mm. It is important to screw them in sequentially from the middle outward to avoid stress buildup.
After the glue has cured (24 hours), the handrail is placed on the rail. It is aligned, temporarily secured with clamps. The positions of the balusters are marked with a pencil on the underside of the handrail through the rail.
Holes for screws are drilled at the marks. Drilling is done from bottom to top at a 30-45° angle to the handrail axis. The incline allows the screw to pass through the rail and penetrate the handrail body to a sufficient depth (30-40 mm).
Glue is applied to the upper surface of the rail. The handrail is placed, pressed down, and 65-75 mm long screws are driven in. They pass through the handrail (diameter 50 mm = 25 mm radius), the rail (thickness 20 mm), and penetrate the baluster to a depth of 20-30 mm.
Fasteners: Wood screws with full threads, yellow (zinc-plated), with countersunk heads are used. For hardwoods (oak, beech, ash), screws with notches or milling ribs on the thread are preferable — they penetrate dense wood more easily. Sizes: for attaching the rail to balusters — 4.5×50 mm or 5×60 mm; for attaching the handrail through the rail — 5×70 mm or 6×80 mm.
Direct handrail attachment to balusters: simplified method
This method involves attaching the handrail directly to the upper ends of the balusters without an intermediate rail.
Method essence: The upper ends of the balusters are cut to create a contact platform with the round handrail. The handrail is placed on these platforms and attached with screws or dowels to each baluster individually.
Advantages:
-
Minimalist design — absence of intermediate elements
-
Material savings — no handrail mounting rail required
-
Visual lightness — the handrail appears to float on the balusters
Disadvantages:
-
High precision requirements — all balusters must be absolutely the same height (tolerance ±0.5 mm)
-
Fitting complexity — the contact platforms on the baluster ends must precisely match the curvature of the handrail
-
Reduced rigidity — absence of a connecting rail lowers the overall system rigidity
-
Installation complexity — precise positioning of each fastener is required
Installation technology:
The upper ends of the balusters are cut at a double angle. The first angle — the staircase slope (creates a horizontally oriented platform). The second angle — a radiused recess matching the handrail curvature. For a handrail with a 50 mm diameter, the recess should have a 25 mm radius.
Creating the radiused recess requires a special tool — a router with a semicircular bit of the corresponding radius or a semicircular chisel. An alternative is using pre-made balusters with a pre-formed radiused platform on the upper end.
The handrail is placed on the balusters, and the fit against each platform is checked. Gaps exceeding 1 mm are unacceptable. If gaps exist, the balusters are trimmed or thin shims are placed under the platform.
Attachment is performed using one of the following methods:
Screws from below through the baluster: A screw 80-100 mm long is driven from below through the baluster into the handrail at the center of each contact platform. The screw passes through the baluster (height about 900 mm, but only the upper 100 mm section is fastened) and penetrates the handrail to a depth of 40-50 mm. A pilot hole 3-4 mm in diameter is pre-drilled strictly along the central axis of the baluster. The screw head is countersunk into the baluster to a depth of 50-60 mm, and the hole is filled with a wooden plug.
Wooden dowels: Holes 10-12 mm in diameter and 30-40 mm deep are drilled into the end of the baluster and the corresponding point on the handrail. A wooden dowel 60-80 mm long is coated with glue and inserted into the baluster hole. The handrail is placed onto the protruding dowels of all balusters. This method requires meticulous precision in hole positioning — an error of 1-2 mm makes installation impossible.
Metal studs: Similar to dowels, but M8-M10 metal studs are used. Stronger than wooden dowels, but visible at the joints (metal contrasts with wood).
Method evaluation: Direct fastening is aesthetically pleasing and minimalist, but requires high installer skill and perfect component preparation. Not recommended for DIY installation. Strength and durability are inferior to fastening via a mounting rail.
Fastening with metal brackets: a technical solution
Specialized metal brackets that are attached to the balusters and grip the handrail from below and the sides.
Method essence: U-shaped or П-shaped metal brackets are installed on the upper parts of the balusters. The handrail is placed into these brackets and secured with screws, which are driven through the side walls of the bracket into the handrail.
Advantages:
-
Fast installation — the handrail snaps or screws into place in minutes
-
Possibility of disassembly — the handrail is easily removed without damaging the components
-
Positioning accuracy — the bracket sets the correct handrail position
-
Strength — the metal bracket creates a rigid connection
Disadvantages:
-
Visibility of fasteners — metal elements contrast with wood
-
Stylistic limitations — not suitable for all designs (good for loft, high-tech, but inappropriate for classic styles)
-
Cost — quality brackets are more expensive than screws and dowels
-
Need for precise selection — the bracket must match the handrail diameter and baluster cross-section
Applicability: The method is popular in commercial facilities, public buildings where fast installation and the possibility of regular maintenance are required. Used less frequently in private interiors due to aesthetic considerations.
Detailed technology: fastening a round handrail via a mounting rail
Let's examine in more detail the classic method, which provides the optimal balance of reliability, aesthetics, and installation complexity.
Preparing balusters: creating a base
Balusters must be installed on the steps and secured before starting work on the rail. Check the verticality of each baluster with a level in two planes — deviations are unacceptable.
Measure the height of all balusters from the step surface to the upper end. Ideally, all values should be the same. In practice, a variation of ±2 mm is acceptable. Balusters protruding more than 2 mm should be trimmed with a handsaw or miter saw.
The upper ends of the balusters must be cut at an angle equal to the slope angle of the staircase. This is necessary for the mounting rail to lie horizontally. If the balusters were supplied without pre-cutting, perform it with a miter saw set to the required angle.
Check the flatness of the ends. They should be even, without concavities or convexities. Sand uneven ends with 120-180 grit sandpaper on a flat block.
Fabricating and installing the mounting rail
Use a block made from the same wood species as the balusters. Standard cross-section is 40×20 mm or 50×25 mm. The length should correspond to the distance from the starting to the ending newel post along the incline, with an allowance of 50-100 mm on each side (to extend the handrail beyond the outermost balusters).
The lower edge of the rail (which will contact the baluster ends) must be cut at the staircase slope angle. The upper edge remains horizontal. Cutting is performed with a miter saw or handsaw using a guide.
Place the rail on the balusters, align it centrally. Visually assess that the rail fits snugly against the ends of all balusters. If there are gaps — identify the cause (inaccuracy in cutting the baluster ends or the rail itself) and correct it.
Using a square and pencil, transfer the positions of the centers of all balusters onto the rail. These will be guides for drilling fastener holes. Remove the rail.
On a workbench, drill holes for screws at the marked points. Use a 4 mm drill bit for 5×60 mm screws or a 3 mm drill bit for 4.5×50 mm screws. Drill strictly perpendicular to the rail surface.
Each baluster is secured with two screws. Position them symmetrically relative to the central axis, 20-25 mm apart from each other. This prevents the balusters from twisting and ensures reliability.
On the top side of the rail, countersink the holes with an 8-10 mm diameter drill bit to a depth of 8-12 mm. The screw heads must be fully recessed into these depressions and sit 1-2 mm below the rail surface.
Return the handrail to the balusters. Apply a thin layer of PVA wood glue to the top ends of the balusters. Use glue sparingly — a thick layer will cause excessive squeeze-out when the handrail is pressed down.
Place the handrail, align it, and clamp it to the support posts at both ends. Start screwing in the screws from the center of the flight towards the edges. This will ensure even pressure along the entire length of the handrail.
Drive the screws with a drill/driver at medium speed. Control the tightening torque — the screw should pull the handrail tightly against the baluster, but not overtighten (this can cause the wood to crack). The screw head should sink into the countersunk recess.
After installing all screws, remove the clamps. Immediately wipe away any squeezed-out excess glue with a damp cloth. Once the glue has hardened, it is difficult to remove — a chisel and sanding will be required.
Leave the assembly for 24 hours for the glue to fully cure. Do not load it before this period expires.
Installing a Round Handrail
Place the handrail on the handrail bracket. Align it to the center of the bracket — the overhang of the handrail on both sides of the bracket should be equal (usually 10-15 mm on each side). Visually assess the straightness of the handrail along the entire flight.
Temporarily secure the handrail with clamps to the support posts. From underneath the handrail, mark the position of each baluster through the bracket with a pencil. Remove the handrail.
Based on the marks, determine the drilling points for the screws. Drilling will be performed from bottom to top at a 30-45° angle to the axis of the handrail. Calculate the drill entry points so that the screw passes through the thickness of the handrail, the bracket, and enters the baluster.
Place the handrail on sawhorses or a workbench with the bottom side up. At the calculated points, drill pilot holes with a 4-5 mm drill bit. Drilling is performed at a 30-45° angle to the longitudinal axis of the handrail. The hole depth should be such that a 70-75 mm long screw passes through the handrail (25-30 mm at an angled entry), the bracket (20 mm), and enters the baluster (25-30 mm).
Angled drilling requires skill. Use a drill guide or jig to ensure the correct angle. An alternative is drilling on a drill press with a tilting table.
Return the handrail to the bracket. Apply a thin layer of glue to the top surface of the bracket. Place the handrail, align it, and secure it with clamps.
Start screwing in the screws. Use screws 70-75 mm long, 5-6 mm in diameter. Screwing is performed from bottom to top through the pre-drilled pilot holes.
The screw spacing depends on the density of the balusters. If there are two balusters per step (spacing about 150 mm), attach the handrail to each baluster. If there is one baluster per step (spacing 250-300 mm), also attach to each one.
Control the tightening. The screw should pull the handrail tightly against the bracket, but not deform the wood. After tightening, check for any cracks around the screw.
After installing all screws, remove the clamps. Check the rigidity of the assembly — grip the handrail, try to move it along or across the flight, rock it up and down. There should be no movement, play, or creaking.
Allow the glue to cure for 24 hours before full use of the staircase.
Concealing Fasteners: Finishing
The screw heads, recessed into the countersunk holes of the handrail bracket, need to be concealed for aesthetics.
Wooden Plugs: From the same material as the handrail and bracket (oak, beech), cut cylindrical plugs 8-10 mm in diameter (slightly larger than the countersunk hole diameter), 12-15 mm high. Use a special plug cutter bit or buy ready-made plugs.
Apply wood glue to the plug, tap it into the hole with a rubber mallet until it seats. Let the glue cure for 2-4 hours. Trim the protruding part of the plug flush with the bracket surface using a chisel. Sand the installation area with 180-240 grit sandpaper.
With precise matching of grain and direction, the plug becomes almost invisible. Especially after applying the finish (oil, varnish), which evens out the color.
Wood Filler: An alternative to plugs, faster but less aesthetic. Use filler matched to the wood color. Fill the hole with filler with a slight excess. After drying (time specified by the manufacturer, usually 1-4 hours), sand it flush.
Filler usually differs in color and texture from natural wood, so the patched areas remain noticeable upon close inspection. The method is acceptable for budget projects or technical staircases.
Fastening Features for Different Wood Species
Oak: Working with Dense Structure
Oak has a density of 690-720 kg/m³ and high hardness. This creates specific requirements for fastening:
Pre-drilling is mandatory: Driving a screw into oak without a pilot hole is highly likely to split the wood. The pilot hole diameter should be 70-80% of the screw shank diameter. For a 5 mm screw — a 3.5-4 mm hole.
Using Lubricant: To ease driving screws into oak, lubricate the threads with soapy water or wax. This reduces friction, prevents overheating, and seizing of the screw.
Screw Selection: For oak, use screws with partial threads or with notches. They enter dense wood more easily. Avoid screws with full threads along the entire length — they are harder to drive.
Caution with edges: Oak tends to chip at the edges when drilling through. When drilling through holes, place a wooden block on the reverse side to catch the drill exit and prevent chipping.
Beech: accounting for hygroscopicity
Beech is denser than oak (650-680 kg/m³) but has a more uniform structure. The main feature is increased hygroscopicity.
Moisture control: Before fastening, ensure that the moisture content of beech components is 8-12%. Wood with higher moisture will shrink after installation, leading to weakened fasteners, gaps, and squeaks.
Glue is mandatory: For beech, adhesive bonding is especially important. Use moisture-resistant PVA glue class D3 or D4. The glue compensates for possible micro-movements of the wood due to humidity changes.
Pre-drilling: As with oak, it is essential. Beech is harder than oak; a screw without a pilot hole may get stuck halfway or split the baluster.
Finishing: All fastening points (especially end grains, where wood is most hygroscopic) must be treated with a protective coating—oil, varnish, or wax. This prevents moisture absorption from the air.
Ash: strength and elasticity
Ash (density 650-690 kg/m³) combines the strength of oak and elasticity, making it an excellent material for stair components.
Ease of fastening: Ash is easier to work with than oak. Pre-drilling is necessary, but the pilot hole diameter can be slightly smaller—60-70% of the screw diameter.
Low tendency to chip: Ash chips less at the edges when drilling. This simplifies work, especially during through-drilling.
Visual expressiveness: Ash has a contrasting grain, so wooden plugs for concealing fasteners must be selected especially carefully according to the grain direction. An improperly installed plug will be noticeable.
Attaching handrail ends to support posts
A reliable connection between the handrail and posts is critical for the rigidity of the entire system. Posts bear the main load, so the fastening must be as strong as possible.
Groove insertion method
A groove matching the handrail profile is routed into the top of the post. For a round handrail with a diameter of 50 mm, this is a semi-circular groove with a radius of 25 mm. The groove depth is 40-50 mm, ensuring a secure fit.
The handrail end is cut perfectly straight at a 90° angle to the axis (or another angle if an angled connection is required). The end is inserted into the groove until it stops. Fixation is done with a wooden dowel 10-12 mm in diameter or an M8-M10 metal stud, installed perpendicularly through the side wall of the post into the handrail end.
Holes are pre-drilled in the side wall of the post and in the handrail end. The dowel or stud is coated with glue and driven in until it stops. The protruding part is cut flush with the post surface, and the area is sanded.
This method provides the strongest and most aesthetic connection. The fastener is completely hidden; the handrail appears to grow out of the post. Requires a router and skill to use it.
Platform mounting method
The top of the post has a horizontal platform. The handrail end is cut and placed on this platform. Fastening is done with screws that are driven from below through the platform into the handrail end.
Long screws—80-100 mm—are used, passing through the post platform (30-40 mm thick) and entering the handrail end to a depth of 50-60 mm. The number of screws is 2-3, arranged in a triangular pattern to prevent the handrail from twisting.
The connection is made with glue for additional strength. After the glue cures, the platform can be covered with a decorative overlay to conceal the fastener.
The method is simpler than the previous one and does not require routing a groove. Strength is slightly lower but sufficient for most applications.
Angled connection method
Used when the handrail approaches the post from the side. The handrail end is cut at a 90° angle to the axis and tightly pressed against the side surface of the post.
Fastening is done with long screws (100-120 mm) that are driven through the handrail end into the post body at an angle. Pilot holes are pre-drilled from the handrail end. The screws are driven so that they pass through the entire diameter of the handrail (50 mm) and enter the post to a depth of 50-70 mm.
The screw heads are countersunk into the handrail end to a depth of 10-15 mm, and the holes are filled with wooden plugs. Additionally, the connection can be reinforced with a metal angle bracket installed underneath and secured with screws to the handrail and post.
The method is the least aesthetic (the fastener fill points on the end are visible) but simple to implement and provides sufficient strength.
Typical fastening errors and methods to prevent them
Insufficient screw length
Error: Using short screws (30-40 mm) to attach the handrail through the rail to the balusters.
Consequences: The screw passes through the handrail and rail but only enters the baluster by 5-10 mm. This attachment does not provide strength. Under load, the screws pull out, and the handrail begins to shift and creak.
Solution: Use screws 70-80 mm long. They should pass through the handrail (25-30 mm at an angled entry), the rail (20 mm), and enter the baluster to a depth of at least 25-30 mm. This ensures reliable fixation.
Absence of glue in joints
Error: Attaching elements only with screws without using glue.
Consequences: Over time, the joints become loose. The wood around the screws slightly deforms, creating micro-gaps. Elements begin to shift relative to each other, and creaks appear under load.
Solution: Always use D3 or D4 class PVA wood glue in all joints — rail to balusters, handrail to rail, handrail to posts. The glue fills micro-irregularities, creates a molecular bond between surfaces, and prevents movement.
Over-tightening screws
Error: Excessive tightening of screws, especially in hardwoods (oak, beech).
Consequences: The wood around the screw gets crushed, and cracks may appear. The screw head sinks too deep, weakening the joint. In the worst case, the baluster or rail splits.
Solution: Use a screwdriver with adjustable torque. Set a medium torque and control the process. The screw should tightly pull the elements together but not deform the wood. The head should sink into the countersunk hole but not go deeper.
Insufficient number of attachment points
Error: Attaching the handrail to the sub-handrail rail only at a few points with large gaps (e.g., only at support posts and in the middle of the flight).
Consequences: The handrail sags between attachment points, feeling unstable. With prolonged use, gaps may appear between the handrail and rail, causing creaks.
Solution: Attach the handrail to each baluster or with a spacing of no more than 300-350 mm. This ensures even load distribution and rigidity along the entire length of the structure.
Incorrect drilling angle
Error: Drilling pilot holes for screws at the wrong angle, leading to the screw entering at a slant, exiting in the wrong place, or splitting the wood.
Consequences: The screw does not provide reliable attachment, may split the element, or protrude in an unexpected place.
Solution: Carefully calculate the screw trajectory. Use drilling guides — special jigs or homemade stops made from a block set at the required angle. When drilling at an angle, make a test hole in a wood scrap to verify the angle is correct.
Installing elements with unsuitable moisture content
Error: Installing handrails and balusters that have not been acclimatized, with moisture content above 14-16%.
Consequences: After installation, the wood dries and shrinks. Elements reduce in size, gaps appear in joints, fasteners loosen, and the structure begins to creak and develop play.
Solution: Before installation, let all elements acclimate in the room where the staircase will be located for at least 7-14 days. This allows the wood to adapt to the room's humidity and temperature. Measure moisture content with a moisture meter — it should be 8-12% for interior elements.
Checking fastening quality: testing the structure
Visual Inspection
Carefully inspect the entire structure:
-
The handrail lies tightly on the sub-handrail rail along its entire length, without gaps or cracks
-
The rail fits snugly against the ends of all balusters
-
All balusters are strictly vertical, none are tilted or rotated
-
Fasteners are concealed with plugs or filler, screw heads do not protrude
-
No cracks around fastening points, no chips on element edges
-
Color and texture of all elements harmonize, no sharp visual transitions
Strength Test
Static vertical load: Lean on the handrail with your full weight, as when descending stairs. The deflection of the handrail on a 3-meter span under a load of 80-100 kg should not exceed 10-12 mm. The deflection should be elastic—when the load is removed, the handrail returns to its original position without residual deformation.
Lateral load: Press on the handrail sideways (perpendicular to the line of the flight) with a force of 40-50 kg. The structure should not shift or tilt. An elastic deviation of 2-3 mm is permissible, which disappears when the load is removed.
Load on support posts: Grasp the post with both hands and try to shake it. The post should be absolutely immobile. Any movement indicates insufficient fastening of the post to the base.
Dynamic load: Walk up and down the stairs several times, leaning on the handrail. Pay attention to sounds—there should be no squeaks, knocks, or clicks. The feeling of stability and reliability should be maintained at any pace of movement.
Squeak Test
Squeaks are a sign of insufficient rigidity of connections or friction between elements. Methodically check each section:
-
Grasp the handrail with both hands and try to twist it around its axis. There should be no movement or sounds.
-
Grab each baluster at the base and try to shake it. Absolute immobility is the norm.
-
Press on the handrail at various points with a force of 20-30 kg. Listen—are there any squeaks?
If squeaks are detected, locate the source. Usually, it is the connection between the handrail and the handrail bracket (insufficient screws or glue) or the bracket and balusters (loose fasteners). Strengthen the fastening by adding screws or drip liquid oil into the friction points.
Frequently Asked Questions about Attaching Handrails to Balusters
Can I do without a handrail bracket?
Theoretically yes, but practically it is highly discouraged for round handrails. Directly attaching a round handrail to balusters requires a radius cut on the ends of the balusters, which is difficult and requires special tools. A handrail bracket creates a flat surface, simplifies installation, compensates for inaccuracies, and increases rigidity. Saving on the bracket will result in installation difficulties and lower reliability of the structure.
Which fastener is better—screws or dowels?
For most cases, screws are preferable. They provide a strong connection, are easy to install, and allow for adjustment of tightness. Dowels (wooden or metal) require meticulous precision in drilling holes, which is difficult to achieve without special equipment. An error of 1-2 mm makes installation impossible. Dowels are used in exclusive projects where maximum aesthetics are important and fasteners must be completely hidden.
Howattach wooden handrails to balustersWhat if the balusters are of different heights?
This is a typical problem with DIY installation. A height variation of up to 3 mm can be compensated for by the handrail bracket—it will smooth out the unevenness. If the variation is greater, it is necessary to trim the protruding balusters. Use a miter saw or a hand saw with a guide. Trim carefully, 1-2 mm per pass, controlling the height. An alternative is to place thin adjustment shims under the low balusters, but this worsens aesthetics.
Is it necessary to prime the fastening points before installation?
For interior stairs in dry rooms, priming is not necessary. It is sufficient for the elements to be made of dry wood with a moisture content of 8-12%. For stairs in rooms with unstable humidity (country houses with periodic occupancy, unheated verandas), it is recommended to treat the ends of the elements and contact points with a protective impregnation. This reduces hygroscopicity and prevents moisture absorption.
Howmount wooden balusters to stepsHow to ensure the reliability of the handrail?
The reliability of the entire system starts with high-quality fastening of balusters to the steps. Use the method with an M8-M10 metal stud, which is glued into the step to a depth of 60-70 mm and onto which the baluster is mounted. This provides a rigid connection without play. An alternative is wooden dowels with a diameter of 12 mm, but they are less strong. Fastening only with screws from the side through the baluster into the step is weaker and suitable only for lightly loaded structures.
How many screws are needed to attach one baluster to the handrail bracket?
A minimum of two screws per baluster, positioned symmetrically relative to the axis of the baluster at a distance of 20-25 mm from each other. This prevents the baluster from twisting around its axis and ensures reliability. One screw is insufficient—the baluster may twist. Three or more screws are excessive for standard balusters with a diameter of 40-50 mm.
How to ensure the straightness of the handrail on a long flight?
Use a stretched string as a guide. Stretch a string from the starting to the ending post along the line where the center of the handrail should run. When laying the handrail on the handrail bracket, control that the handrail does not deviate from the string by more than ±3 mm. If necessary, adjust the position with temporary shims under the handrail, then fix it with clamps in the correct position before final fastening.
HowHow to install balusters and handrails on a woodenstaircase with winder steps?
Winder steps (trapezoidal, in the turn of the staircase) create additional complexity. Balusters on them are installed in the same way as on straight steps—perpendicular to the surface of the step, which means a fan of balusters when viewed from above. The handrail bracket bends along this fan, following the turn. The handrail must also be curved. For amateur fabrication, it is easier to use several straight segments of handrail, joined at angles. A professional solution is a custom-made curved handrail.
Can metal balusters be attached to a wooden handrail?
Yes, this is a common combination in modern interiors. Metal balusters typically have a threaded stud or flange at the top end for attaching the handrail. The wooden handrail is drilled from the underside, with holes corresponding to the position of the baluster studs. The handrail is placed onto the studs and secured with nuts from below. An alternative is to attach the baluster flanges to the handrail bracket with screws, and then place the handrail on top of the bracket. The visual contrast of metal and wood creates a modern, stylish look.
What is the cost of professional installation of handrails and balusters?
The cost depends on the region, complexity of the structure, and materials used. As a rough estimate, for a straight single-flight staircase with 15-20 balusters, professional installation will cost between 20,000 and 35,000 rubles. This includes installing balusters on the steps, mounting the handrail bracket, installing the handrail, attaching it to support posts, and final finishing. For complex configurations (turnaround, spiral staircases), the cost increases by 30-50%.
Howfastening balusters of a wooden staircaseDoes it affect the overall rigidity of the handrail?
The strength of a chain is determined by its weakest link. Even with perfect attachment of the handrail to the balusters, if the balusters themselves are weakly fastened to the steps, the entire system will be unstable.Mounting balusters to steps of a wooden staircaseis the foundation upon which the reliability of the handrail is built. Use only proven methods — studs or dowels with adhesive, embedded at least 50-60 mm into the step.
Conclusion: Reliability through Professionalism
how to attach handrails to wooden staircase balustersis a question for which there is no universal short answer. Every staircase is unique in its configuration, materials, and operating conditions. But there are general principles, proven by decades of practice: using a handrail bracket, quality fasteners, mandatory use of adhesive, careful fitting of elements, and control at every stage.
round wooden handrailsin combination with turned or carved balusters create a classic look that never goes out of style. But this beauty must be supported by reliability, which is achieved through proper fastening.
Don't skimp on fasteners, don't rush during installation, don't ignore preparatory stages. It's better to spend an extra day on careful marking and checking than to dismantle the structure a month later due to squeaks and play.
If you're unsure of your skills — entrust the work to professionals. Installation cost is 15-25% of material cost, but guarantees quality and eliminates the risk of ruining expensive components.
STAVROS is not only a manufacturer of high-quality stair components but also a partner that supports you at every stage of stair creation.
Why choose STAVROS:
23 years in the market — experience accumulated over two decades is embodied in every product. STAVROS knows everything about wooden stairs — from raw material selection to installation nuances.
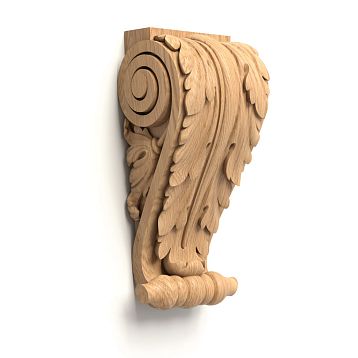
Comprehensive solutions — in the STAVROS catalog you'll find everything needed for stairs: round and shaped handrails from 40 to 80 mm diameter, turned and carved balusters with over 200 models, support posts, sub-handrail strips, treads, risers, fastening systems. All components are made from wood of the same batch, perfectly compatible in size and style.
Wood species to choose from — oak, beech, ash, larch. Each species is available in several grades — from economical "rustic" to premium "extra" without knots or defects.
Manufacturing precision — production on European-made CNC machines ensures geometric accuracy with tolerances of ±0.3 mm. All balusters of the same model are absolutely identical in height, diameter, and profile. Handrails maintain consistent cross-section along their entire length. This critically simplifies installation.
Finish treatment — components are supplied in several options: sanded without coating, with oil coating (clear or tinted), with varnish coating (matte, semi-matte, glossy). You can choose a ready-made option or apply the coating yourself.
Specialist consultations — STAVROS managers will help select components for your stairs, calculate quantities, and suggest optimal configuration solutions. If questions arise during installation — technical specialists will consult and advise on solving non-standard tasks. Call 8-800-555-7788, write[email protected], consult online on the website.
Quality guarantees — all STAVROS products come with a warranty. If you discover manufacturing defects — replacement at company expense, no questions asked.
Logistics across all of Russia — our own delivery service in Moscow and St. Petersburg, partnerships with leading transport companies for the regions. Careful packaging prevents damage during transportation. Tracking of the cargo at all stages.
Stock program — popular models of balusters, handrails, and posts are always in stock in warehouses in Moscow and St. Petersburg. This means fast shipping — an order can be assembled and dispatched within 1-3 business days.
Custom manufacturing — if standard elements are not suitable, STAVROS will manufacture balusters, handrails, and posts according to your drawings. The minimum order quantity for a custom order is from 10 pieces.
Certificates and documents — all STAVROS products are certified, comply with GOST standards and building codes. A full set of documents is provided for corporate clients.
Create staircases that will serve for decades. Choose quality materials, use professional fastening technologies, trust reliable suppliers. Choose STAVROS — the company that over 23 years has earned the trust of thousands of clients across Russia.
Wooden balusters and railingsfrom STAVROS is an investment in the safety, beauty, and durability of your home.