Article Contents:
- Cornice: frame defining scale
- Rosette: compositional center of the ceiling
- Frieze: horizontal detailing
- Logic of combinations: a system, not a set of elements
- Visual height: how molding affects perception of space
- Corner elements: simplified installation and enhanced composition
- Practical composition schemes
- Combination errors: what destroys harmony
- Installation: sequence for perfect result
- Conclusion

The ceiling is the fifth wall of a room, yet the most underestimated. The gaze glides over it briefly, without lingering, unless there is a reason to stop. Ceiling molding transforms an ignored surface into an architectural composition that organizes the entire space, sets the scale, and creates the character of the interior.
But between the idea of decorating the ceiling with molding and a harmonious result lies a chasm of misunderstanding proportions. Cornice, rosette, frieze — each element has its dimensional relationships with the room and with each other. Violating these relationships creates visual discomfort, even if it is difficult to explain exactly what is wrong. A too narrow cornice disappears against a high ceiling. A too large rosette overwhelms a small room. Inconsistent stylistic elements clash, destroying the overall unity.
The logic of ceiling molding combinations — not a set of rigid rules, but a coordinate system for making decisions. Understanding basic proportions frees up creativity, giving confidence that experimentation will not result in error. Classical proportions, derived over centuries of practice, work reliably. But knowing the principles allows one to consciously deviate from canons, creating original solutions.
The visual height of the ceiling critically depends on decoration. A properly chosen cornice raises a low ceiling, creating an illusion of space. An incorrectly chosen one consumes precious centimeters of height, pressing down from above. The rosette gathers the gaze in the center, making the ceiling an active part of the interior. The frieze adds horizontal detailing, enriching the composition.
In this article, we will reveal the mathematics of beautiful ceiling decoration. You will learn exact formulas for calculating the width of the cornice relative to the height of the room, the diameter of the rosette relative to the area, the height of the frieze relative to the cornice. You will understand how corner elements simplify installation and enhance composition. You will learn to see the ceiling as a single system, where each element occupies its place according to the laws of harmony.


Cornice: frame defining scale
Ceiling cornice — a transitional element between the vertical wall and the horizontal ceiling. It completes the wall from above, frames the ceiling along the perimeter, and creates architectural detailing at the corner. But the main function of the cornice — to define the scale of the entire ceiling composition.
The width of the cornice is determined by the height of the ceiling according to a formula verified by centuries of practice. The optimal width is 3-5% of the wall height. For a standard ceiling of 2.7 meters, this gives a range of 80-135 mm. For high ceilings of 3.5 meters — 105-175 mm. For low ceilings of 2.4 meters — 70-120 mm.
Why exactly this range? If the width is less than 3%, the cornice visually disappears, is not perceived as a significant element. The junction between the wall and ceiling appears unfinished, even if the cornice is present. If the width exceeds 5%, the cornice begins to dominate, visually lowers the ceiling, creating a sense of heaviness from above.
The profile of the cornice affects the perception of width. A simple sloped profile is perceived as lighter than its actual width. A multi-tiered profile with deep grooves and ridges appears heavier. An ornamented cornice looks even heavier due to the richness of details. This must be considered when choosing — an ornamented cornice can be taken 10-15% narrower than a simple one for the same ceiling height.
The color of the cornice critically affects the visual height of the room. A white cornice on a white ceiling creates relief visible only by shadow — an elegant modern solution, visually not lowering the ceiling. A contrasting cornice (white on colored ceiling or colored on white) creates a clear horizontal line along the perimeter — this visually lowers the ceiling by the width of the cornice.
Visual height rule: if the ceiling is below 2.7 meters, choose a cornice in the ceiling color for minimal visual lowering. If the ceiling is above 3.2 meters, a contrasting cornice is desirable — it structures excessive height, making the room cozier.
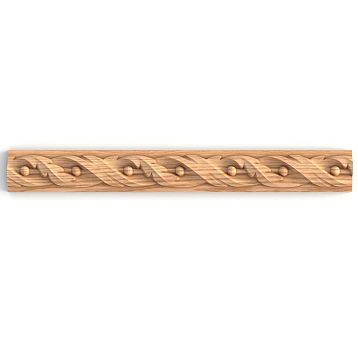
The perimeter of the room determines the amount of cornice. Measure the lengths of all walls, add up, and add 5-10% for trimming at corners.Polyurethane Crown MoldingSupplied in 2-meter long planks. For a room with a 18-meter perimeter, 10 planks (20 meters) are needed, including allowance.
Corner cornice elements — pre-made parts for internal and external corners. They solve the main installation problem — precise 45° trimming of straight planks. The corner element is installed in the corner, and straight planks with simple 90° trimming are connected to it. The ornament of the corner element matches the straight planks, making the joint invisible.
Using corner elements is especially justified for ornate cornices. Even a professional finds it difficult to match complex ornamentation at a 45° corner joint — the slightest cutting error creates a mismatch of details. The corner element guarantees a perfect result.
For a rectangular room with four internal corners, you will need 4 corner elements. If there are protrusions (external corners) — add corner elements for them. The time and stress saved make up for the additional cost of corner elements.


Rosette: compositional center of the ceiling
Ceiling rosette — a round or oval element with relief ornament, placed in the center of the ceiling. Traditionally, the rosette frames a chandelier, but its function is broader — to create a compositional center, gather the gaze, and organize the space around the main axis.
The socket diameter is determined by room area according to an empirical rule. For rooms up to 15 m², optimal socket diameters are 300-400 mm. For 15-30 m² — 400-600 mm. For 30-50 m² — 600-1000 mm. For halls over 50 m² — 1000-1500 mm and larger.
A more accurate mathematical formula: socket diameter in cm equals (room length + room width) / 7. For a 5×4 meter room: (500+400)/7 ≈ 130 cm — too large for a 20 m² area. The formula works for large rooms; for standard apartments, refer to tabular values.
Ceiling height also affects socket selection. The higher the ceiling, the larger the socket should be to maintain proportions. At 2.7 m, use base diameters. At 3.5 m, add 20-30% to the diameter. At 4 m — 40-50%. A 500 mm socket, ideal for a 2.7 m ceiling, will appear small on a 4 m ceiling — a 700-750 mm socket is needed.
Socket relief depth creates visual volume. Flat sockets with 10-15 mm relief appear delicate and suit modern interiors. Bulky sockets with 30-50 mm relief are monumental and fit classical styles. Very deep relief (60-80 mm) is only acceptable in rooms with ceilings over 3.5 m — on standard height, such a socket looks heavy.
The socket ornament style must match the cornice. If the cornice is classical with vegetal ornament, the socket should also have vegetal motifs — acanthus leaves, flowers, vines. If the cornice is geometric, the socket follows the same logic — concentric circles, rays, meanders. Mixing styles creates visual conflict.
Socket color usually matches cornice color. White socket + white cornice — classic solution. Accent gilding of the socket against a white cornice highlights the composition’s center and emphasizes element hierarchy. But gilded cornice + white socket is illogical — periphery is brighter than center, composition is unreadable.
Socket placement is not always at the geometric center of the ceiling. The center is defined by diagonal intersection, but if the room has a dominant zone (dining group, sofa area), the socket is shifted toward it. A chandelier over a table must illuminate the table, even if it’s not in the room’s center. The socket follows the chandelier, creating a compositional center where the room’s functional center lies.
The company STAVROS offersPolyurethane ceiling rosettesDiameters from 200 to 1500 mm in various styles. Clear relief, precise geometry, white surface ready for painting — all for achieving a professional result.
Our factory also produces:


Frieze: horizontal detailing
Frieze — a horizontal decorative band with ornament, placed at the top of the wall under the cornice. Frieze adds vertical division to the wall, creates a transition from a plain surface to a decorated cornice, enriches the composition with additional detailing.
Frieze height is determined by cornice width. Frieze should be 20-40% narrower than cornice to avoid competing for visual attention. If cornice is 100 mm, frieze — 60-80 mm. If cornice is 150 mm, frieze — 90-120 mm. A frieze wider than cornice disrupts hierarchy — secondary element dominates the main one.
Frieze placement — directly under cornice with a 50-100 mm plain wall gap between them. The gap creates visual separation, allowing each element to be read individually. Frieze flush against cornice merges with it, causing loss of composition clarity.
Frieze ornament matches cornice ornament. Classic solution — repeating motif (meander, vegetal vine, beads), continuous ribbon along perimeter. Frieze ornament is finer and simpler than cornice ornament — this supports hierarchy. Complex, saturated frieze + simple cornice — compositional error.
Frieze is not mandatory in all interiors. It adds luxury and detail, suitable for classical styles — Baroque, Empire, Classicism. Modern interiors often use cornice without frieze. Neoclassicism allows frieze, but restrained, with simple ornament.
Ceiling height affects frieze appropriateness. For ceilings below 2.7 m, frieze visually lowers height by adding another horizontal line. Better to use only cornice. For ceilings 3.0 m and above, frieze is appropriate — height allows adding detail without feeling pressure from above.
Frieze installation occurs after cornice installation. Mark a horizontal line 50-100 mm below cornice bottom edge. Use laser level for perfect horizontal alignment. Frieze is glued with the same polyurethane adhesive as cornice. Joints in corners at 45° or using corner elements.
Get Consultation
Combination logic: system, not a set of elements
Harmonious ceiling composition — not simply cornice + socket + frieze installed separately. It’s a system of interconnected elements, where size and style of each is determined by the others.
Element selection sequence begins with cornice. Measure ceiling height, calculate cornice width using 3-5% of height formula. Choose profile and style — classical, modern, Baroque. This is the anchor point from which the entire composition is built.
Socket is selected next. Measure room area, determine diameter using tabular values. Check socket style compatibility with cornice style — ornaments must belong to the same stylistic family. Socket relief depth is proportional to cornice width — wide cornice requires a bulky socket.
Frieze is added last, if interior style and ceiling height allow. Frieze height — 60-80% of cornice width. Frieze style matches cornice, but ornament is simpler and finer. Visually check — if frieze competes with cornice for attention, it’s too active; choose a more restrained option.
Color solution unifies elements. Classic option — all elements white on white ceiling. Contrast option — white elements on colored ceiling or colored on white. Accent option — cornice and frieze white, socket gilded (highlights center). Avoid clutter — more than two colors in ceiling composition creates visual chaos.
Proportional check before purchase. Draw room ceiling to scale on paper or in graphic editor. Mark cornice along perimeter at actual width scale. Draw socket in center at its diameter scale. Add frieze if planned. Visually assess — elements should occupy 15-25% of ceiling area, 75-85% remains clear. If decoration occupies more than 30% — overload, reduce element sizes.
Visual height: how molding affects spatial perception
Ceiling physical height is fixed, but visual height is controllable via decoration. Proper molding raises a low ceiling, improper molding lowers a high one.
Narrow cornice in ceiling color creates minimal visual lowering. Relief is read via shadow, but doesn’t create a clear horizontal line cutting height. This is optimal for 2.4-2.7 m ceilings. Visual height loss does not exceed half cornice width — for 80 mm cornice, ceiling visually lowers by 40 mm.
Wide contrasting cornice creates a clear horizontal line, visually lowering ceiling by full cornice width plus 20-30%. 120 mm cornice lowers visual height by 140-160 mm. For 2.5 m ceiling, this is noticeable. But for 3.5 m ceiling, such lowering is desirable — makes room cozier, reduces well effect.
Socket indirectly affects height perception. Large socket draws gaze to ceiling center, making ceiling appear as an active plane. This psychologically raises gaze, creating a sense of height. Small socket doesn’t attract attention, ceiling remains a background plane.
Frieze intensifies visual lowering created by cornice. Two horizontal lines (cornice + frieze) cut off upper wall section more strongly than one. Frieze is contraindicated for low ceilings. For high ceilings, it’s desirable as it additionally reduces excessive height.
Color techniques correct perception. Dark ceiling visually lower than light — dark color brings surface closer. White cornice on dark ceiling creates strong contrast, cutting height. Dark cornice on white ceiling is less contrasting, cuts height more softly.
Low ceiling rule (up to 2.7 m): cornice 70-90 mm in ceiling color, rose 400-500 mm, frieze not to be used. This minimizes visual lowering while preserving decorative appeal.
High ceiling rule (3.2 m and above): cornice 120-150 mm contrasting, rose 700-1000 mm, frieze 80-100 mm preferred. This structures the height, makes the space cozier without losing monumentality.
Corner elements: simplified installation and enhanced composition
Room corners — the most complex areas for installing moldings. Precise 45° trimming of strips with matching ornament requires experience and time. Corner elements radically simplify the task while simultaneously enhancing the composition’s decorative quality.
Corner cornice element — a pre-fabricated part reproducing the cornice profile and ornament in an L-shaped configuration. The element is installed in the room’s corner, with straight cornice strips trimmed at 90° connected to it. The joint between the straight strip and the corner element is practically invisible due to precise profile alignment.
Types of corner elements: internal (for room corners), external (for protrusions, columns), corner roses (decorative elements in corners). Internal corners are used most often — in a rectangular room, there are four internal corners. External corners are needed for complex room layouts.
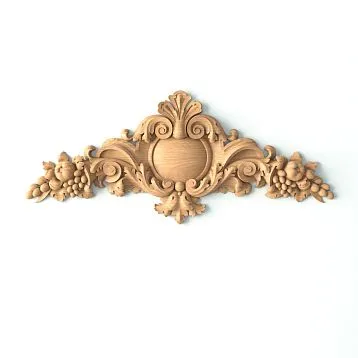
Corner roses — non-functional, decorative elements. They are larger than simple corner elements, feature rich relief ornamentation, and transform utilitarian corners into compositional accents. Corner roses are characteristic of Baroque and Empire styles, where opulence and detail are prized.
Installing a corner element begins with marking the corner. Determine the point where the wall joints will meet along the cornice line. Apply adhesive to the back of the corner element, install it in the corner, aligning with the marking. Press down and secure with painter’s tape. After the adhesive dries (6-8 hours), attach the straight strips.
Advantages of corner elements: time-saving (no complex trimming required), guaranteed joint accuracy (factory precision), enhanced decorative appeal (the corner becomes an accent). The only drawback is additional cost. However, time and stress savings offset the expense.
When corner elements are especially justified: cornices with rich ornamentation (matching ornament at a 45° corner joint is very difficult), first installation experience (simplifies work for beginners), non-standard room angles (differ from 90°, require complex fitting).
Practical composition schemes
Theory gains meaning through concrete examples. Let’s examine proven compositions for typical rooms.
Living room 20 m², ceiling 2.7 m — classic solution. Cornice 100 mm with moderate ornament, white. Rose 500 mm diameter, plant ornament, white. Frieze not used — height insufficient. Chandelier suspended at the center of the rose. Composition is elegant, proportional, visually does not lower the ceiling.
Bedroom 15 m², ceiling 2.5 m — minimalist solution. Cornice 80 mm simple profile, ceiling color (creates relief without contrast). Rose 400 mm diameter, simple geometric ornament. Frieze not used. Chandelier small or fully recessed into the rose. Composition is delicate, does not overload a small space.
Office 18 m², ceiling 3.0 m — traditional solution. Cornice 110 mm with classic profile, white on beige ceiling (moderate contrast). Rose 550 mm diameter, restrained ornament. Frieze 70 mm with meander, adds additional detail. Composition is noble, matches the office’s status.
Hall 45 m², ceiling 3.8 m — grand solution. Cornice 150 mm with rich ornament, white. Rose 900 mm diameter, multi-layered complex ornament, possibly gilded center. Frieze 100 mm with plant vine. Corner roses in corners, enhancing composition. Chandelier large, multi-armed. Composition is monumental, evokes the impression of a palace hall.
Kitchen 12 m², ceiling 2.6 m — practical solution. Cornice 70 mm simple profile, white, easy to clean. Rose not used — in kitchens, chandeliers are rarely hung centrally, preferring spot lighting. Or small rose 300 mm, if chandelier is over dining area. Frieze not used. Composition is minimal, functional.
Children’s room 16 m², ceiling 2.7 m — bright solution. Cornice 90 mm, painted in bright color (blue, pink). Rose 450 mm diameter, may be painted in contrasting color or coated with fluorescent paint (glows in dark). Frieze optional — if used, also bright color. Composition is playful, pleases a child’s eye.
Combination errors: what destroys harmony
Knowing errors prevents disappointment. Let’s examine typical mistakes in combining ceiling moldings.
Mismatch of cornice width to ceiling height — main error. Cornice 150 mm on 2.5 m ceiling suppresses, visually eats up 20 cm of height, creates a sense of pressure from above. Cornice 60 mm on 3.5 m ceiling disappears, looks short, does not create sufficient framing. Follow the 3-5% rule.
Disproportion between rose diameter and room area. Rose 800 mm diameter in 12 m² room suppresses, occupies half the ceiling, turns the center into a compositional monster. Rose 300 mm in 40 m² hall disappears, does not create sufficient accent. Use tabulated diameter values relative to area.
Mismatch of cornice and rose styles. Classic cornice with plant ornament + modern geometric rose = visual conflict. Elements speak different languages, composition does not read as a unified whole. All elements must belong to one style.
Frieze wider than cornice disrupts hierarchy. Cornice — main element of ceiling composition, frieze — secondary. If frieze is wider, it dominates, cornice loses significance. Frieze must be 20-40% narrower than cornice.
Frieze flush against cornice without gap. Elements merge, composition loses clarity, becomes a solid decorative band. A 50-100 mm uniform wall gap between cornice and frieze is mandatory.
Multiple roses in one room without logic. Two or three roses on one ceiling compete for compositional center status. If room is very large (over 60 m²) and divided into functional zones, multiple roses are acceptable — one above each zone. But in a typical room, the center must be one.
Rose shifted from center without functional justification. If chandelier is not centered on ceiling, rose shifts with it, creating center where functional center of room (dining table, sofa group) lies. But arbitrarily shifted rose looks like an installation error.
Excessive detail on low ceiling. Cornice + frieze + corner roses + large central rose on 2.5 m ceiling creates visual overload, reduces height, presses down. For low ceilings, minimalism rule applies — cornice + rose, no frieze or additional elements.
Installation: sequence for ideal result
Correct installation sequence ensures composition accuracy and joint quality.
Ceiling preparation — first stage. The ceiling must be flat (deviation no more than 2-3 mm per meter), clean, dry, and strong. Remove peeling paint, fill cracks, wash away dust. Prime the surface with acrylic primer to improve adhesive bond of the glue.
Marking starts from the center. Determine the ceiling center by intersecting diagonals. Mark the point — this will be the center of the rosette. Mark the perimeter lines for the cornice — use a laser level projecting a horizontal line at a distance equal to the cornice width from the walls.
Rosette installation is performed first. Apply glue to the back of the rosette using a notched trowel in an even layer. Attach to the ceiling, aligning the rosette center with the marked ceiling center. Press evenly over the entire area. Wipe off excess glue with a damp sponge. Secure the rosette with temporary supports if diameter exceeds 600 mm. Leave for 24 hours for full glue polymerization.
Cornice installation begins after the rosette has set. If using corner elements — install them first. Apply glue to the back of the corner element, install precisely at the room’s corner according to the marking. Press and secure with painter’s tape. After setting (6-8 hours), install straight cornice boards.
Straight cornice boards are cut to size — from corner element to corner element minus 2-3 mm of compensatory gap. Apply glue to the board, attach to the ceiling and wall (cornice abuts both surfaces), press firmly. The joint with the corner element must be tight. Secure with painter’s tape every 40-60 cm.
Frieze installation (if used) occurs after the cornice has fully set. Mark a horizontal line 50-100 mm below the bottom edge of the cornice. Frieze is glued using the same technique as the cornice. Joints in corners are at 45° or with corner elements.
Joint finishing — final installation stage. All element joints are filled with acrylic joint compound, sanded with fine-grit sandpaper after drying. An ideal joint is invisible — neither visually nor to the touch.
Painting is done after complete joint finishing. Prime the molding for even color. Paint in two thin layers with acrylic paint. Carefully paint ornament recesses — use a brush of appropriate size.
Conclusion
The logic of ceiling molding combinations is not a set of rigid rules limiting creativity, but a coordinate system freeing up conscious decisions. Understanding basic proportions — cornice width relative to ceiling height, rosette diameter relative to room area, frieze height relative to cornice — gives confidence that selected elements will create a harmonious composition.
Cornice sets the scale of the entire composition. Its width should be 3-5% of wall height for optimal visual balance. A narrow cornice disappears; a wide one overwhelms. Cornice profile and color affect perception of room height — correct choice lifts low ceilings or structures high ones.
Rosette creates the ceiling’s compositional center, gathering the viewer’s gaze and organizing space around the main axis. Rosette diameter is determined by room area — from 300 mm for small rooms to 1500 mm for large halls. Rosette ornament style must match the cornice, creating stylistic unity.
Frieze adds horizontal detailing, enriching the composition with an additional layer. Frieze height — 60-80% of cornice width — ensures element hierarchy. Frieze is suitable for rooms with ceilings over 3 meters and classic interior style.
Corner elements radically simplify installation, eliminating complex 45° board trimming, while simultaneously enhancing decorative composition. Their use is especially justified for ornate cornices and for first-time installation attempts.
Ceiling visual height is controlled through proper selection and color solution of molding. A narrow cornice in ceiling color minimally reduces visual height. A wide contrasting cornice with frieze creates noticeable reduction — desirable for high ceilings, but contraindicated for low ones.
STAVROS company offers a full range of ceiling molding elements —Crown Moldingof various widths and styles,ceiling rosetteswith diameters from 200 to 1500 mm, corner elements for simplified installation. High-qualityPolyurethane Itemswith clear relief, precise geometry, ready for painting.
STAVROS professional consultants will help select elements in proper proportions for your room. Calculate material quantities, recommend optimal composition layout, and advise on installation techniques.
Create a ceiling that becomes the fifth wall, worthy of attention. A ceiling where each element occupies its place according to the laws of harmony, where proportions create beauty, where decoration does not suppress but elevates space.Ceiling moldingSTAVROS — a tool for creating such a ceiling.
Start with proper proportions, continue with quality materials, finish with professional installation. The result will exceed expectations — the ceiling will stop being an ignored surface and become an architectural masterpiece organizing the entire interior space.