Article Contents:
- Anatomy of a joint: why it's not just a line
- Room geometry: perfect corners don't exist
- Material lives: expansion and contraction
- Adhesive compounds: shrinkage and expansion
- Structural weight and gravity
- Installation errors: when beauty turns into ugliness
- First error: cutting at a standard angle without measuring the actual one
- Second error: installation without acclimatization
- Third error: excess or insufficient adhesive at the joint
- Fourth error: ignoring the relief direction
- Fifth error: lack of compensation gaps
- Professional installation techniques: how to ensure perfect joints
- Surface preparation: foundation of reliability
- Marking: measure seven times
- Cutting: precision to the millimeter
- Adhesive: selection and application
- Joint sealing: the art of invisible seams
- Finishing: when the structure becomes a unified whole
- Features of working with different materials
- Polyurethane: flexibility and forgiveness of errors
- Wood: nobility requiring skill
- Combined Solutions: The Best of Both Worlds
- Practical case: installing a cornice in a living room with uneven walls
- FAQ: answers to common questions
- Can molding be installed on an uneven ceiling?
- What gap should be left at joints during installation?
- Should elements be primed before installation?
- Can Moldings Be Installed on Wallpaper?
- How to hide a joint if it's still noticeable?
- How long does molding adhesive take to dry?
- Can a wooden cornice be installed in a bathroom?
- How often are compensation joints needed?
- What's the difference between acrylic sealant and silicone sealant?
- What to do if the joint has separated after installation?
- Conclusion: perfection in details from STAVROS

The ceiling is the fifth wall of the interior, which most people undeservedly ignore. A smooth white surface? Boring. A stretch ceiling with spotlights? Trite. But there is a solution that turns the ceiling into an architectural dominant, creating volume, drama, and character. We're talking about ceiling molding combined with a cornice—wooden or polyurethane, classic or modern. These elements can radically change the perception of space. But only under one condition: proper installation that accounts for the joint line.
The joint line is the place where the wall and ceiling meet, as well as the points where individual decorative elements connect. It might seem like a small detail. But it's precisely the inattention to joints that turns expensive molding into cheap kitsch, and a noble wooden cornice into a source of irritation. Gaps in corners, mismatched patterns, sagging, cracks—all of this is the result of ignoring a fundamental rule: the joint determines quality.


Anatomy of a joint: why it's not just a line


Room geometry: perfect corners don't exist
The first thing everyone planning to installceiling moldingmust understand is that absolutely flat walls and perfect 90-degree angles do not exist in real rooms. Even in business-class new buildings, deviations are 2-5 mm per meter. In old buildings—up to 20-30 mm.
When you installWooden corniceor polyurethane cornice around the perimeter of a room, these irregularities become critical. The standard length of an element is 2-2.5 meters. On such a segment, even a 3 mm deviation creates a visible gap, especially when viewed from below upward, at an angle.
Room corners are rarely exactly 90 degrees. More often it's 89 or 91, sometimes 88 or 92. For an ordinary observer, the difference is unnoticeable. But when you try to join two cornices, cut at standard 45-degree angles, in a corner with an actual value of 91 degrees—a gap appears. Small, about a millimeter or a millimeter and a half, but visible.
Our factory also produces:


Material lives: expansion and contraction
Wood is a living material. Even when properly driedCornice from solid woodreacts to changes in humidity and temperature. In winter, when heating is on and humidity drops to 25-30%, wood releases moisture and slightly contracts. In summer, with humidity at 50-60%, it absorbs moisture and expands.
The amplitude of these changes is small—fractions of a millimeter per meter of length. But at joints, it adds up. Two two-meter cornices installed tightly together in winter may separate in summer, forming a visible gap. Or, conversely, installed in summer with a minimal gap may press against each other in winter, creating tension in the structure.
Polyurethane moldingsis less susceptible to thermal deformation, but not completely free from it. Polyurethane has a linear expansion coefficient of about 0.00006 per degree Celsius. At first glance, it's small. But with a temperature change from +15°C (cold wall in winter) to +25°C (comfortable room temperature), a two-meter element will change by 1.2 mm. At one joint, it's unnoticeable, but if there are ten such joints in a room—that's a total difference of 12 mm.
Get Consultation
Adhesive compounds: shrinkage and expansion
Any adhesive for installing molding and cornices shrinks as it dries. Polymer adhesives—minimally, about 2-3%. Mounting foams—up to 10-15%. If an element is installed with excess adhesive that squeezes out at the joint, after drying, a depression may form in that spot.
Quality adhesives fordecorative moldingshave minimal shrinkage, but absolutely zero shrinkage does not exist. Therefore, during installation, it's necessary to leave micro-gaps at the joints, which are then filled with elastic sealant.
Weight of the structure and gravity
Ceiling molding, especially large rosettes, cornices with protruding elements, combined structures—all of this has weight. Polyurethane is lightweight—a large 60 cm diameter rosette weighs 1-2 kg. A wooden cornice one meter long can weigh 3-5 kg.
Over time, under the influence of gravity, the fastening weakens slightly. Adhesive, no matter how strong, gradually loses its initial adhesion. If the joint between elements is rigid, without a compensation gap, under the weight of the structure, it may separate or, conversely, the elements may slide over each other, creating an unsightly overlap.
Installation errors: when beauty turns into ugliness
First error: cutting at a standard angle without measuring the actual one
A classic amateur mistake. BoughtWooden cornice, cut the ends at 45 degrees in a miter box, installed it. There's a gap in the corner. Why? Because the actual room angle is not 90 degrees.
Professionals use special angle finders, measure each angle individually, divide the obtained value in half, and cut precisely at that angle. If the angle is 91 degrees—they cut at 45.5. If 89—at 44.5. Cutting accuracy is critical. A half-degree error on a two-meter element creates a 2-3 mm gap at the joint.
Modern miter saws with laser guides allow setting the angle with an accuracy of up to 0.1 degrees. But even the most precise tool is useless if you don't know what angle to cut at. First measurement, then cutting.
Second error: installation without acclimatization
Deliveredpolyurethane moldingfrom a cold storage (+5°C) to a warm room (+23°C) and immediately started gluing. The material is cold, the adhesive does not adhere well, and adhesion is weak. After a day, the elements begin to peel off, especially at the joints where the contact area is minimal.
Rule: any decorative elements must lie in the installation room for at least 24 hours before installation. Ideally, 48-72 hours. They must acclimate to the temperature and humidity of the environment, stabilize. Only after that can work begin.
This is especially critical forwooden crown moldings. Wood must equalize its moisture content with the air humidity in the room. If a cornice with 12% moisture is installed in a room with 40% air humidity (which gives an equilibrium wood moisture content of 8%), the cornice will dry out after installation, creating stress at the joints.
Third mistake: excess or insufficient adhesive at the joint
The joint is the most vulnerable point of the structure. Some installers, understanding this, apply an excessive amount of adhesive to the ends of the connecting elements, thinking that more is better. The result is the opposite.
Excess adhesive squeezes out onto the front surface, stains the decor, and requires immediate removal. During removal, it's easy to damage the reliefmolded decoration on the ceiling. Additionally, a thick layer of adhesive causes significant shrinkage; the joint sinks after drying.
The opposite extreme is minimal adhesive 'to avoid staining'. The joint holds poorly, eventually separates, and a gap forms. This is especially dangerous at corners, where the joint also bears the load from the weight of the elements.
The golden mean: a thin, even layer of adhesive on both joining surfaces, plus additional fixation with mechanical fasteners (nails, screws) during adhesive drying, followed by removal or concealment of the fasteners.
Fourth mistake: ignoring the direction of the relief
Moldings and cornicesoften have directional ornamentation—leaves, curls, geometric patterns. When joining two elements, the ornament must match, creating a continuous pattern.
A careless installer cuts elements without paying attention to matching the relief. As a result, the pattern breaks at the joint, a leaf stops halfway, a curl finds no continuation. This looks sloppy and destroys the illusion of structural integrity.
Professional approach: before cutting, elements are placed against each other, the ornament is aligned, a mark is made, and only then is the cut performed. Sometimes this means losing 2-3 cm of material, but the result is worth it.
Fifth mistake: lack of expansion gaps
(over 6-8 meters) require expansion joints. These are special breaks filled with elastic sealant that compensate for thermal expansion and material shrinkage.of the ceiling corniceIf a long section is installed without expansion gaps, internal stresses develop over time. These can lead to elements detaching from the wall, cracks at joints, and deformation of the entire structure.
Rule: for every 4-6 meters of continuous installation—one expansion joint 2-3 mm wide, filled with acrylic sealant matching the material color.
Professional installation techniques: how to ensure perfect joints
The strength of a joint is 70% determined by the quality of the surface to which the element is glued. The wall or ceiling must be:
Surface preparation: the foundation of reliability
Clean. Dust, grease, old paint, flaking plaster—all reduce adhesive adhesion. Before installation, the surface is cleaned, degreased, and sanded with sandpaper if necessary.
Primed. Deep-penetration primer strengthens the surface, evens out absorbency, and improves adhesive bonding. This is a mandatory step; saving on it leads to problems.
Even. Irregularities exceeding 3-5 mm per meter of length create gaps between the decorative element and the wall/ceiling. These gaps must be filled with adhesive, causing unevenness, risk of delamination, and unsightly gaps.
If the wall is uneven, and
must fit tightly against it—either level the wall with plaster or use flexible polyurethane elements that follow the surface contours.Ceiling moldingsBefore starting installation, careful marking is done. A laser level is used to create horizontal and vertical lines. A line is marked around the perimeter of the room where the bottom edge of the cornice will be installed.
Marking: measure seven times
Important to consider: if the ceiling is uneven (and it almost always is), choose a baseline—either strictly horizontal (by level) or parallel to the ceiling (following its irregularities). The first option is geometrically correct but creates a variable gap between the cornice and ceiling. The second option is visually more harmonious but requires trimming the cornice in height.
, especially made from valuable wood species, the first option is preferable, followed by filling the gap with sealant or a decorative profile.
Forwooden cornice, especially for valuable wood species, the first option with subsequent gap filling using sealant or decorative trim is preferable.
Cutting: precision to the millimeter
Proper cutting is half the success of a joint. Used:
Miter saw with a rotating platform, allowing angle adjustment from 0 to 90 degrees with an accuracy of 0.1 degrees. Fine-toothed blade for clean cuts without chipping.
Miter box — for simple straight cuts and standard angles. Suitable for polyurethane, requires care when working with wood.
Fine-toothed saw — for polyurethane elements, even hand tools can be used, the main thing is a sharp blade and care.
After cutting, the ends must be sanded with fine sandpaper (grit 180-220), removing burrs and irregularities. A perfect end is the key to a tight joint.
Adhesive: selection and application
Forpolyurethane moldingSpecial polymer adhesives based on polyurethane or MS polymers are used. They provide strong adhesion, are elastic, and have minimal shrinkage. Examples: polyurethane adhesive "Orac Decofix", "Europlast", equivalents.
Forof wooden elementsThe same compounds are suitable, plus high water-resistant woodworking PVA adhesives (class D3-D4) can be used, but they require mechanical fixation during drying.
Adhesive is applied:
-
To the back of the element — in a zigzag or grid pattern, depending on size.
-
To the ends of the joining elements — in a thin, even layer.
The element is pressed against the surface and held for 30-60 seconds. Long and heavy elements are additionally secured with finishing nails or screws, which after the adhesive dries are either removed (holes filled) or countersunk and concealed.
Sealing joints: the art of invisible seams
After the adhesive has dried (24-48 hours), the joints are treated. Acrylic sealant matching the material's color is used. For white molding — white sealant. For tinted wood — a matching shade is selected.
Sealant is carefully applied in a thin strip into the joint gap, smoothed with a wet finger or a special spatula. Excess is immediately removed with a damp cloth. After drying, the seam becomes practically invisible.
Important: the sealant must be acrylic and paintable. Silicone is not suitable — it is not paintable, yellows over time, and attracts dust.
Finishing: when the structure becomes a single whole
After installation and sealing, the entire structure is painted. Even ifMoldingswas white, a final coat of paint is necessary. It:
-
Evens out the color, hiding possible shade variations between elements.
-
Conceals joints, sealant, and fastener marks.
-
Creates a uniform surface texture.
-
Protects the material from dirt and UV rays.
Water-based or acrylic paint is used, applied with a brush or roller in 2-3 coats. For relief elements, a brush is more convenient — it paints all the recesses of the ornament.
Features of working with different materials
Polyurethane: flexibility and forgiveness of errors
Polyurethane cornices and moldings— the most convenient material for installation. Polyurethane is lightweight, cuts with a regular saw, adheres with special adhesive, and bends when heated with a construction heat gun, allowing for curved sections.
Joints of polyurethane elements are less critical than wooden ones. Small gaps are easily filled with sealant. The material itself does not undergo significant thermal deformation. However, polyurethane also requires attention to joints — careless cutting and poor fitting will create visible defects.
Advantages:
-
Lightweight – does not require powerful fasteners.
-
Moisture resistance – can be used in bathrooms, kitchens.
-
Easy processing – cuts, sands with simple tools.
-
Paintability – any colors and effects.
Disadvantages:
-
Less noble texture compared to wood.
-
Sensitivity to impact loads – may chip under strong impact.
Wood: nobility requiring craftsmanship
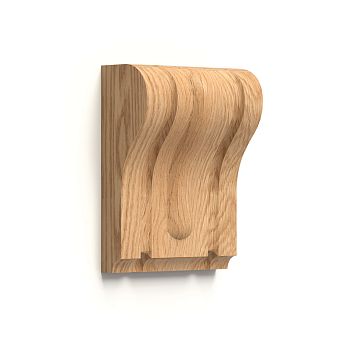
Wooden cornice– the choice for premium interiors where material naturalness is important. Wood is heavier than polyurethane, requires more thorough surface preparation, professional cutting tools.
Joints of wooden elements are critical. The slightest cutting inaccuracy – and the gap will be visible even after puttying and painting, especially if the wood is coated with clear varnish or oil.
Advantages:
-
Natural texture, warmth of the material.
-
Restoration possibility – can be sanded, repainted.
-
Ecological safety.
-
Solidity, status.
Disadvantages:
-
Weight – requires reliable fastening.
-
Reaction to humidity – may warp.
-
Processing complexity – requires professional tools.
-
Price – significantly higher than polyurethane.
Combined solutions: the best of both worlds
Modern trend – combiningwooden crown moldingswith polyurethane decorative elements. For example, the main profile made of MDF or solid wood, and the ornamental insert – made of polyurethane. This reduces the weight of the structure, simplifies installation, while preserving visual richness.
With this approach, joints are especially critical – it is necessary to ensure not only geometric alignment but also coordination of different materials that react differently to temperature and humidity.
Practical case: installing a cornice in a living room with uneven walls
Let's imagine a real situation: a living room of 25 sq.m, ceilings 3 meters high, walls with deviations up to 15 mm vertically, angles from 89 to 91 degrees. Need to installWooden ceiling cornicemade of oak with a figured profile.
Step 1. Situation assessment. Measure all walls with a laser rangefinder, check angles with a protractor, assess wall curvature with a level. Identify problem areas.
Step 2. Decision on baseline. Decide to run the cornice strictly horizontally, by level. This will create a variable gap between the cornice and ceiling (from 5 to 20 mm), but will be geometrically correct. The gap will be covered with decorative molding.
Step 3. Marking. Mark a horizontal line around the perimeter at a height of 2.85 m (cornice height 12 cm, leaving 3 cm to the ceiling) with a laser level. Check several times.
Step 4. Acclimatization. Cornices lie in the room for 3 days, adjusting to room temperature and humidity.
Step 5. Cutting corners. Measure each angle. First angle 89.5°, cut elements at 44.75°. Second angle 90.5°, cut at 45.25°. Use a miter saw with laser.
Step 6. Trial fitting. Place elements without glue, check joints. Adjust if necessary.
Step 7. Installation. Apply glue, install elements, secure with finishing nails. Allow 48 hours to set.
Step 8. Sealing. Fill joints with acrylic sealant matching the wood tone. Smooth out, remove excess.
Step 9. Finish. Apply two coats of oil to the cornice. Install decorative molding in the gap between the cornice and the ceiling.
Result: A perfect cornice with invisible joints that will last for decades.
FAQ: answers to frequently asked questions
Can molding be installed on an uneven ceiling?
Yes, but it will require either leveling the ceiling or using flexible polyurethane elements that follow the surface contours. Rigid wooden cornices on an uneven ceiling will create gaps.
What gap should be left at joints during installation?
For polyurethane — 1-2 mm. For wood — 2-3 mm for every 2 meters of element length. The gap is filled with elastic sealant to compensate for thermal expansion.
Do elements need to be primed before installation?
The wall/ceiling surface where the element is glued must be primed. The elements themselves are primed only before painting, after installation.
Can you install moldings on wallpaper?
Highly undesirable. The adhesive holds onto the wallpaper, not the wall. If the wallpaper peels off, the molding will fall with it. It's better to glue onto a clean, primed wall.
How to hide a joint if it's still noticeable?
After sealing and drying, the joint is painted along with the entire structure. Paint evens out the color and texture. If the joint is still visible, you can locally apply putty and sand it before painting.
How long does adhesive for molding take to dry?
Polymer adhesives set in 2-4 hours, full polymerization — 24-48 hours. Until completely dry, temporary fasteners should not be removed and the structure should not be subjected to loads.
Can a wooden cornice be installed in a bathroom?
Not recommended due to high humidity, which causes wood deformation. For wet areas, it's better to use polyurethane cornices, which are completely moisture-resistant.
How often are expansion joints needed?
On straight sections longer than 6-8 meters — one expansion joint approximately in the middle. For short sections (up to 4 meters), expansion joints are not needed.
What is the difference between acrylic and silicone sealant?
Acrylic — paintable, does not yellow, holds its shape. Silicone — more elastic, but not paintable, yellows over time, attracts dust. For molding, only acrylic is used.
What to do if a joint has separated after installation?
Carefully fill the gap with acrylic sealant, smooth it out, and after drying, paint to match the structure's color. If the separation is significant (more than 5 mm), it may require dismantling and reinstalling the elements.
Conclusion: perfection in details from STAVROS
The joint line is not just a technical installation detail. It is the boundary between professionalism and amateurism, between an interior that delights and a finish that irritates.Ceiling moldingandWooden cornicecan be as expensive and high-quality as you like, but improper installation, ignoring joints, will turn them into a source of disappointment.
For over two decades, STAVROS has been creating decorative elements for interiors, understanding that product quality is determined not only by material and processing but also by thoughtful design, ease of installation, and the ability to create perfect joints.
Polyurethane cornicesSTAVROS are designed with real installation conditions in mind. The ends of the elements are processed so that joining is as simple and precise as possible.Wooden cornicesare made from kiln-dried wood with a residual moisture content of 8±2%, which minimizes deformation after installation.
STAVROS offers not just materials, but comprehensive solutions. The company's range includesRelief Decoration, Moldings, cornices of all sizes and styles, from classic to modern. Every element is thought out down to the smallest detail, every profile line is calculated to ensure not only aesthetics but also installation efficiency.
By choosing STAVROS products, you get materials created for professional results. You invest in durability — correctly installed molding and cornices last for decades without requiring repairs. You create an interior where every detail is in its place, where joints are invisible, where the eye delights in the harmony of lines and forms.
Remember: the perfect interior is the sum of correct decisions. And accounting for the joint line during installationceiling moldingsandwooden crown moldingsis one of the most important. With STAVROS materials and a professional approach to installation, your ceiling will become a work of architectural art.