Article Contents:
- What is Polyurethane Molding and Why It's Ideal for DIY Installation
- Advantages of Polyurethane Over Traditional Materials
- Types of Polyurethane Elements for Interior
- Required Tools and Materials: Assembling the Master's Arsenal
- Measuring tools
- Cutting Tool
- Adhesive Application Tool
- Fastening materials
- Finishing Materials
- Surface preparation: the foundation of quality installation
- Surface Condition Assessment
- Leveling and Cleaning
- Marking: accuracy determines the result
- Marking Ceiling Cornices
- Marking Wall Moldings and Panels
- Marking Ceiling Rosettes
- Step-by-Step DIY Installation Technology
- Installation of ceiling cornice
- Installing Baseboards
- Installing Wall Moldings
- Installing Ceiling Rosettes
- Joint Processing and Finishing
- Puttying Joints
- Priming Before Painting
- Painting the Molding
- Decorative finishing techniques
- Budget Savings: Material Calculation and Real Figures
- Ceiling Cornice
- Baseboard
- Wall Moldings
- Final Estimate for a Room
- Common Beginner Mistakes and How to Avoid Them
- Insufficient Surface Preparation
- Saving on Glue
- Inaccurate Corner Cutting
- Weak Fixation Before Adhesive Sets
- Painting Without Primer
- Frequently Asked Questions
- Conclusion: Architectural Expressiveness is Accessible to Everyone with STAVROS

Why do some interiors look expensive and sophisticated, while others remain flat and faceless even with a significant budget? The secret lies in architectural plasticity—that very three-dimensionality created by decorative molding. Previously, such decor was a privilege of mansions and palaces, requiring months of work by plasterers and astronomical sums. Todaypolyurethane molding DIYturns this dream into a real weekend project with minimal investment.
Can you really install the decor yourself without experience or special skills? Absolutely. Modern polyurethane molding is designed precisely for this—lightweight, with ready-made mounting platforms, precise geometry, requiring no wet processes or complex preparation. The tools are minimal, the technology is transparent, and the result is predictable. The main thing is to understand the logic of the process and follow proven algorithms.

What is polyurethane molding and why is it ideal for DIY installation
Polyurethane is a synthetic polymer that is molded in ready-made matrices under pressure and temperature. The result is elements with perfectly clear details that replicate the originals of plaster or wooden molding, but without the drawbacks of these materials.


Advantages of polyurethane over traditional materials
Weight is a critical difference. A two-meter-long plaster cornice weighs twelve to fifteen kilograms, requires two people for installation and powerful mechanical fastening. A polyurethane one of the same length weighs one and a half to two kilograms, is installed by one person using adhesive without dowels or screws. This radically simplifies the process, making it accessible to women, teenagers, and people without physical training.
The geometric precision of factory manufacturing guarantees perfect joining of elements. Plaster molding, especially handmade, has dimensional deviations of up to three to five millimeters. During joining, one has to adjust, refine, and compensate. Polyurethane elements from the same batch are absolutely identical — they join seamlessly without gaps.
Moisture resistance allows the use of polyurethane decor in bathrooms, kitchens, toilets — everywhere where plaster becomes damp, cracks, and becomes covered with mold. Polyurethane is inert to water, does not absorb moisture, and retains its shape at any humidity.
Impact resistance makes the material practical. Plaster molding is fragile — an accidental hit with a mop or furniture leaves a chip requiring restoration. Polyurethane is elastic, absorbs impacts, and returns to shape. Serious damage is extremely rare.
Paintability is an important quality for personalizing the interior. Polyurethane accepts any water-dispersion paints, latex enamels, acrylic compounds. You can create snow-white classics, pastel romance, contrasting color accents, gilding, patina — any finish.
Our factory also produces:


Types of polyurethane elements for interiors
Ceiling cornices are the most common type of decor. They are installed at the junction of the wall and ceiling, visually raise the height of the room, hide irregularities at the joint, and create a finished look for the interior. Width from thirty millimeters (minimalist narrow strips) to three hundred millimeters (massive multi-profile cornices with ornaments). Standard length is two meters, convenient for transportation and installation.
Floor skirting boards frame the bottom of the wall, close the gap between the wall and floor, and protect the lower part of the wall from mechanical damage. Height from fifty to two hundred fifty millimeters. Simple profiled strips are suitable for minimalist interiors, complex ornamented ones are for classic styles.
Wall moldings are universal decorative strips that create frames, panels, and geometric compositions on flat walls. Width from twenty to one hundred millimeters. The profile can be simple (one curve or bead) or complex (multi-step composition of reliefs).
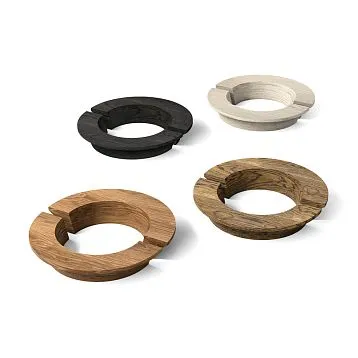
Ceiling rosettes are placed in the center of the ceiling under the chandelier. Diameter from two hundred to one thousand two hundred millimeters. Ornaments: classic floral, geometric, baroque lush, Art Nouveau smooth. The rosette becomes the compositional center of the ceiling, attracting the eye.
Corner elements are ready-made decorative corners for joining cornices and moldings. They eliminate the need for cutting at forty-five degrees, which is critical for beginners. The corner is simply glued into the joint of two strips cut at a right angle.
Decorative panels are large-format elements that imitate coffered ceilings, wall panels, and architectural reliefs. Sizes from three hundred by three hundred millimeters to one thousand by one thousand millimeters. They are installed as independent accents or combined into compositions.
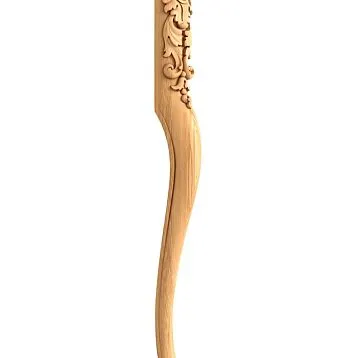
Columns and half-columns (pilasters) create vertical accents, divide space, and frame openings. Height from five hundred to three thousand millimeters. They consist of three parts: base (lower), shaft (middle, sometimes composite from several sections), capital (upper decorated).
Get Consultation
Necessary tools and materials: assembling the master's arsenal
One of the advantages of DIY installationof polyurethane molding with your own handsis the minimal set of tools. Most are already available in the household, the rest are inexpensive.
Measuring tools
A tape measure five to seven meters long for measuring the perimeter of the room, lengths of wall sections, heights. A metal tape with a lock is better — it does not deform and shows accurate dimensions.
A spirit level is a key tool. A one to two meter long bubble level is suitable for most tasks. Check its accuracy before work — rotate the level one hundred eighty degrees on a horizontal surface. The bubble should show the same position. If it shifts, the level is inaccurate.
A laser level significantly speeds up marking, especially for ceiling work. It projects a perfectly horizontal or vertical line across the entire wall, making it easy to align elements. Budget models cost from two to three thousand rubles.
A carpenter's square for checking right angles. Most rooms have deviations from a right angle of one to three degrees, which creates problems when joining cornices. The square helps identify these deviations and adjust the cutting.
A construction pencil or marker for marking on walls and ceilings. A pencil is preferable — it is easy to erase or paint over. A marker may show through the paint.
Cutting tool
A hacksaw for metal with fine teeth is a universal tool for cutting polyurethane. The teeth should be frequent to avoid tearing the material. Cut with smooth movements without strong pressure. Haste creates chips and irregularities.
A miter box is a device for cutting angles at a given angle. A standard miter box has slots for forty-five and ninety degrees. For cornices, precise forty-five-degree cutting is critical — the slightest deviation creates a gap in the joint. A professional adjustable miter box allows setting any angle with accuracy to a degree.
A sharp knife (utility or craft knife with replaceable blades) for trimming small elements, removing burrs after sawing, and adjusting joints. The blade must be sharp — a dull one crushes polyurethane instead of cutting.
A miter saw (optional) is a power tool for precise angle cutting. If the volume of work is large (several rooms), renting or buying a miter saw pays off in speed and quality of cuts. Use a blade with fine teeth for plastic.
Glue application tool
Cartridge glue gun. Polyurethane adhesives come in 300-400 ml tubes. The gun dispenses glue in an even strip, which is impossible to do manually. A basic gun costs 300-500 rubles. Professional cordless models start from 3,000 rubles but are excessive for a one-time repair.
Rubber or plastic spatula for smoothing glue on large surfaces, removing excess glue that squeezes out when pressing the element. Width: 50-80 mm.
Damp sponge or cloth for immediate removal of squeezed-out glue. Fresh glue wipes off easily with water; dried glue will need to be scraped off with a knife and sanded.
Fastening materials
Polyurethane adhesive — a specialized polymer-based compound. Regular PVA or silicone are not suitable — they either don't hold or damage polyurethane. Proven brands: Orac Decor DecoFix Pro, Europlast, Decomaster. Consumption: one cartridge (300 ml) per 8-12 linear meters of cornice or baseboard.
Painter's tape for temporary fixation of elements until the adhesive sets. Width: 25-50 mm. The tape is applied over the glued element, pressing it against the surface. After 2-4 hours, when the adhesive has set, the tape is removed.
Dowels and screws (optional) for additional mechanical fixation of heavy elements or mounting on problematic substrates (old paint, wallpaper). Rarely used, as quality adhesive holds reliably.
Finishing materials
Acrylic putty for filling joints between elements. Elastic, does not crack with thermal expansion. White or tintable. Applied with a rubber spatula, smoothed, and sanded after drying.
Sandpaper grit P220-P320 for sanding puttied joints. Too coarse (P120-P180) scratches polyurethane; too fine (P400+) works slowly.
Acrylic primer for preparing the polyurethane surface for painting. It evens out absorbency, improves paint adhesion, and reveals defects (unsanded areas appear as darker spots).
Water-dispersion or latex paint for the final coating. For classic interiors — white matte or semi-matte. For accents — tinted to any color. Glossy paint highlights the slightest defects; matte hides them.
Surface Preparation: The Foundation of Quality Installation
Quality of installationof polyurethane molding with your own hands90% depends on surface preparation. Polyurethane is lightweight and adheres well, but if the substrate is loose, peeling, or uneven — no adhesive will save it.
Surface condition assessment
Check the strength of the finish coating. Run a stiff brush or spatula over the wall. If the paint or plaster crumbles, peels in flakes — stripping down to a solid layer is necessary. If the surface is monolithic and doesn't crumble — you can proceed with gluing.
Wallpaper — a problematic substrate. The adhesive might stick the molding to the wallpaper, but the wallpaper itself may peel off the wall under the weight, especially if it's old paper wallpaper with weak adhesive. Optimal solution — remove the wallpaper in the installation area of the molding (a strip 20 mm wider than the element's width). If the wallpaper is fresh, non-woven, and firmly glued — you can risk gluing over it, but with additional fixation using painter's tape until the adhesive fully dries.
Whitewash — categorically unsuitable substrate. Chalk has no adhesion; any adhesive will fall off along with the whitewash layer. The only option — completely wash off the whitewash, prime the substrate, then glue.
Old oil-based paint holds firmly but has a smooth, glossy surface with low adhesion. Sand the installation areas of the molding with coarse sandpaper (P80-P120) to create roughness. Remove dust, degrease, and prime.
Alignment and Cleaning
Wall irregularities are compensated by the adhesive layer only up to a certain limit. If the wall has waves with an amplitude of more than 3-5 mm, the cornice will follow these waves, creating a visually uneven line. Local protrusions can be knocked off with a spatula or cut with a sander. Depressions are filled with putty, sanded, and primed.
Room corners are rarely exactly ninety degrees. Measure the actual angle with a square. A deviation of 2-3 degrees is compensated by adjusting the cornice miter cuts. A deviation of more than 5 degrees creates serious problems — the joint will have a gap or overlap. Local corner leveling with plaster may be required.
Dust — the enemy of adhesion. Vacuum the surface with a brush attachment, then wipe with a damp cloth. Pay special attention to cleaning the junction of the wall and ceiling — dust from plastering work accumulates there.
Priming improves adhesion, binds residual dust, and strengthens loose substrates. Use deep-penetration primer for loose substrates (plaster, putty), universal acrylic primer for dense ones (concrete, drywall). Apply with a roller or brush, allow to dry according to instructions (usually 2-4 hours).
Marking: Accuracy Determines the Result
Marking — a stage often underestimated by beginners who start gluing "by eye." The result — crooked lines, uneven spacing, visual chaos. Professionals spend a quarter of the total work time on marking, and it pays off with a perfect result.
Marking ceiling cornices
Determine the cornice offset from the ceiling. If the cornice is wide (over 120 mm), it is often glued not flush to the ceiling but with a 10-20 mm offset. This creates a shadow gap, visually lightening a massive cornice. If the cornice is narrow, glue it flush.
Mark a horizontal line on the wall around the entire room perimeter. Use a laser level — it projects a line instantly. If no level is available, use a water level or a bubble level with a long straightedge. Make pencil marks every 500 mm, then connect them into a solid line using a ruler.
Important: mark from the ceiling downward, not from the floor upward. The floor is often uneven and sloped. The ceiling may also be uneven, but the cornice must be parallel to the ceiling, otherwise it creates the impression of a slanted ceiling.
For rooms with complex geometry (bay windows, niches, protrusions), mark in sections, checking line alignment at corners. A laser level with a circular projection function greatly simplifies this task.
Marking wall moldings and panels
Wall compositions of moldings require precise symmetrical marking. If creating rectangular panels on a wall, start with symmetry axes. Find the center of the wall horizontally and vertically, draw thin pencil lines. From these axes, mark the panel rectangles, ensuring equal spacing from the wall edges and between panels.
Use the golden ratio rule or simple proportions. Panel height is usually from one-third to half of the wall height. Width — proportional to height; a ratio from 1:1.5 to 1:2 looks harmonious.
For vertical moldings dividing the wall into sections, mark considering doors, windows, furniture. The molding should not abut the door jamb tightly — leave a 50-100 mm gap. Consider furniture placement — a tall cabinet will cover part of the wall, making the decoration invisible.
Ceiling rosette marking
The ceiling rosette is placed strictly in the geometric center of the ceiling or in the center of the area it decorates (above the dining table, in the center of the living area). Find the center by drawing diagonals from the corners of the room — the intersection point is the center.
If the chandelier is already installed, the rosette is attached around its mounting assembly. Measure the diameter of the rosette, find the center, mark a circle on the ceiling. Check that the chandelier mounting is exactly in the center of the rosette. Even a ten to fifteen millimeter offset will be noticeable.
For large rosettes (diameter over six hundred millimeters) on drywall ceilings, additional reinforcement may be required. Check that there is a frame behind the drywall or a plywood backing installed at the mounting location. If not — the weight of the rosette may cause the drywall to sag.
Step-by-step DIY installation technology
Preparation is complete, tools are gathered, marking is applied. The most critical stage begins —installing polyurethane moldinginto place. Work slowly, check each step, correct mistakes immediately — after the adhesive dries, adjustments become difficult.
Ceiling cornice installation
Start from the corner that is first visible when entering the room. Measure the length of the first wall, add a fifty millimeter allowance. Cut the cornice strip. Cut one end at a forty-five degree angle for a corner joint (if not using ready-made corner elements), leave the other end straight for now — you will cut it precisely in place after installation.
Apply adhesive to the back of the cornice. Two strips — along the surface adjacent to the wall, and along the surface adjacent to the ceiling. The adhesive strip should be continuous, five to seven millimeters thick. Do not skimp on adhesive, but do not overdo it — excess will squeeze out when pressed and will need to be removed.
Place the cornice against the wall exactly according to the marking. Align the horizontal along the line, check with a level. Press firmly along the entire length. Apply pressure evenly to avoid deforming the polyurethane. Hold for thirty to sixty seconds until the adhesive sets. If the cornice is long (over one and a half meters), work with a partner.
Immediately remove any squeezed-out adhesive with a damp sponge. After ten minutes, the adhesive begins to set, making it harder to remove. If you miss the moment, let the adhesive dry completely (twenty-four hours), then carefully cut it off with a knife and sand it.
Secure the cornice with painter's tape. Apply strips of tape every five hundred millimeters, pressing the cornice against the wall and ceiling. Remove the tape after four to six hours, when the adhesive has set firmly.
Move to the next wall. Cut the second end of the installed cornice precisely at a forty-five degree angle in the corner. Also cut the next strip at a forty-five degree angle, joining it with the first. The corner joint should be tight, without gaps. If a small gap does form, fill it with putty after installing all elements.
Continue around the perimeter of the room. The last strip will require particularly precise fitting — it must fit between two already installed cornices in opposite corners. Measure the length to the millimeter, cut both ends at a forty-five degree angle, install carefully.
Floor skirting board installation
The technology is similar to ceiling cornices, but there are nuances. The skirting board is pressed against the floor and wall, creating a right angle. If the floor is uneven (which is often the case), gaps form between the lower edge of the skirting board and the floor. This is normal — gaps up to three millimeters are unnoticeable. Larger gaps are filled with acrylic sealant matching the color of the skirting board or floor.
Press the skirting board firmly against the floor, not the wall. The floor is the reference plane and should be the base. If the wall has irregularities, the gap between the skirting board and the wall is filled with putty.
Doorways require precise fitting. The skirting board should go under the door casing or butt against it flush. Measure the lengths of sections between openings carefully, check in place before applying adhesive.
Consider cable channels and utilities in advance. Some skirting boards have a built-in cable channel — wires are laid in the groove before installing the skirting board or after through a removable decorative insert.
Wall molding installation
Wall moldings can be horizontal (dividing the wall into panels, creating borders) or vertical-horizontal (forming frames, panels). Apply adhesive to the back in one strip along the center of the mounting surface.
Horizontal moldings are installed strictly horizontally using a level. Even a minimal slope is noticeable to the eye. Place, press, check with a level, secure with tape.
Check vertical moldings with a plumb line or level in the vertical position. A one to two degree deviation from vertical creates the impression of a falling line.
Joining moldings at frame corners is done at a forty-five degree angle (like picture frame molding) or at a right angle with one overlapping the other. For beginners, the second method is simpler — less demanding on cutting precision.
Ceiling rosette installation
The rosette is a large element requiring special care. Apply adhesive to the back of the rosette in a continuous strip around the circumference. If the rosette is large (diameter over six hundred millimeters), add several radial strips from the center to the edge for even adhesive distribution.
Place the rosette against the ceiling, aligning the central hole with the wire outlet for the chandelier. Align the position according to the pre-marked circle. Press firmly, hold for a minute. The rosette is heavier than the cornice, so the adhesive needs more time for initial setting.
Secure the rosette with a prop for two to three hours. Use a stepladder, a mop with a soft pad, any stand that presses against the center of the rosette and supports it until the adhesive dries. Painter's tape is ineffective for rosettes — the contact area is insufficient to hold the weight.
After the adhesive has completely dried (twenty-four hours), install the chandelier. Wires are routed through the central hole of the rosette, the chandelier mounting is fixed to the ceiling. The decorative bowl of the chandelier covers the mounting assembly.
Joint treatment and finishing
Installation is complete, the adhesive has dried, and the elements are securely in place. However, the work is not finished yet — the joints between elements, as well as the areas where they meet the walls and ceiling, require finishing for a perfect result.
Filling the joints
Even with precise cutting, micro-gaps remain between elements — half a millimeter to a millimeter. They are not noticeable from a distance, but stand out upon close inspection. Acrylic filler solves this problem.
Apply a small amount of filler onto a rubber spatula. Fill the joint by pressing the filler into the gap with a crosswise motion. Smooth it flush with the surface of the molding. Remove any excess immediately with a damp sponge.
For thin gaps, use acrylic sealant in a tube for a caulking gun. It has a more liquid consistency and penetrates deeper into narrow spaces. Apply a thin bead along the joint and smooth it with a finger (wet it for easier gliding) or a narrow spatula.
Allow the filler to dry. Acrylic compounds dry in two to six hours depending on layer thickness and air humidity. Fully dry filler becomes hard, white, and cannot be indented with a fingernail.
Sand the filled areas with fine-grit sandpaper (P220-P280). Sand carefully to avoid damaging the molding's relief. Remove sanding dust with a dry cloth or vacuum.
Priming before painting
Polyurethane has a smooth surface with low absorbency. Paint adheres to it but may have uneven gloss and poor coverage. Primer solves these issues.
Use an acrylic primer for plastics or a universal primer. Apply a thin, even layer with a brush or spray gun. Pay special attention to priming the filled areas — filler absorbs more than polyurethane, and without primer, these spots will stand out after painting.
Allow the primer to dry according to the instructions (one to three hours). Once dry, the surface becomes slightly matte and acquires a uniform texture.
Painting the molding
Paint is the final touch that defines the visual perception of the decor. For classic interiors, white is traditional — snow white or with shades of ivory, cream, or pearl. For modern interiors, molding can be painted to match the wall color (tone-on-tone, creating relief without color contrast) or in a contrasting color (black, graphite, gold).
Use water-dispersion or latex paint. Alkyd enamels (oil-based) are not recommended — they yellow over time, have an odor, and take longer to dry. Water-based paints are free of these drawbacks.
Apply with a brush or spray gun. A brush offers greater control, prevents paint waste, and allows thorough coverage of recessed relief details. A spray gun is faster and provides perfectly even coverage but requires skill and protection of surrounding surfaces from paint mist.
The first layer is the main, covering layer. Apply it thinly and evenly, avoiding drips. If the paint is thin, drips may occur in recesses — immediately blend them with a brush. Allow the first layer to dry (two to four hours).
The second layer is the leveling layer, creating the final color density and coverage uniformity. After the second layer, the paint should be applied densely, without gaps, with even gloss or matte finish across the entire surface.
Decorative finishing techniques
To enhance the three-dimensionality of the relief, patination is used. Over the dried base paint (usually white or cream), apply a darker paint (gray, brown, gold) diluted to semi-transparency. Rub the paint into the recesses of the relief with a sponge or brush. After a minute, wipe off excess from the raised parts with a cloth. As a result, recesses are darker and raised areas are lighter — enhancing the three-dimensional effect.
Gilding creates a luxurious accent. Use paint with metallic pigment (acrylic gold, silver, bronze) or special gilding compounds. Apply with a fine brush only to the raised parts of the ornament, creating highlights. Full gilding (entire surface) is acceptable only in palatial Baroque interiors.
Multi-color painting turns molding into a work of art. Individual elements of the ornament (flowers, leaves, ribbons) are painted in different colors with fine brushes. Requires artistic skills or professional services.
Budget savings: material calculation and real figures
How much does it cost to decorate a room with molding yourself? Let's calculate using a living room example: four by five meters, ceiling height two meters seventy centimeters.
Ceiling cornice
Room perimeter — eighteen meters. Ceiling cornice is sold in two-meter strips. You will need nine strips plus one reserve strip in case of cutting errors — ten strips total.
Price of mid-range cornice (width eighty to one hundred millimeters, simple classic profile) — three hundred to five hundred rubles per strip. Total: ten strips at four hundred rubles each — four thousand rubles.
Adhesive: two to three three-hundred-milliliter cartridges. Price — three hundred rubles per cartridge. Total: nine hundred rubles.
Filler, primer, paint — another thousand rubles.
Total cost for cornice: six thousand rubles.
Floor skirting board
Same perimeter — eighteen meters minus the doorway (one meter) — seventeen meters. Skirting board also comes in two-meter strips — nine strips.
Price of skirting board with a height of one hundred to one hundred twenty millimeters — two hundred fifty to four hundred rubles per strip. Total: nine strips at three hundred rubles each — two thousand seven hundred rubles.
Glue, putty, paint — one thousand two hundred rubles.
Total cost for baseboards: four thousand rubles.
Moldings — decorative overlays of various profiles — are used to create wall panels. The classic scheme — dividing the wall into three tiers using horizontal moldings. The lower tier — panels 90-120 cm high from the skirting board. The middle — main zone up to the frieze. The upper — frieze 30-50 cm below the cornice.
If creating a panel from moldings, for example four rectangles on long walls, you will need approximately thirty to forty meters of molding.
Price of molding fifty to sixty millimeters wide — two to three hundred rubles per two-meter strip. Twenty strips at two hundred fifty rubles — five thousand rubles.
Finishing materials — one and a half thousand rubles.
Total cost for moldings: six and a half thousand rubles.
Final estimate for the room
Cornice — six thousand, baseboard — four thousand, moldings — six and a half thousand. Total material expenses — sixteen and a half thousand rubles.
Work by a professional crew is estimated at approximately the cost of materials or higher — another fifteen to twenty thousand. DIY installation saves this money.
Tools (if buying from scratch): mounting gun — five hundred rubles, hacksaw — four hundred rubles, miter box — three hundred rubles, level — seven hundred rubles, spatulas-brushes-sponges — five hundred rubles. Total — two thousand four hundred rubles. They remain and are used in the future.
Savings amount to twelve to eighteen thousand rubles for one room. For an apartment with three to four rooms — fifty to seventy thousand rubles.
Common beginner mistakes and how to avoid them
Even following instructions, beginners make mistakes. Knowing typical problems helps prevent them.
Insufficient surface preparation
The desire to save time pushes one to start gluing immediately, skipping the cleaning and priming stages. The result — the molding peels off after a month or two. The surface must be clean, dry, strong, and primed. This is an axiom.
Savings on adhesive
A thin, intermittent strip of glue will not provide reliable fixation. Glue should be applied in a continuous strip five to seven millimeters thick. Squeezed-out excess is removed, but it's better to overdo it than underdo it.
Inaccurate miter cutting
Cutting at forty-five degrees requires precision. A deviation of even a couple of degrees creates a noticeable gap in the joint. Use a quality miter box or miter saw. Check the room angle with a square — if it's not ninety degrees, adjust the cut.
Weak fixation until the glue sets
Glued, held for ten seconds, released — the element slowly slides down. The glue sets in thirty to sixty seconds, you need to hold or secure it with painter's tape all this time. Don't rush to move to the next element.
Painting without primer
Paint applies unevenly, shines inconsistently, puttied areas stand out. Primer is mandatory; it evens out absorbency and ensures uniformity of the finish coating.
Frequently asked questions
Can polyurethane molding be glued over wallpaper?
Not advisable, but possible if the wallpaper is non-woven, fresh, and firmly glued. Paper wallpaper, especially old, may peel off the wall under the weight of the molding. It's better to remove wallpaper in the installation area or re-wallpaper after installing the molding.
How long does polyurethane adhesive take to dry?
Initial setting (can release the element) — thirty to sixty seconds. Working strength (can remove painter's tape without fear of it falling off) — four to six hours. Full polymerization (maximum strength) — twenty-four hours. Can be painted twenty-four hours after installation.
How to miter a cornice in a corner if the angle is not ninety degrees?
Measure the actual angle with a protractor. Divide in half — these are the miter angles for each of the two strips. For example, an eighty-eight degree angle — miter each strip at forty-four degrees. For accuracy, use a swivel miter box or a miter saw with an angle scale.
What to cut polyurethane molding with?
A metal hacksaw with fine teeth is a universal tool. For large volumes — a miter saw with a blade for plastic. A sharp knife is suitable for thin elements (moldings up to forty millimeters wide). The main thing is tool sharpness and smooth movements.
Can polyurethane be painted with oil-based paint?
Possible, but not advisable. Oil-based paints yellow over time, especially on white polyurethane. They have an odor during application and take a long time to dry (one to two days versus four hours for water-based paints). Water-dispersion and latex paints are preferable in every respect.
Is it necessary to mechanically fasten molding with dowels?
In most cases, no. High-quality adhesive on a prepared surface holds polyurethane securely. Mechanical fastening is required for very heavy elements (large rosettes with a diameter over eight hundred millimeters, decorative panels) or for installation on problematic substrates (old paint that cannot be removed).
How to care for polyurethane molding?
Minimal. Dust is removed with a dry soft cloth or brush. Every six months to a year, you can wipe it with a slightly damp sponge. Do not use aggressive cleaning agents (solvents, acids, alkalis) — they can damage the paint. If the paint has faded, renew it — prime and repaint.
Conclusion: Architectural expressiveness is accessible to everyone with STAVROS
DIYinstalling polyurethane moldingtransforms a standard room into an individual space with character. A ceiling cornice structures the vertical, visually raises the ceiling, and creates completeness. A floor skirting board frames the perimeter, protects the bottom of the wall, and adds neatness. Wall moldings form panels, dividing the wall plane into harmonious sections. A ceiling rosette becomes a compositional center, attracting the eye.
The installation technology is simple and accessible to people without construction experience. A minimal set of tools, a clear action algorithm, and the material's forgiving plasticity make the process comfortable. What's critical is carefulness, patience, and following the rules — qualities accessible to everyone.
The economic benefit of DIY installation is measured in tens of thousands of rubles per apartment. Materials account for half the cost, labor for the other half. By doing the work yourself, you pay only for materials, achieving a result identical to a professional one.
The company STAVROS has been operating in the architectural decor market for over twenty years, offering an extensive range of polyurethane molding for any interior solution. STAVROS collections include thousands of items — from minimalist modern profiles to lush Baroque ornaments, from compact moldings to large-format decorative panels.
Production is carried out on modern European equipment using high-quality polyurethane with a density of two hundred to two hundred fifty kilograms per cubic meter. This density provides an optimal combination of lightness (ease of installation), strength (durability), and sharpness of relief (aesthetics). Each mold undergoes multi-stage control — geometry, surface quality, and absence of defects are checked.
The range of STAVROS ceiling cornices includes over three hundred models. Width from thirty to three hundred millimeters. Styles: classic with modillions and dentils, neoclassical with laconic profiles, Baroque with lush ornaments, Art Nouveau with plant motifs, contemporary minimalism with geometric purity. There is a suitable model for every interior.
The collection of floor skirting boards includes models with a height from fifty to three hundred millimeters. High skirting boards (one hundred eighty to two hundred fifty millimeters) create a classic palace style. Medium (one hundred to one hundred twenty millimeters) are universal for most interiors. Low (fifty to eighty millimeters) are for contemporary minimalist spaces.
STAVROS wall moldings are available in widths from twenty to one hundred fifty millimeters. They allow creating endless variety of compositions — rectangular panels, vertical divisions, borders, frames. By combining moldings of different widths, complex multi-level compositions can be formed.
Ceiling rosettes with a diameter from two hundred to one thousand two hundred millimeters complement the collection. From elegant minimalist rings to monumental Baroque compositions with multi-tiered ornaments. The central hole is adapted to any diameter of wires and mounting units of standard chandeliers.
Corner elements, consoles, brackets, decorative panels, columns, and half-columns expand decorating possibilities. STAVROS offers comprehensive solutions — all elements in a unified stylistic key, coordinated in ornaments and proportions. This allows for a holistic interior design where every detail complements the others.
Ready-made design projects from STAVROS help visualize the result. The website features photographs of completed interiors using the company's products. You can see how specific cornices, skirting boards, and moldings look assembled, how they transform the space.
Consultation support is available at all stages. STAVROS specialists will help select models for your interior style, calculate the amount of materials considering the room perimeter and layout complexity, recommend adhesive and materials for finishing, and advise on installation technology. A call or online chat on the website — and professional help is available.
Delivery is organized throughout Russia. Molding is packaged in protective film, large orders are packed in cardboard boxes. Two-meter-long planks require careful transportation — STAVROS logistics partners have experience transporting such cargo and deliver safely.
Pickup from warehouses in Moscow and St. Petersburg allows receiving the order on the day of request. Showrooms present the main collections — you can see the elements in person, evaluate the sharpness of the relief, compare different models, and get samples for home fitting.
STAVROS pricing policy is focused on the optimal price-quality ratio. The company operates as a manufacturer, without intermediary markups. Bulk purchasing of raw materials, efficient production, and direct sales to the end consumer allow keeping prices at an accessible level with high product quality.
Choosing STAVROS molding for DIY installation, you get quality material, proven by thousands of completed projects. This is a solution for those who value beauty, understand the importance of details, and are ready to invest time in creating an individual interior. Architectural expressiveness, once available only to palaces, is now achievable in an ordinary apartment over a weekend, turning a house into a space with character, style, and soul.