


Article Contents:
- Stage One: Precise Measurements — The Foundation of Correct Calculation
- Room Perimeter: Measurement Methodology
- Ceiling Height: Why It's Needed
- Room Area: When It's Important
- Dimension Diagram: Document for Calculation
- Stage Two: Calculating Material Quantity — Error-Free Math
- Cornices: Basic Calculation and Margin
- Corner Elements: Ready-Made Solutions for Joints
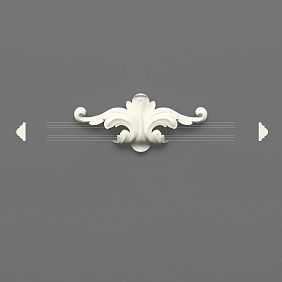
- Rosettes: Center of Ceiling Composition
- Moldings: Linear Decor for Zoning
- Overlays and Decorative Elements: Individual Accents
- Calculation Table: Bring Everything Together
- Stage Three: Material Choice — Polyurethane, Solid Wood, or MDF
- Polyurethane: Universal Leader
- Solid Wood: Classic and Warmth
- MDF: Compromise Between Polyurethane and Solid Wood
- Plaster: Tradition and Weight
- Polystyrene: Budget Minimum
- Material Comparison Table
- Stage Four: Logistics — How to Deliver Molding Intact
- Pickup: Savings and Control
- Courier Delivery: Convenience for Money
- Transport Companies: Delivery to Regions
- Packaging: Protection for Fragile Elements
- Cargo Insurance: Protection Against Risks
- Stage Five: Guarantees and Returns — Company Policy
- Manufacturer's Warranty: What It Covers
- Return of Quality Goods: Legislative Framework
- Return for Defects or Non-Conformity
- STAVROS Policy: Customer First
- Stage Six: Additional Materials for Installation
- Adhesive: The Foundation of Secure Mounting
- Paint: The Final Coating
- Tools: What You'll Need for Installation
- Consumables: Putty, Primer, Sealant
- Stage Seven: Final Check Before Ordering
- Final Checklist
- Placing an Order: Online or by Phone
- Prepayment or Payment Upon Receipt
- Frequently Asked Questions About Buying Ceiling Molding
- Conclusion: an informed purchase is a successful result

Ordering molding isn't like buying a carton of milk. It's an architectural decision that will remain on the ceiling for decades. A miscalculation means an extra linear meter of cornice you'll have to store in the closet. A shortage means a halted renovation, lost time, and an extra delivery. The wrong material choice means disappointment in six months when the decor yellows, warps, or falls off. How to avoid these problems? HowBuy ceiling moldingto get it right the first time, without overpaying or making mistakes?
Before you is a checklist — a step-by-step guide for those preparing to place an order. There's no theory for theory's sake here. Only specific actions: what to measure, how to calculate, what to look for when choosing a material, how to organize delivery, what guarantees to demand.Ceiling moldingcan transform an interior, but only if you approach the purchase systematically.
Seven stages from measurements to receiving the order. Each stage is a fork where you can make the right or wrong decision. Go through all seven correctly — you'll get perfectly fitting decor, install it without problems, and enjoy the result for years. Make a mistake at one — you'll get a headache. Let's begin.


Stage One: Precise Measurements — The Foundation of Correct Calculation
Molding is sold by linear meters (cornices, moldings), by the piece (rosettes, corner elements, decorative overlays), or by square meters (panels). To order the required quantity, precise room dimensions are needed.


Room Perimeter: Measurement Methodology
Perimeter is the sum of the lengths of all walls. For a rectangular room: two long walls plus two short walls. But real rooms are rarely perfectly rectangular. Niches, protrusions, bay windows, columns, built-in wardrobes — all complicate the calculation.
Tools: tape measure (at least five meters, preferably a laser rangefinder), sheet of paper, pencil. Draw a top-down plan of the room — a simplified diagram where each wall is represented by a line. Measure each wall separately, record the dimensions on the diagram. Don't round — record precisely: four meters twenty-three centimeters, three meters ninety-seven centimeters.
Niches and protrusions are accounted for separately. If a wall has a niche thirty centimeters deep and one meter wide, the niche has three additional segments: left side wall, back wall, right side wall. Measure each, add to the total perimeter.
Bay windows (protruding parts of a room with windows) have a complex shape — a polygon instead of a straight wall. Measure each facet of the bay window separately, add them up. This is important for calculating cornices — they will run along the entire contour, including the bay window.
Doors and windows — a debatable question. The cornice runs along the perimeter of the walls under the ceiling, so openings are usually not subtracted from the total length. But if you plan to use cornices around windows (like casings at ceiling level) or around door openings — these are additional meters that need to be accounted for separately.
Our factory also produces:


Ceiling Height: Why It's Needed
Measure ceiling height from floor to ceiling at several points in the room (ceilings aren't always level, especially in old houses). Record the average value. Why is this needed when ordering ceiling molding?
Height affects the choice of cornice profile. Low ceilings (two meters forty — two meters sixty) require narrow cornices five — eight centimeters high. A wide cornice will visually lower the ceiling, creating a oppressive feeling. High ceilings (three meters and above) allow and require cornices ten — twenty centimeters high. A narrow cornice on a high ceiling will get lost, won't be discernible from below.
Height determines the visibility of the decor. On a four-meter ceiling, small ornament details are indistinguishable. You need large, expressive relief. On a two-meter seventy ceiling, even thin lines are visible — you can choose elegant decor with fine details.
For rosettes, ceiling height is one of the parameters for calculating the optimal diameter (there was already an article on this, but I'll remind you: the higher the ceiling, the larger the rosette should be to produce the same visual impression).
Get Consultation
Room Area: When It's Important
Area is length multiplied by width (for a rectangular room). For complex shapes, the area is divided into simple figures (rectangles, triangles), calculated in parts, and summed.
Area is needed when ordering ceiling panels (coffers, decorative tiles), which cover not the perimeter, but the entire ceiling or part of it. It also influences the choice of the number of sockets (in a very large room, one socket may not be enough — several will be required, placed symmetrically).
Area is used to assess the scale of decor. A room of twelve square meters is an intimate space where restrained decor is appropriate. A room of fifty square meters is a ceremonial hall requiring monumental solutions.
Diagram with dimensions: a document for calculation
Combine all measurements into one diagram — a room plan indicating the length of each wall, ceiling height, area, location of windows, doors, niches, protrusions. This diagram is the basis for calculating the quantity of materials. Without it, the calculation will be approximate, with a high probability of error.
The diagram can be drawn by hand on graph paper or created in a simple graphics editor. Accuracy of data is important, not beauty. Save the diagram — it will be useful when communicating with the manager of the company where you will order the molding.
Stage two: calculating the quantity of materials — mathematics without errors
Measurements are done. Now translate them into a specific quantity of products: how many linear meters of cornices, how many corner elements, how many sockets, moldings, overlays.
Cornices: basic calculation and reserve
Cornices are sold in standard-length segments — usually two meters (less often two and a half meters, three meters). You buy whole segments and cut them on-site.
Basic calculation: the room perimeter is divided by the length of one segment, the result is rounded up to a whole number. A room with a perimeter of fourteen meters: fourteen divided by two equals seven segments. A room with a perimeter of sixteen meters: sixteen divided by two equals eight segments.
But this does not account for waste when cutting corners. Cornices are cut at forty-five degrees in corners. Each corner — two cuts (one on the right end of one segment, the second on the left end of another). When cutting, a length equal to the width of the cornice multiplied by the square root of two is lost (geometry of a right triangle). For a cornice ten centimeters wide, the loss per corner is about fourteen centimeters total.
A room with four corners — a loss of about fifty-six centimeters (fourteen multiplied by four). This is almost an entire additional segment for every thirty meters of perimeter. Add one or two segments for waste to the basic calculation — this is a technological reserve necessary for installation.
Consider complex corners. If the room has internal corners (ordinary, where walls converge inward) and external corners (on protrusions, columns, bay windows), consumption increases. External corners require more material — segments must overlap the protrusion, extending onto the side surfaces.
Corner elements: ready-made solutions for joints
Many manufacturers offer ready-made corner elements — special parts that are installed in corners instead of cutting the cornice at forty-five degrees. This simplifies installation, reduces waste, improves appearance (factory joints are always neater than manual ones).
Corner elements are available for internal and external corners. They must match the cornice profile — in height, width, ornament pattern. When buying cornices, immediately find out if there are corner elements for them, how many you will need.
Calculation is simple: count the number of corners in the room (usually four for a rectangular room), order the corresponding number of corner elements. If there are protrusions, niches — add corners for them.
Corner elements are not mandatory — you can manage with cutting. But if you are not confident in your skills of cutting at an angle or want guaranteed even joints, corner elements are a good investment.
Sockets: the center of the ceiling composition
Sockets are sold individually. For most rooms, one socket in the center of the ceiling is sufficient. Large rooms (from forty square meters) may require several sockets — one above each functional zone (for example, above the dining area and relaxation area in a living-dining room).
Choosing the socket diameter is a separate topic, covered in detail in the previous article. Let me remind you of the basics: the diameter is calculated by the formula (length plus width of the room, divided by seven) with adjustments for ceiling height and chandelier size.
When ordering a socket, clarify if there is a central hole for wiring. Some models come solid — the hole will have to be cut out yourself. Others have a ready-made hole of standard diameter (usually five — ten centimeters). Ensure the hole size fits your chandelier.
Moldings: linear decor for zoning
Moldings are linear decorative elements used to create panels on the ceiling, frame zones, geometric compositions. If you plan such decor, the quantity calculation depends on the design project.
The simplest option is rectangular panels on the ceiling. Draw a diagram: how many panels, their sizes. Calculate the perimeter of each panel, sum them, add ten to fifteen percent for cutting and possible errors. This is the required number of linear meters of moldings.
Moldings are sold in segments of the same length as cornices (two — two and a half meters). Divide the required number of meters by the segment length, round up, get the number of segments to order.
Complex compositions (circles, ovals, curvilinear shapes) require flexible moldings. They are more expensive than regular ones, sold in the same length. Calculation is similar: length of the curved line (measured from the diagram or calculated mathematically for a circle) plus reserve.
Overlays and decorative elements: individual accents
Overlays, medallions, corner pieces, ornaments are sold individually. Their quantity is determined by the design. If you plan to place overlays in the corners of ceiling panels — count the number of corners. If you want to create a symmetrical composition of several elements around the socket — determine the number of elements in the composition.
No formulas here — just your vision of the final result. It's better to create a sketch (even a schematic one) of the desired ceiling design, and count the number of each type of element on the sketch.
Calculation table: bring everything together
Create a table with product names and quantities:
| Item Name | Unit of measurement | Calculated quantity | Reserve (%) | Order (pcs/m) |
|---|---|---|---|---|
| Ceiling cornice | linear meter | 14 м | 15% | 8 segments of 2 m each |
| Internal corner elements | pieces | 4 | - | 4 pcs |
| Ceiling rosette with a diameter of 80 cm | pieces | 1 | - | 1 pc |
| Panel molding | linear meter | 24 м | 10% | 14 segments of 2 m each |
| Corner overlays | pieces | 12 | - | 12 pcs |
Such a table is a convenient tool for placing an order. You see the full picture, and the company manager immediately understands what you need.
Third stage: material selection — polyurethane, solid wood, or MDF
Polyurethane moldings— the most popular option for ceiling decor. But not the only one. Wood (solid), MDF, plaster, polystyrene — each material has its advantages and limitations.
Polyurethane: the universal leader
Polyurethane is a polymer material produced by casting in molds. It is lightweight (density about seven hundred kilograms per cubic meter — two to three times lighter than wood, ten times lighter than plaster), durable (does not chip, crumble, absorbs impacts), moisture-resistant (does not absorb water, does not deform from humidity).
Polyurethane is ideal for ceiling decor. Its low weight does not create a load on the ceiling, and installation is possible with adhesive without mechanical fasteners. Moisture resistance allows use in any rooms, including bathrooms, kitchens, and swimming pools. Durability guarantees longevity — decades without deformation or cracks.
The detailing of polyurethane products is high — casting in molds allows reproduction of the finest ornament details. High-quality polyurethane in relief clarity is not inferior to plaster and surpasses wood (where detailing is limited by carving capabilities).
Paintability is an important advantage. Polyurethane can be painted with acrylic and latex paints without primer. Any color, patina effect, gilding, silvering, imitation of stone or marble can be achieved.
The cost of polyurethane molding is lower than that of wood and plaster with comparable quality. This makes it accessible to a wide range of buyers.
Disadvantages? With improper installation (e.g., on undried plaster), detachment is possible. When exposed to open flame, polyurethane melts (but does not support combustion — the material is self-extinguishing). At very low temperatures (below minus thirty), it may become brittle (but this is not relevant for interior spaces).
Solid wood: classic and warmth
Wooden moldings— the choice for those who value the naturalness and tactile warmth of wood. Solid pine, oak, beech, ash — each species has a unique texture, color, and grain pattern.
Wood is heavier than polyurethane — density from five hundred (pine) to nine hundred (oak) kilograms per cubic meter. This creates limitations on element sizes (very large and heavy cornices require mechanical fasteners; adhesive is insufficient).
Wood is sensitive to humidity. It absorbs and releases moisture, expanding or contracting. In rooms with unstable humidity (bathrooms, kitchens without good ventilation), wooden decor may deform or crack. Protective coating (varnish, oil) and regular maintenance are required.
The detailing of wood carving is high but limited by technological capabilities. Hand carving allows for creating unique ornaments, but it is expensive and labor-intensive. Machine carving (CNC) is precise but limited to shapes that can be milled.
The cost of wooden molding is higher than polyurethane — from one and a half to five times depending on the wood species and processing complexity. Exclusive items made from valuable wood species with hand carving can cost ten to twenty times more than polyurethane counterparts.
When to choose wood? When the naturalness of the material is important, when the interior is built on texture contrast (wood + stone + metal), when the budget allows, when there is a humidity control system in the room.
MDF: a compromise between polyurethane and solid wood
MDF (medium-density fiberboard) — a board made of compressed wood fibers. MDF panels with decorative profiles are used as a more affordable alternative to solid wood.
MDF is lighter than solid wood, more stable (less reactive to humidity), cheaper. But it is less durable (the board can split upon impact), requires a protective coating (veneer, paint, lamination), and lacks natural wood grain.
MDF decor is suitable for budget projects where wood imitation is desired but funds for solid wood are lacking. For ceiling decor, MDF is used less often than for walls (where the risk of mechanical damage is higher).
Plaster: tradition and weight
Plaster molding is a historical classic. Before the invention of polyurethane, all molded decor was made of plaster. Plaster allows creating items of any complexity, casting in molds or sculpting by hand.
But plaster is heavy (density about two thousand kilograms per cubic meter — three times heavier than wood, ten times heavier than polyurethane). Installing plaster molding requires reinforced fastening, often impossible on drywall or stretch ceilings.
Plaster is fragile — chips upon impact, crumbles during careless transportation. Plaster absorbs moisture, becomes soggy, develops mold — use in damp rooms is excluded.
The cost of handmade plaster items is high. Mass-produced plaster (casting in molds) is comparable in price to polyurethane but has all the listed drawbacks.
Plaster is chosen for museum restorations (where historical authenticity is required) or exclusive projects with custom sculpting. For standard renovations, polyurethane is preferable in all parameters.
Polystyrene foam: budget minimum
Polystyrene foam (expanded polystyrene) cornices are the cheapest option. Polystyrene foam is the lightest (density twenty to forty kilograms per cubic meter), can be cut with a knife, and glued to any surface.
But polystyrene foam is fragile, breaks easily, and crumbles. The relief on polystyrene foam is shallow, detailing is low — looks acceptable from a distance, roughness is visible up close. Polystyrene foam yellows over time and from UV light, melts from heat (cannot be installed close to light fixtures).
Polystyrene foam is a choice for rental apartments, temporary housing, extremely limited budgets. For permanent housing where quality and durability are important, it's better to choose polyurethane.
Material comparison table
| Material | Weight | Moisture resistance | Strength | Detailing | Cost | Durability |
|---|---|---|---|---|---|---|
| Polyurethane | Lightweight | High | High | High | Medium | 20-30 years |
| Solid wood | Medium | Medium | High | Medium | High | 30-50 years |
| MDF | Medium | Medium | Medium | Medium | Low | 15-25 years |
| Plaster | Heavy | Low | Low | High | High | 50-100 years |
| Polystyrene foam | Very light | Medium | Very low | Low | Very low | 5-10 years |
Step four: logistics — how to deliver molding intact
Molding is fragile cargo. A cornice can break if dropped, a rosette can crack, ornamentation can chip off. Proper packaging and delivery are critical.
Pickup: savings and control
Pickup from the manufacturer's warehouse is the most reliable and economical way to receive an order. You see the goods before receiving, can check completeness, inspect for defects, and immediately resolve any issues with possible defects.
For pickup, a vehicle is needed. Two-meter-long cornices won't fit in a passenger car — you need an estate car with foldable rear seats, a minivan, or a microbus. Large rosettes (one meter in diameter or more) also require a spacious trunk.
Care is important during loading. Cornices should be placed horizontally, without bending. Rosettes — face up, without heavy items on top. If transporting several cornice sections, place soft material (cardboard, foam, bubble wrap) between them so they don't knock against each other during road vibrations.
Pickup is possible if the manufacturer's warehouse is in your city or within reasonable reach (up to one hundred kilometers). If the warehouse is in another region, pickup is impractical — transportation costs will exceed delivery costs.
Courier delivery: convenience for money
Courier delivery is the optimal option for city dwellers without a car. The goods are brought to your door, and help is provided to carry them upstairs (if delivery with lifting is ordered).
The cost of courier delivery depends on the city, weight, and volume of the cargo. In Moscow and St. Petersburg, delivery of an order weighing up to fifty kilograms typically costs from five hundred to two thousand rubles. In the regions — from three hundred to one and a half thousand. Lifting to the floor is paid separately (from one hundred rubles per floor).
When receiving delivery, inspecting the goods upon receipt is important. Do not sign acceptance documents until you have checked completeness and integrity. Open the packaging, inspect each item. If you find a chip, crack, or shortage — record it in the acceptance report, call a company representative to file a complaint.
Some companies offer free delivery for orders over a certain amount (often from ten to fifteen thousand rubles). This is beneficial — saving from five hundred to two thousand.
Transport companies: delivery to regions
If you live in a city where there is no representative office or warehouse of the desired manufacturer, the goods are delivered by a transport company (TC). TCs pick up the cargo from the sender's warehouse, transport it to your city, and deliver it to a terminal or to your home (for an additional fee).
Popular TCs: CDEK, Boxberry, PEC, Delovye Linii, Baikal Service. The cost depends on weight, volume, and distance. For molding weighing twenty kilograms and a volume of half a cubic meter from Moscow to Yekaterinburg, delivery costs about one to two thousand rubles, with a timeframe of five to seven days.
The risk of damage during TC delivery is higher than with courier delivery. The cargo is reloaded several times, and terminals do not always handle fragile cargo carefully. Therefore, quality packaging is critical.
Packaging: protection of fragile elements
Proper packaging is a guarantee of product integrity. Professional manufacturers package molding so that it can withstand transportation without damage.
Cornices are packaged in film or cardboard tubes. The ends of cornices (where the relief is most prone to chipping) are protected with foam or cardboard corners. Several cornices are bundled together, and the bundle is wrapped in stretch film.
Rosettes are packaged individually. The front side (with relief) is protected with soft material (bubble wrap, foam polyethylene), the rosette is placed in a cardboard box with filler (foam crumbs, air pillows), which absorbs shocks.
Small elements (corner trims, decorative parts) are packaged together in a common box with dividers to prevent them from hitting each other.
When receiving goods, pay attention to the condition of the packaging. Crushed boxes, torn film, signs of impact — these are indicators of possible internal damage. Open and check immediately, in the presence of the courier or TC representative.
Cargo insurance: protection against risks
For delivery of an expensive order (from fifty thousand rubles), cargo insurance makes sense. Most TCs offer this service for three to five percent of the declared value of the cargo.
If the cargo is damaged, insurance compensates for the cost (fully or partially, depending on the insurance terms). Without insurance, the TC compensates only at minimum rates (usually no more than a few hundred rubles per kilogram).
Insurance makes sense for long-distance deliveries (from one thousand kilometers), for ordering exclusive items (which cannot be quickly reordered), and for delivering large volumes.
Stage five: guarantees and returns — company policy
Before ordering, clarify the warranty and return conditions. What to do if the product does not fit, turns out to be defective, or was damaged during delivery?
Manufacturer's warranty: what it covers
The warranty on molding usually covers manufacturing defects: uneven relief, voids in the material, deformations, chips, cracks that did not arise due to the buyer's fault.
The warranty period — from one year to five years depending on the manufacturer and material. Polyurethane molding is usually guaranteed for two to three years. Wooden — for one to one and a half years (wood depends on storage and operating conditions, long-term warranty is difficult).
The warranty does not cover damage during transportation (if the buyer organized the delivery independently), damage during installation (incorrect cutting, careless handling), natural changes (darkening, patina, micro-cracks from aging), damage from improper use (exposure to aggressive chemicals, open flame, mechanical impacts).
If a factory defect is discovered, contact the seller with photographs of the defect, a description of the problem, and a copy of the receipt. If the defect is recognized as a warranty case, the product will be replaced or money will be refunded.
Return of quality goods: legal framework
According to Russian legislation, goods of proper quality can be returned within fourteen days from the date of purchase if they do not fit in size, shape, color, or configuration. The condition — the product has not been used, the original packaging is preserved, and there is a receipt.
For molding, this means: if you ordered a cornice, it arrived intact, but you did not like the relief (it turned out to be too large or too small), you can return it within fourteen days. The main thing — do not install, do not cut, preserve the packaging.
Some companies extend the return period to thirty days or offer an exchange for another model without a refund. Clarify the specific seller's policy.
An important nuance: return is possible if the product was not made to order. Custom items (non-standard sizes, exclusive ornament, manufacturing according to the customer's sketch) are not subject to return if they are of proper quality.
Return for defects or non-conformity
If the product arrives defective (cracks, chips, deformations) or does not match the order (wrong size, wrong model, shortage), return or exchange is mandatory regardless of the timeframe.
Procedure: drafting a report on identified defects, photo documentation, sending a claim to the seller. The seller is obliged to review the claim within ten days, replace the product, or refund the money.
If a defect is discovered during delivery (in the presence of the courier or transport company representative), the report is drawn up on the spot, and the product is not accepted. This is the fastest option — the seller immediately sends a replacement.
If a defect is discovered after acceptance (you signed the documents, the courier left, then opened the packaging and found a defect), the process is more complicated. You will have to prove that the defect existed before receipt and did not arise due to your fault. Therefore, it is important to inspect the product upon receipt.
STAVROS policy: customer priority
STAVROS guarantees the quality of all products. The warranty period for polyurethane molding is three years, for wooden products — two years. The warranty covers all manufacturing defects.
If a defect is discovered, STAVROS replaces the product at its own expense, including re-delivery. If replacement is impossible (model discontinued), a refund is issued.
STAVROS accepts returns of quality products within thirty days (twice the legal period) if the product does not fit. Condition — preservation of the product's appearance, packaging, and absence of installation marks.
Custom orders (made according to customer sketches, non-standard sizes) are not subject to return, but in case of manufacturing defects, they are also replaced.
STAVROS technical support helps calculate material quantities, select suitable models, and provides installation recommendations. Consultations are free, available by phone, email, and online chat on the website.
Stage six: additional materials for installation
Molding is not the entire order. For installation, you will need glue, paint (if you plan to paint), and tools. It's better to order everything at once so you don't have to run around stores later.
Glue: the foundation of reliable fastening
Polyurethane molding is installed with polymer glue. The best options are MS-polymer (modified silane) adhesives: Tytan Professional, Makroflex WhiteWash, Moment Crystal.
Glue consumption depends on the contact area of the element with the surface. For cornices, one package (three hundred milliliters) is usually enough for ten to fifteen linear meters. For rosettes — one package for three to five rosettes depending on the diameter.
When ordering molding, order glue with a reserve. Running out of glue during installation is an unpleasant situation that requires stopping work and going to the store.
Wooden molding is installed with wood glue (PVA, polyurethane) plus mechanical fasteners (finish nails, screws). Wood glue is different and incompatible with polyurethane.
Paint: finishing coating
Polyurethane molding is supplied in white, ready for painting. If you plan to paint it a different color or create decorative effects, you will need paint.
Water-based acrylic and latex paints are suitable. They are elastic (do not crack with micro-movements of the molding), easy to apply, dry quickly, and odorless.
Paint consumption depends on the relief of the decor. Smooth elements require less paint (one hundred to one hundred fifty grams per square meter). Relief elements — more (up to three hundred grams per square meter, as paint fills the recesses).
For decorative effects (gilding, silvering, patina), special paints and enamels are used. Their consumption is lower — usually fifty to one hundred grams per square meter is enough (applied in a thin layer on the protruding parts of the relief).
Tools: what you will need for installation
Minimum set of tools for installing ceiling molding:
-
Miter box (tool for cutting at an angle) and fine-toothed saw — for cutting cornices at forty-five degrees in corners.
-
Tape measure and pencil — for marking.
-
Putty knife or glue gun — for applying glue.
-
Laser level or long level — for controlling horizontality when installing cornices.
-
Fine-grit sandpaper — for cleaning joints after installation.
-
Acrylic putty — for sealing joints and minor defects.
If painting is planned, you will additionally need brushes (for relief elements) or a roller (for smooth surfaces), painter's tape (to protect the ceiling and walls from paint), and a paint tray.
Tools can be purchased separately or rented (a miter box and laser level are often available for rent at hardware stores — this is cheaper than buying if you only need them once).
Consumables: putty, primer, sealant
For perfect joints between cornice sections, acrylic putty is needed. It is used to fill gaps (which are inevitable even with careful cutting), the putty is sanded after drying — the joint becomes invisible.
Primer is needed if you are installing molding on a porous surface (plaster, drywall). The primer strengthens the base and improves adhesive adhesion. One liter of primer is enough to treat twenty to thirty square meters of ceiling.
Acrylic sealant is used to fill gaps between the molding and the ceiling/wall if the surface is uneven. The sealant is elastic, can be painted after drying — the gap becomes unnoticeable.
Step seven: final check before ordering
All steps are completed. The final check remains — to make sure nothing is forgotten, everything is accounted for.
Final check checklist
-
Is the room layout with dimensions prepared? Are all walls measured? Are niches, protrusions, bay windows accounted for?
-
Has the material calculation been done? Is the table with names and quantities ready?
-
Is the material selected? Have you decided: polyurethane, solid wood, or another option?
-
Are the models chosen? Do you know the article numbers or names of the needed cornices, rosettes, moldings?
-
Is the delivery method determined? Pickup, courier, transport company?
-
Is the delivery address clarified? Is the contact phone number current?
-
Are additional materials included in the order? Glue, paint, tools?
-
Are the warranty terms clear? Do you know what to do in case of defects or discrepancies?
-
Are the delivery times agreed upon? Do you understand when to expect the order?
-
Is the budget approved? Does the final cost (goods plus delivery) fit within your budget?
If the answer to all questions is 'yes' — you are ready to place the order. If at least one is 'no' — return to the corresponding step and fill the gap.
Placing the order: online or by phone
Most manufacturers offer placing orders online through the website or by phone through a manager. Online is faster, but a manager can provide additional recommendations, help with calculations, and suggest alternatives.
When ordering online, fill out the form carefully. Specify the exact quantity, correct article numbers, and current address. An error in one digit — the wrong model will arrive or the wrong quantity.
When ordering through a manager, explain the task in detail, send the room layout with dimensions (via email or messenger), and ask clarifying questions. A good manager will double-check your calculation, point out possible errors, and suggest optimal solutions.
Prepayment or payment upon receipt
Payment terms vary. Some companies work with full prepayment (especially for delivery to regions by transport companies). Others accept partial prepayment (thirty to fifty percent), with the remainder upon receipt. Still others deliver with payment upon receipt (but usually only in large cities and only with courier delivery).
Full prepayment — a risk for the buyer. You pay before receiving the goods; if something goes wrong (goods are not delivered, wrong items are delivered, defective items are delivered), refunds may be delayed. Choose this option only when ordering from trusted companies with a good reputation.
Payment upon receipt — minimal risk. You inspect the goods before payment; if something is wrong — you don't accept, you don't pay. But this option is not always and not everywhere available.
Partial prepayment — a compromise. The seller insures against unserious orders, the buyer does not risk the entire amount.
Frequently Asked Questions About Buying Ceiling Molding
How do I figure out how much cornice I need if the room has a complex shape?
Draw a top-down plan of the room, as close to the real proportions as possible. Measure each wall (even short sections between protrusions), write down the dimensions on the diagram. Add up all the dimensions — this is the perimeter. Add ten to fifteen percent for cutting corners and possible errors. Divide by the length of one cornice piece (usually two meters), round up — this is the number of pieces to order.
Can I combine molding made from different materials on one ceiling?
Technically yes, but visually challenging. Polyurethane and wood have different textures and reflect light differently. If you paint them the same color, the difference will be less noticeable. But it's usually recommended to choose one material for all ceiling decor — this creates integrity.
What should I do if after installation I discover I'm missing one piece of cornice?
Order an additional piece. Most manufacturers keep leftover collections for several years, so you can reorder the same model. If the model is discontinued, look for one as similar in profile as possible or use the missing section in the least noticeable place (e.g., behind a wardrobe), replacing it with a similarly styled cornice.
Is it mandatory to use corner pieces or can I cut the cornice myself?
Not mandatory, but advisable. Corner pieces simplify installation (no need for precise 45-degree cuts), improve appearance (factory joints are smoother than manual ones), and save material (no waste from cutting). If you have no experience cutting angles or lack a miter box — corner pieces will greatly simplify the task.
Yes, but with features. The cornice is glued not to the stretch ceiling (PVC film will not support the weight, adhesive does not hold on film), but to the wall (the cornice is installed before or after stretching the ceiling - the top edge of the cornice touches the ceiling but is not glued to it, it is glued only to the wall). Backlighting behind the cornice (LED strip between the cornice and ceiling) is created easily - the cornice is set back from the ceiling by three to five centimeters, the strip is mounted in the gap, light is directed at the ceiling - creating a floating ceiling effect.
With limitations. Cornice can be glued to the wall (not the ceiling), it will visually separate the wall from the ceiling, but is not attached to the stretch fabric. A rosette is mounted on the base ceiling before installing the stretch ceiling, then a hole is made in the stretch fabric. Or a special overlay rosette is used, which is glued onto the stretch ceiling through a thermal ring. For details, check with stretch ceiling installers.
How long does delivery to the regions take?
Depends on distance and the transport company. Within one federal district (Moscow — Tver, Moscow — Voronezh) — three to five days. To neighboring districts (Moscow — Yekaterinburg, Moscow — Kazan) — five to seven days. To remote regions (Moscow — Novosibirsk, Moscow — Vladivostok) — seven to fourteen days. Express delivery is possible for an extra fee, reduces the time by half, but costs one and a half to two times more.
What should I do if the product arrives damaged?
Do not sign the acceptance certificate. Document the damage with photos in the presence of the transport company representative or courier, draw up a damage report. Contact the seller, send the photos and a copy of the report. The seller is obligated to replace the product or refund the money. If you signed the acceptance certificate without inspection, it's harder to prove the damage occurred before receipt — so always inspect the goods upon receipt.
How to store molding before installation if the renovation is delayed?
Store in a dry room at temperatures from plus five to plus thirty degrees Celsius. Cornices — horizontally on a flat surface or vertically against a wall (do not lean at an angle — they can deform). Rosettes — horizontally with the front side up, without heavy objects on top. Avoid direct sunlight (polyurethane may yellow), high humidity (packaging may get damp), and temperature fluctuations. Under proper conditions, molding can be stored for years without changes.
Can I paint the molding before installation?
You can, but it's not recommended. Painted elements are harder to join — paint on the ends interferes with tight fitting. Joints will need to be filled with putty, the putty will need to be repainted, and color differences may occur. It's easier to install white molding, fill the joints with putty, then paint everything as a whole — you'll get a uniform finish without visible seams.
Which molding is better for the kitchen — polyurethane or wood?
Polyurethane. The kitchen is a room with high humidity, temperature fluctuations, and grease vapors. Polyurethane is moisture-resistant, does not absorb grease, and is easy to clean. Wood absorbs moisture, can warp, grease penetrates the pores, and over time wood darkens. If you want a wood imitation — choose polyurethane molding with a wood texture, painted to resemble oak, walnut, or other species.
Do I need to prime the ceiling before installing molding?
Depends on the type of ceiling. Concrete or plastered ceiling — prime (primer strengthens the surface, improves adhesive bond). Painted drywall ceiling — you may not need to prime if the paint is firmly adhered. Stretch ceiling — priming is not required (molding is not glued to the stretch fabric). Old ceiling with peeling paint or plaster — be sure to clean, prime, otherwise the molding will fall off along with the old coating.
What is more cost-effective — to order with a surplus or exactly according to calculation?
With a small surplus (ten to fifteen percent above calculation). Cutting corners, possible errors in measurements or installation, accidental damage — all this may require additional material. If you order exactly what you need, one mistake is enough to run short. Reordering means additional delivery, renovation delays. A small surplus protects against this, leftovers can be used in other rooms or returned (if the seller accepts returns of unused goods).
Conclusion: An informed purchase leads to a successful result.
Purchaseceiling moldings— a process requiring attention to detail. The seven stages of the checklist protect against typical mistakes: incorrect calculations, unsuitable material, delivery damage, return problems. Go through them sequentially — get the perfect result.
Accurate measurements are the foundation. Without them, calculating quantity becomes guesswork. Spend an hour measuring, create a detailed diagram — this will save days and thousands of rubles that would go into fixing mistakes.
Correct quantity calculation saves money. Shortage stops renovation, surplus (if large) is wasted money. A ten to fifteen percent surplus is the golden mean between these extremes.
Material choice determines durability.polyurethane moldings— a universal solution for ninety percent of cases. Light, durable, moisture-resistant, affordable. Wood — for connoisseurs of naturalness, willing to pay more and care more attentively. Plaster — for historical restorations and exclusivity. Polystyrene foam — a compromise for a minimal budget.
Logistics ensures preservation. Quality packaging, careful transportation, inspection upon receipt — the three pillars on which cargo integrity rests. Saving on delivery can result in a cracked rosette or broken cornice, the repair of which costs more than what was saved.
Guarantees protect your interests. Knowing the return conditions and warranty obligations gives you confidence: if something goes wrong, you are protected. Choose manufacturers with transparent warranty policies, avoid those who evade responsibility.
STAVROS company is an example of a responsible approach to customers. Three-year warranty onpolyurethane products, thirty-day return period (twice the legal requirement), free technical support at all stages from selection to installation. Wide range ofceiling cornices, rosettes, moldings, overlays in classic and modern styles. Manufactured from European polyurethane on modern equipment — quality proven by thousands of completed projects.
STAVROS delivers orders throughout Russia. Moscow and St. Petersburg — next-day courier delivery. Regional cities — by transport companies in three to fourteen days depending on distance. Pickup from warehouses in Moscow — for those who want to collect the order personally, check before receiving, save on delivery.
STAVROS technical support helps at every stage of the checklist. Doubting calculations — the manager will recalculate according to your scheme, suggest the optimal quantity. Don't know which material to choose — the designer will explain the differences, help you decide. Unsure about the delivery method — the logistician will offer the optimal option for your region. Questions about warranty — the lawyer will clarify the conditions.
Buy ceiling molding correctly — is not difficult. You need a system: measure, calculate, choose, order, receive, check. Seven stages, each of which is important. Skip one — risk a mistake. Complete all — get perfect decor that will turn an ordinary ceiling into an architectural element worthy of admiration.
The ceiling is the fifth wall of your home. It is visible every day, shapes the perception of space, affects mood. A white plane or a work of art — the choice is yours. Stucco makes the ceiling interesting, creates depth, adds nobility. Properly chosen, properly calculated, properly delivered, properly installed — it serves for decades, pleasing the eye and confirming the correctness of your decision.
Use this checklist. Follow it step by step. Do not skip stages, do not neglect details. The result will exceed expectations. Your home will gain character. Your ceiling will become a source of pride. And every time you look up, you will see not just a white surface, but the result of a thoughtful decision, quality materials, professional approach. A result that will stay with you for decades. A result you will enjoy every day. And it all starts with the right purchase. With a conscious choice. With the checklist you just completed.
STAVROS is a partner in creating beautiful interiors. Twenty years of experience, thousands of satisfied customers, hundreds of thousands of linear meters of stucco decorating homes across Russia. From compact apartments to palace mansions, from modest cornices to complex multi-tiered compositions — STAVROS implements projects of any complexity. Quality proven by time. Customer-oriented service. Prices accessible to everyone who values beauty and quality.
Start transforming your home with the ceiling. Order stucco. Use the checklist. Get a result you will be proud of. STAVROS is ready to help at every stage. From the first call to the last rosette. From measurements to final installation. From idea to implementation. Your home deserves the best. STAVROS will provide that best.


