


Article Contents:
- Why choosing a coating for stairs is critically important
- Specifics of various stair elements
- Types of coatings for wooden stairs: comparative analysis
- Wood varnishes: durable protection with gloss
- Oils and waxes: natural protection with tactile comfort
- Enamels and opaque paints: color without texture
- How to choose the right coating for your stairs
- Wood species and coating compatibility
- Intensity of use and coating selection
- Project budget and economic feasibility
- Wood preparation technology before painting
- Sanding: creating a perfect surface
- Degreasing coniferous wood
- Priming: foundation for durable coating
- Application techniques for various coatings
- Applying oil-wax: rubbing and polishing
- Varnishing: creating a transparent protective film
- Painting with enamel: creating an opaque colored coating
- Wooden baseboard painting: additional stair decor elements
- Common mistakes when painting wooden stairs
- Insufficient Surface Preparation
- Incorrect material selection
- Violation of application technology
- Frequently asked questions about painting wooden stairs
- Can stairs be painted in winter in an unheated house?
- How long should stairs not be used after painting?
- How often should stair coating be renewed?
- Can stair color be changed without complete resanding?
- Which coating is best for stairs with heated steps?
- Is special preparation needed for stairs made of thermally treated wood?
- How to protect a staircase during apartment renovation?
- Does the finish affect how much a staircase creaks?
- STAVROS: a partner in creating the perfect staircase

When it comes to transforming a wooden staircase, many mistakenly believe it's enough to simply buy the first can of paint they find and apply it with a brush. But professionals know: choosing the right finish for a staircase is an art, based on a deep understanding of materials, technologies, and operating conditions.Buy interior decor paint in Simferopolor any other city — is just the first step in creating a staircase that will delight the eye and serve for decades without losing its appearance. A wooden staircase is subjected to extreme loads — constant abrasion from shoe soles, heel impacts, humidity fluctuations, and exposure to ultraviolet light through windows. A properly chosen finish doesn't just decorate the wood; it creates reliable protection that extends the life of the structure many times over.


Why the choice of finish for a staircase is critically important
A staircase is not a decorative panel on a wall that you can contemplate from the side. It is a functional element that is subjected to mechanical impacts of incredible intensity every day. Imagine: a family of four makes an average of 30-40 ascents and descents per day. That's over 15,000 passes per year. Over ten years — 150,000. Each step is a point load of up to 100 kg on a small area of the tread. The wood wears down, bare spots form, the finish gets scratched and chipped. An incorrectly chosenInterior decorative paintbegins to deteriorate within just a few months of intensive use.
But wear is not the only problem. A wooden staircase operates under conditions of constant vibration. Each step creates elastic deformation of the tread, balusters, and handrails. A hard film finish cannot withstand such stress — microcracks appear, which quickly turn into visible defects. An elastic finish, capable of following the deformations of the wood, maintains its integrity for years. Temperature differences between the first and second floors can reach 5-7 degrees, causing the wood to expand and contract. The finish must compensate for these movements without cracking or peeling.


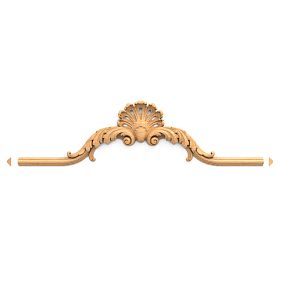
Specifics of various staircase elements
Painting wooden balustersrequires a different approach than painting treads. Balusters are not subjected to abrasion, but they suffer from soiling — dust settles on them, they are touched by hands when ascending, and splashes land on them during wet cleaning. The finish on balusters should be easy to clean, not absorb dirt, and retain its decorative appearance with frequent wiping. A matte or semi-matte finish hides minor soiling better than a glossy one, which turns every little spot into a glaring defect.
Painting a round wooden handrailis a separate story. The handrail is in constant contact with the skin of the hands. The surface should be pleasant to the touch, not slippery, not sticky even in the heat. A cold glossy varnish creates a plastic-like feel and is off-putting. A warm oil finish invites touch and provides tactile comfort. At the same time, the handrail must withstand constant friction from palms, not wear away, and not darken from ingrained dirt and sweat. The density of the handrail wood is critically important — soft woods quickly get indented by fingers, leaving dents.
Treads operate under the harshest conditions. Here, maximum wear resistance combined with anti-slip properties is needed. A tread that is too glossy turns into a skating rink, especially if there is moisture on shoe soles. The ideal tread finish retains a slight roughness, which provides reliable grip but does not hinder cleaning. The nosing part of the tread — the zone of maximum wear — requires additional protection or periodic local renewal of the finish.
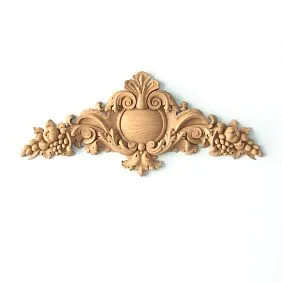
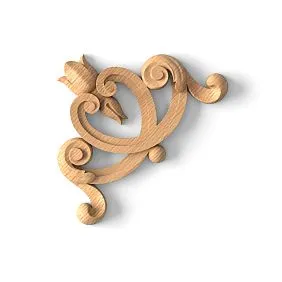
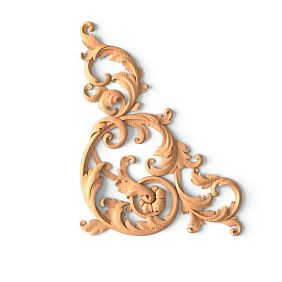
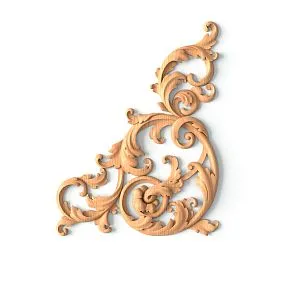
Our factory also produces:


Types of finishes for wooden staircases: a comparative analysis
The market offers dozens of types of wood finishes, but only a few categories of materials are suitable for staircases, capable of withstanding extreme operational loads. Each type of finish possesses a unique set of properties, advantages, and limitations.
Get Consultation
Wood varnishes: durable protection with gloss
Varnish creates a hard, transparent film on the wood surface, which reliably protects the material from moisture, dirt, and mechanical damage. A varnished surface is easy to clean with a damp cloth, does not absorb stains, and retains its decorative appearance for many years. Next-generation polyurethane varnishes possess phenomenal wear resistance — they withstand hundreds of thousands of passes without visible signs of wear. Alkyd-urethane varnishes combine strength with elasticity, not cracking under vibration and thermal deformation of the wood.
But varnish finish has significant drawbacks. A glossy surface is slippery, which reduces the safety of the staircase. Matte and semi-matte varnishes partially solve this problem but cannot completely eliminate slipping. Varnished wood loses the tactile warmth of solid wood — touching a varnished handrail creates a sensation of cold plastic, not living wood. Repairing a varnish finish is difficult — local renewal of a damaged area is impossible; complete re-sanding and re-varnishing of the entire element is required.
The varnishing technology requires professional skills. Varnish is applied in thin layers with interlayer drying and sanding. The slightest defects — drips, bubbles, unpainted areas — spoil the appearance and reduce the protective properties of the finish. Working under conditions of high humidity or low temperature leads to clouding of the varnish, loss of transparency. Therefore, varnishing a staircase is best entrusted to professionals with experience and equipment.
Oils and waxes: natural protection with tactile comfort
Oil finishes work fundamentally differently than varnishes. Oil does not create a surface film but penetrates the wood structure to a depth of 2-5 mm, filling pores and capillaries. Oil-impregnated wood retains vapor permeability, continues to breathe, regulating humidity in the room. The wood grain remains visible and tangible — touching an oiled handrail gives a sensation of contact with a natural material, warm and alive. Oil emphasizes the beauty of the wood grain, makes the color richer and deeper, and reveals the finest nuances of the texture.
Wax is added to oil to enhance protective properties. Wax particles crystallize in the wood pores, creating a hydrophobic barrier that repels water and dirt. Oil-wax possesses high wear resistance, comparable to polyurethane varnishes. At the same time, an oiled surface retains a slight roughness, providing an anti-slip effect without special additives. For staircases, this is a critically important property that makes oil-wax the preferred choice in families with children and elderly people.
The main advantage of an oil finish is the simplicity of local repair. If an area of a tread or handrail has worn down, it is enough to lightly sand the problem zone and apply a fresh layer of oil. After a few hours, the finish will dry, and the repaired area will be indistinguishable from the rest of the surface. Such an operation is impossible with varnish — visible boundaries of the repair zone will inevitably appear. Oil allows you to maintain the staircase in perfect condition for decades without a major renewal of the finish.
The disadvantage of oil finishes is the need for periodic renewal. Every 1-2 years, high-load areas (treads, handrails) require the application of an additional layer of oil to restore protective properties. This is a simple operation that the owner can perform independently without involving specialists. Balusters and less loaded elements are renewed less frequently — every 3-5 years. Such maintenance requires time but ensures impeccable appearance and protection of the staircase throughout its entire service life.
Enamels and opaque paints: color without texture
Opaque paints completely hide the wood grain, creating a uniform color surface. This approach is relevant when the wood species is not decorative enough (pine, spruce) or when the design project requires a specific color that does not correspond to the natural shades of the wood. White staircases in Scandinavian style, black in minimalist, colored in eclectic interiors — all this requires the use of opaque paints. Modern acrylic enamels have excellent adhesion to wood, high wear resistance, and elasticity.
Painting wooden balustersPainting balusters with enamel is a common practice. White balusters combined with dark treads made of stained oak create a classic contrast that never goes out of style. Black balusters against light walls form a graphic, modern image. Colored balusters allow the staircase to be integrated into a bright color concept of the interior. When painting with enamel, the wood species becomes less important — you can use budget pine or birch, hiding the flaws of the wood under a layer of paint.
Enamel painting technology requires thorough surface preparation. The wood is sanded to absolute smoothness—any roughness, dent, or scratch will show through the paint as a defect. Resinous areas of coniferous wood are degreased; otherwise, the paint won't adhere. Priming is mandatory—primer improves adhesion and prevents wood tannins from bleeding through, which can alter the color of light paint. Enamel is applied in 2-3 thin coats with intercoat drying and light sanding to remove raised fibers.
How to Choose the Right Finish for Your Staircase
Choosing the optimal finish depends on numerous factors—wood species, interior style, intensity of use, project budget, and the owner's personal preferences. There is no universal solution—what is perfect for one staircase may be unacceptable for another.
Wood Species and Finish Compatibility
Dense, fine-pored species—beech, hornbeam, maple—work excellently with any finishes. Their uniform structure ensures even oil absorption, an ideal base for varnish, and flawless smoothness under paint. Oak, with its large-pored structure, requires pore filling before varnishing—without this, the varnish sinks into the pores, creating an uneven surface. Oil works wonderfully on oak, deeply impregnating the wood and highlighting its expressive grain. Ash behaves similarly to oak—oil is preferable to varnish.
Coniferous species—pine, spruce, larch—are problematic for transparent finishes due to abundant resin and structural heterogeneity. Light and dark areas of annual rings absorb oil differently, creating a blotchy appearance. Varnish accentuates this heterogeneity, making it even more noticeable. The optimal solution for conifers is opaque paint, which hides texture flaws and creates an even color. If a transparent finish is still required, preliminary staining with a wood stain is necessary to even out the wood color.
Intensity of Use and Finish Selection
A staircase in a country house where a family with young children lives is subjected to daily intensive loads. Here, maximum wear resistance is needed—polyurethane varnish or oil-wax with a high solids content. A staircase in a city apartment of an elderly couple is used gently—more decorative but less durable finishes can be used. A grand staircase in a hallway that is hardly ever walked on requires only protection from dust and UV light—a light oil finish or thin-layer varnish is sufficient.
Caring for Wooden Balustersis determined by the type of finish. Varnished balusters are wiped with a damp cloth without detergents—aggressive chemicals damage the varnish. Oiled balusters are more tolerant of detergents, but it's better to use special products for oiled wood. Painted balusters are cleaned like any painted surfaces—with mild detergents without abrasives.
Project Budget and Economic Feasibility
Buy interior decor paint in Simferopolcan range from budget to premium prices. Inexpensive alkyd enamels cost 300-500 rubles per liter, professional polyurethane varnishes—1500-3000 rubles, premium oil-waxes from well-known European brands—3000-6000 rubles per liter. But the material price is only part of the total cost. Coverage is important—cheap paint requires 4-5 coats, expensive high-quality paint—2-3 coats. The consumption per square meter turns out to be comparable, and labor costs when working with cheap material are higher.
The long-term economic efficiency of a finish is determined by its durability and ease of maintenance. Cheap varnish begins to wear out after 2-3 years, requiring complete re-sanding and re-varnishing—a labor-intensive and costly operation. Premium oil-wax lasts 5-7 years, and local renewal of worn areas costs pennies and takes a couple of hours. Over a 15-year period of use, a cheap finish will require 5-6 major renewals, an expensive one—2-3 local ones. The total costs turn out to be lower for the initially more expensive solution.
Wood Preparation Technology Before Painting
The quality of the final finish is 70% determined by the quality of the base preparation. Even the most expensive paint won't hide defects of a poorly prepared surface but will reveal and accentuate them. Professional wood preparation is a multi-stage process requiring time, patience, and the right materials.
Sanding: Creating the Perfect Surface
Sanding removes the top contaminated layer of wood, eliminates unevenness, scratches, tool marks, and opens pores for finish absorption. The process begins with coarse sanding using 80-100 grit abrasive, which removes major defects. Sanding is performed along the grain—cross-grain sanding leaves deep scratches that will show through a transparent finish. After coarse sanding, the surface is treated with a medium 120-150 grit abrasive, which removes scratches from the previous stage.
Final sanding is performed with 180-220 grit abrasive and creates a perfectly smooth surface. For transparent finishes, this is sufficient, but under paint, even finer treatment is required—240-320 grit. The tiniest imperfections, invisible on oiled wood, appear on painted wood as bumps and dents. After each sanding stage, the surface is thoroughly dusted—dust left in the pores impairs absorption and finish adhesion.
Balusters and complex-shaped details are sanded by hand—a sander cannot reach recesses in the relief. Sandpaper is wrapped around a wooden block for flat areas and folded into several layers for recesses. Patience and care are more important than speed here—a poorly sanded baluster will look sloppy even under an expensive finish. Steps and handrails are sanded with an orbital or belt sander, which significantly speeds up the process and ensures uniform treatment.
Degreasing Coniferous Wood
Pine and spruce contain resin that appears on the surface as dark spots. Resin does not absorb oil, repels paint, and yellows under varnish, ruining the appearance. Degreasing removes resin from the wood's surface layer, preparing it for finish application. Special degreasing compounds based on solvents are applied to the surface and left for 10-15 minutes. The softened resin is wiped off with a rag, and the process is repeated until resinous areas are completely removed.
After degreasing, the wood is rinsed with water to remove solvent residues and completely dried. Wet wood raises the grain—tiny fibers stand up, creating roughness. After drying, light re-sanding with fine abrasive is required to remove the raised grain. Only then is the surface ready for priming or final finish application. Skipping the degreasing stage leads to uneven coloring and premature finish failure.
Priming: The Foundation for a Durable Finish
Primer performs several functions. It evens out the wood's absorption capacity, preventing excessive consumption of the final finish on porous areas. It improves adhesion, ensuring a strong bond between wood and paint. It blocks tannins and other coloring substances in the wood, preventing them from migrating into the final finish and altering its color. It creates an intermediate layer that compensates for differences in the expansion coefficients of wood and finish.
For oil finishes, priming is usually not required—the oil itself performs priming functions on the first coats. But on very porous species, the first coat of oil is diluted 1:1 with solvent for deeper penetration. For varnishes, special varnish primers are used, which fill pores and create an even base. For paints, adhesion primers are used, ensuring maximum bonding strength. Primer is applied in a thin, even coat, dried, and lightly sanded to remove raised grain.
Application Techniques for Various Finishes
Proper application technique is critically important for achieving a quality result. The same material can look magnificent or terrible depending on the application method. Professionals master numerous techniques, adapting them to the specific material and working conditions.
Applying Oil-Wax: Rubbing and Polishing
Oil is applied generously using a brush with short, stiff bristles or a special pad brush. The material is rubbed into the wood with vigorous movements along the grain. The goal is to drive the oil as deeply as possible into the pores, ensuring complete impregnation of the surface layer. After 10-15 minutes, when the oil has partially absorbed, excess is removed with a cotton cloth. Oil left on the surface forms a sticky film instead of a protective layer penetrating the structure.
The first coat absorbs most intensively, saturating the 'hungry' wood. After the first coat dries (6-12 hours depending on temperature and humidity), the second coat is applied. It absorbs less, creating a denser surface saturation. For highly loaded elements—steps, handrails—a third coat is recommended. Less loaded balusters and risers are sufficiently covered with two coats. Each subsequent coat is applied more thinly than the previous one.
After applying the final coat and removing excess, the surface is polished with a wool cloth or a special polishing machine with a soft felt wheel. Polishing compacts the surface layer, creates a light silky sheen, and reveals the full beauty of the wood grain. A properly oiled surface looks natural, feels warm and pleasant to the touch, smells like wood, not chemicals. Complete drying and curing of the coating takes 5-7 days, during which it is better not to use the stairs intensively.
Varnishing: creating a transparent protective film
Varnish is applied in thin coats using a high-quality brush with synthetic bristles or a sprayer. The brush is moved along the grain with smooth motions without pressure. The goal is to create an even coat without drips, bubbles, or missed spots. Excess varnish on the brush leads to drips, insufficient varnish leads to gaps. The optimal thickness of one coat is 60-80 microns, achieved by the correct amount of material on the brush and even distribution.
The first coat of varnish is often thinned with solvent by 10-15% for better penetration into the wood and to create a bonding layer. After the first coat dries (as indicated on the can, usually 6-24 hours), the surface is lightly sanded with fine-grit sandpaper (320-400 grit). This removes raised wood fibers and creates roughness for better adhesion of the next coat. Dust is thoroughly removed with a tack cloth—a regular rag does not remove fine dust completely.
The second and subsequent coats are applied with unthinned varnish. For treads and handrails, 3-4 coats are recommended; for balusters and risers, 2-3 coats are sufficient. Each coat is dried and sanded, except the final one. The final coat should create a perfectly smooth, glossy (or matte, depending on the varnish type) surface without brush marks or sanding marks. Professional varnishing is a complex operation requiring experience, patience, and proper conditions.
Painting with enamel: creating an opaque colored coating
Enamel is applied to a pre-primed surface. The primer must be completely dry and lightly sanded. The enamel is thoroughly stirred until homogeneous—pigments settle at the bottom of the can, and unstirred paint results in uneven color. The first coat—the base coat—is applied thinly and evenly, creating a foundation for subsequent coats. It may not completely cover the primer, leaving slight translucency—this is normal.
After the first coat dries (usually 4-6 hours for acrylic enamels, 12-24 hours for alkyd enamels), the surface is checked for raised wood fibers. If fibers are present, light sanding with fine-grit sandpaper and dust removal are performed. The second coat is applied more densely, ensuring complete coverage and color leveling. For rich dark colors, two coats are usually sufficient; for light and bright colors, a third coat may be needed.
The application technique for enamel differs from varnish with slower brush movements and thorough blending. Enamel is more viscous and dense than varnish, requiring more careful work. Brush marks should be blended until they disappear, creating an absolutely smooth surface. The final coat is applied with particular care—any defects will be visible on the finished staircase. Complete drying of enamel takes several days; full curing takes up to two weeks.
Wooden baseboard paintingSkirting boards: additional elements of staircase decor
A staircase does not exist in isolation—it is integrated into the space, interacting with walls, floors, and ceilings. Skirting boards that frame the stair flights should harmonize with the staircase's finish, creating a cohesive visual image.Wooden baseboard paintingSkirting boards are finished with the same materials and using the same technique as painting the main staircase elements.
A contrasting solution—white skirting boards combined with dark treads—creates a graphic, classic look. A monochrome solution—skirting boards matching the color of the treads—forms visual unity and calmness. Skirting boards can be painted to match the wall color, making them inconspicuous and drawing attention to the staircase itself. Or, conversely, highlight them with a contrasting color, turning them into a decorative element. The choice depends on the overall interior concept and personal preferences.
Common mistakes when painting wooden staircases
Experience shows that most problems with wooden staircase finishes arise from typical mistakes that are easy to avoid with the right approach. Knowing these mistakes saves time, money, and nerves.
Insufficient surface preparation
The most common mistake is trying to save time on preparation. A poorly sanded surface with scratches and unevenness will not be hidden by the finish but will become even more apparent. Skipping resin removal on softwoods leads to paint rejection on resinous areas. Insufficient dust removal after sanding creates a rough surface with embedded dust particles. All these defects can only be corrected by complete re-sanding and repainting—a labor-intensive and costly operation.
Incorrect material choice
Using an unsuitable finish is the second most frequent mistake. Furniture varnish on treads wears out in a few months—special parquet varnish is needed. Exterior paint indoors dries slowly and smells—interior paint is required. Cheap varnish without wear-resistant additives on handrails wears off from hands within a year. Opaque paint on beautiful oak hides the noble grain—oil would have been better. Choosing the right material for the specific task is critically important.
Violation of application technology
Thick coats of varnish instead of several thin ones lead to drips and slow drying. Insufficient intercoat drying causes blistering. Working at low temperature or high humidity creates varnish cloudiness. Skipping intercoat sanding worsens layer adhesion. All these violations reduce the quality and durability of the finish. Strict adherence to manufacturer instructions and proven techniques guarantees success.
Frequently asked questions about painting wooden staircases
Can you paint a staircase in winter in an unheated house?
Most finishes require a temperature of at least +10°C for application and +15°C for drying. At lower temperatures, varnish thickens, spreads poorly, and dries slowly. Oil crystallizes, turning into jelly. Paint does not form a strong film, remaining sticky. Working in winter is only possible with heating and maintaining a stable temperature of at least +18°C. Summer months are optimal for painting—warmth speeds up drying, open windows provide ventilation.
How long should you not use the staircase after painting?
This depends on the type of finish. Fast-drying acrylic enamels allow careful walking on the staircase after 12-24 hours. Alkyd materials require 48-72 hours. Oil-wax is ready for use after 24-48 hours, but full curing takes a week. Polyurethane varnishes require 5-7 days to cure fully. Ideally, the staircase should not be used intensively until the finish is fully cured—this ensures maximum durability.
How often should the staircase finish be renewed?
A quality varnish finish lasts 7-10 years with normal use. Oil-wax requires periodic renewal of high-traffic areas every 1-2 years. Painted surfaces retain their appearance for 5-7 years. But these figures depend heavily on intensity of use, material quality, and correct application. A staircase in a house with a large family wears out faster than in an apartment of a single person. Timely preventive maintenance extends the life of the finish many times over.
Can you change the color of a staircase without complete re-sanding?
If the staircase is finished with oil, re-toning is possible without removing the old finish. The surface is lightly sanded, dusted, and tinted oil of the new color is applied. A dark shade can be made darker, a light shade can be made darker. It is impossible to lighten dark oiled wood without complete re-sanding. A varnished staircase can only be repainted after complete removal of the old varnish. A painted staircase can easily be repainted a different color after light sanding to create roughness.
What finish is best for a staircase with heated treads?
The heating system creates temperature fluctuations that not all finishes can withstand. Hard varnish may crack due to wood expansion. Flexible polyurethane varnishes and oil-waxes perform stably. It is important to use materials specifically designed for heated floors. The manufacturer indicates this information on the label. The heating temperature should not exceed +27°C—higher temperatures are harmful to both the wood and the finish.
Is special preparation needed for a staircase made of thermally treated wood?
Thermowood has reduced absorbency due to pore sealing during high-temperature treatment. Oil absorbs worse than in regular wood, requiring longer exposure time and more intensive rubbing. Varnish applies well after standard preparation. Paint requires mandatory priming with an adhesion primer. Overall, thermowood doesn't create special problems for painting but requires consideration of its specific properties.
How to protect a staircase during apartment renovation?
A finished painted staircase is protected from damage and contamination during renovation. Steps are covered with thick cardboard or plywood secured with painter's tape. Balusters and handrails are wrapped with stretch film or bubble wrap. Heavy objects being carried shouldn't hit balusters. You can walk on the protected staircase, but avoid dropping tools and construction debris. After renovation, the protection is removed, and the staircase is wiped with a damp cloth.
Does coating affect staircase squeakiness?
Squeaking occurs from friction between wooden staircase parts when steps flex. Coating doesn't eliminate this problem—it's only on the surface and doesn't affect structural connections. To eliminate squeaking, you need to tighten fasteners, glue joints, install additional stiffening elements. However, dense oil coating may slightly reduce squeaking due to lubricating effect in micro-gaps. Varnish provides no effect. Squeaking is radically eliminated only by structural methods.
STAVROS: partner in creating the perfect staircase
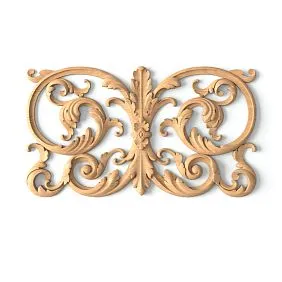
When it comes to creating a wooden staircase that will serve for generations, professionals turn to STAVROS—a recognized leader in manufacturing staircase elements from solid noble wood species. For over two decades, STAVROS has been turning dreams of beautiful and reliable staircases into reality, offering a full range of components—from turned balusters to carved newel posts, from straight handrails to curved ones, from simple treads to elements with complex profiles.
STAVROS works exclusively with selected solid oak, beech, and ash, purchasing wood from trusted European suppliers. Each batch undergoes strict quality control, where material with defects, non-uniform structure, or high moisture content is rejected. Chamber drying using individually developed regimes brings moisture to optimal 8-10%, ensuring product stability during operation. Modern CNC equipment reproduces the most complex profiles with jewelry precision.
But technology doesn't replace human craftsmanship. Carved elements are created manually by experienced carvers, turning wood into decorative art pieces. Finishing—sanding, tinting, varnishing—is performed with meticulousness that guarantees impeccable quality of each product. STAVROS offers professional painting service for orders over 150 thousand rubles—your staircase elements will be delivered ready for installation, with perfect coating applied according to all technological rules.
STAVROS assortment includes thousands of items—balusters for staircasesfrom classic turned to exclusive carved, newel posts with various finials,handrailsstraight and curved handrails, treads, risers, decorative elements. A complete kit for creating staircases of any complexity—from simple straight to spiral with carved decor. Custom manufacturing allows producing elements according to your dimensions and sketches, realizing unique design projects.
STAVROS technical support accompanies the client at all stages. Specialists will help calculate required element quantities, suggest optimal construction, recommend suitable materials and coatings. Years of experience working with wood, thousands of completed projects, positive client feedback—guarantee your staircase's success. Choosing STAVROS means choosing a partner for whom quality isn't a marketing slogan but daily practice tested by time. This is an investment in your home's beauty, reliability, and safety that will delight you and your loved ones for many decades.


