


Article Contents:
- What Are Wooden Profiles and Why They Are Perfect for DIY Furniture
- Basic Tools and Materials for the Job
- Tools
- Materials
- Project 1: Mirror Frame from Carved Moldings
- Choosing the Molding
- Material Calculation
- Manufacturing
- Project 2: Bed Headboard with 3D Decoration
- Concept
- Materials
- Manufacturing
- Project 3: Decorative Panels on Furniture Fronts
- Concept
- Materials
- Manufacturing
- Project 4: Coffee Table from Cornice and Plywood
- Concept
- Materials
- Manufacturing
- Project 5: Wall Shelf with Decorative Brackets
- Concept
- Materials
- Manufacturing
- Finishing Techniques: From Natural Wood to Vintage
- Natural wood under oil
- Painting in Color
- Staining and Toning
- Patination
- Lacquering
- Where to Buy Quality Wooden Profiles
- Beginner Maker Mistakes
- Inaccurate Angle Cutting
- Insufficient Amount of Glue
- Lack of Fixation During Gluing
- Skipping the Sanding Stage
- Rushing the Finishing
- Inspiration: Where to Look for Project Ideas
- Pinterest and Instagram
- Antique Shops and Museums
- Designer Portfolios
- Manufacturer Catalogs
- The Economics of DIY Furniture: How Much Does It Cost
- Frequently Asked Questions
- Do You Need Professional Carpentry Skills to Create Furniture from Profiles?
- Where to Get Tools If You Don't Have Your Own?
- What Glue Is Best for Gluing Wooden Profiles?
- Can You Use Softwood Profiles Instead of Oak?
- How to Calculate the Amount of Material for a Project?
- What to do if you have no experience working with wood?
- Is a finish coating mandatory?
- Can profiles of different wood species be combined?
- Conclusion: creativity is accessible to everyone

Stores are overflowing with generic furniture, where one chest of drawers is indistinguishable from another, where thousands of identical mirrors hang in thousands of apartments. Mass production has killed individuality, turning our homes into showrooms for IKEA and other furniture giants. But there is a way out for those who want to surround themselves with unique items without spending a fortune on custom furniture from renowned designers. The secret is simple:Buy wooden profiles— moldings, baseboards, glazing beads, door casings — and use them as a construction set to create custom furniture with your own hands.
Does it sound unexpected? At first glance, a molding is just a decorative strip for walls or ceilings. But in the hands of a creative person, it transforms into a mirror frame, a carved headboard for a bed, a three-dimensional decoration for a furniture facade, or the base for a coffee table. Ready-made wooden profiles are already processed, sanded, often carved elements made from solid noble wood species. They save dozens of hours of work, require minimal woodworking skills, and are affordable. And most importantly — they offer unlimited possibilities for creativity and creating furniture that no one else will have.


What are wooden profiles and why are they ideal for DIY furniture
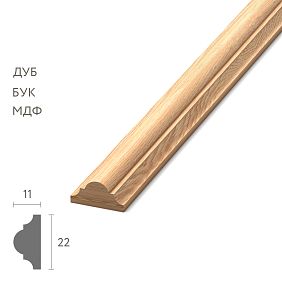
Wooden profiles are millwork products made from solid wood: moldings, baseboards, door casings, cornices, glazing beads, picture frame moldings, friezes. EachProfile made of woodhas a specific cross-section, relief, and purpose. But that doesn't mean it can only be used for its intended purpose.
A molding intended for walls can become a picture frame. A baseboard — the foundation for a shelf. A door casing — a decorative element for a cabinet facade. A cornice — the top part of a bookshelf. Wooden profiles are ready-made construction set parts from which almost any furniture or decorative object can be assembled.
Why are profiles convenient for independent creativity?
Ready-made processing. Profiles are already planed, sanded, and have precise geometry. No need to spend time on primary wood processing — you can start assembling and decorating right away.
Variety of shapes. Manufacturers' catalogs contain dozens of types of profiles: from simple rectangular strips to complex carved moldings with floral patterns. This allows you to select elements for any style — from minimalism to baroque.
Quality wood. Profiles are made from solid oak, beech, ash — strong, durable wood species with beautiful grain. This is a completely different level compared to chipboard or MDF, which most mass-produced furniture is made from.
Affordable price. A linear meter of quality oak molding costs 200-400 rubles. To create a mirror frame measuring 80×100 cm, you'll need about 4 meters of molding, totaling 800-1600 rubles. This is several times cheaper than buying a ready-made solid wood frame.
Ease of processing. Profiles are easily cut with a regular handsaw or miter saw, glued with wood glue, and fastened with screws or small nails. No complex machinery or professional carpentry skills are needed.


Basic tools and materials for the job
Beforecreate furniture with your own handsfrom wooden profiles, prepare a minimal set of tools and consumables.
Our factory also produces:


Tools
Miter saw or miter box with a handsaw. For precise cutting of profiles at the required angle. A miter saw is more convenient and faster, but a miter box is a budget alternative that provides acceptable accuracy.
Screwdriver. For drilling holes and driving screws. A cordless one is better — more convenient to work with.
Clamps. For fixing parts during gluing. You need at least 4-6 pieces of different sizes.
Sanding machine or sandpaper. For final finishing after assembly, removing burrs, and smoothing joints.
Tape measure, square, pencil. For marking.
Brushes. For applying glue, paint, varnish, oil.
Get Consultation
Materials
Wood glue. PVA for wood or polyurethane glue. Provides a strong bond between parts.
Screws and finishing nails. For mechanical fastening. Finishing nails have a small head that is easily countersunk and concealed.
Wood filler. For filling joints, screw holes, and minor defects.
Primer, paint, varnish, oil. For final finishing. The choice depends on the desired effect: natural wood under oil, painting in a color, patination, varnishing.
Base (optional). For some projects, a base will be needed: a sheet of plywood, MDF, chipboard. For example, for a bed headboard or decorative panel.
Project 1: Mirror frame from carved moldings
The simplest and most impressive project for beginners is a mirror frame. Ready-made frames in stores are either cheap and look accordingly, or expensive and don't always fit in size or style. Making a frame yourself fromwooden profile— is a solution that provides the perfect combination of quality, aesthetics, and price.
Choosing Molding
Wide moldings (from 50 to 150 mm) with pronounced relief are suitable for the frame. The larger the mirror, the wider the molding should be so the frame doesn't look flimsy. For a 60×80 cm mirror, molding 70-90 mm wide is suitable. For a large 100×150 cm mirror — 100-120 mm.
Choose moldings with relief that matches the interior style. For classic — floral ornaments, scrolls, fluting. For modern styles — geometric profiles, simple bevels.
The wood species is also important. Oak provides expressive texture and dark, noble shades. Beech is more uniform, lighter. Ash is a middle option with a beautiful grain pattern.
Material calculation
Measure the mirror dimensions. Add 5-10 mm on each side — this is the gap into which the mirror will be inserted. Calculate the perimeter: (length + width) × 2. Add a 10% margin for trimming. This will be the required linear meters of molding.
Example: mirror 70×90 cm. With gaps: 71×91 cm. Perimeter: (71 + 91) × 2 = 324 cm = 3.24 m. With margin: 3.6 m of molding.
Manufacturing
Step 1: Marking and cutting. Measure the lengths of the frame sides on the molding. Cut at a 45-degree angle using a miter box or miter saw. Important: the angles must be precise, otherwise the frame will have gaps.
Step 2: Assembly. Apply wood glue to the ends of the moldings. Connect the four pieces into a frame, secure with clamps. Check right angles with a square. Additionally, you can fasten the corners with finishing nails or thin screws, screwed in at an angle from the back of the frame.
Step 3: Reinforcing corners. For strength, you can glue triangular plywood brackets or metal furniture corner braces to the back side of the corners.
Step 4: Preparing the groove for the mirror. On the back side of the frame, along the inner perimeter, you need to create a stop for the mirror. This can be done by gluing a thin strip (10×10 mm) at a distance of 5-7 mm from the inner edge of the frame. The mirror will rest on this strip.
Step 5: Finishing. Fill the joints, nail holes with putty. Sand after drying. Apply a finish: oil for a natural look, paint for a colored version, patina for an aged effect.
Step 6: Installing the mirror. Insert the mirror into the frame, placing it on the support strip. Secure the mirror from the back with thin battens or metal holders screwed to the frame.
Step 7: Mounting. Attach hangers (D-rings or plates) to the back of the frame for wall mounting.
Done! A unique frame made of solid oak or beech, crafted by your own hands, that no one else has.
Project 2: Bed headboard with 3D decor
A headboard is the centerpiece of a bedroom, an element that sets the tone for the entire interior. Ready-made headboards are often boring or expensive. Creating a custom headboard from wooden profiles is a medium-difficulty project that delivers impressive results.
Concept
The headboard base is a sheet of plywood or MDF, cut to the required dimensions. Wooden profiles are mounted onto this base, creating a three-dimensional pattern: frames, geometric patterns, vertical or horizontal lines.
For a classic style, you can create a boiserie imitation: several rectangular frames made of moldings, symmetrically arranged on the panel. For a modern style — vertical slats of varying widths, creating a dynamic rhythm. For eclectic — an asymmetrical composition of profiles of different shapes.
Get Consultation
Materials
-
A sheet of plywood or MDF, 18-20 mm thick, sized to fit the bed width (e.g., 160×100 cm for a double).
-
Moldings or baseboards of the required width and profile. For frames — moldings 50-80 mm. For slat composition — slats 30-60 mm.
-
Wood glue, finishing nails or screws.
-
Paint or oil for finishing.
-
Hardware for mounting the headboard to the wall or bed frame.
Manufacturing
Step 1: Preparing the base. Cut the plywood sheet to the required size. Sand the edges. If you plan to paint, prime and paint the base in the wall color or a contrasting color (which will be visible in the gaps between the profiles).
Step 2: Marking the pattern. Use a pencil to draw the outlines of future frames or the placement of slats on the base. Use a ruler and level for accuracy. For symmetrical compositions, start marking from the center.
Step 3: Preparing the profiles. Measure and cut the moldings to the required length. For frames, cut at a 45-degree angle. For straight layouts — at 90 degrees.
Step 4: Mounting. Apply glue to the back of the molding. Place it on the base according to the markings, press. Additionally secure with finishing nails (drive them at a slight angle so the heads can be countersunk and filled).
Mount the elements sequentially, allowing the glue to set. If the composition is complex, secure the parts with clamps until the glue dries.
Step 5: Finishing. Fill the joints and nail holes. Sand. Apply a finish to the profiles. You can paint the profiles the same color as the base (monochrome option) or a contrasting one (e.g., white profiles on a gray background).
Step 6: Mounting the headboard. Attach hanging plates or blocks to the back for mounting to the wall. Or create a mounting to the bed frame using bolts.
The result is a voluminous, textured headboard made of natural wood that looks like expensive designer furniture but cost many times less.
Project 3: Decorative panels on furniture fronts
Do you have an old wardrobe, chest of drawers, or kitchen set with smooth, boring fronts? Don't rush to throw it out or repaint it. Add a three-dimensional decoration made of wooden profiles — and the furniture will transform, looking expensive and stylish.
Concept
Frames made of moldings or baseboards are mounted on wardrobe doors or dresser drawers, creating a paneled front effect. This is a classic technique that turns a flat surface into a three-dimensional, architectural one.
Frames can be single (one frame in the center of the front) or multiple (several frames on one door). They can be rectangular, square, or with rounded corners (for this, bent profiles are used).
Get Consultation
Materials
-
Moldings or baseboards 40-70 mm wide. Too wide will look bulky on furniture, too narrow — unimpressive.
-
Wood glue, finishing nails.
-
Filler, paint, or stain.
Manufacturing
Step 1: Removing the fronts. Take the doors off the hinges, pull out the drawers. This will make the work easier.
Step 2: Cleaning and preparation. Remove old paint or varnish (if planning to repaint), sand the surface.
Step 3: Marking. Determine the position of the frames. The classic option is one frame in the center with 5-7 cm margins from the edges of the front. For large doors, you can make two vertical or horizontal frames.
Step 4: Making the frames. Cut the moldings to the required length, assemble the frame on a table by gluing the corners. Let the glue dry.
Step 5: Mounting on the front. Apply glue to the back of the frame, place it on the front according to the markings. Press, secure with finishing nails.
Step 6: Finishing. Fill, sand. Paint the front and frames. You can use one color (monochrome) or contrasting (e.g., dark frames on a light front).
Step 7: Installing hardware and mounting. Install new handles (old ones may not suit the updated design), hang the doors back.
The result — the furniture looks new, stylish, with character. And all this for the cost of a few meters of molding and a day's work.
Project 4: Coffee table from crown molding and plywood
A more complex but very impressive project — creating a small coffee table using wooden crown molding as the main structural element.
Concept
Crown molding is a wide, profiled element typically used under the ceiling. But if you take a massive crown molding and use it as an apron (vertical rail between the legs and tabletop), you get a table with an expressive, architectural appearance.
Get Consultation
Materials
-
Wooden crown molding 100-150 mm wide, length depends on the table size (for an 80×80 cm table, you need about 3.5 m of molding).
-
Four wooden legs (you can buy ready-made turned legs or make them from 50×50 mm timber).
-
A sheet of plywood or MDF for the tabletop, 18-20 mm thick.
-
Wood glue, screws, corner brackets.
-
Finishing materials.
Manufacturing
Step 1: Tabletop. Cut the tabletop to the desired size from plywood (e.g., 80×80 cm). Sand, round the corners (optional).
Step 2: Aprons from crown molding. Cut four pieces of crown molding with a length equal to the sides of the tabletop minus the thickness of the legs. For example, for an 80×80 cm tabletop and 50×50 mm legs: aprons 75 cm (80 - 5 cm for two legs, 2.5 cm each).
Step 3: Assembling the frame. Connect the aprons and legs. The legs are placed at the corners, the aprons are attached horizontally between them. Use wood glue and screws (screw from the inside so they are not visible). For strength, add metal furniture corner brackets at the joints.
Step 4: Attaching the tabletop. Place the tabletop on the frame, attach it from below with screws through the aprons. Screw the screws so they do not go through the tabletop.
Step 5: Finishing. Fill visible joints and fasteners. Sand. Coat the table with oil, stain, or paint. For the tabletop, it's better to use a durable finish — varnish or oil-wax, which can withstand daily use.
Step 6: Floor protection. Attach felt pads to the legs to prevent scratching the floor.
The result is a unique table with an expressive silhouette that will become a focal point in the living room. At the same time, the costs are minimal, and the complexity of making it is accessible even to a beginner.
Project 5: Wall shelf with decorative brackets
A simple wall shelf turns into an art object if you add decorative brackets made from carved moldings.
Concept
The shelf consists of a board (countertop) and two brackets that support it from below and are attached to the wall. Usually, brackets are simple metal or wooden corners. But if you make brackets from shaped moldings, the shelf will acquire a completely different character — decorative, refined.
Get Consultation
Materials
-
Shelf board (solid wood or furniture panel) 20-30 cm wide, length of your choice (60-120 cm).
-
Two pieces of wide shaped molding (80-120 mm) 30-40 cm long for brackets.
-
Two 30×30 mm bars for reinforcing brackets (optional).
-
Fasteners: screws, dowels, corner brackets.
-
Finishing materials.
Manufacturing
Step 1: Preparing the shelf. Sand the board, round the front edge (with a router or sandpaper for aesthetics).
Step 2: Making the brackets. Take the molding, cut a piece to the required length. Cut one end at a 90-degree angle (this end will be against the wall), the second — at an angle that will provide the bracket's tilt (usually 75-80 degrees, so that the bracket goes from the wall slightly upward toward the shelf).
For strength, glue a 30×30 mm bar to the back of the molding — it will be the main load-bearing element, and the molding — a decorative overlay.
Step 3: Mounting brackets to the shelf. Attach the brackets to the underside of the shelf with screws (from the inside, so they are not visible). Position them symmetrically, 15-20 cm from the edges of the shelf.
Step 4: Wall mounting. Mark the shelf position on the wall. Attach the brackets to the wall with dowels and screws. It is important to attach to a solid base (brick, concrete, wooden frame), not just drywall.
Step 5: Finishing. Coat the shelf and brackets with oil or varnish. You can paint them to match the wall color for a monochrome effect or leave the natural wood for contrast.
The result is not just a shelf, but a decorative interior element that looks like an antique console.
Finishing techniques: from natural wood to vintage
Finishing is what turns an assembled structure into a finished product. The choice of technique depends on the desired style.
Natural wood under oil
To emphasize the natural beauty of wood, use wood oil. It penetrates the fibers, protects from moisture, highlights the texture and color. Oil is applied with a brush or pad in 2-3 coats with intermediate drying. Excess is wiped off.
The result is a warm, velvety surface with a natural look. Ideal for Scandinavian, eco-, and modern interiors.
Painting in color
If you want a bright color or need to fit the furniture into a specific interior palette, use acrylic paint for wood. Before painting, apply primer so the paint goes on evenly.
Painting can be solid (covers the texture) or semi-transparent (the wood structure is visible through the paint). For semi-transparency, dilute the paint with water.
Staining and toning
Stain changes the color of the wood while keeping the texture visible. You can darken light wood (imitation wenge, walnut), lighten (bleached oak effect), add gray or green shades.
Stain is applied with a brush or sponge, excess is wiped off with a cloth. After drying, a protective coat of varnish or oil is mandatory.
Patina
A technique for creating an aged effect. First, the item is painted in a base color, then patina (dark paint or a special compound) is applied to the recesses of the relief. Excess patina is wiped off, leaving it only in the recesses, creating an effect of time's patina.
Patination is ideal for classic, vintage, Provence interiors.
Lacquering
Varnish creates a durable protective film. Use matte or semi-matte varnish — gloss on furniture often looks cheap. Varnish is applied in 2-3 coats with intermediate sanding with fine sandpaper.
Varnished surfaces are easy to clean, resistant to moisture and mechanical damage.
Where to buy quality wooden profiles
The quality of the finished product directly depends on the quality of the raw materials. It's better to buy wooden profiles from a manufacturer with a reputation, quality control, and a wide range.
The company STAVROS in St. Petersburg offers solid wood profiles made of oak, beech, and ash: moldings, baseboards, casings, cornices, glazing beads, and battens. In-house production with modern equipment guarantees precise geometry, high-quality surface finishing, and chamber-dried wood.
The STAVROS catalog features dozens of profile types of various widths, heights, and with different reliefs: from simple rectangular to complex carved. This provides immense creative freedom—you can select elements for any project, any style, any task.
Advantages of buying from STAVROS:
-
Wide selection of profiles and sizes
-
High-quality wood with controlled moisture content of 8-12%
-
Precise geometry, ready-to-use surface
-
Competitive prices without intermediary markups
-
Delivery across St. Petersburg and all of Russia
-
Professional consultation on selection and application
When you decideBuy wooden profilesFor your project, choosing STAVROS is a guarantee that the material won't let you down, that the geometry will be precise, and that the wood won't warp after installation.
Common mistakes made by beginners
Creating furniture yourself is a creative process, but it requires attention to detail. Let's examine typical mistakes to avoid.
Inaccurate miter cuts
Frame corners must be exactly 45 degrees, otherwise the joints will separate and gaps will appear. Use a quality miter box or miter saw, and check the angle before each cut.
Insufficient amount of glue
Saving on glue results in weak joints that separate over time. Apply glue generously; excess can always be wiped off with a damp cloth before it dries.
Lack of clamping during gluing
Parts glued without being clamped can shift before the glue dries, causing misalignment. Always use clamps or weights to press parts together tightly.
Skipping the sanding step
Sanding may seem routine, but it's what distinguishes a professional product from an amateur one. Sand after each stage: after assembly, after filling, and between coats of paint.
Rushing the finishing process
Applying the next coat of paint or varnish before the previous one is completely dry leads to drips, unevenness, and peeling. Adhere to the drying times specified on the material packaging.
Inspiration: where to find ideas for projects
Creating custom furniture is a creative endeavor, and it's important to draw inspiration from various sources.
Pinterest and Instagram
Endless sources of visual ideas. Search for queries like: "DIY furniture", "wood molding projects", "деревянные профили мебель", "авторская мебель своими руками".
Antique shops and museums
Antique furniture is a treasure trove of ideas for using moldings, carvings, and proportions. Study how craftsmen of the past created volume and decoration.
Designer portfolios
Professional furniture designers often use molding elements in their projects. Look at their work, adapt ideas to your capabilities.
Manufacturer catalogs
In STAVROS catalogs and other molding manufacturers, you can see a variety of profile shapes — this in itself is a source of ideas on how to combine and apply them.
DIY furniture economics: how much does it cost
One of the main incentives for creating furniture yourself is saving money. Let's calculate using a mirror frame as an example.
Ready-made solid oak frame 70×90 cm in a store: 8000-15000 rubles.
DIY frame from oak molding:
-
Molding 4 m × 300 rub/m = 1200 rub
-
Glue, putty, fasteners = 500 rub
-
Finishing oil = 400 rub
-
Total: 2100 rub
Savings: 6000-13000 rubles. At the same time, the quality is no worse, and often even better than store-bought — you control every step yourself, choose the best materials, and do it with love.
For a bed headboard, the difference is even more dramatic. A ready-made designer headboard made of solid wood — from 30000 rubles. DIY version from plywood and moldings — 5000-8000 rubles. Savings — 20-25 thousand.
Of course, time must be taken into account. The frame will take 4-6 hours of work, the headboard — a day or two. But this is time spent with pleasure, in creativity, with pride in the result.
Frequently asked questions
Are professional carpentry skills needed to create furniture from profiles?
No, basic skills are enough. The main thing is to be able to use hand tools, be careful, and patient. Complex carpentry operations (milling, turning) are not required — the profiles are already ready.
Where to get tools if you don't have your own?
Many tools can be rented from hardware stores or from acquaintances. A basic set (handsaw, screwdriver, clamps) is inexpensive and will be useful for many household tasks.
What glue is best for gluing wooden profiles?
Woodworking PVA or polyurethane wood glue. PVA is cheaper, washes off easily before drying, and provides a strong bond. Polyurethane glue is stronger, moisture-resistant, but more expensive and harder to work with.
Can coniferous wood profiles be used instead of oak?
Yes, but the result will be different. Coniferous woods are softer, scratch more easily, and have a less expressive texture. However, they are cheaper and easier to process. For budget projects or furniture intended for painting, coniferous wood is quite suitable.
How to calculate the amount of material for a project?
Make a sketch, measure all elements, add up the lengths. Add 10-15% for trimming and possible mistakes. It's better to buy with a surplus than to buy more later — the wood shade may differ between batches.
What to do if you have no experience working with wood?
Start with a simple project — a mirror frame or a shelf. This will give you experience, show you the nuances, and help you understand the technology. After the first project, you can move on to more complex ones.
Is a finish coating mandatory?
Yes, untreated wood quickly gets dirty, darkens, and absorbs moisture. At minimum — oil or wax for protection. For furniture that will be used intensively, varnish is better.
Can profiles of different wood species be combined?
Yes, contrasting combinations can be very effective. For example, dark oak + light ash. The main thing is to ensure harmony of color and texture.
Conclusion: creativity is accessible to everyone
Creating custom furniture from ready-made wooden profiles is not a privilege reserved for professional carpenters, but creativity accessible to everyone. It's a way to surround yourself with unique items, infuse your interior with a piece of yourself, save significant amounts of money, and enjoy the process.
Ready-made profiles—moldings, baseboards, cornices, trims—are like building blocks from which you can assemble almost any furniture or decorative object. Picture and mirror frames, bed headboards, decorative panels for facades, shelves, tables, screens, radiator covers—all of these are achievable with a minimal set of tools and skills.
The key is to choose quality materials. STAVROS offers a wide range of wooden profiles made from solid oak, beech, and ash—from simple slats to intricate carved moldings. In-house production, quality control at every stage, precise geometry, and proper wood moisture content—all of this ensures your project turns out exactly as envisioned.
By choosing materials from STAVROS, you're not just getting millwork—you're getting a foundation for creativity, for crafting furniture that will last for decades and delight with its uniqueness. Delivery across Russia, professional consultations, and readiness to assist with calculations and selection—STAVROS supports your creative projects from idea to realization.
Don't be afraid to try. Start with a simple project—and you'll be surprised at how engaging and accessible it is. Your home deserves unique furniture crafted with love, and you deserve to take pride in the results of your own hands!


