


Article Contents:
- Philosophy of reliable fastening: what determines quality
- Fastening balusters to steps: wooden dowels
- Fastening with threaded studs: technological efficiency and disassembly capability
- Through fastening with screws from below
- Angled fastening with hidden screws
- Fastening balusters to the stringer via a baluster mounting block
- Fastening support posts to steps
- Fastening posts with metal brackets
- Fastening to concrete or tile base
- Fastening the upper part of balusters to the handrail via a handrail mounting strip
- Installing handrail on mounting strip
- Direct handrail fastening to balusters without strip
- Connecting handrail at turns and landings
- Special joints: fastening balusters on winder steps
- Fastening quality control: how to check reliability
- Common Mistakes and How to Avoid Them
- Tools for quality fastening
- Popular Questions and Answers
- Conclusion: Mastery in Details

The reliability of stair railings is not just a matter of comfort, but also safety. How correctly theFastening balusters and handrails made of woodis performed determines the stability of the entire structure, its durability, and ability to withstand daily loads. Installation errors result in loose railings, squeaks, and in the worst case — complete failure of fastening joints. There are many technologies for fixing wooden elements, each with its own advantages, limitations, and applications. Let's examine all main methods in detail — from classic proven techniques to modern innovative solutions.


Philosophy of reliable fastening: what determines quality
Before diving into specific techniques, it's important to understand basic principles. QualityBaluster mountingmust ensure three key parameters: joint rigidity (no play or movement), even load distribution (to prevent stress concentration points), and durability (the joint shouldn't weaken over time due to vibrations and thermal expansion).
Wood is a living material that reacts to humidity and temperature changes. Wood expands when moistened and contracts when drying, with these changes occurring unevenly along and across the grain. The fastening system must compensate for these natural movements without losing rigidity. This is why rigid through-fastening with metal elements is often preferable to adhesive joints — metal holds the structure even during wood micro-deformations.
The second important aspect is load direction. Stair railings experience vertical loads (hand support while climbing), horizontal loads (accidental bumps, leaning), and torsional moments (when turning on a landing while holding the handrail). The fastening system must effectively resist all these impacts, achieved through a combination of different fastener types and proper joint geometry.


Fastening balusters to steps: wooden dowels
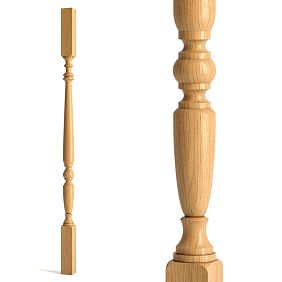
A classic and most common method — installation on wooden dowels. This technology has been tested for centuries, requires no complex tools, and provides a clean connection without visible fasteners. A dowel is a cylindrical wooden rod typically 8-10 millimeters in diameter and 60-80 millimeters long, serving as a connecting element between the baluster and step.
The process begins with marking. The center is marked on the step at the baluster installation point, with a center punch creating an indentation for precise drill positioning. A drill of corresponding diameter (exactly 8 or 10 millimeters depending on dowel size) creates a vertical hole 40-45 millimeters deep. It's critical that the hole is perfectly perpendicular to the step surface — even a 2-3 degree deviation will cause the baluster to stand crooked.
A hole of the same depth is drilled in the baluster's lower end along the central axis. Here, coaxial alignment is important — the hole center must exactly match the geometric center of the end. For precise drilling, a drill press or special guide jig is used. The combined depth of both holes should exceed the dowel length by 5-10 millimeters — this space is needed for excess glue and to prevent baluster ejection during assembly.
The dowel is generously coated with PVA wood glue or polyurethane glue, driven into the step hole until fully seated, leaving a protruding portion of 30-35 millimeters. Glue is also applied to the protruding part. The baluster is placed onto the dowel with gentle rocking motions without sharp impacts. Vertical alignment is checked with a level in two mutually perpendicular planes and secured with temporary supports or clamps until the glue completely dries (24-48 hours depending on glue type and temperature).
Our factory also produces:


Fastening with threaded studs: manufacturability and disassembly
A more modern and technologically advanced method isHow to install wooden balustersfastening with threaded metal studs. This method ensures high joint strength, allows for baluster height adjustment with millimeter precision, and enables disassembly without damaging the components. M8 or M10 studs (thread diameter 8 or 10 millimeters) with a length of 100-120 millimeters made of galvanized or stainless steel are used.
A hole with a diameter of 7-9 millimeters (for an M8 stud) or 9-11 millimeters (for an M10 stud) and a depth of 60-70 millimeters is drilled in the lower end of the baluster along its central axis. The diameter is chosen so that the stud screws in with slight resistance, cutting its own thread into the wood. For softwoods (pine, spruce), the hole diameter is made 1-2 millimeters smaller; for hardwoods (oak, ash), it is made closer to the stud diameter.
The stud is screwed into the prepared hole for two-thirds of its length using two nuts locked together (jam nut method) or a special tool with a hexagonal socket. It is important to screw it in strictly along the axis, without any skew. A corresponding hole of the same diameter and 40-50 millimeters deep is drilled in the step. The baluster with the screwed-in stud is then screwed into the hole in the step with a rotating motion.
Vertical alignment is constantly monitored—if necessary, the baluster is screwed in further or slightly unscrewed for precise positioning. After achieving the desired position, a drop of glue can be applied to the joint for additional fixation. This method is particularly convenient for adjusting baluster height on uneven steps—each baluster can be precisely leveled to the overall plane.
Get Consultation
Through fastening from below with screws
When there is access to the underside of the step, the most reliable method is through fastening with long screws. This method provides maximum joint strength, as the screw passes completely through the entire thickness of the step and enters the body of the baluster to a significant depth. Wood screws 80-100 millimeters long with countersunk or semi-countersunk heads are used.
The baluster is placed on the marked spot and temporarily fixed with double-sided tape or a clamp. From below, through the step, a pilot hole 3-4 millimeters in diameter is drilled, which passes through the step and enters the lower end of the baluster by 30-40 millimeters. The pilot hole prevents the wood from splitting when the screw is driven. Drilling is performed strictly vertically, controlling the entry angle.
Then a screw is driven from below—it passes through the step, pulling the baluster against its surface. For reliable fixation of one baluster, four screws arranged in a cross pattern with an offset of approximately 20 millimeters from the central axis are sufficient. The screw heads are countersunk into the wood of the step by 2-3 millimeters and covered with glued wooden plugs or filled with wood-colored putty.
This method is not suitable for stairs with a closed underside (lined with plywood or drywall), but is ideal for open structures on stringers or for stairs with free space underneath. Dismantling such a fastening is possible but requires full access to the underside of the steps.
Angled fastening with concealed screws
When aesthetics are important and it is necessary to completely hide the fasteners, the angled concealed fastening technique is used. Screws are driven not vertically, but at a 45-60 degree angle through the side surface of the baluster into the step. The entry points are located 20-30 millimeters from the lower end on opposite sides of the baluster (usually on two or four sides).
The baluster is placed in position and set strictly vertical. A pilot hole is made with a 3-millimeter drill bit at an angle—the drill enters the side surface of the baluster, passes through its body at an incline, and exits into the contact area with the step. Then a screw 60-70 millimeters long is driven along this trajectory, securely pulling the baluster against the step.
The screw heads are countersunk into the wood by 5-8 millimeters and covered with wooden plugs cut from the same wood species with matching grain direction. The plugs are glued in, trimmed flush with the surface, and sanded—as a result, the fasteners become practically invisible. This method requires high precision and skill but provides a flawless appearance.
Fastening balusters to a stringer via a baluster rail
If the staircase is made on stringers (side inclined beams into which the steps are mortised),how to mount balusters to wooden handrailsthe fastening is solved differently. Direct fastening to the stringer is difficult due to the inclined surface. Here, a baluster rail is used—a special strip that is attached to the stringer and serves as a base for the balusters.
The baluster rail is made from a board 25-30 millimeters thick and 80-100 millimeters wide. Its length equals the length of the flight. The upper edge of the rail is cut at an angle corresponding to the slope of the staircase so that the balusters can be installed vertically. The positions of the balusters are marked on the rail with precise adherence to intervals.
At the baluster installation points, holes for dowels or shallow sockets for the lower ends of the balusters are drilled in the rail. The lower ends of the balusters are cut at an angle corresponding to the slope of the stringer to ensure a tight fit against the rail. The balusters are installed into the sockets with glue and additionally secured with thin screws driven from below the rail at an angle.
The finished assembly (rail with installed balusters) is attached to the stringer with powerful screws 60-80 millimeters long, driven from the front side. The screw heads are countersunk and covered with decorative plugs. This method allows assembling the railing separately, checking all dimensions and geometry, and then installing the finished section onto the staircase.
Fastening support posts to steps
Support posts have a cross-section from 80x80 to 120x120 millimeters and bear the main load from the handrail and the entire railing.How to attach wooden balustersFastening to steps is one thing, but installing posts requires even more reliable fastening. The classic method is through fastening with large-diameter threaded studs (M12-M16) secured from below with nuts and washers.
Two holes 13-17 millimeters in diameter and 80-100 millimeters deep are drilled in the base of the post along its central axis, with a center-to-center distance of 60-80 millimeters. Through holes of the same diameter are drilled in the step and riser (for stairs on stringers) or in the stringer (for stairs on stringers) at corresponding positions. Studs 150-200 millimeters long are inserted into the holes in the post so that they protrude by 70-120 millimeters.
The post is placed in position, and the studs pass through the step. From below, a reinforced metal washer 30-40 millimeters in diameter and 3-4 millimeters thick is placed on each stud, followed by a nut. The nuts are tightened alternately and evenly, gradually pulling the post against the step. The verticality of the post is checked with a long level in two planes—any deviation is corrected before final tightening.
After tightening, the upper parts of the studs protruding from the base of the post are cut flush with an angle grinder or recessed by 10-15 millimeters and covered with wooden plugs. The lower parts with nuts and washers remain visible if there is no under-stair cladding, or they are hidden behind the cladding. Such fastening withstands significant loads and ensures absolute immobility of the post.
Fastening posts with metal brackets
If there is no access to the underside of the step, fastening with reinforced steel brackets is used. The brackets are made from steel at least 3 millimeters thick, with leg dimensions of 100x100 or 120x120 millimeters. The bracket is attached to the side surface of the post with six to eight powerful wood screws 60-80 millimeters long or with lag screws (screws with a hexagonal head for a wrench) 8-10 millimeters in diameter.
Before fastening, a recess is made in the post to accommodate the thickness of the bracket leg so that it sits flush with the surface and does not protrude. The recess depth is 3-4 millimeters, and its width and height correspond to the leg size. The recess is made with a router or chisel. The bracket is placed into the recess and fastened with screws or lag screws after pre-drilling pilot holes.
Then the post with attached brackets is installed on the step. The second shelves of the brackets rest against the surface of the tread and riser (or against the stringer). Through the holes in the brackets, pilot holes are drilled into the wood, then self-tapping screws or anchors are screwed in (if the base is concrete). Each bracket is fixed with at least four fastening points. When installed correctly, this connection provides sufficient rigidity, although it is inferior to through fastening with studs.
Fastening to a concrete or tiled base
How to secure a wooden baluster to the floormade of concrete or covered with ceramic tiles requires a different technology. Here it is impossible to screw in a self-tapping screw or drive in a dowel — special expansion anchors or bolts are needed, which expand in the base material. Expansion plastic anchors with a diameter of 10-12 millimeters and a length of 60-80 millimeters or metal wedge anchors are used.
A hole for a stud or long self-tapping screw with a diameter of 8-10 millimeters and a depth of 50-60 millimeters is drilled in the center of the lower end of the baluster. In the concrete floor at the installation point, a hole for the anchor is drilled with a hammer drill — the diameter strictly corresponds to the size of the anchor (usually 10 or 12 millimeters), the depth is 10-15 millimeters greater than the length of the anchor to accommodate concrete dust.
The anchor is inserted into the hole in the floor, a long stud or self-tapping screw is screwed into it so that it protrudes by 40-50 millimeters. The baluster is placed over the protruding part of the stud, which enters the prepared hole in its lower end. Vertical alignment is set with a level, the baluster is temporarily fixed with supports. Then, through a pre-drilled side hole in the baluster, a fixing screw is screwed in, which tightens the baluster to the stud.
An alternative method is the use of metal flanges (round or square plates with a central socket for the baluster). The flange is fastened to the concrete floor with anchors or expansion bolts, the baluster is inserted into the flange socket and fixed with side screws. This fastening is less aesthetic (the flange remains visible), but very reliable and allows for quick replacement of balusters if necessary.
Fastening the upper part of balusters to the handrail via a handrail mounting plate
The upper fastening of balusters to the handrail is just as important as the lower one. The most common and technologically advanced method is the use of a handrail mounting plate. This is a horizontal board with a thickness of 18-25 millimeters and a width of 80-120 millimeters, which is installed on the upper ends of the balusters and serves as a base for attaching the handrail. The plate performs several functions: it increases the contact area between the balusters and the handrail, simplifies installation, and compensates for small deviations in the height of the balusters.
Before installing the plate, it is necessary to ensure that all balusters are set to the same height. A control cord is stretched between the support posts at the level of the future upper ends of the balusters. Each baluster is checked — its upper end must touch the cord. If there are deviations, the balusters are trimmed or, if fastened with studs, screwed in/unscrewed until a common level is achieved.
The handrail mounting plate is laid on the upper ends of the balusters, aligned relative to their central axes (usually the plate is centered or shifted to the inner side of the staircase by 5-10 millimeters). The plate is temporarily fixed with clamps. Then, one self-tapping screw 40-50 millimeters long is screwed from above through the plate into each baluster. The screw passes through the plate and enters the body of the baluster by 25-35 millimeters.
The screw heads are countersunk into the plate by 3-5 millimeters — this recess will later be hidden by the handrail. For additional reliability, a thin layer of wood glue can be applied between the plate and the ends of the balusters before fastening. After installing the plate, its ends are trimmed flush with the support posts, and the upper surface is thoroughly sanded to ensure a tight fit of the handrail.
Installing the handrail on the handrail mounting plate
a round handrail 50 mm— is the standard diameter for stair railings, providing a comfortable grip. The handrail can be solid round, oval, or shaped with decorative profiles. For installation on a handrail mounting plate, a longitudinal groove is milled on the underside of the handrail with a width corresponding to the thickness of the plate (usually 20-27 millimeters) and a depth of 12-18 millimeters.
The groove must be located strictly along the central axis of the handrail or offset depending on the design. Milling is performed on a milling machine or with a hand router using a straight cutter of the required diameter and a guide ruler. The length of the groove is equal to the length of the handrail minus the sections adjacent to the posts (if the handrail is mortised into the posts) or equal to the full length (if the handrail is laid on top of the posts).
The inner surface of the groove and the upper plane of the handrail mounting plate are coated with wood glue. The handrail is placed over the plate with the groove, pressed tightly. Excess glue protrudes from the groove — it is immediately removed with a damp cloth. For additional fixation, self-tapping screws 40-50 millimeters long are screwed from below through the plate into the handrail at intervals of 400-500 millimeters. The screws are screwed in at an angle to the vertical so as not to go through the handrail.
The screw points are located between the balusters, where the plate is not occupied by fastening to the balusters. The screw heads remain inside the handrail groove and are not visible from below. On the support posts, the handrail is additionally fixed with long self-tapping screws screwed in from above at an angle — the heads are countersunk and covered with wooden plugs. After installation, all connections are checked for rigidity — the handrail should not have play when pressed or wobbled.
Direct fastening of the handrail to balusters without a plate
There is an alternative method — direct fastening of the handrail to balusters without using a handrail mounting plate. In this case, a tenon (protruding element) with a cross-section usually of 10x30 millimeters and a height of 12-15 millimeters is milled into the upper end of each baluster. Tenons can be milled on a machine or cut by hand with a circular saw followed by fitting with a chisel.
On the underside of the handrailround handrailsa longitudinal groove is milled, into which the tenons of all balusters enter. The groove depth is 15-18 millimeters, the width is 11-12 millimeters (1-2 millimeters wider than the tenon width for a free fit with glue). The distances between the tenons on the balusters must exactly correspond to the distances between the baluster positions on the staircase — even a deviation of 1-2 millimeters will make assembly impossible.
Assembly is performed as follows: glue is applied to the groove of the handrail, the handrail is placed on the tenons of the balusters, slightly rocked for even distribution of the glue, and pressed. The balusters may require slight height adjustment (if fastened with studs) for precise alignment of the tenons with the groove. After the handrail is seated on the tenons, the entire structure is fixed with clamps or weights until the glue dries.
This method provides a clean connection without visible fasteners, but requires the highest precision in manufacturing the tenons and groove. Any error in dimensions makes assembly impossible or leads to gaps in the joints. Disassembling such a structure without damaging the elements is practically impossible — it is a non-separable glued joint.
Connecting the handrail at turns and landings
On turning sections of the staircase, straight sections of the handrail are connected to each other or to curved elements (radius bends, spirals). The standard solution is connecting couplings or fittings made of metal or plastic, which are inserted into the ends of the handrails. A coaxial hole with a diameter usually of 20-25 millimeters and a depth of 40-50 millimeters is drilled in the end of each handrail.
The connecting coupling is a cylindrical rod with a diameter equal to the hole diameter, 80-100 millimeters long. The coupling is coated with glue and inserted into the hole of one handrail to half its length. The second handrail is placed over the protruding part of the coupling. The ends of the handrails are tightly butted. For additional fixation, a thin self-tapping screw can be screwed through the side surface of the handrail into the coupling, or a pin can be driven in.
An alternative method is a miter joint at a 45-degree angle reinforced with dowels. The ends of the handrails to be connected are cut at a 45-degree angle, holes for dowels (usually three pieces with a diameter of 8 millimeters) are drilled in the cut plane. The dowels are glued into one handrail with a protrusion, and the second handrail is placed over them. The joint is clamped with clamps until the glue dries. After drying, the joint area is sanded — a properly executed miter joint is almost invisible.
Special nodes: fastening balusters on winder steps
Winder steps are turning steps of trapezoidal shape that form a smooth turn of the staircase without an intermediate landing. On such steps, balusters are installed in a fan-like pattern, their axes diverge at different angles. Standard fastening is not suitable here — individual fitting of each baluster is required.
The main difficulty is that the lower ends of the balusters must be cut not only at the angle of the staircase inclination (as on ordinary steps) but also taking into account the turn of the step. The cutting angle is determined individually for each position using a template or calculation method. The upper ends are also cut at a variable angle so that they all lie in the plane of the handrail inclination.
To simplify installation on winder steps, a sub-baluster rail is often used—a strip that is attached to the edge of the step and onto which the balusters are mounted. The sub-baluster rail is manufactured to match the turning radius, with its upper edge cut at a variable angle corresponding to the slope angles at each point. Balusters are attached to the sub-baluster rail using dowels or screws, and then the assembled unit is installed on the steps.
Quality control of fastening: how to check reliability
After completing the installation, quality control must be carried out. Visual inspection: all balusters must stand strictly vertical (checked with a level), distances between balusters must be equal (checked with a tape measure), and the upper ends must lie in the same plane (checked with a straightedge or a taut string). The fastening should have no visible defects—no wood chips around the fastener points, no exposed screw heads, and no gaps in the joints.
Mechanical check: grasp each baluster and try to rock it back and forth and left to right. A high-quality fastening should have no play—the baluster should be completely immobile. If even minimal movement is felt, the fastening needs to be reinforced with additional fasteners or the joint must be redone. The handrail is tested by pressing down on it with a force of 20-30 kilograms—it should not sag, creak, or show movement relative to the balusters.
Load test: stand on the bottom step, grasp the handrail with both hands, and pull it toward you with force, simulating real load during ascent. The structure should remain absolutely rigid. If creaking, clicking, or movement is felt, this indicates insufficiently secure fastening. Such a railing is dangerous, and all joints must be inspected and weak points reinforced.
Common mistakes and how to avoid them
First mistake—insufficient fastening depth. A screw or dowel entering the wood less than 30 millimeters does not provide reliable fixation. Over time, the fastening will become loose. Solution: always adhere to the minimum fastener depth—for dowels, at least 80 millimeters total (40 per part), and for screws, at least 40 millimeters of penetration into the supporting element.
Second mistake—lack of pilot holes when working with hardwoods. Driving a screw into oak or ash without pre-drilling leads to cracking. Solution: always drill pilot holes with a diameter 1-2 millimeters smaller than the screw diameter.
Third mistake—using low-quality fasteners. Cheap screws break during tightening, and dowels made from green wood shrink and weaken the joint. Solution: use only high-quality fasteners from reputable manufacturers—screws with anti-corrosion coating, dowels made from dry birch or beech.
Fourth mistake—inaccurate marking. If balusters are installed with uneven intervals or deviations from vertical, correcting this after installation is extremely difficult. Solution: pay maximum attention to marking, use a laser level, and take control measurements before drilling each hole.
Tool for high-quality fastening
Basic tool set: electric or cordless drill with a power of at least 600 W and a set of wood drill bits ranging from 3 to 16 millimeters in diameter, cordless screwdriver with torque adjustment and a set of bits, hand router with a power of 1000-1200 W and a set of bits (straight, groove, edge), miter saw for precise angled trimming of elements.
Measuring tools: laser level or plane builder, 1000-1200 millimeter long spirit level, 5-8 meter metal tape measure with a lock, carpenter's square for checking right angles, caliper for controlling hole diameters, marking tools (pencils, center punch, marking gauge).
Auxiliary tools: clamps of various sizes (at least 4-6 pieces) for securing elements during assembly, rubber mallet for fitting parts without damage, chisels of various widths for adjusting joints, sandpaper and a sander for finishing, brushes for applying glue.
Popular questions and answers
Can balusters be attached only with glue without mechanical fasteners? Glue alone creates a strong bond but does not resist torsional and shear loads. It is recommended to always combine glue with mechanical fasteners—dowels, screws, or threaded rods.
What should be the distance between balusters? According to building codes, the clear distance (between the surfaces of adjacent balusters) should not exceed 150 millimeters. In practice, 2 balusters per step are usually installed, resulting in a gap of 100-120 millimeters.
Should balusters be treated with protective compounds before installation? Yes, it is recommended to perform at least basic treatment—priming and one coat of varnish or oil before installation. This protects the wood and allows treatment of hard-to-reach areas (ends, fastening zones) that will be difficult to access after installation.
How to attach balusters to a metal staircase frame? Balusters are attached to metal via flanges (metal plates with threaded holes welded to the frame). A hole for a threaded rod is drilled into the lower end of the baluster, which is then screwed into the flange.
Can liquid nails be used instead of wood glue? Liquid nails (construction adhesive) have lower shear strength compared to PVA wood glue or polyurethane glue. For critical joints (balusters, handrails), use only specialized wood glue.
How much time should pass after installing balusters before attaching the handrail? If balusters are installed with glue (dowels, direct gluing), a minimum of 24 hours must be allowed for the glue to fully dry. When fastening with screws or threaded rods without glue, handrail installation can proceed immediately.
How to fix a loose baluster fastening? If a baluster has started to wobble, determine the cause: glue weakening, screw backing out, or a crack in the wood. Depending on the cause, either add additional fasteners (angled screws), re-glue the joint after cleaning off the old glue, or replace the baluster with a new one.
Is it mandatory to use a handrail mounting plate? No, it is not mandatory. The handrail can be attached directly to the balusters via tenons or screws from above. However, the handrail mounting plate significantly simplifies installation, improves assembly accuracy, and enhances structural strength, so its use is recommended.
What handrail diameter is most comfortable? The standard 50-millimeter diameter suits most people. For children, 40 millimeters is more comfortable; for people with large hands, 60 millimeters. An oval cross-section (e.g., 50x35 millimeters) is also comfortable and provides a secure grip.
Can a railing be installed on an already finished staircase? Yes, a railing can be installed on an existing staircase. The main thing is to ensure strong fastening to the steps and precise geometry. The work is complicated by limited access and the need to minimize damage to the existing finish.
Conclusion: Mastery in the Details
QualityFastening balusters and handrails made of wood—is a combination of knowledge of technologies, precision in execution, and the use of the right tools and materials. There is no universal method suitable for all situations—the choice of fastening method depends on the staircase design, step material, access to installation points, aesthetic requirements, and project budget.
Dowels provide a clean, invisible joint but require high precision and do not allow disassembly. Threaded rods offer maximum strength and adjustability but are more complex to install. Screws are a quick and reliable method but require masking of fastening points. Sub-baluster rails simplify work on complex sections but add bulk to the structure.
The main thing is not to rush, carefully mark each position, control verticality and alignment, and use high-quality fasteners and glue. Even a small error during marking or drilling can lead to the need to redo the entire joint. Invest time in preparation—and the result will last for decades.
The company STAVROS has specialized in the production of wooden staircase components for over twenty years and offers not only the widest range of balusters, posts, and handrails but also professional installation consultations. STAVROS specialists have developed detailed instructions for all fastening methods, tested various types of fasteners, and are ready to share this experience with every customer.
The STAVROS assortment includes all necessary components for installation: handrail mounting plates of various cross-sections, fastening elements (dowels, studs, screws), specialized wood adhesives, flanges, and corner brackets for post mounting. All elements are selected for compatibility and ensure maximum connection strength.
STAVROS offers professional railing installation services by experienced teams in Moscow, St. Petersburg, and other major cities in Russia. The company's craftsmen handle installations of any complexity—from simple straight flights to multi-level spiral staircases with carved balusters and radius handrails. A one-year warranty on installation work confirms the company's confidence in the quality of execution.
By choosing STAVROS, you receive not only high-quality materials but also expert support at all stages—from design and component calculation to installation and post-warranty service. Thousands of completed projects across Russia and CIS countries, impeccable reputation, fair prices, and an individual approach to each order make STAVROS a reliable partner in creating the staircase of your dreams.


