Article Contents:
- Philosophy of Staircase Decor: Where Function Meets Art
- Balusters: The Vertical Rhythm of a Staircase Flight
- Types of Balusters by Manufacturing Technology
- Making Turned Balusters: Step-by-Step Process
- Installing Balusters: Reliable Fastening Technology
- Handrails: Safety and Tactile Comfort
- Types of Handrails by Profile
- Making Handrails: Technological Features
- Newel Posts: Supporting Accents of a Staircase Flight
- Functions of Newel Posts
- Types of Newel Posts by Location
- Making Newel Posts
- Finials: The Final Accent
- Types of Finials
- Attaching a Finial
- Wood Species for Staircase Elements
- Oak: king of staircase constructions
- Beech: A Warm Alternative to Oak
- Ash: A Combination of Strength and Flexibility
- Pine: budget option
- Larch: Coniferous Hardness
- Styles of Staircase Decor
- Classic style
- Baroque: luxury and theatricality
- Modern: Smoothness and Organic Design
- Scandinavian minimalism
- Loft: industrial aesthetics
- Interior Decor Workshop: Organizing the Workspace
- Minimum Tool Set
- Work Process Organization
- Final Finish: Oil, Wax, Varnish
- Oil
- Wax
- Varnish
- Staining and patination
- Answers to popular questions
- Can balusters be made without a lathe?
- What Distance Should Be Between Balusters?
- How long does it take to make one baluster?
- Can Laminated Wood Be Used for Staircase Elements?
- How to calculate the number of balusters for a staircase?
- Do balusters need to be treated with antiseptic?
- Can Wooden Balusters Be Painted White?
- How to Join a Handrail at a Staircase Turn?
- Conclusion: The Staircase as an Art of Self-Expression

Creating a unique look for a home is a task where every detail matters. When it comes toDIY interior decor, the staircase becomes the very object that connects floors not only physically but also compositionally. Wooden elements for staircase structures — balusters, handrails, newel posts, finials — transform a utilitarian structure into an architectural object capable of setting the tone for the entire living space. These are not just functional safety details but full-fledged designer tools that allow implementing a style concept from classical splendor to modern minimalism.
Why wood specifically? Because this material carries a sense of living nature, tactile warmth, and visual depth of texture that cannot be reproduced by synthetic analogs. Wood acts as an intermediary between a person and space, creates psychological comfort, and softens the coldness of concrete and glass in modern interiors. When you ascend a staircase with wooden handrails, your palm feels not the dead smoothness of plastic or the cold of metal, but a living surface that holds the memory of the tree's years of growth and the hands of the craftsman who shaped the blank.
Independent creationof handmade interior decorfor a staircase is a process that requires understanding of structural fundamentals, mastery of tools, and artistic vision. But this very path offers maximum freedom: you are not limited by standard solutions, can adapt each element to the specific architecture, create unique compositions, and experiment with forms and finishes. The result of such work possesses that unique aura of handcraftedness that distinguishes a true home from a faceless dwelling.


The philosophy of staircase decor: where function meets art
A staircase in a home is a vertical transit, a zone of intensive movement, a place with an increased risk of injury. Hence the strict requirements for strength, stability, and ergonomics. Balusters must withstand lateral loads, handrails must provide a reliable grip, and newel posts must serve as load-bearing supports. Any decorative solution must respect these basic safety requirements.
But a staircase is also a theatrical space. In two-story houses, it is often located in the entry area, becoming the first object seen by those entering. Ascending the stairs is a movement during which a person involuntarily examines the surrounding details: the carving on the balusters, the wood texture, the play of light on the handrail. A staircase is a dynamic object that reveals itself gradually, step by step, unlike static furniture or wall decor.
The third aspect is tactile. A staircase is one of the few interior elements we physically contact with our hands daily. The quality of the handrail finish, the temperature of the wood, the silkiness of the sanded surface—all this forms a physical sensation of comfort or discomfort, which the brain registers on a subconscious level.
By creating aDIY interior decorfor a staircase, it is important to keep all three dimensions in focus: structural, visual, tactile. A beautiful but flimsy baluster is a failure. A sturdy but roughly finished one is also. The ideal is a synthesis of reliability, aesthetics, and pleasantness to the touch.


Balusters: the vertical rhythm of a flight of stairs
wooden balusters DIYare vertical posts that fill the space between the treads and the handrail. Their primary function is protective: they create a barrier preventing falls from the staircase. The second function is load-bearing: balusters support the handrail, transferring the load generated by leaning on the railing to the treads. The third function is decorative: it is the balusters that form the visual rhythm of the staircase, creating its stylistic identity.
Our factory also produces:


Types of balusters by manufacturing technology
Turned balusters are created on a lathe. A wooden blank of square or round cross-section is secured in the lathe's chuck, rotates, and cutting tools gradually remove excess material, forming the profile. Turning allows for creating symmetrical elements with a round cross-section: balls, vases, balusters with smooth thickenings and tapers. This is a classic technology, proven over centuries.
For home work, small lathes are available, allowing the processing of blanks up to a meter in length and up to 150 millimeters in diameter. This is sufficient for making most staircase balusters. Working on a lathe requires skill: one must know how to properly sharpen the cutting tools, control the feed rate, and feel the material. Hardwoods (oak, ash) are processed more slowly but hold their shape better. Softwoods (pine, linden) are easier to work with but less resistant to mechanical loads.
Milled balusters are created on a CNC milling machine or manually with a router. Milling allows for creating more complex profiles: facets, grooves, roundovers, cross-section transitions. On CNC machines, three-dimensional forms can be manufactured—for example, balusters in the form of twisted columns, with floral motifs, geometric patterns. For manual work, handheld routers with a set of bits of different profiles are available.
Flat carved balusters are cut from a wide board with a jigsaw or on a bandsaw. The contour of the future baluster is drawn on the board, then a cut is made along the contour. Flat balusters can have openwork carving—where patterned holes are cut inside the contour. Or relief carving—where the relief is created with carving knives, chisels, without cutting through the board. Flat balusters are characteristic of rustic style, Provence, Scandinavian interiors.
Combined balusters combine different technologies. For example, the main part is turned, and the upper or lower part has added hand carving. Or a milled body is complemented with applied carved elements. Combining allows for achieving maximum decorativeness.
Get Consultation
Making turned balusters: a step-by-step process
It all begins with the choice of wood. For staircase balusters, it is better to use hard deciduous species: oak, beech, ash, birch. They are strong, wear-resistant, and hold their shape well. Coniferous species (pine, larch) are cheaper but softer and more easily damaged. The blank must be dry (moisture content 8–12 percent), without knots, cracks, or wormholes.
The blank is marked: the length of the future baluster is determined with a 20–30 millimeter allowance for the ends. The cross-section of the blank should be 10–15 percent larger than the maximum diameter of the baluster. If you plan for a baluster with a maximum diameter of 60 millimeters, take a blank with a cross-section of 70 millimeters.
The blank is secured in the lathe between the headstock and tailstock. The centers of the headstock and tailstock must align exactly with the axis of the blank—this determines whether the baluster will wobble during rotation. Before starting the lathe, check that the blank is securely fastened, nothing is obstructing it, and the tool is sharpened.
The first stage of turning is roughing. A roughing gouge removes the corners of the blank, turning the square into a cylinder. Work is done at medium speeds (800–1200 revolutions per minute for a diameter of 60–80 millimeters). The tool is fed smoothly, without jerks, removing a layer of 1–2 millimeters per pass.
The second stage is profile marking. With a pencil or awl, key points of the profile are marked on the rotating cylinder: where thickenings will be, where tapers, where transitions. A paper template can be used, applying it to the rotating blank and transferring the contour.
The third stage is profile shaping. Tools of different shapes are used: gouges for concave sections, skew chisels for convex ones, shaped tools for complex profiles. Work proceeds from large forms to small ones: first, general thickenings and tapers are formed, then details are worked on—grooves, beads, fillets. The tool always works from the larger diameter to the smaller one to avoid tearing the wood fibers.
The fourth stage is sanding. On the rotating lathe, the baluster is sanded with sandpaper, starting with coarse grit (120 grit) and gradually moving to fine grit (up to 320–400 grit). Sanding must be even, without lingering in one spot—otherwise, depressions will form. Hold the sandpaper folded, without sharp edges, to avoid scratching the surface.
The fifth stage is removal from the lathe and final end processing. The ends of the balusters are trimmed at an angle or tenons are made for connection with the treads and handrail. This is done on a miter saw or by hand.
Installing balusters: technology for reliable fastening
Installing wooden balusters yourselfbegins with marking their position on the treads. The classic option is two balusters per tread, at the edges. A denser one is three or four balusters per tread. Less common is one baluster per tread in the center, but this is less reliable and requires thicker balusters.
The distance between balusters is regulated by building codes: the gap must not exceed 100–120 millimeters, so a child cannot put their head through. If the balusters are thin (diameter 40–50 millimeters), the spacing should be 80–100 millimeters.
Marking begins with installing the end balusters—at the beginning and end of the flight of stairs, as well as at turns. These balusters are often made more massive—they are the newel posts. A string is stretched between them at the level of the future handrail, and the intermediate balusters are aligned along this string.
Balusters are fastened in several ways. The dowel method: holes 8–10 millimeters in diameter, 30–40 millimeters deep, are drilled in the end of the baluster and in the tread. A wooden dowel (round rod) is inserted into the holes with glue, then the baluster is fitted onto the dowel. This method is simple, reliable, but disassembly is impossible.
Dowel method: a metal dowel (threaded rod) 8–10 millimeters in diameter, 80–100 millimeters long, is screwed into the baluster from below. A hole for the dowel is drilled in the step. The baluster is screwed onto the dowel. This method allows for adjusting the baluster height but requires precise drilling.
Screw method: the baluster is attached to the step with screws driven at an angle through the side surface. The screws are countersunk, and the holes are filled with putty. This method is quick but less aesthetic and reliable.
Baluster rail method: a horizontal rail (baluster rail) is installed on the step, to which the balusters are attached. The baluster rail simplifies installation but visually weighs down the structure.
After installing all balusters, the handrail is mounted on them. The handrail can be attached on top of the baluster ends, inserted into grooves, or mounted using a handrail bracket.
Handrails: safety and tactile comfort
a round wooden handrail— is the upper part of the railing, held onto during ascent and descent. Its main function is to ensure safety: the handrail must be strong enough to support a person's weight and comfortable to hold onto.
Types of handrails by profile
Round handrails — a classic. The diameter is usually 40–50 millimeters — this is the optimal size for an adult hand. A round handrail is universal: suitable for any style, comfortable to grip, and simple to manufacture. It can be made on a lathe or with a router using a special handrail bit.
Oval handrails have an elliptical cross-section — for example, 50 by 35 millimeters. The oval shape is more ergonomic than round: it fits better in the palm and creates more contact points. Oval handrails are characteristic of classic and historical interiors.
Rectangular handrails with rounded edges — a modern solution. The cross-section can be 60 by 40 millimeters, with all corners rounded with a radius of 5–10 millimeters. Rectangular handrails are easier to manufacture (do not require turning), and pair well with minimalist balusters.
Shaped handrails have a complex profile with protrusions, grooves, and decorative elements. They are characteristic of luxurious classic interiors, where every detail is a work of art.
Handrail manufacturing: technological features
The handrail must be made from strong, stable wood. The best species are oak, ash, and beech. Wood moisture content is critical: during drying, the handrail can warp or crack. Use only kiln-dried wood with a moisture content of 8–10 percent.
For straight sections of the staircase, the handrail is made from straight blanks. For turns, bent elements are required. Wood bending is a complex technology: the blank is steamed, then bent in a jig and fixed until completely dry. An alternative is gluing the handrail from thin laminated strips with a bend. Or using ready-made bent elements.
A round handrail is manufactured on a milling machine using a special attachment. A rectangular cross-section blank is passed through the bit, which forms the round profile. The work is done in several passes, gradually deepening the bit. The feed speed should be slow to avoid chipping and burning.
After milling, the handrail is sanded. Sanding must be perfect — the hand will slide along the handrail daily, and any roughness, chip, or unevenness will be felt. Use sandpaper with grit from 180 to 400, sanding along the grain.
The handrail's final finish is oil, wax, or varnish. Oil penetrates the wood, highlights the grain, creates a matte surface that is pleasant to the touch. Wax provides a silky feel and slight shine. Varnish creates a protective film, more resistant to wear but less pleasant tactilely. The choice depends on intensity of use and personal preference.
Newel posts: supporting accents of the stair flight
Staircase newel posts are powerful vertical elements installed at key points: the beginning of the staircase, its end, and at turns.Wooden staircase balusters DIYand newel posts are structurally related: newel posts bear the main load, balusters — the auxiliary load.
Functions of newel posts
Structural function: newel posts are the main load-bearing elements of the railing. The handrail is attached to them, and they withstand lateral loads when leaning on the railing. The newel post must be massive (minimum cross-section 80 by 80 millimeters, often 100 by 100), securely fastened to the step or the staircase's load-bearing structure.
Orienting function: newel posts mark the boundaries of the stair flight, helping with spatial orientation. In darkness or poor lighting, newel posts are perceived first, signaling the beginning or end of the staircase.
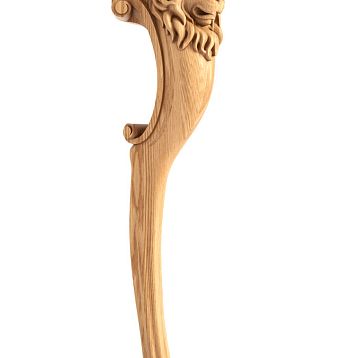
Decorative function: newel posts are the main visual accents of the staircase. They are larger than balusters, more complex in shape, often featuring carvings and applied elements. A newel post is a vertical sculpture that sets the stylistic tone for the entire staircase.
Types of newel posts by location
Starting newel posts are installed at the very beginning of the stair flight, on the first step. They are often made taller and more decorative than intermediate ones — this is a ceremonial element, the first thing seen by those entering.
Intermediate newel posts are placed at staircase turns, where the handrail changes direction. They must be powerful enough to secure the handrail at different angles.
Finishing newel posts complete the stair flight at its upper point. They may connect to the second-floor structure, or to a balcony or gallery balustrade.
Newel post manufacturing
The newel post is made from a solid blank with a minimum cross-section of 100 by 100 millimeters. The length depends on the railing height — usually 900–1100 millimeters from the step to the top of the newel post. For creating carved newel posts, a combination of turning (for round sections), milling (for edges, grooves), and hand carving (for decorative details) is used.
A classical column has a three-part structure: a base (cubic or cylindrical), a body (with threading, fluting, baluster-like thickenings), and a finial (the upper decorative part). This structure is legible, visually comprehensible, and conforms to architectural canons.
Modern columns can be simpler: a rectangular cross-section with minimal processing, rounded corners, and an absence of carving. Such columns suit minimalist, Scandinavian, and loft interiors.
Finials: The Final Accent
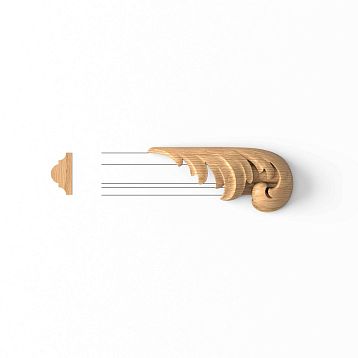
A finial is a decorative element that crowns a column. Its function is purely aesthetic: it completes the composition, adds a vertical accent, and emphasizes the style. A finial can be a simple sphere, pyramid, cube, or a complex carved figure: a pinecone, acorn, pineapple, lion's head, or geometric ornament.
Types of Finials
Geometric finials: sphere, cube, pyramid, cone. These are universal forms suitable for any style. A sphere with a diameter of 80–120 millimeters is a classic solution, proven over centuries. It is easily manufactured on a lathe, visually balanced, and pleasing to the eye.
Turned finials: complex shapes created on a lathe. Combinations of balls, disks, vases, baluster-like elements. They are characteristic of classical, Victorian, and Baroque styles.
Carved finials: figured elements with detailed carving. This could be a stylized hop cone, grape cluster, flower, or heraldic figure. Carved finials are made by hand by carvers or on CNC milling machines.
Modern finials: minimalist forms made of metal, glass, or composite materials. They suit modern staircases where purity of lines and contrast of textures are important.
Finial Attachment
The finial is attached to the column with a tenon or dowel. A hole 10–12 millimeters in diameter and 40–50 millimeters deep is drilled into the end of the column. The base of the finial has a corresponding dowel or tenon. The connection is made with adhesive. The adhesive must be waterproof (carpenter's PVA class D3 or polyurethane) so the finial does not detach due to humidity fluctuations.
Wood Species for Staircase Elements
The choice of wood species affects strength, durability, appearance, and cost.
Oak: the king of staircase constructions
Oak is a hard, dense, wear-resistant wood. Its grain is expressive, with large rays creating a characteristic pattern. Color ranges from light yellow to dark brown. Oak is not afraid of humidity (within reasonable limits), does not deform, and holds its shape for decades. Oak balusters, handrails, and columns are an investment for the lifetime of the house.
The disadvantage of oak is its high price and difficulty of processing. Oak is hard, cutting tools dull quickly, and the work requires powerful equipment and patience. But the result justifies the effort.
Beech: a warm alternative to oak
Beech is slightly softer than oak but still strong and wear-resistant. Its grain is uniform, fine-grained, with a light pink or cream color. Beech is easier to process than oak but is sensitive to humidity: it can warp with fluctuations. For staircases, use only kiln-dried beech with a moisture content of 8–10 percent.
Beech takes stains well, accepting wood stains to create imitations of more expensive species. Beech balusters are often stained to resemble walnut, mahogany, or wenge.
Ash: A Combination of Strength and Flexibility
Ash is a hard wood with high impact toughness. Its grain is contrasting, with pronounced annual rings creating a striped pattern. Color ranges from light gray to yellowish-brown. Ash is strong, resilient, and bends well—ideal for making curved handrails.
Ash is more difficult to process than beech and requires sharp tools. But the result is impressive: ash balusters combine strength with expressive grain.
Pine: budget option
Pine is a soft coniferous wood, the most affordable in price. Its grain features contrasting annual rings, with color ranging from light yellow to reddish. Pine is easy to work with but is soft, easily damaged, and dents from impacts remain permanently.
For staircase elements, pine is conditionally suitable: pine balusters last less than those made from hardwoods and require careful handling. But for cottage staircases, temporary structures, and budget projects, pine is acceptable.
Larch: coniferous hardness
Larch is a coniferous species but is hard, dense, and resinous. In strength, it is close to oak. Its grain is expressive, with an amber-yellow color. Larch is not afraid of moisture and does not rot—ideal for outdoor staircases, terraces, and porches.
Larch is more difficult to process than pine, and its resin clogs tools. But its durability compensates for the difficulties.
Styles of Staircase Decor
The style of a staircase is determined by the shape of the balusters, the profile of the handrails, the carving on the columns, and the type of finials.
Classic style
Classicism requires symmetry, proportionality, and clarity of form. Balusters are turned, with smooth thickenings and thinnings, and a baluster-like profile. Columns are massive, with carved capitals and bases. Finials are in the form of spheres, vases, or urns. The handrail is oval or round, with a smooth polished surface. The wood is light (beech, ash) or dark (oak), coated with a clear varnish that emphasizes the grain.
A classical staircase is monumental, solemn, and timeless. It is not subject to fashion and remains relevant for decades.
Baroque: luxury and theatricality
Baroque is an excess of decor, complexity of forms, and dynamic lines. Balusters are twisted, with carvings imitating fabric and plant motifs. Columns have deep reliefs: acanthus leaves, putti, cartouches. Finials are complex, multi-tiered, with gilding. The handrail may have a figured profile and carved inserts.
A Baroque staircase is the centerpiece of an interior, the main object of attention. It requires ample space, high ceilings, and support from the rest of the decor.
Modern: smoothness and organic forms
Art Nouveau rejects symmetry in favor of smooth curves and natural forms. Balusters can be asymmetrical, imitating plant stems or flowing water. Posts feature carvings of stylized flowers, insects, or female figures. Finials are abstract and streamlined. The handrail can be curved, following a complex trajectory.
Modernist staircases are artistic, individual, but complex to manufacture—requiring high carving skill or expensive CNC machinery.
Scandinavian minimalism
Scandinavian style values simplicity, functionality, and naturalness. Balusters are simple, with square or round cross-sections, and no carving. Posts are laconic, rectangular, with minimal processing. Finials are absent or very simple (cube, sphere). The handrail is round or rectangular, coated with transparent oil or wax that preserves the natural color and texture.
Wood is light-colored: pine, birch, ash. Colors are white, light gray, natural. A Scandinavian staircase is airy, light, and does not overwhelm the space.
Loft: industrial aesthetics
Loft combines wood with metal, concrete, and glass. Balusters can be metal rods, with minimal wooden elements. Or the opposite: massive wooden balusters with rough processing, visible tool marks, knots, and cracks—creating an effect of aged, reclaimed wood.
Posts are simple, rectangular, made from old beams or deliberately roughly processed boards. The handrail can be a metal pipe or a thick wooden board with unfinished edges. A loft-style staircase is brutal, characteristic, and contrasting.
Interior decor workshop: organizing the workspace
Creationof handmade interior decorrequires a properly organized workspace.Interior decor workshop—it doesn't necessarily have to be a huge workshop with industrial equipment. For home work, a garage, shed, or even part of a basement is sufficient, provided ventilation and lighting are ensured.
Minimum set of tools
To make balusters, handrails, and posts, you will need:
-
Wood lathe (minimum power 500 watts, distance between centers 1000 millimeters)
-
Hand router (power 1200–1500 watts) with a set of router bits
-
Circular saw or miter saw for cutting workpieces
-
Belt sander for flat surfaces
-
Orbital sander for curved surfaces
-
Drill with a set of wood drill bits
-
Hand tools: chisels, planes, rasps, files
-
Measuring tools: tape measure, square, caliper, level
This set is sufficient for creating most staircase elements by hand.
Work Process Organization
Work proceeds in stages. First—purchasing and preparing the wood. Workpieces must rest in the workshop for at least a week to acclimate to the room's humidity and temperature. Then—cutting the workpieces to size with a margin. Next—rough processing (turning, routing). The following stage—sanding to perfect smoothness. Final—drilling holes for fasteners, applying a protective coating.
Dust management is the main problem in woodworking. Install an exhaust or vacuum connected to the machines. Use a respirator when sanding—wood dust is harmful to the lungs.
Final finish: oil, wax, varnish
Unprotected wood quickly becomes soiled, darkens, and absorbs moisture. The finish creates a protective layer, highlights the grain, and gives a finished appearance.
Oil
Oil (linseed, tung, special wood oils) penetrates the wood pores, fills them, and creates moisture protection. Oil does not form a film on the surface; the wood remains breathable and pleasant to the touch. The texture is maximally revealed, the color deepens and becomes richer.
Applying oil: the surface is dusted, oil is applied generously with a brush or pad, rubbed into the wood. After 15–20 minutes, excess is wiped off with a dry cloth. After 24 hours, a second coat is applied. For handrails that will be heavily used, a third coat is recommended.
The drawback of oil—it requires periodic renewal (every year or two), especially for handrails.
Wax
Wax (beeswax, carnauba) is applied over oil or on its own. Creates a silky surface with a slight sheen, pleasant to the touch. Wax is rubbed into the wood with a soft cloth in circular motions, then polished.
Wax coating is not durable, requires regular renewal, but provides an unparalleled tactile sensation—this is exactly the finish used for handrails in luxury interiors.
Varnish
Varnish (polyurethane, alkyd) creates a hard protective film on the wood surface. Varnish protects against moisture, dirt, and mechanical damage better than oil or wax. However, the varnished surface is cooler to the touch and less natural.
For stair elements, matte or semi-matte varnishes are used—they reflect less light and hide minor scratches. Glossy varnish is striking, but on handrails, it quickly becomes covered with a network of micro-scratches from hands.
Varnish is applied with a brush or spray gun in 2–3 coats with intermediate sanding using fine sandpaper (320–400 grit). The final coat is not sanded.
Staining and Patination
If you want to change the color of the wood, use stains (water-based, alcohol-based, oil-based). Stain is applied with a brush or cloth, penetrates the wood, colors it while preserving the visibility of the grain. After the stain dries, a protective coating (oil or varnish) is applied.
Patination is a technique of artificial aging. It is used for classic, vintage interiors. Dark paint or wax is applied to carved elements, rubbed into the recesses of the carving, and partially wiped off the raised parts. This creates the effect of natural darkening over time.
Answers to Popular Questions
Can balusters be made without a lathe?
Yes, you can make flat balusters by cutting them from a board with a jigsaw or band saw. Or use simple square-section balusters with minimal router work. However, a lathe is essential for turned balusters.
What distance should be between balusters?
According to building codes, the gap between balusters should not exceed 100–120 millimeters. For families with small children, it is recommended to reduce it to 80–100 millimeters.
How long does it take to make one baluster?
It depends on the complexity. An experienced craftsman can make a simple turned baluster in 20–30 minutes. A complex carved one—several hours. A beginner may need 1–2 hours for the first baluster.
Can laminated wood be used for stair elements?
Yes, laminated wood (furniture board) is even more stable than solid wood—it warps less from humidity. The key is to use high-quality gluing with moisture-resistant adhesive.
How to calculate the number of balusters for a staircase?
Determine the number of steps, multiply by the number of balusters per step (usually 2), add support posts (usually 2–3). Add a 10 percent reserve for defects and errors.
Do balusters need to be treated with antiseptic?
For interior stairs using dry wood, antiseptic treatment is not mandatory. For outdoor stairs, terraces, and porches, antiseptic treatment is mandatory before applying the final coating.
Can wooden balusters be painted white?
Yes, wood can be painted with any paints (acrylic, alkyd, oil-based). White balusters are a classic of Scandinavian and Provence styles. The wood must be primed before painting.
How to connect a handrail at a staircase turn?
Use ready-made curved elements or make a curved handrail using the lamination method. The connection between the straight and curved sections is made on a miter (at a 45-degree angle) with wood glue and additional dowel reinforcement.
Conclusion: Staircase as an Art of Self-Expression
A staircase created by your own hands from natural wood carries something more than just a functional structure. It is materialized time—hours of work on the lathe, days of sanding, weeks of waiting for the coating to dry. It is embodied craftsmanship—the ability to feel the wood, control the tool, achieve perfect form. It is individuality—the impossibility of exactly repeating handwork, the uniqueness of each baluster, each handrail.
Working with wood, you enter into a dialogue with the material. Wood is not plastic like clay, not pliable like paper. It has its own will: fibers, knots, resin pockets dictate the direction of the chisel, limit possibilities. Learning to work with wood means learning to listen to it, accept its character, find a compromise between your vision and the nature of the material.
A staircase assembled from elements made in the interior decor workshop with your own hands becomes the central object of the house. It connects floors not only physically but also emotionally: each time you ascend it, you touch the handrail you turned yourself, see the balusters whose shape you designed, feel the pride of the creator.
STAVROS has been manufacturing wooden elements for stairs and interiors for over two decades. The STAVROS range includes balusters of all styles and shapes: from simple turned to complex carved, from classic symmetrical to modern minimalist. Handrails of round, oval, rectangular cross-section made of oak, beech, ash. Support posts with and without carving, starting and intermediate. Finials—from simple balls to exclusive carved figures.
STAVROS offers ready-made elements for those who want to assemble a staircase themselves but cannot manufacture the parts. All products are made from selected kiln-dried wood and undergo multi-stage quality control. Dimensional accuracy, clean finish, absence of defects—STAVROS standards guarantee easy installation and long-lasting structure.
For those creating elements themselves, STAVROS offers specialist consultations: how to choose wood species, which tools to use, how to avoid common mistakes. The experience accumulated over years of work helps amateur craftsmen achieve professional results.
STAVROS works not only with private clients but also with designers, architects, and construction companies. The ability to manufacture elements according to individual drawings allows for the realization of unique projects: staircases for mansions, restoration of historical objects, exclusive interiors.
Creating a staircase is a multi-stage process requiring planning, patience, and attention to detail. But the result justifies the effort: the staircase becomes not just a way to reach the second floor, but an architectural statement expressing your taste, values, and attitude towards the home. Every ascent on such a staircase reminds you that you are not just a resident of the house, but its creator, the author of the space in which you live.