Article Contents:
- Wall and Floor Preparation
- Surface Diagnosis: Identifying Problem Areas
- Surface Leveling: Creating an Ideal Plane
- Floor Preparation: Ensuring a Smooth Transition
- Choosing Fasteners and Tools
- Fastening Systems: From Traditional to Innovative
- Tool Set: Professional Approach
- Consumables: Ensuring Quality
- Installation Features of MDF and Wooden Profiles
- Installing MDF Baseboards: Technical Nuances
- Installing Wooden Baseboards: Working with Natural Material
- Special Elements: Corners, Plugs, Connectors
- Sealing and protection against moisture
- Joint Sealing: Preventing Moisture and Dust Infiltration
- Waterproofing in Humid Areas
- Protection from Mechanical Damage
- Surface Care and Restoration
- Regular Maintenance: Preserving Original Appearance
- Repairing Local Damage
- Full Restoration: Returning to Original Appearance
- STAVROS Technology — Durability in Details
- Material Quality: Foundation of Longevity
- Technical Support: From Consultation to Installation
- Conclusion

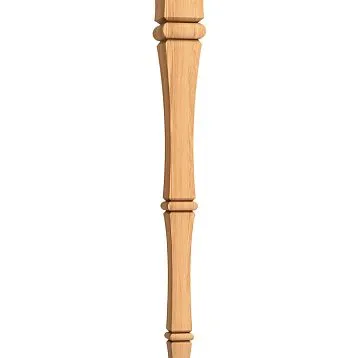
The quality of installation determines the service life and aesthetic perception of architectural elements.MDF Skirting BoardInstalled according to technology, it serves 15-20 years without deformation or peeling.Wooden baseboardWith professional installation, it retains functionality and beauty for 30-50 years.Baseboard InstallationRequires precise measurements, proper fastener selection, and care in every operation.Baseboard CareExtends service life, preserves original appearance, prevents premature wear.Based on 23 years of experience in manufacturing and installing architectural elements, includes detailed instructions and professional technical support.Preparation of walls and floors


Surface diagnostics: identifying problem areas


Before installation, walls must be carefully assessed. Visual inspection reveals obvious defects - cracks, peeling plaster, unevenness exceeding 5 millimeters. For precise diagnostics, a long straightedge or laser level is used. A 2-meter straightedge is placed at various points on the wall, and gaps between the straightedge and wall are measured with a feeler gauge. Unevenness exceeding 3 millimeters over a 2-meter length requires leveling.
Wall moisture is critical for the longevity of installation. Walls after plastering must be completely dry - moisture content no more than 4-5% for cement plaster, 2-3% for gypsum plaster. Moisture is measured with an electronic hygrometer. Wet walls cause adhesive delamination, fastener corrosion, and mold growth behind baseboards.
Installing on wet walls - a common mistake leading to rework.Baseboard InstallationFoundation strength is checked by tapping. A dull sound indicates plaster detachment from the substrate. Such areas are marked, plaster is removed, and the surface is replastered. Weak plaster cannot withstand the load of fasteners, and the baseboard will detach along with the detached plaster. Foundation strength is the foundation of long-lasting installation.
Angle geometry is assessed using a square or laser measuring tool. A 90-degree right angle is rare in real construction. Deviations of 2-5 degrees are typical. Precise angle measurement is necessary for correct baseboard trimming. Standard 45-degree trimming works only for ideal right angles. For 88 or 92-degree angles, individual trimming at 44 or 46 degrees respectively is required.
Surface leveling: creating an ideal flat surface
Our factory also produces:


Local leveling eliminates minor unevenness up to 3-10 millimeters. Gypsum putty is applied using a 150-200 mm wide trowel. The unevenness is filled slightly in excess, then sanded with P120-P150 abrasive mesh to create a smooth surface. Local leveling saves time and materials compared to full wall plastering.
Strip leveling creates a flat strip 150-200 mm wide at the baseboard installation height. Using a laser level, guide rails - metal profiles mounted on gypsum mix - are installed. Plastering compound is applied between guide rails and leveled with a straightedge. After the compound sets, the guide rails are removed and the gaps are filled.
Installed on an ideally flat strip, ensuring tight contact along the entire length.Wooden baseboardFull wall plastering is required for significant unevenness exceeding 20 millimeters. A guide rail system is installed along the entire wall height, and plastering compound is applied in 15-20 mm layers with intermediate drying. The final layer is troweled to create a smooth surface. Full plastering is the most expensive but also the highest quality preparation method.
Grouting prepared surfaces is mandatory. Deep-penetration primer strengthens the plaster surface layer, binds dust, and improves adhesive bond of the adhesive. Applied with a brush or roller in one to two layers with intermediate drying of 2-4 hours. Primer consumption is 0.1-0.15 liters per square meter. Saving on primer reduces installation strength.
Floor preparation: ensuring a smooth transition
Get Consultation
Cleanliness of the floor in the baseboard installation zone is critical for tight contact. Construction dust, residual plaster, and debris create micro-unevenness that prevent tight contact. A 50-100 mm wide strip along walls is thoroughly cleaned with an industrial vacuum cleaner. Residual adhesive or plaster is removed with a trowel or scraper.
Installed on an ideally clean surface.MDF Skirting BoardFloor unevenness is compensated in various ways. For unevenness of 1-2 mm, an elastic sealant is used to fill the gap between the baseboard and floor. For unevenness of 3-5 mm, the bottom edge of the baseboard is trimmed with a hand plane or sander to match the floor profile. For unevenness exceeding 5 mm, floor leveling with self-leveling compound is required.
The compensatory gap between the floor covering and wall must be covered by the baseboard. Laminate and parquet flooring require a 10-15 mm gap to compensate for temperature and humidity expansion. The baseboard is attached to the wall, not the floor, allowing the covering to move freely. Attaching the baseboard to the floor blocks compensation, causing floor bulging, squeaking, and deformation.
Protecting the floor covering during installation prevents damage. Parquet, laminate, and linoleum are covered with cardboard or heavy-duty plastic in the work zone. Tool drops, ladder scratches, and dirt from shoes damage the covering. Protection costs little but saves significant money on covering repairs.
Includes mandatory protection of all surfaces.Based on 23 years of experience in manufacturing and installing architectural elements, includes detailed instructions and professional technical support.Selection of fasteners and tools
Fastening systems: from traditional to innovative
Screws and anchors - a traditional reliable method of fastening. For concrete and brick walls, nylon anchors 6 mm in diameter and 40 mm long, and 4x40 mm screws are used. Holes are drilled with a drill bit 6 mm in diameter at 40-50 cm intervals. First fastening is 5-7 cm from the corner, last fastening is 5-7 cm from the baseboard edge.
Thickness of 16-20 mm withstands screw fastening without cracking when pre-drilled.Wooden baseboardClips - a hidden fastening system without visible fasteners. Clips are installed on the wall at 40-50 cm intervals, and the baseboard clicks into the clips. Advantages - no visible screw heads, possibility of removing the baseboard for access to utilities. Disadvantages - less reliability compared to screws, sensitivity to wall flatness.
With a clip system, popular in modern interiors.MDF Skirting BoardAdhesive fastening uses polymer adhesives - liquid nails, construction adhesive, specialized baseboard adhesives. Adhesive is applied to the back of the baseboard in dots or strips with 20-30 cm intervals. The baseboard is pressed against the wall for 10-20 seconds, then secured with painter’s tape or supports for 12-24 hours until adhesive polymerizes. Adhesive fastening works only on perfectly flat walls and is not suitable for heavy wooden baseboards.
Combined fastening combines screws and adhesive. Adhesive is applied to ensure tight contact along the entire length, screws provide mechanical fastening. This method is optimal for
Combined fastening combines screws and adhesive. Adhesive is applied to ensure tight contact along the entire length, screws provide mechanical fastening. This method is optimal forSolid Wood Skirting BoardOn walls with minor irregularities. The adhesive fills irregularities up to 2-3 millimeters, and self-tapping screws attach the skirting board to the wall. This combination ensures maximum reliability and aesthetics.
Toolset: Professional approach
Measuring tools ensure accurate marking. The laser level projects a horizontal line around the room perimeter, along which the skirting boards are aligned. Modern laser levels are accurate to ±1 millimeter per 10 meters. A 5-10 meter tape measure for measuring skirting board lengths. A square for checking corner angles. A protractor for measuring non-standard angles. A pencil for marking.
Cutting tools for precise trimming of skirting boards. A miter saw with a rotating table provides accurate angled cuts at any angle from 0 to 90 degrees. Cutting accuracy ±0.5 degrees. A fine-toothed disc with 80-100 teeth creates a clean cut without chipping. A hand hacksaw with fine teeth for individual cuts. A miter block for manual trimming at standard 45 and 90-degree angles. Cutting accuracy is critical for tight corner joints.
Drilling tools for preparing holes. A hammer drill for drilling into concrete and brick. Drill bits with diameters of 6 and 8 millimeters. A cordless drill for drilling into wood. Wood drill bits with diameters of 2-4 millimeters for pre-drilling holes for self-tapping screws. A countersink for creating a conical recess for the screw head.Baseboard InstallationRequires precise drilling without misalignment.
Fastening tools for installation. A cordless drill with adjustable torque. PH2 or PZ2 bits depending on screw type. A hammer for driving in anchors. A caulking gun for adhesive. Painter’s tape for temporary fixation. Supports for holding the skirting board during adhesive installation. Professional tools speed up work and improve quality.
Finishing tools for final operations. A narrow putty knife (30-40 mm) for applying sealant and putty. P150-P220 sandpaper for sanding. A brush for applying varnish or paint. A rag for removing excess materials. A vacuum cleaner for cleaning dust. The tool kit costs 30,000-50,000 rubles, but pays for itself through quality and speed of work.
Consumables: ensuring quality
Fasteners are selected based on wall type and skirting board material. For concrete — nylon anchors 6x40 and screws 4x40. For gypsum board — butterfly anchors 10x50 and screws 4x35. For wood — screws 3x35 without anchors. Fastener quantity is calculated based on installation spacing of 40-50 centimeters. For a room with a 20-meter perimeter, 40-50 fastening points are required, i.e., 40-50 anchor-screw sets.
ForMDF Skirting BoardsForSolid Wood Skirting BoardFor — polyurethane adhesive or specialized wood adhesive. Adhesive consumption is 300-500 grams per 10 linear meters depending on application method. Quality adhesive costs 300-500 rubles per 400-500 gram tube.
Sealants for filling joints and gaps. Acrylic sealant for painting, for filling jointsMDF Skirting Boardsbefore painting. Silicone sealant in wood color for filling technological gaps in wooden skirting boards. Colored sealants — white, beech, oak — are selected to match the skirting board color. Sealant consumption is 100-200 grams per 10 linear meters. A 310 ml cartridge costs 150-300 rubles.
For filling mounting locations. Wood putty in wood species color fills recesses from screw heads on wooden skirting boards. Acrylic putty for painting, for MDF skirting boards. After drying, the putty is sanded, and the surface is painted or varnished. A 400 gram can of putty costs 200-300 rubles, sufficient for 50-100 mounting points.Based on 23 years of experience in manufacturing and installing architectural elements, includes detailed instructions and professional technical support.Includes high-quality finishing of all joints.
Features of installing MDF and wooden profiles
Installing MDF skirting boards: technical nuances
Acclimatization of MDF skirting boards before installation prevents deformation. Skirting boards are unpacked and laid horizontally in the room where they will be installed. They are left for 24-48 hours at a temperature of 18-25 degrees and humidity of 40-60 percent. MDF stabilizes, taking dimensions corresponding to operating conditions. Installation without acclimatization leads to gaps appearing in joints after several weeks.
Trimming MDF skirting boards is done with a miter saw using a wood disc with 80-100 teeth. The skirting board is laid with the front side up and pressed against the saw’s fence. The cut is made with a smooth motion without pressure — the disc cuts the material itself. Pressure creates chips on the front side. For internal corners, trim at 45 degrees; for external corners, trim at 45 degrees in the opposite direction.MDF Skirting BoardRequires a sharp disc without chipped teeth.
Mounting MDF skirting boards with clips — recommended method. Clips are installed on the wall at 40-50 centimeter intervals. The first clip is placed 10 centimeters from the corner, subsequent clips at equal intervals. The clip is pressed against the wall, and drilling points are marked through the holes. 6 mm holes are drilled, anchors inserted, and the clip is screwed in. The skirting board clicks into place on the clips with a light press until a distinct click is heard.
Mounting MDF skirting boards with self-tapping screws is used for uneven walls. The skirting board is pressed against the wall, and 3 mm holes are drilled through the front side at 40-50 centimeter intervals. These holes are then drilled into the wall with a 6 mm drill bit. Anchors are inserted, and the skirting board is screwed in. Screw heads are countersunk 1-2 mm, and recesses are filled with acrylic putty. After the putty dries, it is sanded, and the skirting board is painted.
Corner joints of MDF skirting boards require precision. Two skirting boards are trimmed at 45 degrees and joined at the corner. With an ideal cut, the joint is tight with no gaps. If a gap up to 1 mm exists, it is filled with acrylic sealant matching the skirting board color. The sealant is squeezed into the gap, excess is wiped away with a damp cloth. After drying, the joint is almost invisible.Baseboard InstallationRequires millimeter-accurate corner cuts.
Installing wooden skirting boards: working with natural material
Wood acclimatization is more critical than MDF. Wooden skirting boards are left in the room for 3-5 days at a temperature of 18-25 degrees and humidity of 40-60 percent. The wood stabilizes to moisture levels corresponding to operating conditions. Skirting board moisture is checked with a pin-type hygrometer — it should be 8-12 percent. Installing damp skirting boards leads to shrinkage and gaps 2-3 mm wide in joints.
Trimming wooden skirting boards requires sharp tools. A dull disc tears fibers and creates chips. Cutting is done with a miter saw using a wood disc with 100-120 teeth. The skirting board is laid with the profile side up and firmly pressed against the fence. The cut is made with a smooth motion over 3-5 seconds. Fast cutting causes wood burning, slow cutting — chips.Wooden baseboardOak is harder to cut than beech due to higher density.
Pre-drilling prevents cracking. The skirting board is positioned against the wall, and mounting points are marked at intervals of 40-50 centimeters. Using a 3-4 mm drill bit (slightly smaller than the screw diameter), drill through holes in the skirting board. With a countersink, create a conical recess under the screw head, 3-4 mm deep. Drill holes through the wall, insert plastic anchors, and tighten the screws. Pre-drilling is mandatory for hardwoods - oak, ash, beech.
Screwing wooden skirting boards is the primary method. Use concealed-head screws of 4x40 or 4x50 mm depending on the skirting board thickness and wall type. Screw the screw into the countersunk recess until the head is fully flush. Torque is adjustable — excessive torque splits the wood. Recesses are filled with wood putty matching the wood species. After drying, sand with P180-P220 abrasive.
Wooden skirting board corner joints require precision. 45-degree bevels are cut using a miter saw with ±0.5 degree accuracy. Before installation, the beveled edges are sanded with fine-grit sandpaper to remove fine wood fibers. Skirting boards are joined at the corner, and the fit is checked. If the gap is up to 0.5 mm, it is filled with wood putty. If the gap exceeds 0.5 mm, the skirting board must be re-cut — a wide gap is noticeable.Based on 23 years of experience in manufacturing and installing architectural elements, includes detailed instructions and professional technical support.ensures precision of corner joints.
Special elements: corners, end caps, connectors
Internal corners are formed in two ways. First — both skirting boards are beveled at 45 degrees and joined at the corner. Requires precise measurement of the room’s angle and corresponding beveling. Second — use pre-made corner elements. Plastic or wooden corner caps are installed at the corner, and skirting boards are fitted from both sides, butting vertically. Corner elements simplify installation but look less aesthetically pleasing than 45-degree beveling.
External corners are less common — columns, protrusions, bay windows. Beveling is done in the opposite direction compared to internal corners. External corners are technically more complex — even slight deviation from the exact angle creates a visible gap. Alternative — use external corner caps.MDF Skirting Boardwith corner elements, installation is faster but looks less professional.
Connector elements are used to join straight sections of skirting board. If the wall length exceeds the skirting board length (typically 2.4–2.8 meters), a connection is required. Skirting boards are butted vertically and joined with a special connector 20–30 mm wide. The connector covers the joint, creating a neat transition. Professional solution — bevel the ends at a slight angle of 5–10 degrees from vertical, creating a barely noticeable wedge joint.
End caps cover the ends of skirting boards where they terminate — doorways, staircases. Plastic end caps are matched to the skirting board color. Wooden end caps are made from the same wood species as the skirting board. The end cap has a profile matching the skirting board’s end profile and is installed with adhesive or snapped into place.Wooden baseboardwith wooden end caps, it looks seamless, without contrasting plastic elements.
Sealing and Protection from Moisture
Joint sealing: preventing moisture and dust penetration
Acrylic sealant for interior use is used to fill jointsMDF Skirting Boardsfor painting. Sealant is extruded from a cartridge using a caulking gun in a thin bead into the gap between the skirting board and wall, between the skirting board and floor, and into corner joints. Excess is wiped away with a damp cloth before drying. The sealant dries in 2–4 hours, forming an elastic, waterproof seal. After drying, the sealant is painted along with the skirting board.
Silicone sealant for wooden skirting boards is matched to the wood color — transparent, white, beech, oak, walnut, wenge. The sealant fills the technological gap of 2–5 mm between the skirting board and wall, compensating for wall irregularities. Applied in a thin layer, smoothed with a wet finger or putty knife, creating a smooth transition from skirting board to wall. Silicone sealant is elastic, compensating for wood’s temperature and humidity expansion without cracking.
Corner sealing is especially important — corners concentrate stress, where gaps appear more frequently. Acrylic or silicone sealant is extruded into the corner joint, excess is wiped away. After drying, the sealant holds the corner joint, preventing the gap from opening. In critical rooms — bathrooms, kitchens — sanitary silicone sealant with fungicidal additives is used, preventing mold growth.
Sealing around pipe and cable penetrations is done with elastic sealant. A hole is cut in the skirting board for the pipe, 5–10 mm larger than the pipe diameter. The gap is filled with silicone sealant, creating an elastic seal. The sealant compensates for pipe vibrations and thermal expansion, preventing dust and moisture ingress.Baseboard Installationincludes careful sealing of all penetrations.
Hydro-isolation in humid rooms
Bathrooms and toilets require special protective measures.Wooden baseboardTreated with water-resistant lacquer or wax-oil with hydrophobic additives before installation. Skirting board ends — the most vulnerable areas — are impregnated in two to three layers with intermediate drying. Treated skirting board withstands direct water contact for 30–60 minutes without damage.
MDF skirting boards in humid rooms use water-resistant — HDF (High Density Fiberboard) class. Density 850–950 kg/m³, with water-resistant binders.MDF Skirting BoardWater-resistant MDF skirting boards are painted with water-resistant acrylic or polyurethane-based paint in three to four layers. Ends must be painted — unprotected MDF ends absorb moisture and swell.
Sanitary sealant with fungicidal additives prevents mold formation. Contains biocides suppressing fungal, bacterial, and algae growth. Used for sealing all skirting board joints in humid rooms. Color — white, transparent, matched to skirting board color. Sanitary sealant is 30–50% more expensive than standard sealant, but saving on it results in black mold appearing in joints after 6–12 months.
Ventilation gap of 2–3 mm between skirting board and floor in humid rooms ensures air circulation and drying of moisture. Skirting board is installed slightly away from the floor, the gap remains open or is covered with a perforated strip. Ventilation prevents condensation buildup and mold growth.Based on 23 years of experience in manufacturing and installing architectural elements, includes detailed instructions and professional technical support.In humid rooms, this includes a complex of hydro-isolation measures.
Protection from mechanical damage
The bottom edge of the skirting board is subject to mechanical impacts — vacuum cleaner hits, mops, feet, furniture. A protective plastic or rubber strip 10–15 mm wide is installed on the bottom edge of wooden skirting board. The strip absorbs impacts, preventing chips and scratches. Strip color — black, gray, transparent — matched to interior design. The strip is glued or snapped into place.
Skirting board corners are the most vulnerable areas. Protective metal or plastic corner guards are installed on external corners exposed to impacts. The corner guard has an L-shaped cross-section, glued in place, covering the corner from both sides. Material — stainless steel, aluminum, durable plastic. Color — metallic, wood-tone, transparent. Corner guards are especially important in high-traffic areas — corridors, hallways.
Waxing wooden skirting boards creates a protective layer. Hard wax is applied to the skirting board surface and rubbed with a cloth until glossy. Wax fills wood pores, creating a thin protective film that repels water and dirt. Waxing frequency — every 6–12 months depending on usage intensity. Wax enhances wood texture, giving a noble matte sheen.
Lacquering MDF skirting boards increases durability.MDF Skirting BoardPainted surfaces are additionally covered with a transparent acrylic or polyurethane lacquer in one to two layers. The lacquer creates a hard, transparent film protecting the paint from abrasion, scratches, and water. Wear resistance increases by 2-3 times. The lacquer is chosen matte or satin—glossy does not match modern aesthetics.
Surface Care and Restoration
Regular Care: Maintaining Original Appearance
Dry cleaning is the primary method of caring for baseboards. Dust is removed with a soft brush, microfiber cloth, or vacuum cleaner with a soft brush attachment once a week. Dust accumulation on baseboards creates an untidy appearance, absorbs moisture, and promotes microbial growth. Regular dry cleaning takes 5-10 minutes per room, preventing the buildup of contaminants.Baseboard CareIt begins with regular dust removal.
Wet cleaning is performed every 2-4 weeks. A microfiber cloth is lightly dampened with water and thoroughly wrung out until barely damp. Baseboards are wiped with gentle motions, removing dust and light contaminants. Excess moisture is dangerous for wooden baseboards—it causes wood swelling and darkening. ForMDF Skirting Boardsexcess moisture causes end swelling and coating delamination.
Specialized wood care products are used every 3-6 months. Wood polishes contain waxes, oils, and silicones, forming a protective layer. The product is applied to a soft cloth and rubbed into the baseboard surface with circular motions. The wood acquires a light sheen, color becomes richer, and the surface repels dust and moisture.Wooden baseboardWith regular care, it retains its beauty for decades.
Prohibited cleaning agents and methods. Abrasive cleaning powders scratch the surface and destroy the protective coating. Aggressive solvents—acetone, white spirit, ammonia spirit—dissolve lacquers and paints, lightening the wood. Metal brushes and sponges leave deep scratches. Steam cleaners create excessive humidity, causing deformation. Washing with running water is unacceptable—baseboards cannot withstand direct contact with large amounts of water.
Repairing Local Damage
Scratches on lacquered surfaces are removed with touch-up markers or pencils. The marker is matched to the baseboard color, and the scratch is filled with light strokes. Excess is wiped off with a dry cloth. Deep scratches down to the wood are filled with wood putty in the wood species color. After drying, the putty is sanded with fine sandpaper P220-P240, and the repair area is covered with lacquer or oil matching the surrounding surface.
Dents on wooden baseboards are restored using a steam method. A small dent up to 2 millimeters deep is moistened with water, covered with a damp cloth, and heated with an iron. Steam penetrates the wood, compressed fibers swell, and the dent rises. After drying, the area is sanded with fine sandpaper and covered with lacquer or oil. This method works only for natural wood, forMDF Skirting Boardsit is not applicable.
Chipped corners are filled with two-component epoxy wood putty. The putty is mixed according to instructions and applied to the chip with slight excess. After full curing (24 hours), the putty is sanded with a file, then sanded with sandpaper P150-P220. The restored shape is primed, painted or stained to match the baseboard color, and covered with a protective lacquer. Quality repair is not noticeable from a distance of 1-2 meters.
Stains from water, grease, and markers require different removal methods. Water stains on lacquered baseboards are removed with furniture polish containing mild abrasive. Grease stains are removed with specialized wood degreasers. Marker stains are removed with alcohol or specialized cleaners. After stain removal, the area is treated with polish to restore shine. Old, deep stains require sanding and re-coating.
Full Restoration: Returning to Original Appearance
Resanding wooden baseboards restores worn surfaces. Baseboards are removed from walls, old coating is removed with an abrasive sander using P80-P100 grit. A layer of 0.5-1.0 millimeter is removed down to clean wood. Next, the surface is sanded sequentially with P120, P150, P180 grit until perfectly smooth. The wood looks new and is ready for fresh coating.Wooden baseboardIt allows 3-4 resanding cycles over its service life.
Re-painting MDF baseboards refreshes the appearance. The surface is cleaned of dust and grease, lightly sanded with P180-P220 grit to create texture. Dust is removed with vacuum and damp cloth. One layer of primer is applied, followed by two paint layers with intermediate drying. Each layer is lightly sanded for a smooth finish. The final lacquer layer increases durability.MDF Skirting BoardAfter repainting, it looks brand new.
Staining for color change is applied to wooden baseboards. Old lacquer coating is removed by sanding or lacquer stripper. Clean wood is covered with a new stain shade—from light to dark. Stain is applied with brush or cloth, excess is wiped with cloth. After drying, a protective coating—lacquer or oil—is applied. Staining allows changing baseboard color without replacement when interior design changes.
Replacing damaged sections is a last resort. Severely damaged baseboards—with deep cracks, chips, or rot—are replaced with new ones. It is important to preserve samples of old baseboards to select replacements matching profile, species, and shade.Based on 23 years of experience in manufacturing and installing architectural elements, includes detailed instructions and professional technical support.It includes the service of manufacturing baseboards to samples for restoration projects. Partial replacement saves money compared to full replacement throughout the room.
STAVROS Technology — Durability in Details
Quality Materials: The Foundation of Durability
STAVROS uses only kiln-dried wood with 8-12% moisture content. Drying is performed in automated kilns with precise temperature and humidity control. The process takes 14-21 days depending on species and thickness. Kiln drying ensures uniform moisture throughout the material, minimizes internal stresses, and prevents deformation after manufacturing.Wooden baseboardSTAVROS is stable, does not crack or warp.
MDF boards of E1 emission class guarantee ecological safety. Formaldehyde content is less than 0.124 mg per cubic meter of air—5-7 times lower than the maximum allowable concentration. MDF density of 760-780 kg per cubic meter ensures strength and geometric stability.MDF Skirting BoardSTAVROS is safe for health, confirmed by sanitary-epidemiological conclusions.
Professional-grade protective coatings ensure durability. Water-dispersive lacquers with LOS content less than 10 grams per liter are safe for health. Polyurethane lacquers create a hard, wear-resistant coating with 2H-3H hardness on the pencil scale. Oils based on linseed and tung oil with natural pigments preserve the natural wood texture. All coatings are certified for use in residential spaces.
Quality control at every stage of production guarantees no defects. Incoming raw material inspection checks moisture, density, and absence of defects. Operational control verifies dimensional and profile accuracy at each operation. Final control checks geometry, surface quality, and finish. Only products meeting all standards are marked and packaged.Based on 23 years of experience in manufacturing and installing architectural elements, includes detailed instructions and professional technical support.It starts with a quality product.
Technical support: from consultation to installation
Professional consultation helps choose optimal solutions. STAVROS specialists analyze the characteristics of the object — wall type, flooring, room humidity, interior style. Recommend suitable material —Wooden baseboardorMDF Skirting Board, profile, height, type of fastening. Consultation is free, takes 30-60 minutes, saves time and money on the right choice.
Material quantity calculation eliminates shortages or excesses. Room perimeter is measured, doorways, niches, and protrusions are accounted for. Required skirting board quantity is calculated with a 5-7% allowance for trimming. Quantity of corner pieces, plugs, connectors, and fasteners is calculated. Client receives a detailed specification listing each item and quantity.Baseboard InstallationIt starts with precise calculation.
Detailed installation instructions are included with every order. Printed instructions contain step-by-step descriptions with photos of critical operations. Video instructions on the STAVROS website show the installation process in detail. QR code on packaging provides access to the full knowledge base — instructions, videos, and answers to frequently asked questions. Client receives all necessary information for self-installation.
Conclusion
Ideal installation is the result of careful preparation, professional tools, adherence to technology, and quality materials.MDF Skirting BoardandWooden baseboardSTAVROS are designed for long-lasting, flawless service. ProperBaseboard Installationreveals the potential of quality material, ensuring a service life of 15–50 years.
RegularBaseboard Carepreserves the original beauty, prevents premature wear. Simple operations — dry and wet cleaning, use of specialized products, timely repair of local damage — take minimal time and extend the life of architectural elements for years. Full restoration after 10–15 years of use returns skirting boards to a new appearance.
Based on 23 years of experience in manufacturing and installing architectural elements, includes detailed instructions and professional technical support.Combines 23 years of architectural element manufacturing experience with modern technologies and materials. Quality products, professional technical support, warranty obligations, and after-sales service ensure customer peace of mind and confidence. Ideal installation with STAVROS is an investment in interior beauty and functionality, which pays off over decades of flawless service.