


Article Contents:
- The Most Complex Joint in Renovation
- Skirting and Jamb: Face-to-Face Joint
- Door Trim and Door Frame
- Wooden Profile as a Joining Element
- Transitions: Between Skirting and Wall Panels
- Skirting Height Selection Relative to Jamb
- Extended Thresholds and Bevels
- Ready-Made Door Joint Assembly Schemes
- Conclusion: Flawless Joints from STAVROS
- Frequently Asked Questions

A door opening is not just a hole in the wall for passage. It is a complex joint connecting vertical and horizontal elements, where different materials, planes, and functions meet.Wooden baseboardIt runs horizontally along the wall, protecting the base and creating a visual foundation.Oak casingIt frames the opening vertically, creating an architectural frame. At their point of intersection, a complex three-dimensional joint is formed, which can be resolved elegantly or become a sloppy, makeshift joint.Door Trim— frame, dados, stop trim — forms the structure defining the geometry of the entire joint.Profile made of woodIt ensures transitions between floor levels within the opening.Wooden moldingThey create additional detailing, connecting skirtings with wall panels. A professional solution to this joint separates quality renovation from amateur work. We explore the nuances of joinery, technologies, and schemes that transform a problematic zone into a flawless interior detail.


The Most Complex Joint in Renovation
The door joint at the floor-wall junction concentrates both technical and aesthetic problems. Here, at least five elements converge: floor (parquet, laminate, tile), wall (plaster, paint, wallpaper), door frame (wood, MDF),wooden floor baseboardandOak door trimEach element has its own thickness, profile, material, color. The task is to join them so that the joint appears thoughtfully designed, not random.
The geometry of the joint is determined by the relative positioning of the elements. The door frame stands in the opening, protruding from the base wall by the thickness of the frame (usually 30-40 mm). The jamb is mounted to the wall, covering the installation gap between the frame and the wall, protruding from the wall by the thickness of the jamb (18-25 mm). The skirting is mounted to the wall at the bottom, protruding by the thickness of the skirting (20-30 mm). At the point of intersection of the skirting and jamb, an angle is formed that must be neatly finished.
Common errors in this joint spoil the impression of the entire renovation. The skirting is roughly inserted into the jamb, the skirting end is visible, unprocessed, with a splinter sticking out. The jamb does not reach the floor, leaving a 5-10 mm gap between its bottom edge and the floor, filled with sealant or left as an empty void. Skirting and jamb are different colors (though they should match), creating a visual dissonance. The skirting thickness is greater than the jamb thickness, protruding forward and hitting the jamb sideways.
A professional solution implies preliminary joint design. Even during material selection, the designer determines the skirting height, jamb width, profiles, material, and color. A cross-sectional sketch of the joint is prepared, indicating all dimensions, bevel angles, and installation sequence. This sketch is handed over to the installation crew as a technical specification. Deviations from the sketch are not permitted — the joint must be implemented precisely.
Tools for a quality joint include a miter saw with angle setting accuracy of ±0.5 degrees (for 45 and 90-degree bevels), a wood-cutting jigsaw (for custom cuts in skirting to match jamb shape), a fine-grit sander (for finishing ends), a nail set (for recessing nail heads), wood putty in material tone. Without these tools, a quality joint is impossible — you’ll have to settle for an approximate result.
Time to install the joint with a professional approach: 30-40 minutes per opening. This includes marking, beveling, fitting, fastening, puttying, sanding. Rushing is unacceptable — an error in beveling means ruining an expensive material, losing time, and reducing quality. A master who installs the joint in 10 minutes is either a genius or a sloppy worker. The latter is more likely.


Skirting and Jamb: Face-to-Face Joint
Floor baseboard woodIt runs horizontally along the door opening.Oak casingIt stands vertically along the sides of the opening. Their point of intersection is a critical joint with several possible solutions. The choice of solution depends on the thickness ratio of the elements, interior style, and installer’s skill level.
Option 1: The skirting butts against the jamb at a right angle. The simplest solution, applicable when the skirting thickness is less than or equal to the jamb thickness. The skirting end is mitered at 90 degrees perpendicular to its length, sanded, and brought tightly against the jamb. The gap between the skirting end and jamb, no more than 0.5 mm, is filled with a flexible acrylic sealant in wood tone. After the sealant dries, it is sanded with fine abrasive, making the joint invisible. Advantage: simplicity. Disadvantage: the skirting end is visible, which is not noticeable with light-colored wood but contrasts with the side surface of dark stained oak.
Variant 2: The skirting board is milled at a 45-degree angle, creating a beveled edge. Visually more elegant solution. The skirting board’s edge is milled at a 45-degree angle (bevel from front to back surface), sanded, and brought up to the casing. The beveled edge has less surface area than a straight edge, appears more refined, and is less noticeable. With proper milling and sanding, the bevel is perceived as a decorative element rather than a technical edge. Applicable for skirting boards up to 25 mm thick — at greater thicknesses, the bevel becomes too long and unattractive.
Variant 3: The skirting board is cut to match the casing profile. Complex but the most aesthetically pleasing solution for profiled casings. A recess is cut into the skirting board, replicating the casing profile. The casing fits into this recess, and the skirting board flows around it, continuing seamlessly on the other side of the opening without interruption at floor level. Achieved with an electric jigsaw: the casing profile outline is marked on the back of the skirting board, cut out, and edges are sanded. High complexity, requires skill, but the result is a visually continuous skirting board with the casing seamlessly integrated.
Variant 4: Decorative corner insert. Classic solution for luxury interiors. At the junction of the skirting board and casing, a carved wooden rose (square or rectangular, 50x50 mm or 60x80 mm) is installed. The skirting board and casing rest against the rose, which conceals technical joints and transforms the junction into a decorative element. The rose may be carved (vegetal motifs, geometric patterns) or simple relief. Applicable in classical and neoclassical interiors where decorative elements are valued.
Variant 5: Casing does not reach the floor. Modern minimalist solution. The casing ends at a height of 50–100 mm from the floor. A gap forms between the bottom of the casing and the floor, into which the skirting board fits. The skirting board runs continuously along the wall without interruption at the opening. The casing appears to float above the floor, visually lightening the space. Applicable in minimalist interiors, requires perfect geometry — any curvature in the skirting board or casing will create an uneven gap, which will be visually noticeable.
Height of the skirting board and width of the casing are critical for the harmony of the junction. If the skirting board is tall (120–150 mm), the casing must be proportionally wide (110–140 mm). If the skirting board is narrow (60–70 mm), the casing must also be narrow (70–90 mm). Disproportion — skirting board 150 mm and casing 70 mm or vice versa — creates a visual imbalance, an impression that elements from different interiors have been randomly connected.
Color coordination of the skirting board and casing is mandatory. Both elements must be from the same wood species (oak), from the same production batch, with identical finish (lacquer or oil from the same manufacturer, same shade). Even a 1-tone difference is noticeable at the door junction, where elements are adjacent. Ordering skirting boards and casings simultaneously from one supplier guarantees matching. Purchasing after half a year creates a risk of mismatched tones.
Our factory also produces:


Door trim and door casing
Door molding— is a system of elements forming the door assembly. The base is the door casing, made of stiles and headjamb, joined at a 90-degree angle. Additional elements — dados (extend the casing to wall thickness), door stop strips (tighten the door stop), thresholds (cover floor level differences). All these elements must coordinate with skirting boards and casings in material, color, profile.
Door casing width is chosen based on wall thickness. For gypsum board partitions 100–120 mm, a casing width of 80–90 mm is sufficient. For brick walls 150–200 mm, a casing 100–120 mm plus dados is required. For thick walls 250–400 mm (load-bearing walls of old buildings), wide dados 100–200 mm are required, extending the casing to wall thickness. Important: the casing must be flush with wall plane or protrude 2–3 mm (for subsequent adjustment). An inset casing creates a step that the casing cannot cover.
Casing profile affects junction with casing. A casing with a flat front face width of 40–50 mm pairs well with a flat rectangular-section casing. A casing with a decorative profile (rounded front face, protruding edge) requires a casing with a corresponding profile, which either matches or complements the casing shape. Profile mismatch — flat casing on decorative casing — creates a visual break, an impression that elements are not thoughtfully designed.
Dados extend the casing to wall thickness, creating a unified corner plane. Dados join with casing in a groove or overlapping, forming an inconspicuous joint. The dado’s front face must be flush with the casing, without steps. The casing is mounted over the casing-dado joint, concealing it. A quality dado is invisible — texture, color, finish match the casing perfectly. A poor-quality dado reveals itself through tone mismatch, visible as a separate element.
Door stop strips are mounted around the casing, creating a protrusion into which the door leaf rests when closing. Strips improve sound insulation, conceal the gap between the door leaf and casing. Door stop strip profile may be simple (rectangular section 10x20 mm) or decorative (with a tongue that fits into the casing groove). When installing the casing, the protrusion of the door stop strip must be considered — the casing must cover it or be flush with it.
Lower part of the door casing is the most heavily loaded zone. Here, the casing contacts the floor, the door leaf rests against it when closing, and thousands of steps pass through. Casing stiles must rest firmly on the floor without rocking. If the floor is uneven (2–3 mm difference), adjustable shims are placed under the stiles, ensuring tight contact. After installing the casing, gaps between stiles and floor are filled with sealant, providing additional stability.
Height of door casing above floor — technical nuance affecting the junction. Standard practice — casing sits on the floor, stiles rest on flooring. Alternative — casing is raised 8–10 mm above floor on technical shims, after filling the gap with foam and letting it cure, shims are removed, leaving a gap under the casing, covered by skirting board and threshold. This solution simplifies future floor replacement without dismantling the casing, but requires precise height calculation.
Get Consultation
Wooden profile as a junction element
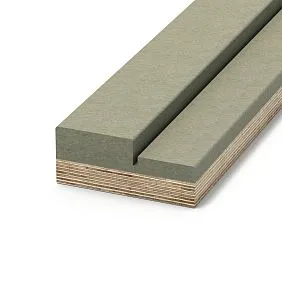
Profile made of wood— in the door junction serves as a transition element between different levels, materials, and planes. The main profile in this junction is the threshold, covering the junction between floor coverings in the opening and height differences between them.
Threshold is necessary when adjacent rooms have different floor coverings of different thicknesses. Parquet in a room 15 mm thick, tile in a corridor 12 mm thick — 3 mm difference. Laminate in a bedroom 10 mm thick, parquet board in a living room 15 mm thick — 5 mm difference. Without a threshold, this difference creates a step, tripping over which looks unattractive. A threshold with a smooth bevel compensates for the difference, creating a safe transition.
Types of wooden thresholds differ by profile. Straight threshold with rectangular section 40x20 mm — for openings without height differences, simply covers material junctions. Threshold with bevel and asymmetrical section — one side higher than the other by the amount of height difference, bevel at 15–25 degrees ensures smooth transition. T-shaped threshold for large height differences 10–15 mm — central stile fits into the gap between coverings, side flanges cover edges of coverings on both sides.
Threshold installation is performed after laying floor coverings in both rooms. The width of the opening is measured in clear span (distance between casing stiles), 2–3 mm are subtracted for thermal gaps, threshold is cut to size. Threshold ends are milled at 90 degrees, sanded. Threshold is laid in the opening, secured with adhesive or screws (screws on top — visible fastening, screws in groove — hidden). After installation, threshold ends join with adjacent room skirting boards.
Threshold junction with skirting board — another complex junction. If skirting boards in adjacent rooms are of the same height and profile, the threshold is placed between them, its ends rest against skirting board ends. The joint must be tight, without gaps. If skirting boards are of different heights (60 mm in corridor, 100 mm in room), a visual break occurs. Solution — use a transition profile on one side of the threshold, which smoothly changes height from 60 to 100 mm over a length of 100–150 mm.
Threshold color and texture must coordinate either with skirting boards (if threshold is perceived as continuation of skirting board), or with door casing (if threshold is perceived as part of door assembly). In the first case, threshold is made of same oak as skirting boards, with same finish. In the second — threshold is matched to casing color. Contrasting threshold (dark with light skirting boards and casing) acts as an accent, emphasizing boundary between rooms.
Alternative to wooden threshold — metal profile (aluminum, brass, stainless steel). Metal thresholds are more durable (not worn from foot traffic), but visually and tactilely colder. Applicable in modern interiors where metal is used as an accent. In classical and traditional interiors, wood is preferable — it is warmer, more natural, better matches wooden skirting boards and casings.
Hidden threshold — modern solution minimizing visual presence. Floor coverings in adjacent rooms are laid with 8–10 mm gap in the opening. The gap is covered by a flat strip 30–40 mm wide, 3–5 mm thick, installed flush with coverings into a special groove. Strip is painted to match floor color or contrasting (black). Visually, this appears as a thin line, not a bulky threshold. Requires precise preparation, but result is elegant.
Baseboards: transitions between skirting boards and wall panels
Wooden molding— in the door junction function as additional detailing elements, connecting skirting boards to wall panels, creating a complex hierarchical structure. Applicable in classical and neoclassical interiors where multi-layered detailing is valued.
Horizontal baseboard along wall at 80–120 cm height divides wall into lower panel zone and upper painted or wallpapered zone. Baseboard 30–40 mm wide runs around entire room perimeter, including door openings. In opening zone, baseboard follows casing similarly to skirting board — rests against it at 90-degree angle, milled at 45 degrees or cut into casing. Baseboard at same height creates horizontal line encircling room, connecting all walls and door openings into unified composition.
Vertical baseboard along sides of door opening creates additional framing, visually expanding the portal. Installed 100–150 mm from casing, 30–40 mm wide from floor to ceiling or to horizontal baseboard at 80–120 cm height. Space between casing and vertical baseboard is filled with contrasting material (different paint color, wallpaper, fabric covering). This solution makes door opening a compositional center, draws attention, emphasizes its architectural significance.
Junction of baseboard with skirting board at bottom of wall requires care. Baseboard running vertically along wall rests against skirting board. If baseboard width is less than skirting board height (baseboard 30 mm, skirting board 100 mm), baseboard simply rests on top of skirting board, joint is invisible. If baseboard width is greater than skirting board height, baseboard protrudes beyond skirting board, which must either be trimmed (baseboard narrowed to skirting board width at junction) or decorated with a decorative element (corner rose).
Corner junctions of baseboards in door junction are more complex than usual. Horizontal baseboard approaches opening, rests against casing. If room on other side of opening has similar baseboard at same height, baseboards must visually "flow" through opening. Solution — short baseboard section above door (on headjamb), connecting baseboards from both sides. This creates visual continuity of horizontal line around entire room and through openings.
Color solution for baseboards in door junction: in casing color (baseboard and casing perceived as unified vertical and horizontal elements framing planes), in skirting board color (baseboard and skirting board form horizontal lines at different heights), contrasting (baseboard white, casing and skirting board natural oak — emphasizes geometric divisions). Choice depends on interior concept.
Skirting board profile should be simpler than the profile of the door casing and baseboard. Skirting is a smaller element, its profile should be more delicate. If the baseboard has a three-layer profile, the skirting should be single-layer (one rounded edge). If the casing has two moldings, the skirting should have one. This creates hierarchy: larger elements (baseboard, casing) have complex profiles, smaller ones (skirting) — simple. Breaking this hierarchy — intricate carved skirting with a simple baseboard — creates visual imbalance.
Selecting skirting height relative to the casing
heightbuy wooden skirtingThe skirting height should match the casing width to create visual harmony of the door assembly. Proportional relationships are determined by style and room scale, but there are universal rules that work in most cases.
Rule 1: 1:1 ratio for classic interiors. Skirting height is approximately equal to casing width. 100 mm skirting — 100-110 mm casing. 120 mm skirting — 120-130 mm casing. This creates visual balance: vertical framing (casing) and horizontal base (skirting) have comparable visual weight. The joint is perceived as a thoughtfully designed system where elements are coordinated.
Rule 2: 1:1.2–1.3 ratio for modern classic. Casing is slightly wider than skirting. 80 mm skirting — 100 mm casing. 90 mm skirting — 110–120 mm casing. This emphasizes the vertical dominance of the opening, making it more expressive. Skirting acts as a modest base, while casing serves as an architectural frame drawing attention.
Rule 3: 1:0.8–0.9 ratio for minimalism. Casing is narrower than skirting. 70 mm skirting — 60 mm casing. 80 mm skirting — 70 mm casing. This reduces the visual presence of the casing, which in minimalism should be as inconspicuous as possible. Skirting is also low, but still dominates as a horizontal element encircling the room.
Rule 4: Avoid extreme disproportions. A 150 mm skirting with a 70 mm casing or a 60 mm skirting with a 140 mm casing creates visual imbalance. Elements appear randomly chosen, mismatched. If such a combination is required for some reason, intermediate elements (skirting, profiles) are needed to smooth the contrast.
Element thicknesses should also match. A 25 mm thick skirting and 18 mm thick casing will cause the skirting to protrude 7 mm beyond the casing, creating an unattractive angle. Solutions: either choose a 18–20 mm thick skirting (flush with casing), or bevel the skirting end at 45 degrees (visually smooths the protrusion), or use a decorative corner insert (hides the problem).
Skirting and casing profiles should harmonize. If the casing has an 8 mm radius rounded edge on its front face, the skirting should have a proportional rounded edge of 6–10 mm on its top edge. If the casing is flat rectangular (minimalism), the skirting should also be simple — a rectangle with minimal bevel or rounding. Profile mismatch — carved ornate skirting with a flat minimalist casing — creates the impression that elements belong to different interiors.
Color coordination is critical. Skirting and casing must be made of the same wood species (both oak or both beech), from the same production batch (guarantee of color match), with identical finish (lacquer or oil from the same manufacturer). Even minor tonal differences are noticeable at the door joint, where elements meet. Ordering the entire set (skirtings, casings, door trim) from one supplier simultaneously — the only guarantee of matching.
Extended thresholds and bevels
Extended threshold — an element extending beyond the door frame into adjacent rooms, creating a wide transition zone. Used when visually expanding the opening, creating a portal effect, emphasizing transition between spaces. Extended threshold width 80–150 mm (standard threshold 40–50 mm).
Extended threshold construction: base — oak solid wood board 30–40 mm thick, 100–150 mm wide, length equal to opening width plus 100–200 mm for overhangs on both sides. The board is placed in the opening, extending 50–100 mm beyond the wall line into each room. Board ends are mitered at 90 degrees or 45 degrees (beveled ends appear lighter visually), sanded, and lacquered. The board is fastened to the floor with screws (visible fastening from above) or hidden fasteners from below.
Extended threshold functions: visual expansion of the opening (threshold acts as a frame highlighting the opening), protection of the floor in high-traffic zones (oak hardness 4.0 on Brinell scale does not wear from thousands of passes), creation of a portal structure (opening is perceived not as a technical aperture but as an architectural portal). Applicable in classic and traditional interiors where monumentality is valued.
The joint between the extended threshold and skirtings of adjacent rooms requires special treatment. Skirtings approach the threshold from both sides, resting against the threshold ends. If the skirting is tall (100–120 mm) and the threshold is 30–40 mm thick, a height difference occurs. Solution: either embed the threshold end into the skirting (a 30–40 mm deep recess is made in the skirting, into which the threshold end fits), or use a transition element (a small board smoothly transitioning height from threshold to skirting).
Skirting bevel under casing — an alternative to direct joint. Instead of the skirting resting directly against the casing with its end, the skirting is beveled at 30–45 degrees, creating a smooth transition. The bevel starts 100–150 mm from the casing, gradually reducing skirting height to zero. Visually, the skirting appears to dissolve, approaching the opening without creating a sharp break.
Bevel implementation: marking on the skirting’s front surface — a bevel line from full height (e.g., 100 mm) to zero over 120 mm. Cutting with a jigsaw along the mark, blade must be clean, cutting slowly for accuracy. Sanding the bevel with 120–180 grit abrasive to smoothness. Coloring or lacquering the bevel to match the skirting. Result — skirting smoothly fades into the opening, the joint looks elegant.
Applicability of bevel: classic and neoclassical interiors where visual lightness and elegance of details are valued. Not applicable in minimalism (too decorative a solution) and rough styles (loft, industrial), where simplicity and honesty of construction are valued.
Ready-made door joint assembly schemes
Scheme 1: Minimalist joint with flat elements. Oak skirting 60 mm, 18 mm thick, rectangular cross-section with 3 mm radius rounding on top edge, painted white. Oak casing 70 mm, 18 mm thick, flat rectangular cross-section, painted white. Oak threshold 40 mm, 20 mm thick, natural color. Skirting joint with casing: skirting rests against casing at 90 degrees, end sanded, gap filled with white acrylic sealant. Total joint height from floor: threshold 20 mm, above it door leaf with 8 mm gap. Total door clearance 28 mm — sufficient for air circulation, not visually excessive.
Scheme 2: Neoclassical joint with profiled elements. Oak skirting 90 mm, 22 mm thick, two-layer profile (lower molding + top rounding), painted white. Oak casing 100 mm, 20 mm thick, single-layer profile (8 mm radius rounding), painted white. Oak threshold with bevel 50 mm, 25 mm thick, painted white. Skirting joint with casing: skirting beveled at 45 degrees, beveled end abuts casing, joint on glue + one finishing nail, spackled, painted. Overall aesthetic: light classicism, white color creates freshness, profiles moderate, not excessive.
Scheme 3: Traditional classic joint with decorative elements. Oak skirting 120 mm, 25 mm thick, three-layer profile (lower rail + molding + rounding + top rail), natural oak under dark stain. Oak casing 130 mm, 25 mm thick, two-layer profile with grooves, natural oak under stain. Extended oak threshold 120 mm, 35 mm thick, natural oak. Skirting joint with casing: decorative carved rose 60x60 mm in corner, skirting and casing rest against rose, rose on glue + two finishing nails. Overall aesthetic: monumental classicism, oak displays noble texture, details meticulously crafted.
Scheme 4: Modern joint with floating casing. Beech skirting 70 mm, 20 mm thick, simple profile, painted gray. Beech casing 80 mm, 18 mm thick, flat, gray, 80 mm above floor. Hidden threshold — flat 3 mm strip level with floor, black. Joint: skirting runs continuously under casing, casing floats above skirting with 80 mm gap. Overall aesthetic: modern minimalism, visual lightness, casing appears to float, not touching floor.
Scheme 5: Eclectic joint with contrasting materials. Oak skirting 100 mm, natural color under oil. Casing white MDF 90 mm (budget solution). Aluminum metal threshold 40 mm, anodized bronze. Skirting joint with casing: skirting makes recess under casing, casing fits into skirting recess, joint tight. Contrast of natural oak skirting, white casing, and bronze threshold creates an eclectic composition, working well in modern interiors where bold combinations are valued.
Conclusion: flawless joints from STAVROS
Door joint — the litmus test of repair quality. Professional solution for skirting, casing, door trim, and threshold joints requires understanding of geometry, materials, technology, and aesthetics. STAVROS company offers a complete set of elements for creating flawless door joints.
Wooden baseboard, Oak casing, Door molding, Profile made of wood, Wooden molding— all elements made from solid oak and beech, from the same wood batch, with a unified processing and finishing. This guarantees color, texture, and quality match — critical factors for door joints.
STAVROS specialist consultations include developing door joint sketches considering project specifics. Recommendations are provided for selecting dimensions, profiles, and joint methods. Technical drawings are developed for installation crews, ensuring precise execution of the intended design.
Warehouse program in Moscow and St. Petersburg ensures simultaneous delivery of all door joint elements. Skirtings, casings, door frames, thresholds, skirtings — all from stock within 1–3 days. Elements can be cut to customer’s size list, optimizing cutting and speeding up installation.
STAVROS — partner of professionals creating interiors where every detail is in its place, where the most complex joints are solved perfectly, where material quality and precision craftsmanship create a result worthy of pride for decades.
Frequently asked questions
How to avoid gaps between skirting board and door casing?
Precise 90-degree trimming of the skirting board end on a miter saw, dry fitting, adjustment if necessary, filling the minimal gap (up to 0.5 mm) with acrylic sealant in wood tone.
What to do if the skirting board thickness is greater than the door casing thickness?
Either choose a skirting board of lesser thickness (flush with the casing), or cut the skirting board end at 45 degrees (the bevel visually smooths the protrusion), or use a decorative corner piece.
Is a threshold needed in every door opening?
Required when there is a floor height difference (3 mm or more) or different floor coverings. When the same covering is used at the same level, a threshold is not mandatory; the joint between coverings can be sealed with flexible sealant.
Can a metal threshold be used with wooden skirting boards?
Yes, this is acceptable in modern interiors. Metal acts as an accent contrasting with wood. In classic styles, a wooden threshold is preferable.
How much does a complete set for one opening — skirting boards, door casings, threshold — cost?
8,000–15,000 rubles (only materials) depending on wood species, dimensions, profile. Oak is 20–30% more expensive than beech. Installation costs 2,000–4,000 rubles per opening.
How to coordinate the color of skirting boards and door casings with the door?
Order everything from the same wood species, from the same batch, from one supplier. Ideally — a complete set: door + frame + casings + skirting boards from one manufacturer.
Is a decorative corner piece mandatory?
No, this is an optional element for classic interiors. In minimalism and modern styles, the corner piece is unnecessary; the joint is made straight or beveled.
How long does it take to install a door unit?
30–40 minutes per opening with a professional approach. This includes trimming, fitting, mounting, and filling all elements.


