Article Contents:
- The Philosophy of 'Details Decide Everything': From Architecture to Your Home
- Psychology of Perception: Why Details Are So Important
- Architectural Traditions: From Antiquity to the Present Day
- Small Overlays, Rosettes, Corner Elements: Catalog of Possibilities
- Carved Appliqués: Universal Decoration Tool
- Decorative Rosettes: The Center of Composition
- Corner Elements: Decorating Problem Areas
- Moldings and Cornices: Lines That Create Structure
- How to Add Details to a Finished Interior Without Renovation
- Express Transformation: Details That Change Everything in One Day
- Spot Accents: Minimum Details, Maximum Effect
- The Principle of Symmetry: How Not to Make Mistakes with Placement
- Wooden vs Polyurethane Details: A Conscious Choice
- Wood: Living Classic with Character
- Polyurethane: technological sophistication and versatility
- Selection Criteria: When to Use What
- Catalog of Small Decorative Elements: A Practical Guide
- Miniature Details: From 30 to 100 mm
- Medium Details: From 100 to 300 mm
- Large Details: From 300 to 600 mm
- Linear Details: Moldings and Cornices
- Installation of Decorative Details: Professional Secrets
- Surface Preparation: The Foundation of Durability
- Marking: accuracy determines the result
- Choosing Adhesive: The Right Composition for Each Material
- Painting: The Final Touch
- Interior Styles and Decor Details: Perfect Combinations
- Classic: Symmetry and the Order System
- Baroque and Rococo: boundless luxury
- Modern and Art Deco: Geometry and Stylization
- Modern styles: Minimalism and Scandinavian
- Frequently Asked Questions: Details for Beginners
- Can You Glue Decorative Details onto Wallpaper?
- How to Paint Wooden Details While Preserving the Texture?
- How Many Details Are Needed for One Room?
- How to Care for Decorative Details?
- Can You Install Decorative Details Yourself?
- How to combine parts from different materials?
- Where to buy quality decorative parts?
- STAVROS Catalog: professional solutions for your interior
- Range of wooden parts
- Polyurethane collection
- Custom solutions and author collections
- Advantages of working with Stavros
- Conclusion: details that create a home

Do you know the secret of interiors you can't take your eyes off of? It's not expensive furniture. Not square footage. Not even trendy renovations. The secret is in the details. They are precisely whatDecorative elementstransform a faceless space into a home with character, soul, and history. A small carved overlay on a door frame, an elegant rosette in a ceiling corner, a thin molding dividing a wall into zones—that's what creates that very atmosphere you can't buy as a ready-made set in a furniture store.
Why do we so rarely think about the power of small things? When renovating, we plan furniture placement, choose wall colors, argue about lighting. And then we live in a space that looks correct but... empty. Something is missing. Precisely of interior decor details—those finishing touches that connect disparate elements into a cohesive composition. It's like an artist's signature on a painting: without it, the canvas seems ready, but something is still lacking.


The philosophy 'details decide everything': from architecture to your home
In architecture, a principle has long been known: the simpler the overall form of a building, the more important the detailing. Look at classical palaces—their facades are literally covered with decorative elements. Every window is framed with architraves, building corners are emphasized with pilasters, under the roof runs a complex cornice with modillions. All these are details. And they are precisely what turn a simple rectangular volume into a work of art.
The same logic works in interiors. A room is a spatial volume bounded by walls, floor, and ceiling. By itself, it is neutral. Character is given to it by details: how planes connect with each other, how corners are finished, which elements create accents.Wooden decorative detailscan radically change the perception of space without altering its physical parameters.


Psychology of perception: why details are so important
The human eye is designed to seek points of interest. In an absolutely smooth space, the eye has nothing to latch onto—such a room is perceived as boring, faceless, and uncomfortable. Even if the walls are painted with expensive Italian paint and the floor is laid with marble, the absence of details creates a feeling of emptiness.
Decorative details give the eye what it needs: variety of textures, play of light and shadow, rhythm, repeating elements that create patterns. Our brain finds pleasure in this—it loves finding patterns, recognizing structures. That's why a classic interior with its symmetry, repeating moldings, and paired rosettes is perceived as harmonious: it gives the brain what it expects.
But details work not only at the level of visual perception. They create an emotional response. Handmade carving evokes respect for craftsmanship. Natural wood gives a feeling of warmth and closeness to nature. Symmetrically placed elements are calming. Asymmetry, on the contrary, excites and creates dynamism. By choosing certain details, we are not just decorating space—we are programming the emotions we will experience in it.
Our factory also produces:


Architectural traditions: from antiquity to the present day
The use of decorative details is not an invention of modern designers. It is a millennia-old tradition rooted in ancient architecture. Ancient Greek temples were adorned with the most complex column capitals, friezes with bas-reliefs, acroteria on pediments. Each detail had symbolic meaning and simultaneously performed an aesthetic function.
The Romans inherited and developed this tradition, adding opulence and luxury. During the Renaissance, interest in ancient forms was revived—architects again began using the order system with its strict proportions and rich decoration. Baroque pushed decorativeness to the limit: walls, ceilings, furniture were covered with a continuous carpet of stucco, carving, and gilding.
Even the minimalist movements of the 20th century did not abandon details completely—they merely changed their character. Instead of lavish carving, laconic moldings, strict baguettes, and contrasting inserts appeared. Details became simpler but did not disappear. Because without them, an interior is dead.
Get Consultation
Small overlays, rosettes, corner elements: a catalog of possibilities
When it comes to decorative details, many imagine something large-scale: stucco cornices across an entire wall, huge ceiling rosettes, monumental pilasters. But the power of details lies precisely in their compactness. A small overlay measuring 10×10 cm can change the entire look of a door. A miniature corner rosette with a diameter of 8 cm turns a boring corner into an architectural accent. A narrow molding 3 cm wide creates an elegant frame around a mirror.
Carved appliqués: universal decoration tool
Overlays are flat or three-dimensional elements that are attached to the surface of furniture, doors, or walls, creating a decorative accent. Their sizes vary from miniature (3×3 cm) to impressive (50×50 cm and larger), shapes—from simple geometric to complex floral and figurative compositions.
Classification of overlays by shape includes several main types. Rosettes—round or oval elements with a centrally symmetrical pattern. They can imitate a blooming flower, a sun with rays, or a geometric ornament. Rosettes are used as independent accents or as centers of molding compositions.
Corner overlays—elements designed for installation in corners: internal or external. They visually enhance the corner, turning it from a problem area into a decorative dominant.Decorative corner elementsare especially important in classic interiors, where every corner must be finished.
Horizontal and vertical overlays—elongated elements used to create frames, panel framing, and decorate door and furniture fronts. Their length can reach several meters, and width—from 2 to 20 cm. The profile can be flat with a carved pattern or three-dimensional with relief.
Figurative overlays are elements of complex shape depicting leaves, flowers, fruits, scrolls, cartouches. These are the most decorative details, requiring fine carving and detailing. Figurative overlays transform furniture into a work of art, and a simple door into an element of a palace interior.
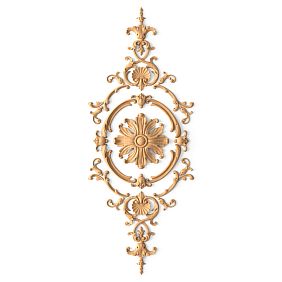
Decorative rosettes: the center of the composition
The rosette is one of the oldest decorative elements. In architecture, rosettes adorned the ceilings of temples and palaces, marking the center of the dome or hall. In furniture, rosettes served as central elements on the facades of cabinets, chests of drawers, and secretaries. In modern interiors, the rosette retains this centering function.
Ceiling rosettes are installed at the point where the chandelier is mounted, creating a visual support for the light fixture. Even a small chandelier against a large carved rosette looks more significant. The rosette draws attention to itself, makes the ceiling an active element of the interior, and not just a white plane overhead.
Wall rosettes are used as independent accents or as elements of more complex compositions. Four rosettes in the corners of a rectangular panel made of moldings create a finished frame. A rosette above a doorway emphasizes its importance. A rosette in the wall space between windows fills empty space without overloading it.
Furniture rosettes are small elements with a diameter of 5-15 cm, which are attached to the facades of cabinets, chests of drawers, and doors. They can serve a purely decorative function or conceal fasteners, keyholes, and technological holes. A pair of symmetrically placed rosettes on a double-door wardrobe creates a classic composition.
Corner elements: designing problem areas
Corners are the most vulnerable places in an interior. They are the first to suffer from mechanical damage, any wall irregularities are noticeable on them, and visual tension accumulates in corners. Proper corner design solves several tasks at once: protection from damage, masking defects, and creating architectural expressiveness.
External wall corners are traditionally decorated with vertical elements: pilasters, pylons, and overlay corner pieces. A pilaster is a flat imitation of a column, consisting of a base, a shaft, and a capital. Installed on an external corner of a room, a pilaster turns it into an architectural accent, sets a vertical rhythm, and visually increases the ceiling height.
A simpler option is a corner profile, which consists of two planks connected at a right angle. The profile can be smooth or milled, painted to match the wall color or in a contrasting color. Installing corner profiles on all external corners of a room creates the effect of expensive paneling at minimal cost.
Internal corners are decorated less often, but there are interesting solutions here as well. Corner moldings, forming a concave profile, soften the transition between walls, making it smooth. In classic interiors, the corners between walls and ceilings are decorated with corner rosettes—decorative elements in the shape of a circle sector with a carved pattern.
Moldings and cornices: lines that create structure
A molding is a profiled strip that creates a protruding or recessed line on a surface.Moldings and cornices— basic elements of architectural decor, used to create the entire structure of a classic interior.
Horizontal moldings divide the wall into tiers, create divisions, and visually change the proportions of a room. A molding at a height of 90-100 cm from the floor (the height of a chair back) historically protected walls from furniture damage. Today it serves a decorative function, dividing the wall into lower and upper zones, which can be painted in different colors or finished with different materials.
Vertical moldings create vertical divisions, form panels, and imitate pilasters. Symmetrically placed vertical moldings on a wall create rhythm, organize space, and set the scale. A combination of horizontal and vertical moldings forms the classic paneling system—boiserie, characteristic of palace interiors.
Ceiling cornices are moldings installed at the junction of the wall and ceiling. They perform several functions at once: they mask irregularities at the joint, visually increase the height of the room, and create architectural completeness. The cornice profile can be simple (one or two curves) or complex (multi-stepped with decorative elements).
Floor baseboards are lower moldings that cover the joint between the wall and floor. The height of the baseboard determines the character of the interior: low (5-7 cm) corresponds to modern minimalism, medium (10-12 cm) to classic, high (15-20 cm) to palace style. The baseboard profile should match the ceiling cornice profile, creating a unified system.
How to add details to a finished interior without renovation
The most wonderful thing about decorative details is that they can be added to an already existing interior without undertaking a major renovation. There's no need to chip off plaster, change flooring, or re-wallpaper. It's enough to glue a few correctly chosen elements—and the space transforms.
Express transformation: details that change everything in one day
Imagine: you have a day off, a little spare money, and a desire to update your interior. A major renovation is not an option: expensive, time-consuming, troublesome. But you can do something more subtle and effective—add decorative details.
Let's start with doors. An ordinary interior door is a smooth panel in a simple frame. Boring. Let's add four vertical moldings, forming two narrow panels. Glue them onto the door panel symmetrically, paint them to match the door color or in a contrasting color. The result—the door looks like a paneled, classic, expensive one. Cost—a few thousand rubles, time—a couple of hours.
Moving on to walls. An empty wall in the living room has long needed some decoration, but you don't want to hang a painting. Let's create a decorative panel from moldings. Mark a rectangle on the wall with proportions of approximately 3:4 (for example, 120×160 cm). Glue a molding 5-7 cm wide along the markings. Inside the panel, the wall remains the same as around it, but this zone is visually highlighted. You can add small rosettes in the corners—you'll get a finished composition.
The ceiling is an area that is almost never decorated, considered difficult. But you can add a ceiling cornice around the perimeter of the room in a few hours. Modern polyurethane cornices are lightweight, glued with ordinary mounting adhesive, and cut with a saw. Install the cornice—and the ceiling visually becomes higher, and the room gains architectural definition.
Spot accents: minimum details, maximum effect
You don't always need many details. Sometimes one or two correctly placed elements are enough to change the perception of space. This is especially relevant for modern interiors, where excessive decorativeness is inappropriate.
One effective technique is a decorative rosette on the ceiling at the point where the chandelier is mounted. Even in a minimalist interior, a rosette with a diameter of 40-50 cm and a laconic geometric pattern will not look out of place. On the contrary, it will emphasize the center of the composition, make the chandelier visually more significant, and create a sense of thoughtfulness.
Another technique is corner elements on external wall corners. If your apartment has protruding corners (ventilation duct, column, bay window), they often look like a nuisance. Decorate them with vertical pilasters or simple corner overlays—and the nuisance turns into an architectural feature that structures the space.
A third technique is accent framing. Choose one object in the interior: a mirror, TV, painting, bed headboard—and create a frame around it using moldings. The object immediately becomes the center of the composition, attracts attention, and organizes the space around itself. Meanwhile, the rest of the interior can remain extremely laconic.
Symmetry Principle: How to Avoid Mistakes with Placement
When adding details to an interior, it's important to understand the principles of their placement. Chaotic application of decorative elements creates a sense of poor taste. Thoughtful placement creates harmony and order.
The main principle is symmetry. Classical interiors are built on strict symmetry: a central axis, relative to which all elements are mirrored. If you create wall panels from moldings, make them an even number, placing them symmetrically relative to the center of the wall. If installing rosettes, place them in pairs or at the center of the composition.
The second principle is scale. The size of decorative details should correspond to the size of the room and other interior elements. In a small room, large details will feel oppressive; in a large hall, small ones will get lost. A general rule: the height of a ceiling cornice should be approximately 1/20 of the wall height, the width of moldings for wall panels should be 1/30-1/40 of their length.
The third principle is stylistic unity. All decorative details in one room should be executed in a single style. You cannot combine classical carved rosettes with bas-reliefs and strict geometric moldings in the Art Deco style — the result will be an eclectic mishmash. Choose one stylistic direction and adhere to it in all details.
Wooden vs. Polyurethane Details: A Conscious Choice
Decorative elements are made from various materials, and the choice of material determines not only appearance but also performance characteristics, durability, and cost. Two main materials dominate the market: natural wood and polyurethane. Each has its own advantages, applications, and limitations.
Wood: Living Classic with Character
Wood is a material with a thousand-year history of use in decoration. Wooden carved details adorned palaces and temples, residential houses and public buildings. Natural wood possesses unique qualities that cannot be fully reproduced in other materials.
The texture of wood is its main advantage. Annual rings, the shimmer of fibers, the natural pattern of knots (in rustic variants) create a living, constantly changing surface. The same wooden rosette looks different in the morning with side light and in the evening under artificial lighting — wood lives, breathes, reacts to light.
The tactile sensations of wood are unmistakable. The warm, slightly rough surface of natural wood is pleasant to the touch; it makes you want to run your hand over it, to feel the texture. This is especially important for details at hand level: furniture overlays, door casings, handrails.
The strength and durability of wood have been tested for centuries. Wooden carved iconostases from the 18th century have survived to this day without losing the clarity of the carving. Wooden moldings and overlays serve for decades without losing shape or cracking (with proper use). Wood is an investment for the long term.
The eco-friendliness of wood is absolute. It is a natural material that does not emit harmful substances, is safe for health, and hypoallergenic. For children's rooms, bedrooms, and spaces where people with heightened sensitivity live, wood is the optimal choice.
But wood also has limitations. It is heavier than polymers, which complicates the installation of large details on the ceiling. Wood reacts to humidity and temperature and can change geometry in unstable conditions. Wood carving is a labor-intensive process, which affects cost: wooden carved details are more expensive than polymer analogues.
Polyurethane: technological and universal
Polyurethane is a modern polymer material that revolutionized interior decoration. Polyurethane details are cast in molds, allowing the creation of elements of any complexity with perfect pattern repetition. Casting technology ensures mass production with consistent quality and an affordable price.
The lightness of polyurethane is its main advantage. A 2-meter long polyurethane ceiling cornice weighs 300-500 grams; a similar wooden one weighs 3-5 kilograms. This radically simplifies installation, especially on the ceiling: light details can be glued with ordinary mounting adhesive, without fear of them pulling off under their own weight.
Polyurethane's geometric stability is absolute. It does not react to humidity, does not warp, shrink, or swell. A polyurethane element will have the same dimensions ten years later as on the day of installation. This is critical for ceiling cornices and wall panels where precise element alignment is important.
Moisture resistance allows the use of polyurethane in bathrooms, saunas, kitchens — anywhere wooden details would quickly deteriorate. Polyurethane decor does not rot, mold, or break down from condensation. After installation, it can be painted with moisture-resistant paints, creating additional protection.
The cost of polyurethane details is significantly lower than wooden ones with comparable decorative effect. A complex rosette with a bas-relief in polyurethane can cost 3-5 times less than a wooden analogue. This makes quality decor accessible to a wide audience.
But polyurethane also has drawbacks. It lacks the texture of a natural material — the surface is absolutely smooth, uniform, 'plastic' in appearance (though this is less noticeable after painting). Tactilely, polyurethane is colder than wood and does not evoke the same emotional response. For interiors where the naturalness of materials is important, polyurethane may seem out of place.
Selection Criteria: When to Use What
How to choose between wood and polyurethane? There is no universal answer — everything depends on the specific task, budget, interior style, and operating conditions.
For high-level classical interiors, where authenticity and the use of natural materials are important, the choice is clear — wood. Wooden carved details create that very atmosphere of palace luxury, which cannot be achieved with polymers. This especially applies to furniture decor: overlays on facades, carved legs, capitals of pilasters should be wooden.
For ceiling decor in rooms with high ceilings (from 3 meters), polyurethane is preferable. Large ceiling cornices, rosettes, coffers made of wood would be too heavy; their installation would require reinforced fastening. Polyurethane details are glued easily, hold reliably, and from a distance are indistinguishable from plaster stucco.
For wet rooms, the choice is obvious — polyurethane. In a bathroom, wooden details will not last long, even if coated with moisture-protective compounds. Polyurethane remains stable in such conditions for decades.
For budget projects, where achieving maximum effect with minimal costs is important, polyurethane is the optimal solution. For the same money as one wooden rosette costs, you can buy a set of polyurethane details to decorate an entire room.
For exclusive projects with individual design, wood offers more possibilities. Wood carving allows the creation of a unique element based on a customer's sketch. Polyurethane details are cast in molds; creating a unique form is an expensive process, justified only in large-scale production.
Catalog of Small Decorative Elements: A Practical Guide
The variety of decorative details is enormous. Hundreds of shapes, sizes, styles. How to make sense of it? I propose a systematization by functional purpose and size.
Miniature details: from 30 to 100 mm
The smallest decorative elements are furniture overlays, decorative plugs, miniature rosettes. Their size ranges from 30 to 100 mm, thickness 5-15 mm. Despite their modest dimensions, they can radically change the perception of furniture.
Furniture corner overlays are elements sized 40-80 mm that are attached to the corners of facades, drawers, countertops. They protect corners from chipping and simultaneously decorate the furniture. The shape of the overlays varies from simple geometric (triangle, sector of a circle) to complex plant motifs (acanthus leaf, grapevine, flower).
Decorative rosettes with diameters of 50-100 mm are used on furniture fronts as standalone decor or to conceal technical holes and keyholes. A rosette with a relief pattern installed at the center of a cabinet door transforms a plain front into a decorative one.
Furniture leg overlays are cylindrical or conical elements that are slipped onto simple turned legs, turning them into carved ones. The height of such overlays is 80-150 mm, diameter 40-60 mm. After painting, the overlay and leg are perceived as a single whole.
Medium parts: from 100 to 300 mm
The medium size range is the foundation of decor. Elements sized 100-300 mm are large enough to be noticeable, and compact enough not to dominate the interior.
Wall rosettes with a diameter of 150-250 mm are a classic element of wall decor. They are installed as independent accents or as corner elements of molding panels. Four rosettes at the corners of a rectangular panel create a finished composition, characteristic of classic interiors.
Vertical overlays with a length of 200-300 mm, width of 50-80 mm are used for decorating door panels, furniture facades, wall spaces between windows. They create vertical accents, visually increase the height of the room, and structure the plane.
Corner elements sized 150-250 mm are intended for decorating external corners of walls, columns, pilasters. They consist of two profiles connected at a right angle, with a carved or milled pattern. Installing such elements on all external corners of a room creates the effect of panel finishing.
Large parts: from 300 to 600 mm
Large decorative elements are dominants, architectural accents that define the character of the interior. A size of 300-600 mm makes them noticeable from any point in the room.
Ceiling rosettes with a diameter of 400-600 mm are installed in the center of the ceiling under a chandelier. A complex relief pattern with several tiers, bas-reliefs, and ornaments turns a simple chandelier into the central element of the interior. The rosette draws attention to itself, making the ceiling an active part of the composition.
Pilaster capitals with a height of 300-500 mm crown vertical elements, creating architectural logic. The capital can be executed in one of the classical orders (Doric, Ionic, Corinthian) or represent a free composition of plant motifs.
Pediments with a width of 500-600 mm, height of 300-400 mm are installed above door and window openings, above cabinets and buffets. They create an architectural finish, turning a utilitarian opening into an element of a palace interior.
Linear parts: moldings and cornices
A separate category is linear products sold not by the piece, but by linear meters. These are moldings, cornices, baseboards, trims — everything that has a constant profile and can be extended in length.
Narrow moldings with a width of 20-40 mm are used to create thin frames, frame panels, decorate furniture. The profile can be simple (one cove) or complex (several steps, carved pattern). A narrow molding does not dominate; it delicately marks boundaries and creates structure.
Medium moldings with a width of 50-80 mm are the basis of wall decor. They are used to create classic boiserie, panel systems, door and window framing. The profile is expressive enough to be noticeable, but not so massive as to overload the interior.
Wide cornices with a width of 100-200 mm are installed at the junction of the wall and ceiling. A complex multi-step profile with decorative elements creates architectural expressiveness and visually increases the height of the room. The higher the ceiling, the more massive the cornice can be.
Baseboards with a height of 80-200 mm complete the decoration of the lower part of the walls. High baseboards (150-200 mm) are characteristic of classic interiors with high ceilings; they visually 'lift' the walls, creating a sense of monumentality.
Installation of decorative parts: professional secrets
Even the highest quality decorative parts will look bad if installed incorrectly. Installation requires care, precision, and an understanding of the material's characteristics.
Surface Preparation: The Foundation of Longevity
Decorative parts are glued onto the surface of walls, ceilings, furniture. The quality of this surface determines the reliability of the fastening. The main rule: the surface must be clean, dry, strong, and degreased.
Dust and dirt are the main enemies of adhesive adhesion. Before installation, the surface must be cleaned with a vacuum cleaner or a damp cloth and allowed to dry. If the wall is painted with chalk or lime paint, it must be washed off — parts will not adhere to such a surface.
Surface irregularities create problems when installing flat parts. If the wall has variations of more than 2-3 mm, the part will not lie tightly, leaving gaps. In this case, the surface must be leveled with putty, then primed.
Surface moisture must be within normal limits (no more than 8-10% for plaster). Adhesive does not set on a damp surface, and parts fall off. If the wall has been recently plastered, it must be allowed to dry for at least 2 weeks.
Marking: Accuracy Determines the Result
Before gluing the parts, it is necessary to carefully mark their installation locations. Marking is the guarantee of symmetry, correct proportions, and a professional result.
The following algorithm is used for marking molding panels. Find the center of the wall horizontally and vertically, mark the axial lines. Determine the size of the panels and the distance between them. Draw the contours of the panels with a pencil or chalk. Check symmetry: the distances from the edges of the panels to the corners of the wall should be the same.
To install a rosette on the ceiling, find the center of the ceiling. In a rectangular room, this is the intersection point of the diagonals. Mark it, measure its radius in four directions (north-south-west-east), check that the distances are the same. Only after that can the rosette be glued.
For vertical elements (pilasters, corner profiles), use a plumb line or laser level. The vertical must be perfect; a deviation of even 1-2 degrees is noticeable to the eye. Mark a vertical line along the entire height of the wall, and use it as a guide when installing the part.
Choosing Adhesive: The Right Composition for Each Material
Different adhesives are used for mounting decorative elements depending on the material of the element and the base.
Polyurethane elements are glued with acrylic construction adhesive (liquid nails). It has a thick consistency, applied in a zigzag pattern or dots on the back of the element. The element is pressed against the surface, held for 30-60 seconds, then can be released. Final curing occurs after 24 hours.
Wooden elements require stronger fastening. A combination of PVA wood glue and mechanical fasteners (finish nails, screws) is used. The element is coated with glue, pressed, and secured with nails or screws. After the glue dries (12-24 hours), the fasteners can be removed or left in place, with the heads filled with putty.
For heavy elements (large wooden rosettes, capitals), two-component polyurethane adhesive or epoxy resin is used. These compounds provide maximum strength but require precision during application—once set, removal without damaging the element is impossible.
Painting: the final touch
After installation, elements usually require painting. Even if they were sold pre-painted, joints and fastener locations need touch-ups.
Wooden elements are sanded with fine sandpaper (P220-P320) before painting, dusted, and primed with acrylic primer. Then paint is applied in 2-3 coats with intermediate drying. For classic interiors, enamels with a slight sheen are used; for modern ones, matte paints.
Polyurethane elements can be painted with acrylic or alkyd paints without primer. If the element was sold already white (primed), applying the final color in 1-2 coats is sufficient. If the element is gray (unprimed), a white primer is needed first, followed by colored paint.
Patination—a technique of artificial aging—is used for classic and vintage interiors. A dark patina (brown, black, green) is applied over a light base color, filling the recesses of the relief. Then the patina is partially wiped off the raised parts. The result is a three-dimensional, deep effect that emphasizes the detailing of the carving.
Interior Styles and Decorative Elements: Perfect Combinations
Decorative elements should match the interior style. A Baroque rosette in a minimalist apartment will look absurd. A strict geometric molding in a Provence interior is also a mistake. Each style corresponds to specific types of elements.
Classic: Symmetry and the Order System
The classical style is based on ancient architecture with its order system. Decorative elements here are not mere ornamentation but part of the architectural logic. Moldings divide the wall into tiers, pilasters create vertical divisions, cornices crown the composition.
Typical elements of a classical interior: ceiling rosettes with plant motifs (laurel wreaths, acanthus leaves), capitals of columns and pilasters in the Corinthian or Ionic order, multi-step cornices with modillions and dentils, wall panels made of moldings (boiserie), corner rosettes at the junction of walls and ceiling.
Natural material is preferred: wood for furniture decor and wall elements, plaster or polyurethane (imitating plaster) for ceiling decor. Painting is white or in pastel tones, with possible gilding of individual elements.
Proportions are strict, determined by mathematical ratios. The height of a column should relate to its diameter as 9:1 (Doric order) or 10:1 (Ionic). The size of a capital is approximately 1.5 times the column's diameter. These rules, developed millennia ago, ensure harmony of perception.
Baroque and Rococo: Luxury Without Limits
Baroque is a style where decorativeness is taken to the maximum. The most complex, richly decorated elements are appropriate here. The more carving, gilding, and ornaments—the better.
Typical elements of Baroque decor: large ceiling rosettes with multi-tiered bas-reliefs depicting cherubs, garlands of flowers and fruits, twisted columns with carved capitals, cartouches (decorative frames with scrolls), large shells (rocaille), abundant gilding.
Rococo is a lighter version of Baroque with greater playfulness and asymmetry. Curved lines, S-shaped scrolls, and elegant ornaments predominate. Colors are light (white, gold, pastels), forms are light and airy.
Material: wood with rich carving, covered in gilding or patinated. Modern interiors in the Baroque style often use polyurethane elements coated with gold or silver paint—this is cheaper than carved wood but creates the desired effect of luxury.
Modern and Art Deco: Geometry and Stylization
Art Nouveau (Art Nouveau) is a style from the turn of the 19th-20th centuries, characterized by smooth curved lines, plant motifs, and asymmetry. Decorative elements of Art Nouveau are recognizable: bending stems, stylized flowers (irises, lilies, poppies), female figures with flowing hair.
Moldings in the Art Nouveau style have a wavy profile, rosettes feature asymmetrical compositions of flowers and leaves, furniture overlays have streamlined forms. Colors are muted, natural: green, ochre, brown. Material preferably wood with emphasized texture.
Art Deco is a style of the 1920s-30s, opposite in spirit to Art Nouveau. Clear geometric shapes, symmetry, and conciseness dominate here. Decorative elements of Art Deco: rosettes in the shape of polygons or stylized suns, moldings with a stepped profile, triangular and trapezoidal overlays.
Characteristic motifs of Art Deco: ziggurats (stepped pyramids), sun rays, geometrized plants and animals. Colors are contrasting: black and gold, white and silver. Materials are luxurious: exotic woods, chrome-plated metal, mirrors.
Modern styles: Minimalism and Scandinavian
Modern styles tend towards conciseness, but there is still a place for decorative elements—they are just different. Not Baroque rosettes and carved capitals, but simple geometric shapes, clear lines, functionality.
Minimalism uses elements as a means of structuring space. Narrow moldings (20-30 mm) create thin frames on walls, highlight zones without overloading the interior. Baseboards and cornices are maximally laconic—simple rectangular profiles without decoration. Colors are neutral: white, gray, black.
Scandinavian style allows for more decorativeness, but restrained and natural. Wooden elements retain their natural texture, coated with clear varnish or white paint. Forms are simple, inspired by nature: rounded corners, soft lines. The use of painted wood (white, gray, pastel tones) is characteristic.
Modern neoclassicism is an attempt to adapt classical forms to modern aesthetics. Traditional elements (moldings, rosettes, cornices) are used here, but simplified, stripped of excessive decoration. Profiles are clear but shallow. Proportions are more elongated. Colors are monochromatic: white, gray, beige.
Frequently Asked Questions: Elements for Beginners
Can decorative elements be glued onto wallpaper?
Yes, but with caveats. If the wallpaper is vinyl or non-woven on a sturdy base, medium-sized decorative elements (moldings, small rosettes) will hold. Use high-quality construction adhesive (liquid nails), apply it in a thin layer, and press the element firmly.
For heavy parts (large wooden elements), this method is not suitable — the wallpaper will not support the weight, and the part will fall off. In this case, it is better to partially remove the wallpaper at the installation site, glue the part to the wall, and then trim the wallpaper around the part.
Paper wallpaper is a poor base for mounting parts. They become soaked from the glue and peel off along with the part. If possible, it is better to glue parts before wallpapering or remove the wallpaper at the installation sites.
How to paint wooden parts to preserve the texture?
Use semi-transparent compositions: stains, tinting oils, glazes. They penetrate the wood, color it, but do not hide the texture. You can enhance the texture contrast by using the brushing technique: soft wood fibers are cleaned out with a metal brush, leaving the hard ones, which are then tinted.
Another option is colored oil-wax. It gives the wood a tint (white, gray, colored) but maintains the visibility of the fibers. After application, the oil is rubbed in, excess is removed, and the surface is polished. The result is colored wood with emphasized texture.
If you want completely opaque painting (texture not visible), use enamel or acrylic paint. But then the advantage of wood is lost — under opaque paint, wooden and polyurethane parts look the same.
How many parts are needed for one room?
It depends on the size of the room, interior style, and your goals. For a minimalist approach, 3-5 elements are enough: a ceiling cornice around the perimeter, baseboards, one or two rosettes or overlays. This is sufficient to create structure and completeness.
For a classic interior, the number of parts is significantly higher. A 20-square-meter room may include: ceiling cornice (8-10 linear meters), baseboards (10-12 meters), 4-8 wall panels made of moldings, a ceiling rosette, 4-8 corner elements, door decor. This can be 15-20 separate parts or elements.
General rule: less is more, but with quality. Three well-chosen, properly installed elements will create a greater effect than ten random pieces applied without a system. Start small, evaluate the result, and add more if necessary.
How to care for decorative parts?
Wooden parts with a varnished or painted surface are wiped with a soft dry or slightly damp cloth. Avoid excess water — wood can swell. To clean carved elements with deep relief, use a soft brush or a vacuum cleaner with a brush attachment.
Polyurethane parts are low-maintenance. They can be washed with a damp cloth and mild detergent. They are not afraid of water, do not absorb dirt, and are easy to clean. The only limitation is to avoid abrasive agents that can scratch the painted surface.
If the paint on the parts has worn off or been damaged, it is easy to refresh. Wooden parts are lightly sanded at the damaged area, then touched up with the same paint. Polyurethane parts can be painted directly over the old coating — just degrease the surface and apply a new layer.
Can decorative parts be installed independently?
Absolutely yes. Installing most decorative parts does not require professional skills. Polyurethane moldings and rosettes are glued with regular mounting adhesive, cut with a saw, and joined without special tools. Anyone who can handle tools can manage this.
Wooden parts require a bit more attention. They often need not only to be glued but also screwed or nailed. You will need a drill, screwdriver, and headless nails. Joints of wooden elements require more careful fitting — unlike polyurethane, wood does not compress.
The most difficult part is not the installation itself, but the marking. The precision of the marking determines whether the result will look professional. Use a level, tape measure, and pencil. Check symmetry several times. The principle 'measure twice, cut once' works perfectly here.
How to combine parts made of different materials?
Parts made of different materials can be used in one interior, but it is important to maintain balance. General rule: parts made of different materials should not be placed next to each other where they can be compared. A polyurethane ceiling cornice and wooden wall moldings are fine — they are in different zones. A polyurethane and wooden rosette on the same wall is bad — the difference in materials will be noticeable.
Another approach is visual unification through painting. If all parts are painted the same color with the same paint, the difference in materials becomes less noticeable. A white polyurethane cornice and white wooden overlays are perceived as a unified system from a distance.
The third point is stylistic unity. Parts made of different materials should be in the same style. A classic polyurethane rosette and classic wooden moldings go together. A classic rosette and minimalist wooden planks do not.
Where to buy quality decorative parts?
The market for decorative parts is huge, with many offers. How to find a quality supplier? Pay attention to several points: variety of assortment (the wider the selection, the easier it is to find what you need), quality of materials (clarify the wood species, density of polyurethane), possibility of custom orders (for non-standard tasks), production and delivery times.
Check the company's portfolio — completed projects will show the quality level better than any descriptions. Read reviews from real customers. Clarify return conditions — a serious company provides a warranty on its products and accepts defective parts back.
STAVROS Catalog: professional solutions for your interior
STAVROS company has specialized in the production of of interior decor details, offering the widest selection of solutions for any styles and tasks. The catalog includes thousands of items: from miniature furniture overlays to monumental ceiling rosettes, from laconic modern moldings to lush Baroque cartouches.
Assortment of wooden parts
Wooden decorative details from STAVROS are made from solid oak, beech, ash — species proven by centuries of use. The wood undergoes chamber drying to 8-10% moisture content, guaranteeing geometric stability. Carving is done on high-precision CNC machines with subsequent manual finishing — this ensures clarity of relief and detailing.
Furniture overlays in the catalog are presented in dozens of options: from simple geometric shapes to complex compositions with plant and figurative motifs. Sizes from 30×30 mm to 500×500 mm allow selecting an element for any task. All overlays are supplied unsanded (for self-finishing) or fully finished: sanded, primed, painted.
STAVROS carved rosettes are a particular point of pride for the company. Each rosette is a miniature work of art with multi-level relief, fine detailing, and harmonious composition. Diameters range from 80 to 600 mm, with relief thickness up to 25 mm. Classical motifs (acanthus, laurel, oak leaves) coexist with original compositions.
Moldings and cornices are presented as linear products up to 3 meters in length. The profiles are developed considering classical proportions and modern requirements. Simple profiles for minimalist interiors, medium complexity for neoclassical, and richly decorated for palace styles. Custom molding production based on individual sketches is possible.
Polyurethane collection
STAVROS polyurethane parts are cast from high-density polyurethane (density 350-400 kg/m³), ensuring sharp relief and strength. The surface is primed with white acrylic primer, ready for final painting. The parts do not yellow over time, do not absorb odors, and are fire-retardant.
Ceiling cornices with widths from 50 to 250 mm allow for decorating rooms of any height. Light weight (300-800 g/linear meter) ensures easy installation — cornices are glued with acrylic adhesive without additional fasteners. Corners are joined using ready-made corner elements, eliminating the need for complex cutting.
Wall moldings are available in dozens of profiles: from narrow decorative strips (20 mm) to wide panel moldings (150 mm). Flexible moldings allow for decorating curved surfaces: arches, bay windows, radius walls. After installation, the flexible molding is indistinguishable from a rigid one.
Rosettes and medallions with diameters from 200 to 1200 mm crown ceilings, creating a focal point. Simple geometric rosettes for modern interiors, classical with floral ornaments, Baroque with multi-tiered bas-reliefs — the choice is vast. Installing a rosette takes 15-20 minutes: apply adhesive, press the rosette to the ceiling, level it, and secure it during curing.
Custom solutions and original collections
In addition to catalog items, STAVROS offers the production of parts based on custom orders. This can include adapting an existing element to required dimensions, creating a part based on a customer's sketch, or developing an entire decorative collection for a specific project.
The company's technologies allow for implementing solutions of any complexity. Three-dimensional wood carving on 5-axis CNC machines creates volumetric compositions with detailing down to 1 mm. Hand finishing adds uniqueness and eliminates mechanical repetition. Polyurethane casting using custom molds enables the replication of original elements.
STAVROS original collections are ready-made solutions for specific styles: classic, Baroque, Art Nouveau, Art Deco, modern neoclassical. Each collection includes coordinated elements: moldings, rosettes, overlays, cornices, all maintained in a unified stylistic key. By choosing a collection, you get a guarantee of harmony for all details.
Advantages of working with STAVROS
Direct manufacturing without intermediaries ensures optimal prices. You pay for the part itself, not for a chain of resellers. The stock program includes several thousand items in stock — most orders are shipped on the day of request. Custom orders are manufactured in 5-15 days depending on complexity.
Delivery is organized throughout Russia and CIS countries. The company's own logistics service selects the optimal delivery method, packs parts securely (preventing damage during transportation), and monitors deadlines. For large orders, delivery to the entrance with a manipulator is possible.
Technical support assists at all stages. Consultants will help select parts for your style, calculate the required quantity, and advise on installation specifics. Designers will develop visualizations showing how the parts will look in your interior. Technologists will consult on painting, patination, and protective coatings.
A quality guarantee applies to all products. If a part has a manufacturing defect (dimensional inaccuracy, surface defects, incomplete relief), it is replaced free of charge. Quality is controlled at every stage: from incoming material inspection to final inspection of finished products.
Conclusion: Details that create a home
An interior without details is just a box with furniture. Details transform a space into a home: with its own character, mood, and soul. They tell the story of the owner's taste, their understanding of beauty, respect for traditions, or aspiration for novelty.
Decorative elements— is not a luxury or an excess. These are the finishing touches, without which even an expensive renovation looks incomplete. A small carved overlay costs a few hundred rubles, but the effect it creates is priceless. Properly selected and skillfully installed details can radically transform a space.
The choice between wooden and polyurethane parts is a question of balancing aesthetics, budget, and operating conditions. Wood provides the warmth of a natural material, authenticity, and prestige. Polyurethane ensures practicality, stability, and affordability. In a perfect interior, there is a place for both materials, each used where its properties are maximized.
Installing parts is accessible even to beginners. It does not require professional tools, deep knowledge, or years of experience. It requires care, precise marking, and an understanding of basic composition principles. Start with something simple — add a ceiling cornice or a few wall moldings. Evaluate the result. Feel how the space changes. Then add more details, gradually building your ideal interior.
STAVROS company offers everything necessary to create the interior of your dreams: from miniature furniture overlays to monumental architectural elements. Quality proven by thousands of completed projects. An assortment covering all styles and directions. Service that makes the process of ordering and receiving parts simple and comfortable.
Details decide everything. Do not postpone the transformation of your interior — start small, with one detail that will become the first step towards your dream home. A home where every detail is thought out, where details create harmony, where space is filled with meaning and beauty. Such a home is not created in one day, but each added detail brings you closer to the ideal.
Let your interior tell a story of taste and understanding of beauty. Let the details you choose reflect your individuality. Let every morning begin in a space that pleases the eye and inspires. STAVROS will help bring this to reality — professionally, with quality, and attention to every detail of your project.