


Article Contents:
- What is a Wooden Corner: Definition, Purpose, Construction
- Two Types of Corners: External and Internal
- Wooden Corner Bead: Differences from Metal and Plastic Counterparts
- Types of Wooden Corners: A Complete Overview
- Equal-Shelf External Corner: Classic in Its Pure Form
- Unequal-Shelf Corner: Flexibility in Non-Standard Situations
- Corner with Chamfer or Rounding: Decorative Profiles
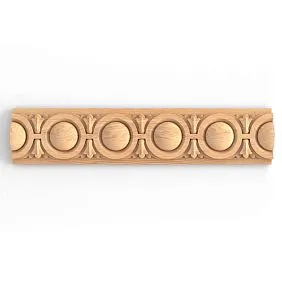
- Decorative Corner with Profile: Between a Corner and a Molding
- Internal Corner (Cove): The Hidden Worker
- Wood Species for Corners: Choosing Wisely
- Beech: Reliability Without Pretension
- Oak: When Wood Species and Grain Matter
- Pine: For Cottages and Country Houses
- Larch: For Wet Areas and Outdoor Use
- Wooden Corner Dimensions: Standards and Custom Solutions
- Standard Size Range by Shelf Width
- Length: Standard and Possibilities
- Application of Wooden Corner for Finishing: From Classic to Modern
- Finishing External Corners When Cladding with Clapboard
- Protecting Corners When Finishing with Drywall
- Joints of Different Materials: Corner as an Adapter
- Furniture Manufacturing: Corner as a Structural Element
- Decorative Role: Corner as a Panel Trim Element
- Wooden Corner Molding and Wooden Trim: A System, Not a Separate Element
- How to Install a Wooden Corner: Step-by-Step Guide for DIY Installation
- Tools and consumables
- Step One: Measurement and Cutting
- Step Two: Dry Fitting Without Adhesive
- Step three: applying adhesive
- Step Four: Installation and Fixation
- Step five: finishing
- Joints between corner pieces: how to make them invisible
- Buying wooden corner pieces: what to look for
- Wooden corner pieces in different interior styles
- About STAVROS: when a detail is a story
- FAQ: Answers to the Most Popular Questions

A corner is where two planes meet. It might seem like nothing special. But it's precisely in corners that space reveals its character: neat, careless, thoughtful, or random.Wooden angle— is the element that turns a vulnerable, unprotected spot into a finished interior detail. A small detail with a big function: it protects, aligns, hides imperfections, and adds that final touch without which the finish looks incomplete.
Note: it's the corner that takes the first hit from awkward furniture movement. It's the corner that shows how evenly the cladding is laid. It's there that materials with different characteristics meet — and this joint requires a delicate, competent solution. A wooden corner piece for finishing is not cosmetics or decoration for decoration's sake. It's an architectural necessity dressed in form.
Today, this element is experiencing a kind of renaissance. Designers are returning to natural materials, to honest finishes without imitations, to details with tactile value. And a solid wood corner piece in this context takes its place not as a relic of the past, but as a response to the demand for authenticity.


What is a wooden corner piece: definition, purpose, construction
Before discussing applications, let's define the subject. A wooden corner piece is a profiled linear product made from solid wood with an L-shaped cross-section: two flanges positioned at a right angle to each other. The flanges can be equal in width — such a corner piece is called equal-flange. They can differ — unequal-flange, or asymmetrical corner piece.
This is a fundamental difference in terms of application. An equal-flange wooden corner piece works perfectly on symmetrical external corners where both walls have the same finish thickness. An unequal-flange one is for where walls differ or where the corner piece must cover a joint of materials with different depths.
By structural logic, a wooden corner piece is a relative of baseboards and moldings, but with a different purpose. A baseboard works horizontally along the floor. A molding creates a decorative line on the wall.wooden corner slat works precisely vertically — on edges and corners, where two surfaces meet. This makes it indispensable in places where neither baseboard nor molding can handle the task.


Two types of corners: external and internal
An external corner is a protruding wall edge that is visible and accessible to impact. Here, the corner piece primarily performs a protective function: it absorbs mechanical loads, prevents the cladding from chipping and crumbling. Wood in this role works better than plaster or drywall: it elastically absorbs impact, and if damaged, it can be repaired by sanding and applying a coating, rather than replacing an entire wall fragment.
An internal corner is a concave junction of two walls. Here, the corner piece's task is different: to hide an uneven joint. When laying any sheet or tile material, the internal corner is the most difficult place for finishing. Precise fit is almost never achieved without a special element. A wooden corner piece conceals this joint, giving the corner a clear, geometrically correct shape.
Our factory also produces:


Wooden corner trim: difference from metal and plastic counterparts
In the construction market, corner pieces are available in three main materials: metal, plastic, wood. Each has its niche. Metal ones — maximum strength, used in industrial premises and public spaces with high loads. Plastic ones — cheap and moisture-resistant, but poor tactilely and visually. A solid wood corner piece is the golden mean for residential interiors: sufficient strength, natural warmth, the possibility of tinting and painting in any color, organic combination with wooden linear products.
Where there isWooden baseboardandWooden moldings on the walls, a wooden corner piece is the only logical choice for corners. Plastic next to solid oak looks like a foreign element. Only material unity creates a cohesive, professionally executed interior.
Get Consultation
Types of wooden corner pieces: full overview
The range of corner products made of wood is wider than it seems at first glance. Let's examine all the main types.
Equal-flange external corner piece: classic in its pure form
A standard symmetrical corner piece with equal flanges — the most universal option. Size range: 15×15, 20×20, 25×25, 30×30, 40×40 mm. This means each flange covers exactly the same number of millimeters of finish. Used on external vertical wall corners when cladding with wooden panels, clapboard, decorative battens.
from STAVROS is a representative of exactly this type. Equal-flange profile made from select beech or oak with a precisely calibrated right angle between the flanges. The surface is sanded for applying any finish coating: oil, varnish, enamel, tint. This product is equally organic on the corner of a wooden panel in a classic study and on the edge of a slatted partition in a modern living room.from STAVROS — a representative of this exact type. An equal-flange profile made of selected beech or oak with a precisely calibrated right angle between the flanges. The surface is sanded for applying any finish: oil, varnish, enamel, stain. This product is equally organic on the corner of a wooden panel in a classic study and on the edge of a slatted partition in a modern living room.
Unequal-flange corner piece: flexibility in non-standard situations
If the thickness of the cladding on the two converging surfaces differs — an equal-flange corner piece won't work. The smaller flange won't cover the required area, the larger one will protrude beyond the finish. An unequal-flange corner piece solves this problem: one flange, say, 20 mm, the other — 30 mm. A typical application situation: a corner where one wall has clapboard 14 mm thick, and the other has drywall with decorative plaster with a total thickness of 25 mm.
Corner piece with chamfer or rounding: decorative profiles
On the edge of the corner — that very spot that takes impacts — additional finishing can be formed. A 45° chamfer softens the sharpness of the edge and creates an additional light accent. Rounding completely removes the sharp edge, making the corner safe in rooms where children are present. In children's rooms, play areas, hallways with high traffic, a corner with a rounded edge is not just an aesthetic choice but also a safety concern.
Decorative corner with a profile: between a corner and a molding
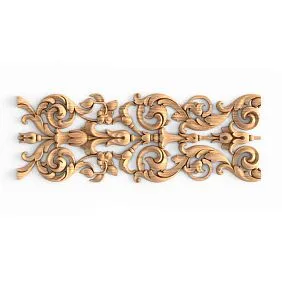
Some products combine the function of corner protection with a decorative profile on the front surface. One or both shelves feature milled relief: a wave, a cove, a rectangular groove. Such a corner becomes an architectural element — it accentuates the corner, giving it visual weight. In classic interiors next towooden cornicesanddoor casingsa decorative corner profile emphasizes the system of horizontal and vertical lines in the interior.
Internal corner (cove molding): the hidden worker
Cove molding is a specialized profile for internal corners. Unlike an external corner, a cove molding has a concave front surface: a quarter-round or half-round profile that neatly fits into the corner and masks the gap between two walls. In saunas and steam rooms, wooden cove molding is a classic solution for all internal corners: both beautiful and hygienic, with no hard-to-reach crevices.
Wood species for corners: choosing wisely
A solid wood corner is not just one product, but an entire family, where the wood species determines everything: strength, appearance, price, durability.
Beech: reliability without pretension
Beech corner is the optimal choice for most tasks in residential interiors. Beech is dense, uniform, machines well — all corners are even, the profile is crisp. Its light neutral shade makes it an ideal base for tinting to any color: want white — no problem, dark walnut — easily, natural beige — naturally and warmly. Beech corner holds fasteners well and doesn't split with precise drilling.
Oak: when species and texture matter
Oak corner is the choice for those who want the wood to read as wood. The expressive texture of solid oak under transparent oil is a statement in itself. Oak is heavier and denser than beech, absolutely resistant to mechanical loads, and unafraid of moisture. In rooms whereslatted oak partitionsandwooden millwork is made of oakforms a system — an oak corner is the only correct solution for corners. It completes this system without disrupting its unity.
Pine: for cottages and country houses
Pine corner is an affordable option for country houses, saunas, cottages, and utility buildings. Pine is lightweight, easy to work with, and its natural resin content provides additional biological protection. The drawback is softness: on external corners with high traffic, pine dents and scratches easily. For concealed and semi-concealed corners, for cottage and country use — it's optimal.
Larch: for wet areas and outdoors
Larch corner is the choice for bathrooms, toilets, kitchens with high humidity, and for exterior applications. The density and natural resin content of larch provide it with moisture resistance that pine and beech lack. Moreover, larch develops a noble silvery-gray patina over time — particularly valued in Scandinavian and Japanese design.
Wooden corner dimensions: standards and custom solutions
The size question is one of the most practical in this topic. The size of a wooden corner is determined by two parameters: shelf width and blank length.
Standard size range by shelf width
Small sizes — 10×10, 12×12, 15×15 mm. Used for thin finishing materials: thin-layer panels, decorative veneer, thin cladding up to 10–12 mm thick. Often used in furniture production to reinforce internal corners of drawers, shelves, and cases.
Medium sizes — 20×20, 25×25, 30×30 mm. The most popular range for wall finishing in residential spaces. Covers standard cladding, decorative wood panels, slat paneling. Looks proportional with standard room heights of 2.7–3.0 m.
Large sizes — 35×35, 40×40, 50×50 mm. For thick cladding, for rooms with high ceilings, for structural corners in post-and-beam systems. In classic interiors with high ceilings, a large corner creates the necessary architectural mass.
Unequal-shelf options — 15×25, 20×30, 25×40 mm. Non-standard combinations for specific finishing conditions.
Length: standard and possibilities
Standard length of wooden corners is 2.0–2.5 m. For rooms up to 2.7 m high, one corner per corner is sufficient without a joint. For heights of 3.0 m and above, joining is necessary: joints are made at a level that is least noticeable — typically at a height of 1.8–2.0 m or hidden behind furniture. Some manufacturers offer lengths of 3.0 m and even 6.0 m — a solution for high-ceilinged rooms that eliminates the need for joints.
Application of wooden corner for finishing: from classic to contemporary
The practice of using wooden corners in interior design and construction is significantly broader than it seems. Let's go through all the main scenarios sequentially.
Finishing external corners when cladding with paneling
Clapboard is one of the most popular materials for interior finishing in country houses, saunas, baths, and dachas. And it's precisely on external corners during clapboard installation that the main problem arises: the board ends in the corner do not form a neat joint without a special element. A wooden corner piece completely covers this joint: both flanges reliably overlap the outermost clapboard boards on both sides of the corner.
The installation peculiarity in this case: the corner piece is installed after mounting the outermost rows of clapboard, but it can also be done before — then the clapboard is tucked under it. Both methods work; the second one is cleaner in terms of final finishing.
Protecting corners when finishing with drywall
Drywall is a convenient material, but vulnerable. An external drywall corner without protection cannot withstand even moderate loads: the facing layer crumbles, the corner acquires an untidy appearance within a year of active use. The standard solution is a metal or plastic perforated corner piece for puttying. But this is a solution for painting, not for exposed wooden finishing.
When the interior includes wooden elements —Wooden casings, Wooden baseboard, decorative moldings— a wooden corner piece on the external corners of drywall partitions becomes an organic continuation of this system. It is mounted over the final finish: putty, plaster, wallpaper, paint.
Joints of dissimilar materials: corner piece as an adapter
One of the most relevant scenarios in modern design is combining different finishing materials in one room. Tile and plaster. Wooden panel and painted wall. Clapboard and glass. Each of these joints requires a delicate solution in the corner area.
A solid wood corner piece works here as a transitional element: one flange overlaps one material, the other — the second. It doesn't just hide the seam — it makes this transition intentional, an architectural solution. An oak corner piece at the junction of an oak panel and a white wall is not a compromise, it's a design technique.
Furniture production: corner piece as a structural element
In joinery and furniture production, wooden corner pieces are used differently — as a constructive element for reinforcing internal corner joints. Drawers, shelves, cabinets, boxes made of plywood or MDF are reinforced with wooden corner pieces glued along internal corners. This significantly increases the rigidity of the structure with minimal costs.
A small corner piece 15×15 or 20×20 mm, glued into the corner of a shelf, withstands a load that would destroy a connection held by screws alone. Professional joiners know and constantly use this technique.
Decorative role: corner piece as a panel framing element
There is another role of the wooden corner piece that is rarely discussed — decorative. If you take several corner pieces of small cross-section (15×15 or 20×20 mm) and mount them around the perimeter of a rectangular wall section — you get a panel frame. This technique creates visual wall division without using milled moldings, which is significantly cheaper and easier to install.
Several rows of such frames along the lower part of the wall from the baseboard to a height of 1.0–1.2 m — this is already a full-fledged panel zone in a classic style. Next towith wooden cornicesat the top andbaseboardat the bottom, this system creates a classic interior with minimal investment in material.
Wooden molding corner piece and wooden millwork: a system, not a separate element
Any competent designer will tell you: a detail is strong not by itself, but in context. A wooden corner piece is maximally revealed within a system of wooden millwork.
Imagine a room:wooden slats on the wallscreate rhythm and texture,solid wood skirtingrun a horizontal line around the perimeter,Ceiling cornicefinish the wall at the top,Wooden casingsframe the doorways. And on the corners — a solid wood corner piece made of the same species, with the same tint. That's a system. That's an interior.
Without a corner piece on external corners, all this unity breaks down precisely at those points where two walls meet: there will be either an unsightly joint or a plastic patch that stands out from the context. A solid wood corner piece is the final element that seals the system.
On stavros.ru, this entire assortment is presented in the sectionof solid wood— from corner pieces to cornices, from baseboards to moldings, in a unified system of materials and quality.
How to install a wooden corner piece: step-by-step guide for DIY installation
Installing a wooden corner piece is a task accessible to anyone who has held a screwdriver and a saw. No complex techniques, no professional skills required. What's needed is accuracy, patience, and the correct sequence of actions.
Tools and consumables
For installation you will need: a miter saw or miter box with a handsaw, a level (laser or bubble), a tape measure and pencil, mounting adhesive (polyurethane-based liquid nails or acrylic construction adhesive), finishing nails 1.4×40 mm or small countersunk head screws 3×30 mm, wood filler for filling holes, sandpaper with grit 150 and 220, finish coating (oil, varnish, paint).
Step one: measurement and cutting
Measure the height of the corner — from the baseboard to the ceiling cornice. This exact dimension will be the length of the corner piece. If the corner piece fits flush with the baseboard and cornice — the length is exactly equal to the distance between them. If it tucks under them — add an overlap.
Cut the corner piece with a miter saw. The horizontal ends (top and bottom) — straight cut at 90°. If you wish to make a miter on the top end for joining with the cornice — cut at 45°. Important: the cut line must be strictly perpendicular to the axis of the corner piece, otherwise the end will be visible.
Step two: dry fitting
Place the cut corner piece against the wall corner without adhesive, check the fit. If the corner is not perfectly square (and in real apartments corners are rarely perfect) — observe where gaps form. Small gaps up to 2–3 mm will be covered by adhesive and filler. Larger ones will require trimming or shimming.
Step three: applying adhesive
Apply mounting adhesive in a zigzag pattern with a 20–25 mm spacing to the back sides of both flanges of the corner piece. If the wall surface is porous (plaster, drywall without a finish coat) — increase the amount of adhesive. If smooth (painted, wallpapered) — apply adhesive a bit more generously and ensure good pressure.
According to the instructions of many mounting adhesives, you need to apply the compound, wait a little (open time 3–5 minutes) and only then press the item. This improves adhesion — especially on non-porous surfaces.
Step four: installation and fixing
Press the corner piece against the wall corner, starting from the top, gradually applying pressure along the entire length. Check for plumb with a level — the wooden corner piece must stand strictly vertical. Additionally secure with finishing nails spaced 400–500 mm apart, sinking the heads 1–2 mm below the surface. Fill nail holes with wood filler of a matching shade.
When using only adhesive (without nails) — press and secure with painter's tape or clamps for 30–60 minutes until the adhesive gains initial strength.
Step five: finishing
After the adhesive has fully cured (24 hours) — sand the filled areas with 150 grit sandpaper, then 220 grit. Apply the finish coating to match the rest of the wooden trim.
Joints between corner pieces: how to make them invisible
When the room height exceeds the length of the corner piece, joining becomes necessary. Join with mitered cuts at 45° — this divides the joint location into two lines, which are less conspicuous than a straight transverse seam. Choose the joint location where it is least in the line of sight: behind furniture, at a height above eye level (1.8–2.0 m), in the shaded part of the corner.
Buying a wooden corner piece: what to look for
The market for wooden trim offers products of very different quality, and you need to be able to distinguish a good item from a bad one before purchase, not after.
Corner geometry: the right angle between the flanges — 90°, without tolerances. Check with a metal square: place it against the inside junction of the flanges — there should be no gaps. Any deviation means that during installation the corner piece will either not fit tightly to the wall, or one flange will 'point' the wrong way.
Flange straightness: place the long flange of the corner piece against a flat surface — it should lie without gaps along its entire length. Warping or twisting is immediately visible. Such a corner piece will create gaps during installation.
Surface quality: planed and sanded surface — without fuzz, tear-outs, or tool marks. Only such a surface will properly accept a finish coating without additional preparation.
Moisture content: ask the seller if the corner piece is made from dry material. Wet material will dry out and deform after installation. You can check with a moisture meter — the norm for interior spaces is 8–14%.
Buy a wooden corner piece with guaranteed geometry and surface quality, made from select beech or oak with documented characteristics — this is exactly what STAVROS offers in its catalog of solid wood products.
Wooden corner piece in different interior styles
A corner piece is such a functional detail that it is often considered neutral. This is a misconception. A correctly chosen corner piece emphasizes the style. An incorrect one — destroys it.
In Scandinavian style — a thin corner piece 15×15 or 20×20 mm made of light pine or beech, unfinished or with clear oil. Minimal, almost unnoticeable, honest. It does not draw attention to itself — merely neatly finishes the corner.
In a classic interior — a corner piece of medium section 25×25 or 30×30 mm with a chamfer or small profile. Matching thecorniceandskirting board. Coating — glossy varnish or matte enamel matching the walls. It is part of the system, not an independent element.
In loft style — a large corner piece 35×35 or 40×40 mm made of dark oak or stained wood. Deliberately expressive, brutal. It does not hide — it accentuates.
In Japanese style — a corner made of untreated larch or oak with a living natural texture. No gloss. Oil, wax — only what emphasizes the honesty of the wood.
About STAVROS: when a detail is a story
The quality of a wooden corner is not just about machines and geometry. It's about understanding what it exists for: not to cover a hole in the wall, but to become part of a thoughtful, cohesive space. This is how the company STAVROS understands its product.
The history of STAVROS begins in 2002 — with a small workshop of two artists, Andrey Ragozin and Evgeny Tsapko. Just a year later, the workshop was invited to participate in the reconstruction of the Konstantinovsky Palace in Strelna. Then — the Hermitage, the Alexander Palace, the Trinity-Izmailovsky Cathedral, the Sheremetev Mansion. This is not a construction company with linear meters in a price list — it's a manufactory with an artistic understanding of wood.
Today STAVROS produces a full range of solid wood products: from wooden corners to the most complex carved moldings, fromIt begins with understanding the basic principles of visual perception of space. The golden ratio, the rule of thirds, symmetry and asymmetry — all these classical principles are applied in wooden wall decoration.tostair balusters—furniture legstoarchitectural overlays. European-class drying chambers, German-made four-sided planing machines, geometric tolerance of ±0.1 mm per linear meter — this is not marketing, it's a production standard.
STAVROS showrooms operate in St. Petersburg and Moscow. Delivery — throughout Russia and CIS countries. Orderingwooden corners and all solid wood millwork is done on the website: current prices, live photos, detailed specifications for each item.
FAQ: answers to the most popular questions
How does a wooden corner differ from a plastic one?
A solid wood corner is stronger than a plastic one with similar dimensions, tactilely and visually warmer, accepts any finish coating, and can be repaired by sanding. Plastic is cheaper and more moisture-resistant in its untreated form. In residential interiors with wooden millwork — only a wooden corner provides visual integrity.
What size corner to choose for walls clad with clapboard?
Depends on the thickness of the clapboard. Standard clapboard 12–16 mm — corner 20×20 or 25×25 mm. Thick clapboard 20–22 mm — 30×30 mm. The corner's shelf should overlap the end of the clapboard with a small overlap of 3–5 mm onto its face side.
Is it necessary to coat a wooden corner with varnish or oil?
Absolutely. An open, uncoated wood surface quickly gets dirty, darkens from touch, and absorbs moisture at the ends. Coating with oil or varnish protects and extends the product's life. Tinting allows for a perfect color match to the rest of the millwork.
Can a wooden corner be installed without nails, using only glue?
Yes, when using high-quality mounting adhesive and good surface contact. A mandatory condition — pressing for 30–60 minutes until initial strength is achieved. For long corners in high rooms, additional fixation with 2–3 finishing nails for insurance is recommended.
How to join corners when the length is insufficient?
Join with miter cuts at 45°: cut the ends of both corners at 45° in the same direction. With proper joining, the seam line is practically invisible. Choose the joint location where it is least in the line of sight: behind furniture, at a height above 1.8 m.
Can a wooden corner be used in a bathroom?
Yes, with the correct choice of wood species and coating. Larch is the optimal species for wet areas. Coating — yacht varnish or special oil for wet rooms. Ventilation in the bathroom must work properly. For a sauna or steam room — a corner made of linden or aspen without coating.
What is the best glue to use for installing a wooden corner?
Polyurethane mounting adhesive like 'liquid nails' — a universal choice. Acrylic construction adhesive — for porous substrates. Two-component epoxy — for critical connections with high load. Do not use PVA on finished surfaces: it leaves stains.
What to do if the wall corner is not straight (deviation from 90°)?
For deviations up to 5° — install the corner along one wall, fill the gap on the other side with acrylic sealant and putty after painting. For larger deviations — first level the corner with plaster or gypsum mixture, then install the corner.
How to calculate the quantity of wooden corners for a room?
Count all external corners in the room (usually 4 in a rectangular room plus additional ones if there are niches, protrusions, columns). Multiply the number of corners by the room height from baseboard to cornice. Add 10% for cutting and fitting. The result is the required number of linear meters.


